No products in the cart.
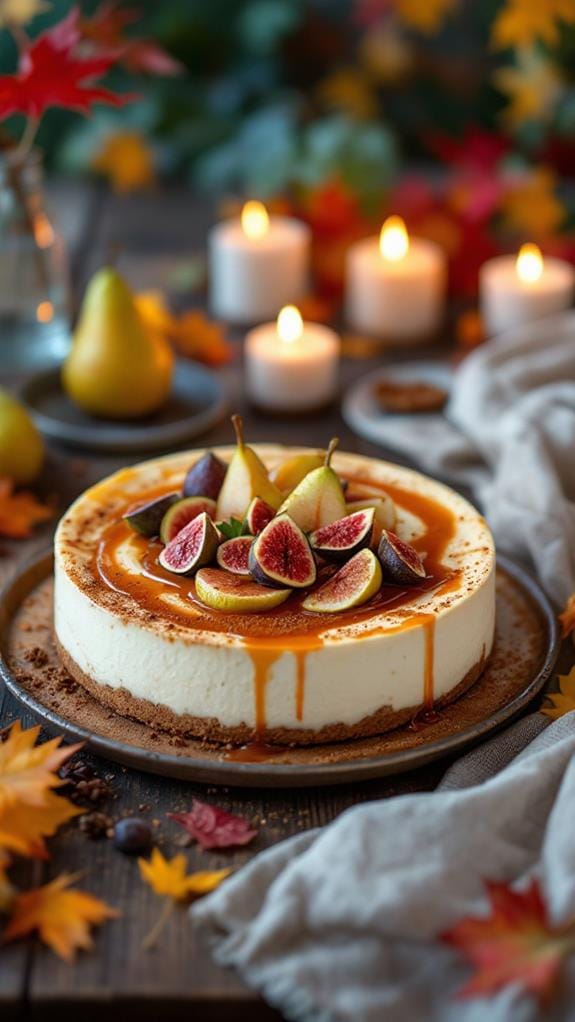
11 Decadent No-Bake Cheesecake Recipes Perfect for Autumn Gatherings
Imagine serving a spiced pumpkin cheesecake at your next autumn gathering that has everyone asking for seconds. With the season’s rich flavors and the convenience of no-bake preparation, you can create stunning desserts without the fuss of an oven. These 11 decadent recipes not only save you time but also elevate your hosting game. Whether you lean towards classic flavors or want to try something new, there’s something here that might just surprise you. So, what are the standout ingredients that can transform your gatherings into a memorable culinary experience?
Contents
hide
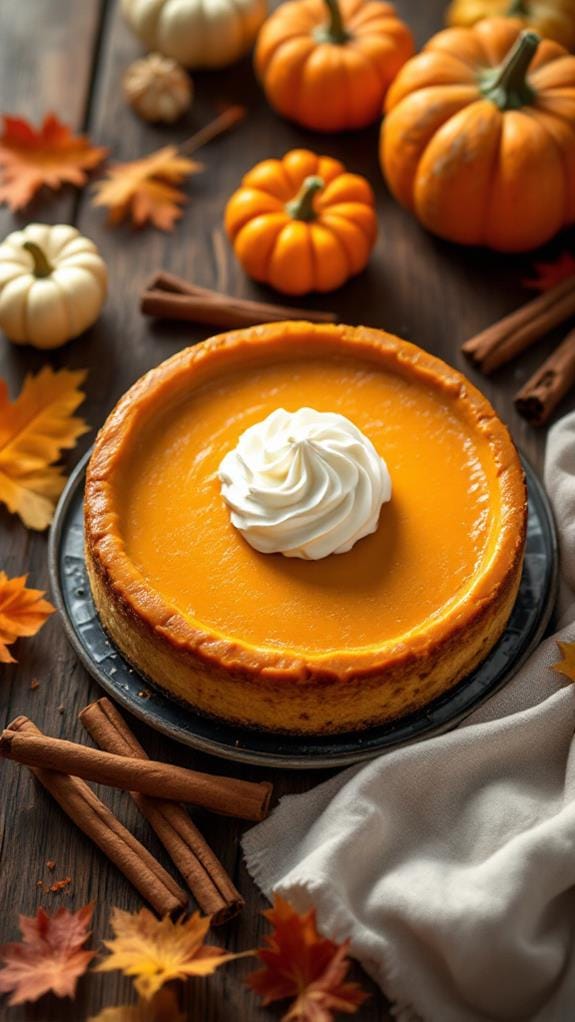
Spiced Pumpkin Cheesecake
Title: Spiced Pumpkin Cheesecake
Prep Time: 20 minutes
Cook Time: 0 minutes
Number of Servings: 8
Required Equipment List: Mixing bowl, electric mixer, 9-inch springform pan, rubber spatula, refrigerator
Cuisine Type: American
This Spiced Pumpkin Cheesecake is a delightful no-bake dessert that combines the rich flavors of pumpkin and warm spices, making it a perfect treat for fall gatherings or holiday celebrations. The creamy filling, made with cream cheese and pumpkin puree, is delicately spiced with cinnamon, nutmeg, and ginger, creating a comforting flavor that’s both seasonal and satisfying.
With a crunchy graham cracker crust, this cheesecake is sure to be a hit at any occasion. One of the best aspects of this recipe is its simplicity. With no baking required, you can whip up this cheesecake in a matter of minutes, allowing it to set in the refrigerator while you focus on other dishes or enjoy time with your guests.
The combination of flavors and textures makes each bite a delicious experience, and the cheesecake can be easily topped with whipped cream or caramel sauce for an added indulgence.
Ingredients:
- 1 ½ cups graham cracker crumbs
- ½ cup unsalted butter, melted
- 2 tablespoons sugar
- 1 (8 oz) package cream cheese, softened
- 1 cup pumpkin puree
- 1 cup powdered sugar
- 1 teaspoon vanilla extract
- 1 teaspoon ground cinnamon
- ½ teaspoon ground nutmeg
- ½ teaspoon ground ginger
- 1 cup heavy whipping cream
Instructions:
- In a mixing bowl, combine the graham cracker crumbs, melted butter, and sugar. Mix until the crumbs are well-coated and resemble wet sand. Press the mixture firmly into the bottom of a 9-inch springform pan to form the crust. Place the pan in the refrigerator to set while preparing the filling.
- In a separate large mixing bowl, beat the softened cream cheese with an electric mixer until smooth and creamy. Gradually add the pumpkin puree, powdered sugar, vanilla extract, cinnamon, nutmeg, and ginger, mixing until well combined and smooth.
- In another bowl, whip the heavy cream until stiff peaks form. Gently fold the whipped cream into the pumpkin mixture using a rubber spatula, being careful not to deflate the whipped cream. This will give your cheesecake a light and airy texture.
- Pour the pumpkin filling into the prepared graham cracker crust, smoothing the top with a spatula. Cover the cheesecake with plastic wrap and refrigerate for at least 4 hours, or overnight for best results, to allow it to set properly.
- Once chilled and set, carefully remove the sides of the springform pan. You can garnish the cheesecake with additional whipped cream, a sprinkle of cinnamon, or a drizzle of caramel sauce before serving.
Extra Tips: For a more intense pumpkin flavor, consider adding an extra ½ cup of pumpkin puree or a bit of pumpkin pie spice in place of the individual spices. If you prefer a sweeter cheesecake, adjust the powdered sugar to taste.
This dessert can be made a day in advance, making it a stress-free addition to your holiday menu. Enjoy this delightful treat chilled, and don’t forget to save a slice for yourself!
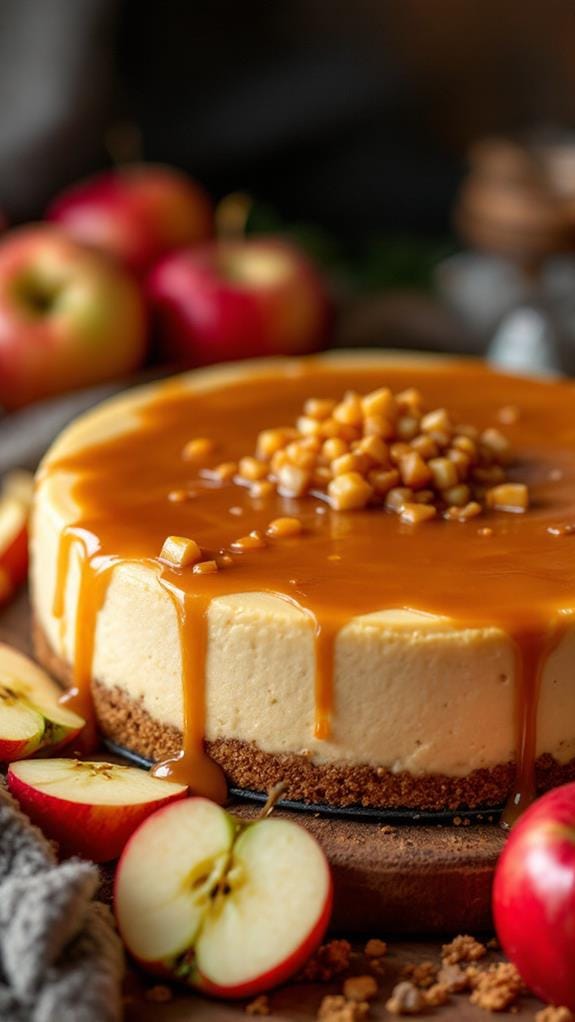
Caramel Apple Cheesecake
Title: Caramel Apple Cheesecake
Prep Time: 20 minutes
Cook Time: 0 minutes
Number of Servings: 8
Required Equipment List: Mixing bowl, springform pan, electric mixer, spatula, saucepan
Cuisine Type: American
Caramel Apple Cheesecake is a delightful no-bake dessert that combines the rich creaminess of cheesecake with the sweet, comforting flavors of caramel and apples. This decadent treat is perfect for fall gatherings or any time you want to impress your guests with a sweet indulgence.
The cheesecake filling is light and fluffy, while the caramel sauce adds a luscious touch, making each bite a heavenly experience. The star of this dessert is the combination of cream cheese and whipped cream, which creates a delightful texture that pairs beautifully with the tartness of the apples.
The crust, made from crushed graham crackers, adds a satisfying crunch that balances the creamy filling. Topped with sliced apples and a drizzle of caramel, this cheesecake isn’t only delicious but also visually stunning, making it a perfect centerpiece for any dessert table.
Ingredients:
- 1 ½ cups graham cracker crumbs
- ½ cup unsalted butter, melted
- 2 cups cream cheese, softened
- 1 cup powdered sugar
- 1 teaspoon vanilla extract
- 1 cup heavy whipping cream
- 2 cups diced apples (about 2 medium apples)
- ½ cup caramel sauce (plus more for drizzling)
- 1 teaspoon lemon juice
- 1 teaspoon cinnamon (optional)
Instructions:
- In a mixing bowl, combine the graham cracker crumbs and melted butter until the mixture resembles wet sand. Press this mixture firmly into the bottom of a springform pan to form the crust. Place the crust in the refrigerator to set while you prepare the filling.
- In another large mixing bowl, beat the softened cream cheese, powdered sugar, and vanilla extract with an electric mixer until smooth and creamy. This will create the base for your cheesecake filling.
- In a separate bowl, whip the heavy cream until stiff peaks form. Gently fold the whipped cream into the cream cheese mixture until fully combined. Be careful not to deflate the whipped cream to maintain the light and airy texture.
- In a small bowl, toss the diced apples with lemon juice and cinnamon (if using) to prevent browning and add flavor. Fold the apple mixture into the cheesecake filling, ensuring an even distribution of apples throughout.
- Pour the cheesecake filling into the prepared crust and smooth the top with a spatula. Cover the cheesecake with plastic wrap and refrigerate for at least 4 hours or until set, preferably overnight for the best results.
- Once set, carefully remove the cheesecake from the springform pan. Drizzle caramel sauce over the top and garnish with additional apple slices if desired before slicing and serving.
Extra Tips: For a more intense apple flavor, consider using a mix of sweet and tart apples, such as Granny Smith and Honeycrisp. You can also bake the apple filling lightly in a saucepan with a bit of sugar and cinnamon for a warm topping before adding it to the cheesecake.
If you want an extra touch of sweetness, feel free to add a sprinkle of chopped nuts or toffee bits on top of the cheesecake before serving. Enjoy this delightful dessert at your next gathering!
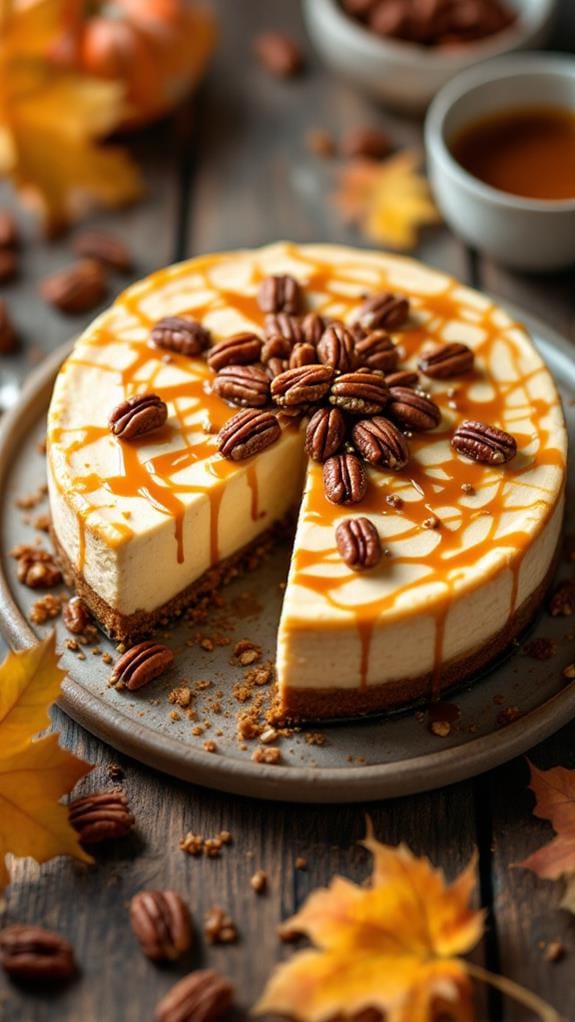
Maple Pecan Cheesecake
Title: Maple Pecan Cheesecake
Prep Time: 20 minutes
Cook Time: 0 minutes
Number of Servings: 8
Required Equipment List: Mixing bowl, 9-inch springform pan, electric mixer, rubber spatula, refrigerator
Cuisine Type: American
This Maple Pecan Cheesecake is a delightful no-bake dessert that combines the rich flavors of cream cheese with the sweetness of maple syrup, creating a decadent treat that’s perfect for any occasion.
The crunchy pecan crust adds a satisfying texture, while the creamy filling offers a smooth finish that will leave your guests wanting more. With its simple preparation and impressive presentation, this cheesecake is an ideal dessert for holiday gatherings, birthdays, or any special celebration.
What sets this cheesecake apart is the infusion of maple flavor throughout, making it a unique alternative to traditional cheesecakes. The pecans not only provide a delicious crunch but also compliment the maple syrup beautifully.
Best of all, this recipe requires no baking, allowing you to whip it up quickly and chill it until ready to serve. Enjoy this delightful dessert with a dollop of whipped cream or a drizzle of additional maple syrup for an extra special touch.
Ingredients:
- 1 ½ cups crushed graham crackers
- ½ cup chopped pecans
- ½ cup unsalted butter, melted
- 2 (8-ounce) packages cream cheese, softened
- 1 cup powdered sugar
- 1 teaspoon vanilla extract
- ½ cup pure maple syrup
- 1 cup heavy whipping cream
- Additional pecans for garnish (optional)
Instructions:
- In a mixing bowl, combine the crushed graham crackers, chopped pecans, and melted butter. Mix until the crumbs are well coated and resemble wet sand. Press this mixture firmly into the bottom of a 9-inch springform pan to form the crust. Place the crust in the refrigerator to set while preparing the filling.
- In a large mixing bowl, beat the softened cream cheese with an electric mixer until smooth and creamy. Gradually add the powdered sugar and continue mixing until well combined. Add the vanilla extract and maple syrup, mixing until everything is fully incorporated and smooth.
- In a separate bowl, whip the heavy cream until stiff peaks form. Gently fold the whipped cream into the cream cheese mixture using a rubber spatula. Be careful not to deflate the whipped cream; this will help keep the filling light and fluffy.
- Pour the cream cheese mixture into the chilled crust, smoothing the top with a spatula. Cover the cheesecake with plastic wrap and refrigerate for at least 4 hours, or overnight, to allow it to set completely.
- Once set, carefully remove the sides of the springform pan. Garnish the cheesecake with additional pecans and a drizzle of maple syrup, if desired. Slice into wedges and serve chilled.
Extra Tips: For an added flavor boost, consider toasting the pecans before chopping them for the crust. This will enhance their nuttiness and make the cheesecake even more delicious.
If you prefer a stronger maple flavor, feel free to increase the amount of maple syrup in the filling. Additionally, this cheesecake can be made a day in advance, making it a perfect make-ahead dessert for busy occasions. Enjoy your Maple Pecan Cheesecake!
Chocolate Hazelnut Cheesecake
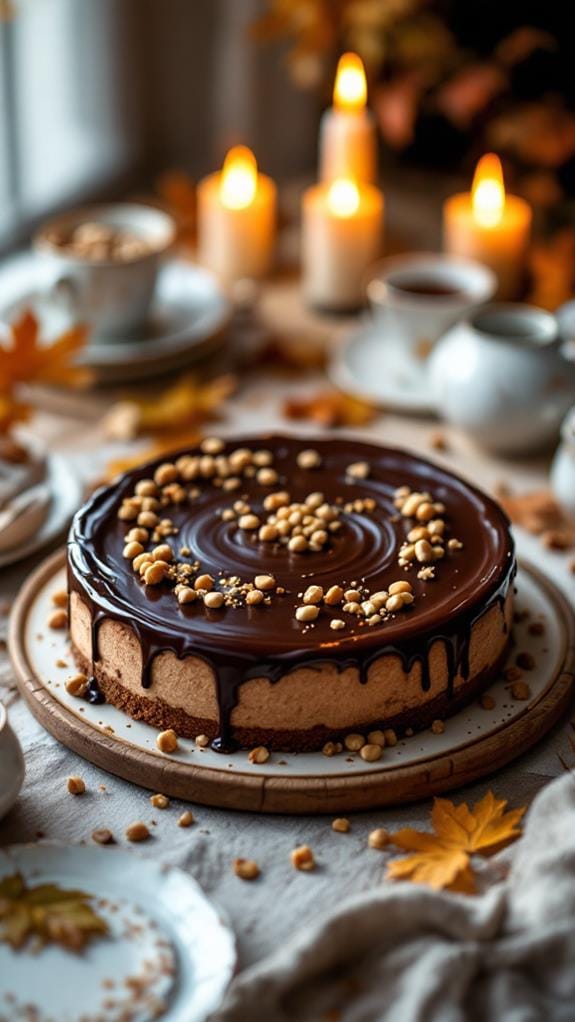
Title: Chocolate Hazelnut Cheesecake
Prep Time: 20 minutes
Cook Time: 0 minutes
Number of Servings: 8
Required Equipment List: 9-inch springform pan, mixing bowl, electric mixer, spatula, refrigerator
Cuisine Type: American
This Chocolate Hazelnut Cheesecake is a decadent no-bake dessert that combines the rich flavors of chocolate and hazelnut, creating a creamy and luxurious treat. With a buttery graham cracker crust and a luscious filling made from cream cheese, Nutella, and whipped cream, this cheesecake is perfect for special occasions or simply as a delightful indulgence at home.
The combination of textures and flavors will leave your taste buds craving more. What makes this cheesecake truly special is its simplicity and the fact that it requires no baking. You can prepare this dessert in just a short amount of time, allowing it to chill in the refrigerator while you focus on other tasks.
The addition of chopped hazelnuts on top adds a delightful crunch, making every bite an experience to remember. This Chocolate Hazelnut Cheesecake is sure to impress your family and friends, making it a must-try recipe for any dessert lover.
Ingredients:
- 1 ½ cups graham cracker crumbs
- ½ cup unsalted butter, melted
- 1 cup cream cheese, softened
- 1 cup Nutella
- 1 cup heavy whipping cream
- ½ cup powdered sugar
- 1 teaspoon vanilla extract
- ½ cup chopped hazelnuts (for topping)
- Chocolate shavings (for garnish, optional)
Instructions:
- In a mixing bowl, combine the graham cracker crumbs and melted butter until the mixture resembles wet sand. Press the mixture firmly into the bottom of a 9-inch springform pan to create an even crust. Place the crust in the refrigerator to set while preparing the filling.
- In another mixing bowl, beat the softened cream cheese with an electric mixer until smooth and creamy. Gradually add in the Nutella, mixing until fully incorporated and the mixture is free of lumps.
- In a separate bowl, whip the heavy cream, powdered sugar, and vanilla extract until stiff peaks form. Gently fold the whipped cream into the Nutella and cream cheese mixture until fully combined, creating a light and airy filling.
- Pour the cheesecake filling over the chilled graham cracker crust, spreading it evenly with a spatula. Smooth the top and tap the pan gently on the counter to remove any air bubbles.
- Cover the cheesecake with plastic wrap and refrigerate for at least 4 hours or overnight to allow it to set properly. Once set, carefully remove the sides of the springform pan.
- To serve, sprinkle the chopped hazelnuts on top of the cheesecake and garnish with chocolate shavings if desired. Slice and enjoy this rich and creamy dessert!
Extra Tips: To enhance the flavor, consider adding a pinch of sea salt to the filling to balance the sweetness. You can also experiment with different toppings, such as drizzling more Nutella or chocolate sauce on top before serving.
This cheesecake can be made a day in advance, making it a convenient option for gatherings or celebrations. Enjoy your delicious creation!
Cranberry Orange Cheesecake
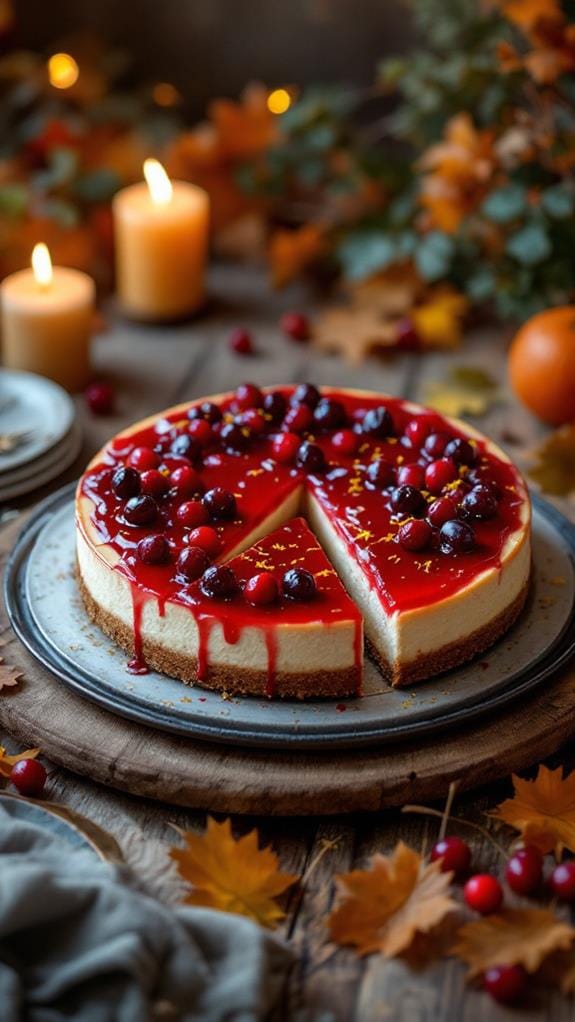
Title: Cranberry Orange Cheesecake
Prep Time: 20 minutes
Cook Time: 0 minutes
Number of Servings: 8
Required Equipment List: 9-inch springform pan, mixing bowls, electric mixer, rubber spatula, measuring cups, measuring spoons, plastic wrap
Cuisine Type: American
This Cranberry Orange Cheesecake is a revitalizing and festive dessert that combines the tartness of cranberries with the bright citrus flavor of oranges. The creamy cheesecake filling is lightened with whipped cream and infused with fresh orange juice and zest, creating a perfect balance of flavors that burst in every bite.
Ideal for holiday gatherings or any special occasion, this no-bake cheesecake is sure to impress your guests while saving you time in the kitchen. The buttery graham cracker crust provides a delightful crunch that complements the smooth filling, and the cranberry topping adds a beautiful pop of color.
This dessert can be made ahead of time, allowing the flavors to meld beautifully. With just a few simple ingredients and minimal effort, you can create a stunning cheesecake that will be the highlight of your dessert table.
Ingredients:
- 1 1/2 cups graham cracker crumbs
- 1/4 cup granulated sugar
- 1/2 cup unsalted butter, melted
- 16 ounces cream cheese, softened
- 1 cup powdered sugar
- 1 tablespoon fresh orange juice
- Zest of 1 orange
- 1 teaspoon vanilla extract
- 1 cup heavy whipping cream
- 1 cup fresh cranberries (for topping)
- 1/4 cup water (for cranberry sauce)
- 1/4 cup granulated sugar (for cranberry sauce)
- Zest of 1 orange (for cranberry sauce)
Instructions:
- Start by preparing the crust. In a mixing bowl, combine the graham cracker crumbs, granulated sugar, and melted butter. Stir until the mixture resembles wet sand. Press the mixture firmly into the bottom of a 9-inch springform pan to create an even layer. Set aside.
- In another mixing bowl, use an electric mixer to beat the softened cream cheese until smooth. Gradually add the powdered sugar, fresh orange juice, orange zest, and vanilla extract. Mix until well combined and creamy.
- In a separate bowl, whip the heavy cream until stiff peaks form. Gently fold the whipped cream into the cream cheese mixture using a rubber spatula. Be careful not to deflate the whipped cream, as this will keep the cheesecake light and airy.
- Pour the cheesecake filling over the prepared crust, smoothing the top with the spatula. Cover the cheesecake with plastic wrap and refrigerate for at least 4 hours or overnight to allow it to set properly.
- While the cheesecake is chilling, prepare the cranberry topping. In a small saucepan, combine the fresh cranberries, water, granulated sugar, and orange zest. Cook over medium heat until the cranberries burst and the mixture thickens slightly, about 10 minutes. Remove from heat and let it cool.
- Once the cheesecake is set, carefully remove it from the springform pan. Spoon the cooled cranberry sauce over the top of the cheesecake before serving. Slice and enjoy!
Extra Tips: To make the cheesecake even more festive, consider adding a sprinkle of chopped nuts or a few additional orange zest shavings on top of the cranberry sauce for garnish.
For a more intense orange flavor, you could substitute a portion of the cream cheese with orange-flavored cream cheese. This cheesecake also freezes well, so you can prepare it ahead of time and thaw it a few hours before serving for a hassle-free dessert. Enjoy your delicious Cranberry Orange Cheesecake!
Gingerbread Cheesecake
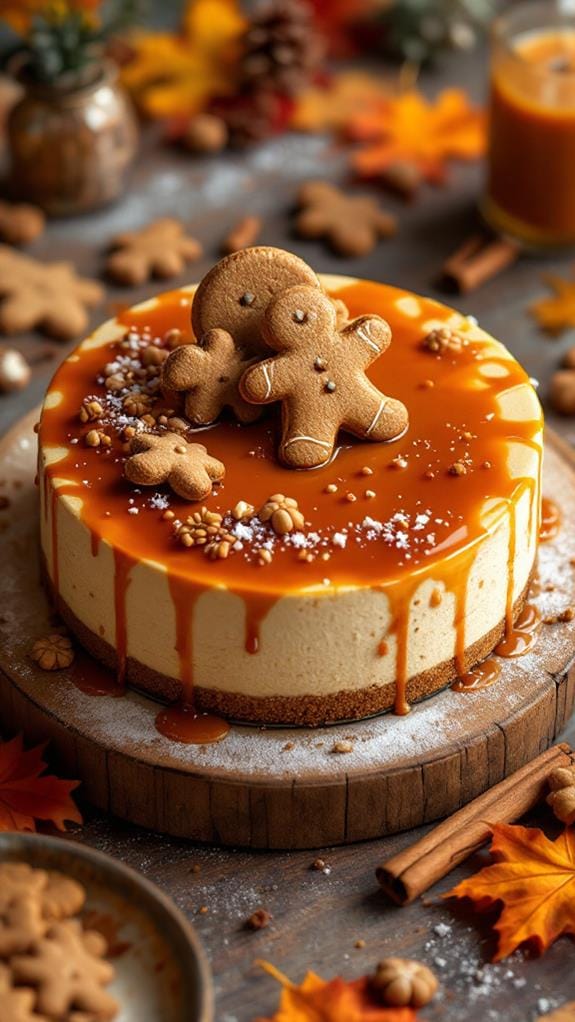
Title: Gingerbread Cheesecake
Prep Time: 20 minutes
Cook Time: 0 minutes
Number of Servings: 8
Required Equipment List: 9-inch springform pan, mixing bowl, electric mixer, spatula, measuring cups, measuring spoons
Cuisine Type: American
This Gingerbread Cheesecake is a delightful and festive no-bake dessert that combines the rich flavors of classic gingerbread cookies with the creamy texture of cheesecake. Perfect for holiday gatherings or special occasions, this cheesecake features a spiced gingersnap crust that complements the smooth and velvety filling.
Topped with a dollop of whipped cream and a sprinkle of cinnamon, it’s a show-stopping dessert that will leave your guests asking for seconds. The beauty of this recipe lies not only in its flavor but also in its simplicity. With no baking required, this cheesecake comes together quickly, making it a convenient option for busy holiday preparations.
The combination of cream cheese, powdered sugar, and warm spices creates a luscious filling that’s both light and indulgent. Serve this Gingerbread Cheesecake chilled for a revitalizing and festive finish to any meal.
Ingredients:
- 2 cups gingersnap cookie crumbs
- 1/2 cup unsalted butter, melted
- 16 ounces cream cheese, softened
- 1 cup powdered sugar
- 1 teaspoon vanilla extract
- 1 teaspoon ground cinnamon
- 1/2 teaspoon ground ginger
- 1/4 teaspoon ground nutmeg
- 1 cup heavy whipping cream
- Whipped cream and ground cinnamon for topping (optional)
Instructions:
- In a mixing bowl, combine the gingersnap cookie crumbs and melted butter. Stir until the mixture resembles wet sand. Press the mixture firmly into the bottom of a 9-inch springform pan to form a crust. Place the crust in the refrigerator to set while you prepare the filling.
- In a large mixing bowl, beat the softened cream cheese with an electric mixer until smooth and creamy. Gradually add the powdered sugar, vanilla extract, ground cinnamon, ground ginger, and ground nutmeg, mixing until well combined and fluffy.
- In a separate bowl, whip the heavy cream until stiff peaks form. Gently fold the whipped cream into the cream cheese mixture until fully incorporated, being careful not to deflate the whipped cream.
- Pour the cheesecake filling over the prepared gingersnap crust, smoothing the top with a spatula. Cover the cheesecake with plastic wrap and refrigerate for at least 4 hours, or overnight, until set.
- Once the cheesecake is set, carefully remove the sides of the springform pan. Top with whipped cream and a sprinkle of ground cinnamon before slicing and serving.
Extra Tips: For added flavor, consider incorporating chopped crystallized ginger into the cheesecake filling. If you prefer a spicier kick, increase the amount of ground ginger slightly.
This cheesecake can be prepared a day in advance, making it a perfect make-ahead dessert for your holiday gatherings. Enjoy the festive flavors of gingerbread in this creamy, no-bake cheesecake!
Nutty Brownie Cheesecake
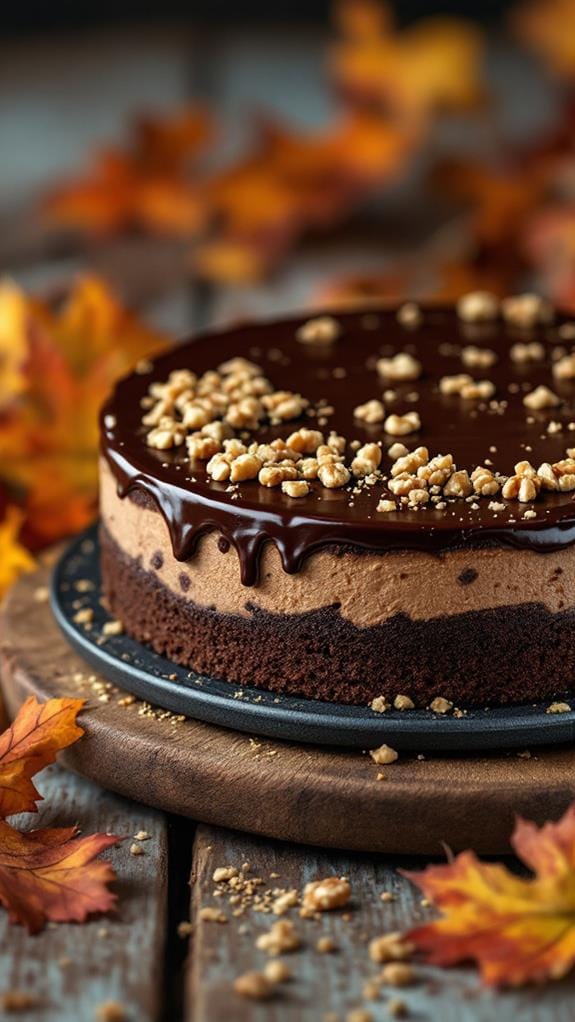
Title: Nutty Brownie Cheesecake
Prep Time: 20 minutes
Cook Time: 0 minutes
Number of Servings: 8
Required Equipment List: 9-inch springform pan, mixing bowls, electric mixer, spatula, refrigerator
Cuisine Type: American
This Nutty Brownie Cheesecake is a decadent dessert that combines the rich flavors of a classic brownie with the creamy texture of cheesecake, making it a truly indulgent treat. The crust is made from crushed brownies and nuts, providing a chewy base that perfectly complements the smooth and creamy cheesecake filling.
Topped with a drizzle of chocolate ganache and a sprinkle of chopped nuts, this no-bake cheesecake isn’t only visually appealing but also incredibly satisfying for chocolate lovers. Making this dessert is a breeze, as it requires no baking, allowing the flavors to meld together in the refrigerator.
It’s perfect for special occasions or just a sweet ending to a weeknight meal. The combination of brownie and cheesecake is sure to impress your guests, and the delightful crunch from the nuts adds an extra layer of texture that elevates the entire experience.
Ingredients:
- 2 cups brownie crumbs (store-bought or homemade)
- 1 cup chopped nuts (walnuts or pecans)
- 1/4 cup unsalted butter, melted
- 16 ounces cream cheese, softened
- 1 cup powdered sugar
- 1 teaspoon vanilla extract
- 1 cup heavy whipping cream
- 1/2 cup semi-sweet chocolate chips
- 1 tablespoon vegetable oil
Instructions:
- In a mixing bowl, combine the brownie crumbs and chopped nuts. Pour in the melted butter and mix until the crumbs are well coated and resemble wet sand. Press the mixture firmly into the bottom of a 9-inch springform pan to create an even crust. Set aside.
- In a separate bowl, beat the softened cream cheese with an electric mixer until smooth and creamy. Gradually add the powdered sugar and vanilla extract, mixing until fully combined and there are no lumps.
- In another bowl, whip the heavy cream until stiff peaks form. Gently fold the whipped cream into the cream cheese mixture until fully incorporated, being careful not to deflate the whipped cream.
- Pour the cheesecake filling over the prepared brownie crust and smooth the top with a spatula. Cover the springform pan with plastic wrap and refrigerate for at least 4 hours, or until the cheesecake is set.
- While the cheesecake is chilling, prepare the chocolate ganache by melting the chocolate chips with vegetable oil in a microwave or double boiler. Stir until smooth and let it cool slightly before drizzling it over the chilled cheesecake.
- Once the cheesecake is set, remove it from the springform pan and drizzle the chocolate ganache over the top. Garnish with additional chopped nuts if desired before slicing and serving.
Extra Tips: For an extra chocolatey flavor, you can mix some cocoa powder into the cream cheese filling before adding the whipped cream. If you prefer a lighter texture, consider folding in some sour cream to the filling for a tangy twist.
Make sure to allow the cheesecake to chill thoroughly for the best texture and flavor, and feel free to customize the toppings with your favorite nuts or even a layer of caramel sauce. Enjoy your heavenly dessert!
Sweet Potato Cheesecake
Title: Sweet Potato Cheesecake
Prep Time: 20 minutes
Cook Time: 0 minutes
Number of Servings: 8
Required Equipment List: Mixing bowl, 9-inch springform pan, electric mixer, spatula, measuring cups and spoons
Cuisine Type: American
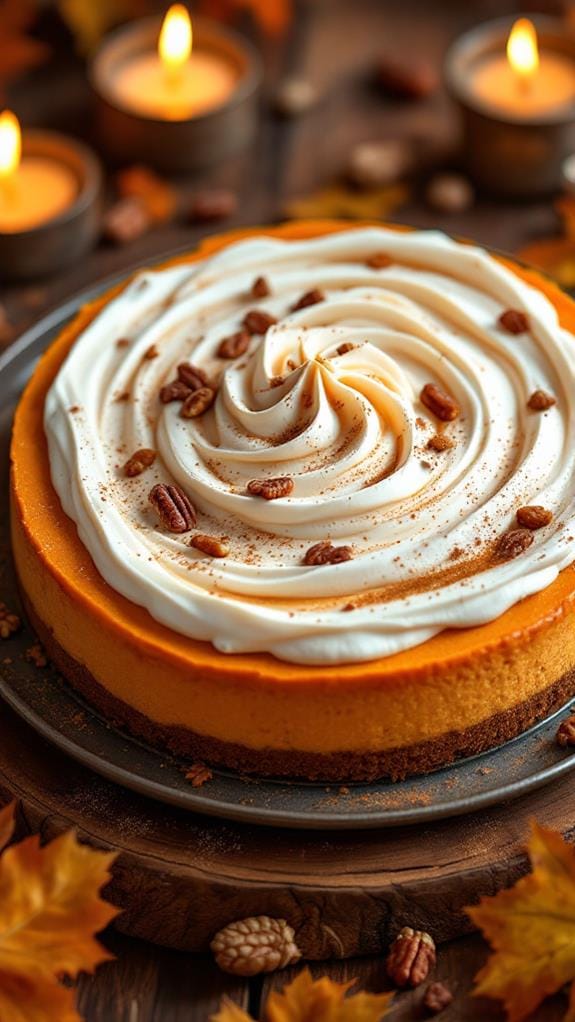
This Sweet Potato Cheesecake is a delightful no-bake dessert that combines the rich flavors of creamy cheesecake with the natural sweetness of sweet potatoes. With a buttery graham cracker crust and a silky filling made from whipped cream cheese, brown sugar, and spiced sweet potatoes, this cheesecake offers a comforting taste that’s perfect for fall gatherings or holiday celebrations.
The best part is that it requires no baking, making it an easy and stress-free dessert to prepare. The vibrant orange hue of the sweet potato adds an appealing look to the cheesecake, while warm spices such as cinnamon and nutmeg enhance its flavor profile.
Topped with a dollop of whipped cream or a sprinkle of toasted pecans, this dessert isn’t only a feast for the eyes but also for the palate. Its light and airy texture will leave your guests asking for seconds!
Ingredients:
- 1 ½ cups graham cracker crumbs
- ½ cup unsalted butter, melted
- 1 cup cooked and mashed sweet potatoes
- 16 ounces cream cheese, softened
- 1 cup powdered sugar
- 1 teaspoon vanilla extract
- 1 teaspoon ground cinnamon
- ½ teaspoon ground nutmeg
- 1 cup heavy whipping cream
Instructions:
- In a mixing bowl, combine the graham cracker crumbs and melted butter. Mix until the crumbs are evenly coated. Press the mixture firmly into the bottom of a 9-inch springform pan to form the crust. Place the crust in the refrigerator to set while preparing the filling.
- In a large bowl, beat the softened cream cheese with an electric mixer until smooth and creamy. Gradually add the powdered sugar, vanilla extract, ground cinnamon, and ground nutmeg. Mix until fully combined and there are no lumps.
- Add the cooked and mashed sweet potatoes to the cream cheese mixture. Continue to beat until the sweet potatoes are well incorporated and the mixture is smooth and creamy.
- In a separate bowl, whip the heavy cream until stiff peaks form. Gently fold the whipped cream into the sweet potato mixture using a spatula, being careful not to deflate the whipped cream.
- Pour the sweet potato cheesecake filling into the prepared crust, smoothing the top with a spatula. Cover the cheesecake with plastic wrap and refrigerate for at least 4 hours, or overnight for the best results.
- Once set, carefully remove the sides of the springform pan. Slice the cheesecake into wedges and serve garnished with whipped cream or toasted pecans if desired.
Extra Tips: To enhance the flavor of your sweet potato cheesecake, consider adding a pinch of salt to the filling to balance the sweetness. You can also experiment with different spices, such as ginger or allspice, for a unique twist.
If you prefer a more decadent touch, drizzle the cheesecake with caramel sauce just before serving. Enjoy this delightful dessert chilled for a rejuvenating treat!
Bourbon Vanilla Cheesecake
Title: Bourbon Vanilla Cheesecake
Prep Time: 30 minutes
Cook Time: 0 minutes
Number of Servings: 8
Required Equipment List: Mixing bowls, electric mixer, 9-inch springform pan, spatula, measuring cups, measuring spoons
Cuisine Type: American
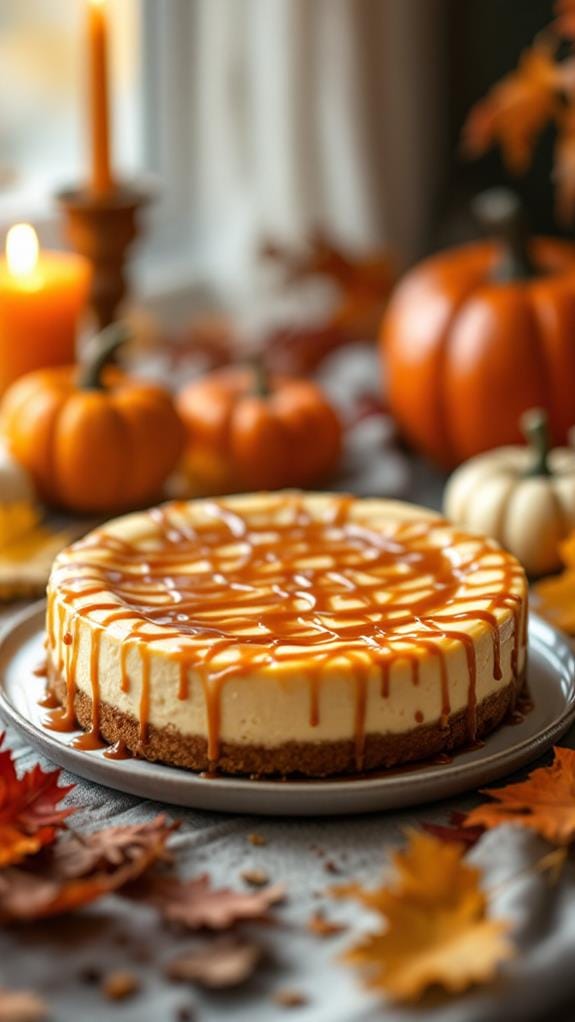
This Bourbon Vanilla Cheesecake is a decadent dessert that brings together the rich flavors of cream cheese and vanilla with a hint of bourbon for a sophisticated twist. Perfectly creamy and smooth, this no-bake cheesecake is set to impress your guests at any gathering or special occasion.
The addition of bourbon enhances the vanilla notes, creating a depth of flavor that makes each bite utterly delightful. The crust, made from crushed graham crackers and melted butter, provides a satisfying crunch that complements the creamy filling beautifully.
This cheesecake is incredibly easy to prepare, requiring no baking, which means you can whip it up in no time. After a brief chilling period in the refrigerator, this dessert is ready to serve, making it an ideal choice for those who love to entertain without the hassle of a complicated baking process.
Ingredients:
- 2 cups graham cracker crumbs
- 1/2 cup unsalted butter, melted
- 1 cup sugar
- 3 (8-ounce) packages cream cheese, softened
- 1 cup heavy whipping cream
- 1 tablespoon vanilla extract
- 1/4 cup bourbon
- 1 tablespoon lemon juice
Instructions:
- Begin by preparing the crust. In a mixing bowl, combine the graham cracker crumbs and melted butter. Stir until the crumbs are well coated and resemble wet sand. Press this mixture firmly into the bottom of a 9-inch springform pan to form an even layer. Set aside.
- In another mixing bowl, use an electric mixer to beat the softened cream cheese until smooth and creamy. Gradually add the sugar, mixing until fully incorporated and the mixture is fluffy.
- Add the vanilla extract, bourbon, and lemon juice to the cream cheese mixture, continuing to mix until combined. Make sure to scrape down the sides of the bowl as needed.
- In a separate bowl, whip the heavy cream until stiff peaks form. Gently fold the whipped cream into the cream cheese mixture using a spatula, being careful not to deflate the whipped cream. This will help keep the cheesecake light and airy.
- Pour the cheesecake filling over the prepared crust in the springform pan, spreading it evenly with a spatula. Smooth the top and gently tap the pan on the counter to remove any air bubbles.
- Cover the cheesecake with plastic wrap and refrigerate for at least 4 hours, or preferably overnight, to allow it to set properly.
Extra Tips: When serving, consider drizzling additional bourbon or a chocolate sauce on top for an extra layer of flavor. You can also garnish with whipped cream or fresh berries for a pop of color and freshness.
Make sure to run a knife around the edge of the pan before removing the sides of the springform pan to prevent any sticking. Enjoy this delightful cheesecake at your next gathering!
Chai Tea Cheesecake
Title: Chai Tea Cheesecake
Prep Time: 20 minutes
Cook Time: 0 minutes
Number of Servings: 8
Required Equipment List: Mixing bowl, 9-inch springform pan, electric mixer, measuring cups, measuring spoons, spatula
Cuisine Type: American
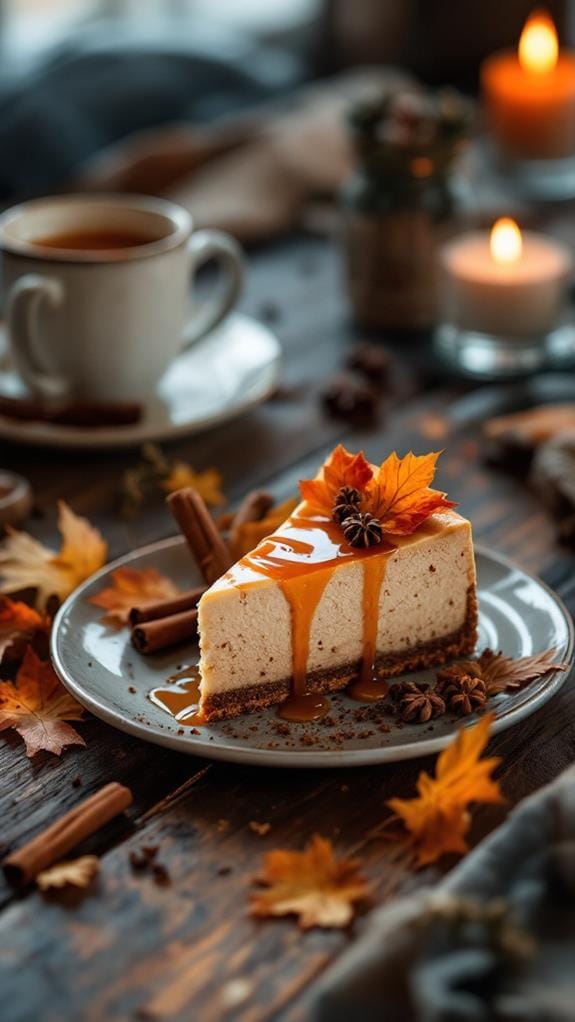
This Chai Tea Cheesecake is a delightful fusion of creamy cheesecake and fragrant chai spices, perfect for those who appreciate the warm, comforting flavors of traditional chai tea. The no-bake aspect of this recipe makes it incredibly easy to prepare, requiring just a bit of chilling time to set.
The rich cream cheese filling combined with the aromatic spices of cinnamon, cardamom, and ginger creates a dessert that’s both indulgent and invigorating, ideal for any occasion from casual gatherings to special celebrations.
The buttery graham cracker crust perfectly complements the spiced filling, providing a delightful crunch that balances the creamy texture of the cheesecake. Topped with a dollop of whipped cream and a sprinkle of chai spices, this cheesecake isn’t only a treat for the taste buds but also a feast for the eyes.
Serve it chilled to enhance the flavors and enjoy a unique dessert that will leave your guests asking for seconds.
Ingredients:
- 1 ½ cups graham cracker crumbs
- ½ cup unsalted butter, melted
- 1 cup cream cheese, softened
- 1 cup powdered sugar
- 1 teaspoon vanilla extract
- 1 teaspoon ground cinnamon
- ½ teaspoon ground cardamom
- ½ teaspoon ground ginger
- 1 cup whipped cream (for topping)
- Additional chai spices (for garnish)
Instructions:
- In a mixing bowl, combine the graham cracker crumbs and melted butter. Stir until the mixture resembles wet sand. Press the crumb mixture evenly into the bottom of a 9-inch springform pan to form the crust. Refrigerate while preparing the filling.
- In another large mixing bowl, use an electric mixer to beat the softened cream cheese until smooth and creamy. Gradually add the powdered sugar, mixing until well combined.
- Add the vanilla extract, ground cinnamon, ground cardamom, and ground ginger to the cream cheese mixture. Continue to mix until the spices are fully incorporated and the mixture is smooth and fluffy.
- Gently fold in ½ cup of whipped cream into the cream cheese mixture to lighten it. Then pour the filling over the chilled graham cracker crust, smoothing the top with a spatula.
- Cover the cheesecake with plastic wrap and refrigerate for at least 4 hours or overnight to allow it to set properly.
- Once set, remove the cheesecake from the springform pan and top with the remaining whipped cream. Garnish with additional chai spices for an extra touch of flavor and presentation.
Extra Tips: For a richer chai flavor, steep some chai tea bags in warm water and use the brewed tea to enhance the spices in the filling. You can also add a hint of nutmeg or allspice for a unique twist.
If you prefer a bit of texture, consider folding in crushed nuts or chocolate chips into the filling before pouring it over the crust. Enjoy this delightful dessert with a cup of chai tea for the ultimate experience!
Harvest Berry Cheesecake
Title: Harvest Berry Cheesecake
Prep Time: 20 minutes
Cook Time: 0 minutes
Number of Servings: 8
Required Equipment List: 9-inch springform pan, mixing bowl, electric mixer, spatula, refrigerator
Cuisine Type: American
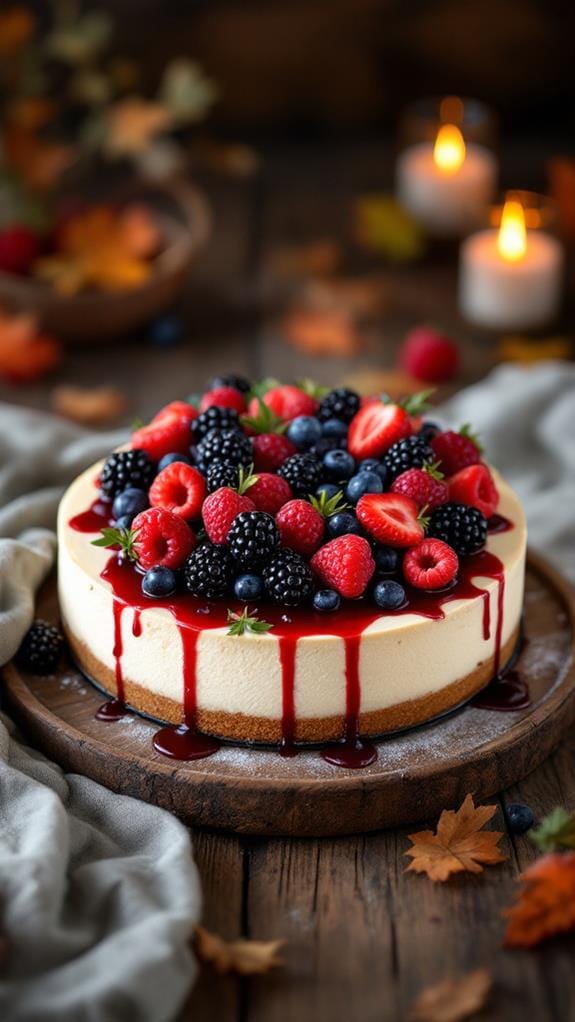
This Harvest Berry Cheesecake is a delightful no-bake dessert that captures the essence of fall with its rich creaminess and vibrant berry topping. The cheesecake filling, made with cream cheese and whipped cream, is perfectly balanced with a hint of vanilla and a touch of sweetness.
The addition of a buttery graham cracker crust provides a delightful crunch that complements the smooth filling beautifully. Topped with a medley of fresh berries, this cheesecake isn’t only a visual treat but also a delicious celebration of seasonal flavors.
Perfect for gatherings, potlucks, or simply as a special treat at home, this no-bake cheesecake is incredibly simple to prepare. With minimal cooking involved, it requires only a little bit of patience as it sets in the refrigerator.
The combination of cream cheese, fresh berries, and the buttery crust makes it a crowd-pleaser that will leave everyone wanting more.
Ingredients:
- 1 ½ cups graham cracker crumbs
- ½ cup unsalted butter, melted
- 2 cups cream cheese, softened
- 1 cup powdered sugar
- 1 teaspoon vanilla extract
- 1 cup heavy whipping cream
- 2 cups mixed fresh berries (strawberries, blueberries, raspberries)
- Mint leaves for garnish (optional)
Instructions:
- In a mixing bowl, combine the graham cracker crumbs and melted butter. Stir until the crumbs are evenly coated and resemble wet sand. Press the mixture firmly into the bottom of a 9-inch springform pan to form a crust. Place the pan in the refrigerator to set while you prepare the filling.
- In a separate mixing bowl, beat the softened cream cheese with an electric mixer until smooth and creamy. Gradually add the powdered sugar and vanilla extract, mixing until well combined and fluffy.
- In another bowl, whip the heavy cream until stiff peaks form. Gently fold the whipped cream into the cream cheese mixture using a spatula, taking care not to deflate the whipped cream. This will give the cheesecake its light and airy texture.
- Pour the cheesecake filling over the prepared graham cracker crust in the springform pan. Use a spatula to smooth the top evenly. Cover the cheesecake with plastic wrap and refrigerate for at least 4 hours, or overnight for best results.
- Once the cheesecake has set, carefully remove it from the springform pan. Top the cheesecake with the mixed fresh berries, arranging them as desired. Garnish with mint leaves if using, and serve chilled.
Extra Tips: For a flavorful twist, consider adding a tablespoon of lemon juice to the filling for a hint of tanginess. You can also experiment with different types of berries or even a berry compote for the topping.
Make sure to serve the cheesecake chilled for the best texture, and if you’re preparing it in advance, keep it covered in the refrigerator to maintain freshness. Enjoy your delicious Harvest Berry Cheesecake!
Conclusion
So there you have it—11 no-bake cheesecake recipes that’ll wow your guests this autumn! Imagine hosting a cozy gathering where your friends can’t stop raving about your spiced pumpkin cheesecake, all while enjoying the crisp fall air. You’ll not only delight their taste buds but also save time in the kitchen. Why not try one of these recipes this weekend? After all, who wouldn’t want to indulge in a slice of creamy, seasonal goodness?
