No products in the cart.
13 Thanksgiving Recipes For Dinner Parties
Did you know that over 90% of Americans celebrate Thanksgiving with a festive meal? If you’re hosting a dinner party this year, you might be wondering how to impress your guests with standout dishes that evoke the spirit of the season. From a succulent herb-roasted turkey to indulgent desserts like pumpkin pie, the options are vast. But what truly makes a Thanksgiving feast memorable? Explore some essential recipes that not only satisfy but also elevate your gathering to a new level of culinary delight.
Herb-Roasted Turkey
Title: Herb-Roasted Turkey
Prep Time: 30 minutes
Cook Time: 180 minutes
Number of Servings: 10
Required Equipment List: Roasting pan, meat thermometer, basting brush, aluminum foil, carving knife
Cuisine Type: American
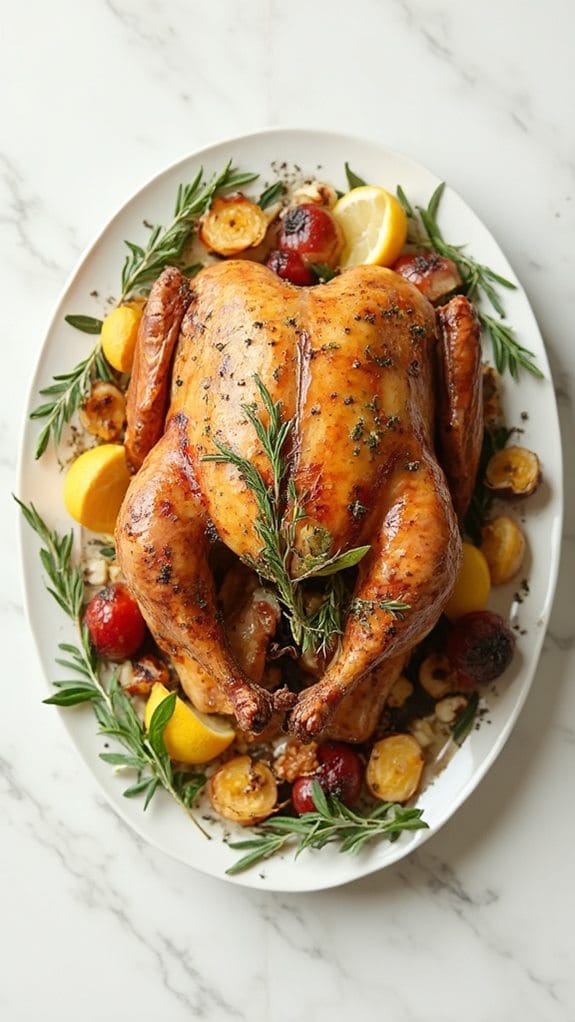
Herb-Roasted Turkey is a classic centerpiece for any Thanksgiving feast, bringing together the rich flavors of fresh herbs and butter that create a beautifully golden and flavorful bird. This recipe highlights the simplicity of roasting a turkey while guaranteeing it remains juicy and tender throughout the cooking process.
The combination of rosemary, thyme, and sage not only infuses the meat with aromatic goodness but also gives the skin a delightful crispness, making each slice a heavenly experience. Preparing an herb-roasted turkey may seem intimidating, but with a little planning, it can be a rewarding endeavor.
The key is to start with a high-quality turkey and to season it generously inside and out. Allowing the turkey to rest before carving guarantees that the juices redistribute, preventing dryness. Whether it’s your first time or you’re a seasoned pro, this herb-roasted turkey recipe will make your holiday meal memorable and delicious.
Ingredients:
- 1 (12-14 pound) whole turkey, thawed
- 1/2 cup unsalted butter, softened
- 2 tablespoons fresh rosemary, chopped
- 2 tablespoons fresh thyme, chopped
- 2 tablespoons fresh sage, chopped
- 4 cloves garlic, minced
- Salt and pepper to taste
- 1 large onion, quartered
- 1 lemon, halved
- 2 cups low-sodium chicken broth
- Fresh herbs for garnish (optional)
Instructions:
- Preheat your oven to 325°F (163°C). Remove the turkey giblets and pat the turkey dry with paper towels. This step is vital for achieving crispy skin during roasting.
- In a small bowl, combine the softened butter with chopped rosemary, thyme, sage, minced garlic, salt, and pepper. Carefully loosen the skin of the turkey over the breast and thighs using your fingers, being careful not to tear it. Spread a generous portion of the herb butter mixture under the skin and over the outside of the turkey.
- Stuff the cavity of the turkey with the quartered onion and halved lemon. This will add flavor and moisture during the roasting process. Tie the legs together with kitchen twine and tuck the wing tips under the bird to guarantee even cooking.
- Place the turkey breast-side up in a roasting pan. Pour the chicken broth into the bottom of the pan to create steam and keep the meat moist. Cover the turkey loosely with aluminum foil to prevent over-browning.
- Roast the turkey in the preheated oven for approximately 13-15 minutes per pound, or until the meat thermometer inserted into the thickest part of the thigh reads 165°F (74°C). Remove the foil during the last hour of cooking to allow the skin to brown beautifully.
- Once cooked, remove the turkey from the oven and cover it loosely with foil. Let it rest for at least 30 minutes before carving. This resting period is critical for juicy meat.
Extra Tips: To enhance the flavor, consider brining the turkey a day before roasting. A simple brine of water, salt, sugar, and herbs can elevate the taste considerably.
Additionally, remember to baste the turkey every 30-45 minutes with the pan juices for extra moisture and flavor. If you have leftover turkey, it can be used for delicious sandwiches, soups, or casseroles, making it a versatile addition to your holiday leftovers. Enjoy your perfectly herb-roasted turkey!
Maple-Glazed Ham
Title: Maple-Glazed Ham
Prep Time: 20 minutes
Cook Time: 90 minutes
Number of Servings: 8
Required Equipment List: Roasting pan, aluminum foil, whisk, basting brush, meat thermometer
Cuisine Type: American
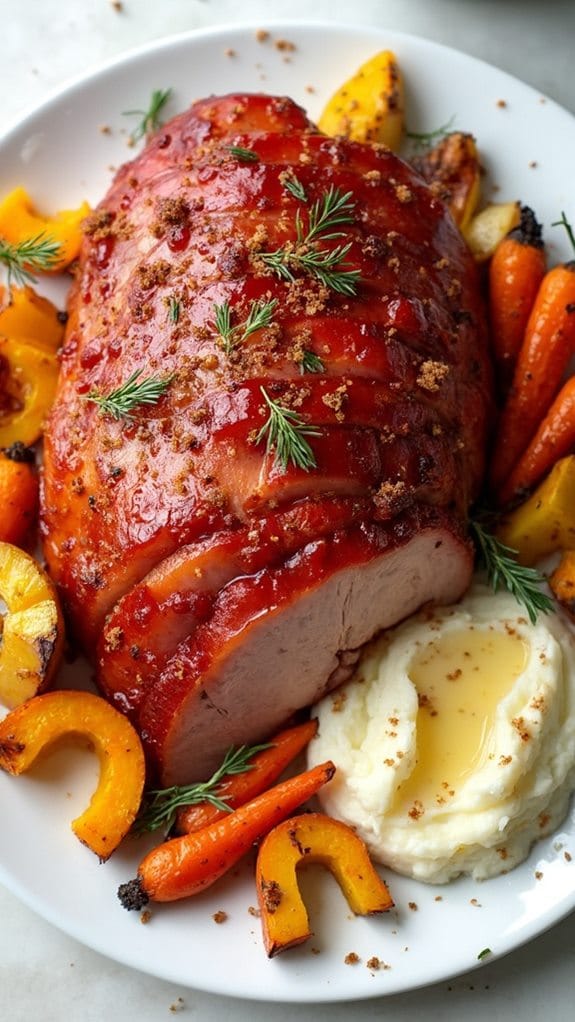
This Maple-Glazed Ham is a centerpiece worthy of any holiday table, particularly during Thanksgiving. The sweet and sticky maple glaze caramelizes beautifully in the oven, creating a rich and flavorful crust that perfectly complements the savory ham. This dish isn’t only visually stunning but also incredibly simple to prepare, making it a perfect choice for family gatherings and celebrations.
The aroma that wafts through your kitchen while this ham is roasting will have everyone enthusiastic to dig in. Using a pre-cooked ham considerably reduces the cooking time while allowing you to focus on enhancing its flavor with the maple glaze. This recipe is versatile; you can add spices like cinnamon or cloves to the glaze for an extra layer of warmth.
By serving this succulent ham with sides like roasted vegetables or creamy mashed potatoes, you’ll create a memorable feast that will delight your guests.
Ingredients:
- 1 fully cooked bone-in ham (about 7-9 pounds)
- 1 cup pure maple syrup
- 1/2 cup brown sugar
- 1/4 cup Dijon mustard
- 1/4 cup apple cider vinegar
- 1 teaspoon ground cinnamon
- 1/2 teaspoon ground cloves
- 1/2 teaspoon black pepper
- Fresh herbs (for garnish, optional)
Instructions:
- Preheat your oven to 325°F (163°C). Place the fully cooked ham on a roasting pan, flat side down, to guarantee even cooking. If there’s a layer of skin, score it in a diamond pattern to allow the glaze to penetrate and flavor the meat.
- In a mixing bowl, whisk together the maple syrup, brown sugar, Dijon mustard, apple cider vinegar, ground cinnamon, ground cloves, and black pepper until well combined. This will be your glaze, which adds a sweet and tangy flavor to the ham.
- Brush half of the maple glaze generously over the surface of the ham, making sure to get it into the scored cuts. Cover the ham loosely with aluminum foil to prevent it from drying out during the initial cooking phase.
- Place the ham in the preheated oven and bake for about 1 hour. After 30 minutes, remove the foil and baste the ham with the remaining glaze. Continue to bake uncovered for the last 30 minutes, allowing the glaze to caramelize and form a beautiful crust.
- Check the internal temperature of the ham using a meat thermometer; it should reach at least 140°F (60°C) for ideal flavor and safety. Once cooked, remove the ham from the oven and let it rest for at least 15 minutes before slicing.
- Slice the ham into thick pieces and serve, garnished with fresh herbs if desired. Enjoy the delicious flavors and tenderness of your maple-glazed ham alongside your favorite holiday sides.
Extra Tips: For an even deeper flavor, consider adding a splash of bourbon or whiskey to the glaze mixture. If you prefer a spicier kick, a pinch of cayenne pepper can be added.
Additionally, if you have leftovers, this ham can be easily repurposed in sandwiches, soups, or casseroles, making it a versatile dish that’s just as delicious the next day. Enjoy your festive feast!
Stuffed Acorn Squash
Title: Stuffed Acorn Squash
Prep Time: 15 minutes
Cook Time: 45 minutes
Number of Servings: 4
Required Equipment List: Baking sheet, sharp knife, mixing bowl, spoon, aluminum foil
Cuisine Type: American
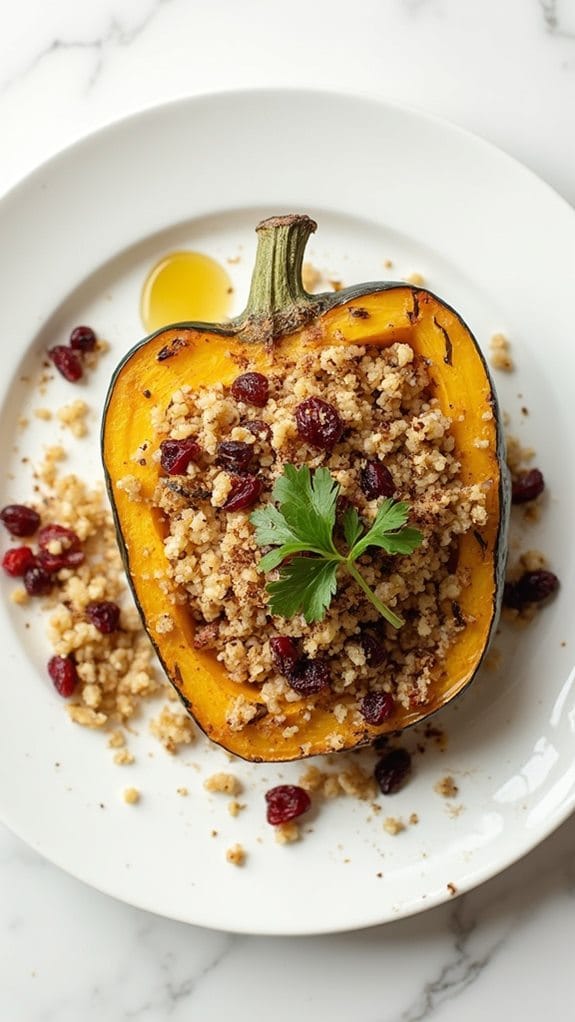
Stuffed acorn squash is a beautiful and nutritious dish that showcases the essence of fall flavors. This recipe features roasted acorn squash halves filled with a savory mixture of quinoa, cranberries, nuts, and spices that create a delightful balance of sweetness and earthiness.
The golden-brown roasted squash provides a warm, inviting presentation, making it perfect for Thanksgiving or any festive gathering. Not only is this dish visually appealing, but it’s also packed with nutrients, making it a wholesome vegetarian option that everyone will enjoy.
The combination of textures from the chewy quinoa, crunchy nuts, and tender squash creates a satisfying experience, while the cranberries add a burst of tartness. This stuffed acorn squash can be served as a main course or a side dish, complementing a variety of proteins for a complete meal.
Ingredients:
- 2 medium acorn squashes
- 1 cup cooked quinoa
- 1/2 cup dried cranberries
- 1/2 cup chopped nuts (walnuts or pecans)
- 1/2 teaspoon cinnamon
- 1/4 teaspoon nutmeg
- 1 tablespoon maple syrup
- Salt and pepper to taste
- Olive oil for drizzling
- Fresh parsley for garnish (optional)
Instructions:
- Preheat the oven to 400°F (200°C). Cut each acorn squash in half vertically and scoop out the seeds and stringy flesh. Place the squash halves cut-side up on a baking sheet and drizzle with olive oil, then sprinkle with salt and pepper.
- Roast the squash in the preheated oven for about 25-30 minutes, or until the flesh is tender and easily pierced with a fork. While the squash is roasting, prepare the stuffing.
- In a mixing bowl, combine the cooked quinoa, dried cranberries, chopped nuts, cinnamon, nutmeg, maple syrup, salt, and pepper. Mix well to guarantee all ingredients are evenly incorporated.
- Once the squash is cooked, carefully remove it from the oven and fill each half with the quinoa mixture, pressing down gently to pack it in. Drizzle a little more olive oil over the top for extra flavor.
- Return the stuffed squash to the oven and bake for an additional 10-15 minutes, allowing the flavors to meld and the tops to brown slightly.
- Remove from the oven and let cool for a few minutes before serving. Garnish with fresh parsley if desired, and enjoy your delicious stuffed acorn squash!
Extra Tips: To save time, you can prepare the quinoa in advance and store it in the refrigerator until ready to use. Feel free to customize the stuffing by adding sautéed vegetables like spinach or mushrooms for added flavor and nutrition.
This dish can also be made ahead of time and reheated in the oven, making it a convenient option for holiday dinners. Enjoy the rich flavors and beautiful presentation of this seasonal favorite!
Garlic Mashed Potatoes
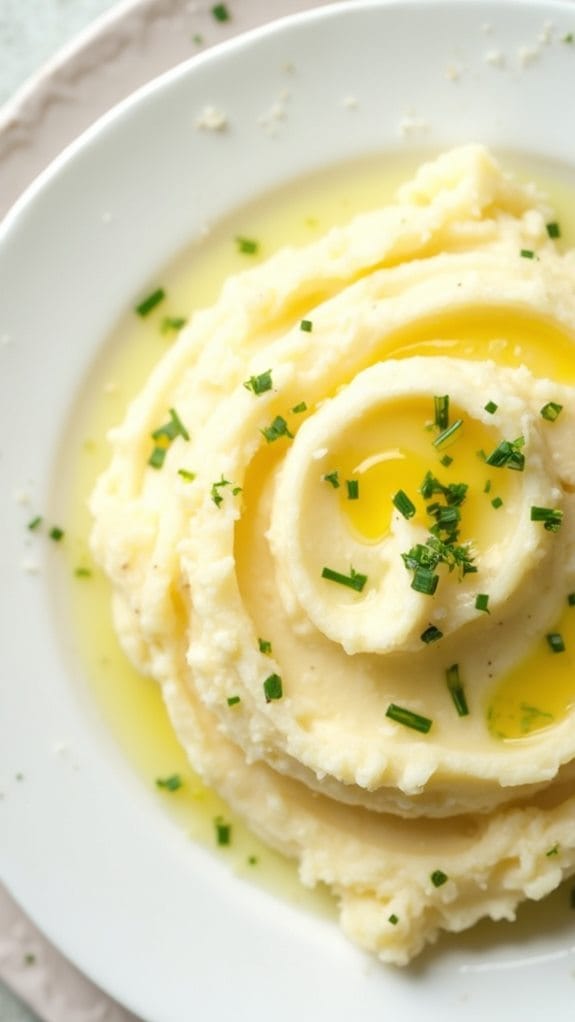
Title: Garlic Mashed Potatoes
Prep Time: 15 minutes
Cook Time: 20 minutes
Number of Servings: 6
Required Equipment List: Large pot, potato masher, colander, mixing bowl, garlic press, measuring cups and spoons
Cuisine Type: American
Garlic Mashed Potatoes are a classic side dish that brings comfort and warmth to any holiday table. Creamy, buttery, and infused with roasted garlic, this dish elevates the humble potato to a flavorful indulgence.
Whether served alongside turkey, ham, or a vegetarian meal, these mashed potatoes are sure to be a hit with family and friends. The addition of roasted garlic adds a sweet and nutty depth to the potatoes, making them irresistible.
This recipe isn’t only easy to follow but also allows for customization based on your taste preferences. You can adjust the amount of garlic, add some cream for extra richness, or sprinkle fresh herbs for a pop of color and flavor.
With just a few simple ingredients, you can create a side dish that’s both delicious and memorable, perfect for Thanksgiving or any gathering.
Ingredients:
- 2 pounds russet potatoes
- 4 cloves garlic
- 1/2 cup unsalted butter
- 1/2 cup heavy cream
- Salt to taste
- Pepper to taste
- Chopped chives or parsley (for garnish, optional)
Instructions:
- Begin by peeling the russet potatoes and cutting them into evenly sized chunks, about 1-2 inches in diameter. This will guarantee they cook evenly and mash easily. Place the potato chunks into a large pot and cover them with cold water, adding a generous pinch of salt.
- Next, peel the garlic cloves and place them in a small piece of aluminum foil. Drizzle with a bit of olive oil, fold the foil to create a packet, and roast them in the oven at 400°F (200°C) for about 15-20 minutes, or until the garlic is soft and fragrant.
- While the garlic is roasting, bring the pot of potatoes to a boil over high heat. Once boiling, reduce the heat to medium and simmer for about 15-20 minutes, or until the potatoes are fork-tender. Drain the potatoes in a colander, allowing them to sit for a minute to release excess steam.
- In a mixing bowl, combine the drained potatoes, roasted garlic (squeezed from the skins), butter, and heavy cream. Use a potato masher to mash the mixture until smooth and creamy. Taste and season with salt and pepper to your liking.
- Serve the mashed potatoes warm, garnished with chopped chives or parsley if desired. They’re best enjoyed with a drizzle of extra melted butter on top for added richness.
Extra Tips: To make your garlic mashed potatoes even creamier, you can substitute some of the heavy cream with sour cream or cream cheese. For a different flavor profile, consider adding a splash of chicken broth or a pinch of nutmeg.
If you prefer a chunkier texture, simply mash the potatoes less. These mashed potatoes can be made ahead of time and reheated gently in the oven or microwave, making them a perfect addition to any holiday feast. Enjoy your creamy, garlicky delight!
Green Bean Casserole
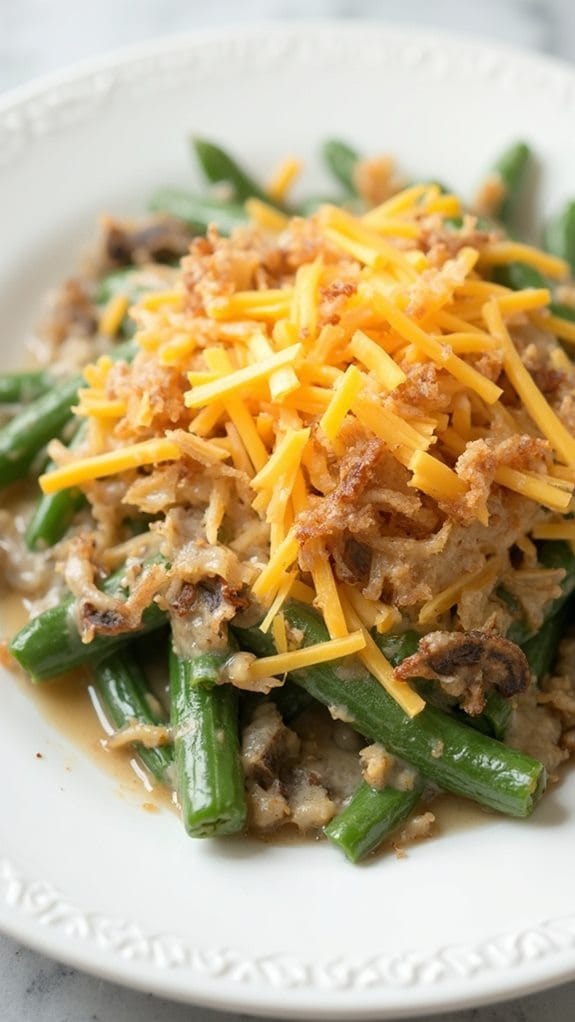
Title: Green Bean Casserole
Prep Time: 15 minutes
Cook Time: 30 minutes
Number of Servings: 8
Required Equipment List: 9×13 inch baking dish, mixing bowl, oven, cooking spoon
Cuisine Type: American
Green Bean Casserole is a classic dish that has graced holiday tables for generations, combining tender green beans with a creamy mushroom sauce and topped with crispy fried onions. This comforting casserole isn’t only easy to prepare but also provides a delightful balance of flavors and textures that are sure to please both family and guests alike.
Its creamy, savory base contrasts beautifully with the crispiness of the fried onions, making each bite a delicious experience. This dish is an essential part of many Thanksgiving meals, often evoking nostalgia and warmth during family gatherings.
Using fresh or frozen green beans, along with canned cream of mushroom soup, makes it a convenient option that can be prepared in advance. With just a few simple ingredients, this Green Bean Casserole is a must-have side dish that will complement any holiday feast.
Ingredients:
- 1 pound fresh green beans (trimmed) or 2 cans (14.5 oz each) green beans (drained)
- 1 can (10.5 oz) cream of mushroom soup
- 1/2 cup milk
- 1 teaspoon soy sauce
- 1 cup shredded cheddar cheese
- 1 cup crispy fried onions
- Salt and pepper to taste
Instructions:
- Preheat your oven to 350°F (175°C). If using fresh green beans, blanch them in boiling water for about 5 minutes until bright green and tender-crisp. Drain and set aside.
- In a mixing bowl, combine the cream of mushroom soup, milk, soy sauce, salt, and pepper. Stir until well blended to create the creamy base for your casserole.
- Add the green beans and half of the shredded cheddar cheese to the soup mixture. Stir gently to coat the beans evenly with the sauce.
- Transfer the green bean mixture into a greased 9×13 inch baking dish, spreading it out evenly. Sprinkle the remaining cheddar cheese on top.
- Bake in the preheated oven for about 25 minutes until the casserole is hot and bubbly. Remove from the oven and sprinkle the crispy fried onions on top.
- Return the casserole to the oven and bake for an additional 5 minutes or until the onions are golden brown and crispy.
Extra Tips: For added flavor, consider sautéing some diced onions or mushrooms in butter and mixing them into the casserole. You can also use different types of cheese, such as Gruyère or mozzarella, for a unique twist.
If you want a little crunch, try adding chopped nuts, like pecans or almonds, to the topping. This dish can be prepared a day in advance; just cover it with foil and refrigerate until ready to bake. Enjoy your holiday gathering with this delicious Green Bean Casserole!
Cranberry Orange Relish
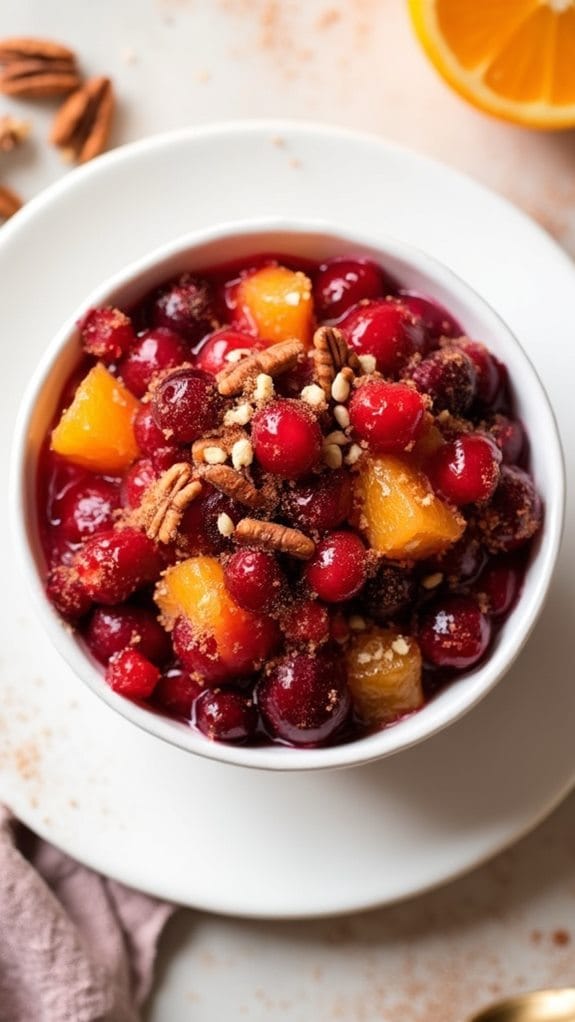
Title: Cranberry Orange Relish
Prep Time: 10 minutes
Cook Time: 0 minutes
Number of Servings: 8
Required Equipment List: Food processor, mixing bowl, spoon
Cuisine Type: American
Cranberry Orange Relish is a fresh and zesty condiment that brightens up any Thanksgiving table. This vibrant relish combines tart cranberries with the sweet and citrusy notes of oranges, creating a revitalizing balance of flavors that pairs beautifully with roasted turkey and other holiday dishes.
The natural brightness of the cranberries combined with the aromatic touch of orange zest makes this relish a delightful addition to your festive feast. This no-cook relish is incredibly easy to prepare, taking only minutes to whip up. Simply pulse the ingredients in a food processor, and you have a homemade condiment that can be made ahead of time, allowing the flavors to meld beautifully.
Serve it chilled or at room temperature for the best taste. It can also be used as a topping for cream cheese on crackers or as a vibrant addition to salads, making it a versatile option for any occasion.
Ingredients:
- 12 ounces fresh cranberries
- 1 orange, quartered (with peel)
- 1 cup granulated sugar
- 1/2 teaspoon ground cinnamon (optional)
- 1/4 cup chopped pecans (optional)
Instructions:
- Begin by rinsing the fresh cranberries under cold water to remove any impurities. Discard any that are soft or damaged. This guarantees that only the freshest cranberries are used in your relish.
- Cut the orange into quarters, leaving the peel on. This will add a lovely citrus flavor and aroma to the relish. If you prefer a less intense orange flavor, you can remove some of the white pith before processing.
- In a food processor, combine the rinsed cranberries, orange quarters, granulated sugar, and ground cinnamon if using. Pulse the mixture until the cranberries are coarsely chopped and everything is well combined. Be careful not to over-process, as you want some texture in the relish.
- Taste the relish and adjust sweetness if necessary by adding more sugar, depending on your preference. If you like a nutty crunch, fold in the chopped pecans at this stage.
- Transfer the cranberry orange relish to a mixing bowl and cover. Refrigerate for at least 1 hour before serving to allow the flavors to develop. This relish can be made a day in advance for added convenience.
Extra Tips: For an extra layer of flavor, consider adding a splash of freshly squeezed lemon juice or a tablespoon of grated ginger to the mixture. If you prefer a smoother texture, pulse the mixture longer in the food processor, but be cautious not to turn it into puree.
This relish can be stored in an airtight container in the refrigerator for up to a week, making it easy to prepare ahead of time and enjoy during the holiday season.
Roasted Root Vegetables
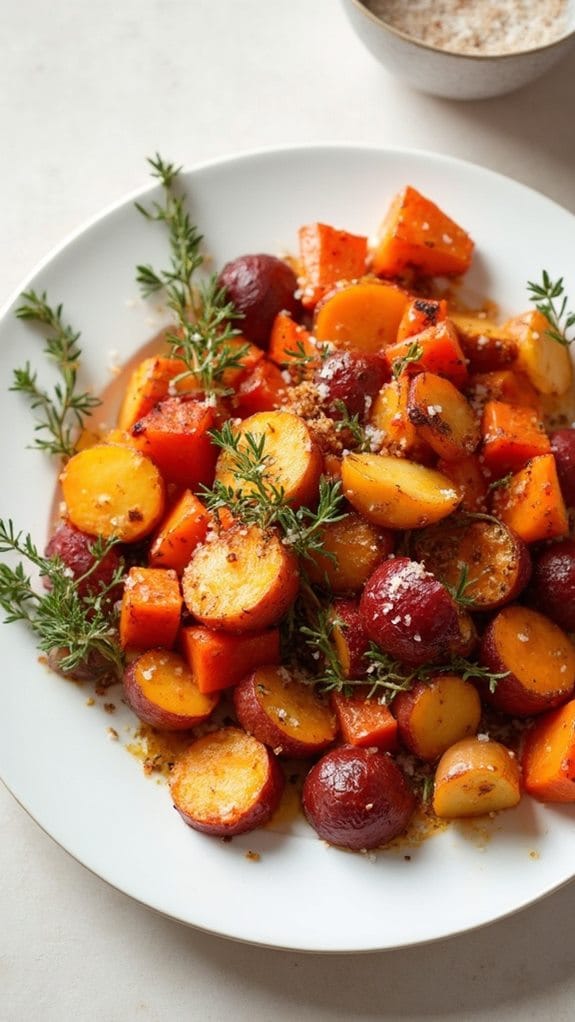
Title: Roasted Root Vegetables
Prep Time: 15 minutes
Cook Time: 30 minutes
Number of Servings: 6
Required Equipment List: Baking sheet, mixing bowl, oven, spatula, measuring spoons
Cuisine Type: American
Roasted Root Vegetables are a vibrant and hearty dish that captures the essence of fall and winter cooking. This recipe features a medley of root vegetables such as carrots, parsnips, potatoes, and sweet potatoes, all roasted to perfection in the oven. The roasting process caramelizes the natural sugars in the vegetables, resulting in a sweet and savory flavor that pairs well with any main dish.
Perfect for Thanksgiving or any family gathering, this dish won’t only brighten your table but also provide a comforting and nutritious side.
This Roasted Root Vegetables recipe is incredibly versatile, allowing you to mix and match your favorite root vegetables based on seasonal availability or personal preference. You can also enhance the flavor by adding fresh herbs like rosemary or thyme, or even a sprinkle of balsamic vinegar before roasting. The result is a colorful, delicious side dish that’s sure to impress your guests and become a regular on your holiday menu.
Ingredients:
- 2 cups carrots, peeled and cut into 1-inch pieces
- 2 cups parsnips, peeled and cut into 1-inch pieces
- 2 cups sweet potatoes, peeled and cut into 1-inch cubes
- 2 cups red potatoes, cut into 1-inch cubes
- 4 tablespoons olive oil
- 2 teaspoons salt
- 1 teaspoon black pepper
- 1 teaspoon dried thyme (or 2 teaspoons fresh thyme)
- 1 teaspoon garlic powder
Instructions:
- Preheat your oven to 425°F (220°C). This high temperature is essential for achieving a crispy exterior and tender interior on the vegetables.
- In a large mixing bowl, combine the carrots, parsnips, sweet potatoes, and red potatoes. Drizzle the olive oil over the vegetables and sprinkle with salt, pepper, thyme, and garlic powder. Toss everything together until the vegetables are evenly coated.
- Spread the vegetable mixture in a single layer on a large baking sheet. Make sure not to overcrowd the pan, as this can lead to steaming instead of roasting.
- Roast the vegetables in the preheated oven for 25-30 minutes, stirring halfway through the cooking time. The vegetables are done when they’re golden brown and tender when pierced with a fork.
- Remove the baking sheet from the oven and let the vegetables cool slightly before serving. This will help them retain their shape and texture.
Extra Tips: For added flavor, consider mixing in some chopped fresh herbs like parsley or chives right before serving. If you prefer a little heat, you can toss in some red pepper flakes or experiment with different spices like cumin or paprika.
To make this dish even more festive, try adding cranberries or pecans during the last few minutes of roasting for a delightful crunch and a pop of flavor. Enjoy your delicious roasted root vegetables!
Classic Stuffing
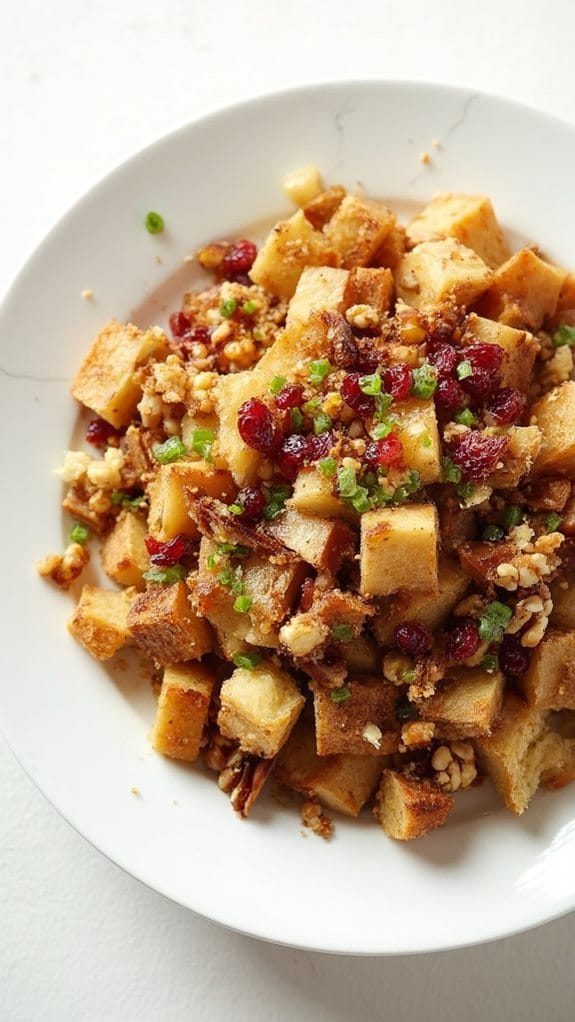
Title: Classic Stuffing
Prep Time: 20 minutes
Cook Time: 30 minutes
Number of Servings: 8
Required Equipment List: Large mixing bowl, baking dish, oven, spoon, measuring cups and spoons
Cuisine Type: American
Classic Stuffing is a beloved dish that often graces the Thanksgiving table, offering a comforting blend of savory flavors and delightful textures. Made with cubed bread, aromatic vegetables, and a medley of herbs, this stuffing embodies the essence of the holiday season.
It’s perfect for pairing with turkey, chicken, or even as a standalone dish to complement your festive spread. This stuffing recipe is versatile and can be tailored to fit your taste preferences. You can add sausage for a heartier option, or incorporate dried fruits and nuts for a hint of sweetness and crunch.
Whether baked alongside your turkey or cooked separately in a casserole dish, this Classic Stuffing is sure to be a crowd-pleaser at any gathering.
Ingredients:
- 1 loaf of day-old bread, cubed
- 1 cup celery, diced
- 1 cup onion, diced
- 1/2 cup unsalted butter
- 2 cups chicken or vegetable broth
- 1 tablespoon fresh sage, chopped (or 1 teaspoon dried)
- 1 tablespoon fresh thyme, chopped (or 1 teaspoon dried)
- 1 teaspoon salt
- 1/2 teaspoon black pepper
- 1/2 cup dried cranberries (optional)
- 1/2 cup walnuts or pecans, chopped (optional)
Instructions:
- Preheat your oven to 350°F (175°C). Begin by preparing the bread cubes by placing them in a large mixing bowl. If the bread isn’t stale, you can spread the cubes on a baking sheet and toast them in the oven for about 10 minutes to dry them out.
- In a large skillet, melt the butter over medium heat. Add the diced celery and onion, sautéing until the onions are translucent and the celery is tender, about 5-7 minutes. This step builds the foundation of flavor for your stuffing.
- Pour the sautéed vegetables over the bread cubes in the mixing bowl. Add the chopped sage, thyme, salt, pepper, and any optional ingredients like dried cranberries or nuts. Toss everything together until the bread is evenly coated with the vegetable mixture.
- Gradually pour in the chicken or vegetable broth, stirring gently until the bread is moistened but not soggy. The amount of broth may vary depending on how dry your bread is, so adjust accordingly to achieve your desired consistency.
- Transfer the stuffing mixture into a greased baking dish, spreading it out evenly. Cover the dish with aluminum foil and bake for 20 minutes. Then, remove the foil and bake for an additional 10 minutes to achieve a golden-brown top.
- Once baked, remove the stuffing from the oven and let it cool for a few minutes before serving. This dish can be enjoyed alongside your favorite holiday proteins or as part of a festive buffet.
Extra Tips: For extra flavor, consider adding cooked sausage to the stuffing mixture. You can also play around with different types of bread, such as sourdough or whole wheat, to give your stuffing a unique twist.
If you prefer a more herbaceous flavor, feel free to experiment with additional herbs like rosemary or parsley. Leftover stuffing can be stored in the refrigerator and reheated in the oven for another delicious meal. Enjoy your Classic Stuffing!
Sweet Potato Casserole
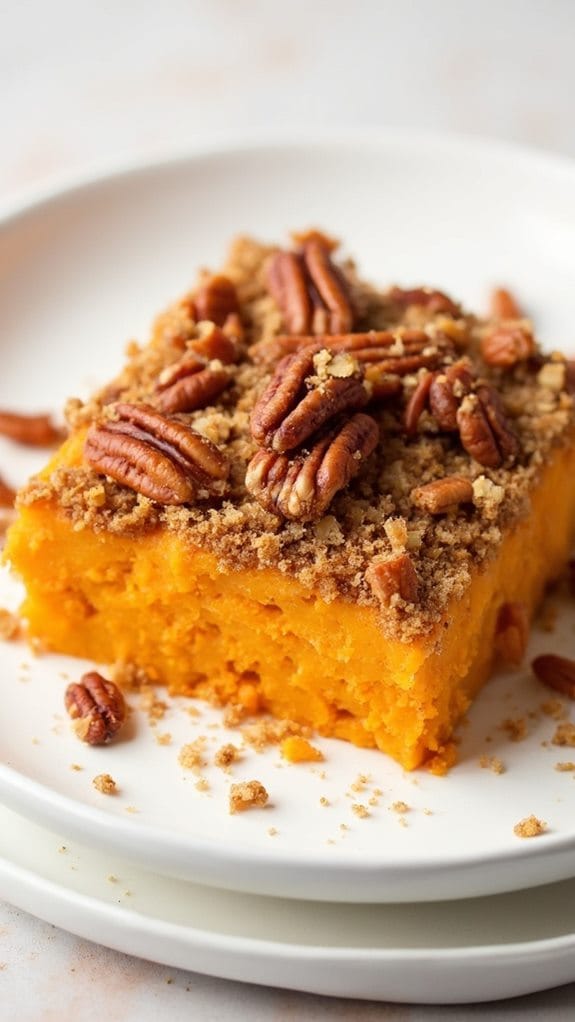
Title: Sweet Potato Casserole
Prep Time: 20 minutes
Cook Time: 30 minutes
Number of Servings: 8
Required Equipment List: 9×13 inch baking dish, mixing bowl, potato masher, oven
Cuisine Type: American
Sweet Potato Casserole is a classic dish that brings warmth and comfort to any Thanksgiving table. This recipe features creamy mashed sweet potatoes blended with rich flavors of brown sugar, cinnamon, and vanilla, creating a luscious base that’s both sweet and satisfying.
Topped with a crunchy pecan streusel, this casserole isn’t only visually appealing but also delivers a delightful contrast in textures that will make it a favorite among family and friends. This dish is versatile enough to be enjoyed as a side or even as a dessert, making it a fantastic addition to any holiday feast.
The natural sweetness of the sweet potatoes is perfectly complemented by the buttery pecan topping, making each bite a delicious experience. With its simple preparation and impressive presentation, Sweet Potato Casserole is sure to be a highlight of your Thanksgiving celebration.
Ingredients:
- 4 large sweet potatoes, peeled and cubed
- 1/2 cup brown sugar
- 1/4 cup milk
- 1/4 cup unsalted butter, melted
- 1 teaspoon vanilla extract
- 1/2 teaspoon cinnamon
- 1/4 teaspoon nutmeg
- 1/4 teaspoon salt
- 1 cup chopped pecans
- 1/2 cup all-purpose flour
- 1/4 cup sugar
Instructions:
- Preheat your oven to 350°F (175°C). Begin by bringing a large pot of salted water to a boil. Add the cubed sweet potatoes and cook until tender, about 15-20 minutes. Drain the sweet potatoes and let them cool slightly.
- In a mixing bowl, mash the cooked sweet potatoes until smooth. Add in the brown sugar, milk, melted butter, vanilla extract, cinnamon, nutmeg, and salt. Mix until well combined and creamy. Transfer this mixture into a greased 9×13 inch baking dish, spreading it evenly.
- In another bowl, prepare the pecan topping by combining the chopped pecans, flour, and sugar. Pour in the melted butter and mix until the mixture resembles coarse crumbs.
- Sprinkle the pecan topping evenly over the sweet potato mixture in the baking dish. Bake in the preheated oven for 25-30 minutes, or until the topping is golden brown and the casserole is heated through.
- Once done, remove the casserole from the oven and let it sit for a few minutes before serving. This will allow the flavors to meld together beautifully.
Extra Tips: For an extra layer of flavor, consider adding a splash of orange juice or zest to the sweet potato mixture. You can also substitute the pecans with walnuts or even add mini marshmallows on top for a more traditional touch.
This casserole can be made ahead of time and stored in the refrigerator, then baked just before serving for a stress-free holiday meal. Enjoy your delicious Sweet Potato Casserole!
Creamed Spinach
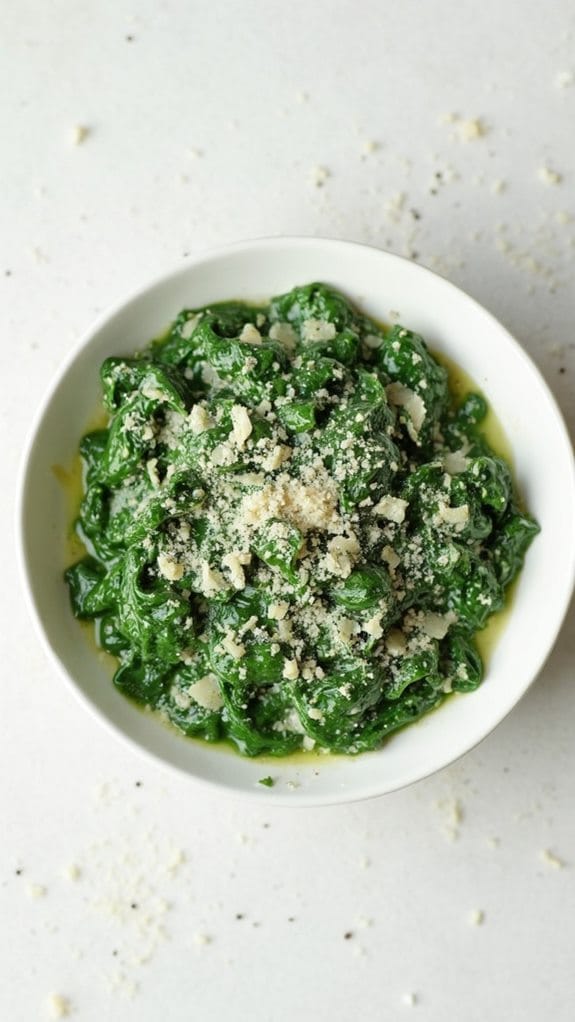
Title: Creamed Spinach
Prep Time: 10 minutes
Cook Time: 15 minutes
Number of Servings: 4
Required Equipment List: Large skillet, wooden spoon, measuring cups, measuring spoons, serving dish
Cuisine Type: American
Creamed spinach is a classic side dish that adds a touch of elegance and comfort to any holiday meal or weeknight dinner. This rich and creamy dish features fresh spinach cooked down to a tender texture, combined with a luscious cream sauce that’s both savory and satisfying.
With its vibrant green color and delicious flavor, creamed spinach isn’t only a feast for the eyes but also a crowd-pleaser at the dining table. This recipe is quick and easy to prepare, making it a fantastic addition to your Thanksgiving spread or any gathering.
The combination of garlic, cream, and cheese adds depth to the dish, while the spinach provides essential nutrients. Whether served alongside roasted meats or as part of a vegetarian feast, creamed spinach is sure to be a hit with family and friends alike.
Ingredients:
- 1 pound fresh spinach
- 2 tablespoons butter
- 2 cloves garlic, minced
- 1 cup heavy cream
- 1/2 cup grated Parmesan cheese
- 1/4 teaspoon nutmeg
- Salt and pepper to taste
Instructions:
- Begin by washing the fresh spinach thoroughly under cold water to remove any dirt or grit. Once cleaned, roughly chop the spinach and set it aside.
- In a large skillet, melt the butter over medium heat. Add the minced garlic and sauté for about 1 minute until fragrant but not browned.
- Add the chopped spinach to the skillet, stirring well to coat it with the melted butter and garlic. Cook for about 3-5 minutes, or until the spinach has wilted down considerably.
- Pour in the heavy cream and stir to combine. Bring the mixture to a gentle simmer, then reduce the heat to low. Let it cook for another 5 minutes, allowing the cream to thicken slightly.
- Stir in the grated Parmesan cheese and nutmeg, mixing well until the cheese is fully melted and incorporated. Season with salt and pepper to taste, adjusting according to your preference.
- Remove the skillet from heat and transfer the creamed spinach to a serving dish. Serve warm as a delightful side to your main course.
Extra Tips: For added flavor, consider incorporating a pinch of crushed red pepper flakes for a touch of heat or using a blend of cheeses like cream cheese and mozzarella for a creamier texture.
If you prefer a lighter version, you can substitute half of the heavy cream with low-fat milk or use a dairy-free alternative. Leftover creamed spinach can be stored in the refrigerator and reheated, making it a great make-ahead option for busy holiday preparations. Enjoy this timeless dish!
Pumpkin Pie
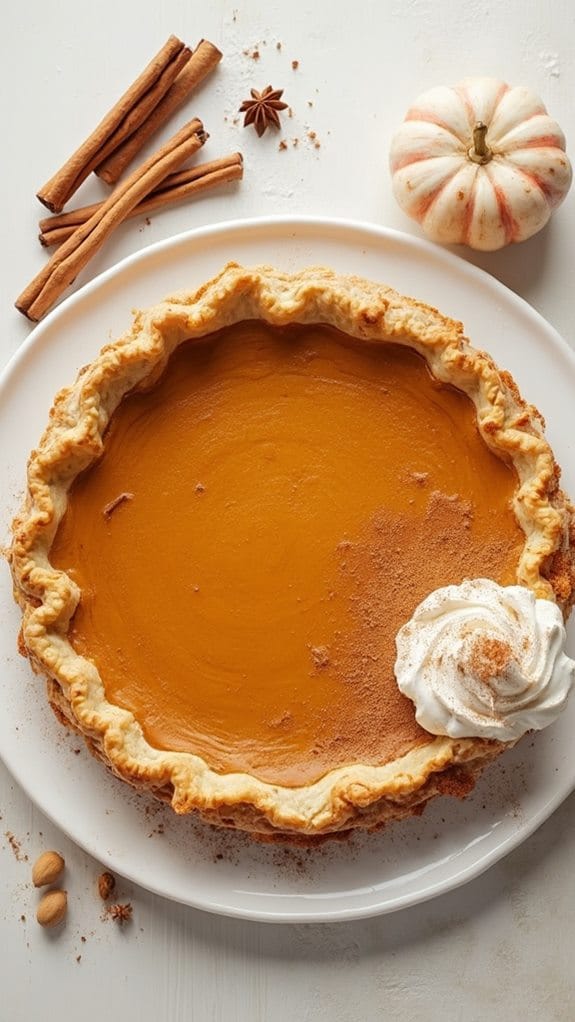
Title: Classic Pumpkin Pie
Prep Time: 20 minutes
Cook Time: 60 minutes
Number of Servings: 8
Required Equipment List: Pie dish, mixing bowl, whisk, measuring cups, measuring spoons, oven
Cuisine Type: American
Classic Pumpkin Pie is a beloved staple of Thanksgiving celebrations, known for its rich, spiced filling and flaky crust. This dessert isn’t only a delicious way to end a holiday meal but also represents the flavors of fall with its earthy pumpkin and warm spices. The creamy texture paired with a hint of sweetness makes it irresistible to both pumpkin pie aficionados and newcomers alike.
Making pumpkin pie from scratch may seem intimidating, but this recipe simplifies the process, allowing you to create a homemade pie that will impress your guests. With just a handful of ingredients and easy-to-follow steps, you’ll have a stunning pie ready to be served with whipped cream or vanilla ice cream. This recipe is sure to become a cherished tradition in your home for years to come.
Ingredients:
- 1 unbaked pie crust (store-bought or homemade)
- 1 can (15 oz) pure pumpkin puree
- 3/4 cup granulated sugar
- 1 teaspoon ground cinnamon
- 1/2 teaspoon ground ginger
- 1/4 teaspoon ground nutmeg
- 1/4 teaspoon ground cloves
- 1/2 teaspoon salt
- 3 large eggs
- 1 can (12 oz) evaporated milk
Instructions:
- Preheat your oven to 425°F (220°C). Place the unbaked pie crust in a 9-inch pie dish and crimp the edges as desired. This will help the crust hold its shape during baking.
- In a mixing bowl, whisk together the pumpkin puree, sugar, cinnamon, ginger, nutmeg, cloves, and salt until well combined. This mixture will create the flavorful filling that gives pumpkin pie its signature taste.
- Add the eggs to the pumpkin mixture, one at a time, whisking well after each addition. This guarantees that the eggs are fully incorporated and adds to the pie’s creamy texture.
- Gradually stir in the evaporated milk, mixing until the filling is smooth and uniform. This step is essential for achieving the creamy consistency that makes pumpkin pie so delightful.
- Pour the pumpkin filling into the prepared pie crust, smoothing the top with a spatula. Bake in the preheated oven for 15 minutes, then reduce the temperature to 350°F (175°C) and continue baking for an additional 40-45 minutes, or until a knife inserted in the center comes out clean.
- Once baked, remove the pie from the oven and let it cool on a wire rack for at least 2 hours before serving. This cooling period allows the filling to set properly.
Extra Tips: To make sure your pie crust doesn’t become soggy, consider pre-baking the crust for about 10 minutes before adding the filling. You can also enhance the flavor by using freshly grated nutmeg instead of pre-ground. For an extra touch, serve your pumpkin pie with a dollop of whipped cream and a sprinkle of cinnamon on top. Enjoy this classic dessert with family and friends during your Thanksgiving feast!
Pecan Pie Bars
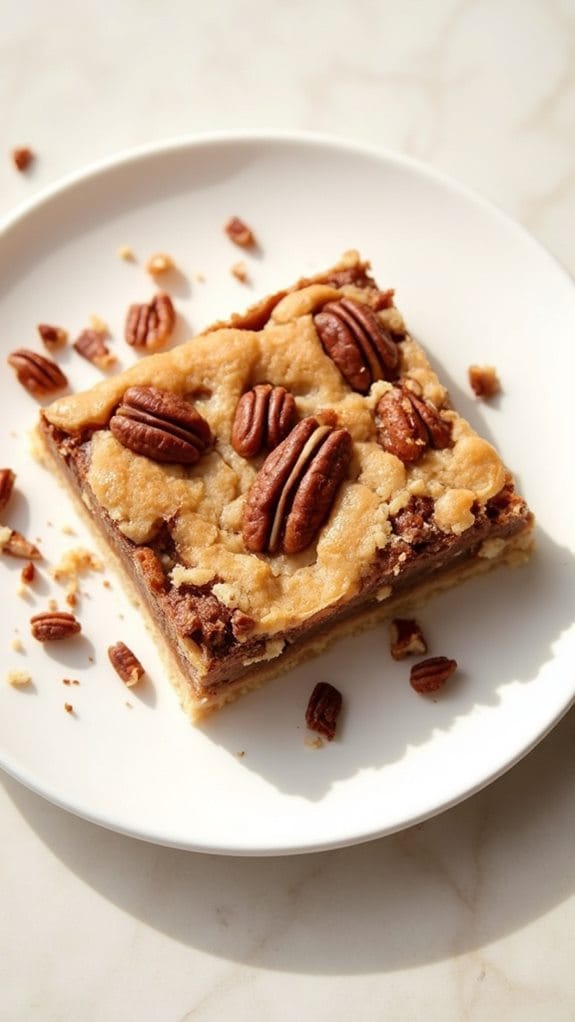
Title: Pecan Pie Bars
Prep Time: 20 minutes
Cook Time: 30 minutes
Number of Servings: 12
Required Equipment List: 9×13 inch baking dish, mixing bowls, whisk, spatula, parchment paper
Cuisine Type: American
Pecan Pie Bars are a delicious and convenient twist on the classic pecan pie, perfect for Thanksgiving or any festive occasion. These bars capture the same rich, nutty flavor of traditional pecan pie but are easier to serve and share.
With a buttery crust and a gooey pecan filling that’s perfectly sweetened, these bars are sure to be a hit at your holiday gatherings. They can be made ahead of time and stored, making them a great option for busy cooks.
The beauty of these bars lies in their simplicity. The crust is made with just a few ingredients and provides a perfect base for the sweet pecan filling. Baking them in a pan allows for easy slicing, and they can be enjoyed warm or at room temperature, making them versatile for any occasion.
Whether you’re a pecan pie lover or trying to win over skeptics, these Pecan Pie Bars will definitely impress.
Ingredients:
- 1 cup unsalted butter, softened
- 1/2 cup granulated sugar
- 1/2 cup brown sugar, packed
- 2 cups all-purpose flour
- 1/4 teaspoon salt
- 4 large eggs
- 1 teaspoon vanilla extract
- 2 cups pecan halves
- 1 cup corn syrup
Instructions:
- Preheat your oven to 350°F (175°C). Grease a 9×13 inch baking dish or line it with parchment paper for easy removal of the bars after baking.
- In a mixing bowl, cream together the softened butter, granulated sugar, and brown sugar until light and fluffy. This will create a rich base for the crust.
- Gradually add in the flour and salt to the butter mixture, stirring until just combined. The mixture will be crumbly. Press this mixture evenly into the bottom of the prepared baking dish to form the crust layer.
- In another bowl, whisk together the eggs, corn syrup, and vanilla extract until smooth. Then, fold in the pecan halves gently to coat them in the mixture.
- Pour the pecan mixture over the crust in the baking dish, spreading it evenly. Bake in the preheated oven for 30 minutes or until the filling is set and just slightly jiggly in the center.
- Once baked, remove the dish from the oven and allow it to cool completely in the pan on a wire rack. Once cooled, slice into bars and serve.
Extra Tips: For added flavor, consider toasting the pecans lightly before adding them to the filling. This enhances their nutty taste and adds depth to the bars.
You can also experiment with adding a dash of cinnamon or nutmeg to the filling for a warm spice note. These bars are great on their own but can also be served with a dollop of whipped cream or a scoop of vanilla ice cream for an indulgent treat!
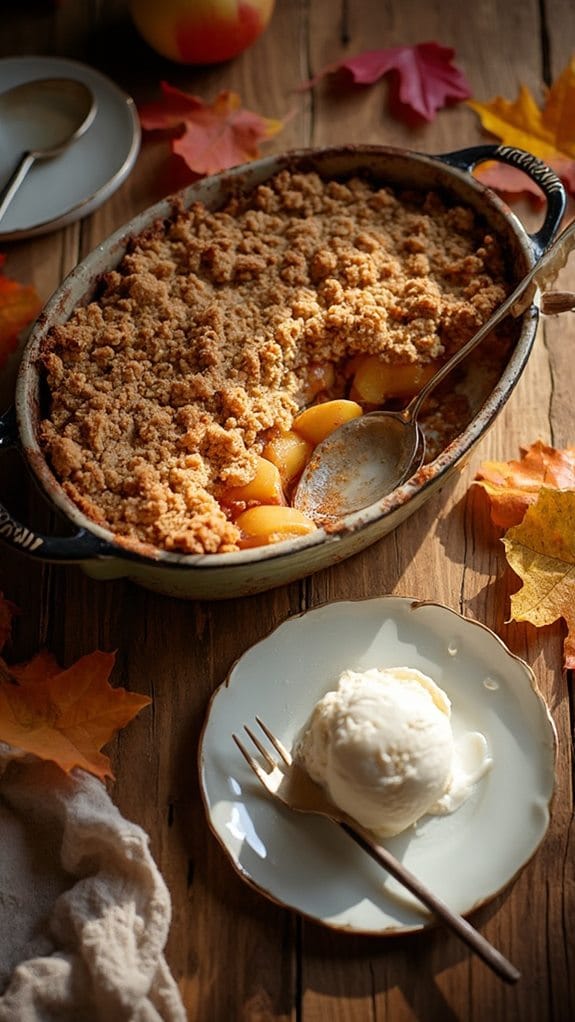
Apple Crisp
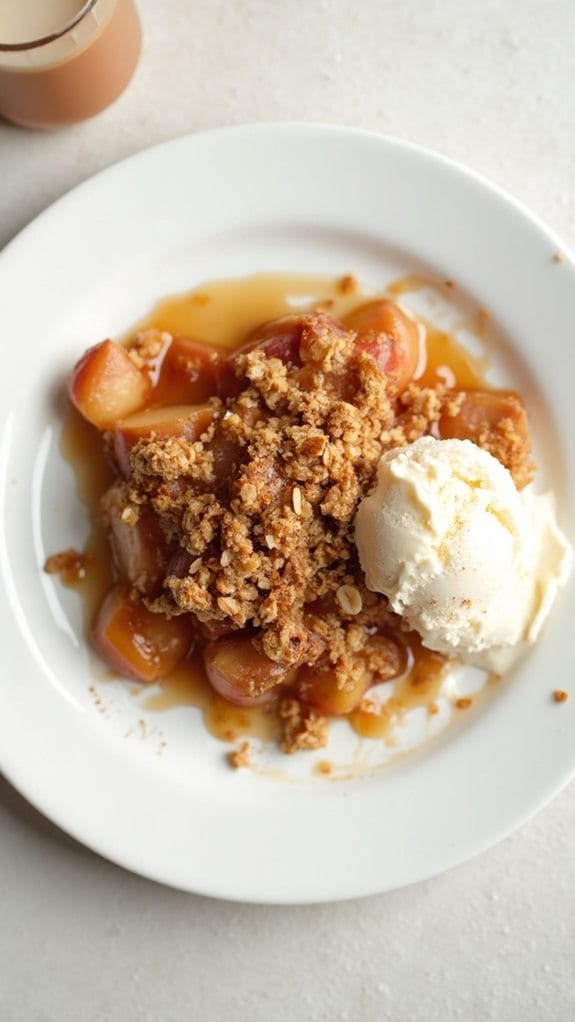
Title: Apple Crisp
Prep Time: 15 minutes
Cook Time: 45 minutes
Number of Servings: 6
Required Equipment List: Oven, baking dish, mixing bowl, spoon, knife
Cuisine Type: American
Apple Crisp is a classic dessert that combines tender, sweet apples with a crunchy, buttery topping, making it a favorite for fall gatherings and holiday feasts. The warm, spiced apples are baked to perfection, while the crisp topping adds a delightful texture that contrasts beautifully with the softness of the fruit.
This dish isn’t only delicious but also incredibly easy to prepare, making it an excellent choice for both novice and experienced bakers alike. What makes this Apple Crisp truly special is the use of a variety of apples to achieve the perfect balance of sweetness and tartness.
With a hint of cinnamon and nutmeg, the flavors evoke a sense of nostalgia, inviting everyone to enjoy a comforting slice, especially when served warm with a scoop of vanilla ice cream or a dollop of whipped cream. This dessert is sure to be a hit at your Thanksgiving table or any autumn gathering.
Ingredients:
- 6 cups apples, peeled and sliced
- 1 cup granulated sugar
- 1 teaspoon ground cinnamon
- 1/2 teaspoon ground nutmeg
- 1 tablespoon lemon juice
- 1 cup rolled oats
- 1 cup all-purpose flour
- 1/2 cup brown sugar, packed
- 1/2 cup unsalted butter, melted
- 1/4 teaspoon salt
Instructions:
- Preheat your oven to 350°F (175°C). Grease a 9×13-inch baking dish with butter or non-stick cooking spray to prevent sticking and guarantee easy serving.
- In a large mixing bowl, combine the sliced apples, granulated sugar, ground cinnamon, ground nutmeg, and lemon juice. Toss until the apples are well coated in the sugar and spices, then pour the mixture into the prepared baking dish, spreading it evenly.
- In a separate bowl, mix the rolled oats, all-purpose flour, brown sugar, melted butter, and salt until crumbly. This will form the topping that will create a delightful crunch when baked.
- Evenly distribute the oat mixture over the apple filling in the baking dish, guaranteeing that the apples are completely covered. This will help the apples cook evenly while providing a delicious topping.
- Bake in the preheated oven for 35-45 minutes, or until the apples are tender and the topping is golden brown. You can check for doneness by inserting a fork into the apples; they should be soft but not mushy.
- Once baked, remove the Apple Crisp from the oven and let it cool for a few minutes before serving. This will help the juices settle and make it easier to scoop out portions.
Extra Tips: To enhance the flavor of your Apple Crisp, consider adding chopped nuts such as walnuts or pecans to the topping for an extra crunch. You can also mix in dried cranberries or raisins with the apples for a hint of tartness and added texture.
For an indulgent treat, serve each portion with a scoop of vanilla ice cream or a drizzle of caramel sauce for a delicious contrast to the warm, spiced apples. Enjoy your homemade dessert!
Conclusion
As you gather around the table this Thanksgiving, remember that these recipes are like the warm embrace of a good friend, bringing everyone together in celebration. From the savory turkey to the sweet pies, each dish contributes to a feast that nurtures both body and soul. So, why not try your hand at these delightful recipes? They’re sure to spark joy and gratitude, making your dinner party a cherished memory for years to come. Happy cooking!

