No products in the cart.
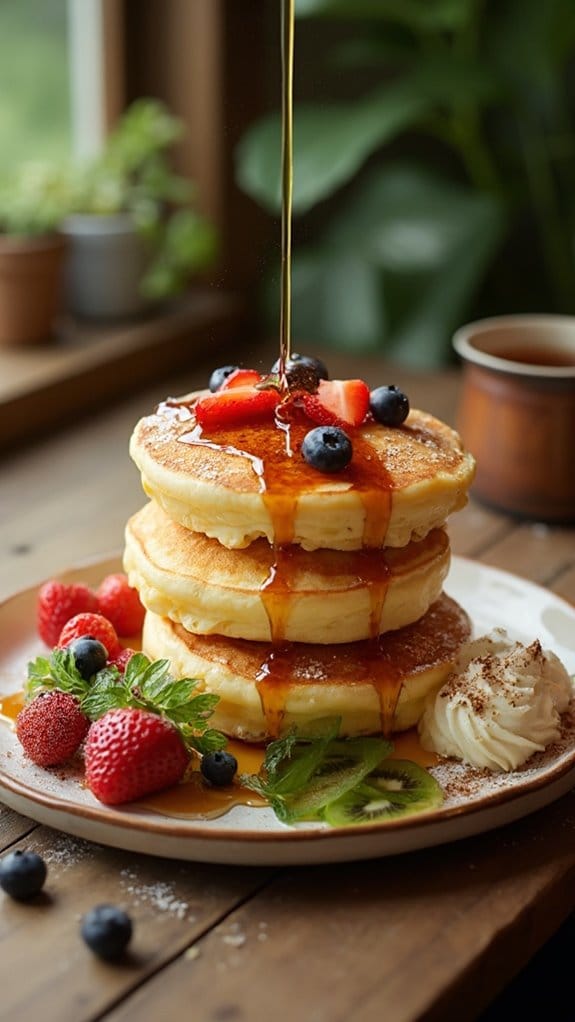
14 Popular Japanese Recipe Ideas
If you’re craving some delicious Japanese cuisine, how about trying these 14 popular Japanese recipe ideas? Start with ramen, where you can customize flavors with toppings like chashu pork and soft-boiled eggs. Sushi rolls bring fun to the kitchen, letting you experiment with fresh fillings. Don’t forget about hearty okonomiyaki, savory pancakes loaded with your favorite ingredients, or the street food classic, takoyaki. Tempura, gyoza dumplings, and chirashi bowls add variety, while matcha desserts satisfy your sweet tooth. Curious about how to make these dishes shine? Stick around, and you’ll uncover some great tips and tricks!
Ramen Variations
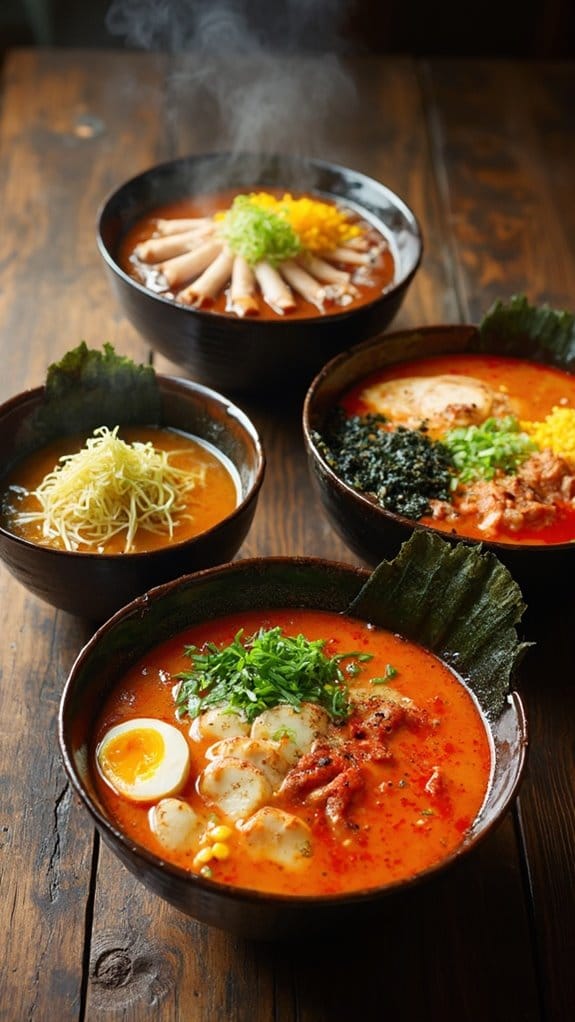
Title: Ramen Variations: Tonkotsu Ramen
Prep Time: 30 minutes
Cook Time: 6 hours
Number of Servings: 4
Required Equipment List: Large pot, colander, ladle, serving bowls, whisk
Cuisine Type: Japanese
Tonkotsu Ramen is a rich and flavorful Japanese noodle soup that showcases a creamy, pork-based broth, making it a favorite among ramen enthusiasts. The long cooking time allows the pork bones to break down, releasing collagen and creating a velvety texture that envelops the noodles beautifully.
Topped with tender slices of chashu pork, soft-boiled eggs, and fresh scallions, this ramen is a comforting dish that warms both the body and soul. While the cooking process may seem intimidating due to the lengthy simmering time, the result is a deeply satisfying bowl of ramen that’s well worth the effort.
Each component can be prepared in advance, allowing you to assemble your ramen quickly when it’s time to eat. This recipe invites you to explore the depths of umami flavor, as you customize your bowl with various toppings to create a personalized experience.
Ingredients:
- 2 pounds pork bones (neck bones or trotters)
- 1 onion, halved
- 1 head of garlic, halved horizontally
- 1 piece of ginger (2 inches), sliced
- 12 cups water
- 4 servings of ramen noodles
- 4 soft-boiled eggs
- 1 cup sliced scallions
- 1 cup sliced nori (seaweed)
- Soy sauce (for seasoning)
- Sesame oil (for drizzling)
Instructions:
- In a large pot, place the pork bones and cover them with cold water. Bring to a boil over high heat, then boil for about 10 minutes. This step helps to remove impurities and creates a clearer broth. After boiling, drain and rinse the bones under cold water to clean off any scum.
- Return the cleaned bones to the pot and add the onion, garlic, ginger, and 12 cups of water. Bring the mixture to a boil again, then reduce the heat to low, covering the pot slightly with a lid. Let the broth simmer gently for 6 hours, stirring occasionally.
- After 6 hours, strain the broth through a colander into a large bowl, discarding the solids. The broth should be rich and creamy. If desired, you can skim off any excess fat from the surface for a lighter broth.
- In the meantime, cook the ramen noodles according to the package instructions. Drain the noodles and divide them among serving bowls.
- Pour the hot tonkotsu broth over the noodles in each bowl. Top with sliced chashu pork, a soft-boiled egg cut in half, sliced scallions, and nori. Drizzle with soy sauce and sesame oil for extra flavor.
- Serve immediately, allowing diners to customize their bowls with additional toppings as desired, such as chili oil or bamboo shoots.
Extra Tips: For the best flavor, use a combination of different pork bones, such as trotters and neck bones, to create a more complex broth.
If you’re short on time, you can use store-bought broth as a base and enhance it with additional aromatics and seasonings. Additionally, feel free to experiment with toppings based on personal preference, such as corn, bean sprouts, or chili paste, to make your ramen truly your own. Enjoy the process and the delightful results!
Sushi Rolls
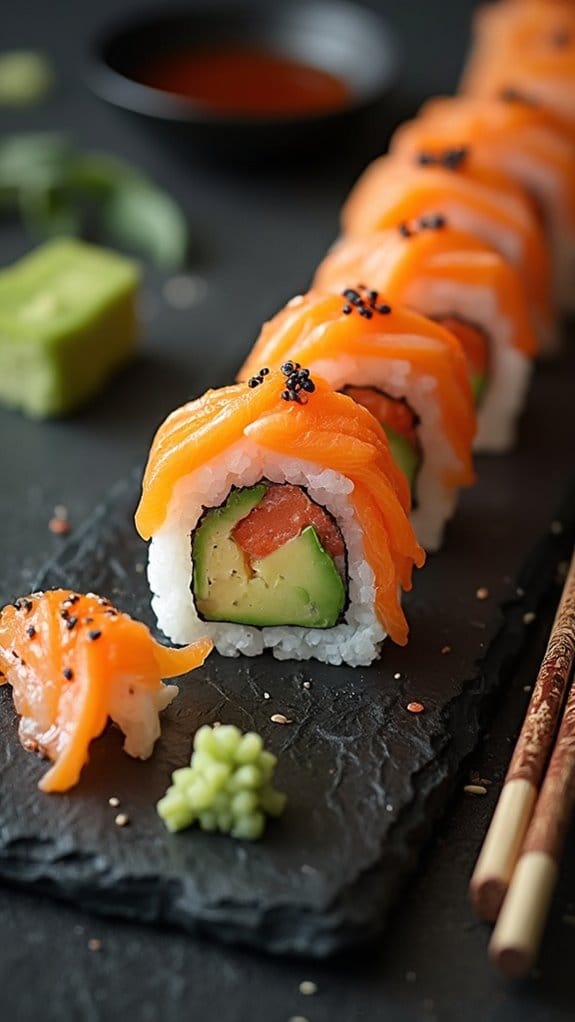
Title: Sushi Rolls
Prep Time: 30 minutes
Cook Time: 10 minutes
Number of Servings: 4
Required Equipment List: Bamboo sushi mat, sharp knife, rice cooker or pot, mixing bowl, plastic wrap
Cuisine Type: Japanese
Sushi rolls, or maki, are a popular Japanese dish that combines vinegared rice with a variety of fillings, wrapped in seaweed (nori). This recipe highlights the classic flavors of sushi, allowing you to customize your rolls with your favorite ingredients.
Whether you prefer traditional fillings like fresh fish and vegetables, or you want to experiment with cooked options, sushi rolls are fun to make and perfect for sharing with family and friends. Making sushi rolls at home is a rewarding experience that also allows for creativity in the kitchen.
With the right ingredients and tools, you can create beautiful rolls that aren’t only delicious but also visually appealing. This recipe will guide you through the steps of preparing sushi rice, assembling the rolls, and slicing them into perfect bite-sized pieces. Gather your ingredients and get ready to impress your guests with your homemade sushi!
Ingredients:
- 2 cups sushi rice
- 2 1/2 cups water
- 1/3 cup rice vinegar
- 3 tablespoons sugar
- 1 teaspoon salt
- 4 sheets of nori (seaweed)
- 1 cucumber, julienned
- 1 avocado, sliced
- 8 ounces sushi-grade fish (such as tuna or salmon), thinly sliced
- Soy sauce (for dipping)
- Pickled ginger (for serving)
- Wasabi (optional)
Instructions:
- Rinse the sushi rice under cold water in a fine-mesh strainer until the water runs clear. This step is essential for removing excess starch and guaranteeing that the rice becomes fluffy rather than sticky during cooking.
- In a rice cooker or pot, combine the rinsed rice and water. Cook according to the rice cooker’s instructions or bring to a boil, then reduce heat to low, cover, and simmer for about 20 minutes until the water is absorbed. Remove from heat and let it sit, covered, for 10 minutes.
- While the rice is resting, prepare the sushi vinegar by combining rice vinegar, sugar, and salt in a small bowl. Microwave briefly or stir until the sugar dissolves completely.
- Transfer the cooked rice to a large mixing bowl and gently fold in the sushi vinegar with a wooden spatula. Allow the rice to cool to room temperature while you prepare your fillings.
- Place a sheet of nori, shiny side down, on a bamboo sushi mat. With wet hands, spread a thin layer of sushi rice evenly over the nori, leaving a 1-inch border at the top. Arrange your desired fillings (cucumber, avocado, fish) in a line across the center of the rice.
- Using the bamboo mat, carefully roll the sushi away from you, applying gentle pressure to keep the roll tight. Once rolled, use a sharp knife to slice the sushi into 6-8 pieces. Wipe the knife with a damp cloth between cuts to guarantee clean edges.
Extra Tips: Feel free to get creative with your fillings! You can add cooked shrimp, crab sticks, or even tempura vegetables for a different flavor.
To enhance the presentation, sprinkle sesame seeds on the outside of the sushi rolls after slicing. Remember to serve your sushi rolls with soy sauce, pickled ginger, and wasabi for a complete experience. Practice makes perfect, so don’t worry if your first rolls aren’t perfect—just enjoy the process!
Tempura Dishes
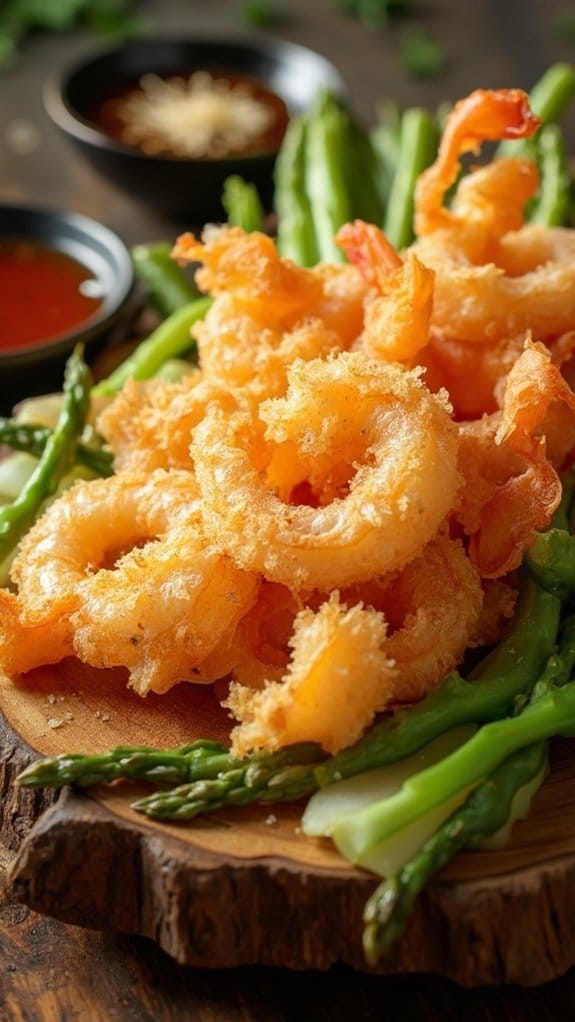
Title: Crispy Vegetable Tempura
Prep Time: 20 minutes
Cook Time: 15 minutes
Number of Servings: 4
Required Equipment List: Deep frying pan, slotted spoon, mixing bowl, whisk, paper towels, serving platter
Cuisine Type: Japanese
Crispy Vegetable Tempura is a classic Japanese dish that features an assortment of fresh vegetables coated in a light, airy batter and deep-fried to perfection. The result is a delightful medley of flavors and textures, with each vegetable retaining its unique taste while being enveloped in a crispy shell.
This dish is perfect as an appetizer or a side dish and is often served with a dipping sauce, making it a favorite among both adults and kids. The beauty of tempura lies in its versatility; you can use a variety of vegetables such as sweet potatoes, bell peppers, zucchini, and green beans, letting your creativity shine.
The key to achieving that signature light batter is to keep the ingredients cold and to avoid over-mixing, which guarantees a crispy finish. Whether you’re hosting a dinner party or simply enjoying a cozy night in, this vegetable tempura is sure to impress with its delicate crunch and delectable flavors.
Ingredients:
- 1 cup all-purpose flour
- 1/2 cup cornstarch
- 1 teaspoon baking powder
- 1 cup ice-cold water
- 1 sweet potato, sliced
- 1 zucchini, sliced
- 1 bell pepper, sliced
- 1 cup green beans, trimmed
- Vegetable oil (for frying)
- Soy sauce (for dipping, optional)
Instructions:
- Begin by preparing your vegetables. Slice the sweet potato, zucchini, and bell pepper into thin strips. Trim the ends of the green beans. Set the prepared vegetables aside.
- In a mixing bowl, combine the all-purpose flour, cornstarch, and baking powder. Whisk them together until well combined. Next, gradually add the ice-cold water to the dry ingredients, stirring gently until just combined. Be careful not to over-mix; a few lumps are okay, as this will help create a light batter.
- Heat the vegetable oil in a deep frying pan over medium-high heat. The oil is ready for frying when it reaches approximately 350°F (175°C). To check, drop a small amount of batter into the oil; if it sizzles and rises to the surface, it’s ready.
- Dip each piece of vegetable into the batter, making sure it’s fully coated, and carefully place them in the hot oil. Fry in small batches to avoid overcrowding, cooking until golden brown and crispy, about 3-4 minutes per batch. Use a slotted spoon to turn the vegetables as needed for even cooking.
- Once cooked, remove the tempura from the oil and place them on a plate lined with paper towels to absorb excess oil. Repeat the process until all vegetables are fried.
- Serve the crispy vegetable tempura immediately with soy sauce or your favorite dipping sauce on the side. Enjoy the crunchy texture and delightful flavors of your homemade tempura!
Extra Tips: For an extra touch, consider adding a pinch of salt to the batter for enhanced flavor. You can also experiment with different vegetables or even shrimp for a non-vegetarian option.
Remember to keep the batter cold and work quickly to maintain the crispiness of the tempura. Enjoy your culinary adventure with this traditional Japanese dish!
Takoyaki Balls
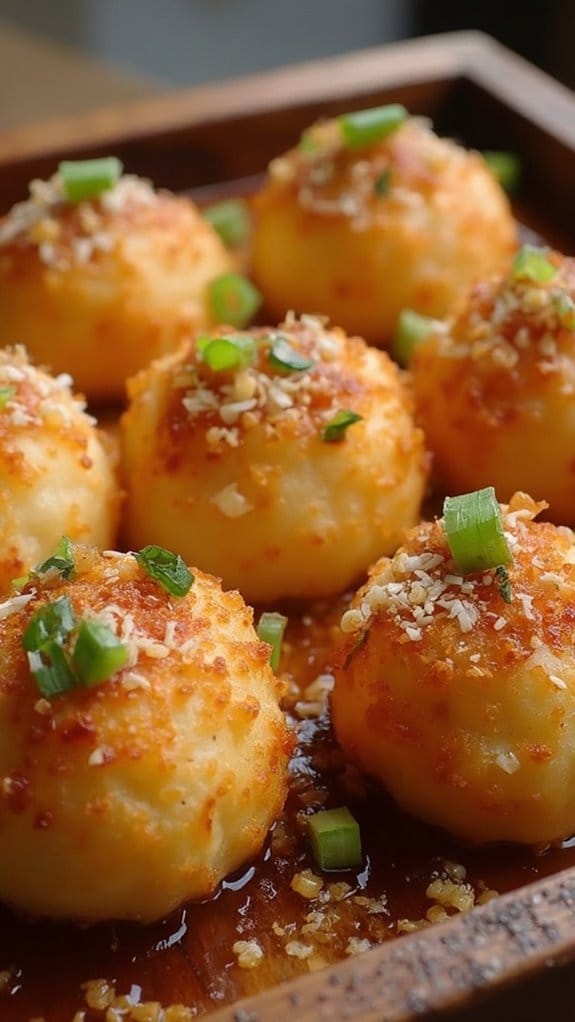
Title: Takoyaki Balls
Prep Time: 20 minutes
Cook Time: 15 minutes
Number of Servings: 4
Required Equipment List: Takoyaki pan, mixing bowl, whisk, spatula, measuring cups, and spoons
Cuisine Type: Japanese
Takoyaki Balls are a popular Japanese street food that brings the taste of Japan right to your home kitchen. These delightful, round dumplings are filled with diced octopus, green onions, and tempura scraps, creating a savory snack that’s both fun to eat and cook. The exterior is crispy, while the inside is soft and flavorful, making each bite a satisfying experience.
Traditionally served with takoyaki sauce, mayonnaise, and bonito flakes, these balls are perfect for parties or casual gatherings. Making Takoyaki can be a fun activity, especially if you have friends or family to help out. The process of pouring the batter into the pan, adding the fillings, and turning the balls isn’t only engaging but also a great way to bond with loved ones.
With a few simple ingredients and the right equipment, you can recreate this iconic dish and impress everyone with your culinary skills.
Ingredients:
- 1 cup all-purpose flour
- 1 1/2 cups dashi stock (or water)
- 2 large eggs
- 1 cup cooked octopus, diced
- 1/2 cup green onions, chopped
- 1/4 cup tempura scraps (tenkasu)
- 1/4 cup pickled ginger, chopped
- Takoyaki sauce (for serving)
- Japanese mayonnaise (for serving)
- Bonito flakes (for garnish)
- Aonori (seaweed flakes) (for garnish)
Instructions:
- In a mixing bowl, whisk together the flour, dashi stock, and eggs until you have a smooth batter. The consistency should be similar to pancake batter. Let it rest for about 10 minutes to allow the flavors to meld.
- Preheat your takoyaki pan over medium heat and lightly grease each mold with oil to prevent sticking. Once the pan is hot, pour the batter into each mold until they’re filled to the brim.
- Quickly add the diced octopus, green onions, tempura scraps, and pickled ginger into the batter-filled molds. Use a skewer or chopstick to gently mix the filling into the batter without removing it from the mold.
- After about a minute, when the edges of the batter start to set, use a skewer to turn each ball 90 degrees. This will help form a round shape. Continue to turn the balls every 30 seconds or so, allowing them to cook evenly on all sides.
- Once they’re golden brown and crispy all around (about 5-7 minutes), remove the takoyaki balls from the pan using a spatula and place them on a serving plate.
- Drizzle takoyaki sauce and Japanese mayonnaise over the hot balls, then sprinkle with bonito flakes and aonori for garnish before serving.
Extra Tips: When making takoyaki, verify your pan is well-heated before adding the batter; this will help achieve that perfect crispy exterior. You can customize the fillings based on your preferences, using shrimp, cheese, or even vegetables for a vegetarian option.
If you don’t have a takoyaki pan, you can use a muffin tin as an alternative, though the shape will be slightly different. Enjoy the process and have fun experimenting with flavors!
Okonomiyaki
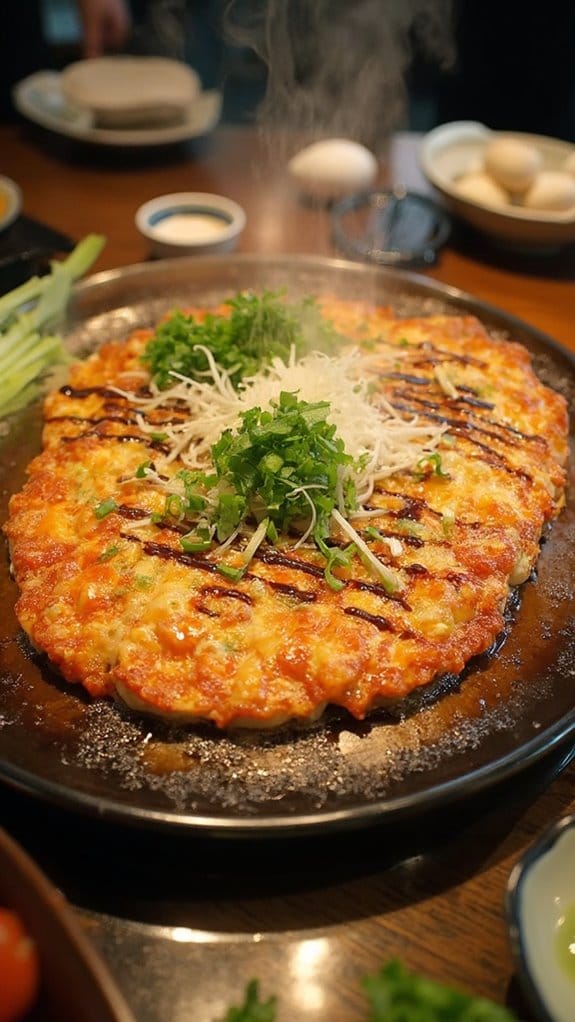
Title: Okonomiyaki
Prep Time: 15 minutes
Cook Time: 20 minutes
Number of Servings: 4
Required Equipment List: Mixing bowl, whisk, frying pan, spatula, measuring cups, and plates
Cuisine Type: Japanese
Okonomiyaki, often referred to as “Japanese savory pancakes,” is a delightful dish that combines a variety of flavors and textures, making it a favorite among many. Originating from Osaka, this dish features a batter made from flour, eggs, shredded cabbage, and a variety of toppings, allowing for endless customization.
It’s typically cooked on a hot griddle or frying pan, resulting in a crispy exterior and a soft, flavorful inside. Whether enjoyed as a casual meal or a festive gathering, okonomiyaki is sure to impress your guests.
The beauty of okonomiyaki lies in its versatility; you can add ingredients such as green onions, shrimp, or even cheese to the batter. Once cooked, it’s traditionally topped with a savory okonomiyaki sauce, mayonnaise, bonito flakes, and nori seaweed. This combination not only adds layers of flavor but also creates an enticing presentation that’s as pleasing to the eyes as it’s to the palate.
Ingredients:
- 1 cup all-purpose flour
- 1 cup dashi stock (or water)
- 2 large eggs
- 4 cups shredded cabbage
- 1/2 cup chopped green onions
- 1/2 cup cooked and chopped shrimp (optional)
- 1/4 cup pickled ginger (optional)
- 1/4 cup okonomiyaki sauce
- Mayonnaise (for drizzling)
- Bonito flakes (for garnish)
- Nori seaweed (for garnish)
- Oil for frying
Instructions:
- In a mixing bowl, combine the all-purpose flour and dashi stock, whisking until smooth. Add the eggs and mix until well incorporated. The batter should be somewhat thick but pourable.
- Fold in the shredded cabbage, chopped green onions, cooked shrimp, and pickled ginger if using. Guarantee that all ingredients are evenly coated with the batter.
- Heat a frying pan over medium heat and add a small amount of oil. Once the oil is hot, pour about half of the batter mixture into the pan, shaping it into a round pancake about 1 inch thick.
- Cook for 5-7 minutes or until the bottom is golden brown. Carefully flip the pancake using a spatula, and cook for another 5-7 minutes on the other side until fully cooked through.
- Remove the pancake from the pan and repeat the process with the remaining batter, adding more oil as needed.
- Once all pancakes are cooked, drizzle each with okonomiyaki sauce and mayonnaise. Top with bonito flakes and nori seaweed for an authentic finish.
Extra Tips: For an extra crunch, consider adding tempura flakes to the batter. You can also customize your toppings based on your preferences; popular options include sliced pork belly, cheese, or even kimchi.
Serve hot off the pan for the best flavor, and don’t hesitate to get creative with the toppings to make each okonomiyaki uniquely yours!
Miso Soup
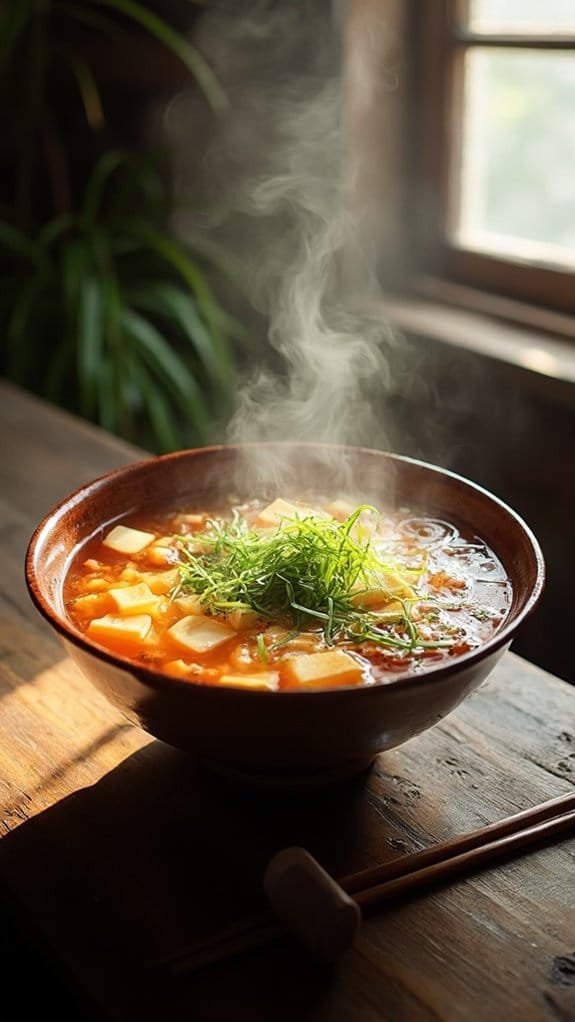
Title: Miso Soup
Prep Time: 10 minutes
Cook Time: 15 minutes
Number of Servings: 4
Required Equipment List: Medium saucepan, whisk, measuring cups, serving bowls
Cuisine Type: Japanese
Miso Soup is a classic Japanese dish that’s both comforting and nourishing, perfect for any time of the day. This simple yet flavorful soup is made from just a few key ingredients, including miso paste, dashi broth, and a selection of fresh vegetables.
It embodies the essence of Japanese cooking, emphasizing umami flavors and wholesome ingredients that come together to create a warm and inviting bowl of soup. The beauty of miso soup lies in its versatility; you can easily customize it by adding various ingredients like tofu, seaweed, or seasonal vegetables.
Whether served as an appetizer or as a light meal, miso soup is a staple in Japanese cuisine that’s enjoyed by many for its health benefits and delicious taste. This recipe is quick to prepare, making it an excellent option for busy weeknights or a cozy weekend brunch.
Ingredients:
- 4 cups dashi broth (or vegetable broth)
- 1/4 cup miso paste (white or red, to taste)
- 1 cup soft or firm tofu, cubed
- 1 cup green onions, sliced
- 1/2 cup seaweed (wakame), rehydrated
- 1 cup mushrooms, sliced (shiitake or button)
- Optional: additional vegetables (carrots, bok choy, etc.)
Instructions:
- In a medium saucepan, bring the dashi broth to a gentle simmer over medium heat. If you’re using store-bought broth, follow the package instructions to prepare it.
- In a small bowl, add the miso paste and a ladleful of hot dashi broth. Whisk together until the miso is fully dissolved and smooth. This step helps to prevent clumps of miso in your soup.
- Once the broth is simmering, add the sliced mushrooms and any additional vegetables you desire. Cook for about 3-5 minutes until the vegetables are tender.
- Reduce the heat to low and stir in the dissolved miso mixture, being careful not to let the soup boil, as this can alter the flavor of the miso. Add the cubed tofu and rehydrated seaweed, and gently stir to combine.
- Allow the soup to heat through for another 2-3 minutes, then remove from heat. Stir in the sliced green onions just before serving for a fresh burst of flavor.
Extra Tips: When preparing miso soup, it’s important to avoid boiling the soup after adding the miso, as this can diminish its probiotic benefits.
Feel free to get creative with your ingredients—try adding different types of mushrooms or leafy greens depending on what you have on hand. Miso soup is best enjoyed fresh, but you can store leftovers in the refrigerator for a day or two; just be sure to reheat gently to preserve the flavors.
Enjoy this delightful soup as part of a traditional Japanese meal or as a comforting dish on its own!
Sashimi Plates
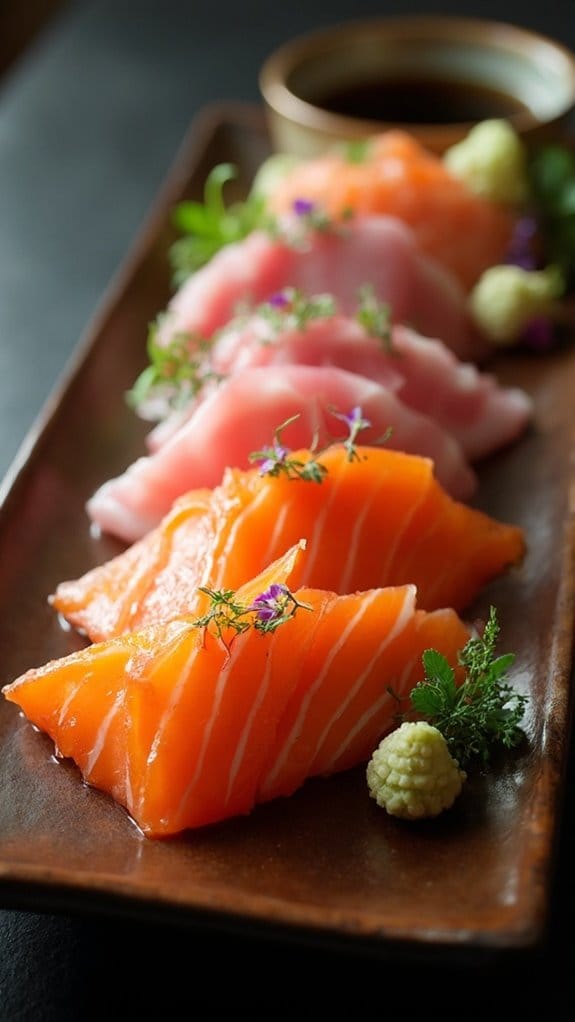
Title: Sashimi Plates
Prep Time: 20 minutes
Cook Time: 0 minutes
Number of Servings: 4
Required Equipment List: Sharp knife, cutting board, serving plates, small bowls for sauces
Cuisine Type: Japanese
Sashimi Plates are an elegant and crisp dish that celebrates the simplicity and quality of raw fish. This Japanese delicacy features thinly sliced seafood, such as salmon, tuna, or yellowtail, served beautifully alongside traditional accompaniments like wasabi, soy sauce, and pickled ginger. The art of sashimi is all about showcasing the freshness of the ingredients, making it a perfect appetizer or light meal for gatherings or special occasions.
The beauty of sashimi lies in its versatility. While the classic preparation often includes fish, you can also experiment with other seafood such as shrimp, octopus, or scallops. A well-prepared sashimi plate offers a delightful combination of flavors and textures, and it’s visually stunning, making it a centerpiece for any dining experience. Pair your sashimi with a revitalizing side of cucumber salad or a bowl of miso soup for a complete meal.
Ingredients:
- 8 ounces fresh salmon fillet
- 8 ounces fresh tuna fillet
- 8 ounces yellowtail fillet
- 1 tablespoon wasabi
- 1 cup soy sauce
- 1 cup pickled ginger
- 1 radish, thinly sliced (for garnish)
- 1 cucumber, thinly sliced (for garnish)
- Microgreens or shiso leaves (for garnish)
Instructions:
- Begin by selecting the freshest fish possible from a reputable source. Look for bright colors and a clean smell. Once you have your fish, use a sharp knife to slice the salmon, tuna, and yellowtail against the grain into thin pieces, approximately 1/4 inch thick.
- Arrange the sliced fish artfully on individual serving plates or a large platter. You can create a fan shape or place them in a neat row, making sure to keep the colors separated for a beautiful presentation.
- In small bowls, serve the soy sauce and wasabi on the side, allowing guests to customize their dipping preferences. You can mix some wasabi into the soy sauce for added flavor.
- Garnish the sashimi plates with pickled ginger on the side, along with thinly sliced radish and cucumber for an added crunch and freshness. If using, scatter microgreens or shiso leaves to enhance the visual appeal.
- Serve immediately, encouraging guests to enjoy the sashimi fresh. It’s best consumed shortly after preparation to appreciate the delicate flavors and textures of the fish.
Extra Tips: When preparing sashimi, always use a clean and sharp knife to guarantee clean cuts without tearing the fish. It’s also essential to keep the fish chilled until serving to maintain its freshness.
If you’re new to sashimi, start with milder fish like salmon or tuna, which are more forgiving regarding flavor and texture. Pairing your sashimi with a light sake or green tea can elevate the dining experience. Enjoy your culinary creation!
Japanese Curry
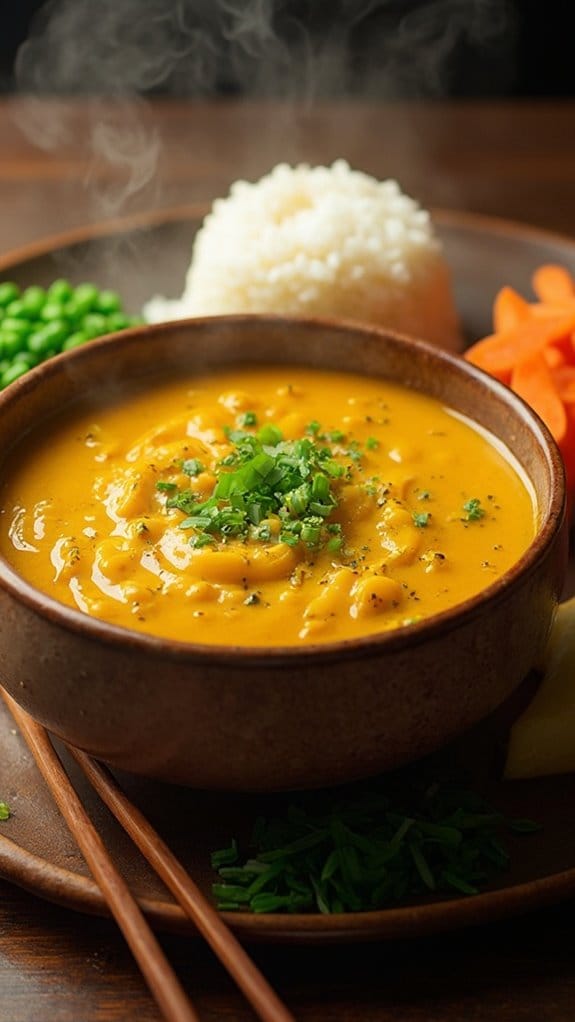
Title: Japanese Curry
Prep Time: 15 minutes
Cook Time: 45 minutes
Number of Servings: 4
Required Equipment List: Large pot, cutting board, knife, measuring cups, stirring spoon
Cuisine Type: Japanese
Japanese Curry is a comforting and flavorful dish that has become a beloved staple in Japanese cuisine. Unlike its Indian counterpart, Japanese curry is milder and sweeter, thanks to the addition of ingredients like apples and honey. This dish is often served over rice and can be made with various proteins and vegetables, making it a versatile option for family dinners or meal prep.
The rich, thick sauce envelops the ingredients, creating a harmonious blend of flavors that makes each bite satisfying. This recipe for Japanese Curry is both simple and rewarding, offering a delightful mix of textures and tastes. By using a variety of vegetables and your choice of meat, you can easily customize the curry to suit your preferences.
The key to perfecting this dish lies in allowing the flavors to meld together during the cooking process, resulting in a hearty meal that will warm your soul.
Ingredients:
- 1 pound chicken thighs, diced
- 2 medium carrots, sliced
- 1 medium onion, chopped
- 1 medium potato, diced
- 2 tablespoons vegetable oil
- 3 cups water
- 1 package (7 oz) Japanese curry roux (mild or medium)
- 1 tablespoon soy sauce
- 1 tablespoon honey (optional)
- Cooked rice (for serving)
- Chopped green onions (for garnish, optional)
Instructions:
- In a large pot, heat the vegetable oil over medium heat. Add the chopped onion and sauté until translucent, about 5 minutes. This will add a sweet flavor to the base of your curry.
- Add the diced chicken thighs to the pot, cooking until they’re browned on the outside, about 5-7 minutes. Stir frequently to guarantee even cooking and to incorporate the flavors from the onion.
- Once the chicken is browned, add the sliced carrots and diced potato to the pot. Stir the vegetables with the chicken for another 2-3 minutes to begin softening them.
- Pour in 3 cups of water and bring the mixture to a boil. After reaching a boil, reduce the heat to low, cover the pot, and let it simmer for about 20 minutes. This allows the vegetables to become tender and the chicken to cook through.
- After 20 minutes, break the curry roux into pieces and add it to the pot. Stir well to dissolve the roux, which will thicken the sauce and add depth of flavor. Allow the curry to simmer for an additional 10-15 minutes, stirring occasionally, until the sauce thickens to your liking.
- Finally, stir in the soy sauce and honey (if using) to enhance the sweetness and umami of the curry. Taste and adjust seasoning if necessary. Serve the curry over cooked rice and garnish with chopped green onions, if desired.
Extra Tips: To elevate your Japanese Curry, consider adding other vegetables such as bell peppers, peas, or mushrooms. If you prefer a spicier kick, you can use a medium or spicy curry roux.
Leftovers can be stored in the refrigerator and actually taste even better the next day, as the flavors continue to develop. Enjoy this comforting dish with a side of pickled vegetables for a complete meal!
Onigiri
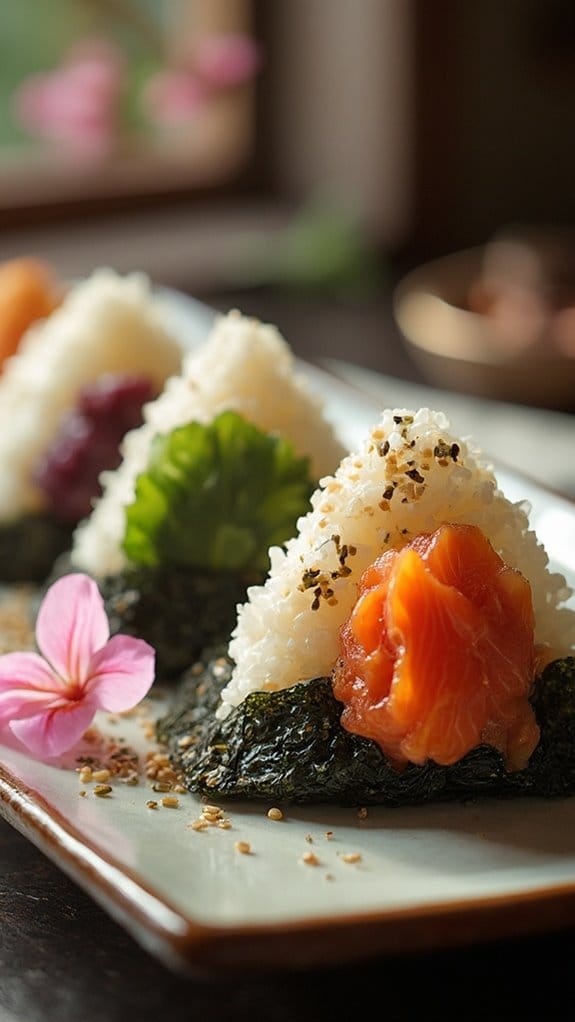
Title: Onigiri – Japanese Rice Balls
Prep Time: 10 minutes
Cook Time: 20 minutes
Number of Servings: 4
Required Equipment List: Rice cooker or pot, mixing bowl, plastic wrap, bamboo mat (optional)
Cuisine Type: Japanese
Onigiri, or Japanese rice balls, are a beloved staple in Japanese cuisine, known for their simplicity and versatility. These delightful little morsels are made from short-grain rice and can be filled with a variety of ingredients, such as pickled plums (umeboshi), grilled salmon, or seasoned seaweed.
Onigiri can be enjoyed as a snack, a side dish, or even as a light meal, making them a perfect addition to bento boxes or picnics. The fun shape and customizable fillings make them appealing to both kids and adults alike.
The beauty of onigiri lies in its adaptability; you can create your own flavor combinations based on your preferences. The rice is typically seasoned with a touch of salt, which enhances its natural sweetness and makes it even more delicious.
Wrapped in a piece of nori (seaweed), onigiri not only looks appetizing but also adds extra flavor and texture to each bite. With just a few ingredients and some simple steps, you can bring a taste of Japan to your kitchen.
Ingredients:
- 2 cups short-grain rice
- 2 1/2 cups water
- 1 teaspoon salt
- 1/2 cup filling of your choice (e.g., umeboshi, grilled salmon, tuna mayo)
- 4 sheets of nori (seaweed), cut into strips (optional)
- Sesame seeds (for garnish, optional)
Instructions:
- Rinse the short-grain rice under cold water in a fine-mesh strainer until the water runs clear. This step removes excess starch, ensuring the rice cooks up fluffy and not overly sticky.
- Cook the rinsed rice with water in a rice cooker or pot according to the manufacturer’s instructions or by bringing it to a boil and then reducing the heat to low, covering it, and simmering for about 15-20 minutes until all the water is absorbed.
- Once cooked, transfer the rice to a mixing bowl and let it cool slightly. Once it’s cool enough to handle (but still warm), stir in the salt to season the rice evenly.
- With wet hands to prevent sticking, take a handful of rice and create a small indentation in the center. Place about a tablespoon of your chosen filling into the indentation, then mold the rice around the filling to create a triangular or oval shape.
- Wrap a strip of nori around the bottom of each onigiri or sprinkle sesame seeds on top for an extra touch. Continue this process until all the rice and filling are used.
Extra Tips: To enhance the flavor of your onigiri, consider adding a bit of roasted sesame oil to the rice before shaping. You can also experiment with different fillings and seasonings, such as furikake (a Japanese rice seasoning) or even vegetables.
If you plan to store onigiri for later, keep the nori separate until you’re ready to eat so it stays crispy. Enjoy your homemade onigiri as a tasty snack or a delightful lunch option!
Yakitori Skewers
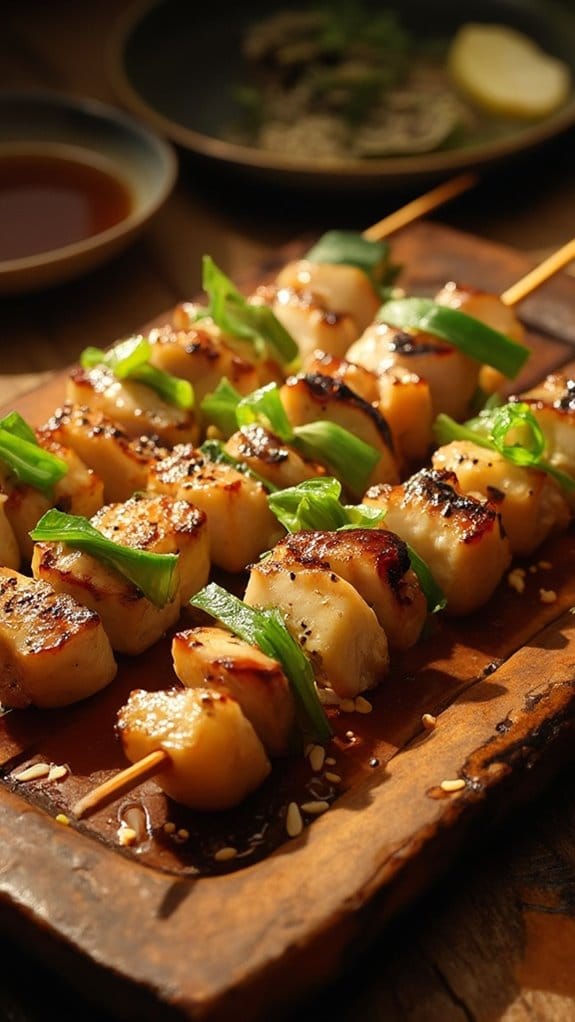
Title: Yakitori Skewers
Prep Time: 15 minutes
Cook Time: 10 minutes
Number of Servings: 4
Required Equipment List: Grill or grill pan, skewers, bowl, brush
Cuisine Type: Japanese
Yakitori skewers are a beloved Japanese dish that features tender pieces of chicken grilled to perfection and brushed with a savory-sweet glaze. These skewers are often enjoyed as a street food delicacy or served as an appetizer in izakayas (Japanese pubs).
The key to authentic yakitori lies in the marinade, which combines soy sauce, mirin, and sake to create a delicious umami flavor that complements the smoky char from grilling. Making yakitori at home is a delightful way to experience Japanese cuisine and impress your family or guests.
This recipe is adaptable; you can use different parts of the chicken such as thighs, wings, or even vegetables for a vegetarian version. Serve your yakitori with a side of rice or as part of a larger Japanese-inspired meal for a truly satisfying dining experience.
Ingredients:
- 1 pound chicken thighs, cut into 1-inch pieces
- 1 tablespoon vegetable oil
- 1/4 cup soy sauce
- 2 tablespoons mirin
- 2 tablespoons sake
- 1 tablespoon sugar
- 2 green onions, cut into 1-inch pieces
- Skewers (soaked in water if wooden)
Instructions:
- In a bowl, combine the soy sauce, mirin, sake, and sugar to create the marinade. Stir until the sugar is dissolved. Add the chicken pieces to the marinade, ensuring they’re well coated. Let the chicken marinate for at least 10 minutes, or up to 1 hour in the refrigerator for deeper flavor.
- Preheat your grill or grill pan over medium-high heat. If using wooden skewers, make sure they’ve been soaked in water for about 30 minutes to prevent burning during grilling.
- Thread the marinated chicken pieces onto the skewers, alternating with green onion pieces for added flavor and color. Don’t overcrowd the skewers, as this will prevent even cooking.
- Brush the grill with a little vegetable oil to prevent sticking. Place the skewers on the grill and cook for about 3-4 minutes on each side, or until the chicken is cooked through and has a nice char.
- While grilling, you can brush the remaining marinade onto the skewers for added flavor. Just make sure to discard any marinade that has come into contact with raw chicken to avoid contamination.
- Once cooked, remove the yakitori skewers from the grill and let them rest for a minute before serving. Enjoy them hot with a side of dipping sauce or over steamed rice.
Extra Tips: To enhance the flavor of your yakitori, consider adding a sprinkle of sesame seeds or a dash of shichimi togarashi (Japanese seven-spice) before serving.
You can also experiment with different vegetables like bell peppers or mushrooms to add variety. For a more authentic experience, serve your yakitori with tare sauce, which is a thicker, sweeter glaze made from soy sauce, mirin, and sugar, brushed on during the last few minutes of grilling. Enjoy your homemade yakitori!
Gyoza Dumplings
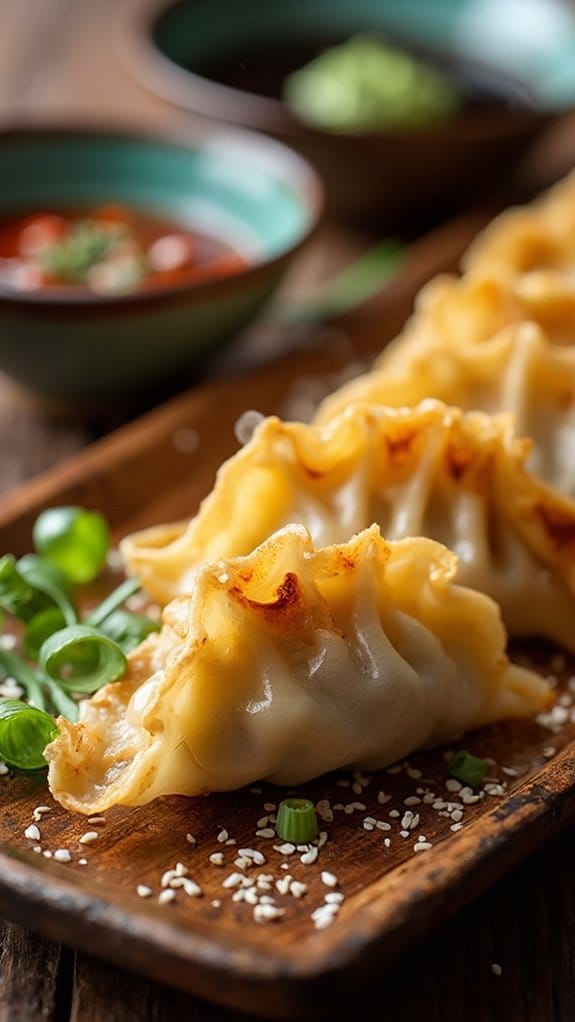
Title: Gyoza Dumplings
Prep Time: 30 minutes
Cook Time: 15 minutes
Number of Servings: 4
Required Equipment List: Mixing bowl, rolling pin, skillet, parchment paper, steamer basket
Cuisine Type: Japanese
Gyoza Dumplings are a beloved Japanese dish that combines the comforting flavors of ground meat and vegetables wrapped in a delicate dough. These tasty little pockets are pan-fried to create a crisp bottom while being steamed to perfection, resulting in a delightful texture that’s both crunchy and tender.
Perfect as a starter or a main dish, gyoza are sure to impress your family and friends with their delicious flavor and homemade touch. Making gyoza from scratch is a rewarding experience that allows you to customize the filling to suit your taste.
Whether you prefer pork, chicken, or a vegetarian option, the filling can be adjusted to include your favorite ingredients and seasonings. Once you master the art of folding the dumplings, you’ll find that they make for a fun cooking activity to share with others, making every bite a little piece of joy.
Ingredients:
- 1 cup all-purpose flour
- 1/3 cup water
- 1/2 pound ground pork (or chicken)
- 1/2 cup finely chopped cabbage
- 1/4 cup finely chopped green onions
- 1 tablespoon minced garlic
- 1 tablespoon minced ginger
- 2 tablespoons soy sauce
- 1 tablespoon sesame oil
- Salt and pepper to taste
- Cooking oil for frying
Instructions:
- To make the gyoza wrappers, combine the flour and water in a mixing bowl. Knead the dough on a floured surface until smooth and elastic, about 5-7 minutes. Cover the dough with a damp cloth and let it rest for 20 minutes.
- In a separate bowl, mix together the ground pork, chopped cabbage, green onions, garlic, ginger, soy sauce, sesame oil, salt, and pepper. Stir well until all ingredients are thoroughly combined.
- Divide the rested dough into small balls, about the size of a golf ball. Roll each ball out into a thin circle, approximately 3 inches in diameter. Place a teaspoon of filling in the center of each wrapper.
- Moisten the edges of the wrapper with water and fold it in half, pressing the edges together to seal. You can pleat the edges for a decorative touch if desired. Repeat this process until all the filling is used.
- Heat a skillet over medium heat and add a tablespoon of cooking oil. Place the gyoza in the skillet in a single layer and cook for 2-3 minutes or until the bottoms are golden brown. Add 1/4 cup of water to the skillet and cover immediately with a lid to steam the dumplings for about 5 minutes.
- Once the water has evaporated, remove the lid and allow the gyoza to cook for an additional 2 minutes to crisp up the bottoms. Serve hot with dipping sauce, such as soy sauce or a vinegar-based sauce.
Extra Tips: For a more flavorful filling, consider adding chopped mushrooms or water chestnuts for extra texture. If you’re short on time, you can use store-bought gyoza wrappers instead of making them from scratch.
Additionally, gyoza can be frozen uncooked; simply place them on a parchment-lined tray, freeze until solid, then transfer to a zip-top bag for later use. When ready to cook from frozen, simply add a couple of extra minutes to the cooking time. Enjoy your homemade gyoza!
Chirashi Bowls
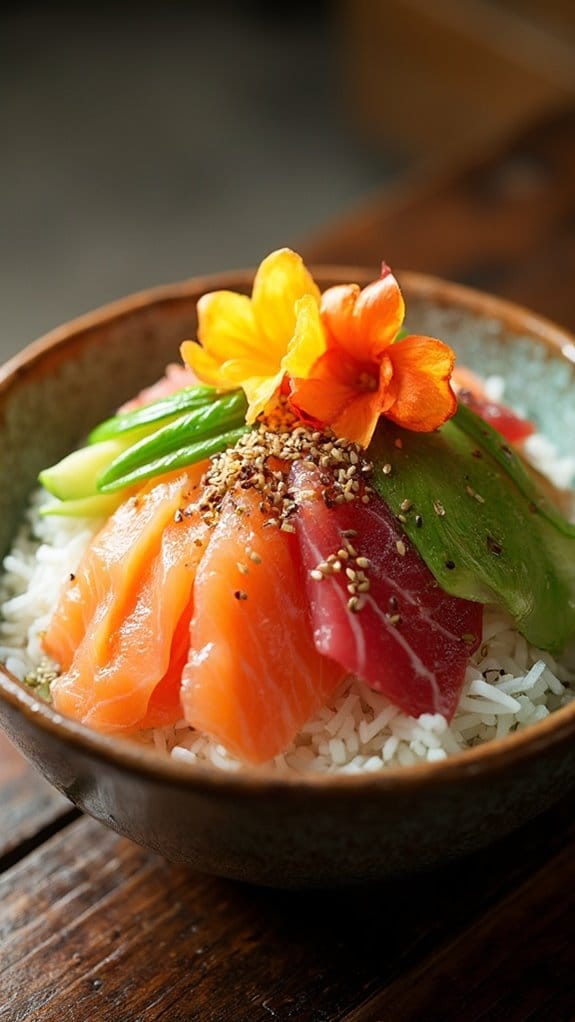
Title: Chirashi Bowls
Prep Time: 20 minutes
Cook Time: 10 minutes
Number of Servings: 4
Required Equipment List: Rice cooker or pot, mixing bowl, cutting board, knife, serving bowls
Cuisine Type: Japanese
Chirashi Bowls, or “scattered sushi,” are a vibrant and colorful Japanese dish that brings together a variety of fresh ingredients atop a bed of seasoned sushi rice. This dish isn’t only visually appealing but also allows for endless customization based on personal preferences and seasonal ingredients.
The combination of flavors from the sweet and tangy rice, fresh fish, and crisp vegetables creates a delightful experience that transports you straight to a sushi bar in Japan. The beauty of Chirashi Bowls lies in their versatility; you can use any combination of sashimi, vegetables, and garnishes that you like.
Traditional toppings include tuna, salmon, shrimp, and a variety of vegetables such as cucumber, radish, and avocado, all beautifully arranged to create an appealing presentation. Perfect for a light meal or as an impressive dish for entertaining, Chirashi Bowls are a delightful way to enjoy a taste of Japanese cuisine at home.
Ingredients:
- 2 cups sushi rice
- 2 1/2 cups water
- 1/4 cup rice vinegar
- 2 tablespoons sugar
- 1 teaspoon salt
- 1/2 pound sashimi-grade tuna, sliced
- 1/2 pound sashimi-grade salmon, sliced
- 1/2 cup cucumber, thinly sliced
- 1/4 cup radish, thinly sliced
- 1 avocado, sliced
- 2 tablespoons sesame seeds
- Pickled ginger (for serving)
- Wasabi (for serving)
Instructions:
- Rinse the sushi rice under cold water in a fine-mesh strainer until the water runs clear. This step removes excess starch and helps the rice become fluffy when cooked. For best results, soak the rice in water for 30 minutes before cooking, then drain.
- In a rice cooker or pot, combine the rinsed rice and 2 1/2 cups of water. Cook according to the rice cooker’s instructions or bring to a boil on the stove, then reduce the heat to low, cover, and simmer for 18-20 minutes until the rice is tender and the water is absorbed.
- While the rice is cooking, prepare the sushi vinegar mixture by combining rice vinegar, sugar, and salt in a small saucepan over low heat. Stir until the sugar and salt are fully dissolved. Once the rice is done, transfer it to a mixing bowl and gently fold in the vinegar mixture while the rice is still warm. Allow it to cool to room temperature.
- Once the rice has cooled, divide it evenly among four serving bowls. Arrange the sliced tuna, salmon, cucumber, radish, and avocado over the rice in a decorative manner. Sprinkle sesame seeds on top for added flavor and crunch.
- Serve the Chirashi Bowls with pickled ginger and wasabi on the side. Encourage diners to mix the ingredients together for a delightful blend of flavors with each bite.
Extra Tips: To enhance the flavor of your Chirashi Bowls, consider marinating the fish in a mixture of soy sauce and mirin for about 15 minutes before serving. This adds an extra layer of umami to the dish.
Feel free to experiment with other toppings such as seaweed salad, scallions, or microgreens for additional textures and flavors. Chirashi Bowls are best enjoyed fresh, but you can prepare the rice and toppings ahead of time for a quick assembly when you’re ready to serve. Enjoy your culinary adventure!
Matcha Desserts
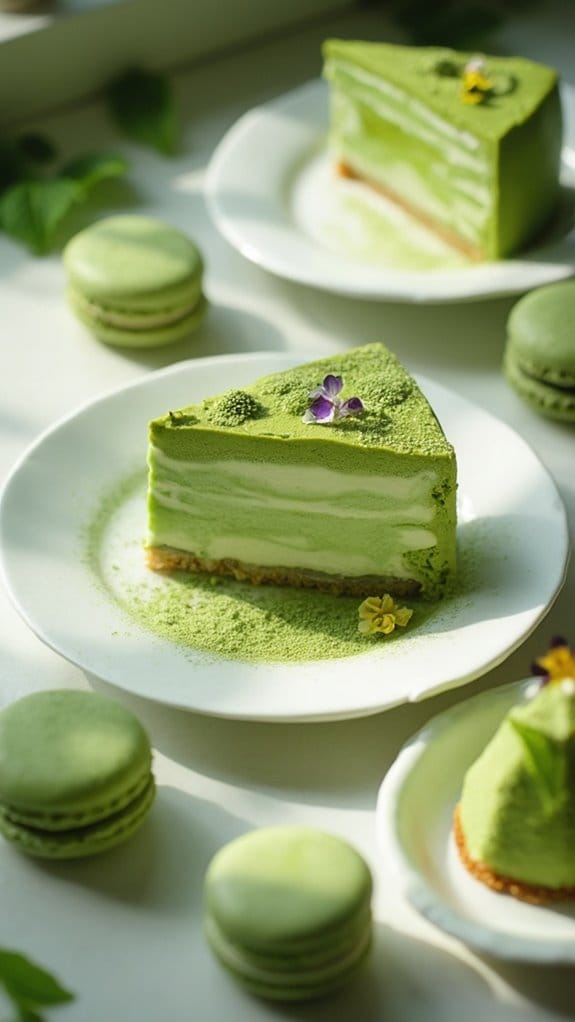
Title: Matcha Green Tea Cheesecake
Prep Time: 20 minutes
Cook Time: 60 minutes
Number of Servings: 8
Required Equipment List: Springform pan, mixing bowls, electric mixer, spatula, measuring cups and spoons, baking sheet, parchment paper
Cuisine Type: Japanese-inspired
This Matcha Green Tea Cheesecake is a unique and delicious dessert that combines the rich flavors of creamy cheesecake with the earthy, slightly bitter notes of matcha green tea. The vibrant green color adds a visually stunning element that makes it a perfect centerpiece for any occasion.
The buttery graham cracker crust complements the creamy filling, while the matcha imparts a subtle yet distinctive flavor that will delight your guests and leave them wanting more. This cheesecake isn’t only a feast for the eyes but also a great way to introduce the unique taste of matcha to those who may be unfamiliar with it.
It can be served plain or topped with fresh fruit, whipped cream, or a drizzle of chocolate sauce for added decadence. Whether you’re celebrating a special occasion or simply treating yourself, this Matcha Green Tea Cheesecake is sure to impress.
Ingredients:
- 1 ½ cups graham cracker crumbs
- ½ cup unsalted butter, melted
- 2 cups cream cheese, softened
- ¾ cup granulated sugar
- 3 large eggs
- 1 cup sour cream
- ½ cup heavy cream
- 2 tablespoons matcha green tea powder
- 1 teaspoon vanilla extract
- Pinch of salt
Instructions:
- Preheat your oven to 325°F (163°C). Prepare a springform pan by greasing it lightly and lining the bottom with parchment paper to prevent sticking. This guarantees a smooth release when the cheesecake is done.
- In a mixing bowl, combine the graham cracker crumbs and melted butter. Mix until the crumbs are evenly coated. Press this mixture firmly into the bottom of the prepared springform pan to create an even crust. Bake in the preheated oven for 10 minutes, then remove and let cool.
- In another mixing bowl, beat the softened cream cheese and granulated sugar together using an electric mixer until smooth and creamy. Make sure there are no lumps, as this will ensure a silky texture in your cheesecake.
- Add the eggs one at a time to the cream cheese mixture, mixing well after each addition. Then, add the sour cream, heavy cream, matcha powder, vanilla extract, and a pinch of salt. Continue to mix until all ingredients are well incorporated and the mixture is smooth.
- Pour the matcha cheesecake filling over the cooled crust in the springform pan. Tap the pan gently on the counter to release any air bubbles. Bake in the oven for 50-60 minutes, or until the center is set but still slightly jiggly. Turn off the oven and let the cheesecake cool in the oven for one hour to prevent cracking.
- Once cooled, remove the cheesecake from the oven and refrigerate for at least 4 hours or overnight for the best texture. Before serving, carefully remove the sides of the springform pan and slice into wedges.
Extra Tips: To enhance the matcha flavor, you can sprinkle a little extra matcha powder on top of the cheesecake before serving. For a unique twist, consider adding a layer of fruit such as raspberries or strawberries on top, which pairs wonderfully with the earthy flavor of matcha.
This cheesecake can be made a day in advance, making it a great dessert for entertaining or special occasions. Enjoy your delightful creation!
Japanese Pancakes

Title: Fluffy Japanese Pancakes
Prep Time: 15 minutes
Cook Time: 20 minutes
Number of Servings: 4
Required Equipment List: Mixing bowl, electric mixer, non-stick skillet, spatula, measuring cups, measuring spoons
Cuisine Type: Japanese
Fluffy Japanese pancakes are a delightful breakfast treat that have gained popularity for their airy texture and beautiful presentation. Unlike traditional pancakes, these Japanese-style pancakes are thick and fluffy, thanks to the incorporation of whipped egg whites.
They’re deliciously sweet and can be served with a variety of toppings such as fresh fruit, syrup, or whipped cream. This recipe brings a taste of Japan right to your kitchen, making breakfast feel like a special occasion.
Making these pancakes is a simple yet rewarding process. The key to achieving that signature fluffiness lies in properly whipping the egg whites to stiff peaks, which creates a light and airy batter.
Once cooked, these pancakes can be stacked high for an impressive brunch dish or served individually for a cozy breakfast at home. With their soft texture and delightful sweetness, these pancakes are sure to be a hit with family and friends alike.
Ingredients:
- 1 cup all-purpose flour
- 2 tablespoons sugar
- 1 teaspoon baking powder
- 1/2 cup milk
- 2 large eggs, separated
- 2 tablespoons vegetable oil
- 1/2 teaspoon vanilla extract
- Pinch of salt
- Butter for cooking
- Maple syrup and fresh fruit for serving
Instructions:
- In a mixing bowl, combine the all-purpose flour, sugar, baking powder, and a pinch of salt. Mix well to guarantee the dry ingredients are evenly distributed.
- In another bowl, whisk together the egg yolks, milk, vegetable oil, and vanilla extract until well combined. Gradually add this wet mixture to the dry ingredients, stirring until smooth and free of lumps.
- In a clean mixing bowl, use an electric mixer to whip the egg whites until stiff peaks form. This step is essential for achieving the fluffiness of the pancakes.
- Gently fold the whipped egg whites into the batter in three additions, being careful not to deflate the mixture. The batter should be light and airy.
- Preheat a non-stick skillet over low to medium heat and add a small amount of butter to coat the surface. Using a large spoon or ladle, scoop a portion of the batter onto the skillet, forming thick round pancakes. Cover the skillet with a lid and cook for about 4-5 minutes on one side.
- Carefully flip the pancakes and cook for an additional 4-5 minutes, still covered, until they’re golden brown and fully cooked through. Repeat with the remaining batter.
- Stack the pancakes high on a plate and serve warm with maple syrup and fresh fruit for a delightful finishing touch.
Extra Tips: To achieve the best results, be sure to whip the egg whites until they’re very stiff; this is what gives the pancakes their characteristic fluffiness.
Allowing the pancakes to cook slowly over low heat is also key to making sure they cook through without burning. For a fun twist, you can add flavorings like matcha powder or cocoa powder to the batter for a unique variation. Enjoy your fluffy pancakes!
Conclusion
So, whether you’re slurping up ramen or flipping okonomiyaki, diving into Japanese cuisine is always a treat! Imagine hosting a cozy dinner party where you whip up gyoza and sushi rolls. Your friends will be impressed with these Japanese recipe ideas, and you’ll all have a blast trying new flavors together. Isn’t that what cooking’s all about? Don’t hesitate to experiment and have fun in the kitchen; who knows, you might just find your new favorite dish!

