No products in the cart.

15 Gluten-Free Appetizers For Your Holiday Party
When you’re planning your holiday party, catering to gluten-free guests can seem challenging, but it doesn’t have to be. You can create a memorable spread with 19 delectable appetizers that everyone will enjoy. Imagine offering a mix of flavors, from the fresh taste of Caprese skewers to the comforting warmth of stuffed mushrooms. You might be surprised at how easy it is to impress your guests with a selection that’s both festive and accommodating. Let’s explore these gluten-free appetizers and find the perfect bites for your gathering.
Caprese Skewers
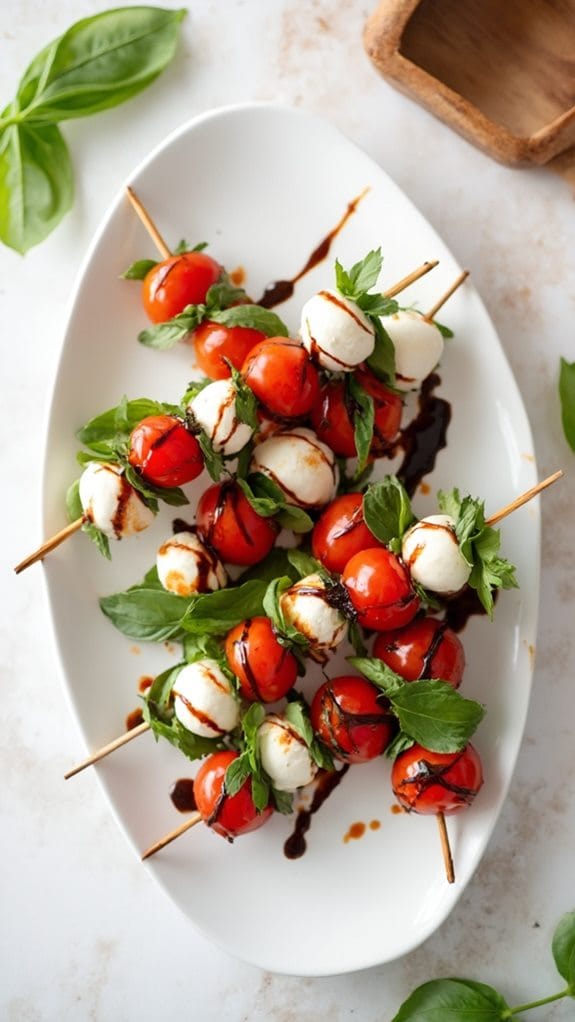
Title: Caprese Skewers
Prep Time: 15 minutes
Cook Time: 0 minutes
Number of Servings: 4
Required Equipment List: Skewers, cutting board, knife
Cuisine Type: Italian
Caprese Skewers are a fresh and vibrant appetizer that celebrates the classic Italian combination of tomatoes, mozzarella, and basil. Perfect for gatherings, these skewers aren’t only visually appealing but also quick and easy to assemble.
With no cooking required, they make for a fantastic option when you want to impress your guests without spending too much time in the kitchen. Simply layer the ingredients on skewers for a delightful bite-sized treat that captures the essence of summer.
These skewers are versatile and can be customized to your liking. Drizzle them with a balsamic reduction or sprinkle with salt and pepper for an extra burst of flavor. They’re perfect for picnics, barbecues, or as a rejuvenating starter for dinner parties.
Enjoy the delightful combination of fresh ingredients that will transport your taste buds to the Italian countryside!
Ingredients:
- 1 pint cherry tomatoes
- 8 ounces fresh mozzarella balls (bocconcini)
- Fresh basil leaves
- Balsamic glaze (for drizzling)
- Salt and pepper to taste
- Skewers
Instructions:
- Start by washing the cherry tomatoes and patting them dry with a clean towel. Choose tomatoes that are firm and vibrant in color for the best flavor.
- Next, drain the mozzarella balls from their packaging and gently pat them dry to remove excess moisture, which will help to keep the skewers from getting soggy.
- Take your skewers and begin assembling the Caprese Skewers by threading one cherry tomato onto the skewer, followed by a basil leaf, and then a mozzarella ball. Continue this pattern until the skewer is filled, leaving a little space at each end for handling.
- Repeat the assembly process with the remaining ingredients, creating as many skewers as desired. Aim for about 3-4 sets of tomato, basil, and mozzarella per skewer for a balanced bite.
- Once all skewers are assembled, arrange them on a serving platter. Drizzle balsamic glaze over the top and sprinkle with salt and pepper to enhance the flavors.
Extra Tips: For a fun twist, you can marinate the mozzarella balls in olive oil, garlic, and herbs for a few hours before assembling the skewers. This will infuse them with additional flavor.
Also, consider using larger skewers for a more substantial appetizer or adding other ingredients like prosciutto or avocado for variety. These skewers are best served fresh but can be prepared a few hours in advance; just keep them covered in the refrigerator until serving. Enjoy!
Stuffed Mushrooms
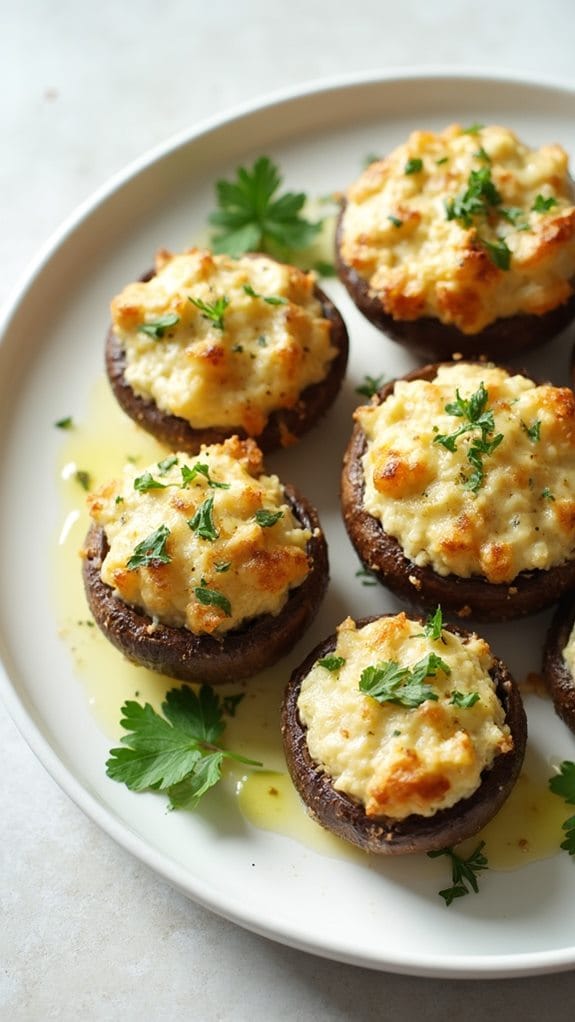
Title: Stuffed Mushrooms
Prep Time: 15 minutes
Cook Time: 20 minutes
Number of Servings: 6
Required Equipment List: Baking sheet, mixing bowl, spoon, oven, knife
Cuisine Type: Italian-American
Stuffed mushrooms are a classic appetizer that brings together the earthy flavors of mushrooms and a savory filling for a delightful bite-sized treat. This gluten-free version features a rich mixture of cream cheese, garlic, and herbs, perfectly complementing the tender mushroom caps.
These stuffed mushrooms aren’t only easy to make but also versatile, allowing you to customize the filling to suit your taste preferences. They make an excellent addition to any gathering, whether it’s a casual family dinner or a festive celebration.
This recipe is quick to prepare and can be made ahead of time, making it perfect for entertaining. The combination of cheese and herbs creates a creamy, flavorful filling that pairs beautifully with the umami of the mushrooms. Serve them warm out of the oven, and watch as they quickly disappear from the platter!
Ingredients:
- 12 large mushrooms, stems removed
- 8 ounces cream cheese, softened
- 1/2 cup grated Parmesan cheese
- 2 cloves garlic, minced
- 1 tablespoon fresh parsley, chopped
- 1 teaspoon dried Italian seasoning
- Salt and pepper to taste
- Olive oil for drizzling
Instructions:
- Preheat your oven to 375°F (190°C) and line a baking sheet with parchment paper. This will prevent the stuffed mushrooms from sticking and make cleanup easier.
- In a mixing bowl, combine the softened cream cheese, grated Parmesan cheese, minced garlic, chopped parsley, Italian seasoning, salt, and pepper. Mix well until all the ingredients are thoroughly combined and the filling is creamy.
- Take each mushroom cap and fill it generously with the cream cheese mixture, pressing it down slightly to guarantee it holds. Place the filled mushroom caps on the prepared baking sheet.
- Drizzle a little olive oil over the stuffed mushrooms to help them brown in the oven. This will enhance their flavor and add a nice golden color.
- Bake the stuffed mushrooms in the preheated oven for 15-20 minutes, or until the mushrooms are tender and the filling is lightly golden on top. Keep an eye on them to avoid overcooking.
- Once baked, remove the mushrooms from the oven and let them cool for a few minutes before serving. They’re best enjoyed warm but can also be served at room temperature.
Extra Tips: To add an extra layer of flavor, consider incorporating cooked sausage or spinach into the filling for a heartier option. You can also experiment with different types of cheese, such as feta or mozzarella, for a unique twist.
If you’re preparing them ahead of time, you can fill the mushrooms and store them in the refrigerator for a few hours before baking. Just remember to adjust the baking time slightly if they’re chilled. Enjoy your delicious stuffed mushrooms!
Sweet Potato Bites
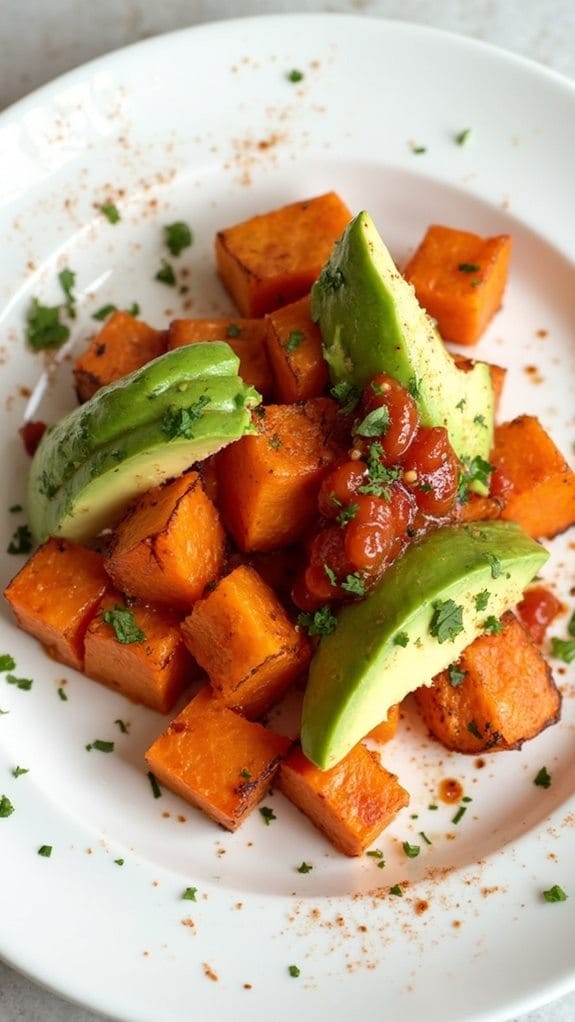
Title: Sweet Potato Bites
Prep Time: 15 minutes
Cook Time: 25 minutes
Number of Servings: 4
Required Equipment List: Baking sheet, parchment paper, mixing bowl, fork, knife
Cuisine Type: American
Sweet Potato Bites are a delicious and nutritious appetizer that’s perfect for any gathering. These bite-sized pieces of roasted sweet potato are seasoned to perfection and can be topped with your favorite ingredients, making them versatile enough to please any palate.
The natural sweetness of the sweet potatoes is enhanced by a blend of spices, creating a delightful flavor that pairs wonderfully with various toppings, from creamy avocado to zesty salsa. Not only are these Sweet Potato Bites gluten-free, but they’re also easy to prepare, making them an excellent choice for a quick snack or a party platter.
They can be served warm or at room temperature, and their vibrant orange color adds a cheerful touch to your table. Whether you’re serving them as an appetizer or as a side dish, these sweet potato bites are sure to be a hit with everyone.
Ingredients:
- 2 large sweet potatoes
- 2 tablespoons olive oil
- 1 teaspoon garlic powder
- 1 teaspoon paprika
- 1/2 teaspoon salt
- 1/4 teaspoon black pepper
- Optional toppings: avocado, salsa, sour cream, chopped cilantro
Instructions:
- Preheat your oven to 400°F (200°C) and line a baking sheet with parchment paper. This will help prevent the sweet potatoes from sticking and guarantee an easy cleanup.
- Peel the sweet potatoes and cut them into bite-sized cubes, about 1-inch in size. This size allows for even cooking and makes them easy to eat as appetizers.
- In a mixing bowl, toss the sweet potato cubes with olive oil, garlic powder, paprika, salt, and black pepper until they’re evenly coated with the seasoning.
- Spread the seasoned sweet potatoes in a single layer on the prepared baking sheet. Make sure they aren’t overcrowded, as this will help them roast evenly and get crispy edges.
- Roast in the preheated oven for 20-25 minutes, or until the sweet potatoes are tender and slightly caramelized. You may want to flip them halfway through to guarantee they cook evenly.
- Once cooked, remove the sweet potato bites from the oven and let them cool slightly before serving. Top with your choice of optional toppings like avocado or salsa for added flavor.
Extra Tips: To enhance the flavor of your Sweet Potato Bites, consider adding a sprinkle of chili powder or cumin for a bit of heat.
You can also experiment with different toppings based on your preferences—try feta cheese, jalapeños, or a dollop of Greek yogurt for a rejuvenating twist. For a meal prep option, make a larger batch and store them in the refrigerator; they can be easily reheated in the oven or microwave for quick snacks throughout the week. Enjoy your delicious and healthy sweet potato bites!
Shrimp Cocktail
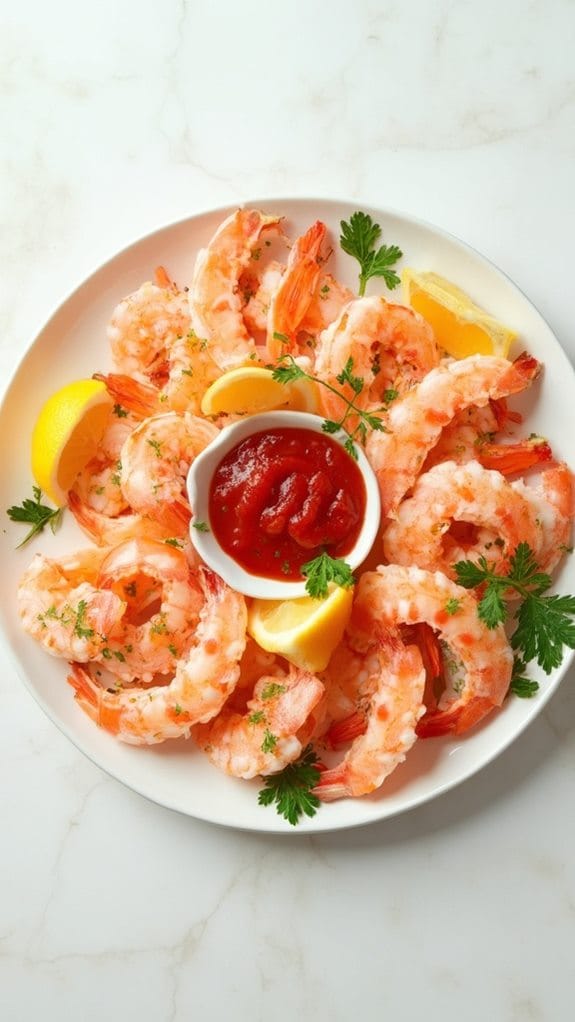
Title: Shrimp Cocktail
Prep Time: 15 minutes
Cook Time: 5 minutes
Number of Servings: 4
Required Equipment List: Medium saucepan, slotted spoon, serving platter, bowl for ice water, cocktail glasses
Cuisine Type: American
Shrimp cocktail is a classic appetizer that never goes out of style, making it an ideal choice for gatherings or special occasions. This dish features succulent shrimp that are poached to perfection and served chilled, providing a revitalizing contrast to the zesty cocktail sauce. The delightful combination of flavors is both simple and sophisticated, guaranteed to impress your guests and elevate any event.
The preparation of shrimp cocktail is incredibly straightforward, requiring minimal ingredients and time. With just a few steps, you can create a stunning presentation that highlights the vibrant color of the shrimp alongside a tangy dipping sauce. It’s a dish that allows the natural sweetness of the shrimp to shine, making it a beloved favorite in many households.
Ingredients:
- 1 pound large shrimp, peeled and deveined
- 1 tablespoon Old Bay seasoning
- 1 lemon, halved
- Ice water (for chilling)
- 1 cup ketchup
- 2 tablespoons horseradish
- 1 tablespoon Worcestershire sauce
- Salt and pepper to taste
Instructions:
- In a medium saucepan, fill it with water and add the Old Bay seasoning and the juice of one lemon half. Bring the water to a rolling boil over high heat to infuse the flavors into the shrimp.
- Once boiling, add the shrimp to the pot and cook for about 2-3 minutes, or until they turn pink and opaque. Be careful not to overcook them, as they can become tough.
- Using a slotted spoon, transfer the cooked shrimp to a bowl filled with ice water to stop the cooking process and keep them chilled. Let them sit in the ice water for about 5 minutes.
- While the shrimp cool, prepare the cocktail sauce by combining ketchup, horseradish, Worcestershire sauce, and the juice of the remaining lemon half in a small bowl. Mix well and season with salt and pepper to taste.
- Once the shrimp are chilled, drain them and arrange them on a serving platter or in cocktail glasses. Serve alongside the cocktail sauce for dipping.
Extra Tips: For the best flavor, consider marinating the shrimp in the Old Bay seasoning for about 30 minutes before cooking. You can also customize the cocktail sauce by adjusting the amount of horseradish to suit your taste preferences.
For an elegant presentation, garnish the platter with lemon wedges and fresh parsley. Enjoy your delicious shrimp cocktail as a revitalizing start to any meal!
Spinach and Artichoke Dip
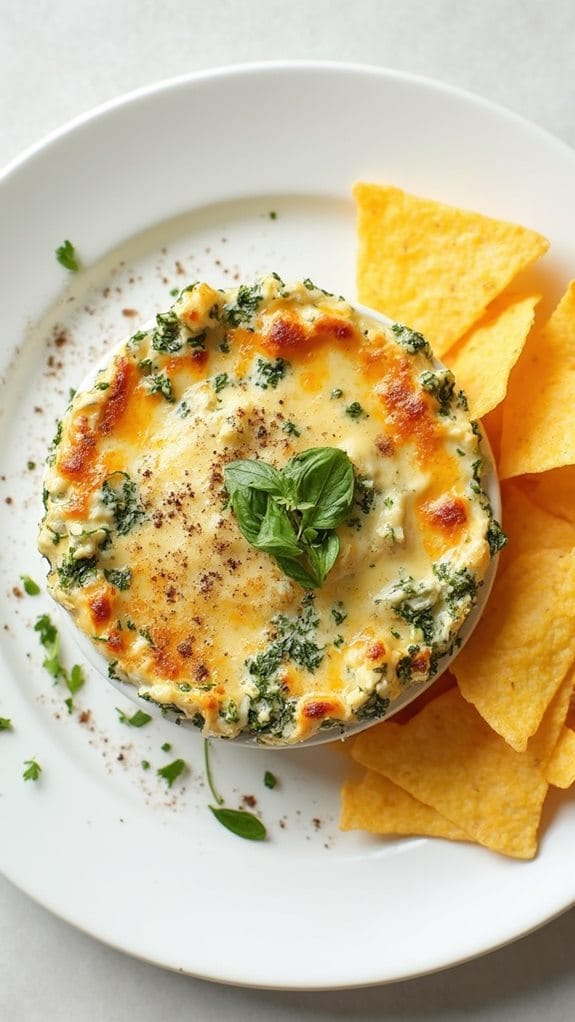
Title: Spinach and Artichoke Dip
Prep Time: 15 minutes
Cook Time: 25 minutes
Number of Servings: 6
Required Equipment List: Mixing bowl, baking dish, oven, spatula
Cuisine Type: American
Spinach and Artichoke Dip is a classic appetizer that brings together the earthy flavors of spinach and the tangy taste of artichokes in a creamy, cheesy blend. This dish is perfect for gatherings, game days, or a cozy night in. The combination of cream cheese, sour cream, and mozzarella gives it a rich texture, while the addition of garlic and Parmesan cheese adds a depth of flavor that keeps everyone coming back for more.
Not only is this dip deliciously addictive, but it’s also easy to prepare, making it a go-to recipe for both novice cooks and seasoned chefs. Served warm with crunchy tortilla chips, toasted bread, or fresh vegetable sticks, this gluten-free appetizer is sure to please a crowd.
Whether you’re hosting a party or just indulging in a snack, Spinach and Artichoke Dip will quickly become a favorite on your menu.
Ingredients:
- 1 cup frozen chopped spinach, thawed and drained
- 1 cup canned artichoke hearts, drained and chopped
- 1 cup cream cheese, softened
- 1/2 cup sour cream
- 1/2 cup mayonnaise
- 1 cup shredded mozzarella cheese
- 1/4 cup grated Parmesan cheese
- 2 cloves garlic, minced
- Salt and pepper to taste
- Tortilla chips or bread for serving
Instructions:
- Preheat your oven to 350°F (175°C). This guarantees that the dip will be baked evenly and thoroughly, creating a bubbly and golden finish.
- In a mixing bowl, combine the softened cream cheese, sour cream, and mayonnaise. Use a spatula to mix them until smooth and well blended. This creamy base is essential for achieving the perfect dip texture.
- Add the chopped spinach, artichoke hearts, minced garlic, shredded mozzarella, and grated Parmesan cheese to the bowl. Season with salt and pepper to taste. Stir everything together until all the ingredients are evenly distributed.
- Transfer the mixture into a baking dish, spreading it out evenly. This will allow for even cooking and browning as it bakes in the oven.
- Bake in the preheated oven for 20-25 minutes, or until the top is golden and the dip is bubbling. Keep an eye on it towards the end to avoid over-baking.
- Once done, remove the dip from the oven and let it cool slightly before serving. Pair it with tortilla chips, toasted bread, or an assortment of fresh veggies for dipping.
Extra Tips: For an extra layer of flavor, consider adding a pinch of crushed red pepper flakes or a dash of hot sauce to the mixture before baking. If you want to make it even cheesier, feel free to sprinkle some additional mozzarella or Parmesan on top during the last few minutes of baking.
This dip can also be made ahead of time and stored in the refrigerator. Just reheat it in the oven before serving for a quick and easy appetizer. Enjoy your delicious Spinach and Artichoke Dip!
Mini Quiche

Title: Mini Quiche
Prep Time: 15 minutes
Cook Time: 25 minutes
Number of Servings: 12
Required Equipment List: Muffin tin, mixing bowl, whisk, measuring cups, measuring spoons, oven
Cuisine Type: French-American
Mini quiches are a delightful and versatile appetizer that can be customized to suit any palate. These bite-sized treats are perfect for gatherings, brunches, or even as a quick snack on the go. The flaky, golden crust holds a creamy filling made from eggs, cheese, and a variety of vegetables or meats, allowing you to create a flavor profile that everyone will enjoy.
They can be prepared ahead of time and served warm or at room temperature, making them an ideal choice for entertaining. The beauty of mini quiches lies in their adaptability; you can easily swap out ingredients based on what you have on hand or your guests’ preferences.
Whether you prefer classic combinations like spinach and feta or more adventurous options with bacon and cheddar, this recipe provides a solid base for your culinary creativity. With just a few simple steps, you’ll have a batch of delicious mini quiches ready to impress your family and friends.
Ingredients:
- 1 pre-made pie crust (or gluten-free crust)
- 6 large eggs
- 1 cup milk
- 1 cup shredded cheese (cheddar, mozzarella, or your choice)
- 1 cup diced vegetables (spinach, bell peppers, mushrooms, etc.)
- 1/2 cup cooked and crumbled bacon or sausage (optional)
- Salt and pepper to taste
- Fresh herbs for garnish (optional)
Instructions:
- Preheat your oven to 375°F (190°C). Lightly grease a muffin tin with non-stick spray or butter to prevent the mini quiches from sticking. This will guarantee easy removal after baking.
- Roll out the pre-made pie crust on a lightly floured surface and cut out circles that fit into the muffin tin cups. Press the crust circles into each cup, making sure to cover the bottom and sides evenly.
- In a mixing bowl, whisk together the eggs and milk until well combined. Season the mixture with salt and pepper to taste, which will enhance the overall flavor of your quiches.
- Evenly distribute the diced vegetables and any optional cooked meat into the crust-lined muffin cups. Pour the egg mixture over the fillings, filling each cup about three-quarters full to allow for rising during baking.
- Sprinkle the shredded cheese on top of each quiche, ensuring that they’re well covered. This will create a delicious cheesy crust as they bake.
- Bake the mini quiches in the preheated oven for 20-25 minutes, or until the tops are golden brown and a toothpick inserted into the center comes out clean. Allow them to cool for a few minutes before removing from the muffin tin.
Extra Tips: To add an extra layer of flavor, consider sautéing your vegetables for a few minutes before adding them to the quiches. This will enhance their taste and texture.
You can also experiment with different cheese types or mix in some spices like paprika or garlic powder for a unique twist. These mini quiches can be stored in the refrigerator for up to three days, making them a great make-ahead option for busy days or unexpected guests. Enjoy your delicious creations!
Guacamole and Chips
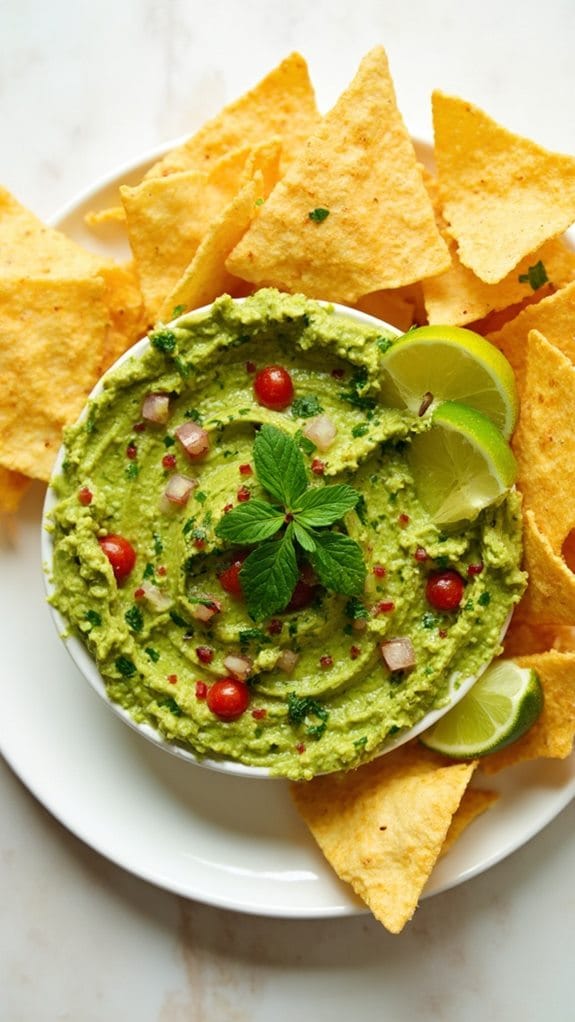
Title: Guacamole and Chips
Prep Time: 10 minutes
Cook Time: 0 minutes
Number of Servings: 4
Required Equipment List: Mixing bowl, fork, serving platter, tortilla chips
Cuisine Type: Mexican
Guacamole and chips is a classic appetizer that brings together fresh ingredients and vibrant flavors, making it a crowd-pleaser for any occasion. This quick and easy recipe features ripe avocados blended with zesty lime juice, diced tomatoes, onions, and cilantro, creating a creamy dip that pairs perfectly with crispy tortilla chips.
Whether you’re hosting a party, enjoying a casual get-together, or simply indulging in a snack, this guacamole is sure to elevate your dining experience. The beauty of guacamole lies in its simplicity and versatility. You can adjust the ingredients to suit your taste, adding more or less of each component as desired.
Serve it with your favorite tortilla chips, and watch it disappear as everyone gathers around to enjoy the rich, flavorful dip. This recipe isn’t only gluten-free but also packed with healthy fats and nutrients, making it a guilt-free treat that everyone can enjoy.
Ingredients:
- 2 ripe avocados
- 1 lime, juiced
- 1 small onion, finely diced
- 1 medium tomato, diced
- 1/4 cup fresh cilantro, chopped
- Salt to taste
- Tortilla chips (for serving)
Instructions:
- Start by cutting the ripe avocados in half and removing the pit. Scoop the avocado flesh into a mixing bowl. Use a fork to mash the avocado to your desired level of creaminess—some prefer it smooth, while others enjoy a chunkier texture.
- Add the freshly squeezed lime juice to the mashed avocado. This not only adds flavor but also helps prevent the avocado from browning. Stir well to combine the lime juice with the avocado.
- Next, fold in the finely diced onion, diced tomato, and chopped cilantro. These ingredients bring freshness and color to the guacamole, enhancing the overall taste and presentation.
- Season the mixture with salt to taste, adjusting according to your preference. Mix everything together gently until all ingredients are well incorporated, but be careful not to over-mix.
- Transfer the guacamole to a serving platter and accompany it with a bowl of tortilla chips. Optionally, you can garnish the guacamole with additional cilantro or a few slices of lime for an attractive presentation.
Extra Tips: For an extra kick, consider adding diced jalapeños or a dash of hot sauce to the guacamole. If you prefer a creamier texture, you can mix in a spoonful of sour cream or Greek yogurt. To keep your guacamole from browning, store it in an airtight container with a piece of plastic wrap pressed directly onto the surface of the guacamole.
Enjoy your delicious guacamole and chips as a delightful appetizer!
Cheese Platter

Title: Gourmet Cheese Platter
Prep Time: 20 minutes
Cook Time: 0 minutes
Number of Servings: 6
Required Equipment List: Cheese board or platter, knife, small bowls for accompaniments
Cuisine Type: International
Creating a Gourmet Cheese Platter is an art that combines various flavors, textures, and colors to create an inviting and visually appealing appetizer. This recipe features a selection of cheeses from different regions, complemented by an assortment of fruits, nuts, and spreads that enhance the tasting experience.
It’s perfect for entertaining guests, offering something for everyone and making it a great conversation starter. This cheese platter isn’t only delicious but also incredibly simple to assemble, allowing you to showcase your creativity.
By mixing different types of cheeses such as sharp cheddar, creamy brie, and tangy blue cheese, along with fresh fruits like grapes and figs, you can create a diverse flavor profile. Add in some crunchy nuts and a couple of spreads like honey or fig jam, and you have a delightful appetizer that will impress your guests without requiring any cooking.
Ingredients:
- 6 ounces sharp cheddar cheese
- 6 ounces creamy brie cheese
- 6 ounces blue cheese
- 1 cup grapes (red or green)
- 1 cup fresh figs (or dried figs)
- 1/2 cup mixed nuts (almonds, walnuts, pecans)
- 1/4 cup honey
- 1/4 cup fig jam
- Crackers or sliced baguette (for serving)
- Fresh herbs (such as rosemary or thyme, for garnish)
Instructions:
- Start by selecting a large cheese board or platter that will allow you enough space to arrange your cheeses and accompaniments attractively. Consider using a wooden or slate board for a rustic look.
- Unwrap the cheeses and cut the sharp cheddar into small wedges, the brie into slices, and break the blue cheese into smaller chunks. Arrange the cheeses on the board, leaving some space between each type to create visual interest.
- Rinse the grapes under cold water and pat them dry. Cluster the grapes next to the cheeses on the platter, adding a pop of color and freshness.
- If using fresh figs, cut them in half and arrange them near the cheeses. If using dried figs, place them whole. This will add both sweetness and texture to the platter.
- Scatter the mixed nuts around the cheeses and fruits, providing a crunchy element that contrasts beautifully with the creaminess of the cheeses.
- Place small bowls on the board for the honey and fig jam. This allows guests to serve themselves easily and adds to the overall presentation.
- Finally, add some fresh herbs as a garnish to enhance the visual appeal of your cheese platter. Rosemary or thyme works well and adds a subtle aroma.
Extra Tips: When selecting cheeses, aim for a variety of textures and flavors, including soft, semi-soft, and hard cheeses. You can also include some unique cheeses from local dairies for a personal touch.
Don’t hesitate to add seasonal fruits or other accompaniments like olives or pickles to customize your platter. Consider serving with a selection of wines that pair well with the cheeses for a complete gourmet experience. Enjoy your cheese platter as a delightful starter or a casual snack!
Roasted Veggie Skewers
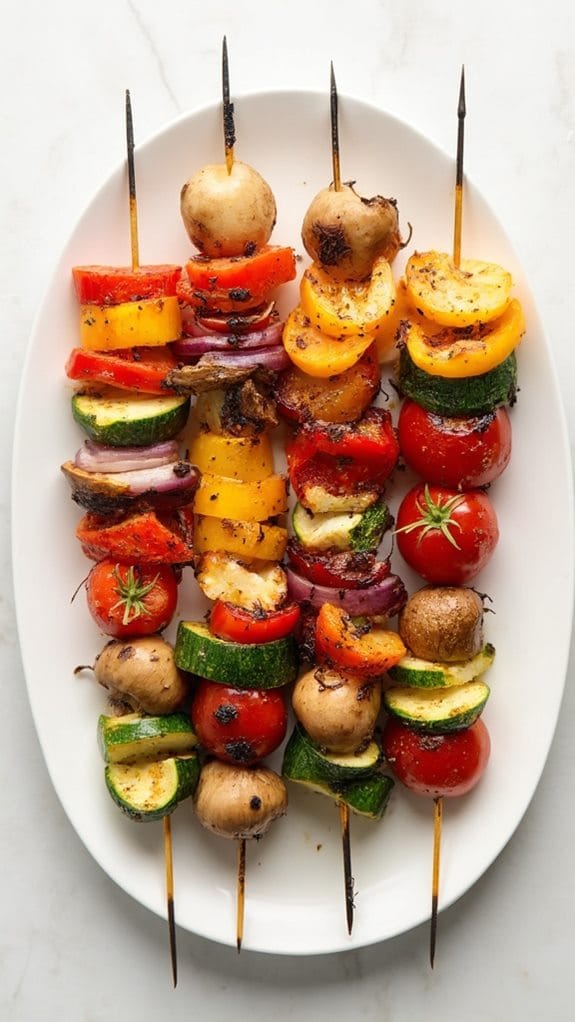
Title: Roasted Veggie Skewers
Prep Time: 15 minutes
Cook Time: 20 minutes
Number of Servings: 4
Required Equipment List: Skewers, baking sheet, oven, mixing bowl, brush
Cuisine Type: American
Roasted Veggie Skewers are a colorful and nutritious appetizer that brings together a delightful medley of seasonal vegetables. Perfect for summer barbecues or as a healthy snack, these skewers can be easily customized with your favorite veggies and seasonings. The roasting process enhances the natural sweetness of the vegetables, making them irresistibly flavorful.
Pair them with a dipping sauce for added zing, and you have an appetizer that everyone will love. These skewers not only look beautiful on a platter, but they also provide a healthy eating option that’s gluten-free and packed with vitamins.
Whether you’re hosting a party or just looking for a quick and easy snack, Roasted Veggie Skewers are a versatile choice. They can be served warm or at room temperature, making them ideal for any occasion.
Ingredients:
- 1 bell pepper (red, yellow, or green), cut into chunks
- 1 zucchini, sliced into rounds
- 1 red onion, cut into wedges
- 1 cup cherry tomatoes
- 1 cup mushrooms, halved
- 2 tablespoons olive oil
- 1 teaspoon garlic powder
- 1 teaspoon dried oregano
- Salt and pepper to taste
- Skewers (wooden or metal)
Instructions:
- Preheat your oven to 400°F (200°C). If using wooden skewers, soak them in water for about 15 minutes to prevent burning during roasting.
- In a mixing bowl, combine the chopped bell pepper, zucchini, red onion, cherry tomatoes, and mushrooms. Drizzle with olive oil and sprinkle with garlic powder, oregano, salt, and pepper. Toss until all the vegetables are evenly coated.
- Thread the marinated vegetables onto the skewers, alternating between different types for a vibrant presentation. Aim to fill each skewer with a variety of colors and textures.
- Place the skewers on a baking sheet lined with parchment paper or a lightly greased baking tray. Make sure they’re spaced out evenly to allow for proper roasting.
- Roast in the preheated oven for about 15-20 minutes, turning once halfway through, until the vegetables are tender and slightly charred.
- Once done, remove the skewers from the oven and let them cool for a few minutes. Serve warm, with a dipping sauce of your choice if desired.
Extra Tips: Feel free to experiment with different vegetables based on what’s in season or what you have on hand. Other great options include asparagus, eggplant, or even chunks of pineapple for a sweet twist.
For added flavor, marinate the vegetables in your favorite vinaigrette or spice blend before threading them onto the skewers. These Roasted Veggie Skewers can also be made ahead of time and served cold, making them a convenient option for meal prep or picnics. Enjoy!
Deviled Eggs

Title: Gluten-Free Deviled Eggs
Prep Time: 15 minutes
Cook Time: 10 minutes
Number of Servings: 6
Required Equipment List: Pot, mixing bowl, spoon, piping bag or small zip-top bag, serving platter
Cuisine Type: American
Deviled eggs are a classic appetizer that never fails to impress at gatherings and parties. This gluten-free version maintains the traditional creamy filling, enhanced with a touch of mustard and mayonnaise for the perfect balance of flavors. They aren’t only visually appealing but also packed with protein, making them a satisfying snack or starter.
The simplicity of this dish allows for endless variations, so you can easily customize them to suit your taste. These deviled eggs are incredibly easy to prepare, making them an ideal choice for last-minute entertaining or meal prepping for the week ahead.
The process involves boiling the eggs until they’re hard-boiled, cooling them, and then mixing the yolks with creamy ingredients to create the filling. Whether you enjoy them plain or with added spices and toppings, deviled eggs are sure to be a hit at your next gathering.
Ingredients:
- 6 large eggs
- 1/4 cup mayonnaise
- 1 teaspoon Dijon mustard
- 1 teaspoon apple cider vinegar
- Salt and pepper to taste
- Paprika (for garnish)
- Fresh chives or parsley (for garnish, optional)
Instructions:
- Place the eggs in a pot and cover them with cold water. Bring the water to a boil over medium-high heat. Once boiling, remove the pot from heat, cover it, and let the eggs sit for about 10-12 minutes for hard-boiling.
- After the eggs have finished cooking, transfer them to a bowl of ice water and let them cool for about 5-10 minutes. This step makes peeling the eggs easier and helps prevent a greenish ring from forming around the yolks.
- Once cooled, gently tap the eggs on a hard surface to crack the shell, then peel them under running water for easier removal. Cut the eggs in half lengthwise and carefully scoop out the yolks into a mixing bowl.
- In the mixing bowl with the yolks, add the mayonnaise, Dijon mustard, apple cider vinegar, salt, and pepper. Use a fork to mash and mix everything together until smooth and creamy. Taste and adjust the seasoning if needed.
- Transfer the yolk mixture into a piping bag or a small zip-top bag with the corner snipped off. Pipe or spoon the filling back into the egg white halves.
- Garnish the deviled eggs with a sprinkle of paprika and finely chopped chives or parsley if desired. Serve immediately or refrigerate until ready to serve.
Extra Tips: For a unique twist, consider adding different ingredients to the filling, such as diced pickles, relish, or even a dash of hot sauce for some heat.
You can also experiment with various toppings, such as crumbled bacon or capers, to elevate the flavor and presentation. Make sure to serve them chilled for the best taste and texture!
Hummus With Veggies
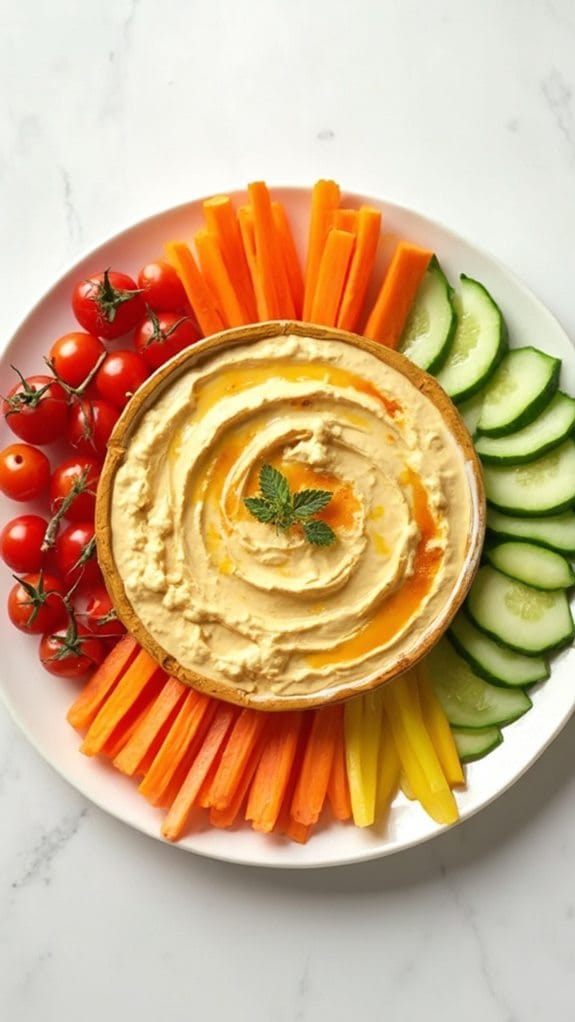
Title: Hummus With Veggies
Prep Time: 10 minutes
Cook Time: 0 minutes
Number of Servings: 4
Required Equipment List: Food processor or blender, serving bowl, cutting board, knife
Cuisine Type: Middle Eastern
Hummus with Veggies is a delightful and nutritious appetizer that’s perfect for any occasion. This creamy dip, made primarily from chickpeas, tahini, and olive oil, is rich in flavor and packed with protein. Served alongside an array of fresh vegetables, it provides a satisfying and healthy option for snacking or entertaining guests.
Whether you’re hosting a party or just looking for a quick appetizer, this dish is sure to impress. The beauty of hummus is its versatility; you can customize the flavors by adding garlic, lemon, or spices to suit your taste. The vibrant colors of the assorted veggies not only make the dish visually appealing but also add a variety of textures and nutrients.
This gluten-free appetizer isn’t only delicious but also caters to a wide range of dietary preferences, making it a go-to option for gatherings and celebrations.
Ingredients:
- 1 can (15 oz) chickpeas, drained and rinsed
- 1/4 cup tahini
- 2 tablespoons olive oil
- 2 tablespoons lemon juice
- 1 garlic clove, minced
- 1/2 teaspoon ground cumin
- Salt to taste
- Assorted fresh vegetables (carrots, cucumbers, bell peppers, cherry tomatoes, etc.) for dipping
Instructions:
- In a food processor or blender, combine the drained chickpeas, tahini, olive oil, lemon juice, minced garlic, ground cumin, and salt. Blend until smooth, scraping down the sides as needed to guarantee everything is well combined. If the mixture is too thick, you can add a tablespoon of water at a time until you reach your desired consistency.
- Taste the hummus and adjust seasoning if necessary. You may want to add more lemon juice for extra tang, more garlic for a bolder flavor, or additional salt to enhance the overall taste. Blend again to mix any added ingredients thoroughly.
- Once the hummus is smooth and flavorful, transfer it to a serving bowl. You can use the back of a spoon to create a swirl on the surface for presentation.
- Drizzle a little extra olive oil on top of the hummus for added richness and garnish with a sprinkle of paprika or chopped parsley if desired.
- Prepare your fresh vegetables by washing and cutting them into sticks or bite-sized pieces. Arrange the vegetables on a platter around the bowl of hummus for an inviting presentation.
Extra Tips: For a unique twist, try adding roasted red peppers, sun-dried tomatoes, or spices like smoked paprika or cayenne pepper to the hummus before blending. If you prefer a creamier texture, consider using a high-powered blender.
Make certain to serve the hummus fresh, but it can be stored in an airtight container in the fridge for up to a week. Enjoy your healthy and delicious appetizer!
Bacon-Wrapped Dates

Title: Bacon-Wrapped Dates
Prep Time: 15 minutes
Cook Time: 20 minutes
Number of Servings: 8
Required Equipment List: Baking sheet, parchment paper, toothpicks, oven
Cuisine Type: Mediterranean
Bacon-Wrapped Dates are a delectable combination of sweet and savory flavors, making them a perfect appetizer for any gathering. The rich, salty bacon envelops the sweet, caramel-like dates, creating a mouthwatering contrast that’s hard to resist.
These bites aren’t only quick to prepare but also pack a punch of flavor that will leave your guests wanting more. They’re ideal for parties, holiday celebrations, or simply as a special treat at home.
The beauty of this recipe lies in its simplicity and versatility. You can easily customize the filling of the dates, whether you prefer goat cheese, almonds, or even blue cheese for a more robust flavor.
The bacon adds a crispy texture that complements the soft, chewy dates, making each bite a delightful experience. Once baked, these appetizers are best served warm, allowing the flavors to meld beautifully together.
Ingredients:
- 16 Medjool dates, pitted
- 8 slices of bacon, cut in half
- Toothpicks
- Optional: filling of your choice (e.g., goat cheese, almonds)
Instructions:
- Preheat your oven to 400°F (200°C) and line a baking sheet with parchment paper. This will help prevent the bacon from sticking and guarantee an easy cleanup after cooking.
- Carefully make a small slit in each date and stuff them with your desired filling, if using. If you’re just using plain dates, you can skip this step.
- Take a half slice of bacon and wrap it around each stuffed date, securing it with a toothpick to hold it in place. Make sure the bacon overlaps slightly to guarantee it cooks evenly.
- Place the bacon-wrapped dates on the prepared baking sheet. Make sure they’re spaced out evenly to allow the heat to circulate around them during cooking.
- Bake in the preheated oven for 15-20 minutes or until the bacon is crispy and browned. Keep an eye on them to prevent burning, as oven temperatures may vary.
- Once done, remove the baking sheet from the oven and let the dates cool for a few minutes. Serve warm, either on their own or with a dipping sauce of your choice, such as balsamic glaze or a spicy aioli.
Extra Tips: For a unique twist, consider sprinkling a little brown sugar or maple syrup over the bacon-wrapped dates before baking to create a caramelized glaze.
You can also experiment with different types of bacon, such as turkey bacon for a lighter option or applewood smoked bacon for a smoky flavor. If you want to prepare these ahead of time, you can assemble them a few hours in advance and refrigerate them until you’re ready to bake. Enjoy your delicious appetizers!
Zucchini Fritters
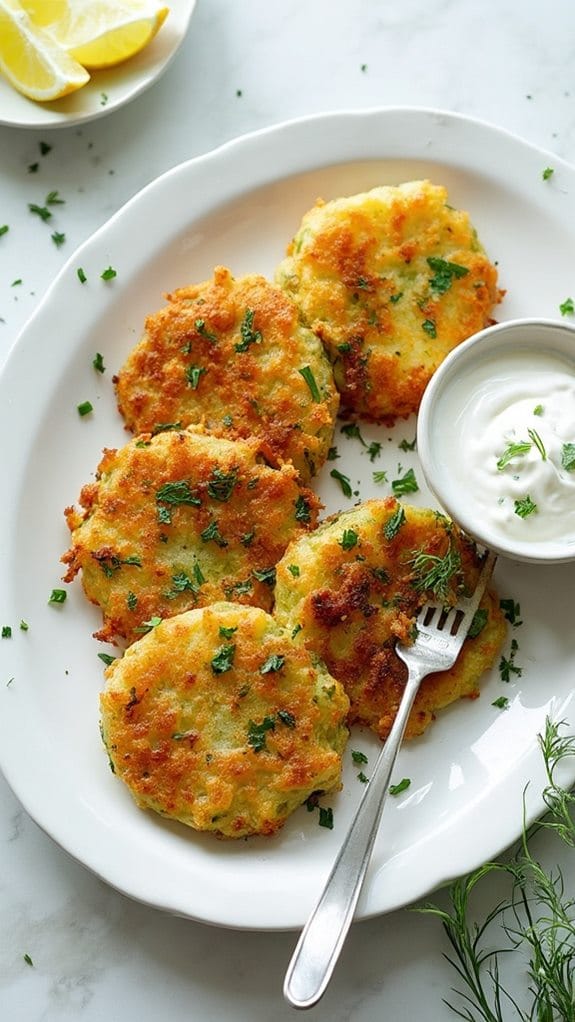
Title: Zucchini Fritters
Prep Time: 15 minutes
Cook Time: 20 minutes
Number of Servings: 4
Required Equipment List: Mixing bowl, grater, skillet, spatula, paper towels
Cuisine Type: American
Zucchini Fritters are a delightful and healthy appetizer that are perfect for any occasion. These crispy, golden-brown fritters are made from fresh zucchini, which is combined with savory herbs and spices to create a flavorful bite. The addition of eggs and gluten-free flour helps bind the ingredients together while still allowing the zucchini to shine through.
Serve them with a dollop of sour cream or a tangy yogurt sauce for a delicious and satisfying snack. These fritters aren’t only gluten-free but also an excellent way to sneak some vegetables into your diet. They can be prepared quickly and are great for both casual gatherings and more formal events. Enjoy them hot off the skillet or at room temperature; either way, they’re sure to be a hit among friends and family.
Ingredients:
- 2 medium zucchinis, grated
- 1 teaspoon salt
- 1/2 cup gluten-free flour
- 2 large eggs
- 1/4 cup grated Parmesan cheese (optional)
- 1/4 cup green onions, chopped
- 2 cloves garlic, minced
- 1/2 teaspoon black pepper
- Olive oil for frying
Instructions:
- Begin by grating the zucchinis using a box grater or food processor. Place the grated zucchini in a clean kitchen towel or cheesecloth and squeeze out as much moisture as possible. This step is essential to achieving crispy fritters, as excess water can make them soggy.
- In a mixing bowl, combine the drained grated zucchini, gluten-free flour, eggs, Parmesan cheese (if using), chopped green onions, minced garlic, salt, and pepper. Mix until all ingredients are well combined and a thick batter forms.
- Heat a skillet over medium heat and add a couple of tablespoons of olive oil. Once the oil is hot, spoon about 2 tablespoons of the zucchini mixture into the skillet for each fritter, flattening them slightly with the back of the spatula.
- Cook the fritters for about 3-4 minutes on each side or until they’re golden brown and crispy. Adjust the heat as necessary to avoid burning, and add more oil to the skillet if needed.
- Once cooked, transfer the fritters to a plate lined with paper towels to absorb any excess oil. Repeat the cooking process with the remaining zucchini mixture until all fritters are made.
Extra Tips: To enhance the flavor of your zucchini fritters, consider adding fresh herbs like dill or parsley to the batter. If you prefer a spicier version, a pinch of red pepper flakes can add a nice kick.
These fritters are best enjoyed fresh, but leftovers can be stored in an airtight container in the refrigerator for up to two days. Reheat them in a skillet for ideal crispiness before serving. Enjoy your delicious zucchini fritters!
Pigs in a Blanket

Title: Gluten-Free Pigs in a Blanket
Prep Time: 15 minutes
Cook Time: 20 minutes
Number of Servings: 8
Required Equipment List: Baking sheet, parchment paper, oven, rolling pin, knife
Cuisine Type: American
Gluten-Free Pigs in a Blanket are a fun and delicious twist on the classic appetizer, perfect for parties, game days, or just a cozy night in. This recipe uses gluten-free crescent roll dough to wrap around your choice of hot dogs or sausage, creating a savory bite-sized treat that everyone will love.
The flaky texture of the dough combined with the juicy, flavorful sausage makes for a delightful snack that pairs well with your favorite dipping sauces. Not only are these pigs in a blanket gluten-free, but they’re also incredibly simple to make. They can be prepared in no time, making them an ideal choice for last-minute gatherings or family movie nights.
Serve them hot from the oven with mustard, ketchup, or a homemade dipping sauce for an elevated experience. Your guests will be asking for the recipe!
Ingredients:
- 1 can gluten-free crescent roll dough
- 8 small gluten-free hot dogs or sausages
- 1 egg (for egg wash)
- 1 tablespoon poppy seeds or sesame seeds (optional)
- Mustard or ketchup (for serving)
Instructions:
- Preheat your oven to 375°F (190°C) and line a baking sheet with parchment paper to prevent sticking and guarantee easy cleanup.
- Unroll the gluten-free crescent roll dough on a clean surface and separate it into triangles according to the package instructions. If the dough isn’t in triangles, use a rolling pin to roll it out to about 1/4 inch thickness.
- Place one hot dog or sausage on the wide end of each triangle. Roll the dough around the sausage, starting from the wide end and wrapping towards the point, making sure the sausage is fully enclosed.
- Place the rolled pigs in a blanket onto the prepared baking sheet, seam side down. This will help them stay closed while baking.
- In a small bowl, beat the egg and brush the mixture over the tops of the wrapped sausages. This will give them a beautiful golden color once baked. If desired, sprinkle poppy seeds or sesame seeds on top for added texture.
- Bake in the preheated oven for 15-20 minutes or until the dough is golden brown and fully cooked. Keep an eye on them to prevent over-browning.
- Once baked, remove from the oven and let them cool slightly before serving. Pair with your choice of mustard or ketchup for dipping.
Extra Tips: For added flavor, consider seasoning the gluten-free dough with garlic powder or Italian herbs before wrapping the sausages. You can also experiment with different types of sausages, such as spicy or smoked varieties, to give your pigs in a blanket a unique twist.
These treats are best enjoyed fresh out of the oven, but they can be reheated in the oven for a few minutes if you have leftovers. Enjoy your delicious gluten-free appetizer!
Fruit and Nut Board
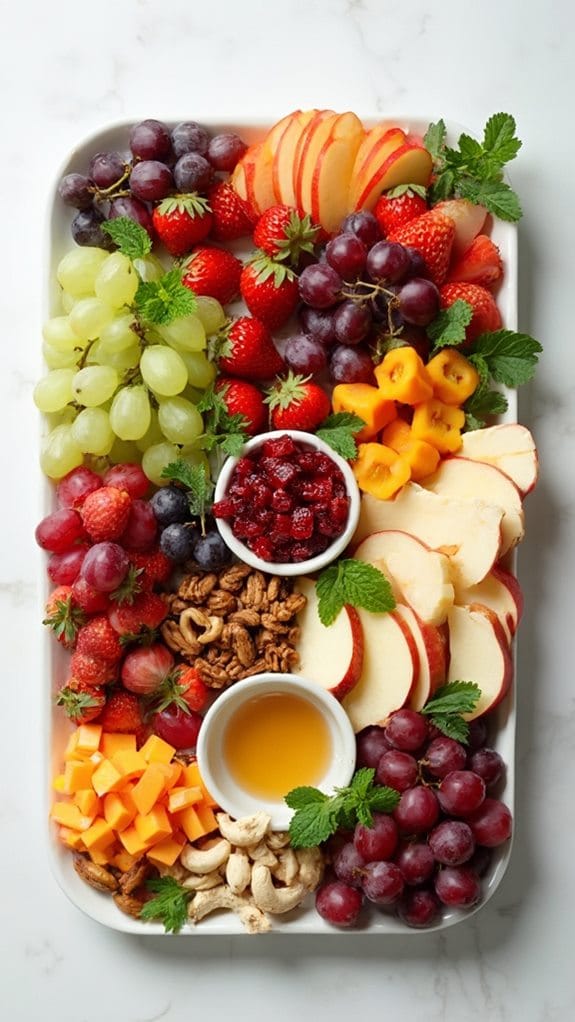
Title: Fruit and Nut Board
Prep Time: 20 minutes
Cook Time: 0 minutes
Number of Servings: 6-8
Required Equipment List: Serving board or platter, small bowls (optional)
Cuisine Type: American
A Fruit and Nut Board is a visually appealing and delicious appetizer that brings together a variety of fresh fruits, nuts, and other complementary items. This no-cook dish serves as an excellent choice for entertaining, allowing guests to graze and mix flavors as they please. The vibrant colors of seasonal fruits paired with the crunch of nuts create a delightful sensory experience, perfect for gatherings, parties, or as a light snack.
Creating a fruit and nut board isn’t only simple but also highly customizable to suit your preferences and the season. You can mix and match fruits based on what’s in season or what you have on hand, and choose nuts that you enjoy. Adding some cheese, crackers, or a drizzle of honey can elevate the board even further. This appetizer isn’t only gluten-free but also packed with nutrients, making it a healthy and satisfying option for everyone.
Ingredients:
- 1 cup assorted fresh fruits (e.g., strawberries, grapes, apple slices, kiwi)
- 1 cup assorted nuts (e.g., almonds, walnuts, pecans, cashews)
- 1/2 cup dried fruits (e.g., apricots, cranberries, raisins)
- 1 cup cheese (e.g., brie, cheddar, goat cheese) – optional
- 1/2 cup honey or maple syrup for drizzling – optional
- Fresh herbs (e.g., mint or basil) for garnish – optional
Instructions:
- Begin by selecting a large serving board or platter to create your fruit and nut board. This will be the base for arranging all of your ingredients. Confirm it’s clean and dry before starting.
- Wash and prepare the fresh fruits by cutting them into bite-sized pieces if necessary. Arrange the fruits in clusters around the board, keeping similar colors together for visual appeal.
- Place small bowls on the board if you’re including items like honey or dried fruits. This adds an organized touch and makes it easy for guests to access these items.
- Next, evenly distribute the assorted nuts around the board, filling in empty spaces. Consider mixing different textures and flavors for added interest.
- If using cheese, cut it into wedges or cubes and place it in strategic areas on the board. Cheese pairs wonderfully with fruits and nuts, enhancing the overall flavor profile.
- For a finishing touch, drizzle honey or maple syrup over the fruits and nuts if desired, and garnish with fresh herbs to add a pop of color and freshness.
Extra Tips: Feel free to customize your fruit and nut board based on your guests’ preferences or dietary restrictions. For a more sophisticated touch, consider incorporating artisanal cheeses or unique nut varieties.
To keep the fruits fresh and vibrant, avoid cutting them too far in advance and consider using citrus juice to prevent browning on fruits like apples. This appetizer can also be adapted for themed parties by incorporating seasonal elements or colors. Enjoy your beautiful and delicious creation!
Conclusion
As you gear up for your next gathering, remember that the heart of any great party lies in the food you serve, and these gluten-free appetizers are sure to steal the show. Picture yourself delighting your guests with the irresistible crunch of Sweet Potato Bites or the comforting warmth of Stuffed Mushrooms—both of which are personal favorites of mine. Trust me, when you see those smiles and hear the compliments flowing, you’ll feel like the culinary superstar of the evening. So, gather your ingredients, roll up your sleeves, and get ready to impress; after all, nothing brings people together quite like good food. Now, go ahead and pick a recipe (or two) that speaks to you, and let the fun begin!

