No products in the cart.
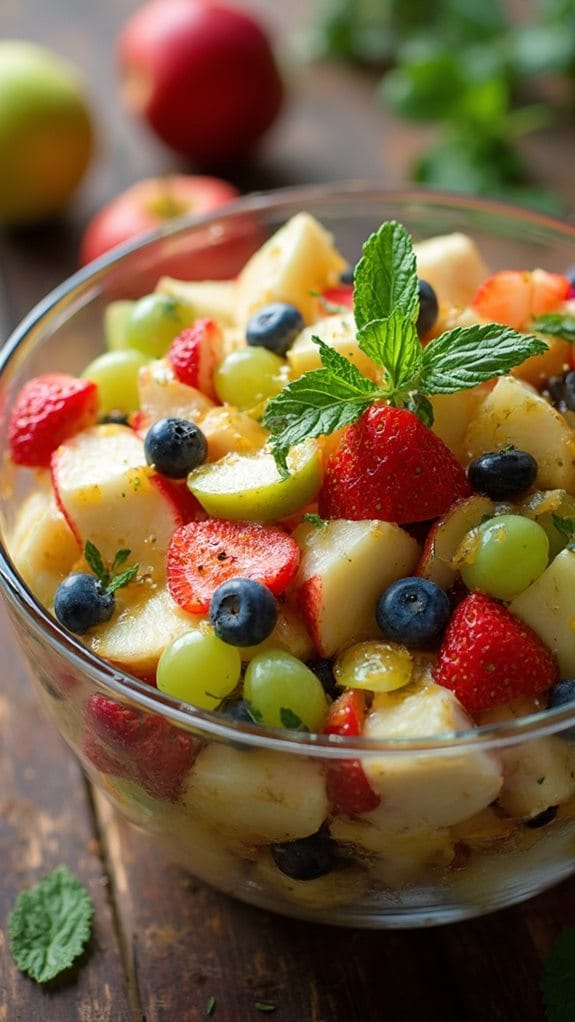
15 Low-Budget Thanksgiving Recipes
If you’re looking to create a memorable Thanksgiving feast without overspending, you might want to contemplate some low-budget recipes that don’t skimp on flavor. You can impress your guests with dishes like Classic Stuffing or Creamy Mashed Potatoes, all while keeping your finances in check. There’s a range of options, from savory sides to sweet desserts, ensuring everyone finds something they enjoy. Curious about how to prepare these economical delights? Let’s explore these recipes that could transform your holiday table.
Contents
hide
Roasted Vegetable Medley
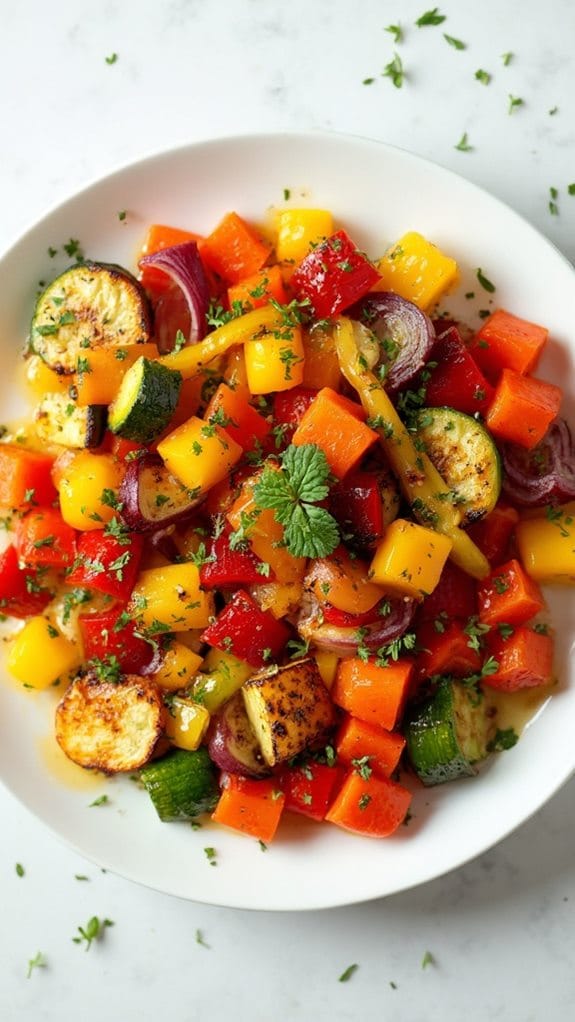
Title: Roasted Vegetable Medley
Prep Time: 15 minutes
Cook Time: 30 minutes
Number of Servings: 4
Required Equipment List: Baking sheet, mixing bowl, oven, spatula
Cuisine Type: American
This Roasted Vegetable Medley is a colorful and nutritious dish that brings together a variety of seasonal vegetables, making it a perfect side for your Thanksgiving feast or any family dinner. The roasting process intensifies the natural flavors of the vegetables while creating a delightful caramelization that enhances their sweetness.
With minimal effort and just a few ingredients, this dish is both budget-friendly and satisfying, ideal for feeding a crowd without breaking the bank. Versatile and customizable, this medley allows you to use whatever vegetables you have on hand, whether it’s carrots, bell peppers, zucchini, or Brussels sprouts.
Seasoned with olive oil, garlic, and your choice of herbs, this roasted vegetable medley won’t only complement your main dishes but also serve as a healthy, vibrant addition to your table. It’s an easy way to incorporate more veggies into your meal without sacrificing flavor.
Ingredients:
- 2 cups diced carrots
- 2 cups diced bell peppers (any color)
- 2 cups diced zucchini
- 1 cup diced red onion
- 4 tablespoons olive oil
- 4 cloves garlic, minced
- 1 teaspoon dried oregano
- 1 teaspoon dried thyme
- Salt and pepper to taste
Instructions:
- Preheat your oven to 425°F (220°C). This high temperature is crucial for achieving beautifully roasted, caramelized vegetables. While the oven heats, prepare your vegetables by washing and dicing them into uniform pieces to guarantee even cooking.
- In a large mixing bowl, combine the diced carrots, bell peppers, zucchini, and red onion. Drizzle with olive oil and add the minced garlic, oregano, thyme, salt, and pepper. Toss everything together until the vegetables are well coated in the oil and seasonings, assuring an even distribution.
- Spread the seasoned vegetables in a single layer on a baking sheet. Avoid overcrowding the pan, as this can lead to steaming instead of roasting. If necessary, use two baking sheets to allow for proper air circulation around the veggies.
- Roast the vegetables in the preheated oven for 25-30 minutes, stirring halfway through the cooking time. This will help them cook evenly and achieve a nice golden-brown color. Keep an eye on them towards the end to prevent burning.
- Once the vegetables are tender and caramelized, remove them from the oven and let them cool for a few minutes before serving. You can adjust the seasoning with additional salt and pepper if needed.
Extra Tips: For added flavor, try incorporating other herbs such as rosemary or basil, or even a splash of balsamic vinegar before roasting for a tangy twist. You can also experiment with different vegetable combinations based on what’s in season or what you have available.
Leftover roasted vegetables can be stored in the refrigerator and used in salads, wraps, or as a flavorful addition to grains. Enjoy your vibrant and delicious roasted vegetable medley!
Classic Stuffing
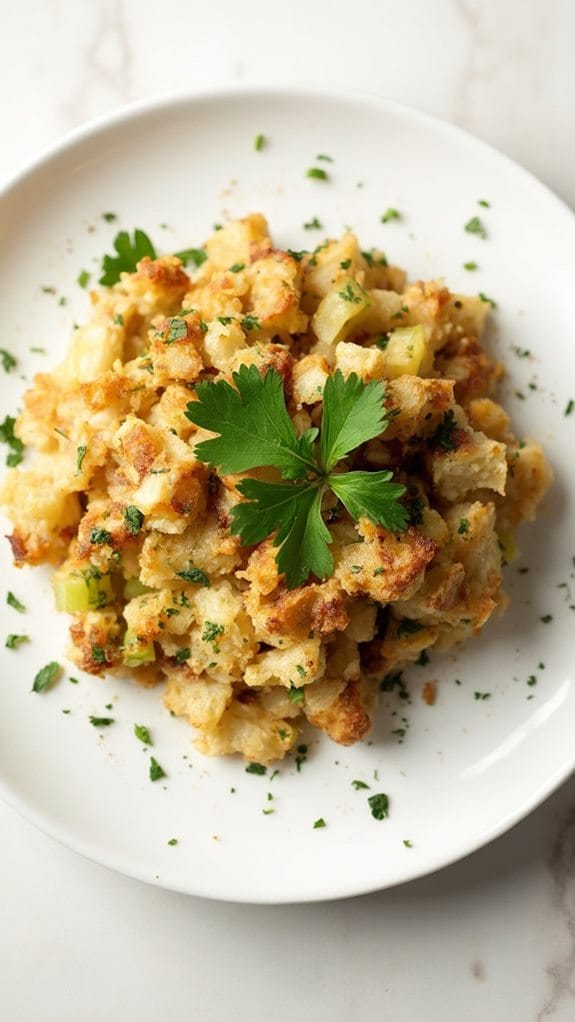
Title: Classic Stuffing
Prep Time: 20 minutes
Cook Time: 30 minutes
Number of Servings: 8
Required Equipment List: Large mixing bowl, baking dish, oven, sauté pan, spoon
Cuisine Type: American
Classic stuffing is a beloved dish that often graces the table during Thanksgiving and other festive gatherings. This recipe captures the essence of traditional stuffing with a savory blend of bread, herbs, and vegetables, creating a dish that’s both comforting and flavorful.
The combination of sautéed onions and celery, along with a medley of herbs like sage and thyme, brings depth to this stuffing, making it a perfect side to accompany turkey or any roast.
Making stuffing from scratch is easier than you might think and can be customized to suit your taste. Whether you prefer a drier texture or a moister stuffing, this recipe provides a solid base that you can adapt by adding ingredients such as sausage, nuts, or dried fruit.
The aroma of fresh herbs baking in the oven is sure to bring warmth and nostalgia to your holiday celebrations.
Ingredients:
- 10 cups cubed day-old bread
- 1 cup onion, diced
- 1 cup celery, diced
- 1/2 cup unsalted butter
- 2 cups chicken or vegetable broth
- 1 tablespoon dried sage
- 1 tablespoon dried thyme
- Salt and pepper to taste
- 2 large eggs, beaten
- Fresh parsley, chopped (for garnish, optional)
Instructions:
- Preheat your oven to 350°F (175°C). Grease a large baking dish with butter or cooking spray to prevent sticking. This will guarantee that your stuffing bakes evenly and comes out easily when served.
- In a large sauté pan, melt the butter over medium heat. Add the diced onion and celery, cooking until softened, about 5-7 minutes. Stir occasionally to prevent burning and to guarantee even cooking.
- In a large mixing bowl, combine the cubed bread, sautéed onion and celery mixture, dried sage, dried thyme, salt, and pepper. Toss everything together to guarantee the bread is evenly coated with the flavorful mixture.
- Pour the chicken or vegetable broth over the bread mixture, mixing gently until the bread is moistened but not soggy. Add the beaten eggs, stirring to incorporate and bind the ingredients together.
- Transfer the stuffing mixture to the prepared baking dish, spreading it out evenly. Cover with aluminum foil and bake in the preheated oven for 20 minutes. Then, remove the foil and bake for an additional 10 minutes, allowing the top to become golden and crispy.
- Once done, remove the stuffing from the oven and let it cool for a few minutes before serving. Garnish with chopped fresh parsley if desired, and enjoy this classic side dish alongside your holiday feast.
Extra Tips: For added flavor, consider incorporating cooked sausage or diced apples into the stuffing mixture before baking. If you prefer a more herby flavor, feel free to increase the amounts of sage and thyme.
To make the stuffing ahead of time, prepare it up until the baking step, cover it tightly, and refrigerate. When ready to serve, bake it straight from the fridge, adding an extra 10-15 minutes to the cooking time to guarantee it heats through.
Creamy Mashed Potatoes
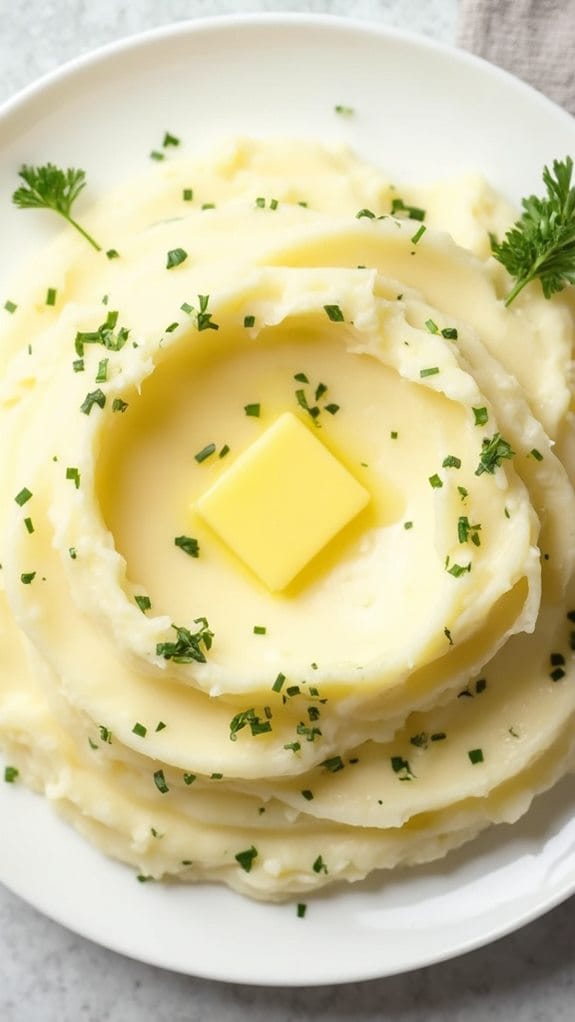
Title: Creamy Mashed Potatoes
Prep Time: 15 minutes
Cook Time: 20 minutes
Number of Servings: 4
Required Equipment List: Large pot, potato masher or ricer, measuring cups, measuring spoons, mixing bowl
Cuisine Type: American
Creamy Mashed Potatoes are a classic side dish that brings comfort to any meal, making them a must-have for your Thanksgiving table. This recipe offers a smooth and buttery texture, perfectly seasoned to complement your turkey or other main dishes.
With just a few simple ingredients, you can create a rich and creamy side that will have everyone coming back for seconds. The beauty of this dish lies in its versatility; you can customize the flavors by adding garlic, cheese, or herbs to suit your taste.
Whether you’re preparing a lavish holiday feast or a simple family dinner, these mashed potatoes aren’t only easy to make but also budget-friendly, ensuring that you can enjoy a delicious side without breaking the bank.
Ingredients:
- 2 pounds russet potatoes
- 1/2 cup milk
- 4 tablespoons unsalted butter
- Salt to taste
- Pepper to taste
- Optional: garlic powder or fresh herbs for flavor
Instructions:
- Start by peeling the russet potatoes and cutting them into even-sized chunks, about 1-2 inches in size. This will help them cook evenly and make the mashing process easier.
- Place the cut potatoes into a large pot and cover them with cold water. Add a generous pinch of salt to the water, then bring it to a boil over medium-high heat. Once boiling, reduce the heat to medium and let the potatoes simmer for about 15 minutes, or until they’re tender when pierced with a fork.
- Once the potatoes are cooked, drain them in a colander and return them to the pot. This allows any excess moisture to evaporate, ensuring that your mashed potatoes are creamy and not watery.
- Add the butter to the hot potatoes and begin mashing them using a potato masher or ricer until they reach your desired consistency. Gradually pour in the milk while continuing to mash, adjusting the amount to achieve your preferred creaminess.
- Season the mashed potatoes with salt and pepper to taste. If desired, you can also stir in optional ingredients like garlic powder or fresh herbs for an extra flavor boost. Mix well until everything is combined and creamy.
Extra Tips: For a richer flavor, consider using half-and-half or cream instead of milk. If you want to add a bit of tang, incorporate some sour cream or cream cheese into the mash.
When serving, you can top the mashed potatoes with a pat of butter or a sprinkle of fresh herbs for a beautiful presentation. Enjoy these creamy delights as the perfect side dish for any meal!
Savory Green Bean Casserole
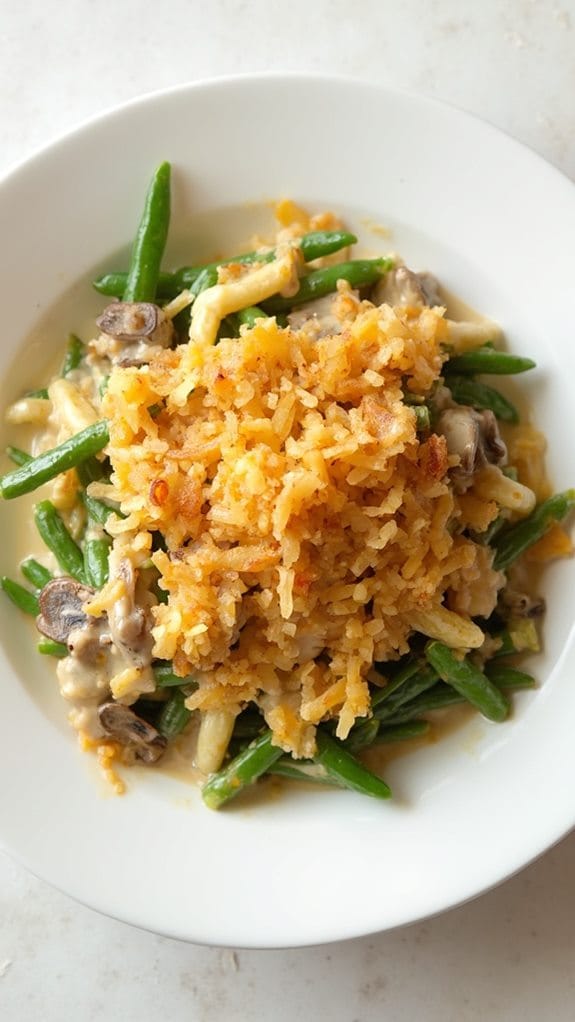
Title: Savory Green Bean Casserole
Prep Time: 15 minutes
Cook Time: 30 minutes
Number of Servings: 6
Required Equipment List: 9×13 inch baking dish, mixing bowl, whisk, oven
Cuisine Type: American
Savory Green Bean Casserole is a classic dish that graces many Thanksgiving tables, combining tender green beans with a creamy mushroom sauce and crispy topping. This budget-friendly recipe isn’t only easy to prepare but also delivers a comforting and satisfying taste that pairs wonderfully with turkey and other holiday favorites.
The use of canned green beans and cream of mushroom soup keeps the costs low while still providing that beloved creamy texture. This casserole is versatile and can be made ahead of time, allowing for a stress-free holiday meal.
The crunchy topping adds a delightful contrast to the soft green beans, creating a dish that’s both visually appealing and delicious. Whether served at Thanksgiving or any family gathering, this Savory Green Bean Casserole is sure to be a hit with guests of all ages.
Ingredients:
- 2 (14.5-ounce) cans green beans, drained
- 1 (10.5-ounce) can cream of mushroom soup
- 1/2 cup milk
- 1 cup shredded cheddar cheese
- 1/2 teaspoon garlic powder
- Salt and pepper to taste
- 1 cup French fried onions
Instructions:
- Preheat your oven to 350°F (175°C). This temperature will guarantee that the casserole heats through evenly while allowing the top to become golden and crispy.
- In a mixing bowl, combine the drained green beans, cream of mushroom soup, milk, shredded cheddar cheese, garlic powder, salt, and pepper. Mix well until all the ingredients are thoroughly incorporated.
- Transfer the mixture into a 9×13 inch baking dish, spreading it out evenly with a spatula to guarantee even cooking.
- Bake the casserole in the preheated oven for 25 minutes. This will allow the flavors to meld and the casserole to heat through.
- After 25 minutes, remove the dish from the oven and sprinkle the French fried onions evenly over the top. Return the casserole to the oven and bake for an additional 5 minutes, or until the onions are golden brown and crispy.
- Once done, remove the casserole from the oven and let it sit for a few minutes before serving. This resting time will help the casserole set a bit, making it easier to serve.
Extra Tips: For added flavor, consider mixing in some sautéed mushrooms or chopped onions into the green bean mixture. If you prefer a lighter version, you can substitute the cream of mushroom soup with a homemade béchamel sauce.
Additionally, feel free to top with more cheese or a sprinkle of paprika before the final baking for an extra layer of flavor. This casserole is perfect for leftovers, so don’t hesitate to make a larger batch!
Herb-Infused Turkey Gravy
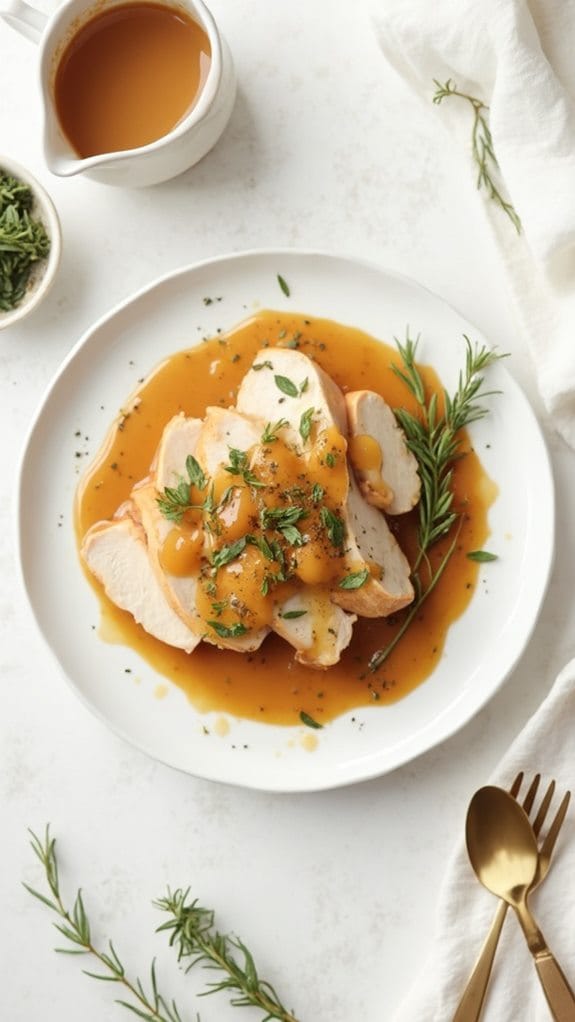
Title: Herb-Infused Turkey Gravy
Prep Time: 10 minutes
Cook Time: 20 minutes
Number of Servings: 4-6
Required Equipment List: Medium saucepan, whisk, measuring cups, ladle
Cuisine Type: American
This Herb-Infused Turkey Gravy is a rich and flavorful accompaniment to your Thanksgiving feast. Made from the drippings of your roasted turkey, this gravy captures the essence of the holiday and elevates any meal. By infusing it with fresh herbs like thyme and rosemary, you create a fragrant and delicious sauce that perfectly complements roasted meats, mashed potatoes, and stuffing.
Making your own gravy is easier than you might think, and it adds a personal touch to your holiday table. The beauty of this recipe lies in its simplicity and the ability to adjust it based on your personal preferences. Whether you like your gravy smooth or chunky, this recipe allows for variations such as adding sautéed onions or mushrooms for extra flavor.
It’s a cost-effective way to enhance your Thanksgiving dinner, ensuring that every bite is packed with savory goodness.
Ingredients:
- 1/4 cup turkey drippings (from roasted turkey)
- 1/4 cup all-purpose flour
- 2 cups turkey or chicken stock
- 1 tablespoon fresh thyme, chopped
- 1 tablespoon fresh rosemary, chopped
- Salt and pepper to taste
Instructions:
- After roasting your turkey, carefully collect the drippings from the roasting pan and transfer them to a medium saucepan. Allow the drippings to settle for a few minutes so that any fat rises to the top. Skim off excess fat if desired, leaving about 1/4 cup of drippings.
- Over medium heat, sprinkle the flour into the drippings in the saucepan, whisking continuously to form a roux. Cook for about 2-3 minutes until the mixture is light golden brown and has a nutty aroma, which will help eliminate the raw flour taste.
- Gradually pour in the turkey or chicken stock while continuing to whisk. This will help prevent lumps from forming. Bring the mixture to a simmer and allow it to thicken, stirring occasionally for about 5-7 minutes.
- Once the gravy has reached your desired thickness, add the chopped thyme and rosemary. Season with salt and pepper to taste, adjusting the flavors as needed. If you prefer a smoother gravy, you can strain it through a fine-mesh sieve.
- Remove the gravy from heat and let it sit for a minute before serving. Use a ladle to serve the warm gravy over slices of turkey and other holiday dishes.
Extra Tips: To enhance the flavor of your gravy even further, consider adding a splash of white wine or a teaspoon of soy sauce for depth. If you have leftover turkey carcass, simmer it with water and vegetables to create a homemade stock for a richer gravy.
Always taste and adjust the seasoning at the end, as the saltiness of the drippings can vary based on how the turkey was prepared. Enjoy your holiday meal!
Sweet Potato Casserole
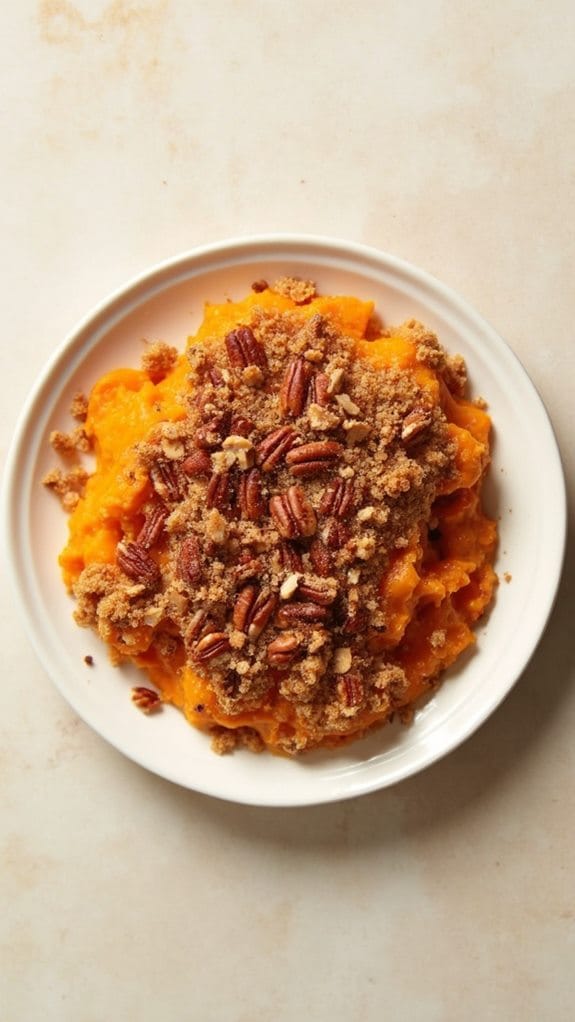
Title: Sweet Potato Casserole
Prep Time: 20 minutes
Cook Time: 30 minutes
Number of Servings: 6
Required Equipment List: 9×13 inch baking dish, mixing bowl, whisk, oven
Cuisine Type: American
Sweet Potato Casserole is a classic dish that embodies the essence of Thanksgiving. This comforting side dish features creamy, mashed sweet potatoes that are sweetened with brown sugar and topped with a buttery pecan crumble. The combination of flavors and textures makes it a favorite at holiday gatherings, bringing warmth and nostalgia to the table.
Not only is it delicious, but it also showcases seasonal ingredients that are budget-friendly and easy to prepare. This casserole is versatile enough to be served alongside turkey, ham, or any main course, making it a perfect addition to your holiday feast.
The sweet and nutty topping contrasts beautifully with the smooth sweet potato filling, creating a dish that’s both visually appealing and utterly satisfying. Plus, it can be made ahead of time and simply heated before serving, which is a great time-saver during the busy holiday season.
Ingredients:
- 4 cups mashed sweet potatoes (about 4 large sweet potatoes)
- 1/2 cup brown sugar
- 1/4 cup milk
- 1/4 cup butter, melted
- 1 teaspoon vanilla extract
- 1/2 teaspoon ground cinnamon
- 1/4 teaspoon salt
- 1 cup pecans, chopped
- 1/2 cup flour
- 1/4 cup brown sugar (for topping)
- 1/4 cup butter, melted (for topping)
Instructions:
- Begin by preheating your oven to 350°F (175°C). While the oven is heating, peel and chop the sweet potatoes into chunks. Boil them in a large pot of salted water until tender, about 15-20 minutes. Drain and then mash them in a large mixing bowl.
- In the bowl with the mashed sweet potatoes, add 1/2 cup brown sugar, 1/4 cup milk, 1/4 cup melted butter, vanilla extract, cinnamon, and salt. Use a whisk or a hand mixer to combine until the mixture is smooth and creamy.
- Transfer the sweet potato mixture into a greased 9×13 inch baking dish, spreading it evenly across the bottom.
- In a separate bowl, prepare the topping by combining the chopped pecans, 1/2 cup flour, 1/4 cup brown sugar, and 1/4 cup melted butter. Mix well until the pecans are evenly coated and the mixture resembles a crumbly texture.
- Sprinkle the pecan topping evenly over the sweet potato layer in the baking dish. Place in the preheated oven and bake for about 30 minutes, or until the topping is golden brown and the sweet potato filling is heated through.
- Once finished, remove the casserole from the oven and let it cool for a few minutes before serving. This dish is best enjoyed warm, allowing the flavors to meld together beautifully.
Extra Tips: For added flavor, consider mixing in a dash of nutmeg or using maple syrup instead of brown sugar for a different sweetness.
You can also prepare the sweet potato mixture a day in advance and store it in the refrigerator; just add the topping before baking. If you’re looking to make it a bit healthier, you can substitute half of the butter with unsweetened applesauce for a lighter version. Enjoy your Sweet Potato Casserole!
Cranberry Sauce
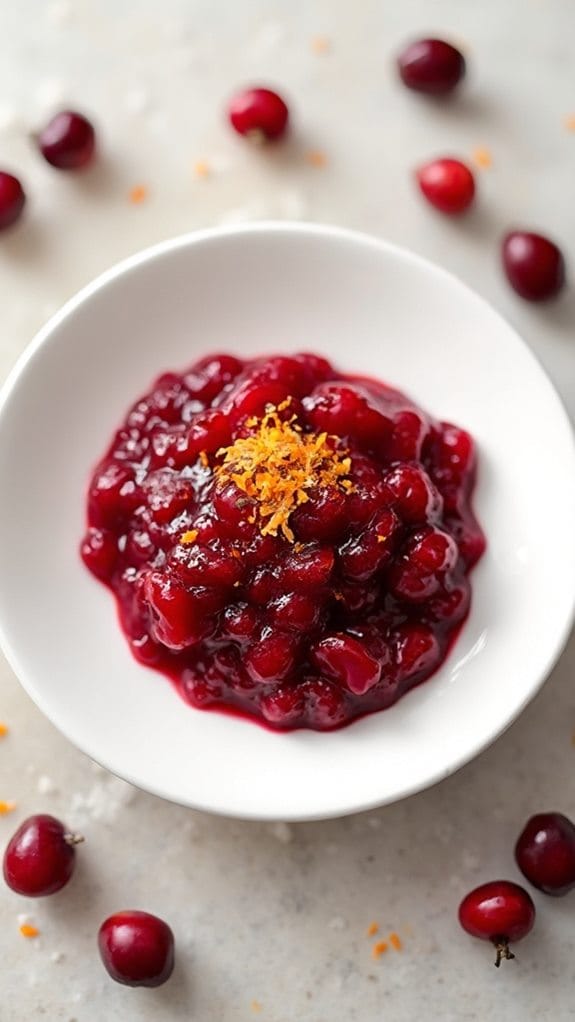
Title: Homemade Cranberry Sauce
Prep Time: 10 minutes
Cook Time: 15 minutes
Number of Servings: 8
Required Equipment List: Medium saucepan, measuring cups, wooden spoon, serving dish
Cuisine Type: American
Homemade Cranberry Sauce is a classic accompaniment to any Thanksgiving feast, offering a tart and sweet contrast to the savory dishes on your table. This simple recipe uses fresh cranberries, sugar, and a splash of orange juice to create a vibrant side dish that enhances the flavors of turkey and stuffing alike.
Not only is it easy to make, but it can also be prepared ahead of time, allowing you to enjoy more time with your loved ones on the holiday.
The beauty of this cranberry sauce lies in its versatility. You can adjust the sweetness to your preference by varying the amount of sugar or even experimenting with spices like cinnamon or nutmeg for an extra flavor kick.
Whether served chilled or at room temperature, this sauce is sure to be a hit, bringing a burst of color and taste to your Thanksgiving table.
Ingredients:
- 12 ounces fresh cranberries
- 1 cup granulated sugar
- 1 cup water
- 1/2 cup orange juice
- Zest of 1 orange (optional)
- 1/2 teaspoon cinnamon (optional)
Instructions:
- Rinse the fresh cranberries under cold water and pick out any that are soft or damaged. This guarantees you’re using only the best berries for your sauce.
- In a medium saucepan, combine the water, sugar, and orange juice. Stir the mixture over medium heat until the sugar completely dissolves, creating a sweet syrup.
- Once the sugar is dissolved, add the rinsed cranberries to the saucepan. Bring the mixture to a boil, then reduce the heat to a simmer. You’ll hear the cranberries start to pop as they cook, which is a good sign!
- Let the cranberries simmer for about 10 minutes, stirring occasionally. The cranberries will burst and the sauce will thicken as it cooks. If you’d like, you can add orange zest and cinnamon during the last few minutes for added flavor.
- Once the sauce has reached your desired thickness, remove it from the heat. Allow it to cool slightly before transferring it to a serving dish. The sauce will continue to thicken as it cools.
Extra Tips: To make this cranberry sauce even more special, consider adding chopped nuts or dried fruits like raisins or apricots for added texture and sweetness.
If you like a smoother texture, you can blend the sauce briefly with an immersion blender after it has cooled. This homemade cranberry sauce can be stored in the refrigerator for up to one week, making it a convenient make-ahead option for your Thanksgiving meal. Enjoy!
Pumpkin Soup

Title: Cozy Pumpkin Soup
Prep Time: 10 minutes
Cook Time: 30 minutes
Number of Servings: 4
Required Equipment List: Large pot, blender or immersion blender, cutting board, knife, measuring cups, measuring spoons
Cuisine Type: American
Cozy Pumpkin Soup is the perfect fall dish that brings warmth and comfort to your table without breaking the bank. This creamy, savory soup is made with canned pumpkin puree, which not only saves time but also provides a rich flavor and velvety texture. Infused with spices like cinnamon and nutmeg, this soup captures the essence of the season, making it a delightful starter or a satisfying meal on its own.
Pair it with crusty bread for a complete dining experience. This budget-friendly recipe isn’t only easy to prepare but also packed with nutrients, making it a great option for families or anyone looking to enjoy a wholesome meal. You can easily customize the flavor by adjusting the spices or adding your favorite toppings, such as toasted pumpkin seeds or a drizzle of cream.
With minimal ingredients and effort, this Cozy Pumpkin Soup is bound to become a seasonal favorite.
Ingredients:
- 1 tablespoon olive oil
- 1 small onion, diced
- 2 cloves garlic, minced
- 1 can (15 oz) pumpkin puree
- 3 cups vegetable broth
- 1 teaspoon ground cinnamon
- 1/2 teaspoon ground nutmeg
- Salt and pepper to taste
- 1/2 cup heavy cream (optional, for garnish)
- Toasted pumpkin seeds (for garnish, optional)
Instructions:
- In a large pot, heat the olive oil over medium heat. Add the diced onion and sauté until translucent, about 5 minutes. Stir in the minced garlic and cook for an additional minute, until fragrant.
- Add the canned pumpkin puree to the pot and stir well to combine with the onions and garlic. Cook for about 2-3 minutes, allowing the pumpkin to warm up and the flavors to meld.
- Pour in the vegetable broth and stir in the ground cinnamon, ground nutmeg, salt, and pepper. Bring the mixture to a boil, then reduce the heat and let it simmer for about 20 minutes, allowing the flavors to develop.
- After the soup has simmered, use an immersion blender to puree the soup until smooth. If you don’t have an immersion blender, carefully transfer the soup in batches to a standard blender and blend until smooth.
- Once blended, taste the soup and adjust the seasoning if necessary. If desired, stir in heavy cream for a richer texture. Heat through for a couple of minutes before serving.
- Ladle the soup into bowls and garnish with toasted pumpkin seeds and a drizzle of cream if using. Serve warm with crusty bread or crackers.
Extra Tips: For added depth of flavor, consider roasting fresh pumpkin or butternut squash and adding it to the soup instead of using canned puree. You can also experiment with different spices such as ginger or cayenne pepper for a bit of heat.
Make sure to store any leftovers in an airtight container in the refrigerator for up to three days, and reheat gently on the stove or in the microwave before serving. Enjoy this comforting dish during chilly evenings or as part of your Thanksgiving feast!
Cheesy Broccoli Bake

Title: Cheesy Broccoli Bake
Prep Time: 15 minutes
Cook Time: 30 minutes
Number of Servings: 6
Required Equipment List: Baking dish, mixing bowl, oven, whisk
Cuisine Type: American
Cheesy Broccoli Bake is a comforting and satisfying dish that combines tender broccoli florets with a creamy cheese sauce, all baked to perfection. This recipe is a great way to incorporate vegetables into your meal while satisfying cheese cravings.
With its gooey, melted cheese topping, this dish is sure to be a hit at your Thanksgiving table or any family gathering. Not only is this Cheesy Broccoli Bake budget-friendly, but it’s also incredibly versatile. You can easily swap out the broccoli for other vegetables like cauliflower or mixed greens depending on what you have on hand.
With simple ingredients and a straightforward preparation process, this recipe helps you create a hearty side dish that pairs wonderfully with a variety of mains, making it perfect for a festive occasion or a cozy dinner at home.
Ingredients:
- 4 cups fresh broccoli florets
- 1 cup shredded cheddar cheese
- 1/2 cup cream cheese, softened
- 1/2 cup milk
- 1/2 teaspoon garlic powder
- 1/2 teaspoon onion powder
- Salt and pepper to taste
- 1/4 cup breadcrumbs (optional)
- 1 tablespoon olive oil (optional)
Instructions:
- Preheat your oven to 350°F (175°C). Prepare a baking dish by greasing it lightly with cooking spray or butter to prevent sticking.
- In a large mixing bowl, combine the softened cream cheese, milk, garlic powder, onion powder, salt, and pepper. Whisk until the mixture is smooth and creamy, ensuring there are no lumps.
- Add the broccoli florets to the cream cheese mixture and gently fold until the florets are well-coated with the sauce. Then, transfer the mixture into the prepared baking dish, spreading it evenly.
- Sprinkle the shredded cheddar cheese evenly over the top of the broccoli mixture. If you like a crunchy topping, mix the breadcrumbs with olive oil and sprinkle them over the cheese.
- Bake in the preheated oven for 25-30 minutes, or until the cheese is melted and bubbly, and the edges are slightly golden. If you added breadcrumbs, they should be toasted and crispy.
- Once baked, remove from the oven and let it cool for a few minutes before serving. This dish can be enjoyed warm as a side or even as a main vegetarian option!
Extra Tips:
To enhance the flavor of your Cheesy Broccoli Bake, consider adding some cooked bacon bits or sautéed onions for extra texture and taste. You can also experiment with different types of cheese, such as mozzarella or pepper jack, for a unique twist.
For a healthier version, try using low-fat cream cheese and milk, or add in some other vegetables like diced bell peppers or carrots for a colorful addition. Enjoy your delicious creation!
Cornbread Muffins

Title: Cornbread Muffins
Prep Time: 10 minutes
Cook Time: 20 minutes
Number of Servings: 12
Required Equipment List: Muffin tin, mixing bowl, measuring cups, measuring spoons, whisk
Cuisine Type: American
Cornbread muffins are a classic comfort food, perfect for any Thanksgiving table or as a side dish for your favorite meals. These muffins are moist, slightly sweet, and have a delightful crumb that pairs wonderfully with soups, stews, or simply enjoyed on their own with a pat of butter.
They embody the spirit of fall, bringing warmth and heartiness to your gatherings while remaining budget-friendly and easy to make. This recipe for cornbread muffins uses simple pantry staples, making it not only economical but also quick to whip up.
With a few steps, you can have a batch of freshly baked muffins ready to impress your family and friends. The addition of honey or jalapeños can give these muffins a unique spin, so feel free to customize them to suit your taste!
Ingredients:
- 1 cup cornmeal
- 1 cup all-purpose flour
- 1 tablespoon baking powder
- 1/4 cup sugar
- 1/2 teaspoon salt
- 1 cup milk
- 2 large eggs
- 1/4 cup vegetable oil
- 1 tablespoon honey (optional)
Instructions:
- Preheat your oven to 400°F (200°C). Grease a muffin tin with cooking spray or line it with muffin liners to prevent sticking and make cleanup easier.
- In a large mixing bowl, combine the cornmeal, all-purpose flour, baking powder, sugar, and salt. Whisk together until the dry ingredients are well mixed and free of lumps.
- In another bowl, whisk together the milk, eggs, vegetable oil, and honey (if using). Make sure the mixture is well combined before adding it to the dry ingredients.
- Pour the wet ingredients into the bowl with the dry ingredients, and gently stir until just combined. Be careful not to overmix; a few lumps are okay. The batter should be thick but pourable.
- Evenly distribute the batter into the prepared muffin tin, filling each cup about two-thirds full. This will allow room for the muffins to rise while baking.
- Bake the muffins in the preheated oven for 15-20 minutes, or until they’re golden brown and a toothpick inserted into the center comes out clean. Let them cool in the pan for a few minutes before transferring to a wire rack to cool completely.
Extra Tips: For a delicious twist, consider adding shredded cheese or diced jalapeños to the batter for a savory kick. You can also experiment with different types of sweeteners, such as maple syrup instead of honey, to suit your preference.
These cornbread muffins are best enjoyed warm, but they can also be stored in an airtight container for a few days and reheated for a quick snack. Enjoy your homemade cornbread muffins!
Apple Crisp
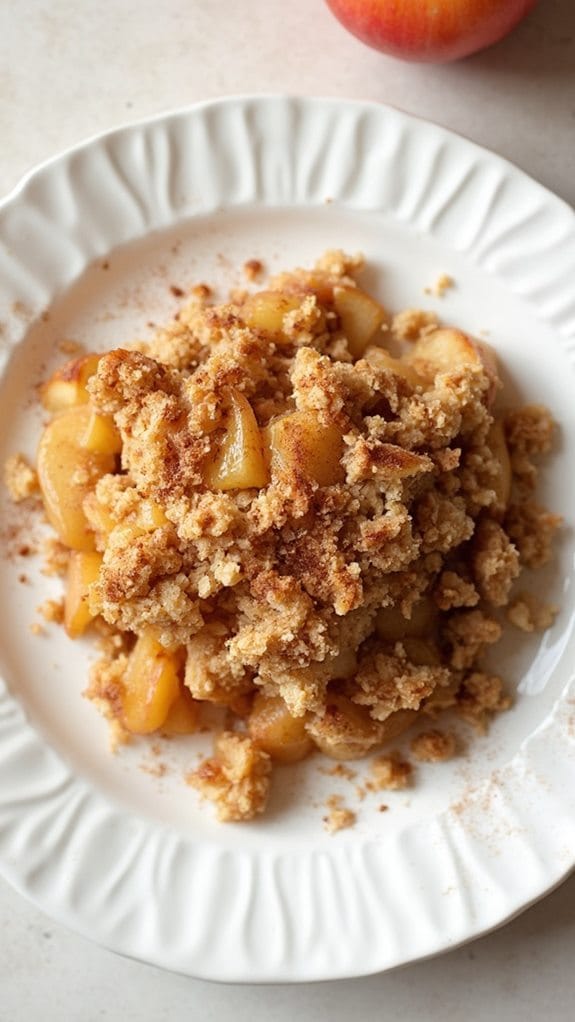
Title: Low-Budget Apple Crisp
Prep Time: 15 minutes
Cook Time: 30 minutes
Number of Servings: 6
Required Equipment List: Baking dish, mixing bowl, oven, measuring cups, spoon
Cuisine Type: American
This Low-Budget Apple Crisp is a warm, comforting dessert that highlights the natural sweetness of apples, making it a perfect treat for Thanksgiving or any family gathering. With simple ingredients and minimal prep time, this recipe allows you to create a delicious dessert without breaking the bank.
The combination of tender, spiced apples topped with a crunchy oat and brown sugar crumble provides a delightful contrast in textures that will satisfy your sweet cravings. Using budget-friendly ingredients like apples and rolled oats, this apple crisp isn’t only easy to make but also a great way to utilize leftover fruit.
It can be served warm with a scoop of vanilla ice cream or simply enjoyed on its own. This recipe is a wonderful way to bring the flavors of fall into your home, creating a cozy atmosphere that everyone will appreciate.
Ingredients:
- 4 cups sliced apples (about 4 medium apples)
- 1 tablespoon lemon juice
- 1/2 cup granulated sugar
- 1 teaspoon ground cinnamon
- 1 cup rolled oats
- 1/2 cup all-purpose flour
- 1/2 cup packed brown sugar
- 1/2 cup unsalted butter, melted
Instructions:
- Preheat your oven to 350°F (175°C). Grease a baking dish with butter or cooking spray to prevent the apple crisp from sticking. A 9×9-inch or similar-sized dish works well for this recipe.
- In a mixing bowl, combine the sliced apples with lemon juice, granulated sugar, and cinnamon. Toss the apples until they’re evenly coated with the mixture, then spread them evenly in the prepared baking dish.
- In a separate bowl, mix together the rolled oats, flour, brown sugar, and melted butter until the mixture resembles coarse crumbs. This will be the topping for your apple crisp.
- Sprinkle the oat mixture evenly over the apples in the baking dish, ensuring that the apples are fully covered. This will create a nice, crunchy layer on top as it bakes.
- Bake in the preheated oven for 30 minutes, or until the apples are tender and the topping is golden brown. You can check for doneness by inserting a fork into the apples; they should be soft and easily pierced.
- Once baked, remove the apple crisp from the oven and allow it to cool for a few minutes before serving. This dessert is best enjoyed warm, but can also be stored in the refrigerator for a few days.
Extra Tips: For a fun twist, consider adding nuts such as walnuts or pecans to the topping for added crunch. You can also use a mix of apple varieties for depth of flavor, such as combining tart Granny Smith apples with sweeter Fuji or Gala apples.
If you have any spices on hand, adding a pinch of nutmeg or allspice can enhance the warm flavors of the dish. Enjoy your homemade apple crisp!
Pecan Pie Bars
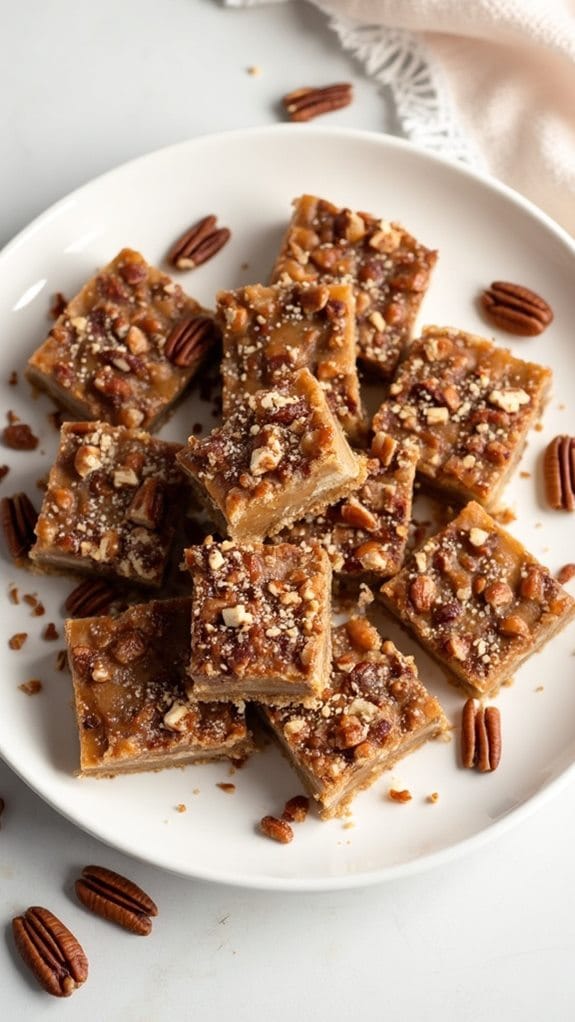
Title: Pecan Pie Bars
Prep Time: 15 minutes
Cook Time: 30 minutes
Number of Servings: 16
Required Equipment List: 9×13 inch baking dish, mixing bowl, whisk, measuring cups, measuring spoons, knife
Cuisine Type: American
Pecan Pie Bars are a delightful, portable twist on the classic pecan pie, making them perfect for gatherings or a sweet treat at home. These bars feature a buttery, crumbly crust that serves as the perfect foundation for a gooey, sweet pecan filling. The combination of brown sugar, corn syrup, and toasted pecans creates that signature flavor that pecan pie lovers adore.
They’re easy to make and can be cut into smaller portions, making them a great dessert option for sharing during the holidays. These bars can be prepared ahead of time and stored, allowing you to focus on other dishes during your Thanksgiving feast.
The addition of vanilla and a hint of salt balances the sweetness beautifully, while the crunchy pecans add texture. Serve them warm or at room temperature, and watch as they disappear from the dessert table!
Ingredients:
- 1 cup all-purpose flour
- 1/2 cup unsalted butter, softened
- 1/4 cup granulated sugar
- 1/4 teaspoon salt
- 1 cup brown sugar, packed
- 1/2 cup corn syrup
- 3 large eggs
- 1 teaspoon vanilla extract
- 1 1/2 cups pecans, chopped
Instructions:
- Preheat your oven to 350°F (175°C). Grease or line a 9×13 inch baking dish with parchment paper, allowing some overhang for easy removal after baking.
- In a mixing bowl, combine the flour, softened butter, granulated sugar, and salt. Mix until the mixture resembles coarse crumbs. Press this mixture firmly into the bottom of the prepared baking dish to form an even layer.
- Bake the crust in the preheated oven for about 15 minutes, or until lightly golden. While the crust is baking, prepare the filling.
- In a separate bowl, whisk together the brown sugar, corn syrup, eggs, and vanilla extract until smooth. Stir in the chopped pecans, ensuring they’re evenly distributed throughout the mixture.
- Once the crust is baked, remove it from the oven and pour the pecan filling over the hot crust, spreading it evenly. Return the dish to the oven and bake for an additional 15-20 minutes, or until the filling is set and slightly puffed.
- Allow the pecan pie bars to cool in the baking dish for at least 30 minutes before cutting into squares. Use the parchment overhang to lift the bars out of the dish for easier slicing.
Extra Tips: For an extra touch of flavor, consider toasting the pecans in a dry skillet for a few minutes before adding them to the filling. This will enhance their nuttiness.
You can also experiment with adding a splash of bourbon to the filling for a richer flavor. These bars can be stored in an airtight container at room temperature for up to a week, making them a perfect make-ahead dessert for your Thanksgiving celebrations. Enjoy!
Pumpkin Bread
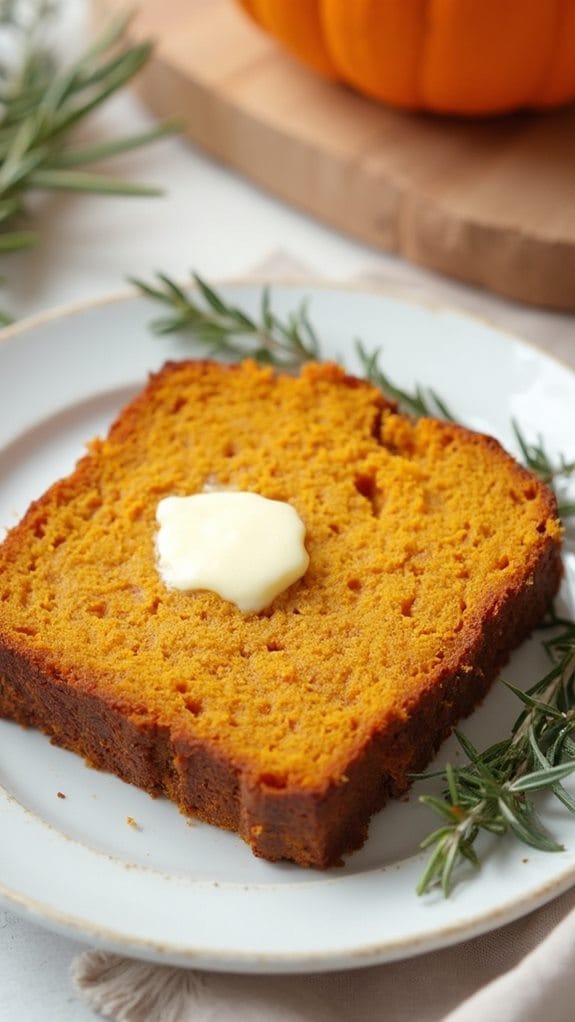
Title: Moist Pumpkin Bread
Prep Time: 15 minutes
Cook Time: 60 minutes
Number of Servings: 8
Required Equipment List: Mixing bowl, loaf pan, whisk, measuring cups and spoons, oven
Cuisine Type: American
This Moist Pumpkin Bread is a warm and comforting treat that captures the essence of fall with its rich pumpkin flavor and delightful spices. Perfect for breakfast, an afternoon snack, or even as a dessert, this bread isn’t only delicious but also budget-friendly.
The combination of pumpkin puree, cinnamon, and nutmeg creates a moist and flavorful loaf that will fill your home with the inviting aroma of autumn. What makes this pumpkin bread truly special is its simplicity. With just a few pantry staples, you can whip up this delightful loaf in no time.
It’s versatile too; you can enjoy it plain, slathered with butter, or even topped with cream cheese frosting for a sweeter touch. Whether you’re celebrating Thanksgiving or just craving a cozy slice of bread, this recipe is a must-try.
Ingredients:
- 1 cup pumpkin puree
- 1 cup sugar
- 1/2 cup vegetable oil
- 2 large eggs
- 1 1/2 cups all-purpose flour
- 1 teaspoon baking soda
- 1/2 teaspoon baking powder
- 1 teaspoon ground cinnamon
- 1/2 teaspoon ground nutmeg
- 1/2 teaspoon salt
- 1/4 teaspoon ground cloves (optional)
Instructions:
- Preheat your oven to 350°F (175°C). Grease a 9×5 inch loaf pan or line it with parchment paper for easy removal after baking. This will guarantee your pumpkin bread doesn’t stick and comes out beautifully.
- In a mixing bowl, combine the pumpkin puree, sugar, and vegetable oil. Whisk together until well blended, then add the eggs one at a time, continuing to whisk until the mixture is smooth and creamy.
- In a separate bowl, mix the all-purpose flour, baking soda, baking powder, cinnamon, nutmeg, salt, and ground cloves (if using). Stir to combine the dry ingredients evenly.
- Gradually add the dry mixture to the wet ingredients, folding gently with a spatula or wooden spoon until just combined. Be careful not to over-mix, as this can result in a denser bread.
- Pour the batter into the prepared loaf pan, smoothing the top with a spatula. Bake in the preheated oven for 55-60 minutes, or until a toothpick inserted into the center comes out clean.
- Once baked, remove the pumpkin bread from the oven and allow it to cool in the pan for about 10 minutes. Then, transfer it to a wire rack to cool completely before slicing.
Extra Tips: For added texture and flavor, consider mixing in some chopped nuts or chocolate chips into the batter before baking. If you have leftover pumpkin puree, it can be stored in the fridge for a few days or frozen for future baking.
This pumpkin bread also makes for a wonderful gift; simply wrap it in wax paper and tie it with a festive ribbon to share the joy of homemade goodness with friends and family. Enjoy every delicious bite!
Maple-Glazed Carrots

Title: Maple-Glazed Carrots
Prep Time: 10 minutes
Cook Time: 20 minutes
Number of Servings: 4
Required Equipment List: Medium saucepan, knife, cutting board, stirring spoon
Cuisine Type: American
Maple-Glazed Carrots are a simple yet elegant side dish that brings a touch of sweetness to your Thanksgiving table. The natural sweetness of the carrots is enhanced by the rich, caramel-like flavor of maple syrup, making them an irresistible addition to any meal.
This dish not only looks vibrant and colorful but also delivers a delightful crunch that pairs wonderfully with roasted meats and savory stuffing.
This recipe is incredibly easy to prepare, making it a perfect choice for busy cooks during the holidays. With just a handful of ingredients and minimal cooking time, you can whip up these flavorful carrots in no time. Their glossy finish from the maple glaze will impress your guests and add a festive touch to your Thanksgiving spread.
Ingredients:
- 1 pound baby carrots (or regular carrots, peeled and sliced)
- 3 tablespoons maple syrup
- 2 tablespoons unsalted butter
- 1/2 teaspoon salt
- 1/4 teaspoon black pepper
- 1/4 teaspoon ground cinnamon (optional)
- Fresh parsley (for garnish, optional)
Instructions:
- Begin by washing the baby carrots thoroughly and trimming the ends. If using regular carrots, peel and slice them into uniform pieces to guarantee even cooking.
- In a medium saucepan, melt the butter over medium heat. Once melted, add the maple syrup, salt, black pepper, and ground cinnamon (if using), stirring to combine all the ingredients into a smooth glaze.
- Add the prepared carrots to the saucepan and toss them in the maple glaze until they’re well-coated.
- Cover the saucepan with a lid and let the carrots cook for about 10 minutes, stirring occasionally. This will allow them to steam and soften while absorbing the flavors of the glaze.
- After 10 minutes, remove the lid and continue to cook for an additional 5-10 minutes until the carrots are tender and the glaze has thickened slightly. Stir frequently to prevent the glaze from burning.
- Once cooked, remove the saucepan from heat and transfer the glazed carrots to a serving dish. Garnish with fresh parsley if desired, and serve warm.
Extra Tips: For an added depth of flavor, consider roasting the carrots in the oven instead of cooking them on the stove. Simply toss them with the maple glaze and roast at 400°F (200°C) for about 20-25 minutes, turning halfway through for even caramelization.
You can also experiment with different herbs, such as thyme or rosemary, to complement the sweetness of the maple syrup. Enjoy this delightful side dish as a sweet complement to your Thanksgiving feast!
Holiday Fruit Salad

Title: Holiday Fruit Salad
Prep Time: 15 minutes
Cook Time: 0 minutes
Number of Servings: 6
Required Equipment List: Mixing bowl, cutting board, knife, serving spoon
Cuisine Type: American
This Holiday Fruit Salad is a rejuvenating and colorful addition to any Thanksgiving table, bringing a touch of sweetness and vibrancy to the holiday feast. With a mix of seasonal fruits, this salad not only pleases the palate but also adds a festive touch to your meal. Its simple preparation allows you to focus on the main dishes while still offering a delicious side that everyone will enjoy.
The beauty of this fruit salad lies in its versatility; you can use any combination of fruits that are in season or that you have on hand. The dressing, made from honey and lime juice, enhances the natural sweetness of the fruits while providing a zesty kick. Whether served as a light appetizer or a rejuvenating dessert, this Holiday Fruit Salad is sure to be a hit with family and friends.
Ingredients:
- 2 apples, diced
- 2 pears, diced
- 1 cup grapes, halved
- 1 cup strawberries, sliced
- 1 cup blueberries
- 1 banana, sliced
- 1/4 cup honey
- 2 tablespoons lime juice
- Fresh mint leaves (for garnish, optional)
Instructions:
- Begin by washing all the fruits thoroughly under cold water. This will guarantee they’re clean and ready to eat. Once washed, dry them gently with a paper towel to remove excess moisture.
- Dice the apples and pears into bite-sized pieces, halving the grapes and slicing the strawberries. For the banana, slice it just before adding to the salad to prevent browning. Place all the prepared fruits into a large mixing bowl.
- In a small bowl, whisk together the honey and lime juice until well combined. This dressing will add a delightful sweetness and tang to the fruit salad. Adjust the sweetness by adding more honey if desired.
- Pour the honey-lime dressing over the mixed fruits in the bowl. Gently toss the salad using a serving spoon, guaranteeing that all the fruits are evenly coated with the dressing without mashing them.
- Transfer the fruit salad to a serving dish and garnish with fresh mint leaves if desired. This not only adds a pop of color but also enhances the aroma of the salad. Serve immediately or refrigerate for up to an hour before serving for a chilled delight.
Extra Tips: To prevent browning of the apples and bananas, you can toss them in a little extra lime juice before adding them to the salad. Feel free to customize the fruit selection based on your preferences or what’s available, such as adding citrus segments or pomegranate seeds for an extra festive touch.
This salad can also be made a few hours in advance; just keep it covered in the fridge until ready to serve for maximum freshness.
Conclusion
So, there you have it—15 budget-friendly Thanksgiving recipes that won’t just fill your guests’ bellies but also warm their hearts. Did you know that nearly 50 million Americans struggle with food insecurity? By whipping up these affordable dishes, you’re not only creating a feast but also embracing the spirit of gratitude and sharing. Remember, a delicious meal doesn’t have to cost a fortune. So roll up your sleeves, get cooking, and enjoy a memorable holiday with your loved ones!

