No products in the cart.

15 Quick Dinner Recipes Using A Sandwich Maker
You can whip up delicious meals in minutes with your sandwich maker, and why not try some exciting dinner options? Imagine cheesy veggie quesadillas, mini pizza pockets, or savory spinach and feta pitas all ready in no time. Grilled chicken paninis and BBQ chicken sliders make for great hearty choices! These recipes aren’t just quick; they’re easy to customize using your favorite ingredients, so you won’t tire of them. Feeling adventurous? You might want to switch things up with sweet potato hash or pancake breakfast sandwiches! Stick around, and you’ll discover even more ways to impress at dinner!
Contents
hide
Cheesy Veggie Quesadillas
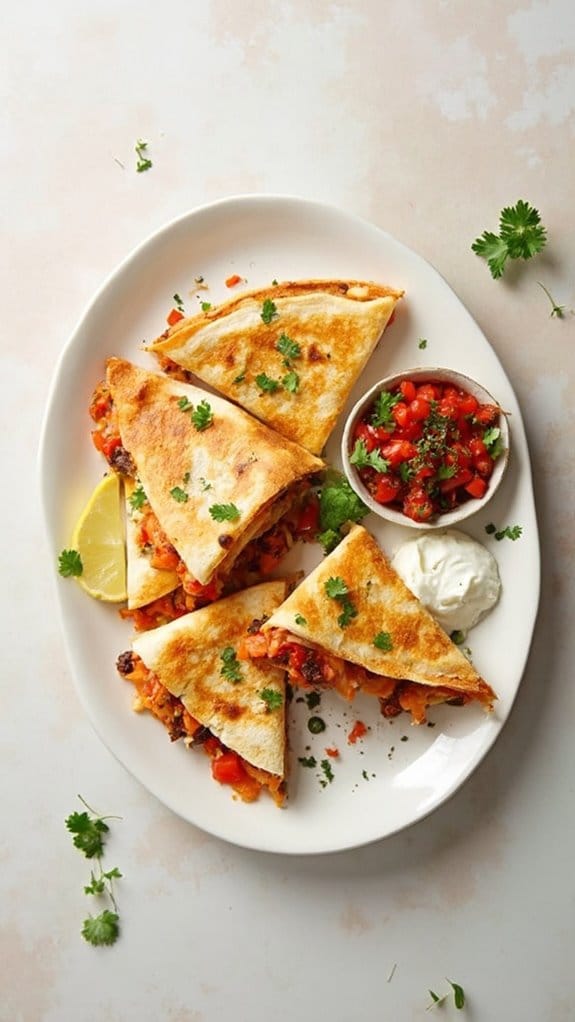
Title: Cheesy Veggie Quesadillas
Prep Time: 10 minutes
Cook Time: 15 minutes
Number of Servings: 4
Required Equipment List: Sandwich maker, cutting board, knife, spatula
Cuisine Type: Mexican
Cheesy Veggie Quesadillas are a quick and satisfying meal that combines the best of flavors and textures. This recipe utilizes a sandwich maker to create golden, crispy quesadillas filled with gooey cheese and a colorful assortment of vegetables. Perfect for a busy weeknight dinner or a snack, these quesadillas can be customized with your favorite fillings, making them a versatile dish the whole family will enjoy.
The combination of melted cheese and fresh veggies not only makes for a delicious bite but also adds nutritional value to your meal. Whether you prefer bell peppers, onions, spinach, or mushrooms, the options are endless. Serve them with salsa, sour cream, or guacamole for a delightful dipping experience. These quesadillas aren’t just easy to make but also a hit at parties or casual gatherings.
Ingredients:
- 4 flour tortillas
- 1 cup shredded cheese (cheddar, Monterey Jack, or a blend)
- 1 cup mixed vegetables (bell peppers, onions, spinach, or mushrooms)
- 1 tablespoon olive oil
- 1 teaspoon taco seasoning (optional)
- Salsa or sour cream (for serving)
Instructions:
- Begin by chopping your vegetables into small, bite-sized pieces. This guarantees they cook evenly and fit nicely inside the quesadilla. If you’re using raw veggies like bell peppers or onions, consider sautéing them in olive oil for a few minutes to soften them before filling the quesadillas.
- Preheat your sandwich maker according to the manufacturer’s instructions. While it’s heating up, lay out the flour tortillas on a clean surface. On one half of each tortilla, sprinkle a generous amount of shredded cheese, followed by a layer of your mixed vegetables, and then add a little more cheese on top. This helps hold the quesadilla together.
- If desired, sprinkle a small amount of taco seasoning over the vegetables for an extra kick of flavor. Fold the tortillas in half, pressing down gently to seal the filling inside.
- Once the sandwich maker is ready, carefully place the folded quesadillas inside and close the lid. Cook for about 5-7 minutes or until the tortillas are golden brown and the cheese has melted. Keep an eye on them to prevent burning.
- When done, carefully remove the quesadillas from the sandwich maker using a spatula. Let them cool for a minute before slicing them into wedges. Serve with your favorite salsa, sour cream, or guacamole.
Extra Tips: To make your quesadillas even more flavorful, consider adding beans or cooked chicken for added protein. You can also experiment with different types of cheese to find your favorite combination. If you don’t have a sandwich maker, you can cook these on a skillet over medium heat, flipping them halfway through until both sides are crispy. Enjoy the cheesy goodness!
Mini Pizza Pockets

Title: Mini Pizza Pockets
Prep Time: 10 minutes
Cook Time: 10 minutes
Number of Servings: 4
Required Equipment List: Sandwich maker, mixing bowl, spoon
Cuisine Type: Italian-American
These Mini Pizza Pockets are a fun and convenient twist on classic pizza, perfect for a quick dinner or snack. With just a few simple ingredients, you can create these delicious, portable bites that are sure to please both kids and adults alike.
The crispy exterior from the sandwich maker encases a gooey, cheesy center filled with your favorite pizza toppings, making them an ideal choice for any pizza lover. The beauty of these mini pizza pockets lies in their versatility; you can customize the fillings based on what you have on hand or your personal preferences.
Whether you choose classic pepperoni and mozzarella or load them up with veggies and cheese, these pockets are ready in minutes and are ideal for busy weeknights. Perfectly sized for little hands or as a party appetizer, they’re sure to be a hit at any gathering.
Ingredients:
- 1 package of refrigerated pizza dough
- 1 cup pizza sauce
- 1 cup shredded mozzarella cheese
- 1/2 cup pepperoni slices (or preferred toppings)
- 1 teaspoon Italian seasoning (optional)
- Olive oil or cooking spray (for greasing)
Instructions:
- Preheat your sandwich maker according to the manufacturer’s instructions. While it heats up, prepare your filling by mixing the pizza sauce, mozzarella cheese, and pepperoni slices in a mixing bowl. If desired, add Italian seasoning for extra flavor.
- On a floured surface, roll out the refrigerated pizza dough to about 1/4 inch thickness. Use a pizza cutter or knife to cut the dough into squares or circles, about 4 inches in diameter.
- Place a spoonful of the filling mixture in the center of each dough piece, being careful not to overfill. Fold the dough over to create a pocket and pinch the edges to seal them tightly.
- Lightly grease the sandwich maker with olive oil or cooking spray, then place the filled pizza pockets inside. Close the sandwich maker and cook for about 3-5 minutes, or until golden brown and crispy.
- Carefully remove the pizza pockets from the sandwich maker using a spatula or tongs. Let them cool for a minute before serving with extra pizza sauce for dipping.
Extra Tips: For a fun twist, experiment with different fillings such as cooked sausage, diced bell peppers, or even pineapple for a Hawaiian flavor. If you don’t have a sandwich maker, you can bake the pockets in a preheated oven at 400°F (200°C) for about 15-20 minutes until golden.
Serve these mini pizza pockets with a side salad or veggie sticks for a complete meal!
Spinach and Feta Pita
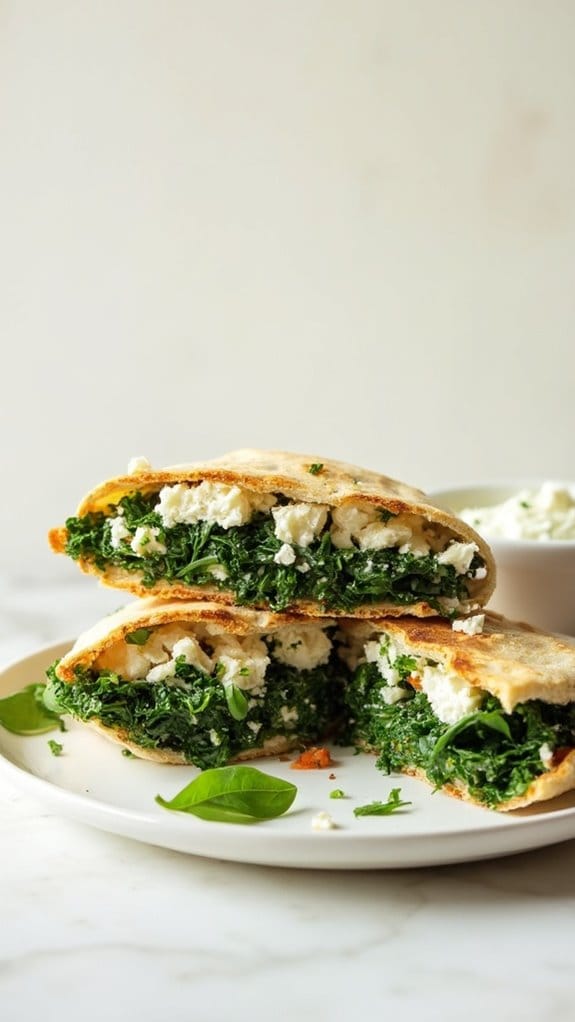
Title: Spinach and Feta Pita
Prep Time: 10 minutes
Cook Time: 5 minutes
Number of Servings: 2
Required Equipment List: Sandwich maker, mixing bowl, spatula
Cuisine Type: Mediterranean
This Spinach and Feta Pita is a delicious and quick meal that perfectly combines the earthiness of spinach with the tangy flavor of feta cheese. It’s an ideal option for busy weeknights, as it takes only minutes to prepare and cook. The sandwich maker creates a crispy pita pocket filled with a creamy, savory filling that will satisfy your hunger without weighing you down.
Not only is this dish quick and easy to make, but it also offers a nutritious boost. Spinach is packed with vitamins and minerals, while feta cheese adds a delightful creaminess that contrasts beautifully with the crunchy pita. This recipe is easily customizable; you can throw in some sun-dried tomatoes or olives for an extra flavor punch, making it a versatile option that everyone will love.
Ingredients:
- 2 whole wheat pitas
- 1 cup fresh spinach, chopped
- 1/2 cup feta cheese, crumbled
- 1 tablespoon olive oil
- 1/2 teaspoon garlic powder
- Salt and pepper to taste
Instructions:
- Preheat your sandwich maker according to the manufacturer’s instructions. While it’s heating up, prepare the filling by combining the chopped spinach, crumbled feta cheese, olive oil, garlic powder, salt, and pepper in a mixing bowl. Toss until all ingredients are well mixed.
- Carefully cut each pita in half to create pockets. Gently open each pocket and fill them with the spinach and feta mixture. Be sure not to overfill, as this may cause the filling to spill out during cooking.
- Place the filled pita halves into the preheated sandwich maker, ensuring they’re sealed well. Close the lid and cook for about 3-5 minutes, or until the pitas are golden brown and crispy.
- Once cooked, carefully remove the pitas from the sandwich maker using a spatula. Let them cool for a minute before serving, as the filling will be hot.
Extra Tips: You can enhance the flavor of the spinach and feta mixture by adding herbs like oregano or dill. For a spicier kick, consider adding a pinch of red pepper flakes. These pitas can also be served with a side of tzatziki sauce or a light salad for a complete meal. Enjoy this quick and healthy dish that isn’t only satisfying but also full of flavor!
Breakfast Sandwiches
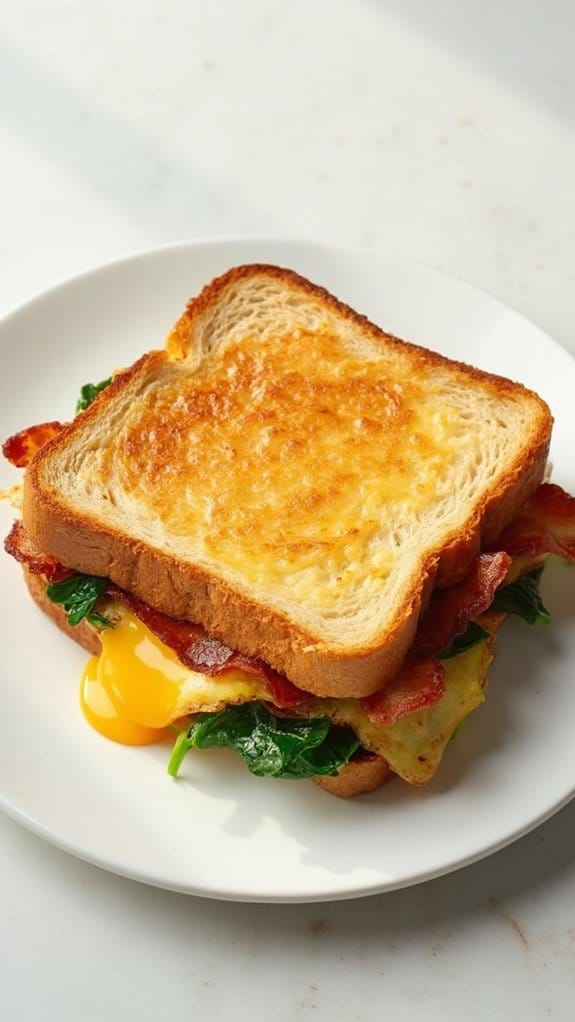
Title: Breakfast Sandwiches
Prep Time: 10 minutes
Cook Time: 10 minutes
Number of Servings: 2
Required Equipment List: Sandwich maker, measuring cups, spatula, knife
Cuisine Type: American
Breakfast sandwiches are a delightful and convenient way to start your day, offering a combination of flavors and textures that are both satisfying and energizing. This recipe uses a sandwich maker to create a perfectly toasted sandwich filled with eggs, cheese, and your choice of meat or vegetables.
It’s not only quick to prepare but also customizable, allowing you to mix and match ingredients based on your preferences or what you have on hand. With just a few simple ingredients, these breakfast sandwiches can be whipped up in no time, making them an ideal choice for busy mornings or a leisurely weekend brunch.
Feel free to experiment with different types of bread, cheeses, and fillings to create your perfect breakfast sandwich. Whether you enjoy a classic egg and cheese combo or prefer a more adventurous flavor profile, this sandwich maker recipe will guarantee that your mornings are deliciously satisfying.
Ingredients:
- 2 slices of bread (white, whole wheat, or bagels)
- 2 large eggs
- 2 slices of cheese (cheddar, Swiss, or your choice)
- 2 slices of cooked bacon, ham, or sausage (optional)
- Salt and pepper to taste
- Butter or cooking spray (for greasing)
Instructions:
- Begin by preheating your sandwich maker according to the manufacturer’s instructions. If your sandwich maker requires greasing, lightly butter the plates or use cooking spray to prevent sticking.
- In a small bowl, crack the eggs and beat them with a fork. Season with salt and pepper to taste. If you’re adding cooked meat, prepare it now by slicing it into appropriate sizes.
- Lay one slice of bread on the bottom plate of the sandwich maker. Pour the beaten eggs over the bread, ensuring it’s evenly distributed. If using meat, add it on top of the eggs, followed by a slice of cheese.
- Place the second slice of bread on top to complete the sandwich. Close the sandwich maker and cook for about 5-7 minutes, or until the bread is golden brown and the cheese has melted.
- Once cooked, carefully remove the sandwich from the maker using a spatula. Allow it to cool for a minute before cutting it in half for easier handling.
Extra Tips: For a heartier sandwich, consider adding sautéed vegetables such as spinach, bell peppers, or onions. You can also use different types of bread like English muffins or croissants for a unique twist.
If you’re short on time, prepare the ingredients the night before, so you can quickly assemble and cook your breakfast sandwich in the morning. Enjoy your delicious creation with a side of fresh fruit or a hot beverage for a complete breakfast experience!
Grilled Chicken Paninis
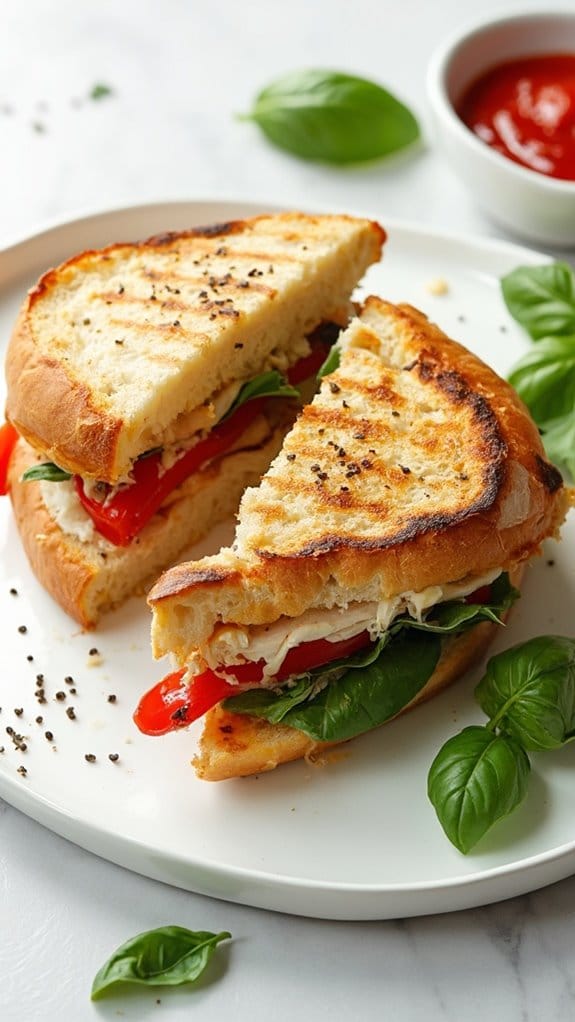
Title: Grilled Chicken Paninis
Prep Time: 10 minutes
Cook Time: 10 minutes
Number of Servings: 2
Required Equipment List: Sandwich maker, cutting board, knife, mixing bowl
Cuisine Type: American
Grilled Chicken Paninis are a delicious and satisfying meal that can be whipped up in no time, making them perfect for busy weeknights or casual lunch gatherings. The combination of juicy grilled chicken, melted cheese, and fresh vegetables pressed between crusty bread creates a delightful crunch with every bite.
This recipe not only delivers on flavor but also allows you to customize it according to your taste preferences, whether you prefer a classic Italian twist with pesto and mozzarella or a spicy kick with pepper jack cheese.
Using a sandwich maker simplifies the cooking process, guaranteeing that the bread is golden and crispy while the insides are warm and melty. This versatile dish can be prepared with leftover chicken or deli meat, making it a fantastic way to use up ingredients in your fridge.
Serve these paninis with a side salad or some homemade fries for a complete meal that everyone will love.
Ingredients:
- 2 slices of ciabatta or sourdough bread
- 1 cup cooked chicken breast, sliced
- 1/2 cup mozzarella cheese, shredded
- 1/4 cup roasted red peppers, sliced
- 1/4 cup fresh spinach leaves
- 1 tablespoon pesto sauce (optional)
- Olive oil or butter for grilling
- Salt and pepper to taste
Instructions:
- Preheat your sandwich maker according to the manufacturer’s instructions. This will guarantee that it’s hot and ready to grill your paninis to perfection.
- On a cutting board, lay out the slices of bread and spread a thin layer of olive oil or butter on one side of each slice. This will help achieve a golden crust when grilled.
- On the unbuttered side of one slice of bread, spread the pesto sauce if using. Layer the sliced chicken evenly over the bread, followed by the roasted red peppers, spinach leaves, and shredded mozzarella cheese.
- Season the filling with a pinch of salt and pepper to taste, then place the other slice of bread on top, unbuttered side facing down. This creates a sandwich that’s ready to be grilled.
- Carefully place the assembled sandwich into the preheated sandwich maker and close the lid. Grill for about 5-7 minutes, or until the bread is golden brown and the cheese is melted.
- Once done, carefully remove the panini from the sandwich maker using a spatula. Let it cool for a minute before slicing it in half and serving.
Extra Tips: For added flavor, consider marinating the chicken in your favorite spices or herbs before cooking. You can also mix and match different types of cheese and vegetables based on your preference.
If you don’t have a sandwich maker, you can easily grill the panini in a skillet, pressing down with a spatula to achieve a similar crispy texture. Serve with a side of dipping sauce, like marinara or ranch, for an extra touch of deliciousness!
Sweet Potato Hash
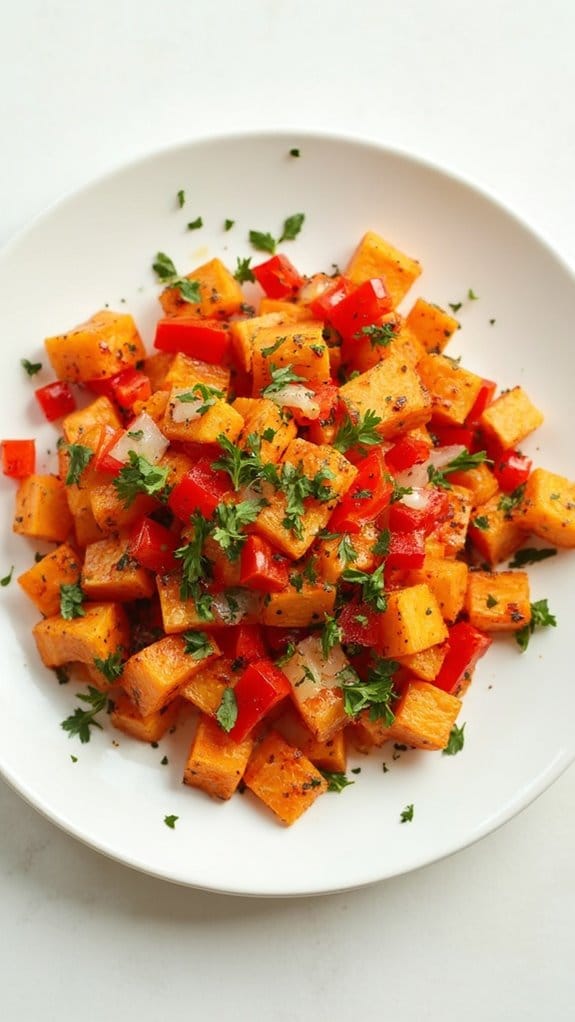
Title: Sweet Potato Hash
Prep Time: 10 minutes
Cook Time: 15 minutes
Number of Servings: 4
Required Equipment List: Sandwich maker, cutting board, knife, mixing bowl, spatula
Cuisine Type: American
Sweet Potato Hash is a delicious and hearty dish that can be prepared quickly using a sandwich maker, making it an ideal option for busy weeknights. This dish combines the natural sweetness of sweet potatoes with savory ingredients like bell peppers and onions, creating a colorful and flavorful medley that’s both satisfying and nutritious.
The sandwich maker cooks the hash evenly, resulting in crispy edges and tender insides, while minimizing cleanup time. This recipe is highly versatile, allowing you to customize the ingredients based on what you have on hand. You can add proteins like diced ham or scrambled eggs for a more filling meal, or toss in your favorite herbs and spices to enhance the flavor.
Sweet Potato Hash is perfect for breakfast, lunch, or dinner, and can be served alone or with a side of fresh greens for a balanced meal.
Ingredients:
- 2 medium sweet potatoes, peeled and diced
- 1 red bell pepper, diced
- 1 small onion, diced
- 2 tablespoons olive oil
- 1 teaspoon garlic powder
- Salt and pepper to taste
- Fresh parsley, chopped (for garnish)
Instructions:
- Begin by preheating your sandwich maker according to the manufacturer’s instructions. While it heats up, prepare the vegetables by peeling and dicing the sweet potatoes, red bell pepper, and onion.
- In a mixing bowl, combine the diced sweet potatoes, bell pepper, onion, olive oil, garlic powder, salt, and pepper. Toss the ingredients together until the sweet potatoes and vegetables are evenly coated with the olive oil and seasonings.
- Once the sandwich maker is ready, carefully place half of the sweet potato mixture onto the bottom plate of the sandwich maker, spreading it out evenly. Close the lid and cook for about 10-12 minutes, or until the sweet potatoes are tender and slightly crispy.
- After the first batch is done, remove it from the sandwich maker and repeat the process with the remaining sweet potato mixture. You may need to adjust the cooking time based on your specific sandwich maker model.
- Once all the hash is cooked, transfer it to a serving plate and garnish with freshly chopped parsley for a pop of color and flavor. Serve warm as a satisfying meal any time of day.
Extra Tips: For added flavor, consider incorporating spices such as cumin or smoked paprika into the sweet potato mixture before cooking. If you prefer a bit of heat, diced jalapeños or a sprinkle of cayenne pepper can be included as well.
This hash pairs wonderfully with a dollop of sour cream or a fried egg on top, making it a versatile dish that can be enjoyed in various ways.
Caprese Stuffed Peppers

Title: Caprese Stuffed Peppers
Prep Time: 10 minutes
Cook Time: 15 minutes
Number of Servings: 4
Required Equipment List: Sandwich maker, knife, cutting board, mixing bowl, spoon
Cuisine Type: Italian
Caprese Stuffed Peppers are a vibrant and healthy twist on the classic Caprese salad, combining fresh ingredients that are both delicious and visually appealing. This recipe features bell peppers filled with a mixture of ripe tomatoes, mozzarella cheese, fresh basil, and a drizzle of balsamic glaze, all cooked to perfection in a sandwich maker.
This dish is perfect for a quick weeknight dinner or as an impressive appetizer for entertaining guests. Using a sandwich maker not only simplifies the cooking process but also allows the flavors to meld beautifully while giving the peppers a slightly charred exterior.
This recipe isn’t only quick and easy to make but also customizable; you can add your favorite ingredients or adjust the seasoning to your liking. The result is a delightful dish that captures the essence of summer in every bite.
Ingredients:
- 4 medium bell peppers (any color)
- 1 cup cherry tomatoes, halved
- 1 cup fresh mozzarella cheese, diced
- 1/4 cup fresh basil, chopped
- 2 tablespoons balsamic glaze
- Salt and pepper to taste
- Olive oil for drizzling
Instructions:
- Begin by preparing the bell peppers. Slice the tops off the peppers and remove the seeds and membranes. Set the hollowed peppers aside on a cutting board.
- In a mixing bowl, combine the halved cherry tomatoes, diced mozzarella cheese, and chopped basil. Season the mixture with salt and pepper to taste, and drizzle in the balsamic glaze. Stir gently to combine all the ingredients evenly.
- Stuff each hollowed bell pepper with the tomato and mozzarella mixture, pressing down slightly to confirm they’re well filled. Drizzle a little olive oil over the stuffed peppers for added flavor.
- Preheat your sandwich maker according to the manufacturer’s instructions. Once heated, carefully place the stuffed peppers inside the sandwich maker and close the lid. Cook for about 8-10 minutes or until the peppers are tender and the cheese is melted.
- Once done, carefully remove the stuffed peppers from the sandwich maker using tongs. Allow them to cool for a minute before serving. Drizzle with additional balsamic glaze if desired.
Extra Tips: For added flavor, consider mixing in some chopped olives or sun-dried tomatoes into the stuffing mixture. Additionally, if you prefer a bit of heat, you can add a pinch of red pepper flakes.
These stuffed peppers can be served warm or at room temperature, making them versatile for any occasion. Enjoy your delicious Caprese Stuffed Peppers!
Garlic Butter Shrimp

Title: Garlic Butter Shrimp
Prep Time: 10 minutes
Cook Time: 10 minutes
Number of Servings: 2
Required Equipment List: Sandwich maker, bowl, measuring spoons, spatula
Cuisine Type: American
Garlic Butter Shrimp is a quick and flavorful dish that perfectly balances the richness of garlic butter with the tenderness of shrimp. This recipe is ideal for busy weeknights or when you want a delicious meal without spending too much time in the kitchen.
The shrimp cooks quickly in the sandwich maker, allowing the flavors to meld beautifully while keeping the shrimp juicy and tender. The use of a sandwich maker for this dish not only makes for an easy cleanup but also brings a unique cooking method to the table.
With just a handful of ingredients and minimal prep, you can whip up this tasty seafood dish in no time. Serve it over rice or alongside a fresh salad for a complete meal that’s sure to impress.
Ingredients:
- 1 pound shrimp, peeled and deveined
- 4 tablespoons unsalted butter
- 4 cloves garlic, minced
- 1 tablespoon lemon juice
- Salt and pepper to taste
- Chopped parsley for garnish
Instructions:
- Begin by preheating your sandwich maker according to the manufacturer’s instructions. This will confirm that it’s hot and ready for cooking the shrimp.
- In a bowl, combine the shrimp, minced garlic, melted butter, lemon juice, salt, and pepper. Toss everything together until the shrimp are well coated in the garlic butter mixture.
- Once the sandwich maker is preheated, carefully place the shrimp mixture onto the grill plates. Close the sandwich maker and cook for about 5-7 minutes, or until the shrimp are pink and opaque.
- After cooking, carefully open the sandwich maker and use a spatula to transfer the shrimp to a serving plate. Make sure to scrape up any delicious garlic butter that may have dripped out during cooking.
- Garnish the shrimp with chopped parsley for a pop of color and an extra layer of flavor. Serve immediately, either on a bed of rice or alongside your favorite vegetables.
Extra Tips: For a little extra kick, consider adding red pepper flakes to the garlic butter mixture before cooking. If you’re using frozen shrimp, confirm they’re fully thawed and patted dry to prevent excess moisture.
This dish pairs wonderfully with a crisp white wine or a light salad, making it a versatile option for any dinner occasion. Enjoy your quick and savory garlic butter shrimp!
Turkey and Avocado Wraps
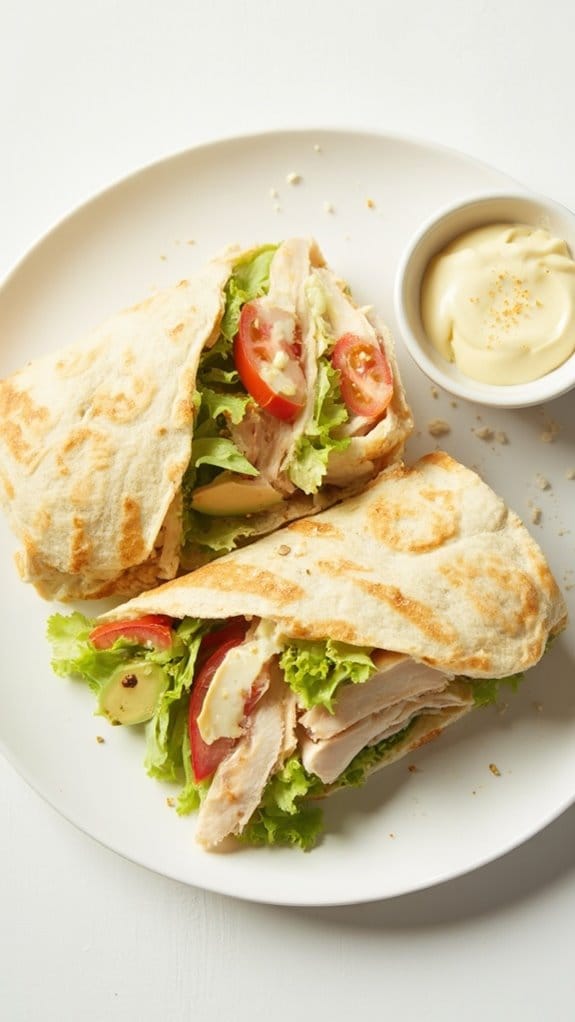
Title: Turkey and Avocado Wraps
Prep Time: 10 minutes
Cook Time: 5 minutes
Number of Servings: 2
Required Equipment List: Sandwich maker, cutting board, knife
Cuisine Type: American
Turkey and Avocado Wraps are a quick and nutritious meal option that combines the savory flavors of turkey with the creamy texture of avocado. Perfect for a busy weeknight, these wraps can be made in just minutes using a sandwich maker, providing a delicious way to enjoy a healthy dinner.
The fresh ingredients make this dish light yet satisfying, ideal for both adults and kids alike. These wraps aren’t only easy to prepare, but they also offer versatility. You can customize the ingredients to suit your taste, adding your favorite vegetables or spreads.
By using whole wheat or spinach wraps, you can create a colorful and wholesome meal that’s perfect for lunch or dinner. Enjoy this simple recipe that brings together great flavors and nutritious ingredients in a matter of moments.
Ingredients:
- 2 whole wheat or spinach wraps
- 6 ounces sliced turkey breast
- 1 ripe avocado, sliced
- 1/2 cup shredded lettuce
- 1/4 cup sliced tomatoes
- 2 tablespoons mayonnaise or mustard (optional)
- Salt and pepper to taste
- Olive oil spray (for the sandwich maker)
Instructions:
- Begin by preparing your ingredients. Slice the avocado and tomatoes, and wash the lettuce. Lay out the wraps on a clean cutting board to assemble your turkey and avocado fillings.
- Spread a thin layer of mayonnaise or mustard on each wrap if using. This adds flavor and helps hold the ingredients together.
- Layer the sliced turkey evenly over the wraps, followed by slices of avocado, shredded lettuce, and tomatoes. Season with salt and pepper to taste for added flavor.
- Carefully roll the wraps tightly, tucking in the sides as you go to guarantee the fillings stay inside. Once rolled, cut each wrap in half diagonally for easier handling.
- Preheat your sandwich maker according to the manufacturer’s instructions. Lightly spray the plates with olive oil to prevent sticking. Place the wraps in the sandwich maker and close the lid. Cook for about 3-5 minutes, or until the wraps are golden and crisp.
- Once done, carefully remove the wraps from the sandwich maker and let them cool slightly before serving. Enjoy your turkey and avocado wraps warm or at room temperature.
Extra Tips: To elevate your wraps, consider adding other ingredients such as cheese, cucumber, or red onion for extra crunch and flavor. If you prefer a kick, try adding sliced jalapeños or a dash of hot sauce.
These wraps are also great for meal prep; simply assemble them in advance and heat them up when you’re ready to eat. Enjoy your quick and healthy dinner!
Pancake Breakfast Sandwiches

Title: Pancake Breakfast Sandwiches
Prep Time: 10 minutes
Cook Time: 10 minutes
Number of Servings: 2
Required Equipment List: Sandwich maker, mixing bowl, measuring cups, spatula
Cuisine Type: American
Pancake Breakfast Sandwiches are a delicious and fun way to kickstart your morning or enjoy a quick dinner. This recipe combines fluffy pancakes with savory breakfast ingredients, creating a delightful sandwich that’s both satisfying and easy to make.
With the help of a sandwich maker, you can achieve a crispy exterior while keeping the inside warm and flavorful. It’s a perfect dish for busy mornings or a family brunch that will have everyone coming back for seconds.
These pancake sandwiches can be customized to suit your taste, whether you prefer classic bacon and eggs or want to try something more adventurous like sausage and cheese. The pancake batter is simple to whip up, and once cooked, you can layer your favorite breakfast fillings in between two pancakes for a handheld delight.
Serve them with maple syrup or your favorite condiment for an extra touch of sweetness or savoriness.
Ingredients:
- 1 cup pancake mix
- 3/4 cup water
- 2 large eggs
- 4 slices cooked bacon or sausage patties
- 2 slices cheese (cheddar or American)
- Maple syrup (optional)
Instructions:
- In a mixing bowl, combine the pancake mix and water, stirring until just combined. Be careful not to overmix; a few lumps are fine. Let the batter sit for a few minutes while you prepare the other ingredients.
- Preheat your sandwich maker according to the manufacturer’s instructions. While it heats up, cook the bacon or sausage until crispy, and have your cheese slices ready.
- Once the sandwich maker is ready, pour half of the pancake batter onto the bottom plate of the sandwich maker, spreading it evenly to cover the surface.
- Quickly place the cooked bacon or sausage on top of the batter, followed by a slice of cheese. Pour the remaining pancake batter over the top to cover the fillings.
- Close the sandwich maker and cook for about 3-5 minutes, or until the pancakes are golden brown and cooked through. Carefully remove the sandwich and let it cool for a minute before slicing in half.
- Serve warm with maple syrup on the side for dipping, if desired.
Extra Tips: For added flavor, consider mixing some chopped herbs or spices into the pancake batter, such as chives or black pepper. You can also add extras like avocado slices or sautéed vegetables to the filling for a more gourmet twist.
Experiment with different types of cheese or meats to create your perfect pancake breakfast sandwich!
Mushroom and Swiss Melts
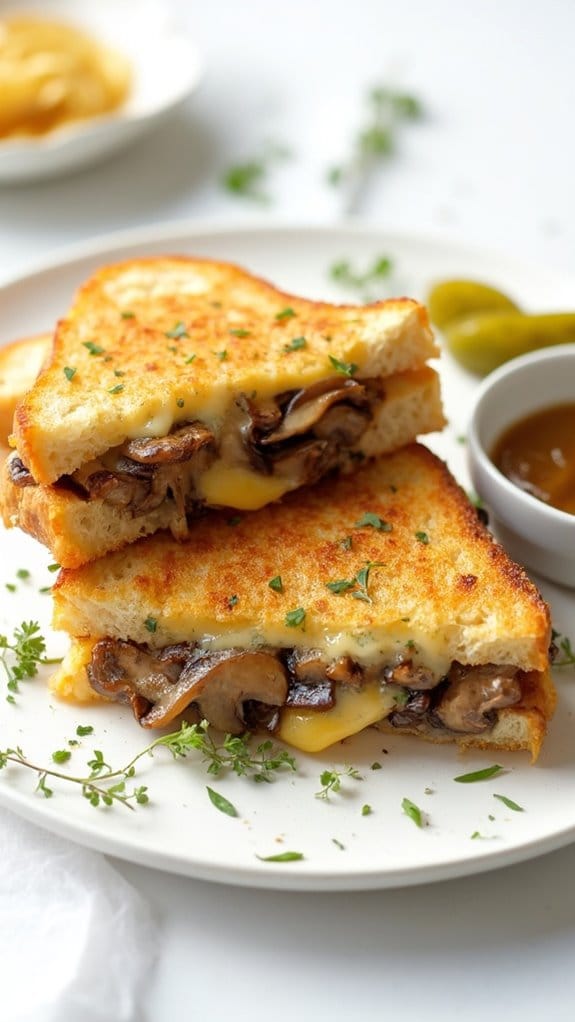
Title: Mushroom and Swiss Melts
Prep Time: 10 minutes
Cook Time: 10 minutes
Number of Servings: 2
Required Equipment List: Sandwich maker, knife, cutting board, spatula
Cuisine Type: American
Mushroom and Swiss Melts are a scrumptious and easy dish that combines savory sautéed mushrooms with gooey Swiss cheese, nestled between two slices of bread. This recipe is perfect for a quick dinner or a satisfying lunch, and it takes advantage of the sandwich maker to create perfectly toasted sandwiches with a melty filling.
The earthy flavor of the mushrooms pairs wonderfully with the creamy Swiss cheese, making each bite a delicious treat. This dish is highly customizable, allowing you to add ingredients like sautéed onions or fresh herbs to suit your taste.
With minimal prep and cook time, Mushroom and Swiss Melts are ideal for busy weeknights or when you’re craving something comforting yet quick. Serve these melts with a side salad or some crispy fries for a complete meal that everyone will love.
Ingredients:
- 1 cup mushrooms, sliced
- 1 tablespoon butter
- 2 slices Swiss cheese
- 4 slices bread (your choice)
- Salt and pepper to taste
- Optional: sautéed onions, fresh herbs
Instructions:
- Begin by heating a skillet over medium heat and adding the butter. Once melted, add the sliced mushrooms, seasoning them with salt and pepper. Sauté the mushrooms for about 5 minutes, or until they’re golden and tender. If you’re adding sautéed onions, throw them in during the last couple of minutes of cooking.
- While the mushrooms are cooking, preheat your sandwich maker according to the manufacturer’s instructions.
- Assemble your sandwiches by placing one slice of bread on a clean surface. Layer with a slice of Swiss cheese, followed by the sautéed mushrooms, and then top with another slice of Swiss cheese. Finally, place the second slice of bread on top.
- Carefully transfer the assembled sandwich into the preheated sandwich maker. Close the lid and cook for about 3-5 minutes, or until the bread is golden brown and the cheese has melted.
- Once cooked, carefully remove the sandwich from the sandwich maker using a spatula. Let it cool for a minute before slicing in half and serving.
Extra Tips: For added flavor, consider seasoning the mushrooms with garlic powder or a splash of soy sauce while sautéing. You can also experiment with different types of cheese, such as cheddar or provolone, for a unique twist.
If you’re looking for a heartier meal, add cooked bacon or sliced turkey to the sandwich before grilling. Enjoy your Mushroom and Swiss Melts with your favorite dipping sauce or a side of pickles for an extra crunch!
BBQ Chicken Sliders
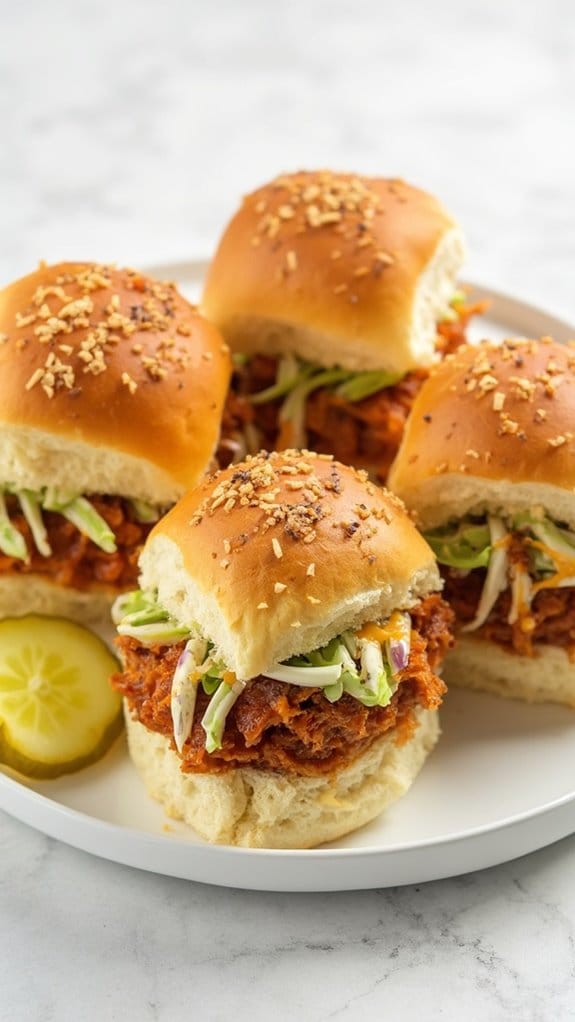
Title: BBQ Chicken Sliders
Prep Time: 10 minutes
Cook Time: 15 minutes
Number of Servings: 4
Required Equipment List: Sandwich maker, mixing bowl, measuring cups, spatula
Cuisine Type: American
BBQ Chicken Sliders are a delicious and satisfying meal that doesn’t take much time to prepare, making them perfect for busy weeknights or game day gatherings. The combination of tender shredded chicken coated in tangy BBQ sauce, nestled between soft slider buns, creates a mouthwatering experience that’s both flavorful and filling.
These sliders can easily be customized with your favorite toppings, such as coleslaw, pickles, or cheese, to suit your taste preferences. Using a sandwich maker to prepare these sliders adds a convenience factor that makes the cooking process faster and easier. The heat from the sandwich maker guarantees that the sliders are heated through and the buns are perfectly toasted, giving each bite a delightful crunch.
Whether you’re hosting a small get-together or just looking to whip up a quick dinner for the family, BBQ Chicken Sliders are sure to become a favorite in your household.
Ingredients:
- 2 cups cooked shredded chicken
- 1 cup BBQ sauce
- 8 slider buns
- 1 cup coleslaw (optional)
- 1/2 cup sliced pickles (optional)
- 1/2 cup shredded cheese (optional)
Instructions:
- In a mixing bowl, combine the shredded chicken and BBQ sauce, stirring until the chicken is evenly coated. Make certain the chicken is well-distributed in the sauce to enhance the flavor in every bite.
- Preheat your sandwich maker according to the manufacturer’s instructions. While the sandwich maker heats up, take the slider buns and slice them in half horizontally.
- Place the bottom halves of the slider buns on a clean surface and spoon a generous amount of the BBQ chicken mixture onto each bun. If desired, add coleslaw, pickles, or cheese on top of the chicken for extra flavor and texture.
- Carefully place the top halves of the slider buns over the chicken mixture to complete the sliders. Gently press down to ascertain they hold together during cooking.
- Place the assembled sliders in the preheated sandwich maker and close the lid. Cook for about 3-5 minutes or until the buns are toasted and the filling is hot. Keep an eye on them to avoid overcooking.
- Once cooked, carefully remove the sliders from the sandwich maker using a spatula. Allow them to cool for a minute before serving, and cut in half if desired for easy handling.
Extra Tips: For an extra kick of flavor, consider adding a dash of hot sauce or some diced jalapeños to the BBQ chicken mixture. If you have leftover chicken, this recipe is a perfect way to repurpose it into a quick meal.
Feel free to experiment with different types of BBQ sauce, such as spicy or honey BBQ, to tailor the sliders to your taste. These sliders pair wonderfully with potato chips, sweet potato fries, or a fresh salad for a complete meal. Enjoy your BBQ Chicken Sliders!
Nutella and Banana Toast
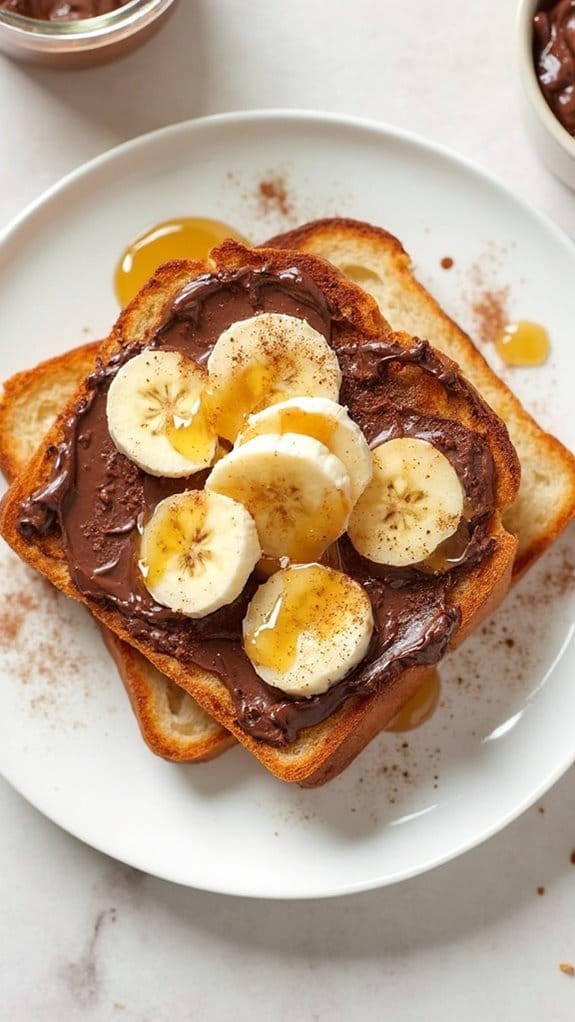
Title: Nutella and Banana Toast
Prep Time: 5 minutes
Cook Time: 5 minutes
Number of Servings: 2
Required Equipment List: Sandwich maker, knife, plate
Cuisine Type: American
Nutella and Banana Toast is a quick and indulgent treat that combines the rich, creamy goodness of Nutella with the natural sweetness of bananas. This recipe is perfect for breakfast, a snack, or even a light dessert.
The sandwich maker gives it a delightful crispy exterior while keeping the inside warm and gooey. It’s a simple yet satisfying option that can be prepared in just a few minutes, making it a great choice for those busy days when you want something delicious without much fuss.
This delightful toast can be easily customized based on your taste preferences. You can add a sprinkle of cinnamon, a drizzle of honey, or even some chopped nuts for extra crunch. Not only is it quick to prepare, but it also makes for a fun activity to get kids involved in the kitchen.
Whether you enjoy it as a morning pick-me-up or an afternoon snack, Nutella and Banana Toast is sure to bring a smile to your face.
Ingredients:
- 4 slices of bread
- 4 tablespoons Nutella
- 1 banana, sliced
- Butter or margarine (for spreading)
- Optional toppings: cinnamon, honey, chopped nuts
Instructions:
- Preheat your sandwich maker according to the manufacturer’s instructions. This guarantees that it’s hot and ready to create the perfect toast.
- While the sandwich maker is heating, spread a thin layer of butter or margarine on one side of each slice of bread. This will help achieve a golden-brown crust once pressed in the sandwich maker.
- On the non-buttered side of two slices of bread, generously spread 2 tablespoons of Nutella each. Layer the sliced bananas on top of the Nutella, and if desired, sprinkle with cinnamon or add chopped nuts for an extra flavor boost.
- Place the remaining slices of bread on top of the banana and Nutella layers, buttered side facing out. This creates a sandwich that will be pressed and toasted.
- Carefully place the prepared sandwiches in the preheated sandwich maker. Close the lid and cook for about 3-5 minutes, or until the bread is golden brown and crispy.
- Once done, carefully remove the sandwiches from the sandwich maker. Let them cool slightly before slicing in half and serving warm. Drizzle with honey if desired for an extra touch of sweetness.
Extra Tips: For an added layer of flavor, consider using different types of bread such as whole grain, brioche, or even gluten-free options.
If you want to make this treat even more decadent, try adding a dollop of whipped cream or a scoop of vanilla ice cream on the side. Enjoy your Nutella and Banana Toast as a delightful snack any time of day!
Egg and Cheese Muffins

Title: Egg and Cheese Muffins
Prep Time: 10 minutes
Cook Time: 10 minutes
Number of Servings: 2
Required Equipment List: Sandwich maker, mixing bowl, whisk, measuring cups, spatula
Cuisine Type: American
Egg and Cheese Muffins are a quick and satisfying meal that’s perfect for breakfast, lunch, or even a light dinner. This recipe features fluffy eggs combined with melted cheese, all nestled between two toasted muffin halves. The sandwich maker cooks everything to perfection, resulting in a deliciously warm and cheesy treat that’s ready in just a matter of minutes.
It’s an excellent way to use up leftover ingredients and can easily be customized with your favorite add-ins, such as vegetables or meats. These muffins aren’t only easy to make but also portable, making them ideal for busy mornings or picnics. You can prepare the egg mixture ahead of time and assemble them quickly when you’re ready to eat.
With this simple recipe, you can enjoy a homemade meal that rivals any café offering, all while keeping your kitchen clean and your cooking time to a minimum.
Ingredients:
- 2 English muffins, split
- 4 large eggs
- 1/2 cup shredded cheese (cheddar, mozzarella, or your choice)
- Salt and pepper to taste
- Optional: diced vegetables (bell peppers, spinach, etc.) or cooked meats (ham, bacon, etc.)
Instructions:
- Begin by preheating your sandwich maker according to the manufacturer’s instructions. This guarantees that it reaches the ideal temperature for cooking the muffins evenly.
- In a mixing bowl, crack the eggs and whisk them together until well combined. Season the eggs with salt and pepper to taste, and if desired, mix in any additional ingredients such as diced vegetables or cooked meats.
- Place the bottom halves of the English muffins onto the sandwich maker. Pour an even amount of the egg mixture onto each muffin half, being careful not to overfill.
- Sprinkle the shredded cheese generously over the egg mixture on each muffin half. Then, place the top halves of the English muffins on top to complete the sandwiches.
- Close the sandwich maker and cook for about 5-7 minutes, or until the eggs are cooked through and the cheese is melted. Keep an eye on the cooking time, as it may vary depending on your specific sandwich maker.
- Once cooked, carefully remove the muffins from the sandwich maker using a spatula. Allow them to cool for a minute before slicing in half and serving warm.
Extra Tips: For a little extra flavor, consider adding a splash of hot sauce or a sprinkle of herbs to the egg mixture before cooking. You can also experiment with different types of cheese or mix in some cooked sausage or bacon for a heartier muffin.
These egg and cheese muffins are best enjoyed fresh but can be stored in the refrigerator for a quick reheat in the microwave, making them a great make-ahead option!
Stuffed Cornbread Muffins

Title: Stuffed Cornbread Muffins
Prep Time: 15 minutes
Cook Time: 15 minutes
Number of Servings: 12
Required Equipment List: Sandwich maker, mixing bowl, spoon, measuring cups, and muffin tin
Cuisine Type: American
Stuffed Cornbread Muffins are a delightful twist on traditional cornbread, offering a perfect handheld option for a quick dinner or snack. These muffins aren’t only fluffy and moist but also filled with a delicious surprise, making them a favorite among both kids and adults.
The combination of sweet cornbread and savory fillings creates a satisfying contrast, making these muffins versatile enough for any meal of the day. Using a sandwich maker to prepare these muffins allows for a speedy cooking process while guaranteeing a crispy exterior.
The fillings can be customized based on your preferences, whether you prefer cheese, vegetables, or meats. These muffins are perfect for meal prep, and they can be easily frozen for future use, making them a convenient choice for busy weeknights.
Ingredients:
- 1 cup cornmeal
- 1 cup all-purpose flour
- 1 tablespoon baking powder
- 1/2 teaspoon salt
- 1 cup milk
- 1/4 cup vegetable oil
- 1 large egg
- 1 cup shredded cheese (cheddar, mozzarella, or your choice)
- 1/2 cup cooked and crumbled sausage or bacon (optional)
- 1/2 cup diced bell peppers or jalapeños (optional)
Instructions:
- In a large mixing bowl, combine the cornmeal, all-purpose flour, baking powder, and salt. Whisk together until well combined to guarantee an even distribution of the leavening agent.
- In another bowl, whisk together the milk, vegetable oil, and egg until smooth. Gradually pour the wet ingredients into the dry ingredients, mixing until just combined. Be careful not to overmix, as this can lead to dense muffins.
- Fold in your choice of fillings, such as cheese, sausage or bacon, and diced vegetables. Certify that the fillings are evenly distributed throughout the muffin batter.
- Preheat your sandwich maker according to the manufacturer’s instructions. Lightly grease the sandwich plates to prevent sticking.
- Spoon the cornbread mixture into the preheated sandwich maker, filling each section about two-thirds full to allow for rising. Close the lid and cook for about 5-7 minutes or until the muffins are golden brown and cooked through.
- Once cooked, carefully remove the muffins from the sandwich maker and let them cool on a wire rack. Repeat the process with the remaining batter.
Extra Tips: For added flavor, consider mixing in spices like cumin or smoked paprika into the batter. If you’re using frozen fillings, be certain they’re thawed and drained before adding them to the mixture to prevent excess moisture.
These muffins are best enjoyed warm but can be stored in an airtight container for up to three days or frozen for longer storage. Reheat in the microwave or toaster oven for a quick snack!
Conclusion
So, are you ready to release your sandwich maker magic? With these quick and delicious recipes, dinner’s about to get a whole lot easier—and tastier! Just imagine the savory smells wafting through your kitchen as you whip up cheesy quesadillas or mini pizza pockets. Your family won’t believe how simple it is to create these mouthwatering meals. Why wait? Grab your sandwich maker now, and let the deliciousness begin! What will you make first?

