No products in the cart.

15 Southern Thanksgiving Recipes
Much like the legendary feasts of old, a Southern Thanksgiving brings together flavors that tell stories of tradition and warmth. You might be curious about how dishes like cornbread dressing and honey-glazed ham can elevate your holiday table. These recipes not only capture the essence of Southern hospitality but also offer a unique twist that could surprise even the most seasoned cook. What might you discover about these classic flavors that could redefine your Thanksgiving celebration?
Contents
hide
Classic Southern Cornbread Dressing
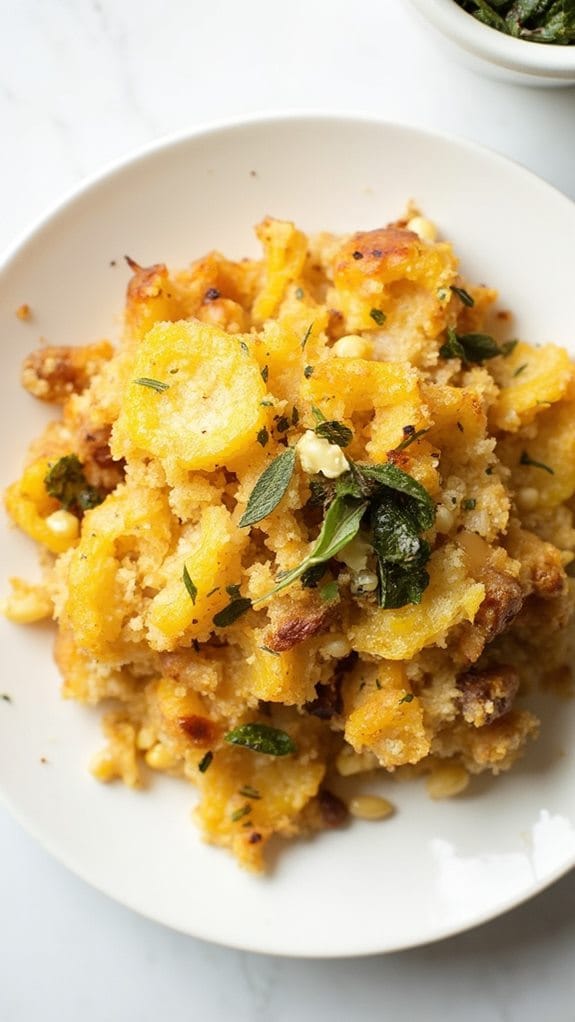
Title: Classic Southern Cornbread Dressing
Prep Time: 30 minutes
Cook Time: 45 minutes
Number of Servings: 8
Required Equipment List: Large mixing bowl, skillet, baking dish, whisk, oven
Cuisine Type: Southern
Classic Southern Cornbread Dressing is a cherished dish that brings a taste of the South to your holiday table. This flavorful stuffing features a base of crumbly cornbread, enhanced with aromatic vegetables, savory herbs, and a touch of broth for moisture.
It’s the perfect accompaniment to roasted turkey or chicken, and its comforting taste evokes memories of family gatherings and festive celebrations. This dish isn’t only delicious but also versatile, as it can be prepared in advance and simply reheated before serving.
The heart of this dressing lies in the cornbread, which can be made from scratch or purchased pre-made for convenience. The combination of sautéed onions and celery adds a delightful texture, while fresh sage and thyme contribute a fragrant herbal note that elevates the dish.
Whether you serve it for Thanksgiving or any special occasion, Classic Southern Cornbread Dressing is sure to be a hit with everyone at the table.
Ingredients:
- 4 cups crumbled cornbread
- 1 cup diced onions
- 1 cup diced celery
- 1/2 cup unsalted butter
- 2 cups chicken or vegetable broth
- 2 large eggs, beaten
- 1 teaspoon dried sage
- 1 teaspoon dried thyme
- Salt and pepper to taste
Instructions:
- Preheat your oven to 350°F (175°C). Grease a 9×13-inch baking dish with butter or cooking spray to prevent sticking.
- In a large skillet, melt the butter over medium heat. Add the diced onions and celery, sautéing until they’re soft and translucent, about 5-7 minutes. Remove from heat and let cool slightly.
- In a large mixing bowl, combine the crumbled cornbread, sautéed vegetables, dried sage, dried thyme, salt, and pepper. Mix until the ingredients are evenly distributed.
- In a separate bowl, whisk together the chicken or vegetable broth and beaten eggs. Pour this mixture over the cornbread mixture, stirring gently until the bread is moistened but not overly soggy.
- Transfer the dressing mixture to the prepared baking dish, spreading it out evenly. Cover with aluminum foil and bake in the preheated oven for 30 minutes.
- After 30 minutes, remove the foil and bake for an additional 15 minutes, or until the top is golden and slightly crispy. Remove from the oven and let it rest for a few minutes before serving.
Extra Tips: For added flavor, consider incorporating cooked sausage or bacon into the dressing mixture. You can also experiment with different herbs according to your taste preferences.
If you prefer a more moist dressing, simply add more broth before baking. Leftovers can be stored in the refrigerator and reheated in the oven or microwave for a quick and tasty side dish on another day. Enjoy this classic Southern staple with your favorite holiday meal!
Buttermilk Biscuits With Gravy
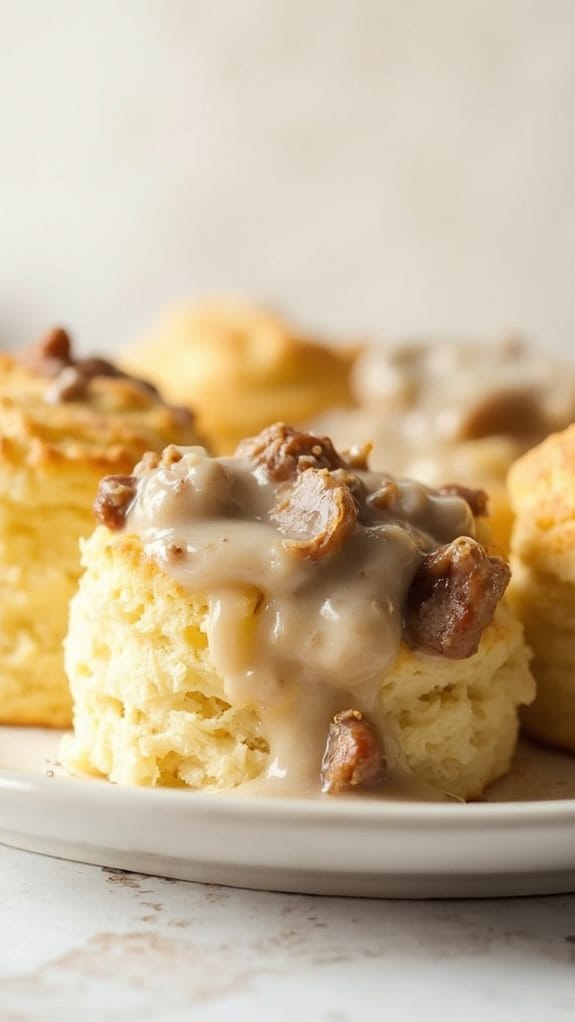
Title: Buttermilk Biscuits With Gravy
Prep Time: 15 minutes
Cook Time: 30 minutes
Number of Servings: 6
Required Equipment List: Mixing bowl, rolling pin, baking sheet, skillet, whisk
Cuisine Type: Southern
Buttermilk Biscuits with Gravy is a quintessential Southern dish that brings warmth and comfort to any table. Fluffy, buttery biscuits are the star of this recipe, offering a melt-in-your-mouth texture that pairs perfectly with a rich and creamy sausage gravy. This dish is a staple at family gatherings and is often served for breakfast, but it can easily be enjoyed at any time of day.
The combination of freshly baked biscuits and savory gravy creates a satisfying meal that’s sure to please everyone. Making homemade buttermilk biscuits is easier than you might think, and they can be whipped up in no time. The key to achieving the perfect biscuit is to handle the dough gently and avoid overworking it, ensuring that your biscuits come out light and flaky.
Paired with the deliciously seasoned sausage gravy, this dish will become a favorite for both special occasions and everyday meals.
Ingredients:
- 2 cups all-purpose flour
- 1 tablespoon baking powder
- 1/2 teaspoon baking soda
- 1 teaspoon salt
- 1/4 cup cold unsalted butter, cubed
- 3/4 cup buttermilk
- 1 pound breakfast sausage
- 1/4 cup all-purpose flour (for gravy)
- 2 cups milk
- Salt and pepper to taste
Instructions:
- Preheat your oven to 425°F (220°C). In a mixing bowl, whisk together the flour, baking powder, baking soda, and salt until well combined. This dry mixture is the base for your delicious biscuits.
- Add the cold, cubed butter to the dry ingredients. Using a pastry cutter or your fingertips, work the butter into the flour until the mixture resembles coarse crumbs. This step is essential for achieving that flaky biscuit texture.
- Pour in the buttermilk and gently stir until just combined. Be careful not to overmix, as this can lead to tough biscuits. Turn the dough out onto a lightly floured surface and knead gently just until it comes together.
- Roll out the dough to about 1-inch thickness and use a biscuit cutter to cut out rounds. Place the biscuits on a baking sheet lined with parchment paper, and bake in the preheated oven for 12-15 minutes or until golden brown.
- While the biscuits are baking, prepare the gravy. In a skillet over medium heat, cook the breakfast sausage until browned and crumbled. Sprinkle in the flour and stir, cooking for an additional minute to form a roux.
- Gradually whisk in the milk, stirring constantly until the mixture thickens. Season with salt and pepper to taste. Keep the gravy warm until the biscuits are ready.
- Once the biscuits are done, remove them from the oven and serve warm, topped generously with the creamy sausage gravy.
Extra Tips: For even flakier biscuits, try freezing the butter before cutting it into the flour. This helps create steam pockets that lead to a lighter texture.
You can also experiment with adding herbs or cheese to the biscuit dough for added flavor. If you want to make a vegetarian version of the gravy, consider using plant-based sausage and vegetable broth instead of milk. Enjoy your homemade Southern comfort food!
Sweet Potato Casserole
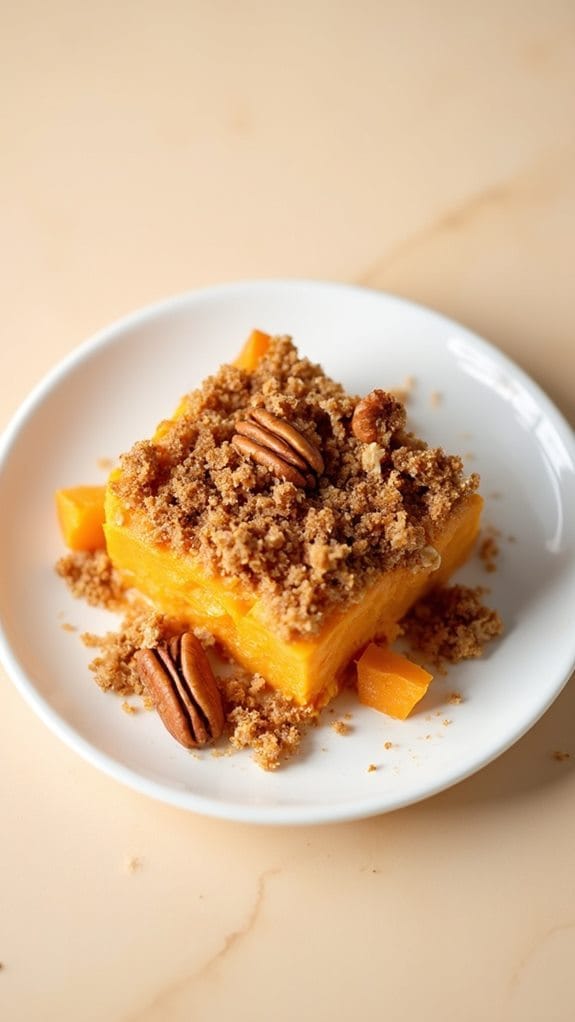
Title: Sweet Potato Casserole
Prep Time: 20 minutes
Cook Time: 30 minutes
Number of Servings: 8
Required Equipment List: 9×13 inch baking dish, mixing bowl, whisk, knife, cutting board
Cuisine Type: Southern
Sweet Potato Casserole is a beloved dish that embodies the warmth and comfort of Southern cooking. This rich and creamy casserole is made with mashed sweet potatoes, which are naturally sweet and nutritious, combined with a buttery streusel topping that adds a delightful crunch. It serves as a perfect side dish for Thanksgiving or any family gathering, bringing a burst of color and flavor to your holiday table.
The balance of flavors in this casserole is simply irresistible. The sweet potatoes are seasoned with warm spices like cinnamon and nutmeg, enhancing their natural sweetness, while the pecan topping provides a satisfying crunch that contrasts beautifully with the smooth texture of the potatoes. This dish not only tastes amazing but also fills your kitchen with a delicious aroma, making it an essential part of any Southern Thanksgiving feast.
Ingredients:
- 4 cups sweet potatoes, peeled and cubed
- 1/2 cup sugar
- 1/4 cup milk
- 1/4 cup butter, melted
- 2 eggs
- 1 teaspoon vanilla extract
- 1/2 teaspoon cinnamon
- 1/4 teaspoon nutmeg
- 1 cup brown sugar
- 1 cup pecans, chopped
- 1/2 cup flour
- 1/4 cup butter, softened
Instructions:
- Preheat your oven to 350°F (175°C). Begin by peeling and cubing the sweet potatoes. Place them in a large pot of boiling water and cook until tender, about 15-20 minutes. Drain and let them cool slightly.
- In a mixing bowl, mash the cooked sweet potatoes until smooth. Add in the sugar, milk, melted butter, eggs, vanilla extract, cinnamon, and nutmeg. Whisk everything together until well combined and creamy.
- Transfer the sweet potato mixture into a greased 9×13 inch baking dish, spreading it evenly across the bottom. This will be the base of your casserole.
- In another mixing bowl, combine the brown sugar, chopped pecans, flour, and softened butter. Mix until crumbly. Sprinkle this mixture evenly over the sweet potato layer, creating a streusel topping.
- Bake the casserole in the preheated oven for 25-30 minutes, or until the topping is golden brown and the casserole is heated through. When done, it should be bubbling slightly around the edges.
- Remove from the oven and allow it to cool for a few minutes before serving. This will help the casserole set and make it easier to serve.
Extra Tips: To save time, you can use canned sweet potatoes; just be sure to drain them well before mashing. For an extra layer of flavor, consider adding a splash of orange juice or zest to the sweet potato mixture. If you like a little more crunch, feel free to sprinkle some additional pecans on top before baking.
This Sweet Potato Casserole pairs wonderfully with savory dishes like roasted turkey or ham, making it a versatile addition to your holiday spread. Enjoy!
Southern Collard Greens
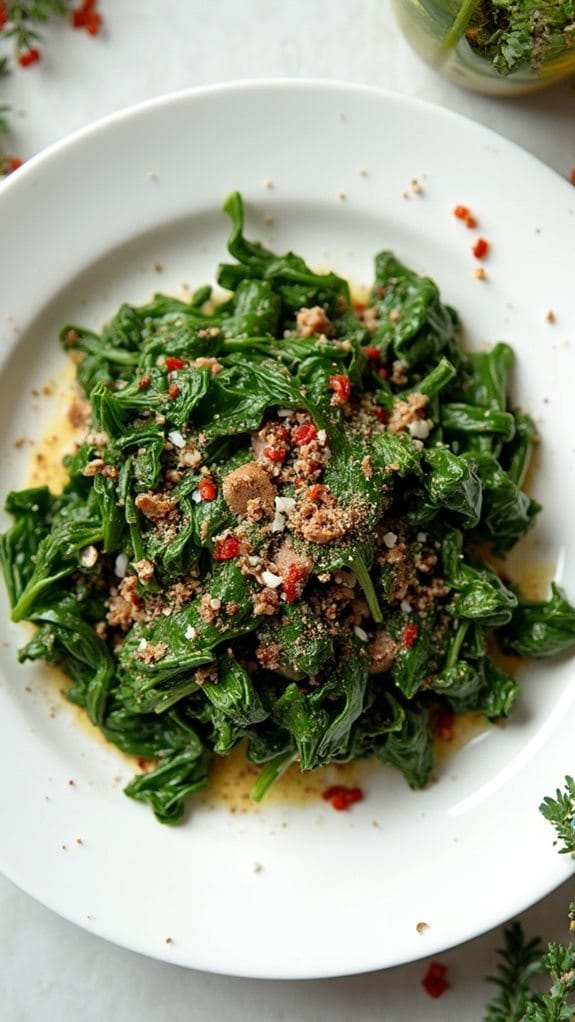
Title: Southern Collard Greens
Prep Time: 15 minutes
Cook Time: 45 minutes
Number of Servings: 6
Required Equipment List: Large pot, cutting board, knife, wooden spoon, measuring cups and spoons
Cuisine Type: Southern
Southern Collard Greens are a quintessential dish often enjoyed in homes across the South, especially during Thanksgiving. This recipe showcases the robust and earthy flavors of collard greens, which are simmered to perfection. The addition of smoked ham hocks, or bacon, infuses the greens with a rich, savory depth that’s both comforting and satisfying.
Cooked low and slow, these greens become tender and flavorful, making them a perfect side dish to complement your holiday feast. The beauty of collard greens lies in their versatility; they can be served alongside turkey, cornbread, or even as a hearty topping for rice. This dish isn’t only a staple in Southern cooking but also packed with nutrients, making it a healthy addition to your Thanksgiving spread.
With just a handful of ingredients and a bit of patience, you can create a pot of flavorful collard greens that will have everyone coming back for seconds.
Ingredients:
- 2 pounds collard greens, washed and chopped
- 1 smoked ham hock (or 4 slices of bacon, diced)
- 1 onion, chopped
- 4 cloves garlic, minced
- 4 cups chicken or vegetable broth
- 1 tablespoon apple cider vinegar
- 1 teaspoon red pepper flakes (optional)
- Salt and pepper to taste
Instructions:
- In a large pot, cook the smoked ham hock or diced bacon over medium heat until it starts to brown and render its fat, about 5-7 minutes. This step adds a smoky flavor to the collard greens.
- Add the chopped onion to the pot and sauté for about 5 minutes, or until the onions are translucent. Stir in the minced garlic and cook for an additional minute until fragrant.
- Carefully add the washed and chopped collard greens to the pot, stirring to mix with the onion and meat. You may need to add them in batches as they’ll wilt down considerably.
- Pour in the chicken or vegetable broth, ensuring that the greens are mostly submerged. Add the apple cider vinegar and red pepper flakes, if using, to enhance the flavor. Season with salt and pepper to taste.
- Bring the mixture to a boil, then reduce the heat to low. Cover the pot and let the collard greens simmer for about 30-40 minutes, or until they’re tender and flavorful. Stir occasionally and add more broth or water if needed.
- Once cooked, taste and adjust the seasoning if necessary. Remove the ham hock, shred any meat back into the greens if desired, and serve warm alongside your favorite holiday dishes.
Extra Tips: For a vegetarian version, simply omit the ham hock or bacon and use vegetable broth instead. If you like a bit more heat, increase the amount of red pepper flakes or add a splash of hot sauce when serving.
Collard greens can also be made ahead of time and reheated, making them a convenient option for busy holiday preparations. Enjoy this Southern classic and savor the warmth it brings to your Thanksgiving table!
Green Bean Almondine
Title: Green Bean Almondine
Prep Time: 10 minutes
Cook Time: 15 minutes
Number of Servings: 4
Required Equipment List: Skillet, measuring cups, measuring spoons, spatula
Cuisine Type: Southern
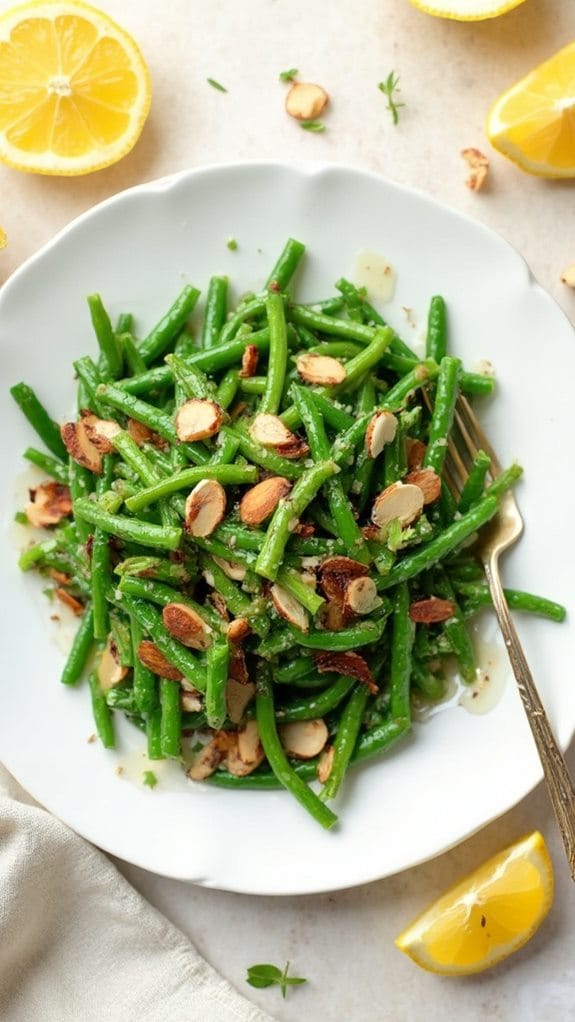
Green Bean Almondine is a classic Southern side dish that perfectly complements any holiday meal or family gathering. The dish features tender green beans tossed with toasted almonds and enhanced with a splash of lemon juice, creating a delightful balance of flavors and textures.
This vibrant dish not only adds a pop of color to your table but also provides a nutritious option that everyone will enjoy. The combination of crisp-tender green beans and crunchy almonds is truly irresistible. The simplicity of the ingredients allows the natural flavors to shine, while the addition of butter and lemon brightens the overall taste.
This recipe is quick to prepare, making it an ideal choice for busy cooks who still want to serve something delicious and elegant.
Ingredients:
- 1 pound fresh green beans, trimmed
- 1/4 cup sliced almonds
- 2 tablespoons unsalted butter
- 1 tablespoon olive oil
- 1 tablespoon lemon juice
- Salt and pepper to taste
- Lemon wedges (for serving, optional)
Instructions:
- Begin by bringing a pot of salted water to a boil. Add the trimmed green beans and blanch them for about 3-4 minutes until they’re bright green and just tender. Once cooked, immediately transfer the beans to a bowl of ice water to stop the cooking process and preserve their color.
- In a skillet over medium heat, melt the butter and olive oil together. Once the butter has melted and begins to foam, add the sliced almonds to the skillet. Toast the almonds for about 3-4 minutes, stirring frequently, until they turn golden brown and fragrant.
- Drain the green beans from the ice water and add them to the skillet with the toasted almonds. Toss the beans in the skillet to coat them evenly with the butter and almonds for about 2-3 minutes, allowing them to heat through.
- Drizzle the lemon juice over the green beans and season with salt and pepper to taste. Toss everything together once more to guarantee the flavors are well combined.
- Serve the Green Bean Almondine warm, garnished with additional lemon wedges on the side if desired. This dish is a perfect accompaniment to any main course, adding a fresh and crunchy element to your meal.
Extra Tips: For an extra layer of flavor, consider adding minced garlic to the skillet when toasting the almonds. This will infuse the dish with a wonderful aroma and taste.
You can also experiment with different nuts, such as hazelnuts or pecans, for a unique twist on this classic recipe. Be sure to keep an eye on the almonds while toasting, as they can burn quickly if left unattended. Enjoy your delicious Green Bean Almondine!
Baked Macaroni and Cheese
Title: Baked Macaroni and Cheese
Prep Time: 15 minutes
Cook Time: 30 minutes
Number of Servings: 6
Required Equipment List: Large pot, baking dish, colander, mixing bowl, whisk, oven
Cuisine Type: Southern
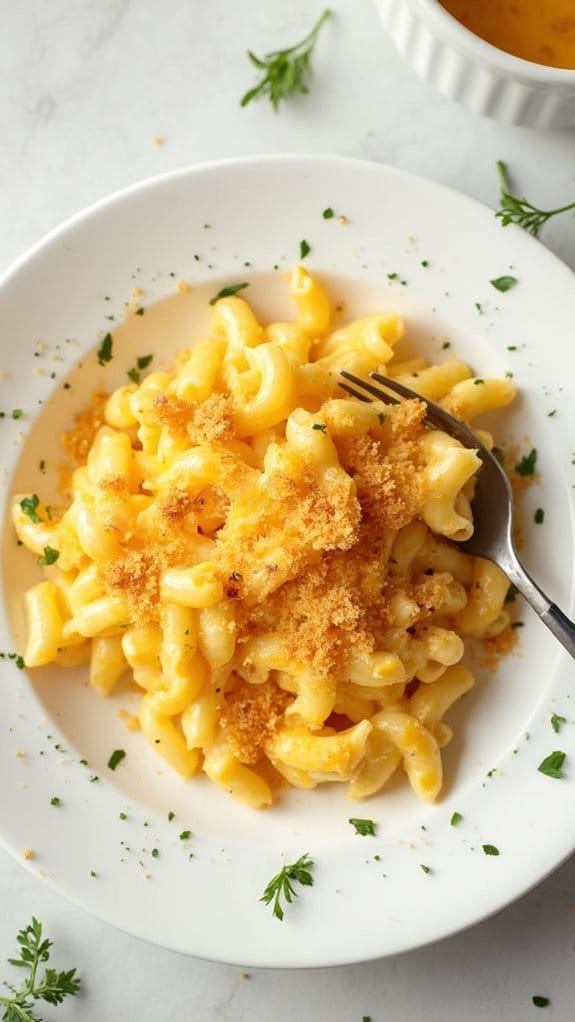
Baked Macaroni and Cheese is a classic comfort dish, beloved for its creamy, cheesy goodness and crispy topping. This Southern version elevates the traditional recipe by incorporating a blend of cheeses that create a rich, velvety sauce enveloping the pasta. Topped with a buttery breadcrumb mixture, this dish not only tastes incredible but also has a delightful texture that will please any crowd, making it a staple at holiday gatherings and family dinners alike.
The beauty of this recipe lies in its versatility—feel free to experiment with different cheeses or add in extras like cooked bacon, vegetables, or spices to tailor it to your taste. The combination of sharp cheddar, creamy mozzarella, and a hint of parmesan provides a depth of flavor that’s simply irresistible. With just a few simple steps, you’ll have a warm, hearty meal that’s bound to become a favorite.
Ingredients:
- 1 pound elbow macaroni
- 4 tablespoons butter
- 1/4 cup all-purpose flour
- 3 cups milk
- 2 cups shredded sharp cheddar cheese
- 1 cup shredded mozzarella cheese
- 1/2 cup grated parmesan cheese
- 1 teaspoon garlic powder
- 1 teaspoon onion powder
- Salt and pepper to taste
- 1 cup breadcrumbs
- 2 tablespoons melted butter (for topping)
Instructions:
- Preheat your oven to 350°F (175°C). Cook the elbow macaroni according to package instructions until al dente, then drain and set aside. This will guarantee your pasta maintains a firm texture even after baking.
- In a large pot over medium heat, melt the butter. Once melted, whisk in the flour, stirring constantly for about 2 minutes to create a roux. This will help thicken your cheese sauce and add a rich flavor.
- Gradually add the milk to the roux, whisking continuously until the mixture is smooth and begins to thicken, about 5-7 minutes. Stir in the garlic powder, onion powder, and season with salt and pepper to taste.
- Remove the pot from heat and add the cheddar, mozzarella, and parmesan cheeses, stirring until melted and creamy. Fold in the cooked macaroni until fully coated in the cheese sauce.
- Pour the macaroni and cheese mixture into a greased baking dish. In a separate bowl, combine the breadcrumbs with the melted butter and sprinkle evenly over the top of the macaroni and cheese.
- Bake in the preheated oven for 25-30 minutes, or until the top is golden brown and crispy. Allow it to cool for a few minutes before serving to let the cheese set.
Extra Tips: For added flavor, consider mixing in some cooked bacon or a pinch of cayenne pepper for a kick. If you prefer a creamier texture, you can stir in a little sour cream or cream cheese into the cheese sauce before baking. This baked macaroni and cheese can also be made ahead of time and refrigerated; simply reheat in the oven when ready to serve. Enjoy your delicious creation!
Honey-Glazed Ham
Title: Honey-Glazed Ham
Prep Time: 15 minutes
Cook Time: 90 minutes
Number of Servings: 10
Required Equipment List: Roasting pan, aluminum foil, basting brush, meat thermometer
Cuisine Type: Southern
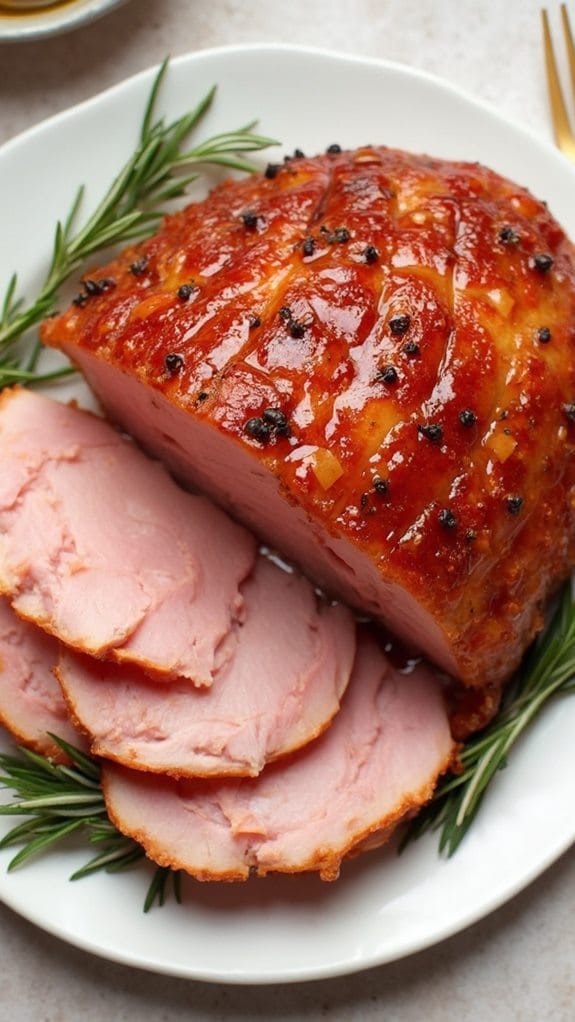
Honey-Glazed Ham is a classic dish that graces many Southern tables, especially during holidays and family gatherings. This recipe features a succulent ham glazed with a sweet and sticky mixture of honey, brown sugar, and Dijon mustard, which caramelizes beautifully during baking. The result is a dish that isn’t only visually stunning but also bursting with flavor, making it the star of the meal.
Served warm, this ham pairs wonderfully with sides like collard greens, cornbread, and sweet potato casserole. The beauty of this Honey-Glazed Ham is in its simplicity—few ingredients lead to a deeply satisfying dish that will impress your guests. As the ham cooks, the glaze becomes rich and flavorful, creating a delectable crust that adds texture and sweetness to each slice.
Perfect for holiday feasts or special occasions, this recipe is sure to become a family favorite.
Ingredients:
- 1 (8 to 10-pound) fully cooked ham
- 1 cup honey
- 1/2 cup brown sugar
- 1/4 cup Dijon mustard
- 1/4 teaspoon ground cloves
- 1/4 teaspoon ground cinnamon
- 1/4 teaspoon black pepper
- Whole cloves (for studding, optional)
Instructions:
- Preheat your oven to 325°F (165°C). Place the fully cooked ham in a roasting pan, cut-side down. If desired, you can stud the surface of the ham with whole cloves for added flavor and decoration.
- In a mixing bowl, whisk together the honey, brown sugar, Dijon mustard, ground cloves, ground cinnamon, and black pepper until well combined. This will create the sweet glaze that will coat the ham.
- Brush a generous amount of the glaze over the surface of the ham, ensuring it gets into the scored areas if you’ve made cuts in the surface. Reserve some glaze for basting during cooking.
- Cover the ham loosely with aluminum foil and bake in the preheated oven for about 1 hour. This allows the ham to heat through without drying out.
- After 1 hour, remove the foil and brush the ham with more glaze. Return it to the oven and continue baking uncovered for an additional 30 minutes, basting every 10 minutes until the glaze is caramelized and sticky.
- Once finished, check the internal temperature of the ham; it should be at least 140°F (60°C) when fully heated. Remove the ham from the oven and let it rest for about 15 minutes before slicing and serving.
Extra Tips: For an extra layer of flavor, consider adding a splash of apple cider vinegar or orange juice to the glaze mixture. This won’t only enhance the sweetness but also add a nice tang.
If you have any leftover ham, it makes for delicious sandwiches or can be added to soups and casseroles. Always make sure to keep any leftovers stored in the refrigerator to maintain freshness. Enjoy your delightful Honey-Glazed Ham!
Spicy Fried Turkey
Title: Spicy Fried Turkey
Prep Time: 30 minutes
Cook Time: 60 minutes
Number of Servings: 10
Required Equipment List: Turkey fryer, propane tank, large pot, thermometer, marinade injector, cutting board, tongs
Cuisine Type: Southern
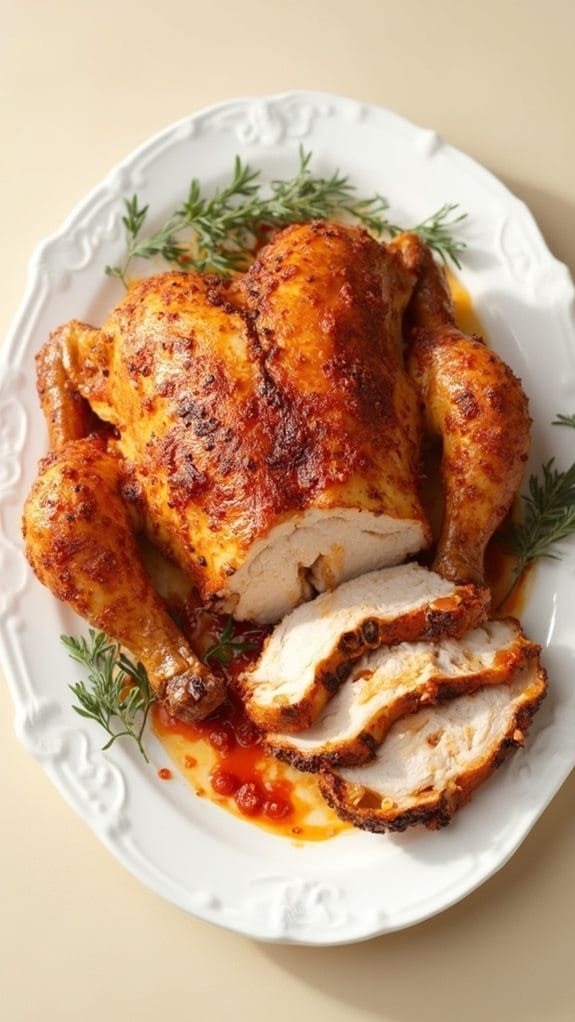
Spicy Fried Turkey is a southern classic that brings a burst of flavor to any Thanksgiving table. This dish takes the traditional roasted turkey up a notch by infusing it with a spicy marinade and frying it to crispy perfection. The result is juicy meat enveloped in a crunchy, golden-brown skin that’s simply irresistible.
The combination of spices used in the marinade adds depth and warmth, making every bite an explosion of flavor that’s perfect for those who enjoy a little heat in their holiday meals. Preparing a Spicy Fried Turkey requires some care and attention, particularly when it comes to safety while frying. However, the process is straightforward and can be a fun activity for the whole family to participate in.
The turkey cooks much faster than traditional roasting, allowing you to enjoy more time with your loved ones. This recipe won’t only impress your guests but also become a cherished tradition that you’ll want to recreate every Thanksgiving.
Ingredients:
- 1 whole turkey (12-14 pounds), thawed
- 1 gallon of peanut oil (for frying)
- 1 cup hot sauce (your favorite brand)
- 1 tablespoon cayenne pepper
- 1 tablespoon garlic powder
- 1 tablespoon onion powder
- 1 tablespoon paprika
- 1 tablespoon black pepper
- 1 tablespoon salt
- 1 teaspoon thyme
- 1 teaspoon oregano
- 1 tablespoon sugar
Instructions:
- Begin by preparing the marinade. In a mixing bowl, combine the hot sauce, cayenne pepper, garlic powder, onion powder, paprika, black pepper, salt, thyme, oregano, and sugar. Stir until well mixed, then set aside.
- Rinse the turkey thoroughly under cold water and pat it dry with paper towels. Make sure to remove any giblets from the cavity. This helps the skin crisp up nicely when frying.
- Using a marinade injector, inject the spicy marinade into multiple areas of the turkey, focusing on the breast and thighs to guarantee even flavor distribution. Be careful not to puncture the skin excessively.
- Allow the turkey to marinate for at least 30 minutes at room temperature, or refrigerate it for several hours or overnight for even more flavor.
- While the turkey is marinating, prepare your fryer according to the manufacturer’s instructions. Fill the pot with peanut oil and heat it to 350°F (175°C) using a thermometer to verify accuracy.
- Once the oil is hot, carefully lower the turkey into the fryer using the basket or tongs. Fry the turkey for about 3-4 minutes per pound, or until the internal temperature reaches 165°F (74°C).
- After cooking, carefully remove the turkey from the oil and let it rest on a cutting board for at least 20 minutes before carving. This resting period allows the juices to redistribute throughout the meat.
Extra Tips: Safety is paramount when frying a turkey, so make sure to fry outside, away from flammable materials, and have a fire extinguisher nearby. If you want to reduce the heat, you can adjust the amount of cayenne pepper or hot sauce in the marinade.
To enhance the flavor even more, consider brining the turkey overnight before marinating. Enjoy this flavorful dish with your favorite sides, and watch how it becomes the star of your Thanksgiving feast!
Shrimp and Grits
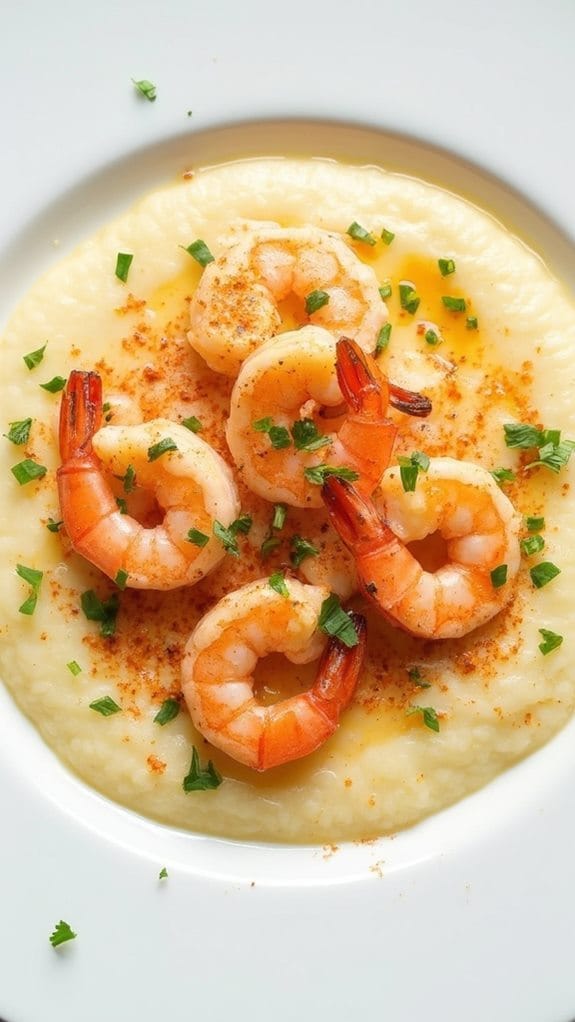
Title: Shrimp and Grits
Prep Time: 15 minutes
Cook Time: 30 minutes
Number of Servings: 4
Required Equipment List: Medium saucepan, skillet, wooden spoon, measuring cups, mixing bowl
Cuisine Type: Southern
Shrimp and Grits is a classic Southern dish that beautifully marries the flavors of succulent shrimp with creamy, buttery grits. This dish is often served for breakfast, brunch, or dinner, making it a versatile option for any meal of the day.
The shrimp is typically sautéed with garlic, spices, and sometimes a hint of hot sauce, adding depth to the dish. Meanwhile, the grits are cooked to perfection, creating a smooth and comforting base that enhances the dish’s overall flavor.
This recipe highlights the beauty of Southern cuisine, showcasing how simple ingredients can create an unforgettable meal. The combination of savory shrimp and rich, creamy grits is both satisfying and indulgent, making it a favorite among many.
With the addition of fresh herbs and a touch of cheese, this Shrimp and Grits recipe is sure to become a staple in your culinary repertoire.
Ingredients:
- 1 cup stone-ground grits
- 4 cups water
- 1 teaspoon salt
- 1 pound shrimp, peeled and deveined
- 4 tablespoons butter
- 4 cloves garlic, minced
- 1/2 teaspoon cayenne pepper
- 1/2 teaspoon paprika
- 1/2 cup heavy cream
- 1/2 cup shredded cheddar cheese
- 2 tablespoons chopped fresh parsley
- Freshly ground black pepper to taste
Instructions:
- In a medium saucepan, bring 4 cups of water to a boil. Add the salt and gradually stir in the stone-ground grits. Lower the heat to a simmer and cook, stirring frequently, for about 20-25 minutes or until the grits are thick and creamy. If the mixture gets too thick, you can add a little more water or milk to reach your desired consistency.
- While the grits are cooking, heat a skillet over medium-high heat and melt 2 tablespoons of butter. Once melted, add the minced garlic and sauté for about 1 minute until fragrant, being careful not to burn it.
- Add the shrimp to the skillet and sprinkle with cayenne pepper and paprika. Cook the shrimp for about 3-4 minutes, or until they turn pink and opaque. Stir frequently to guarantee even cooking. Remove the skillet from heat and stir in the heavy cream for a richer sauce.
- When the grits are done cooking, stir in the remaining 2 tablespoons of butter and the shredded cheddar cheese until melted and well combined. Taste and adjust seasoning with salt and freshly ground black pepper as needed.
- To serve, spoon a generous portion of the creamy grits onto each plate and top with the sautéed shrimp mixture. Garnish with chopped parsley for a fresh touch and enjoy your delightful Southern dish.
Extra Tips: For added flavor, consider incorporating crispy bacon or sausage into the shrimp mixture. You can also experiment with different types of cheese, such as gouda or pepper jack, to give the grits a unique twist.
If you prefer a bit of heat, feel free to add more cayenne pepper or serve with hot sauce on the side. This dish is best enjoyed fresh, but leftovers can be stored in the refrigerator and reheated gently on the stovetop.
Candied Yams
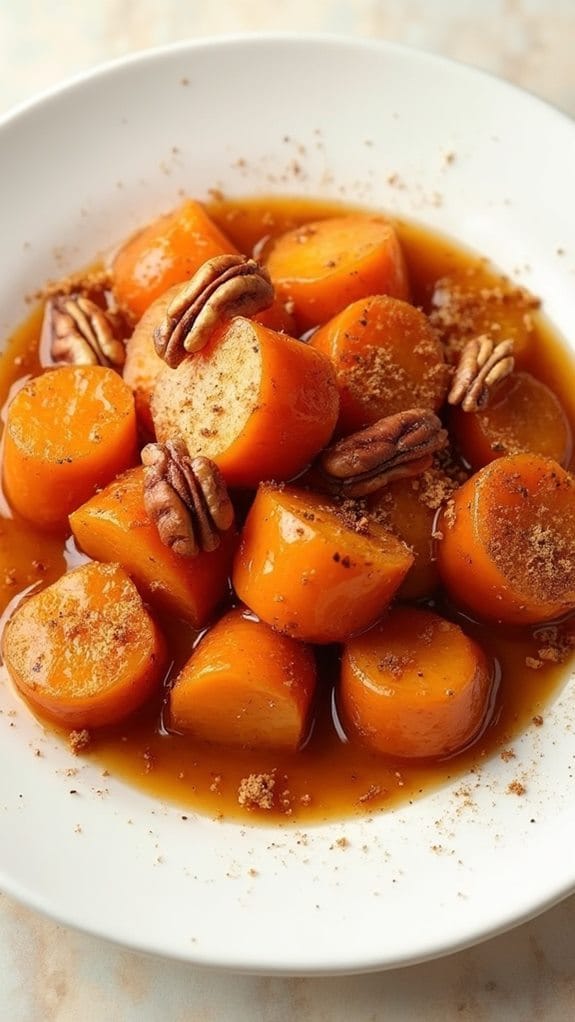
Title: Candied Yams
Prep Time: 15 minutes
Cook Time: 45 minutes
Number of Servings: 6
Required Equipment List: Baking dish, saucepan, mixing spoon, measuring cups, aluminum foil
Cuisine Type: Southern
Candied yams are a classic Southern dish that combines the natural sweetness of yams with a rich and buttery glaze, making them a staple during Thanksgiving and holiday dinners. This dish not only serves as a comforting side but also doubles as a dessert, delighting both kids and adults alike.
The combination of brown sugar, butter, and spices creates a syrupy coating that caramelizes beautifully in the oven, resulting in tender yams that are bursting with flavor. The preparation of candied yams is simple, requiring just a few ingredients and basic cooking techniques.
The yams are sliced and layered in a baking dish, then generously coated with a mixture of brown sugar, butter, and cinnamon. When baked, they become soft and sweet, offering a warm and inviting aroma that fills your kitchen. Whether served alongside savory dishes or enjoyed on their own, candied yams are certain to leave a lasting impression at your holiday table.
Ingredients:
- 4 large yams, peeled and sliced
- 1 cup brown sugar
- 1/2 cup unsalted butter
- 1 teaspoon ground cinnamon
- 1/2 teaspoon ground nutmeg
- 1/4 teaspoon salt
- 1 cup water
- 1 teaspoon vanilla extract (optional)
Instructions:
- Preheat your oven to 350°F (175°C). Begin by peeling the yams and slicing them into 1/4-inch thick rounds. This guarantees even cooking and allows the yams to absorb the sweet glaze.
- In a medium saucepan over medium heat, combine the brown sugar, butter, cinnamon, nutmeg, salt, and water. Stir the mixture until the butter has melted and the sugar has fully dissolved, creating a smooth syrup.
- In a greased baking dish, layer the sliced yams, arranging them neatly. Pour the warm syrup mixture evenly over the yams, guaranteeing that they’re well coated.
- Cover the baking dish tightly with aluminum foil to trap steam and moisture, which will help the yams cook evenly. Place the dish in the preheated oven and bake for 30 minutes.
- After 30 minutes, carefully remove the foil and baste the yams with the syrup in the bottom of the dish. Return the dish to the oven, uncovered, and bake for an additional 15 minutes, allowing the syrup to thicken and the yams to caramelize.
- Once done, remove the candied yams from the oven and let them sit for a few minutes before serving. Drizzle any remaining syrup over the top for added sweetness.
Extra Tips: For a unique twist, consider adding chopped pecans or marshmallows on top during the last few minutes of baking for an added texture and flavor. You can also adjust the sweetness by adding more or less brown sugar according to your taste.
If you want a richer flavor, try using maple syrup instead of brown sugar for a delightful variation. Enjoy your candied yams as a delicious side that compliments any holiday feast!
Pecan Pie
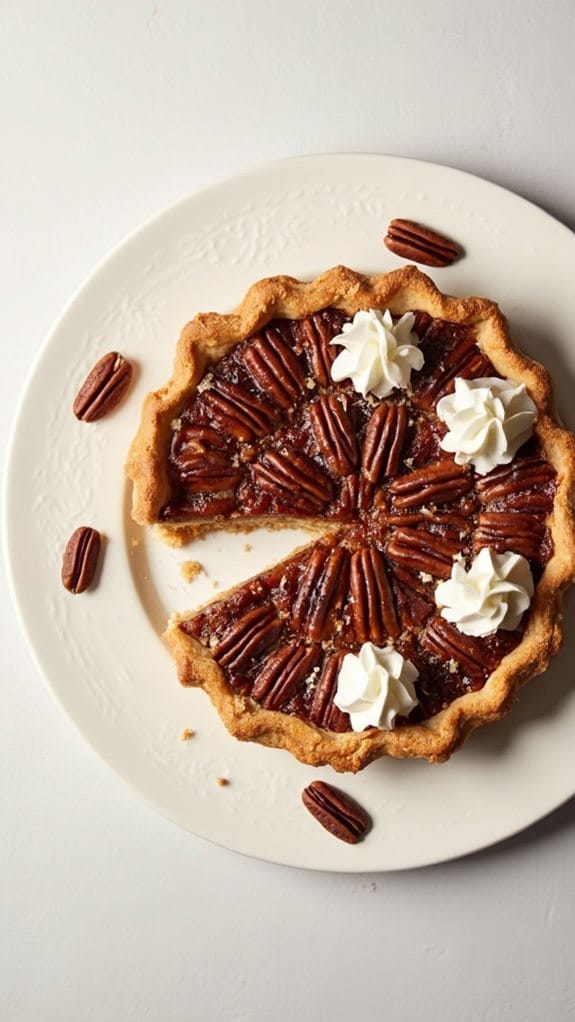
Title: Southern Pecan Pie
Prep Time: 15 minutes
Cook Time: 60 minutes
Number of Servings: 8
Required Equipment List: 9-inch pie pan, mixing bowl, whisk, measuring cups, measuring spoons, oven
Cuisine Type: Southern American
Pecan Pie is a classic Southern dessert that embodies the warmth and comfort of Thanksgiving gatherings. With its rich, sweet filling made from pecans, sugar, and eggs, this pie offers a delightful nutty flavor and a gooey texture that will have everyone coming back for seconds.
The buttery crust serves as the perfect vessel for the luscious filling, making it a beloved staple at holiday tables throughout the South. Traditionally served warm or at room temperature, Pecan Pie is often accompanied by a dollop of whipped cream or a scoop of vanilla ice cream.
This recipe isn’t just simple to prepare, but it also allows for variations—like adding chocolate or bourbon—if you’re feeling adventurous. Whether you’re a seasoned baker or trying your hand at pie for the first time, this Southern classic is sure to impress.
Ingredients:
- 1 unbaked 9-inch pie crust
- 1 cup light corn syrup
- 1 cup granulated sugar
- 1/2 cup unsalted butter, melted
- 4 large eggs
- 1 teaspoon vanilla extract
- 2 cups pecans, chopped
- Pinch of salt
Instructions:
- Preheat your oven to 350°F (175°C). Prepare your 9-inch pie pan by confirming it’s clean and ready for the pie crust. If using a store-bought crust, follow the package instructions for pre-baking if necessary.
- In a mixing bowl, whisk together the corn syrup, granulated sugar, melted butter, eggs, vanilla extract, and a pinch of salt until the mixture is smooth and well combined. This will form the sweet filling that makes pecan pie so delightful.
- Stir in the chopped pecans into the mixture, confirming they’re evenly distributed throughout the filling. This will ensure that every bite is packed with delicious pecan flavor.
- Pour the pecan mixture into the prepared pie crust, spreading it evenly. Make sure the pecans are evenly distributed across the top for a beautiful presentation once baked.
- Bake the pie in the preheated oven for 55-60 minutes, or until the filling is set and the top is golden brown. You may want to check around the 45-minute mark; if the crust edges are browning too quickly, cover them with foil to prevent burning.
- Once baked, remove the pie from the oven and let it cool on a wire rack for at least 2 hours before serving. This cooling time allows the filling to firm up for easier slicing.
Extra Tips: To enhance the flavor of your pecan pie, consider adding a tablespoon of bourbon or a tablespoon of chocolate chips for a richer taste. If you prefer a more textured pie, leave some pecans whole for a beautiful presentation.
Serve with whipped cream or a scoop of vanilla ice cream to elevate this dessert further. Enjoy your delicious pecan pie at your Thanksgiving feast!
Pumpkin Pie With a Twist
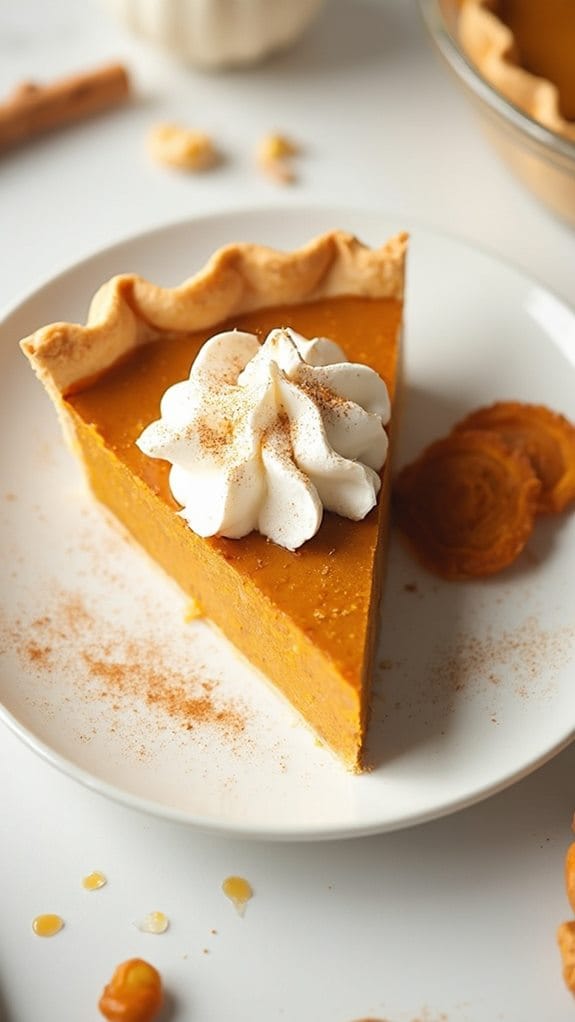
Title: Pumpkin Pie With a Twist
Prep Time: 20 minutes
Cook Time: 50 minutes
Number of Servings: 8
Required Equipment List: 9-inch pie pan, mixing bowls, whisk, measuring cups, measuring spoons, oven
Cuisine Type: Southern
This Pumpkin Pie With a Twist is a delightful reimagining of the classic autumn dessert, adding unique flavors that elevate it to a new level of deliciousness. By incorporating a touch of maple syrup and a hint of ginger, this recipe brings warmth and depth to the traditional pumpkin filling.
The use of a buttery, flaky crust complements the creamy filling perfectly, creating a comforting dessert that’s certain to impress your guests during the holiday season. Not only is this pie a feast for the eyes with its beautiful golden crust and rich filling, but it also offers a delightful balance of sweetness and spice.
Topped with a dollop of freshly whipped cream or a scoop of vanilla ice cream, this pumpkin pie becomes a memorable centerpiece for your Thanksgiving table. It’s a reminder that while traditions are important, there’s always room for a twist!
Ingredients:
- 1 pre-made pie crust (9-inch)
- 1 can (15 oz) pure pumpkin puree
- 3/4 cup brown sugar
- 1/2 cup maple syrup
- 1 teaspoon ground cinnamon
- 1/2 teaspoon ground ginger
- 1/4 teaspoon ground nutmeg
- 1/4 teaspoon salt
- 3 large eggs
- 1 cup heavy cream
- Whipped cream (for serving)
Instructions:
- Preheat your oven to 425°F (220°C). Place the pre-made pie crust into a 9-inch pie pan, pressing it into the bottom and up the sides. Trim any excess crust hanging over the edges. Prick the bottom of the crust with a fork to prevent bubbling.
- In a large mixing bowl, whisk together the pumpkin puree, brown sugar, maple syrup, cinnamon, ginger, nutmeg, and salt until well combined. This mixture should be smooth and free of lumps, allowing the spices to evenly distribute throughout the filling.
- Add the eggs one at a time, whisking well after each addition to confirm they’re fully incorporated. Then, gradually mix in the heavy cream until the filling is creamy and smooth.
- Pour the pumpkin filling into the prepared pie crust, using a spatula to spread it evenly. Carefully place the pie in the preheated oven and bake for 15 minutes.
- After 15 minutes, reduce the oven temperature to 350°F (175°C) and continue to bake for an additional 30-35 minutes, or until the filling is set and a knife inserted in the center comes out clean. The edges of the crust should be golden brown.
- Once baked, remove the pie from the oven and allow it to cool at room temperature for at least one hour before slicing. This cooling period helps the filling to firm up and makes it easier to cut clean slices.
Extra Tips: For a decorative touch, consider crimping the edges of the pie crust or using cookie cutters to create shapes from leftover dough. If you prefer a deeper flavor, try adding a tablespoon of bourbon or rum to the filling.
This pumpkin pie can be made a day in advance, allowing the flavors to meld together even more, making it a convenient option for your Thanksgiving feast. Enjoy your delicious creation!
Southern Fruit Salad
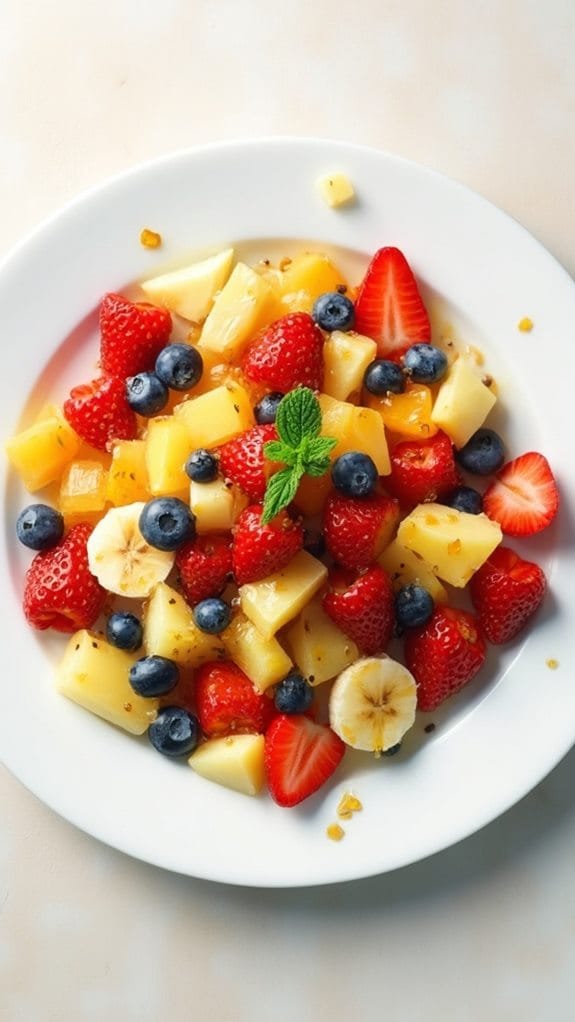
Title: Southern Fruit Salad
Prep Time: 15 minutes
Cook Time: 0 minutes
Number of Servings: 6
Required Equipment List: Mixing bowl, knife, cutting board, serving bowl
Cuisine Type: Southern
Southern Fruit Salad is a revitalizing and colorful dish that embodies the sweetness of the South, making it a perfect addition to any Thanksgiving table. This salad combines a variety of fruits, often including classic Southern staples like peaches, strawberries, and blueberries, all tossed together in a light syrup or dressing.
The dish not only highlights the seasonal fruits available but also brings a burst of flavor and brightness that complements the heavier dishes typically served during the holidays. The beauty of this recipe lies in its versatility; you can adjust the fruits based on what’s in season or your personal preferences.
This fruit salad isn’t only a delightful way to incorporate more fruits into your meal, but it also serves as a palate cleanser between savory dishes. With a quick prep time and no cooking required, this salad is an easy yet impressive dish that will have your guests coming back for seconds.
Ingredients:
- 2 cups strawberries, hulled and sliced
- 2 cups blueberries
- 2 cups peaches, diced
- 1 cup pineapple, diced
- 1 banana, sliced
- 1 tablespoon honey (optional)
- 1 tablespoon fresh lime juice
- Fresh mint leaves (for garnish, optional)
Instructions:
- Begin by preparing all the fruits. Hull and slice the strawberries, dice the peaches and pineapple, and slice the banana. Make sure to use fresh, ripe fruits for the best flavor and texture.
- In a large mixing bowl, combine the prepared strawberries, blueberries, peaches, pineapple, and banana. Gently toss the fruits together to guarantee an even distribution while being cautious not to mash the softer fruits like bananas.
- In a small bowl, whisk together the honey (if using) and fresh lime juice. This mixture will add a little sweetness and tang to the fruit salad. Drizzle it over the mixed fruits in the large bowl.
- Carefully toss the fruit salad again to coat the fruits with the dressing. Be gentle to avoid bruising the berries and bananas.
- Transfer the fruit salad to a serving bowl and garnish with fresh mint leaves for a pop of color and added freshness. Serve immediately or refrigerate for a short time before serving if you prefer it chilled.
Extra Tips: For an added crunch, consider including some chopped nuts, such as pecans or walnuts, just before serving. If you’d like a bit more sweetness, feel free to adjust the honey to your taste.
This salad can also be made a few hours in advance; just add the bananas right before serving to keep them from browning. Enjoy this revitalizing Southern classic at your Thanksgiving gathering!
Cranberry Sauce With Bourbon
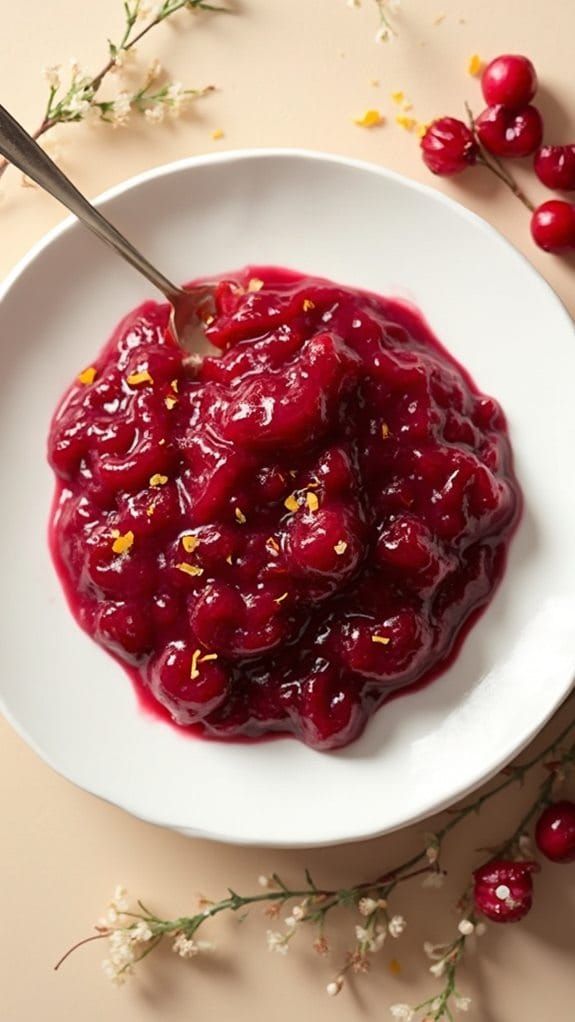
Title: Cranberry Sauce With Bourbon
Prep Time: 10 minutes
Cook Time: 20 minutes
Number of Servings: 8
Required Equipment List: Medium saucepan, measuring cups, measuring spoons, wooden spoon
Cuisine Type: Southern
This Cranberry Sauce With Bourbon is a delightful, adult twist on a classic Thanksgiving side dish that adds depth and richness to your holiday meal. The tartness of fresh cranberries is complemented by the warm notes of bourbon, creating a balance of flavors that elevates this sauce from ordinary to extraordinary.
Perfect for serving alongside roasted turkey or as a vibrant addition to a charcuterie board, this cranberry sauce is sure to become a staple in your holiday repertoire. Making this sauce isn’t only easy but also allows for customization to suit your taste. The sweetness can be adjusted by varying the amount of sugar, and additional spices like cinnamon or nutmeg can be added for extra warmth.
This recipe showcases how a traditional dish can be transformed into something special, making it a fantastic conversation starter at your Thanksgiving gathering.
Ingredients:
- 12 ounces fresh cranberries
- 1 cup granulated sugar
- 1 cup water
- 1/2 cup bourbon
- 1 teaspoon vanilla extract
- 1/2 teaspoon ground cinnamon (optional)
- Zest of 1 orange (optional)
Instructions:
- In a medium saucepan, combine the water and granulated sugar over medium heat. Stir until the sugar has completely dissolved, creating a simple syrup base for your cranberry sauce.
- Once the syrup is boiling, add the fresh cranberries to the saucepan. Stir gently to coat the cranberries in the syrup, then bring the mixture to a boil again. You’ll hear the cranberries pop as they cook, which is a sign that they’re releasing their juices.
- Reduce the heat to low and let the mixture simmer for about 10-15 minutes, stirring occasionally. The cranberries will break down and thicken the sauce as it cooks. If desired, add the ground cinnamon and orange zest during this simmering phase for added flavor.
- After the sauce has thickened to your liking, remove the saucepan from the heat and stir in the bourbon and vanilla extract. Allow the sauce to cool slightly before transferring it to a serving dish or airtight container.
- Let the cranberry sauce cool to room temperature before serving, or refrigerate it for later use. The flavors will continue to meld and develop as it sits, making it even more delicious.
Extra Tips: For an extra layer of complexity, consider adding a pinch of salt to balance the sweetness of the sauce. You can also experiment with different types of bourbon to find the flavor profile that best suits your palate.
This cranberry sauce can be made up to a week in advance, making it a convenient addition to your Thanksgiving prep. Serve it chilled or at room temperature for the best flavor experience!
Classic Sweet Tea

Title: Classic Sweet Tea
Prep Time: 5 minutes
Cook Time: 15 minutes
Number of Servings: 8
Required Equipment List: Medium saucepan, measuring cups, stirring spoon, pitcher, refrigerator
Cuisine Type: Southern
Classic Sweet Tea is a beloved beverage that embodies the spirit of Southern hospitality. This invigorating drink is perfect for warm weather gatherings, backyard barbecues, or simply enjoying on a quiet afternoon. Made with simple ingredients, sweet tea is brewed with black tea bags and sugar, resulting in a sweet and energizing drink that can be served over ice.
It’s a staple in Southern homes and is often enjoyed as a comforting drink that brings people together. The process of making sweet tea is straightforward, but the key to achieving the perfect balance of sweetness and flavor lies in the brewing time and the amount of sugar used.
Whether you prefer your tea extra sweet or just mildly sweetened, this recipe can be easily adjusted to suit your taste. Serve it with lemon slices or fresh mint for an added touch of flavor, and watch as it becomes a favorite at your family gatherings.
Ingredients:
- 4 cups water
- 4 black tea bags
- 1 cup granulated sugar
- 1 teaspoon baking soda (optional)
- Ice cubes
- Lemon slices (for garnish, optional)
- Fresh mint (for garnish, optional)
Instructions:
- In a medium saucepan, bring 4 cups of water to a boil over medium-high heat. Once boiling, remove the pot from the heat and add the black tea bags. Allow the tea to steep for about 10-15 minutes, depending on how strong you like your tea.
- After steeping, carefully remove the tea bags from the saucepan. If you prefer a smoother taste, add 1 teaspoon of baking soda at this point; it helps to reduce bitterness and enhance the natural flavors of the tea.
- Stir in 1 cup of granulated sugar while the tea is still warm. Mix until the sugar has completely dissolved. Adjust the sweetness to your liking by adding more or less sugar as desired.
- Pour the brewed tea into a large pitcher and allow it to cool to room temperature. Once cooled, refrigerate the sweet tea for at least 2 hours to chill thoroughly.
- To serve, fill glasses with ice cubes and pour the chilled sweet tea over the ice. Garnish with lemon slices or fresh mint, if desired.
Extra Tips: For a unique twist, try infusing your sweet tea with flavors like peach, raspberry, or mint. You can add fresh fruit or herbs to the saucepan while brewing for a delicious variation.
Additionally, if you find yourself in a hurry, you can brew the tea using cold water and let it steep in the refrigerator overnight for a cool, invigorating drink ready to enjoy the next day.
Conclusion
As you gather around the table this Thanksgiving, remember that Southern hospitality shines through every dish. From cornbread to cranberry sauce, these recipes bring warmth and whimsy to your celebration. So, why not whip up a little magic in the kitchen? With each bite, you’ll savor the sweetness of togetherness and the spirit of tradition. Embrace the flavors, share the joy, and create cherished memories that linger long after the feast. Happy feasting, y’all!

