No products in the cart.

15 Thanksgiving Desserts That Can Be Made In Under 30 Minutes
When Thanksgiving rolls around, you might find yourself pressed for time but still wanting to impress your guests with delicious desserts. You can whip up an array of delightful treats in under 30 minutes, ensuring you don’t spend all day in the kitchen. From no-bake options like Pumpkin Spice Mousse to quick baked delights such as Mini Pumpkin Pies, there’s a variety that suits every palate. Curious about which recipes can elevate your holiday spread without the fuss? Let’s explore these quick yet impressive options.
Contents
hide
Pumpkin Spice Mousse

Title: Pumpkin Spice Mousse
Prep Time: 15 minutes
Cook Time: 0 minutes
Number of Servings: 6
Required Equipment List: Mixing bowls, electric mixer, spatula, serving cups
Cuisine Type: American
This delightful Pumpkin Spice Mousse is the perfect dessert to celebrate the flavors of fall without spending hours in the kitchen. With its creamy texture and rich pumpkin flavor, this mousse is effortlessly light and fluffy, making it an ideal way to end your Thanksgiving feast.
The blend of warm spices like cinnamon, nutmeg, and ginger adds a cozy touch, ensuring that each bite is as comforting as a warm pumpkin pie. Best of all, it can be prepared in just 15 minutes, leaving you with more time to enjoy the festivities.
This recipe isn’t only quick and easy, but it also offers the versatility of being served in individual cups, making it a beautiful addition to your dessert table. The mousse can be garnished with whipped cream, a sprinkle of cinnamon, or even some crushed graham crackers for that classic pie feel.
Whether you’re hosting a large gathering or enjoying a quiet dinner at home, this Pumpkin Spice Mousse is sure to impress your guests and satisfy your sweet tooth.
Ingredients:
- 1 cup heavy whipping cream
- 1 cup pumpkin puree (canned or homemade)
- 1/2 cup powdered sugar
- 1 teaspoon vanilla extract
- 1 teaspoon pumpkin pie spice
- 1/2 teaspoon ground cinnamon
- Pinch of salt
Instructions:
- In a mixing bowl, combine the heavy whipping cream and powdered sugar. Using an electric mixer, whip the cream on medium-high speed until soft peaks form. Be careful not to over-whip, as you want the mousse to remain light and airy.
- In another bowl, mix together the pumpkin puree, vanilla extract, pumpkin pie spice, ground cinnamon, and a pinch of salt. Stir until well combined, creating a smooth and flavorful pumpkin mixture.
- Gently fold the whipped cream into the pumpkin mixture using a spatula. Start by adding a small amount of whipped cream to lighten the pumpkin base, then gradually fold in the remaining whipped cream until fully incorporated. This helps to maintain the mousse’s airy texture.
- Once the mousse is fully combined, spoon it into individual serving cups or bowls. You can also use a piping bag for a fancier presentation if desired.
- Chill the mousse in the refrigerator for at least 1 hour to allow it to set and the flavors to meld together. This step is essential for achieving the best texture and taste.
- Before serving, garnish each cup with a dollop of whipped cream, a sprinkle of cinnamon, or crushed graham crackers if desired. Serve chilled and enjoy!
Extra Tips: For an added touch of flavor, consider incorporating a splash of maple syrup into the pumpkin mixture for a hint of sweetness. You can also customize the spices according to your taste; if you love a stronger ginger flavor, feel free to increase the amount of ground ginger used.
This mousse can be made a day in advance, making it a convenient option for holiday gatherings. Enjoy your festive dessert!
Chocolate Peanut Butter Cups
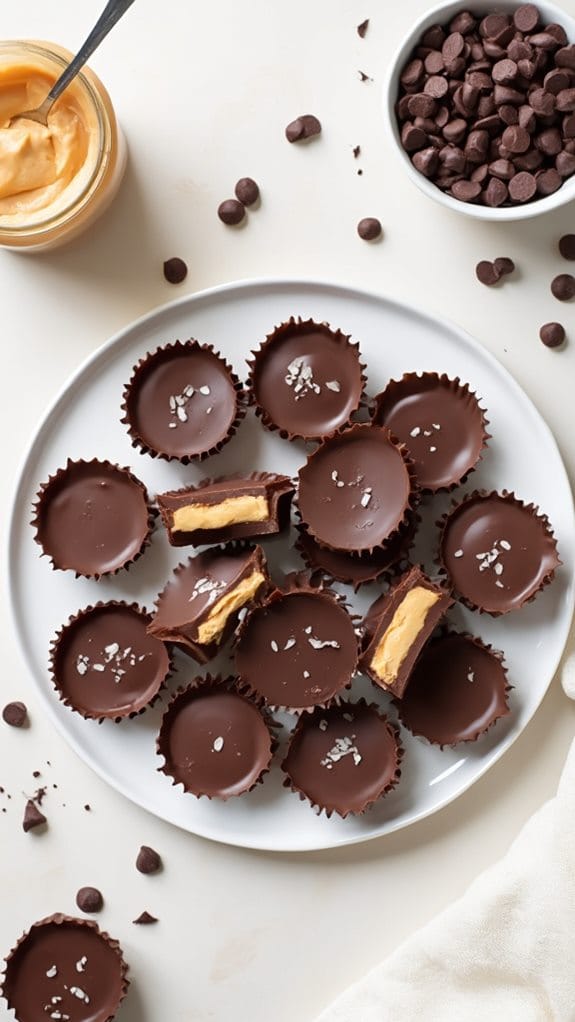
Title: Chocolate Peanut Butter Cups
Prep Time: 10 minutes
Cook Time: 15 minutes
Number of Servings: 12
Required Equipment List: Muffin tin, cupcake liners, microwave-safe bowl, mixing spoon, refrigerator
Cuisine Type: American
Chocolate Peanut Butter Cups are a classic treat that brings together the rich flavors of chocolate and creamy peanut butter. This quick and easy recipe allows you to satisfy your sweet tooth in under 30 minutes, making it perfect for Thanksgiving gatherings or any occasion when you crave something delicious.
With just a few simple ingredients, you can create these mouthwatering desserts that are sure to be a hit with family and friends. These homemade treats aren’t only simple to prepare, but they also offer the flexibility to customize based on your preferences. You can use dark, milk, or even white chocolate to suit your taste.
Plus, the creamy peanut butter filling can be enhanced with a sprinkle of sea salt or mixed with a touch of honey for added sweetness. Impress your guests with these delectable chocolate peanut butter cups that look and taste gourmet!
Ingredients:
- 1 cup chocolate chips (milk or dark)
- 1/2 cup creamy peanut butter
- 1/4 cup powdered sugar
- 1 teaspoon vanilla extract
- 1/4 cup additional chocolate chips for topping (optional)
- Sea salt (for sprinkling, optional)
Instructions:
- Begin by lining a muffin tin with cupcake liners. This will make it easier to remove the chocolate peanut butter cups once they’re set, as well as keep them neat and tidy for serving.
- In a microwave-safe bowl, melt 1 cup of chocolate chips in 30-second intervals, stirring in between until smooth. Be careful not to overheat the chocolate, as this can cause it to seize.
- Spoon about 1 tablespoon of the melted chocolate into the bottom of each cupcake liner, spreading it evenly to cover the base. Place the muffin tin in the refrigerator for about 5 minutes to allow the chocolate to set.
- While the chocolate is setting, prepare the peanut butter filling by mixing together the creamy peanut butter, powdered sugar, and vanilla extract in a separate bowl until smooth and well combined.
- Once the chocolate has set, remove the muffin tin from the refrigerator and add about 1 tablespoon of the peanut butter mixture on top of the chocolate layer in each cup. Gently spread it out to create an even layer.
- Pour the remaining melted chocolate over the peanut butter layer in each cup, making sure to cover the filling completely. If desired, sprinkle a little sea salt on top for an extra flavor boost. Return the muffin tin to the refrigerator for another 10-15 minutes to allow the chocolate to fully set.
Extra Tips: For a fun twist, try adding crushed graham crackers or chopped nuts to the peanut butter mixture for added texture. You can also experiment with different nut butters, like almond or cashew, to create your own unique flavor combinations.
If you want to make these ahead of time, they store perfectly in an airtight container in the refrigerator for up to a week. Enjoy your homemade chocolate peanut butter cups!
No-Bake Cheesecake Bites
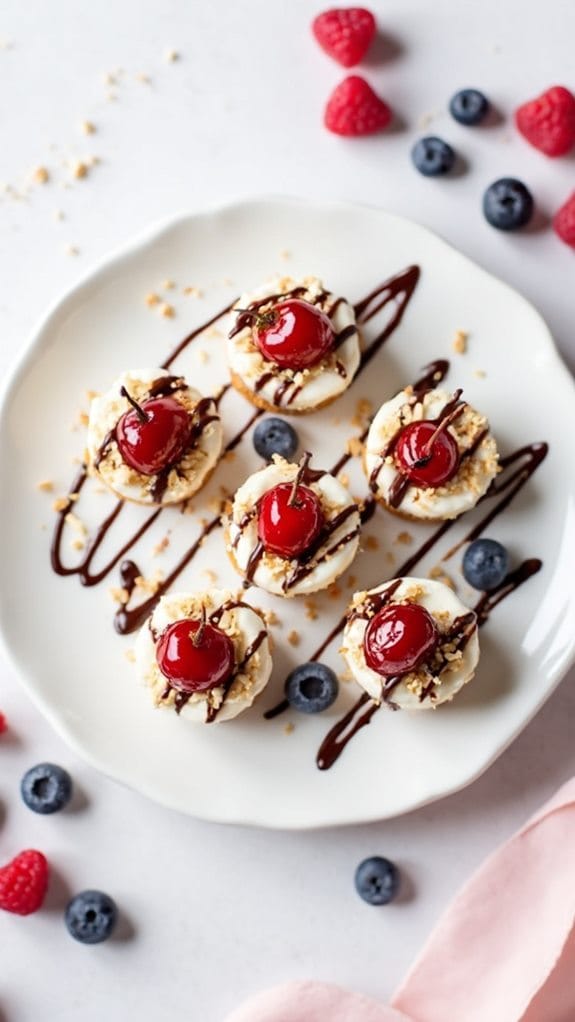
Title: No-Bake Cheesecake Bites
Prep Time: 20 minutes
Cook Time: 0 minutes
Number of Servings: 12
Required Equipment List: Mixing bowl, electric mixer, spatula, mini muffin tin, paper liners
Cuisine Type: American
No-Bake Cheesecake Bites are the perfect sweet treat for any Thanksgiving gathering or holiday celebration. These delightful little bites combine a creamy cheesecake filling with a buttery graham cracker crust, all without the need for baking.
They can be prepared in just 20 minutes, making them an excellent option for those who want to whip up a quick dessert that impresses everyone. With their bite-sized portions, they’re ideal for sharing and add a touch of elegance to your dessert table.
The beauty of these cheesecake bites lies in their versatility. You can customize the toppings to suit your tastes, whether you prefer classic cherry, rich chocolate, or fresh fruit. They aren’t only delicious but also visually appealing, making them a hit with both kids and adults.
Serve them chilled for a rejuvenating dessert that brings a taste of creamy cheesecake without the fuss of traditional baking.
Ingredients:
- 1 cup graham cracker crumbs
- 1/4 cup granulated sugar
- 1/2 cup unsalted butter, melted
- 8 ounces cream cheese, softened
- 1/2 cup powdered sugar
- 1 teaspoon vanilla extract
- 1 cup heavy whipping cream
- Toppings of your choice (fruit, chocolate sauce, caramel, etc.)
Instructions:
- In a mixing bowl, combine the graham cracker crumbs, granulated sugar, and melted butter. Stir until the mixture resembles wet sand. This will be the crust for your cheesecake bites.
- Line a mini muffin tin with paper liners. Press about a tablespoon of the graham cracker mixture into the bottom of each muffin cup, making sure to pack it tightly to form a sturdy crust.
- In a separate bowl, beat the softened cream cheese with an electric mixer until smooth and creamy. Gradually add the powdered sugar and vanilla extract, mixing until thoroughly combined.
- In another bowl, whip the heavy cream until stiff peaks form. Gently fold the whipped cream into the cream cheese mixture until well incorporated. This will create a light and fluffy cheesecake filling.
- Spoon the cheesecake filling into each muffin cup on top of the graham cracker crusts, filling them to the top. Smooth the surface with a spatula for an even finish.
- Refrigerate the cheesecake bites for at least 2 hours or until set. Once chilled, remove them from the muffin tin and top with your desired toppings before serving.
Extra Tips: For a fun twist, you can mix in some lemon zest or chocolate chips into the cheesecake filling for added flavor.
If you want to make these bites even more festive, consider adding a dollop of whipped cream and a sprinkle of crushed nuts or sprinkles on top. Remember to keep them stored in the refrigerator until ready to serve to maintain their freshness and creaminess. Enjoy these delightful treats at your next gathering!
Apple Crisp in a Mug
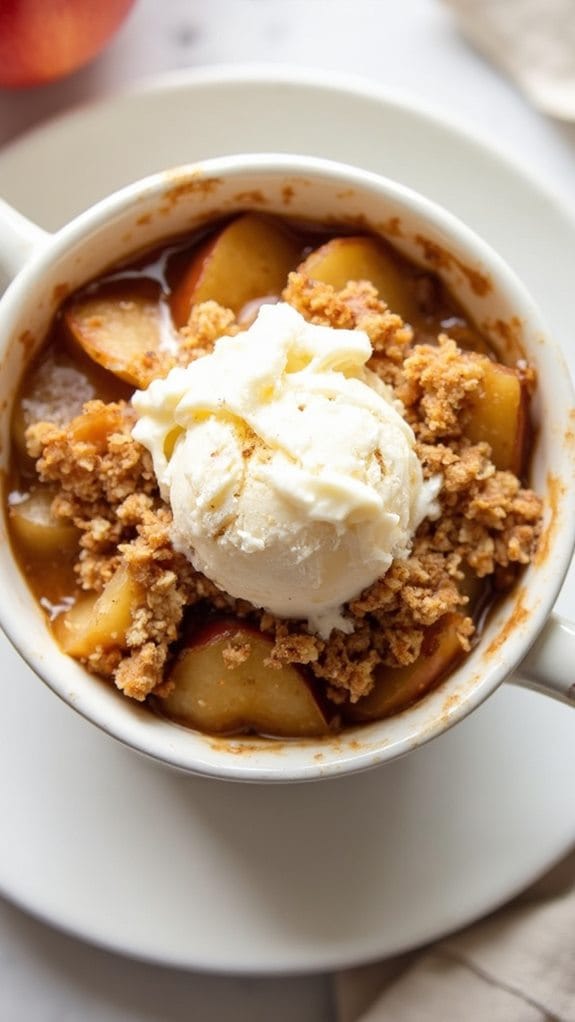
Title: Apple Crisp in a Mug
Prep Time: 10 minutes
Cook Time: 1 minute
Number of Servings: 1
Required Equipment List: Microwave-safe mug, spoon, microwave
Cuisine Type: American
Apple Crisp in a Mug is a quick and delicious dessert that captures the essence of fall in just a few minutes. This single-serving treat combines tender baked apples with a crunchy topping, all cooked in the microwave, making it the perfect choice for those craving something sweet without the wait.
The warm, spiced apples paired with a buttery crumble are satisfying and comforting, ideal for cozy evenings or when you want a quick dessert fix. This recipe is incredibly versatile; you can easily customize it by adding your favorite nuts or swapping in different fruits based on what you have on hand.
Plus, it’s a great way to enjoy the classic flavors of apple crisp without the hassle of baking a full dish. Serve it with a scoop of vanilla ice cream or a dollop of whipped cream for an extra indulgent experience.
Ingredients:
- 1 medium apple, peeled and diced
- 1 tablespoon brown sugar
- 1/2 teaspoon cinnamon
- 2 tablespoons oats
- 1 tablespoon all-purpose flour
- 1 tablespoon butter, melted
- Pinch of salt
Instructions:
- In a microwave-safe mug, combine the diced apple, brown sugar, and cinnamon. Stir well to coat the apple pieces evenly with the sugar and spice mixture.
- In a separate small bowl, mix together the oats, flour, melted butter, and a pinch of salt until crumbly. This will create the topping for your crisp.
- Spoon the crumble mixture over the apple mixture in the mug, spreading it evenly across the top. Don’t worry about being perfect; a rustic look adds to the charm!
- Microwave the mug on high for 1 minute. Check to see if the apples are tender; if not, microwave for an additional 10-15 seconds as needed. Be careful not to overcook, as the apple will continue to soften after removing from the microwave.
- Let the mug cool for a minute before serving. You can enjoy it straight from the mug or transfer it to a bowl. Top with ice cream or whipped cream if desired!
Extra Tips: For an added layer of flavor, consider adding a splash of vanilla extract to the apples before microwaving. You can also experiment with different types of apples, such as Granny Smith for a tart flavor or Honeycrisp for sweetness.
If you’re feeling adventurous, try adding a few raisins or chopped nuts to the topping for extra texture. Enjoy your quick and delightful apple crisp!
Pecan Pie Parfaits
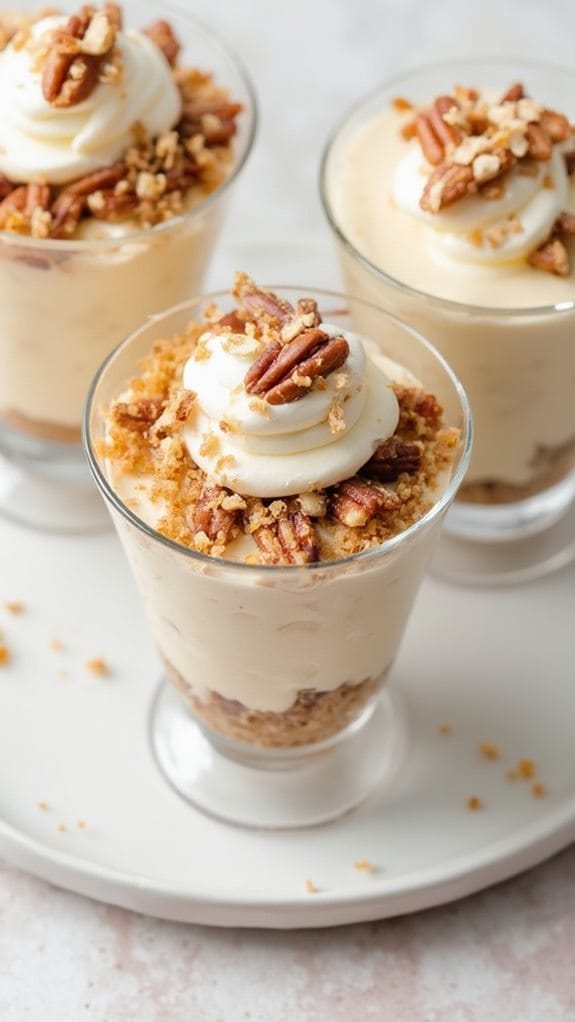
Title: Pecan Pie Parfaits
Prep Time: 10 minutes
Cook Time: 0 minutes
Number of Servings: 4
Required Equipment List: Bowls, whisk, serving cups, measuring cups, measuring spoons
Cuisine Type: American
Pecan Pie Parfaits are a delicious and quick way to enjoy the classic flavors of pecan pie without the hassle of baking. These parfaits combine layers of creamy filling, crunchy pecans, and a buttery graham cracker crust that will make your taste buds sing.
With a preparation time of just 10 minutes, they’re perfect for last-minute dessert cravings or to impress your guests at Thanksgiving gatherings. This no-bake dessert isn’t only easy to assemble but also allows for customization. You can adjust the sweetness or add extra toppings like whipped cream or chocolate shavings to make them even more indulgent.
These parfaits are an excellent option for those who love pecan pie but want a lighter and more manageable version. Serve them in individual cups for a charming presentation that will surely delight everyone at the table.
Ingredients:
- 1 cup pecans, chopped
- 1 cup graham cracker crumbs
- 4 tablespoons unsalted butter, melted
- 1 cup cream cheese, softened
- 1 cup powdered sugar
- 1 teaspoon vanilla extract
- 1 cup whipped topping
Instructions:
- In a mixing bowl, combine the graham cracker crumbs and melted butter until the mixture resembles wet sand. This will serve as the base layer for your parfaits. Divide the mixture evenly among the serving cups, pressing it down gently to create a firm layer.
- In another bowl, beat the softened cream cheese with a whisk until smooth. Gradually add the powdered sugar and vanilla extract, mixing until fully combined and creamy. This will be the filling for your parfaits.
- Spoon a layer of the cream cheese mixture over the graham cracker crust in each cup, smoothing it out with the back of the spoon. This will create a lovely contrast to the crunchy base.
- Next, sprinkle a layer of chopped pecans over the cream cheese filling in each cup. Ascertain an even distribution of the pecans to add that classic pecan pie flavor.
- Repeat the layering process by adding another layer of the cream cheese mixture followed by more pecans, finishing with a dollop of whipped topping on top for an extra touch of creaminess.
- If desired, top with additional chopped pecans or drizzle with caramel sauce before serving. Chill the parfaits in the refrigerator for about 10 minutes to set slightly before digging in.
Extra Tips: For added flavor, consider toasting the pecans in a dry skillet over medium heat for a few minutes until fragrant before adding them to the parfaits. This will enhance their nuttiness and give your dessert an extra depth of flavor.
You can also swap the whipped topping for freshly whipped cream for a richer texture. These parfaits can be made ahead of time and stored in the fridge, making them a convenient option for holiday entertaining. Enjoy your delicious Pecan Pie Parfaits!
Mini Pumpkin Pies

Title: Mini Pumpkin Pies
Prep Time: 15 minutes
Cook Time: 15 minutes
Number of Servings: 12
Required Equipment List: Muffin tin, mixing bowl, whisk, measuring cups, measuring spoons, oven
Cuisine Type: American
These Mini Pumpkin Pies are the perfect bite-sized treat for your Thanksgiving dessert table. With a creamy pumpkin filling nestled in flaky pastry shells, these delightful desserts capture the essence of fall in every bite.
The simplicity of the recipe allows you to whip them up in under 30 minutes, making them an excellent option for last-minute gatherings or potlucks. Using pre-made pie crusts saves time and guarantees a flaky, tender base without the hassle of making dough from scratch.
The spiced pumpkin filling, featuring warm flavors of cinnamon, nutmeg, and cloves, pairs beautifully with a dollop of whipped cream on top. These mini pies aren’t only delicious but also visually appealing, making them a crowd-pleaser for any holiday celebration.
Ingredients:
- 1 package of pre-made pie crusts (usually contains 2 crusts)
- 1 cup canned pumpkin puree
- 1/2 cup sweetened condensed milk
- 1 large egg
- 1 teaspoon ground cinnamon
- 1/2 teaspoon ground nutmeg
- 1/4 teaspoon ground ginger
- 1/4 teaspoon ground cloves
- 1/4 teaspoon salt
- Whipped cream (for serving, optional)
Instructions:
- Preheat your oven to 400°F (200°C). Lightly grease a muffin tin with non-stick spray to guarantee easy removal of the pies once baked.
- Roll out the pre-made pie crusts on a lightly floured surface. Using a round cookie cutter or a glass, cut out circles that are about 4 inches in diameter. You should have enough circles to fill the muffin tin with 12 mini pie shells.
- Gently press each pie crust circle into the muffin tin cups, making sure to create a small border around the edges. This will hold the pumpkin filling and give the pies their shape.
- In a mixing bowl, whisk together the pumpkin puree, sweetened condensed milk, egg, cinnamon, nutmeg, ginger, cloves, and salt until the mixture is smooth and well combined.
- Pour the pumpkin filling into each prepared pie crust, filling them about three-quarters full to allow for slight expansion during baking.
- Bake the mini pumpkin pies in the preheated oven for 15 minutes or until the filling is set and the crust is golden brown. Allow them to cool in the muffin tin for a few minutes before carefully removing them.
- Serve the mini pumpkin pies warm or at room temperature, topped with a dollop of whipped cream if desired.
Extra Tips: For an extra touch of flavor, consider adding a splash of vanilla extract to the filling mixture. If you want to make these pies ahead of time, you can prepare them and store them in the refrigerator for a day before baking.
Just remember to let them come to room temperature before placing them in the oven. Enjoy these delightful bites at your Thanksgiving feast!
Cinnamon Roll Casserole
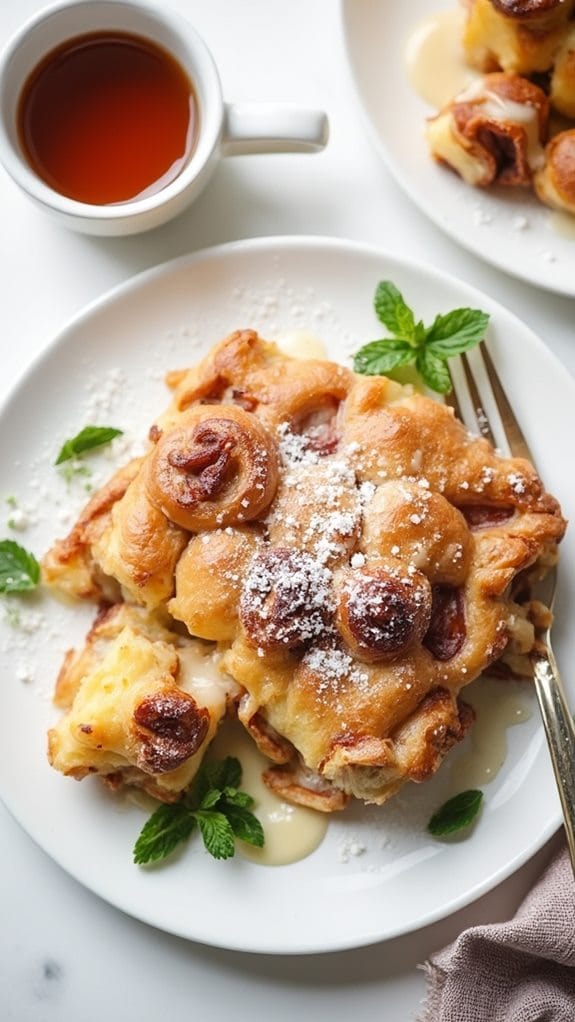
Title: Cinnamon Roll Casserole
Prep Time: 10 minutes
Cook Time: 20 minutes
Number of Servings: 8
Required Equipment List: 9×13 inch baking dish, mixing bowl, whisk, oven
Cuisine Type: American
This Cinnamon Roll Casserole is a delightful and indulgent dish that takes the beloved flavors of cinnamon rolls and transforms them into a simple casserole format. Perfect for a cozy brunch or a sweet breakfast treat, this recipe allows you to enjoy the warm, gooey goodness of cinnamon rolls with minimal effort.
The combination of cinnamon, vanilla, and a rich custard makes this dish both comforting and satisfying, and it can be on your table in less than 30 minutes!
Using pre-made cinnamon roll dough is the key to this quick and easy recipe. With just a few additional ingredients, you can create a decadent casserole that rivals any bakery’s offering. Top it with a creamy glaze and serve it warm for a delicious start to your day or a festive dessert during the holidays.
Ingredients:
- 2 cans (12.4 ounces each) refrigerated cinnamon rolls with icing
- 4 large eggs
- 1 cup milk
- 1 teaspoon vanilla extract
- 1 teaspoon ground cinnamon
- 1/4 cup maple syrup (optional)
- Powdered sugar (for dusting, optional)
Instructions:
- Preheat your oven to 350°F (175°C) and grease a 9×13 inch baking dish to prevent sticking. This will guarantee a golden, crisp bottom on your casserole while making cleanup a breeze.
- Open the cans of cinnamon rolls and cut each roll into quarters. Evenly distribute the cinnamon roll pieces in the prepared baking dish, ensuring they’re spread out for even cooking.
- In a mixing bowl, whisk together the eggs, milk, vanilla extract, ground cinnamon, and maple syrup (if using). This mixture will serve as the custard that binds the cinnamon rolls together.
- Pour the egg mixture evenly over the cinnamon roll pieces in the baking dish, making sure to coat all the pieces. Use a fork or spatula to gently press down on the rolls to help them absorb the liquid.
- Bake in the preheated oven for 20-25 minutes or until the casserole is puffed and golden brown. A toothpick inserted in the center should come out clean, indicating that it’s fully cooked.
- Once baked, remove the casserole from the oven and allow it to cool for a few minutes. Drizzle the included icing from the cinnamon rolls over the top while it’s still warm, and dust with powdered sugar if desired before serving.
Extra Tips:
For a fun twist, consider adding chopped nuts, chocolate chips, or dried fruit to the cinnamon roll pieces before pouring the custard over them.
You can also experiment with flavored extracts like almond or maple for added depth. Serve this casserole warm with a side of fresh fruit or whipped cream for a truly indulgent experience. Enjoy your deliciously easy Cinnamon Roll Casserole!
Chocolate Dipped Pretzels

Title: Chocolate Dipped Pretzels
Prep Time: 10 minutes
Cook Time: 20 minutes
Number of Servings: 12
Required Equipment List: Baking sheet, parchment paper, microwave-safe bowl, fork, cooling rack
Cuisine Type: American
Chocolate Dipped Pretzels are a delightful combination of sweet and salty that makes for a perfect quick dessert or snack for Thanksgiving gatherings. These treats are incredibly easy to prepare and offer a satisfying crunch with every bite.
The process involves dipping crisp pretzels into melted chocolate and allowing them to set, making them an appealing option for both kids and adults alike. Not only are these chocolate-dipped delights visually appealing, but they can also be customized with different types of chocolate and toppings, such as sprinkles or crushed nuts.
They’re perfect for holiday parties, as they can be made in large batches and are easy to transport. With a minimal amount of time and ingredients, you can create a festive dessert that everyone will love.
Ingredients:
- 2 cups pretzel rods or twists
- 1 cup semi-sweet chocolate chips
- 1 tablespoon coconut oil (optional, for thinning)
- Assorted toppings (sprinkles, crushed nuts, sea salt, etc.)
Instructions:
- Begin by lining a baking sheet with parchment paper. This will prevent the chocolate-dipped pretzels from sticking as they cool. Set the baking sheet aside while you prepare the chocolate.
- In a microwave-safe bowl, add the semi-sweet chocolate chips and coconut oil (if using). Heat the mixture in the microwave in 30-second intervals, stirring between each interval until the chocolate is completely melted and smooth.
- Once the chocolate is melted, take a pretzel rod or twist and dip it into the chocolate, ensuring that it’s fully coated. Allow any excess chocolate to drip off before placing it on the prepared baking sheet.
- While the chocolate is still wet, sprinkle your desired toppings over the pretzels. Get creative with flavors by mixing and matching different toppings for a colorful display.
- Repeat the dipping and topping process until all pretzels are coated. Once finished, place the baking sheet in the refrigerator for about 15 minutes or until the chocolate has completely set.
- After the chocolate has hardened, remove the pretzels from the refrigerator. They can be served immediately or stored in an airtight container at room temperature for up to a week.
Extra Tips: For an added layer of flavor, consider using flavored chocolate, such as white chocolate or dark chocolate, in place of semi-sweet chocolate.
You can also experiment with various toppings, like crushed peppermint candies for a festive touch, or a drizzle of contrasting chocolate over the set pretzels for a decorative look. These treats are also fantastic for gifting, so don’t hesitate to package them nicely for friends and family!
Berry Tart With Whipped Cream
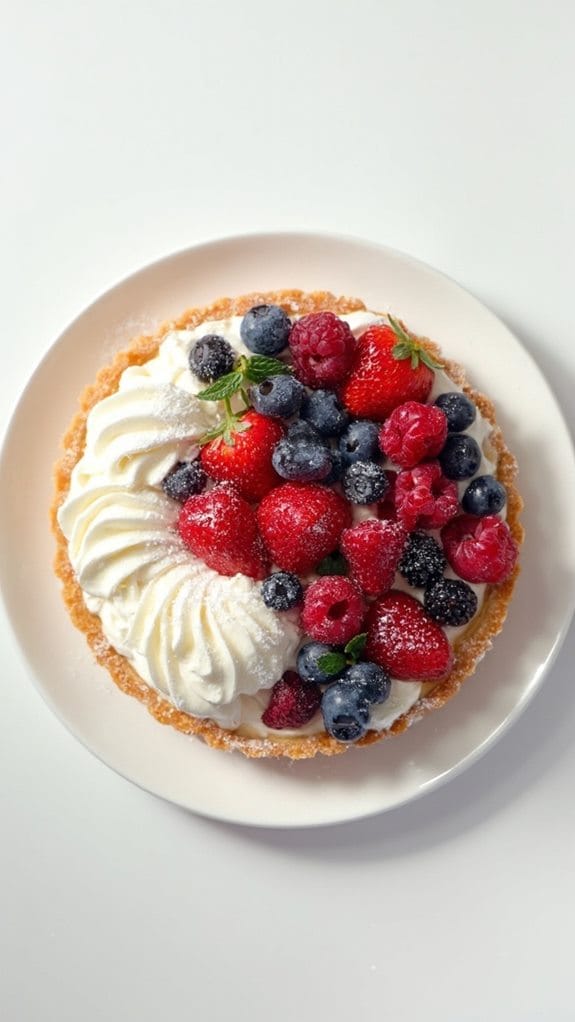
Title: Berry Tart With Whipped Cream
Prep Time: 10 minutes
Cook Time: 20 minutes
Number of Servings: 8
Required Equipment List: Tart pan, mixing bowl, whisk, oven, parchment paper, baking beans (or rice)
Cuisine Type: American
This Berry Tart With Whipped Cream is a quick and delightful dessert that captures the essence of Thanksgiving. With a buttery crust filled with a luscious cream cheese mixture and topped with an array of fresh berries, it’s as visually appealing as it’s delicious.
The combination of sweet and tart berries, complemented by the lightness of whipped cream, creates a perfect ending to your Thanksgiving feast. Ideal for those who want to impress without spending hours in the kitchen, this recipe utilizes pre-made pastry dough, allowing you to focus on the fun part—assembling and decorating your tart.
It’s a versatile dessert that can be customized with your favorite seasonal fruits, making it not only a crowd-pleaser but also a fresh addition to your holiday table.
Ingredients:
- 1 pre-made tart shell (9-inch)
- 8 ounces cream cheese, softened
- 1/2 cup powdered sugar
- 1 teaspoon vanilla extract
- 1 cup heavy whipping cream
- 2 cups mixed fresh berries (strawberries, blueberries, raspberries)
- Mint leaves (for garnish, optional)
Instructions:
- Preheat your oven to 350°F (175°C). Place the pre-made tart shell on a baking sheet and line it with parchment paper. Fill with baking beans or rice to weigh it down, ensuring the crust maintains its shape while baking.
- Bake the tart shell in the preheated oven for about 15 minutes, or until lightly golden brown. Remove from the oven, discard the parchment and weights, and allow it to cool completely.
- In a mixing bowl, beat the softened cream cheese with a whisk until smooth. Gradually add the powdered sugar and vanilla extract, mixing until well combined and creamy.
- In a separate bowl, whip the heavy cream until stiff peaks form. Gently fold the whipped cream into the cream cheese mixture until fully incorporated, creating a light and fluffy filling.
- Once the tart shell has cooled, spread the cream cheese filling evenly across the bottom. Arrange the mixed fresh berries on top in a decorative pattern, pressing them lightly into the filling to secure them.
- Refrigerate the tart for at least 30 minutes before serving to allow the flavors to meld and the filling to set. When ready to serve, garnish with mint leaves if desired.
Extra Tips: For an extra layer of flavor, consider adding a tablespoon of lemon zest to the cream cheese mixture. You can also drizzle a little honey or maple syrup over the berries before serving for additional sweetness.
This tart can be made a few hours in advance, making it an excellent choice for holiday gatherings. Enjoy your festive dessert!
Maple Walnut Fudge
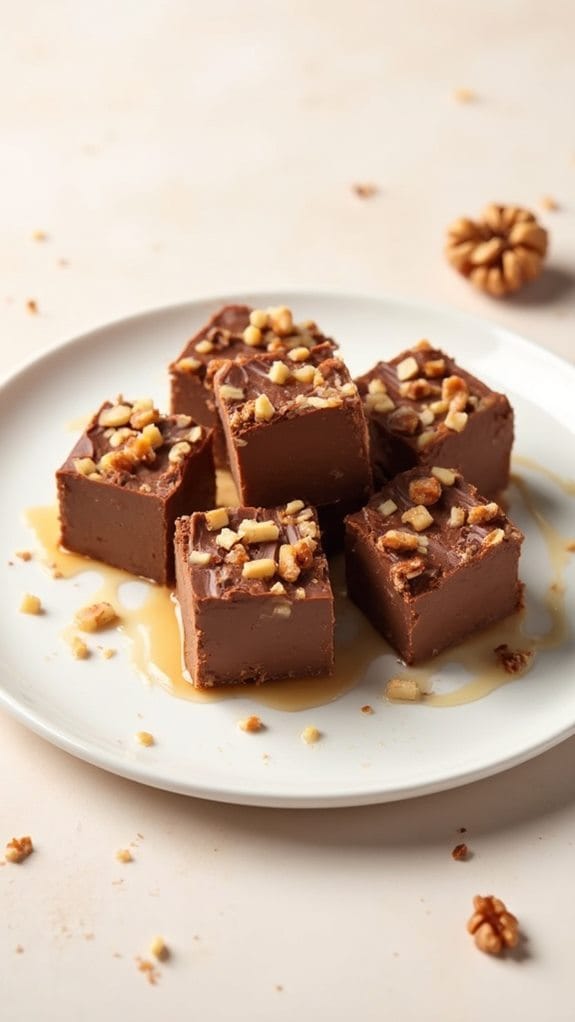
Title: Maple Walnut Fudge
Prep Time: 10 minutes
Cook Time: 20 minutes
Number of Servings: 16
Required Equipment List: Medium saucepan, wooden spoon, 8×8 inch baking dish, parchment paper, refrigerator
Cuisine Type: American
This Maple Walnut Fudge is a quick and indulgent treat that combines the rich flavors of maple syrup and crunchy walnuts. Perfect for Thanksgiving or any festive occasion, this fudge is a delightful way to satisfy your sweet tooth without spending hours in the kitchen.
With just a few ingredients, you can create a creamy, melt-in-your-mouth confection that’s sure to impress your family and friends. The beauty of this recipe lies in its simplicity – it requires minimal cooking time and no complicated techniques.
The natural sweetness of maple syrup pairs beautifully with the nuttiness of walnuts, making each bite a perfect balance of flavor and texture. Whether enjoyed as a dessert or a sweet snack, this fudge is a must-try for anyone who loves a sweet treat that can be made in a hurry.
Ingredients:
- 1 cup maple syrup
- 2 cups semi-sweet chocolate chips
- 1 can (14 oz) sweetened condensed milk
- 1 cup chopped walnuts
- 1 teaspoon vanilla extract
- Pinch of salt
Instructions:
- In a medium saucepan, combine the maple syrup and sweetened condensed milk over medium heat. Stir the mixture continuously until it comes to a gentle boil, ensuring it doesn’t scorch on the bottom.
- Once the mixture is boiling, remove it from heat and immediately add the semi-sweet chocolate chips, stirring until they’re completely melted and the mixture is smooth. This will create a rich chocolatey base for your fudge.
- Next, fold in the chopped walnuts, vanilla extract, and a pinch of salt. Mix until the walnuts are evenly distributed throughout the fudge mixture, adding a delightful crunch.
- Line an 8×8 inch baking dish with parchment paper for easy removal. Pour the fudge mixture into the prepared dish, spreading it evenly with a spatula. Smooth the top for a polished finish.
- Allow the fudge to cool at room temperature for about 10 minutes before transferring it to the refrigerator. Let it chill for at least 2 hours, or until it’s firm enough to cut into squares.
Extra Tips: For a unique twist, consider adding a sprinkle of sea salt on top of the fudge before refrigerating to enhance the flavors. If you prefer a different nut, feel free to substitute the walnuts with pecans or almonds.
Make sure to store any leftover fudge in an airtight container in the refrigerator, where it will keep for up to a week. Enjoy your delicious creation!
S’mores Dip
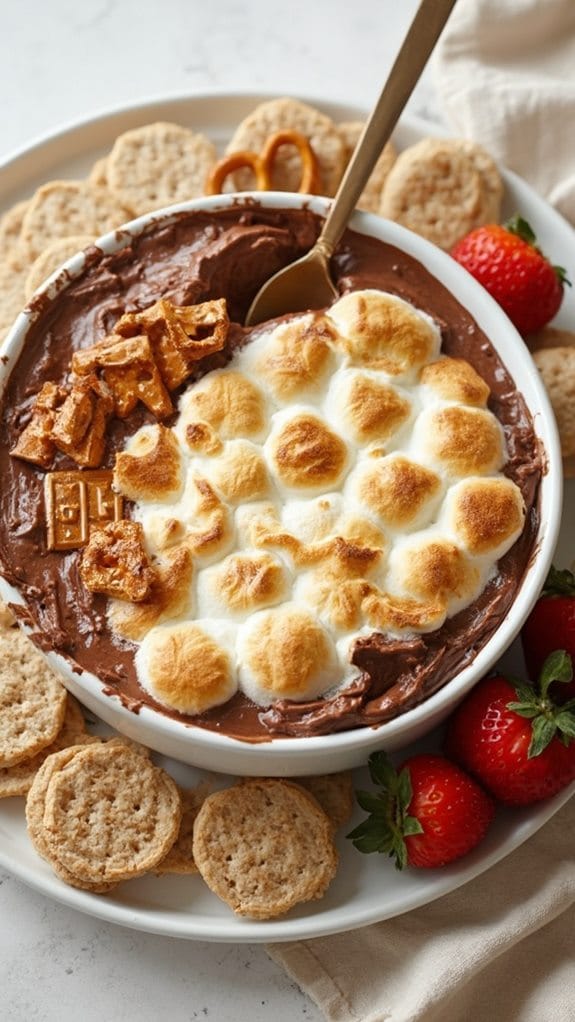
Title: S’mores Dip
Prep Time: 10 minutes
Cook Time: 10 minutes
Number of Servings: 4
Required Equipment List: Oven-safe skillet or baking dish, spatula, oven mitts
Cuisine Type: American
S’mores Dip is a delightful and gooey twist on the classic campfire treat, making it an ideal dessert for gatherings or cozy nights in. This quick recipe brings together the flavors of chocolate, marshmallows, and graham crackers in a warm, melty dip that’s sure to satisfy your sweet tooth.
With just a few simple ingredients and minimal prep time, you can indulge in this nostalgic favorite without the hassle of building a fire. Perfect for sharing, S’mores Dip is a fun and interactive dessert that invites everyone to dig in with their favorite dippers.
You can serve it with graham cracker pieces, pretzels, or even fruits like strawberries and bananas for a deliciously versatile snack. This dessert isn’t only easy to make but also a crowd-pleaser, making it a great addition to your Thanksgiving celebrations or any festive occasion.
Ingredients:
- 1 cup semi-sweet chocolate chips
- 2 cups mini marshmallows
- 1 tablespoon unsalted butter
- 1 teaspoon vanilla extract
- 1 cup graham cracker crumbs (for serving)
- Additional graham crackers, fruit, or pretzels (for dipping)
Instructions:
- Preheat your oven to 450°F (232°C). This high temperature will help melt the chocolate and toast the marshmallows perfectly, creating a deliciously gooey dip.
- In an oven-safe skillet or baking dish, spread the semi-sweet chocolate chips evenly across the bottom. Add the unsalted butter in small pieces on top of the chocolate to enhance the creaminess.
- Place the skillet in the preheated oven and bake for about 5 minutes, or until the chocolate is melted and bubbly. Keep an eye on it to prevent burning.
- Remove the skillet from the oven using oven mitts, and quickly sprinkle the mini marshmallows evenly over the melted chocolate. Return the skillet to the oven and bake for an additional 5 minutes, or until the marshmallows are golden brown and toasted.
- Once baked, remove the skillet from the oven and let it cool for a minute. Serve warm with graham cracker crumbs and additional dippers for a fun and interactive dessert experience.
Extra Tips: To make your S’mores Dip even more decadent, consider adding a layer of peanut butter or a sprinkle of crushed graham crackers on top of the chocolate before adding the marshmallows.
If you prefer a more controlled way of serving, you can also use individual ramekins for portion sizes. Enjoy this dessert straight from the oven for the best gooey experience!
Vanilla Pudding Cups
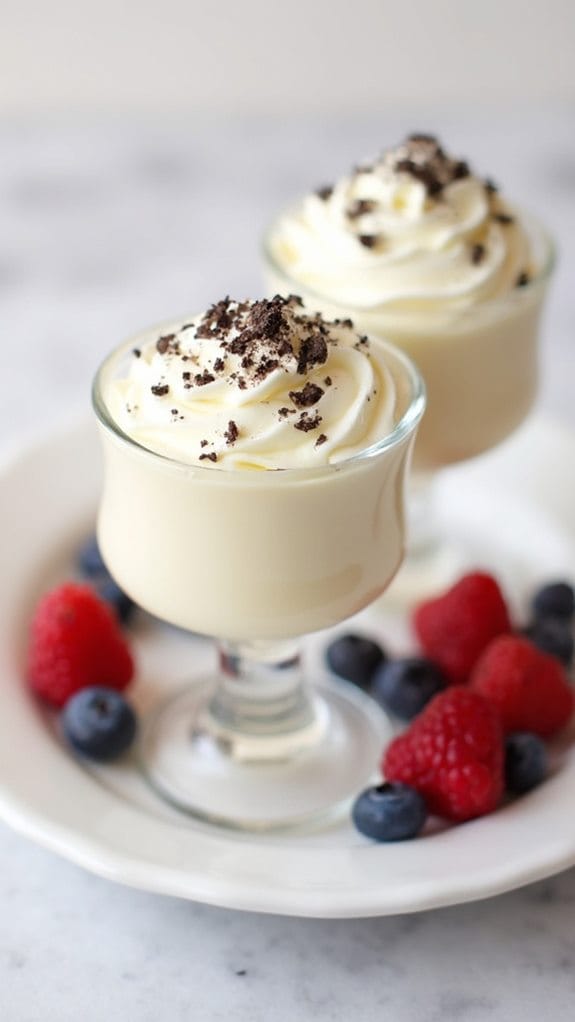
Title: Vanilla Pudding Cups
Prep Time: 10 minutes
Cook Time: 0 minutes
Number of Servings: 4
Required Equipment List: Mixing bowl, whisk, measuring cups, serving cups or bowls
Cuisine Type: American
These Vanilla Pudding Cups are a quick and delightful dessert that brings a taste of nostalgia to your Thanksgiving table. With a rich and creamy texture, this easy-to-make pudding is flavored with pure vanilla extract, making it a comforting treat that everyone will love.
The best part? It requires no cooking, allowing you to whip up this dessert in just a matter of minutes. Perfect for individual servings, these pudding cups can be dressed up with various toppings like whipped cream, fresh berries, or crushed cookies.
This versatile dessert isn’t only a crowd-pleaser but also an excellent way to use up any leftover ingredients you might’ve in your pantry. Whether served as a sweet end to your Thanksgiving feast or as a simple treat any day, these vanilla pudding cups are sure to satisfy your sweet tooth.
Ingredients:
- 2 cups milk
- 1/2 cup granulated sugar
- 1/3 cup cornstarch
- 1/4 teaspoon salt
- 1 tablespoon unsalted butter
- 1 teaspoon pure vanilla extract
- Whipped cream (for topping, optional)
- Fresh berries or crushed cookies (for garnish, optional)
Instructions:
- In a mixing bowl, combine the granulated sugar, cornstarch, and salt. Whisk together until well blended to guarantee there are no lumps.
- Gradually whisk in the milk, ensuring that the mixture is smooth and free of clumps. This step is essential for achieving a creamy texture in the pudding.
- Once combined, add the butter and vanilla extract to the mixture and stir well. The butter will melt as the pudding sets, adding richness to the flavor.
- Divide the mixture evenly into serving cups or bowls. You can cover them with plastic wrap to prevent a skin from forming on the surface as they chill.
- Refrigerate the pudding cups for at least 2 hours, or until they’re fully set. This chilling time allows the flavors to meld and the pudding to thicken.
- Before serving, top each pudding cup with whipped cream, fresh berries, or crushed cookies for added texture and flavor.
Extra Tips: For an extra burst of flavor, consider adding a pinch of cinnamon or nutmeg to the pudding mixture before refrigerating. If you prefer a dairy-free option, you can substitute the milk with almond milk or coconut milk.
These pudding cups can be made a day in advance, making them a convenient choice for holiday gatherings. Enjoy your delightful and creamy vanilla pudding!
Caramel Apple Nachos
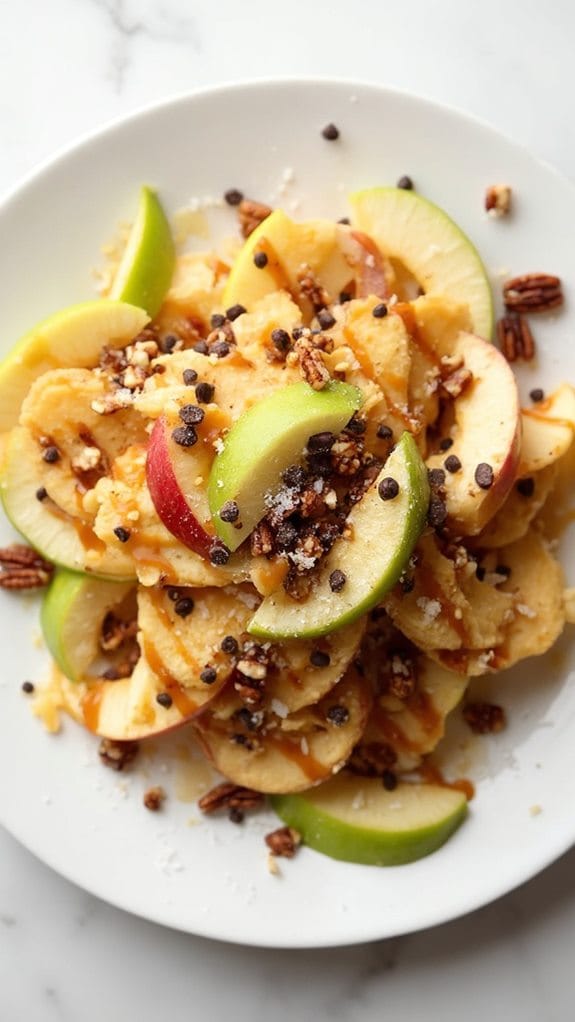
Title: Caramel Apple Nachos
Prep Time: 10 minutes
Cook Time: 5 minutes
Number of Servings: 4
Required Equipment List: Baking sheet, parchment paper, microwave-safe bowl, knife, cutting board
Cuisine Type: American
Caramel Apple Nachos are a fun and quick dessert that turns traditional apple slices into a decadent treat. This recipe combines crisp, fresh apple slices with a drizzle of warm caramel sauce, a sprinkle of chocolate chips, and a dash of nuts, creating a delightful contrast of textures and flavors.
Perfect for a Thanksgiving gathering or a cozy family night, these nachos are sure to satisfy your sweet tooth without requiring extensive prep time. Not only are these nachos delicious, but they also offer a healthier alternative to typical dessert options. By using fresh apples, you can enjoy a burst of natural sweetness and crunch, while the caramel and toppings provide just the right amount of indulgence.
This recipe is easily customizable—feel free to add your favorite toppings such as mini marshmallows, shredded coconut, or even a drizzle of peanut butter for an extra treat.
Ingredients:
- 2 medium apples (such as Granny Smith or Honeycrisp)
- 1/2 cup caramel sauce (store-bought or homemade)
- 1/4 cup chocolate chips
- 1/4 cup chopped nuts (e.g., pecans or walnuts)
- Sea salt (optional, for garnish)
Instructions:
- Begin by washing and drying the apples thoroughly. Using a knife, slice the apples into thin wedges, discarding the core. Arrange the apple slices in a single layer on a baking sheet lined with parchment paper for easy serving.
- In a microwave-safe bowl, heat the caramel sauce in the microwave for about 30-45 seconds, or until it becomes warm and pourable. Be sure to stir the sauce halfway through to guarantee even heating.
- Once heated, drizzle the warm caramel sauce generously over the arranged apple slices, allowing it to drip down the sides for an appealing presentation.
- Next, sprinkle chocolate chips and chopped nuts evenly over the caramel-drizzled apple slices. For added flavor, you can also lightly sprinkle some sea salt on top, enhancing the sweet and salty contrast.
- Serve the Caramel Apple Nachos immediately while the caramel is still warm and gooey. You can also offer extra caramel sauce on the side for dipping, if desired.
Extra Tips: For added visual appeal, consider using a variety of apple types, such as red and green apples, to create a colorful platter. If you want to make this treat even more festive, try incorporating seasonal toppings like crushed candy corn or cinnamon sugar.
Keep in mind that these nachos are best enjoyed fresh, as the apples may begin to brown if left out for too long. Enjoy your deliciously sweet creation!
Quick Fruit Salad

Title: Quick Fruit Salad
Prep Time: 10 minutes
Cook Time: 0 minutes
Number of Servings: 4
Required Equipment List: Mixing bowl, knife, cutting board, serving spoon
Cuisine Type: American
This Quick Fruit Salad is a rejuvenating and colorful addition to any Thanksgiving table, perfect for those looking for a light dessert option that can be whipped up in no time. With a medley of seasonal fruits, this salad not only tastes great but also brings a burst of color and nutritional value to your meal.
Whether served as a side dish or a dessert, this fruit salad is sure to please guests of all ages. The beauty of this recipe lies in its versatility. You can use any combination of fruits you have on hand, making it an ideal choice for using up leftover fruit.
Tossed together with a drizzle of honey and a sprinkle of lime juice, the flavors meld beautifully, enhancing the natural sweetness of the fruit. This salad is also a great way to add a touch of vitality to balance out heavier dishes typically served during the holiday season.
Ingredients:
- 1 cup strawberries, hulled and sliced
- 1 cup blueberries
- 1 cup diced pineapple
- 1 cup seedless grapes, halved
- 1 banana, sliced
- 1 tablespoon honey
- 1 tablespoon lime juice
- Fresh mint leaves for garnish (optional)
Instructions:
- Begin by preparing your fruit. Rinse the strawberries, blueberries, and grapes under cold water. Hull and slice the strawberries, dice the pineapple, and slice the banana. Halve the grapes. Place all the prepared fruit into a large mixing bowl.
- In a small bowl, whisk together the honey and lime juice until well combined. This will serve as your dressing for the fruit salad and will help to enhance the flavors of the fruit while adding a slight tang.
- Drizzle the honey-lime mixture over the prepared fruit in the mixing bowl. Gently toss the fruit using a serving spoon to guarantee that all the pieces are evenly coated with the dressing.
- Once combined, taste the fruit salad and adjust sweetness, if desired, by adding more honey. If you like, you can also add a pinch of salt to bring out the flavors even more.
- Transfer the fruit salad to a serving dish or bowl. Garnish with fresh mint leaves for an added touch of vitality and color. Serve immediately or chill in the refrigerator for a few minutes before serving to let the flavors meld.
Extra Tips: Feel free to customize your fruit salad based on seasonal availability and personal preference. Additional fruits like kiwi, oranges, or apples can add different textures and flavors.
If you’re preparing the salad in advance, consider adding delicate fruits like bananas just before serving to prevent browning. For a delightful twist, sprinkle some chopped nuts or shredded coconut on top for added crunch and flavor!
Thanksgiving Cookie Platter
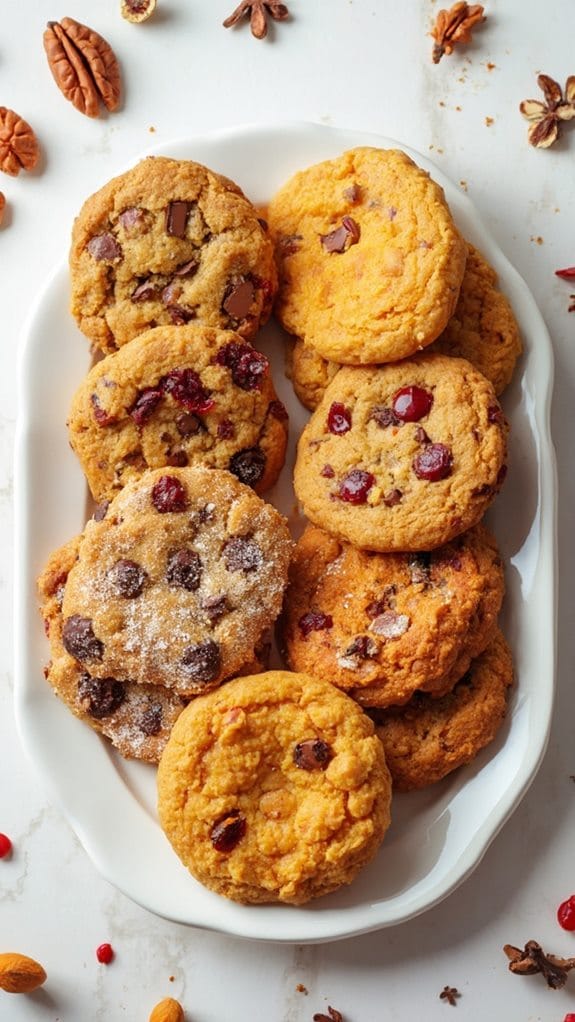
Title: Thanksgiving Cookie Platter
Prep Time: 15 minutes
Cook Time: 10 minutes
Number of Servings: 24 cookies
Required Equipment List: Baking sheet, parchment paper, mixing bowl, whisk, cookie scoop, oven
Cuisine Type: American
The Thanksgiving Cookie Platter is a festive and colorful assortment of cookies that captures the essence of the holiday season. With a variety of flavors and textures, these cookies aren’t only delicious but also visually appealing, making them perfect for sharing with family and friends during Thanksgiving gatherings.
From classic chocolate chip to pumpkin spice and cranberry orange, this platter offers something for everyone and can be prepared in under 30 minutes. Creating a cookie platter allows you to showcase your baking skills without spending hours in the kitchen.
Simply whip up a few different cookie recipes, let them cool, and arrange them beautifully on a platter. This delightful selection won’t only satisfy your sweet tooth but also serve as a centerpiece for your holiday table, inviting guests to indulge in a variety of treats.
Ingredients:
- 1 cup unsalted butter, softened
- 1 cup brown sugar, packed
- 1/2 cup granulated sugar
- 2 large eggs
- 2 teaspoons vanilla extract
- 3 cups all-purpose flour
- 1 teaspoon baking soda
- 1/2 teaspoon salt
- 1 cup chocolate chips
- 1 cup dried cranberries
- 1 cup pumpkin puree
- 1 teaspoon pumpkin spice
- 1/2 cup chopped nuts (optional)
Instructions:
- Preheat your oven to 350°F (175°C) and line two baking sheets with parchment paper. This will guarantee that your cookies don’t stick to the pan and will make for an easy cleanup.
- In a large mixing bowl, cream together the softened butter, brown sugar, and granulated sugar until light and fluffy. This process incorporates air into the mixture, which will help your cookies rise nicely.
- Beat in the eggs one at a time, then add the vanilla extract, mixing until well combined. This adds moisture and flavor to the cookie dough.
- In a separate bowl, whisk together the all-purpose flour, baking soda, and salt. Gradually add this dry mixture to the wet ingredients, stirring until just combined. Be careful not to overmix, as this can lead to tough cookies.
- Divide the dough into three portions. To one portion, fold in the chocolate chips; to the second, mix in the dried cranberries; and to the third, incorporate the pumpkin puree and pumpkin spice. If desired, add chopped nuts to any of the mixtures for extra crunch.
- Using a cookie scoop or tablespoon, drop rounded balls of dough onto the prepared baking sheets, spacing them about 2 inches apart. This allows room for spreading while baking.
- Bake the cookies in the preheated oven for 8-10 minutes or until the edges are lightly golden. Remove from the oven and let them cool on the baking sheets for a few minutes before transferring them to a wire rack to cool completely.
Extra Tips: To save time, you can prepare the cookie dough ahead of time and refrigerate it for up to 24 hours before baking. This not only enhances the flavors but also allows you to bake fresh cookies when you’re ready to serve them.
For a festive touch, consider decorating the cooled cookies with icing or sprinkles to further enhance your Thanksgiving Cookie Platter. Enjoy the delightful variety and the warmth of sharing homemade treats with loved ones!
Conclusion
With these 15 quick Thanksgiving desserts, you can whip up something sweet in no time, leaving you more moments to savor with friends and family. Isn’t it invigorating to know that delicious treats don’t have to take hours to prepare? From creamy Pumpkin Spice Mousse to fun Caramel Apple Nachos, there’s something for everyone. So, why not add a few of these delightful desserts to your holiday spread? Your guests will definitely appreciate the effort!

