No products in the cart.

16 Time-Tested Hanukkah Appetizers Your Grandmother Would Love
Looking for Hanukkah appetizers that would warm your grandmother’s heart? You’re in luck! Classic potato latkes, crispy and golden, are a must. They pair beautifully with sour cream or applesauce. Don’t forget savory spinach bourekas and sweet cheese blintzes for a delightful mix of flavors. You might also try a colorful beet and apple salad to brighten the table. If you’re feeling adventurous, mini brisket sliders and stuffed mini peppers will steal the spotlight. With options like creamy spinach dip and a pickled vegetable platter, you’ll impress everyone. Curious about even more festive ideas? There’s plenty more to explore!
Contents
hide
Classic Potato Latkes
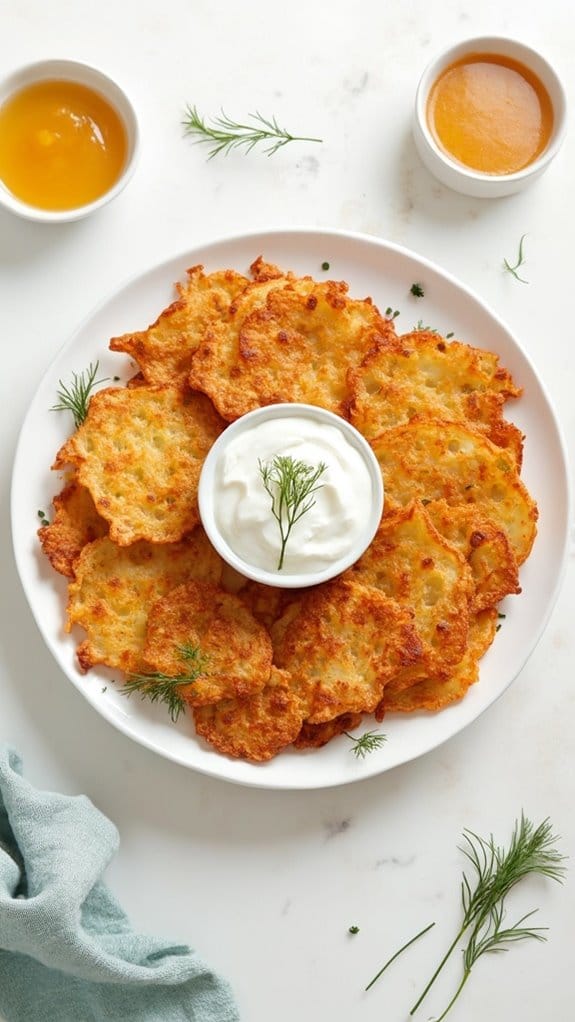
Title: Classic Potato Latkes
Prep Time: 15 minutes
Cook Time: 20 minutes
Number of Servings: 4
Required Equipment List: Box grater or food processor, mixing bowl, frying pan, spatula, paper towels, slotted spoon
Cuisine Type: Jewish
Classic Potato Latkes are a beloved staple during Hanukkah celebrations, representing the miracle of the oil. These crispy, golden-brown pancakes are made with simple ingredients that highlight the natural flavor of potatoes. Traditionally served with applesauce or sour cream, latkes aren’t only a delicious appetizer but also a symbol of the joyful spirit of the festival.
With a perfect balance of crispy edges and tender centers, they’re sure to be a hit at any holiday gathering. Making latkes from scratch is a fun and rewarding process. The key to achieving the perfect texture lies in properly draining excess moisture from the grated potatoes, which allows for that coveted crispy exterior. This recipe guides you through the steps to create these delightful potato pancakes, making certain they’re a standout dish at your Hanukkah feast.
Ingredients:
- 4 medium russet potatoes, peeled
- 1 small onion, peeled
- 2 large eggs
- 1/4 cup all-purpose flour
- 1 teaspoon salt
- 1/4 teaspoon black pepper
- Vegetable oil (for frying)
- Applesauce or sour cream (for serving)
Instructions:
- Using a box grater or food processor, grate the peeled potatoes and onion into a large mixing bowl. After grating, place the mixture in a clean kitchen towel and squeeze out as much liquid as possible. This step is essential for achieving crispiness.
- In a separate bowl, whisk together the eggs, flour, salt, and black pepper until well combined. Add the drained potato and onion mixture to the egg mixture, stirring until everything is evenly coated.
- Heat about 1/4 inch of vegetable oil in a frying pan over medium-high heat. To test if the oil is hot enough, drop a small amount of the latke mixture into the pan; it should sizzle immediately.
- Using a spoon or your hands, form small patties of the potato mixture and carefully place them into the hot oil, cooking only a few at a time to avoid overcrowding. Fry for about 4-5 minutes on each side, or until they’re golden brown and crispy.
- Once cooked, transfer the latkes to a plate lined with paper towels to absorb excess oil. Repeat the frying process until all the mixture is used, adjusting the heat as necessary to prevent burning.
- Serve the latkes warm with a side of applesauce or sour cream for dipping. Enjoy the crispy goodness with family and friends during your Hanukkah celebrations!
Extra Tips: For an extra flavor boost, consider adding a tablespoon of finely chopped fresh herbs, such as dill or chives, to the potato mixture. If you prefer a spicier kick, a pinch of cayenne pepper can be mixed in as well.
Make certain that your oil is hot enough to prevent the latkes from absorbing too much oil, and don’t forget to keep them warm in a low oven while you finish frying the remaining batches. Enjoy your homemade latkes!
Savory Spinach Bourekas
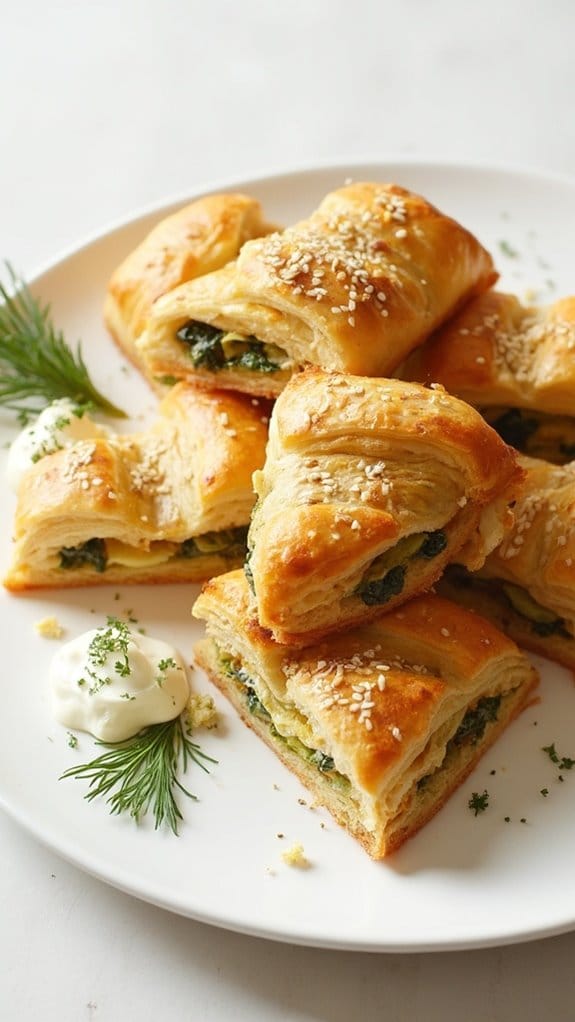
Title: Savory Spinach Bourekas
Prep Time: 20 minutes
Cook Time: 30 minutes
Number of Servings: 8
Required Equipment List: Baking sheet, parchment paper, mixing bowl, rolling pin, oven
Cuisine Type: Middle Eastern
Savory Spinach Bourekas are a delightful pastry that hails from the Mediterranean region, particularly popular in Israeli and Turkish cuisine. These flaky, golden-brown pastries are filled with a rich mixture of sautéed spinach, creamy feta cheese, and aromatic herbs, making them an irresistible appetizer for any gathering.
Bourekas can be served warm or at room temperature, making them versatile for both parties and casual family dinners. The beauty of this dish lies in its simplicity and the use of store-bought pastry dough, which cuts down on preparation time considerably. Wrapped in layers of crispy dough, each bite of these bourekas delivers a satisfying crunch followed by a burst of savory filling.
They’re perfect for celebrating Hanukkah or any festive occasion, offering a taste of tradition that everyone will enjoy.
Ingredients:
- 1 package of puff pastry (2 sheets, thawed)
- 2 cups fresh spinach, chopped
- 1 cup feta cheese, crumbled
- 1 small onion, finely chopped
- 2 cloves garlic, minced
- 1 egg, beaten (for egg wash)
- 2 tablespoons olive oil
- Salt and pepper to taste
- 1 teaspoon ground cumin
- Sesame seeds (for garnish, optional)
Instructions:
- Preheat your oven to 400°F (200°C) and line a baking sheet with parchment paper. This will help prevent the bourekas from sticking and guarantee an easy cleanup after baking.
- In a skillet, heat the olive oil over medium heat. Add the chopped onion and sauté until translucent, about 5 minutes. Then, add the minced garlic and chopped spinach, cooking until the spinach is wilted. Season with salt, pepper, and ground cumin. Remove from heat and let the mixture cool slightly.
- In a mixing bowl, combine the spinach mixture with crumbled feta cheese. Stir until well combined, and set aside. This filling is packed with flavor and provides a rich contrast to the crispy pastry.
- Roll out the thawed puff pastry sheets on a lightly floured surface. Cut each sheet into squares, approximately 4×4 inches. Place a heaping tablespoon of the spinach filling in the center of each square. Be careful not to overfill, as this can lead to leaks during baking.
- Fold each square into a triangle by bringing opposite corners together, sealing the edges by pressing with a fork. Brush the tops of the bourekas with the beaten egg for a beautiful golden finish. Optionally, sprinkle sesame seeds on top for added texture.
- Bake the bourekas in the preheated oven for 25-30 minutes, or until they’re puffed up and golden brown. Keep an eye on them, as baking times may vary depending on your oven.
Extra Tips: For added flavor, consider mixing in some chopped fresh herbs like dill or parsley into the filling. You can also experiment with different cheeses, such as ricotta or goat cheese, to create variations of this classic dish.
Bourekas can be made ahead of time and frozen before baking; just add a few extra minutes to the baking time if baking from frozen. Enjoy your savory snacks!
Sweet Cheese Blintzes
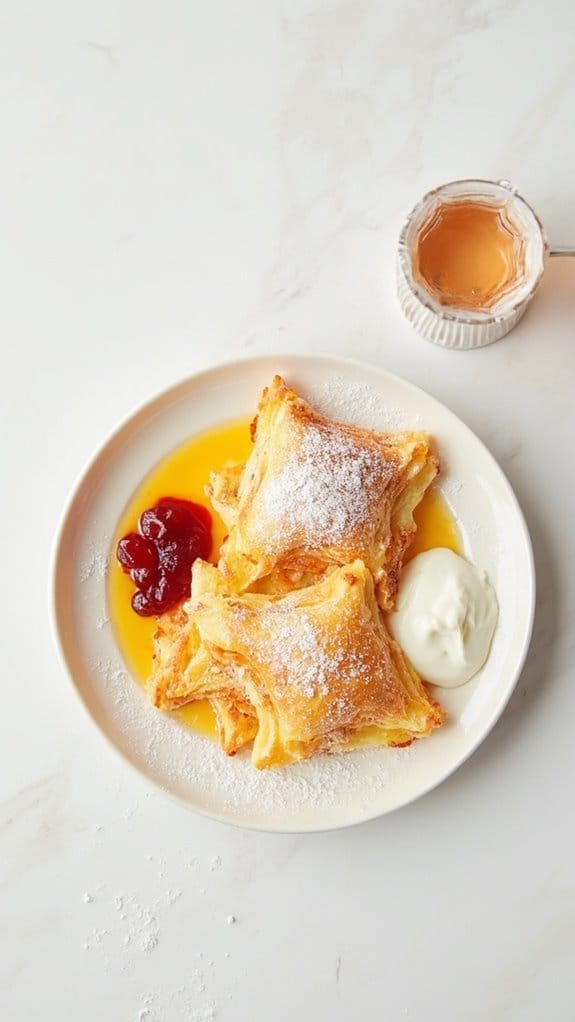
Title: Sweet Cheese Blintzes
Prep Time: 30 minutes
Cook Time: 15 minutes
Number of Servings: 6
Required Equipment List: Mixing bowl, frying pan, spatula, measuring cups, measuring spoons, blender or food processor, parchment paper
Cuisine Type: Jewish
Sweet Cheese Blintzes are a delightful traditional dish that brings a touch of sweetness to the table, making them a perfect appetizer or dessert for Hanukkah celebrations. These delicate crepes are filled with a creamy cheese mixture, often flavored with vanilla and lemon zest, creating a wonderful balance of flavors.
When pan-fried to golden perfection, they develop a slightly crispy exterior that encases the soft, sweet filling, making each bite a heavenly experience. Making blintzes can be a fun and rewarding activity, especially when shared with family and friends.
While the process may seem intricate, the results are well worth the effort. Serve them with a dusting of powdered sugar, a dollop of sour cream, or a drizzle of fruit preserves to enhance their sweetness and add a beautiful presentation to your holiday table.
Ingredients:
- 1 cup all-purpose flour
- 2 large eggs
- 1 ½ cups milk
- 2 tablespoons melted butter
- 1 teaspoon vanilla extract
- 1 cup ricotta cheese
- ½ cup cream cheese, softened
- ¼ cup granulated sugar
- Zest of 1 lemon
- ¼ teaspoon salt
- Oil for frying
- Powdered sugar for serving (optional)
Instructions:
- In a mixing bowl, combine the flour, eggs, milk, melted butter, and vanilla extract. Whisk until smooth, ensuring there are no lumps. The batter should be slightly thinner than pancake batter. Let it rest for about 15 minutes, which helps to relax the gluten, resulting in more tender crepes.
- Heat a non-stick frying pan over medium heat and lightly grease it with oil. Pour about ¼ cup of the batter into the pan, swirling it around to create a thin, even layer. Cook for about 1-2 minutes or until the edges begin to lift and the bottom is lightly golden. Flip and cook the other side for an additional minute. Remove the crepe and place it on a sheet of parchment paper. Repeat this process with the remaining batter.
- In a blender or mixing bowl, combine the ricotta cheese, cream cheese, granulated sugar, lemon zest, and salt. Blend or mix until smooth and creamy. This will be your delicious filling.
- Take one crepe and place a generous spoonful of the cheese mixture in the center. Fold the sides over the filling, then roll it up tightly from the bottom to the top. Repeat with the remaining crepes and filling.
- In the same frying pan, add a little oil over medium heat. Place the filled blintzes seam-side down and cook for about 2-3 minutes on each side until they’re golden brown and heated through.
- Serve the blintzes warm, dusted with powdered sugar, and accompanied by sour cream or fruit preserves, if desired.
Extra Tips: For an added touch of flavor, consider mixing in some cinnamon or nutmeg into the cheese filling. If you have leftover crepes, they can be stored in the refrigerator or freezer and reheated when needed.
Additionally, feel free to experiment with different fillings, such as fruit or chocolate, to create your own unique blintzes. Enjoy this sweet treat during your Hanukkah festivities!
Beet and Apple Salad
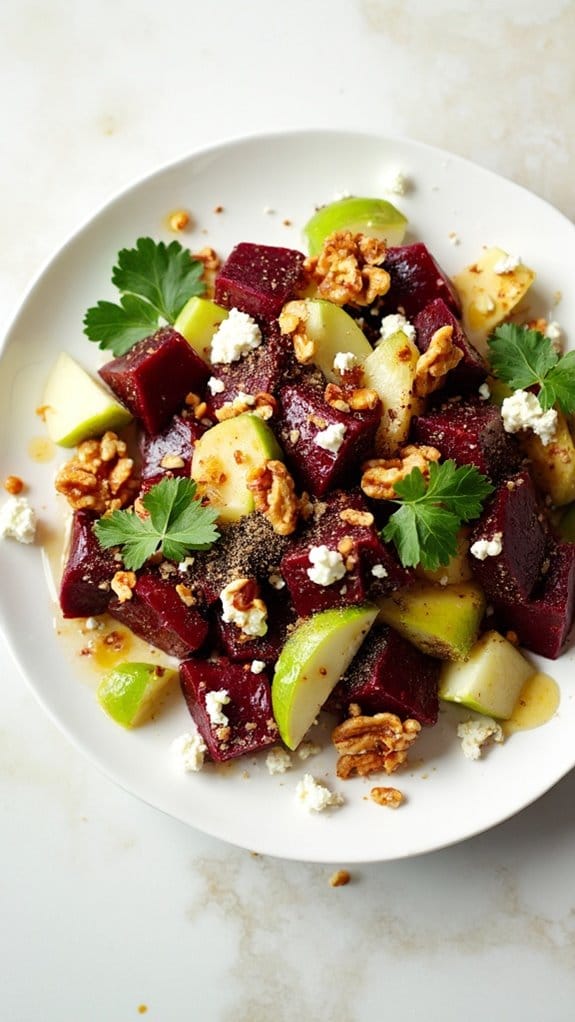
Title: Beet and Apple Salad
Prep Time: 15 minutes
Cook Time: 0 minutes
Number of Servings: 4
Required Equipment List: Mixing bowl, whisk, knife, cutting board, serving platter
Cuisine Type: Jewish-American
This Beet and Apple Salad is a revitalizing and vibrant dish that beautifully combines the earthiness of roasted beets with the crisp sweetness of fresh apples. The salad isn’t only visually appealing but also packed with nutrients, making it a perfect appetizer for your Hanukkah celebration.
The addition of walnuts adds a delightful crunch, while the tangy vinaigrette ties all the flavors together, creating a harmonious blend that’s sure to impress your guests.
With no cooking required, this salad is incredibly easy to prepare, allowing you to focus on other dishes as you get ready for your holiday festivities. It’s a versatile recipe that can be served as a light starter or as a side dish to complement your main courses. The vibrant colors and flavors make it a standout addition to any holiday table.
Ingredients:
- 2 medium beets, roasted and diced
- 1 large apple, cored and diced
- 1/2 cup walnuts, toasted and chopped
- 1/4 cup feta cheese, crumbled (optional)
- 3 tablespoons olive oil
- 1 tablespoon apple cider vinegar
- 1 teaspoon honey
- Salt and pepper to taste
- Fresh parsley for garnish
Instructions:
- Begin by preparing the roasted beets. If not already done, roast the beets by wrapping them in foil and placing them in a preheated oven at 400°F (200°C) for about 45 minutes or until tender. Allow them to cool, then peel and dice them into bite-sized pieces.
- In a large mixing bowl, combine the diced roasted beets, diced apple, and chopped walnuts. If desired, add crumbled feta cheese for an extra layer of flavor.
- In a separate small bowl, whisk together the olive oil, apple cider vinegar, honey, salt, and pepper to create the vinaigrette dressing. Adjust the seasoning to taste, ensuring a balanced flavor.
- Drizzle the vinaigrette over the beet and apple mixture, gently tossing to coat all ingredients evenly. Be careful not to mash the beets while mixing.
- Transfer the salad to a serving platter and garnish with fresh parsley for a pop of color. Serve immediately or let it chill in the refrigerator for about 15 minutes to allow the flavors to meld.
Extra Tips: Feel free to customize this salad by adding other ingredients such as arugula for a peppery bite or dried cranberries for added sweetness.
If you prefer a nut-free version, you can substitute sunflower seeds for the walnuts. This salad can be made ahead of time; just keep the dressing separate until you’re ready to serve to maintain the freshness of the apples. Enjoy this colorful dish as part of your festive Hanukkah menu!
Miniature Brisket Sliders

Title: Miniature Brisket Sliders
Prep Time: 20 minutes
Cook Time: 60 minutes
Number of Servings: 12 sliders
Required Equipment List: Slow cooker, mixing bowl, baking sheet, serving platter, knife
Cuisine Type: Jewish-American
Miniature Brisket Sliders are the perfect addition to your Hanukkah celebration, combining the rich flavors of slow-cooked brisket with the convenience of a slider. These bite-sized sandwiches aren’t only delicious but also easy to prepare, making them ideal for entertaining guests during the holiday season.
The tender brisket, seasoned with a blend of spices and cooked until it’s melt-in-your-mouth tender, is topped with tangy pickles and served on soft slider buns, creating a delightful treat that everyone will love.
These sliders can be made ahead of time, allowing you to enjoy the festivities without being stuck in the kitchen. Simply prepare the brisket in a slow cooker, let it absorb all the flavors, and then shred it just before serving. The combination of savory meat and crunchy toppings nestled in a warm bun makes these sliders a crowd-pleaser, perfect for sharing with family and friends as you light the menorah and celebrate the holiday.
Ingredients:
- 2 pounds brisket
- 1 onion, sliced
- 3 cloves garlic, minced
- 1 cup beef broth
- 2 tablespoons brown sugar
- 2 tablespoons soy sauce
- 1 tablespoon paprika
- 1 teaspoon black pepper
- 12 slider buns
- Dill pickles (for topping)
- Optional: horseradish sauce or mustard (for serving)
Instructions:
- Start by placing the sliced onion and minced garlic at the bottom of the slow cooker. This will create a flavorful base for the brisket as it cooks.
- In a mixing bowl, combine the beef broth, brown sugar, soy sauce, paprika, and black pepper. Stir until the sugar is dissolved, then pour this mixture over the brisket, ensuring the meat is well-coated.
- Cover the slow cooker and set it on low heat. Cook for 8 hours or until the brisket is fork-tender. If you’re short on time, you can cook it on high for 4-5 hours, but low and slow is ideal for flavor.
- Once the brisket is done, remove it from the slow cooker and let it rest for about 10 minutes before shredding it into bite-sized pieces using two forks.
- To assemble the sliders, cut the slider buns in half and place a generous portion of the shredded brisket on the bottom half. Top with dill pickles and any additional toppings like horseradish sauce or mustard before placing the top half of the bun on.
- Arrange the sliders on a serving platter and serve warm. These can also be kept warm in the oven on low heat if needed.
Extra Tips: For additional flavor, consider marinating the brisket overnight in the broth mixture before cooking. You can also experiment with different toppings like sautéed onions or cheese for a richer taste.
These sliders can be made a day in advance; simply reheat the brisket and assemble the sliders just before serving to maintain the freshness of the buns. Enjoy your festive gathering!
Traditional Matzo Ball Soup

Title: Traditional Matzo Ball Soup
Prep Time: 30 minutes
Cook Time: 1 hour
Number of Servings: 6
Required Equipment List: Large pot, mixing bowl, whisk, slotted spoon, ladle
Cuisine Type: Jewish
Traditional Matzo Ball Soup is a cherished comfort food that warms the soul during the chilly winter months and is especially popular during Hanukkah and Passover. This hearty soup features fluffy matzo balls that are simmered to perfection in a rich, flavorful chicken broth, often enhanced with carrots, celery, and fresh herbs. The combination of the delicate matzo balls and the savory broth creates a harmonious dish that brings families together around the table.
Making matzo ball soup isn’t only a delightful cooking experience, but it also allows you to create cherished memories with loved ones. The matzo balls can be made with a variety of ingredients, but traditional recipes typically include matzo meal, eggs, and fat, guaranteeing a light and airy texture. Serve this comforting soup as an appetizer or a main dish, and enjoy the warmth and love that comes with each spoonful.
Ingredients:
- 1 cup matzo meal
- 4 large eggs
- 1/4 cup vegetable oil or melted schmaltz
- 1/4 cup water or chicken broth
- 1 teaspoon salt
- 1/2 teaspoon black pepper
- 1 teaspoon garlic powder (optional)
- 8 cups chicken broth
- 2 carrots, sliced
- 2 stalks celery, sliced
- Fresh dill or parsley for garnish
Instructions:
- In a mixing bowl, combine the matzo meal, eggs, vegetable oil, water or chicken broth, salt, pepper, and garlic powder (if using). Mix well until all ingredients are fully incorporated into a smooth batter. Cover the bowl with plastic wrap and refrigerate for at least 30 minutes to allow the mixture to firm up.
- While the matzo mixture is chilling, bring the chicken broth to a gentle boil in a large pot. Add the sliced carrots and celery to the broth, allowing them to soften for about 10 minutes.
- Once the matzo mixture is chilled, wet your hands and form the mixture into small balls, about 1 inch in diameter. Carefully drop the matzo balls into the simmering broth. Reduce the heat to low, cover the pot, and let the matzo balls cook for about 20-25 minutes. They’ll expand as they cook.
- After the matzo balls have cooked, check for doneness by cutting one in half; it should be light and fluffy inside. Once ready, ladle the soup into bowls, guaranteeing each serving has a few matzo balls and plenty of broth and vegetables.
- Garnish each bowl with fresh dill or parsley before serving. Enjoy your traditional matzo ball soup warm and delight in the comforting flavors.
Extra Tips: To guarantee your matzo balls are extra fluffy, be careful not to overwork the mixture when forming the balls. If you prefer denser matzo balls, you can add a bit more matzo meal or reduce the liquid slightly.
Experiment with adding fresh herbs such as dill or thyme to the broth for added flavor. This soup can also be made in advance and reheated, making it perfect for holiday gatherings.
Herbed Mushroom Knishes

Title: Herbed Mushroom Knishes
Prep Time: 30 minutes
Cook Time: 25 minutes
Number of Servings: 12
Required Equipment List: Mixing bowl, rolling pin, baking sheet, parchment paper, frying pan
Cuisine Type: Jewish
Herbed Mushroom Knishes are a delightful appetizer that bring a taste of tradition to your holiday table. These savory pastries are filled with a mixture of sautéed mushrooms, onions, and fresh herbs, all enveloped in a tender dough. Perfect for sharing, these knishes can be enjoyed warm out of the oven or at room temperature, making them a versatile choice for festive gatherings like Hanukkah.
Making your own knishes may seem intimidating, but this recipe simplifies the process without compromising flavor. The rich, earthy notes of the mushrooms combined with the aromatic herbs create a filling that’s both comforting and satisfying. Serve these knishes with a side of sour cream or applesauce for a deliciously simple dipping experience that everyone will love.
Ingredients:
- 1 pound mushrooms, finely chopped
- 1 medium onion, diced
- 2 tablespoons olive oil
- 2 cloves garlic, minced
- 1 teaspoon fresh thyme, chopped
- 1 teaspoon fresh parsley, chopped
- Salt and pepper to taste
- 2 cups all-purpose flour
- 1/2 teaspoon salt
- 1/2 cup unsalted butter, cold and cubed
- 1/4 cup cold water
- 1 egg, beaten (for egg wash)
Instructions:
- In a frying pan, heat the olive oil over medium heat. Add the diced onion and sauté until translucent, about 5 minutes. Then, add the minced garlic and chopped mushrooms, cooking until the mushrooms have released their moisture and are golden brown, approximately 8-10 minutes. Stir in thyme, parsley, salt, and pepper, then remove from heat and allow to cool.
- In a mixing bowl, combine the flour and salt. Add the cold, cubed butter and use your fingers or a pastry cutter to mix until the mixture resembles coarse crumbs. Gradually add cold water, mixing until the dough comes together. Form the dough into a ball, wrap in plastic wrap, and chill in the refrigerator for at least 15 minutes.
- Preheat your oven to 375°F (190°C) and line a baking sheet with parchment paper. On a floured surface, roll out the chilled dough to about 1/8 inch thick. Cut the dough into squares, approximately 4×4 inches in size.
- Place a spoonful of the mushroom filling in the center of each square. Fold the dough over to form a triangle, pressing the edges to seal. Crimp the edges with a fork for a decorative touch.
- Arrange the knishes on the prepared baking sheet. Brush the tops with the beaten egg for a golden finish. Bake in the preheated oven for 20-25 minutes or until the knishes are golden brown and flaky.
- Once baked, remove from the oven and allow to cool slightly before serving. These knishes are best enjoyed warm but can also be served at room temperature.
Extra Tips: To enhance the flavor of the filling, try adding a splash of soy sauce or a sprinkle of Parmesan cheese. If you prefer a different filling, you can experiment with various vegetables or even meats. For a shortcut, consider using store-bought pastry dough instead of making your own, saving you time while still achieving a satisfying result. Enjoy your Herbed Mushroom Knishes at your Hanukkah celebration!
Sizzling Stuffed Grape Leaves
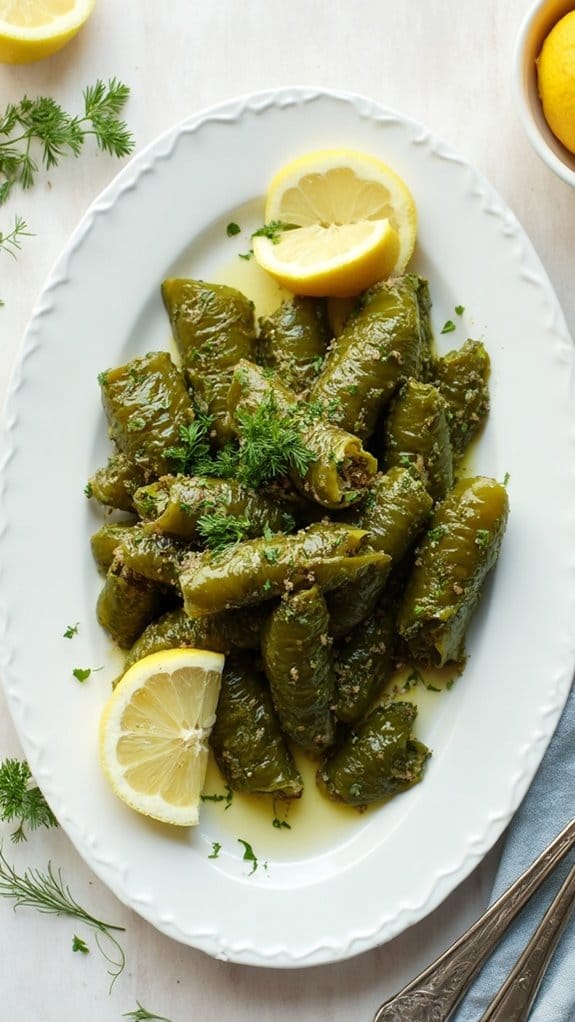
Title: Sizzling Stuffed Grape Leaves
Prep Time: 30 minutes
Cook Time: 40 minutes
Number of Servings: 6
Required Equipment List: Large pot, mixing bowl, sharp knife, wooden spoon, measuring cups, and parchment paper
Cuisine Type: Mediterranean
Sizzling Stuffed Grape Leaves, also known as Dolmas, are a traditional Mediterranean dish that showcases the delicate flavors of vine leaves filled with a savory mixture. These little parcels are typically stuffed with a combination of rice, fresh herbs, and spices, making them a delicious appetizer or side dish.
When cooked, they become tender and fragrant, offering a delightful burst of flavor in every bite. This recipe isn’t only a celebration of Mediterranean cuisine but also a chance to engage in a fun and rewarding cooking process. Preparing stuffed grape leaves is an excellent way to gather friends or family around the kitchen, as everyone can pitch in to help fill and roll the leaves.
Once cooked, these grape leaves can be served warm or at room temperature, making them versatile for any gathering or holiday celebration.
Ingredients:
- 1 jar (16 oz) grape leaves in brine
- 1 cup uncooked rice (preferably short-grain)
- 1 medium onion, finely chopped
- 2 tablespoons olive oil
- 1/4 cup fresh parsley, chopped
- 1/4 cup fresh dill, chopped
- 1 teaspoon salt
- 1/2 teaspoon black pepper
- 1/2 teaspoon allspice
- 1 lemon, juiced
- 2 cups vegetable or chicken broth
Instructions:
- Rinse the grape leaves under cold water to remove excess brine and set them aside to drain. In a large mixing bowl, combine the uncooked rice, chopped onion, olive oil, parsley, dill, salt, pepper, allspice, and lemon juice. Mix until the ingredients are well combined.
- Lay a grape leaf on a flat surface, stem side facing you. Place about 1 tablespoon of the rice mixture near the stem end of the leaf. Fold the sides over the filling and roll it up tightly from the stem end to the tip, creating a small cylinder. Repeat this process until all the filling is used.
- In a large pot, line the bottom with any leftover or torn grape leaves to prevent sticking. Arrange the stuffed grape leaves seam-side down in a single layer in the pot. If necessary, stack them in layers, alternating directions to keep them secure.
- Pour the vegetable or chicken broth over the stuffed grape leaves, making sure they’re just covered. Place a plate on top to keep them submerged during cooking. Cover the pot with a lid and bring to a gentle simmer over medium heat.
- Cook the grape leaves for about 40 minutes, or until the rice is tender and the leaves are cooked through. Once done, remove from heat and let them cool slightly before serving.
Extra Tips: For added flavor, consider mixing in some pine nuts or currants into the rice filling. If you prefer a tangier taste, serve the stuffed grape leaves with a side of lemon wedges or yogurt sauce.
These can be made ahead of time and stored in the refrigerator, where they taste even better after the flavors have had time to meld. Enjoy your culinary adventure with these delightful Sizzling Stuffed Grape Leaves!
Crispy Eggplant Chips
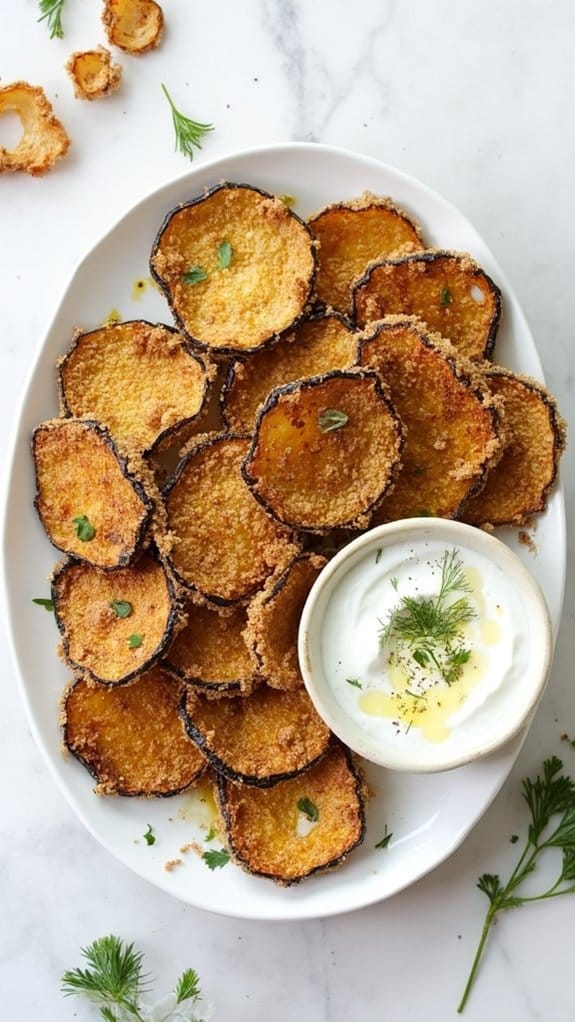
Title: Crispy Eggplant Chips
Prep Time: 15 minutes
Cook Time: 25 minutes
Number of Servings: 4
Required Equipment List: Baking sheet, parchment paper, oven, shallow bowl, whisk, cooling rack
Cuisine Type: Mediterranean
Crispy Eggplant Chips are a delightful and healthier alternative to traditional potato chips, making them the perfect appetizer for any gathering, especially during Hanukkah. Coated in a seasoned breadcrumb mixture, these eggplant slices emerge from the oven golden and crunchy, delivering a satisfying crunch with every bite. They can be served with a variety of dips, such as tzatziki or hummus, adding a revitalizing twist to your holiday platter.
This recipe isn’t only simple to prepare but also a great way to introduce more vegetables into your diet without sacrificing flavor. The eggplant absorbs the spices beautifully, and the baking method keeps them lighter than frying, making them a guilt-free snack option. These crispy chips are sure to impress your guests and will disappear quickly from the serving bowl!
Ingredients:
- 1 large eggplant
- 1 cup breadcrumbs (panko recommended)
- 1/2 cup grated Parmesan cheese
- 1 teaspoon garlic powder
- 1 teaspoon onion powder
- 1 teaspoon paprika
- Salt and pepper to taste
- 2 large eggs
- Olive oil spray
Instructions:
- Preheat your oven to 425°F (220°C) and line a baking sheet with parchment paper to prevent sticking. This will guarantee that your eggplant chips come out crispy and easy to clean up afterward.
- Slice the eggplant into thin rounds, about 1/4 inch thick. Place the rounds on a paper towel and sprinkle lightly with salt. Let them sit for about 10 minutes to draw out excess moisture. This step helps make the chips crispier when baked.
- In a shallow bowl, whisk together the eggs until well combined. In another bowl, mix the breadcrumbs, Parmesan cheese, garlic powder, onion powder, paprika, salt, and pepper until evenly blended.
- Dip each eggplant slice into the egg mixture, allowing any excess to drip off, then coat it generously with the breadcrumb mixture. Press the breadcrumbs onto the eggplant to guarantee they adhere well.
- Place the coated eggplant slices in a single layer on the prepared baking sheet. Lightly spray the tops with olive oil to encourage browning and crispiness. Bake in the preheated oven for 20-25 minutes, flipping halfway through, until the chips are golden brown and crunchy.
- Once baked, remove the eggplant chips from the oven and let them cool on a wire rack for a few minutes before serving. This cooling step will help them maintain their crispness.
Extra Tips: For added flavor, feel free to experiment with different spices in the breadcrumb mixture, such as Italian seasoning or cayenne pepper for a kick. If you prefer a gluten-free version, substitute regular breadcrumbs with almond flour or gluten-free breadcrumbs.
These eggplant chips can also be stored in an airtight container for a day or two, but they’re best enjoyed fresh out of the oven for maximum crispiness. Enjoy your crispy and delicious creation!
Honey-Glazed Carrots

Title: Honey-Glazed Carrots
Prep Time: 10 minutes
Cook Time: 20 minutes
Number of Servings: 4
Required Equipment List: Medium saucepan, cutting board, knife, wooden spoon, serving dish
Cuisine Type: Jewish
Honey-Glazed Carrots are a delightful side dish that perfectly complements any Hanukkah meal. The natural sweetness of the carrots is enhanced by a rich honey glaze, creating a beautiful balance of flavors that’s sure to please your guests. This dish not only adds a pop of color to your table but also offers a touch of sweetness that pairs wonderfully with savory holiday dishes, making it a staple for festive gatherings.
This easy-to-make recipe showcases the versatility of carrots, transforming them into a delectable treat that everyone will enjoy. The combination of honey, butter, and a hint of salt creates a glossy coating that elevates the carrots from simple to spectacular. Whether served alongside brisket, latkes, or matzo ball soup, these honey-glazed carrots will become a cherished addition to your holiday tradition.
Ingredients:
- 1 pound baby carrots (or sliced regular carrots)
- 2 tablespoons unsalted butter
- 3 tablespoons honey
- 1/2 teaspoon salt
- 1/4 teaspoon black pepper
- 1/4 teaspoon cinnamon (optional)
- Fresh parsley for garnish (optional)
Instructions:
- Begin by washing and peeling the carrots if using regular ones. If using baby carrots, simply rinse them under cold water. Cut them into even-sized pieces if necessary, ensuring they cook evenly.
- In a medium saucepan, bring a pot of salted water to a boil. Add the carrots and blanch them for about 5 minutes, just until slightly tender but still crisp. Drain the carrots and set them aside.
- In the same saucepan, melt the butter over medium heat. Once melted, add the honey, salt, black pepper, and cinnamon (if using). Stir the mixture until well combined and bubbling.
- Add the blanched carrots to the saucepan, tossing them gently to coat evenly with the honey glaze. Cook for an additional 5-7 minutes, stirring occasionally, until the carrots are tender and the glaze has thickened slightly.
- Once cooked, transfer the honey-glazed carrots to a serving dish. Garnish with freshly chopped parsley if desired, and serve warm as a delightful side dish for your Hanukkah celebration.
Extra Tips: To enhance the flavor of your honey-glazed carrots, consider adding a splash of orange juice or a sprinkle of orange zest to the glaze. If you prefer a bit of crunch, you can toss in some chopped pecans or walnuts just before serving.
These carrots can be made ahead of time and reheated gently in the oven or microwave, making them a convenient option for busy holiday preparations. Enjoy the sweet and savory goodness of these delicious carrots!
Roasted Cauliflower Bites
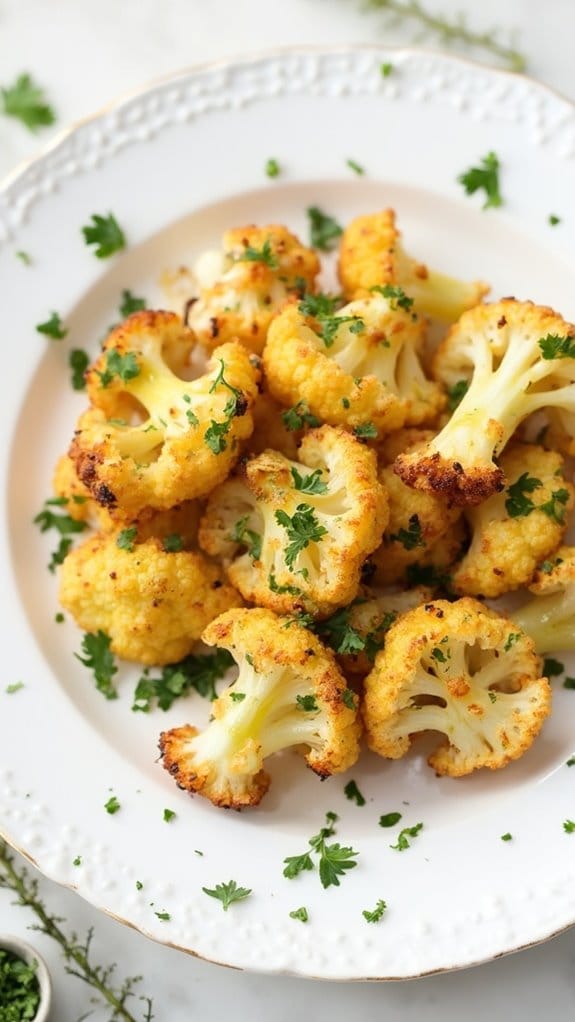
Title: Roasted Cauliflower Bites
Prep Time: 10 minutes
Cook Time: 25 minutes
Number of Servings: 4
Required Equipment List: Baking sheet, parchment paper, mixing bowl, oven
Cuisine Type: Mediterranean
Roasted Cauliflower Bites are a delicious and healthy appetizer that will elevate your Hanukkah celebrations. These bite-sized morsels are seasoned to perfection, offering a delightful crunch on the outside while remaining tender and flavorful on the inside.
With a blend of spices and a touch of olive oil, these cauliflower bites aren’t only easy to prepare but are also a fantastic way to incorporate more vegetables into your holiday feast.
These roasted bites are versatile and can be enjoyed on their own or paired with your favorite dipping sauce. They can easily be made ahead of time and served warm or at room temperature, making them perfect for gatherings.
Whether you’re looking for a light starter or a satisfying snack, these Roasted Cauliflower Bites are sure to be a hit at your table.
Ingredients:
- 1 head of cauliflower, cut into bite-sized florets
- 3 tablespoons olive oil
- 1 teaspoon garlic powder
- 1 teaspoon paprika
- 1/2 teaspoon cumin
- Salt and pepper to taste
- Fresh parsley, chopped (for garnish)
Instructions:
- Preheat your oven to 425°F (220°C) and line a baking sheet with parchment paper. This will prevent the cauliflower from sticking and make for easy cleanup.
- In a large mixing bowl, combine the cauliflower florets with olive oil, garlic powder, paprika, cumin, salt, and pepper. Toss well to guarantee that the florets are evenly coated with the seasoning.
- Spread the seasoned cauliflower evenly on the prepared baking sheet in a single layer. Avoid overcrowding the pan to allow for even roasting and maximum crispiness.
- Roast the cauliflower in the preheated oven for 20-25 minutes, or until golden brown and tender. Be sure to stir the florets halfway through the cooking time for even browning.
- Once cooked, remove the cauliflower from the oven and let it cool slightly. Transfer to a serving platter and garnish with chopped fresh parsley for a pop of color.
Extra Tips: For added flavor, you can sprinkle some grated Parmesan cheese over the cauliflower during the last few minutes of roasting. If you prefer a bit of heat, consider adding crushed red pepper flakes to the seasoning mix.
These bites are also great for meal prep; just store them in an airtight container in the refrigerator and reheat in the oven before serving. Enjoy your delicious Roasted Cauliflower Bites!
Zesty Hummus and Pita
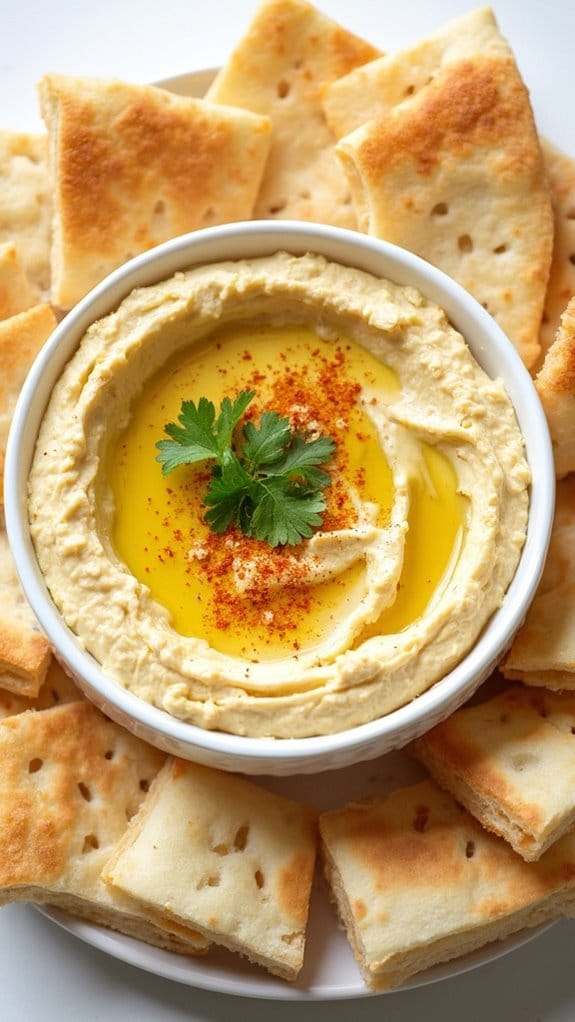
Title: Zesty Hummus and Pita
Prep Time: 10 minutes
Cook Time: 5 minutes
Number of Servings: 4
Required Equipment List: Mixing bowl, food processor, baking sheet, oven
Cuisine Type: Middle Eastern
Zesty Hummus and Pita is a delicious appetizer that brings the vibrant flavors of the Mediterranean right to your table. The creamy, tangy hummus is made with chickpeas, tahini, lemon juice, and garlic, creating a smooth and flavorful dip that pairs perfectly with warm, freshly baked pita bread.
This dish isn’t only easy to prepare but also packs a nutritious punch, making it a great option for gatherings or a simple snack at home. The hummus can be customized to suit your taste by adding spices, herbs, or extra toppings such as olives or roasted red peppers.
Serving it with warm pita bread, which can be easily baked in the oven for just a few minutes, elevates the experience and guarantees a fresh, inviting dish. This Zesty Hummus and Pita is sure to be a crowd-pleaser at any gathering, providing a delightful balance of flavors and textures.
Ingredients:
- 1 can (15 oz) chickpeas, drained and rinsed
- 1/4 cup tahini
- 2 tablespoons olive oil
- 2 tablespoons lemon juice
- 1 clove garlic, minced
- 1/2 teaspoon ground cumin
- Salt to taste
- 4 pita breads
- Paprika and parsley for garnish
Instructions:
- In a food processor, combine the drained chickpeas, tahini, olive oil, lemon juice, minced garlic, ground cumin, and salt. Process until smooth, scraping down the sides as necessary. If the hummus is too thick, add a little water or more olive oil until you reach your desired consistency.
- Taste the hummus and adjust the seasoning as needed, adding more lemon juice, salt, or cumin to enhance the flavor. Once satisfied, transfer the hummus to a serving bowl and drizzle a bit of olive oil on top for garnish. You may also sprinkle paprika and chopped parsley for an added touch.
- Preheat your oven to 350°F (175°C). Place the pita breads on a baking sheet and warm them in the oven for about 5 minutes, or until they’re soft and slightly toasted.
- Once the pita is heated, remove it from the oven and cut it into wedges for easy dipping. Serve the warm pita alongside the zesty hummus, allowing your guests to enjoy this delightful appetizer.
Extra Tips: For an extra kick, consider adding a pinch of cayenne pepper or a few drops of hot sauce to the hummus. You can also experiment with different toppings such as roasted garlic, sun-dried tomatoes, or pine nuts to personalize your hummus.
This dish is best served fresh, but any leftovers can be stored in an airtight container in the refrigerator for up to three days. Enjoy your Zesty Hummus and Pita as a delicious start to your Hanukkah celebration!
Stuffed Mini Peppers
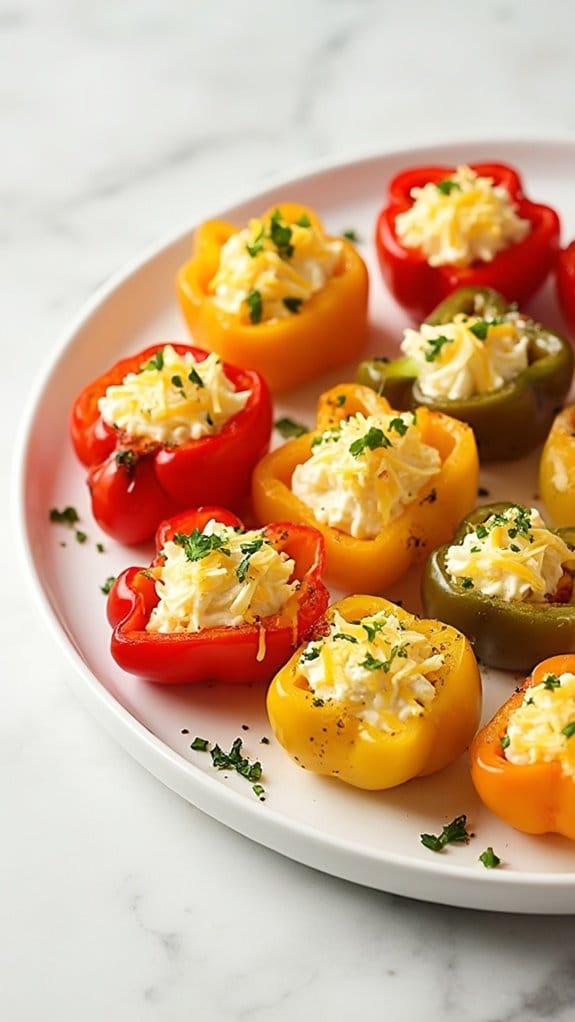
Title: Stuffed Mini Peppers
Prep Time: 15 minutes
Cook Time: 20 minutes
Number of Servings: 4
Required Equipment List: Baking dish, mixing bowl, oven, spoon, knife
Cuisine Type: Mediterranean
Stuffed Mini Peppers are a colorful and flavorful appetizer that brings a delightful crunch to your Hanukkah celebrations. These vibrant peppers are packed with a savory filling made from cream cheese, herbs, and spices, offering a perfect balance of creamy and fresh flavors. Not only do they look appealing on the table, but they’re also easy to prepare and can be enjoyed warm or at room temperature, making them a versatile addition to any festive spread.
The beauty of this recipe lies in its simplicity and adaptability. You can easily customize the filling by adding your favorite ingredients such as sautéed onions, garlic, or crumbled feta cheese. These stuffed mini peppers aren’t only a hit during the holidays but also make a great snack or party food throughout the year. With each bite, you’ll enjoy a burst of flavor that will leave your guests asking for more.
Ingredients:
- 12 mini bell peppers
- 8 ounces cream cheese, softened
- 1/2 cup shredded cheddar cheese
- 1/4 cup fresh parsley, chopped
- 1 teaspoon garlic powder
- 1 teaspoon onion powder
- Salt and pepper to taste
- Olive oil (for drizzling)
Instructions:
- Preheat your oven to 375°F (190°C). While the oven is heating, prepare the mini bell peppers by cutting them in half lengthwise and removing the seeds. Arrange them cut-side up in a baking dish.
- In a mixing bowl, combine the softened cream cheese, shredded cheddar cheese, chopped parsley, garlic powder, onion powder, salt, and pepper. Mix well until all ingredients are fully incorporated and the filling is creamy.
- Using a spoon, generously fill each half of the mini bell peppers with the cheese mixture, ensuring they’re heaping full for extra flavor.
- Once all the peppers are filled, lightly drizzle olive oil over the top of the stuffed peppers to add moisture and enhance the roasting process.
- Place the baking dish in the preheated oven and bake for 15-20 minutes, or until the peppers are tender and the cheese filling is bubbly and slightly golden on top.
- Remove the stuffed mini peppers from the oven and let them cool for a few minutes before serving. They can be enjoyed warm or at room temperature.
Extra Tips: For an extra layer of flavor, consider adding cooked sausage or bacon bits to the cheese filling for a heartier option. You can also experiment with different types of cheeses, like goat cheese or feta, to give your stuffed peppers a unique twist. If you want a little kick, try adding some chopped jalapeños or crushed red pepper flakes to the filling. Enjoy these delightful bites as a festive treat during Hanukkah or any gathering!
Creamy Spinach Dip
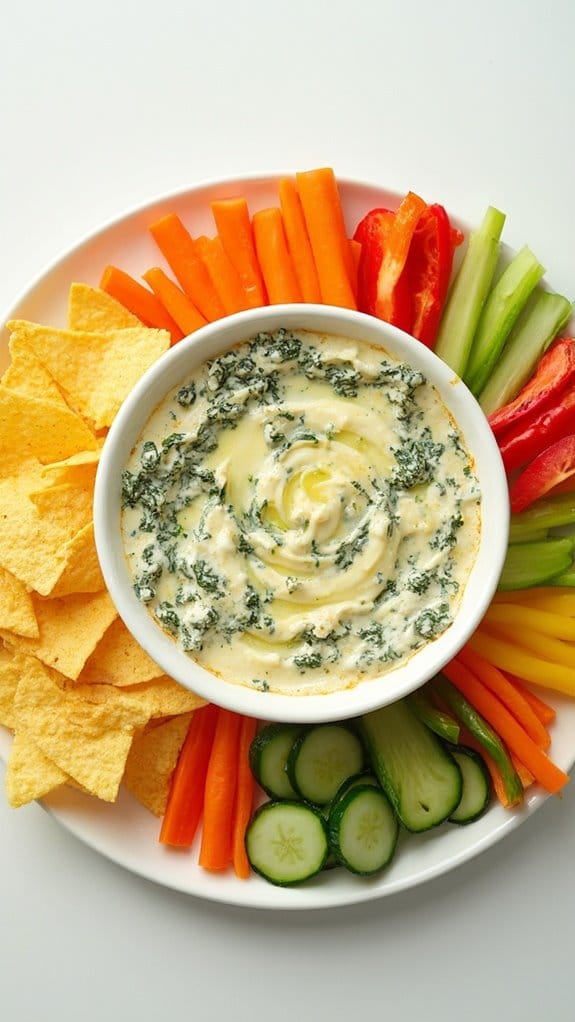
Title: Creamy Spinach Dip
Prep Time: 10 minutes
Cook Time: 20 minutes
Number of Servings: 8
Required Equipment List: Mixing bowl, baking dish, oven, spatula
Cuisine Type: American
Creamy Spinach Dip is a classic appetizer that brings together the rich flavors of spinach, cream cheese, and cheese for a delightful party treat. This dish is incredibly versatile, making it suitable for any gathering, whether it’s a festive holiday celebration or a casual game day.
The combination of creamy and cheesy elements creates a dip that’s both comforting and indulgent, making it a favorite among guests of all ages. This recipe isn’t only easy to prepare but also allows for customization based on personal preferences. You can serve it warm with an assortment of dippables like tortilla chips, pita bread, or fresh vegetables.
The creamy texture paired with the savory spinach makes for a satisfying starter that will keep everyone coming back for more. Prepare to impress your friends and family with this simple yet delicious dip!
Ingredients:
- 1 (10-ounce) package frozen chopped spinach, thawed and drained
- 1 cup cream cheese, softened
- 1/2 cup sour cream
- 1/2 cup mayonnaise
- 1 cup shredded mozzarella cheese
- 1/4 cup grated Parmesan cheese
- 1 teaspoon garlic powder
- 1 teaspoon onion powder
- Salt and pepper to taste
- Tortilla chips or fresh veggies for serving
Instructions:
- Preheat your oven to 350°F (175°C). This step is essential to guarantee that your dip bakes evenly and becomes hot and bubbly.
- In a mixing bowl, combine the softened cream cheese, sour cream, and mayonnaise. Use a spatula to mix until the ingredients are well blended and creamy.
- Add the thawed and drained spinach to the bowl, along with the shredded mozzarella cheese, grated Parmesan cheese, garlic powder, onion powder, salt, and pepper. Stir until all the ingredients are evenly incorporated.
- Transfer the spinach mixture into a baking dish, spreading it out evenly. This will help it cook uniformly and create a deliciously golden top.
- Bake the dip in the preheated oven for 20 minutes or until it’s hot and bubbly. The top should be lightly golden, indicating that the cheeses have melted beautifully.
- Once baked, remove the dip from the oven and let it cool for a couple of minutes before serving. Pair it with tortilla chips or fresh vegetables for dipping.
Extra Tips: For an extra kick, consider adding some red pepper flakes or diced jalapeños to the mixture before baking. You can also experiment with different types of cheese, such as cheddar or pepper jack, to give the dip a unique flavor.
If you want to prepare this dish in advance, you can assemble the dip ahead of time and refrigerate it until you’re ready to bake. Just add a few extra minutes to the baking time if it’s coming straight from the fridge!
Pickled Vegetable Platter
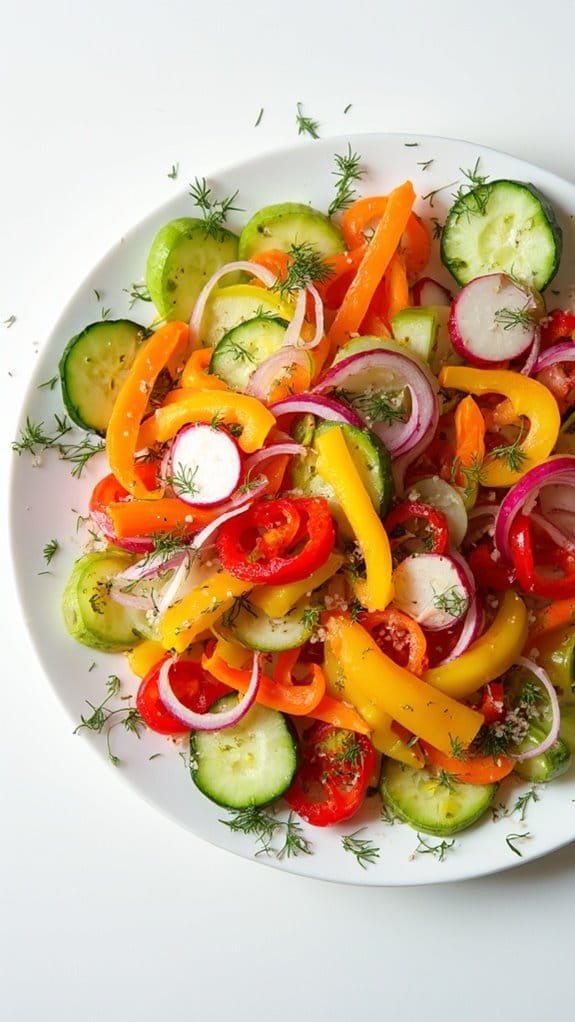
Title: Pickled Vegetable Platter
Prep Time: 30 minutes
Cook Time: 0 minutes
Number of Servings: 6
Required Equipment List: Glass jars, cutting board, knife, mixing bowl, whisk, measuring cups and spoons
Cuisine Type: Jewish
A Pickled Vegetable Platter is a vibrant and invigorating dish that brings a burst of flavor to your Hanukkah celebrations. This colorful assortment of pickled vegetables isn’t only visually appealing but also enhances the dining experience with its tangy and crunchy texture. By pickling seasonal vegetables, you’ll capture their natural flavors while adding a delightful zing that complements the richness of traditional holiday dishes.
This platter can be prepared in advance, making it a convenient choice for entertaining. The beauty of this pickled vegetable platter lies in its versatility. You can use a variety of vegetables such as cucumbers, carrots, radishes, and bell peppers, depending on your preferences or what you have on hand.
The quick pickling process infuses the vegetables with a sweet and sour brine, resulting in a delicious appetizer that can be enjoyed on its own or as part of a larger spread. Serve it alongside a selection of dips, cheeses, or crackers for a festive touch.
Ingredients:
- 1 cup cucumbers, sliced
- 1 cup carrots, julienned
- 1 cup radishes, sliced
- 1 cup bell peppers, sliced
- 1 cup red onion, thinly sliced
- 1 cup white vinegar
- 1 cup water
- 1/4 cup sugar
- 2 tablespoons salt
- 1 teaspoon mustard seeds
- 1 teaspoon black peppercorns
- 1 teaspoon garlic powder
- Fresh dill (for garnish, optional)
Instructions:
- Begin by preparing your vegetables. Wash and slice the cucumbers, carrots, radishes, bell peppers, and red onion. Arrange them in a large mixing bowl, ensuring that they’re evenly mixed for a colorful presentation.
- In a separate bowl, whisk together the white vinegar, water, sugar, salt, mustard seeds, black peppercorns, and garlic powder until the sugar and salt are fully dissolved. This will create the pickling brine that will flavor your vegetables.
- Pour the prepared brine over the mixed vegetables in the bowl, making sure they’re fully submerged. If necessary, you can add more vinegar and water in equal parts to cover the vegetables completely.
- Transfer the vegetables and brine into clean glass jars, sealing them tightly. Allow the jars to cool to room temperature before refrigerating. Let the vegetables pickle for at least 24 hours for ideal flavor, although they can be enjoyed sooner.
- When ready to serve, remove the jars from the refrigerator and garnish the pickled vegetables with fresh dill if desired. Arrange them on a platter for an eye-catching presentation, and serve alongside your favorite dips and snacks.
Extra Tips: To enhance the flavor of your pickled vegetables, consider adding additional spices such as red pepper flakes for heat, or fresh herbs like thyme or bay leaves for depth.
You can also experiment with different types of vinegar, such as apple cider or rice vinegar, for a unique twist. Remember to store any leftover pickled vegetables in the refrigerator, where they’ll continue to develop flavor for up to a week. Enjoy this delightful addition to your Hanukkah feast!
Chocolate-Dipped Fruit

Title: Chocolate-Dipped Fruit
Prep Time: 15 minutes
Cook Time: 0 minutes
Number of Servings: 6
Required Equipment List: Baking sheet, parchment paper, microwave-safe bowl, fork, refrigerator
Cuisine Type: American
Chocolate-Dipped Fruit is a simple yet elegant dessert that brings together the sweetness of fresh fruit and the indulgence of rich chocolate. This dish is perfect for any occasion, from holiday gatherings to casual get-togethers, and is sure to please both children and adults alike.
The combination of juicy strawberries, bananas, and other fruits coated in luscious chocolate creates a delightful contrast in flavors and textures that’s hard to resist. Not only is this dessert visually appealing, but it’s also incredibly easy to prepare.
With just a few ingredients and minimal time required, you can create a beautiful platter of chocolate-dipped fruit that’s perfect for sharing. Feel free to mix and match your favorite fruits and chocolates to customize this treat to your liking. Whether enjoyed as a light dessert or a fun snack, Chocolate-Dipped Fruit is a deliciously satisfying way to celebrate any occasion.
Ingredients:
- 1 cup semi-sweet chocolate chips
- 1 tablespoon coconut oil (optional)
- 1 cup strawberries, washed and dried
- 1 cup banana slices
- 1 cup pineapple chunks
- 1 cup apple slices
- Parchment paper
Instructions:
- Begin by preparing your work area. Line a baking sheet with parchment paper and set it aside. This will be where you place the chocolate-dipped fruits to cool and set.
- In a microwave-safe bowl, combine the semi-sweet chocolate chips and coconut oil (if using). Microwave in 30-second intervals, stirring in between, until the chocolate is completely melted and smooth. Be careful not to overheat the chocolate, as it can burn easily.
- Once the chocolate is melted, take each piece of fruit and dip it into the chocolate, using a fork to help cover it evenly. Allow any excess chocolate to drip off before placing the dipped fruit onto the prepared parchment-lined baking sheet.
- Continue this process until all of the fruit pieces are dipped in chocolate. You can also drizzle any leftover chocolate over the dipped fruits for added decoration.
- Once all the fruit is dipped and laid out on the baking sheet, place the baking sheet in the refrigerator for about 15-30 minutes, or until the chocolate has fully set and hardened.
Extra Tips: For added flair, consider sprinkling chopped nuts, shredded coconut, or colorful sprinkles on the chocolate before it sets. You can also use different types of chocolate, such as white or dark chocolate, for a variety of flavors.
To guarantee the fruit stays fresh and vibrant, serve the chocolate-dipped fruit within a few hours of preparation. Enjoy this delightful treat as a fun and indulgent way to enjoy your favorite fruits!
Conclusion
So, as you get ready to celebrate Hanukkah, why not try out these time-tested appetizers? Did you know that nearly 75% of Americans celebrate the festival of lights with their families? It’s true! Whether it’s latkes or blintzes, these dishes not only fill your stomach but also warm your heart. So, gather your loved ones, whip up these treats, and create memories that’ll last a lifetime. What’s your favorite Hanukkah dish to share?

