No products in the cart.

17 Dinner Recipes Using Creamy Buttermilk
Buttermilk can elevate your dinner game, don’t you think? From Creamy Buttermilk Chicken Alfredo to Buttermilk Mashed Potato Casserole, the possibilities are endless! Why not try whipping up some zesty Buttermilk Lemon Herb Chicken or savoring a comforting bowl of Creamy Buttermilk Tomato Soup? Each recipe brings a delightful twist that’ll impress your family and friends. You’ll get satisfaction with southern favorites like Buttermilk Biscuits with Gravy or Barbecue Ribs that melt in your mouth. These creamy dishes? They’re just what you need to turn an ordinary meal into something special, and there’s so much more to explore!
Contents
hide
Creamy Buttermilk Chicken Alfredo
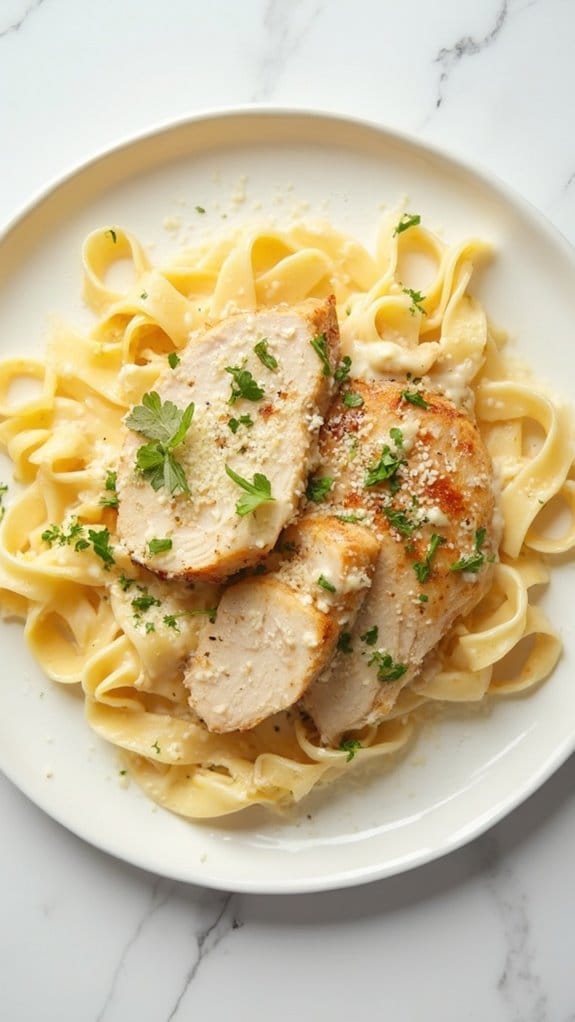
Title: Creamy Buttermilk Chicken Alfredo
Prep Time: 15 minutes
Cook Time: 25 minutes
Number of Servings: 4
Required Equipment List: Large skillet, measuring cups, measuring spoons, whisk, pasta pot, colander
Cuisine Type: Italian-American
Creamy Buttermilk Chicken Alfredo is a rich and indulgent dish that combines tender pieces of chicken with a luscious, creamy sauce made from buttermilk. This recipe is perfect for weeknight dinners or special occasions, offering a comforting meal that’s sure to please everyone at the table.
The buttermilk adds a delightful tang to the Alfredo sauce, creating a unique twist on the classic recipe, while the garlic and Parmesan bring depth and flavor.
In addition to its scrumptious taste, this dish is wonderfully versatile. You can pair it with your favorite pasta, such as fettuccine or penne, and add vegetables like broccoli or spinach to boost the nutritional value. Quick to prepare, this creamy chicken Alfredo will become a go-to recipe in your dinner rotation, impressing family and friends alike with its delicious flavor and creamy texture.
Ingredients:
- 12 ounces fettuccine pasta
- 1 pound boneless, skinless chicken breasts
- Salt and pepper to taste
- 2 tablespoons olive oil
- 3 cloves garlic, minced
- 1 cup buttermilk
- 1 cup heavy cream
- 1 cup grated Parmesan cheese
- Fresh parsley, chopped (for garnish)
Instructions:
- Begin by cooking the fettuccine pasta according to the package instructions in a large pot of salted boiling water. Once cooked, drain the pasta and set aside, reserving about 1 cup of the pasta cooking water.
- While the pasta is cooking, season the chicken breasts with salt and pepper. In a large skillet, heat the olive oil over medium heat. Add the chicken and cook for about 5-7 minutes on each side or until the chicken is golden brown and cooked through. Remove the chicken from the skillet and let it rest before slicing it into bite-sized pieces.
- In the same skillet, add the minced garlic and sauté for about 1 minute until fragrant. Be careful not to burn the garlic. Then, pour in the buttermilk and heavy cream, stirring to combine. Bring the mixture to a gentle simmer.
- Gradually whisk in the grated Parmesan cheese until the sauce is smooth and creamy. If the sauce is too thick, add a little of the reserved pasta cooking water until you reach your desired consistency. Season the sauce with additional salt and pepper to taste.
- Add the cooked fettuccine and sliced chicken back into the skillet, tossing to coat everything in the creamy sauce. Cook for an additional 2-3 minutes over low heat to heat through.
- Serve the creamy buttermilk chicken Alfredo hot, garnished with chopped parsley for a pop of color and freshness.
Extra Tips: For extra flavor, consider marinating the chicken in buttermilk for a few hours before cooking; this will make the chicken even more tender.
You can also customize the dish by adding sautéed vegetables such as mushrooms, bell peppers, or spinach. If you prefer a lighter version, you can substitute half of the heavy cream with additional buttermilk.
This dish pairs wonderfully with a side salad or garlic bread for a complete meal. Enjoy your delicious creation!
Buttermilk Mashed Potato Casserole
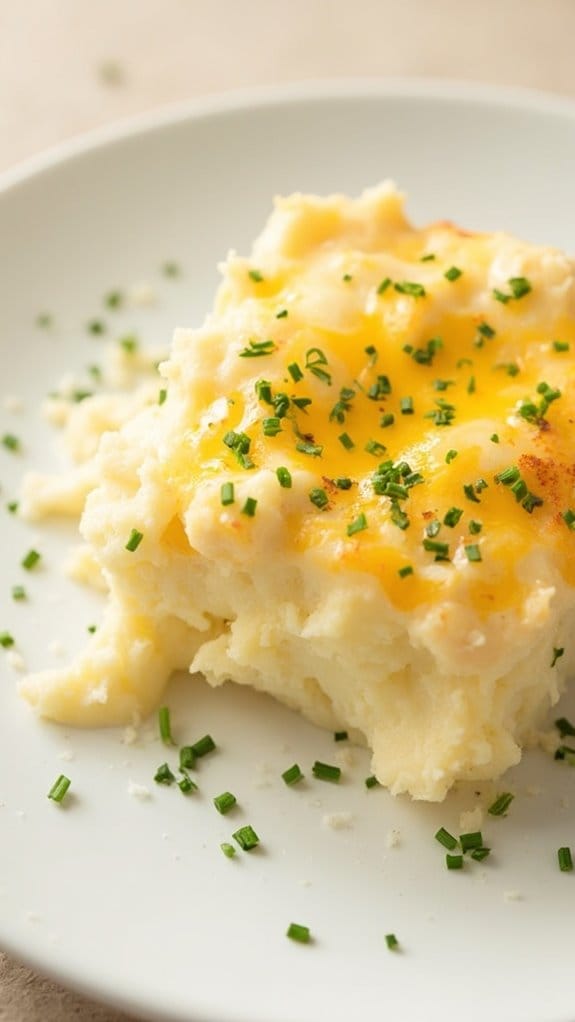
Title: Buttermilk Mashed Potato Casserole
Prep Time: 20 minutes
Cook Time: 45 minutes
Number of Servings: 6
Required Equipment List: Large pot, potato masher, mixing bowl, casserole dish, oven
Cuisine Type: American
Buttermilk Mashed Potato Casserole is a comforting and creamy dish that elevates the classic mashed potatoes to a whole new level. By incorporating buttermilk, you create a tangy flavor that perfectly complements the buttery richness of the potatoes.
This casserole isn’t only a crowd-pleaser but also makes for an excellent side dish for family gatherings, holidays, or a cozy weeknight dinner. Topped with a crispy layer of cheese, this dish is creamy on the inside and golden brown on the outside, offering delightful textures with every bite.
The beauty of this casserole lies in its simplicity and versatility. You can customize it by adding herbs, cheese, or even garlic for an extra punch of flavor. It can be prepared in advance and baked just before serving, making it a perfect choice for meal prep.
Whether served alongside a hearty roast or enjoyed on its own, this Buttermilk Mashed Potato Casserole is sure to become a family favorite.
Ingredients:
- 2 pounds russet potatoes, peeled and diced
- 1/2 cup buttermilk
- 1/4 cup unsalted butter, softened
- 1 cup shredded cheddar cheese (plus extra for topping)
- 1/2 teaspoon garlic powder
- 1/2 teaspoon onion powder
- Salt and pepper to taste
- Chopped chives or parsley (for garnish, optional)
Instructions:
- Begin by placing the diced potatoes in a large pot and covering them with cold water. Add a generous pinch of salt and bring the water to a boil over medium-high heat. Cook the potatoes for about 15-20 minutes, or until they’re fork-tender.
- Once the potatoes are cooked, drain them well and return them to the pot. Using a potato masher, mash the potatoes until they reach your desired consistency—smooth or slightly chunky, depending on your preference.
- In a mixing bowl, combine the buttermilk, softened butter, garlic powder, onion powder, and salt and pepper. Stir until the mixture is well combined, then fold it into the mashed potatoes. Add the shredded cheddar cheese and mix until fully incorporated.
- Preheat your oven to 350°F (175°C). Transfer the mashed potato mixture into a greased casserole dish, spreading it out evenly. Sprinkle additional cheddar cheese on top to create a cheesy crust.
- Bake in the preheated oven for 25-30 minutes or until the cheese is melted and bubbly, and the top is golden brown. If you prefer a crunchier top, you can broil it for an additional 2-3 minutes, keeping a close watch to prevent burning.
- Once baked, remove the casserole from the oven and let it rest for a few minutes before serving. Garnish with chopped chives or parsley for a fresh touch.
Extra Tips: For an extra creamy texture, you can add a splash of heavy cream to the buttermilk mixture. Feel free to experiment with different cheeses such as gouda or mozzarella for a unique flavor twist.
This casserole can be made ahead of time; simply prepare it up to the baking step, cover, and refrigerate. When ready to serve, bake it straight from the fridge, adding a few extra minutes to the cooking time. Enjoy the comfort of this delightful dish!
Southern Buttermilk Biscuits With Gravy
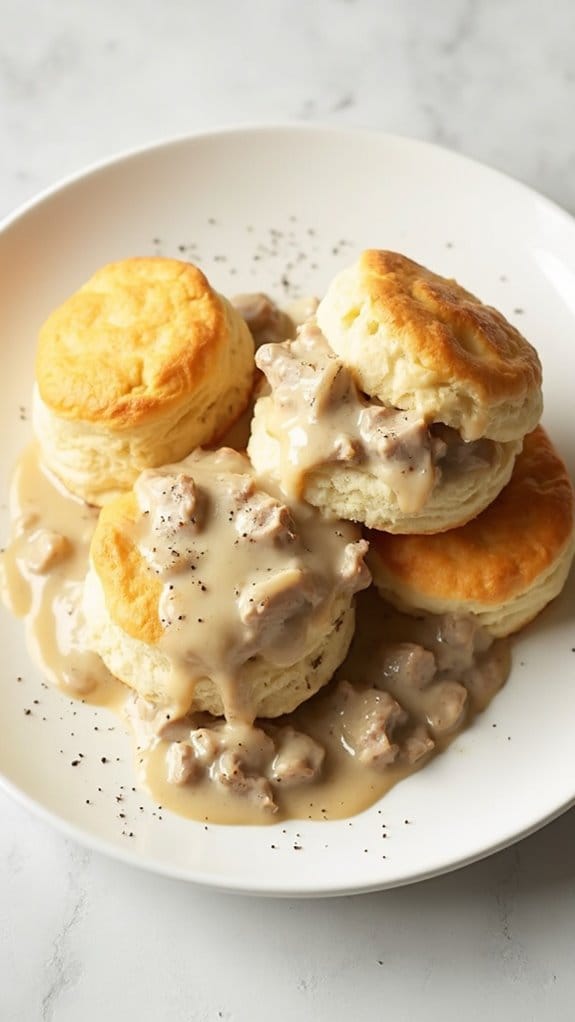
Title: Southern Buttermilk Biscuits With Gravy
Prep Time: 15 minutes
Cook Time: 25 minutes
Number of Servings: 4
Required Equipment List: Mixing bowl, rolling pin, baking sheet, skillet, whisk
Cuisine Type: Southern American
Southern Buttermilk Biscuits with Gravy is a classic comfort food that embodies the heart and soul of Southern cooking. Fluffy, buttery biscuits are the perfect vehicle for a rich, creamy sausage gravy that will have your taste buds dancing. This dish isn’t only satisfying but also brings a warm, nostalgic feeling, making it a perfect choice for breakfast, brunch, or even dinner.
The secret to achieving the perfect biscuit lies in the buttermilk, which adds moisture and a subtle tang while helping the biscuits rise beautifully. Meanwhile, the homemade sausage gravy is a savory blend of crumbled sausage, milk, and spices, creating a delectable sauce that complements the flaky biscuits wonderfully.
Whether served at a family gathering or as a hearty weeknight meal, this dish is sure to become a beloved staple in your kitchen.
Ingredients:
- 2 cups all-purpose flour
- 1 tablespoon baking powder
- 1/2 teaspoon baking soda
- 1/2 teaspoon salt
- 1/4 cup unsalted butter, cold and cubed
- 3/4 cup buttermilk
- 1 pound breakfast sausage
- 1/4 cup all-purpose flour (for gravy)
- 2 cups milk
- Salt and pepper to taste
Instructions:
- Preheat your oven to 450°F (230°C). In a mixing bowl, whisk together the flour, baking powder, baking soda, and salt. Add the cold cubed butter and use a pastry cutter or your fingers to cut the butter into the flour until the mixture resembles coarse crumbs.
- Pour in the buttermilk and stir gently until just combined. Be careful not to overmix; the dough should be slightly sticky. Turn the dough out onto a floured surface and gently knead it 3-4 times to bring it together.
- Roll out the dough to about 1-inch thickness and use a biscuit cutter or a glass to cut out biscuits. Place them on a baking sheet, close together but not touching. Bake in the preheated oven for 12-15 minutes or until golden brown.
- While the biscuits are baking, prepare the gravy. In a skillet over medium heat, cook the breakfast sausage, breaking it up into small pieces until browned and fully cooked. Drain excess fat, leaving about 1 tablespoon in the skillet.
- Sprinkle the additional 1/4 cup of flour over the cooked sausage and stir to combine. Gradually whisk in the milk, stirring continuously to avoid lumps. Cook until the gravy thickens, about 5-7 minutes. Season with salt and pepper to taste.
- Once the biscuits are baked, remove them from the oven and let them cool slightly. Serve the warm biscuits topped with a generous ladle of the sausage gravy.
Extra Tips: For extra flaky biscuits, handle the dough as little as possible and guarantee the butter is very cold before mixing. You can also add shredded cheese or herbs to the biscuit dough for an added flavor twist.
If you prefer a spicier gravy, consider adding crushed red pepper flakes or hot sauce to taste. Enjoy your Southern feast!
Buttermilk Ranch Pasta Salad
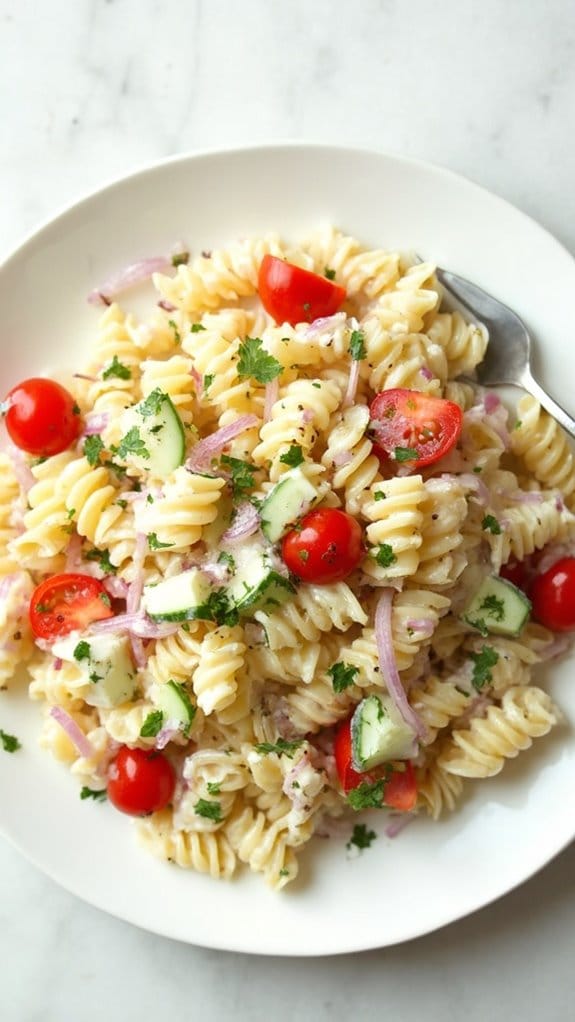
Title: Buttermilk Ranch Pasta Salad
Prep Time: 15 minutes
Cook Time: 10 minutes
Number of Servings: 6
Required Equipment List: Large pot, colander, mixing bowl, whisk, spoon
Cuisine Type: American
Buttermilk Ranch Pasta Salad is a revitalizing and creamy dish that combines the beloved flavors of ranch dressing with al dente pasta and vibrant vegetables. This salad is perfect for potlucks, summer picnics, or as a delicious side dish for a family dinner. The buttermilk dressing adds a tangy twist that beautifully complements the crunch of fresh vegetables and the hearty pasta, making it a crowd-pleaser.
This recipe isn’t only quick and easy to prepare, but it’s also versatile. You can customize it with your favorite vegetables, proteins, or even cheese to make it your own. The creamy buttermilk ranch dressing can also be adjusted to suit your taste, allowing you to create a dish that everyone will love. Serve it chilled for a revitalizing meal or as a side that will brighten up any table.
Ingredients:
- 8 ounces rotini pasta
- 1 cup cherry tomatoes, halved
- 1 cup cucumber, diced
- 1/2 cup red bell pepper, diced
- 1/4 cup red onion, finely chopped
- 1 cup buttermilk
- 1/2 cup mayonnaise
- 1 tablespoon ranch seasoning mix
- Salt and pepper to taste
- Fresh parsley, chopped (for garnish)
Instructions:
- Begin by cooking the rotini pasta according to the package instructions in a large pot of salted boiling water. Cook until al dente, about 8-10 minutes, then drain the pasta in a colander and rinse it under cold water to stop the cooking process. Allow it to cool while you prepare the dressing.
- In a mixing bowl, whisk together the buttermilk, mayonnaise, ranch seasoning mix, salt, and pepper until smooth. Adjust the seasoning according to your taste, adding more ranch mix for extra flavor if desired.
- In a large mixing bowl, combine the cooled pasta, cherry tomatoes, cucumber, red bell pepper, and red onion. Pour the buttermilk ranch dressing over the pasta and vegetables, tossing gently to combine everything evenly.
- Cover the pasta salad with plastic wrap or a lid and refrigerate for at least 30 minutes to allow the flavors to meld together. This also helps the pasta absorb some of the dressing.
- Before serving, give the pasta salad a gentle stir and garnish with chopped fresh parsley for a pop of color and freshness. Serve chilled as a delicious side dish or light meal.
Extra Tips: For added protein, consider mixing in some shredded rotisserie chicken, diced ham, or crumbled bacon. You can also incorporate other vegetables such as peas, broccoli, or spinach for extra nutrition. If you prefer a lighter version, swap out the mayonnaise for Greek yogurt. This pasta salad can be made ahead of time and stored in the refrigerator for up to 2 days, making it a great make-ahead option for busy days!
Creamy Buttermilk Tomato Soup

Title: Creamy Buttermilk Tomato Soup
Prep Time: 10 minutes
Cook Time: 30 minutes
Number of Servings: 4
Required Equipment List: Large pot, immersion blender, cutting board, knife, measuring cups, measuring spoons
Cuisine Type: American
Creamy Buttermilk Tomato Soup is a comforting and tangy twist on the classic tomato soup that’s perfect for chilly evenings or as a delicious starter to any meal. The addition of buttermilk provides a rich creaminess and a subtle tang that beautifully balances the sweetness of the tomatoes. This soup is easy to prepare, making it a great option for both busy weeknights and cozy weekends.
This soup not only features the vibrant flavors of ripe tomatoes but also incorporates aromatic vegetables and herbs, resulting in a hearty and satisfying dish. Pair it with a slice of crusty bread or a grilled cheese sandwich for a nostalgic yet gourmet experience that’s sure to please your family and friends.
Ingredients:
- 2 tablespoons olive oil
- 1 medium onion, chopped
- 2 cloves garlic, minced
- 1 can (28 ounces) crushed tomatoes
- 2 cups vegetable broth
- 1 teaspoon dried basil
- 1 teaspoon sugar
- Salt and pepper to taste
- 1 cup buttermilk
- Fresh basil leaves (for garnish)
Instructions:
- In a large pot, heat the olive oil over medium heat. Add the chopped onion and sauté until it becomes translucent, about 5 minutes. Stir in the minced garlic and cook for an additional minute until fragrant.
- Pour in the crushed tomatoes and vegetable broth, then add the dried basil, sugar, salt, and pepper. Stir well to combine, then bring the mixture to a gentle boil. Reduce the heat and let it simmer uncovered for about 20 minutes to allow the flavors to meld.
- After the soup has simmered, use an immersion blender to carefully puree the soup until smooth. If you don’t have an immersion blender, you can transfer the soup in batches to a countertop blender, but be cautious with the hot liquid.
- Once blended, stir in the buttermilk until fully incorporated. Heat the soup gently over low heat for about 5 minutes to warm it through, taking care not to boil it after adding the buttermilk to prevent curdling.
- Taste the soup and adjust the seasoning with additional salt and pepper as needed. Serve hot, garnished with fresh basil leaves for a pop of color and flavor.
Extra Tips: For an extra depth of flavor, consider roasting the tomatoes before adding them to the soup. Simply halving fresh tomatoes, drizzling them with olive oil, and roasting them in the oven until caramelized will enhance their sweetness.
If you prefer a thicker soup, reduce the amount of broth, or for a spicier kick, add a pinch of red pepper flakes during cooking. This soup can be made ahead of time and stored in the fridge for up to three days, making it a perfect meal prep option.
Buttermilk Garlic Shrimp
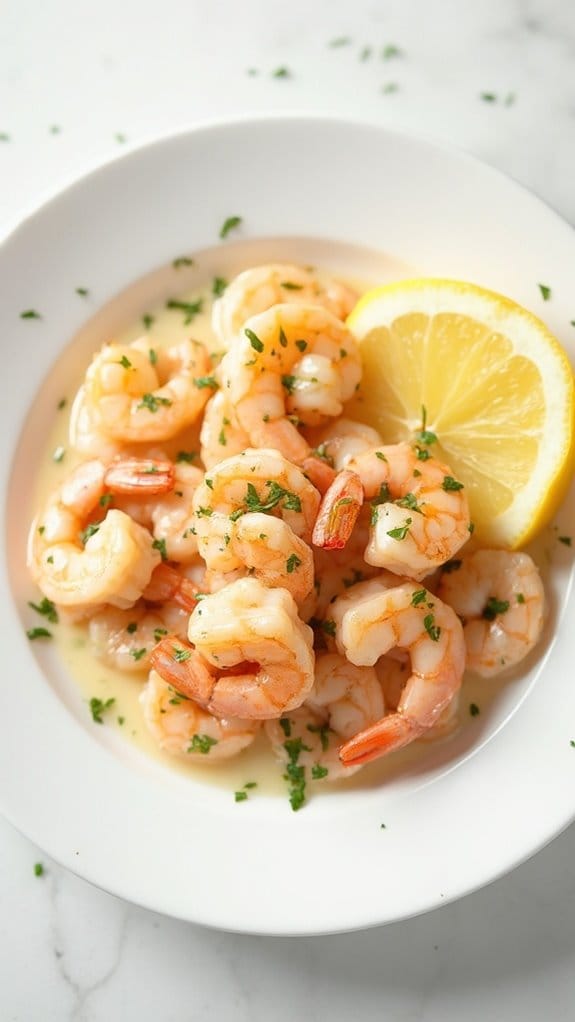
Title: Buttermilk Garlic Shrimp
Prep Time: 10 minutes
Cook Time: 15 minutes
Number of Servings: 4
Required Equipment List: Large skillet, measuring cups, measuring spoons, spatula, serving dish
Cuisine Type: American
Buttermilk Garlic Shrimp is a quick and delicious seafood dish that combines the tangy flavor of buttermilk with the rich taste of garlic, creating a creamy sauce that perfectly coats tender shrimp. This recipe is ideal for busy weeknights or special occasions, as it can be prepared in just 25 minutes.
The buttermilk not only adds a unique flavor but also helps to tenderize the shrimp, resulting in a dish that’s both flavorful and satisfying. Packed with protein and zesty flavors, this dish pairs wonderfully with a side of rice or crusty bread to soak up the creamy sauce.
The addition of fresh herbs further enhances the overall taste, making it a delightful option for seafood lovers. Easy to make and elegant in presentation, Buttermilk Garlic Shrimp is sure to impress your family and friends.
Ingredients:
- 1 pound large shrimp, peeled and deveined
- 1 cup buttermilk
- 4 cloves garlic, minced
- 2 tablespoons butter
- 1 tablespoon olive oil
- 1 teaspoon paprika
- Salt and pepper to taste
- 2 tablespoons chopped fresh parsley (for garnish)
- Lemon wedges (for serving)
Instructions:
- In a bowl, combine the shrimp and buttermilk, ensuring the shrimp are fully submerged. Let them marinate for about 10 minutes. This step helps to tenderize the shrimp while infusing them with flavor.
- In a large skillet, heat the butter and olive oil over medium heat. Once the butter has melted and is bubbly, add the minced garlic and sauté for about 1 minute, stirring constantly to prevent burning.
- Remove the shrimp from the buttermilk, letting any excess liquid drip off before adding them to the skillet. Sprinkle the shrimp with paprika, salt, and pepper. Cook for 3-4 minutes on each side, or until the shrimp are pink and opaque.
- Once the shrimp are fully cooked, remove the skillet from heat. If desired, you can stir in a splash of the leftover buttermilk to create a creamier sauce. Adjust seasoning as needed.
- Transfer the shrimp to a serving dish, garnish with chopped fresh parsley, and serve with lemon wedges on the side for an extra burst of flavor.
Extra Tips: For an extra kick, consider adding a pinch of red pepper flakes when sautéing the garlic. If you want to make the dish even heartier, you can add some vegetables such as spinach or cherry tomatoes during the last few minutes of cooking.
Serve this dish over cooked rice or pasta to soak up all the delicious sauce. Enjoy your flavorful and creamy shrimp dish!
Buttermilk Mac and Cheese

Title: Buttermilk Mac and Cheese
Prep Time: 10 minutes
Cook Time: 30 minutes
Number of Servings: 4
Required Equipment List: Large pot, colander, mixing bowl, baking dish, whisk, oven
Cuisine Type: American
Buttermilk Mac and Cheese is a creamy and indulgent twist on the classic comfort food that everyone loves. The addition of buttermilk adds a tangy flavor that perfectly complements the rich cheese sauce, making it a delightful dish to serve on a cozy night in or at a family gathering.
With its velvety texture and cheesy goodness, this mac and cheese will quickly become a favorite in your household. This recipe isn’t only delicious but also easy to prepare. It combines the simplicity of stovetop cooking with the option to bake it for a crispy topping.
You can customize the cheese blend to your liking, whether you prefer sharp cheddar, creamy mozzarella, or even a sprinkle of blue cheese for an adventurous flavor. It’s a comforting dish that warms the heart and satisfies the appetite.
Ingredients:
- 8 ounces elbow macaroni
- 2 tablespoons butter
- 2 tablespoons all-purpose flour
- 2 cups milk
- 1 cup buttermilk
- 2 cups shredded cheese (cheddar, mozzarella, or a mix)
- 1/2 teaspoon garlic powder
- 1/2 teaspoon onion powder
- Salt and pepper to taste
- 1/2 cup breadcrumbs (optional, for topping)
Instructions:
- Begin by cooking the elbow macaroni according to the package instructions in a large pot of salted boiling water. Once al dente, drain the pasta in a colander and set aside while you prepare the cheese sauce.
- In the same pot, melt the butter over medium heat. Once melted, whisk in the flour until a smooth paste forms, cooking for about 1-2 minutes to remove the raw flour taste.
- Gradually pour in the milk and buttermilk, whisking constantly to prevent lumps. Continue to cook this mixture until it thickens and begins to bubble, usually about 5-7 minutes.
- Reduce the heat to low and stir in the shredded cheese, garlic powder, onion powder, and season with salt and pepper. Stir until the cheese is completely melted and the sauce is creamy.
- Add the cooked macaroni to the cheese sauce, stirring until the pasta is well coated. If you choose to bake it, transfer the mixture to a greased baking dish. Sprinkle breadcrumbs on top for added crunch.
- Preheat your oven to 350°F (175°C) and bake the mac and cheese for about 15-20 minutes, or until the top is golden brown and bubbly. If you prefer it stovetop only, serve immediately after mixing.
Extra Tips: For an extra layer of flavor, consider adding cooked bacon or sautéed vegetables like spinach or broccoli into the cheese sauce.
You can also experiment with different cheese combinations to find your perfect blend. If you like a bit of heat, a pinch of cayenne pepper or diced jalapeños can add a delicious kick to the dish. Enjoy your creamy buttermilk mac and cheese!
Buttermilk Mushroom Stroganoff
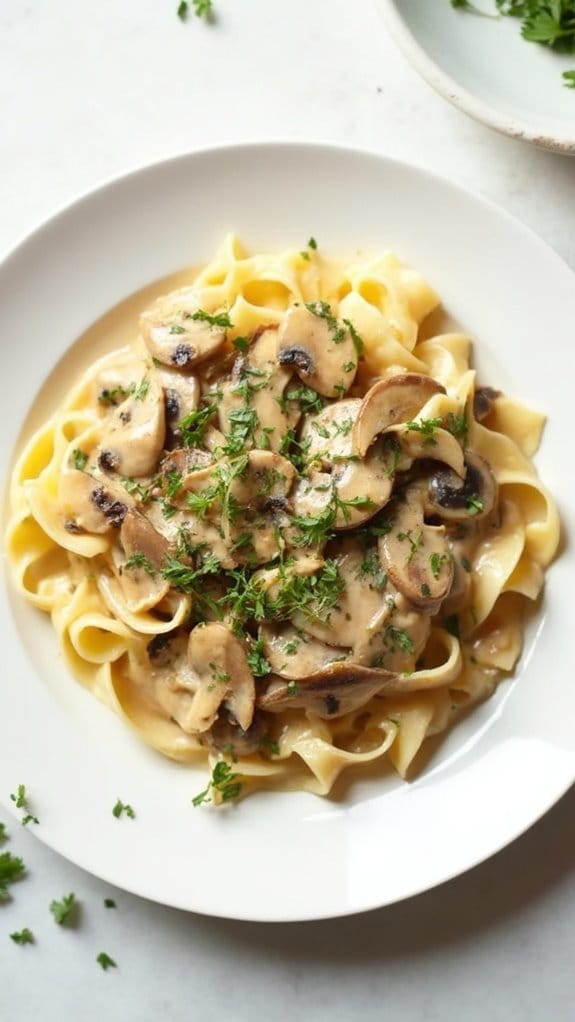
Title: Buttermilk Mushroom Stroganoff
Prep Time: 15 minutes
Cook Time: 25 minutes
Number of Servings: 4
Required Equipment List: Large skillet, wooden spoon, measuring cups, measuring spoons, serving dish
Cuisine Type: American
Buttermilk Mushroom Stroganoff is a creamy and savory dish that brings comfort food to a whole new level. This recipe features tender mushrooms sautéed to perfection, enveloped in a rich, tangy buttermilk sauce that perfectly complements the earthiness of the mushrooms. The addition of garlic and herbs adds depth, making it a satisfying meal that can be enjoyed any night of the week.
Serve it over pasta or rice for a heartwarming dinner that will please the whole family. This dish isn’t only delicious but also quick to prepare, making it ideal for busy weeknights. The buttermilk provides a unique twist to the standard stroganoff sauce, offering a creamy texture with a hint of tanginess that balances the richness of the mushrooms.
Pair this stroganoff with a side of steamed vegetables or a fresh salad for a complete meal that showcases the best of comfort cooking.
Ingredients:
- 16 ounces mushrooms, sliced
- 1 tablespoon olive oil
- 1 small onion, diced
- 2 cloves garlic, minced
- 1 teaspoon dried thyme
- 1 tablespoon all-purpose flour
- 1 cup vegetable broth
- 1 cup buttermilk
- Salt and pepper to taste
- 8 ounces egg noodles or pasta of choice
- Fresh parsley, chopped (for garnish)
Instructions:
- Begin by cooking the egg noodles according to the package instructions. Once cooked, drain and set aside, reserving a bit of the pasta water for later use if needed.
- In a large skillet, heat the olive oil over medium heat. Add the diced onion and sauté for about 3-4 minutes until it becomes translucent. Then, add the minced garlic and continue to cook for an additional minute until fragrant.
- Add the sliced mushrooms to the skillet, stirring occasionally for about 5-7 minutes until they’re browned and tender. Sprinkle in the dried thyme and flour, mixing well to coat the mushrooms evenly.
- Gradually pour in the vegetable broth while stirring, allowing the mixture to come to a gentle simmer. Let it cook for about 5 minutes, allowing the sauce to thicken slightly.
- Lower the heat and stir in the buttermilk, mixing until well incorporated. Season the stroganoff with salt and pepper to taste, and allow it to simmer for another 3-4 minutes to heat through.
- Combine the cooked egg noodles with the mushroom mixture, tossing gently to coat the pasta. If the sauce is too thick, add a splash of the reserved pasta water to reach your desired consistency.
- Serve the Buttermilk Mushroom Stroganoff hot, garnished with freshly chopped parsley for a pop of color and flavor.
Extra Tips: For an extra layer of flavor, consider adding a splash of Worcestershire sauce or soy sauce to the mushroom mixture while it simmers. You can also incorporate other vegetables like spinach or peas for added nutrition. If you prefer a heartier dish, feel free to add cooked chicken or beef to the stroganoff.
Enjoy your meal with a slice of crusty bread to soak up the delicious sauce!
Spicy Buttermilk Fried Chicken

Title: Spicy Buttermilk Fried Chicken
Prep Time: 20 minutes
Cook Time: 30 minutes
Number of Servings: 4
Required Equipment List: Large bowl, whisk, frying pan, thermometer, plate, paper towels
Cuisine Type: Southern
Spicy Buttermilk Fried Chicken is a deliciously crispy and flavorful dish that brings the comfort of Southern cooking to your dining table. The chicken is marinated in a spicy buttermilk mixture that not only tenderizes the meat but also infuses it with rich flavors. The result is a juicy and moist chicken, covered in a perfectly seasoned crispy crust that will have everyone coming back for seconds.
This recipe is ideal for family gatherings or casual dinners, and it pairs wonderfully with classic sides like coleslaw or cornbread. What sets this fried chicken apart is the balance of spice and creaminess from the buttermilk. The marinating process allows the spices to penetrate deeply into the chicken, creating a flavor explosion with every bite.
Once fried to a golden perfection, this spicy fried chicken isn’t only visually appealing but also irresistibly delicious, making it a standout dish that’s sure to impress anyone who tries it.
Ingredients:
- 4 pieces of chicken (legs and thighs recommended)
- 2 cups buttermilk
- 1 tablespoon hot sauce
- 1 teaspoon paprika
- 1 teaspoon garlic powder
- 1 teaspoon onion powder
- 1 teaspoon cayenne pepper (adjust to taste)
- 1 teaspoon salt
- 1 teaspoon black pepper
- 1 cup all-purpose flour
- Oil for frying
Instructions:
- In a large bowl, whisk together the buttermilk, hot sauce, paprika, garlic powder, onion powder, cayenne pepper, salt, and black pepper until well combined. This spicy marinade will tenderize the chicken and add flavor.
- Add the chicken pieces to the buttermilk mixture, guaranteeing they’re fully submerged. Cover the bowl with plastic wrap and refrigerate for at least 1 hour, or ideally overnight for maximum flavor and tenderness.
- Once marinated, remove the chicken from the buttermilk and let the excess drip off. In a shallow dish, place the flour and season it with a pinch of salt and pepper. Dredge each piece of chicken in the flour, pressing gently to adhere the coating.
- Heat oil in a frying pan over medium-high heat until it reaches 350°F (175°C). Carefully add the chicken pieces to the pan, skin side down, working in batches if necessary to avoid overcrowding.
- Fry the chicken for about 15 minutes on each side or until the internal temperature reaches 165°F (74°C) and the coating is golden brown and crispy. Use a thermometer to ascertain doneness without cutting into the meat.
- Once cooked, transfer the fried chicken to a plate lined with paper towels to drain excess oil. Allow it to rest for a few minutes before serving to let the juices redistribute.
Extra Tips: For an extra kick, consider adding additional spices to the flour mixture like smoked paprika or a touch of chili powder. If you want to make the chicken extra crispy, dip the dredged chicken back into the buttermilk and then into the flour again for a double coating.
Serve your spicy buttermilk fried chicken with your favorite dipping sauces or alongside classic Southern sides for a complete meal. Enjoy!
Buttermilk Corn Chowder

Title: Buttermilk Corn Chowder
Prep Time: 15 minutes
Cook Time: 30 minutes
Number of Servings: 6
Required Equipment List: Large pot, cutting board, knife, measuring cups, measuring spoons, wooden spoon, immersion blender (optional)
Cuisine Type: American
Buttermilk Corn Chowder is a comforting, creamy soup that showcases the sweet, succulent flavors of fresh corn. This easy-to-make chowder combines buttermilk with other wholesome ingredients to create a rich and satisfying dish that’s perfect for any season.
The combination of tender potatoes and vibrant corn kernels brings a delightful texture, while the buttermilk adds a tangy creaminess that elevates the overall flavor profile. Serve it warm as a starter or enjoy it as a light meal accompanied by crusty bread.
This chowder isn’t only delicious but also versatile; you can customize it by adding vegetables like bell peppers or zucchini, or even some crispy bacon for a smoky twist. It’s a wonderful way to use up fresh corn during the summer months, but frozen corn works just as well, allowing you to enjoy this comforting dish year-round.
Whether you’re preparing a family dinner or hosting a gathering, this Buttermilk Corn Chowder is sure to impress your guests and warm their hearts.
Ingredients:
- 4 cups fresh corn kernels (or frozen corn)
- 1 medium onion, diced
- 2 medium potatoes, peeled and diced
- 4 cups vegetable or chicken broth
- 2 cups buttermilk
- 2 tablespoons butter
- 1 teaspoon garlic powder
- Salt and pepper to taste
- Chopped chives (for garnish, optional)
Instructions:
- In a large pot, melt the butter over medium heat. Add the diced onion and sauté for about 5 minutes or until the onions become translucent and fragrant. This will provide a flavorful base for your chowder.
- Add the diced potatoes and corn kernels to the pot, stirring to combine with the sautéed onions. Cook for an additional 3-4 minutes, allowing the vegetables to soften slightly.
- Pour in the vegetable or chicken broth, bringing the mixture to a boil. Once boiling, reduce the heat to low, cover the pot, and let it simmer for about 15-20 minutes or until the potatoes are tender.
- Once the potatoes are cooked, remove the pot from heat. Use an immersion blender to blend the chowder until it reaches your desired consistency (smooth or chunky). If you don’t have an immersion blender, you can carefully transfer half of the chowder to a regular blender, blend, and then return it to the pot.
- Stir in the buttermilk and garlic powder, mixing well to incorporate. Season with salt and pepper to taste. Heat the chowder over low heat for a few more minutes until warmed through, but don’t let it boil.
- Serve the chowder warm, garnished with chopped chives if desired. Pair it with a slice of crusty bread for a complete meal.
Extra Tips: For an additional layer of flavor, consider adding a teaspoon of smoked paprika or a splash of hot sauce for a bit of heat. If you prefer a richer chowder, you can substitute part of the buttermilk with heavy cream.
This chowder can also be made ahead of time; simply reheat it on the stove when ready to serve. Enjoy this hearty dish that’s sure to become a family favorite!
Creamy Buttermilk Spinach Dip

Title: Creamy Buttermilk Spinach Dip
Prep Time: 10 minutes
Cook Time: 15 minutes
Number of Servings: 6
Required Equipment List: Mixing bowl, baking dish, oven, spoon, measuring cups
Cuisine Type: American
This Creamy Buttermilk Spinach Dip is a deliciously indulgent appetizer that’s perfect for entertaining or enjoying as a snack. Combining the tangy flavor of buttermilk with fresh spinach and a blend of creamy cheeses, this dip is rich, flavorful, and incredibly easy to prepare.
Serve it warm with crunchy vegetables, pita chips, or crackers for a delightful treat that everyone will love. The beauty of this dip lies in its versatility; you can easily customize it by adding ingredients such as garlic, onions, or your favorite spices.
Whether you’re hosting a party or simply enjoying a cozy night in, this creamy spinach dip is sure to become a favorite. With its inviting aroma and smooth texture, it’s a crowd-pleaser that will have your guests coming back for more.
Ingredients:
- 2 cups fresh spinach, chopped
- 1 cup buttermilk
- 1 cup cream cheese, softened
- 1 cup shredded mozzarella cheese
- 1/2 cup grated Parmesan cheese
- 1/2 teaspoon garlic powder
- Salt and pepper to taste
Instructions:
- Preheat your oven to 350°F (175°C). Grease a baking dish lightly with cooking spray or butter to prevent sticking. This will guarantee an easy cleanup once the dip is baked.
- In a mixing bowl, combine the softened cream cheese and buttermilk. Use a spoon or spatula to mix until the mixture is smooth and creamy, free of lumps. This will be the base of your dip.
- Add the chopped spinach, shredded mozzarella, grated Parmesan, garlic powder, salt, and pepper to the cream cheese mixture. Stir well to combine all the ingredients evenly, guaranteeing that the spinach is distributed throughout.
- Transfer the mixture into the prepared baking dish, spreading it out evenly. This will help the dip bake evenly and develop a lovely golden top.
- Bake the dip in the preheated oven for 15-20 minutes or until it’s hot and bubbly, and the top is lightly golden. Keep an eye on it to prevent over-browning.
- Once baked, remove the dip from the oven and let it cool slightly before serving. Serve warm with your choice of dippers such as pita chips, crackers, or fresh vegetables.
Extra Tips: For a little extra flavor, consider adding some sautéed onions or minced garlic to the spinach mixture before baking. If you want to make this dip ahead of time, you can prepare it up to the baking step and refrigerate it until you’re ready to cook. Just add a few extra minutes to the baking time if baking straight from the fridge. Enjoy your creamy, savory spinach dip!
Buttermilk Beef Stroganoff
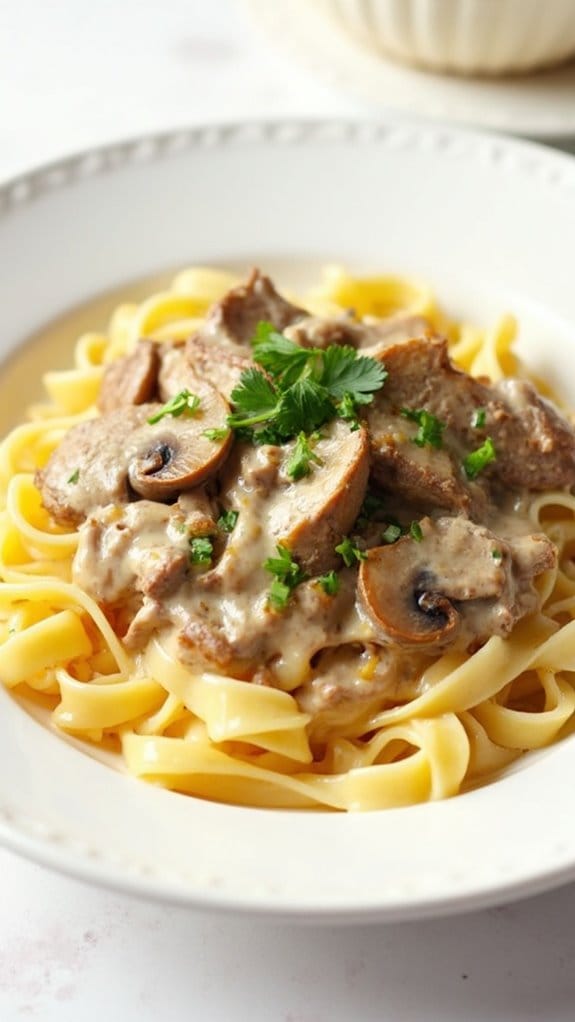
Title: Buttermilk Beef Stroganoff
Prep Time: 15 minutes
Cook Time: 30 minutes
Number of Servings: 4
Required Equipment List: Large skillet, cutting board, knife, measuring cups, measuring spoons, wooden spoon
Cuisine Type: American
Buttermilk Beef Stroganoff is a creamy and comforting dish that elevates the classic stroganoff by incorporating tangy buttermilk into the sauce. This recipe features tender strips of beef sautéed to perfection, coated in a luscious sauce made from buttermilk, mushrooms, and seasonings. Served over egg noodles or rice, this hearty meal is perfect for family dinners or cozy nights in, assuring satisfaction with every bite.
The use of buttermilk not only adds a unique flavor but also helps tenderize the beef, resulting in a dish that’s both rich and velvety. With simple ingredients and straightforward steps, you can whip up this delightful stroganoff in no time. It’s an excellent option for those looking to impress without spending hours in the kitchen, bringing a taste of home-cooked goodness to your table.
Ingredients:
- 1 pound beef sirloin, cut into thin strips
- 2 tablespoons olive oil
- 1 medium onion, chopped
- 2 cloves garlic, minced
- 8 ounces mushrooms, sliced
- 1 cup beef broth
- 1 cup buttermilk
- 2 tablespoons Worcestershire sauce
- 1 teaspoon paprika
- Salt and pepper to taste
- 8 ounces egg noodles or rice, cooked according to package instructions
- Fresh parsley, chopped (for garnish)
Instructions:
- In a large skillet, heat the olive oil over medium-high heat. Add the beef strips in batches, cooking until browned on all sides. Remove the beef from the skillet and set it aside on a plate.
- In the same skillet, add the chopped onion and sauté until it becomes translucent, about 3-4 minutes. Then add the minced garlic and mushrooms, cooking until the mushrooms are softened and any liquid has evaporated.
- Pour in the beef broth, and scrape the bottom of the skillet to loosen any browned bits. Bring the mixture to a simmer, then stir in the buttermilk, Worcestershire sauce, and paprika. Allow the sauce to simmer gently for about 5 minutes until it thickens slightly.
- Return the cooked beef to the skillet, stirring to coat it in the creamy sauce. Season with salt and pepper to taste. Let the stroganoff simmer for an additional 3-4 minutes to confirm the beef is heated through.
- Serve the buttermilk beef stroganoff over the cooked egg noodles or rice. Garnish with chopped fresh parsley before enjoying this comforting meal.
Extra Tips: For a richer flavor, consider adding a tablespoon of Dijon mustard to the sauce. You can also substitute the beef with chicken or turkey for a different protein option.
If you’re looking to make this dish even heartier, toss in some fresh spinach or peas just before serving for added color and nutrition. Enjoy your delicious buttermilk beef stroganoff with a side salad or crusty bread for a complete meal!
Buttermilk Vegetable Curry
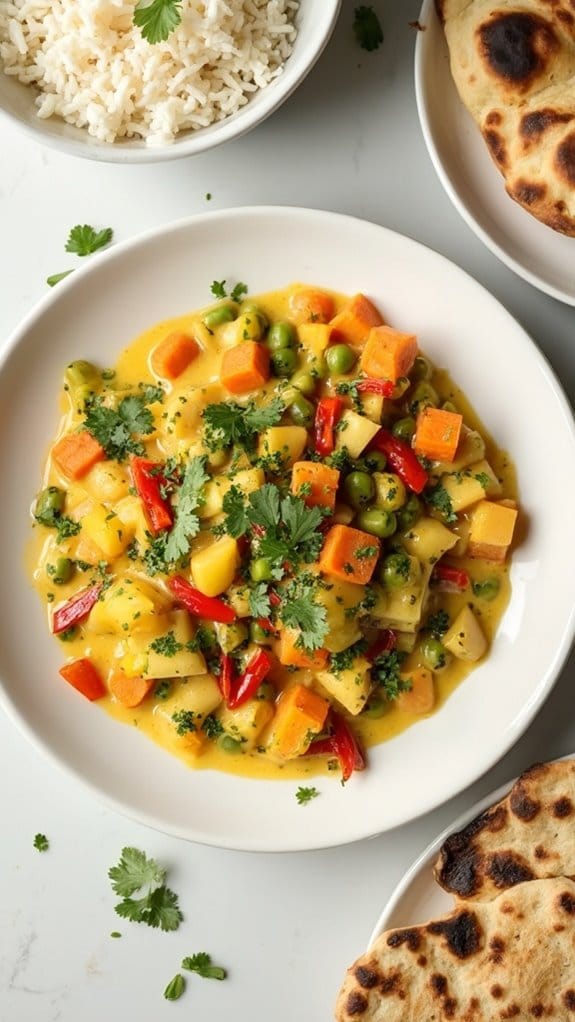
Title: Buttermilk Vegetable Curry
Prep Time: 15 minutes
Cook Time: 30 minutes
Number of Servings: 4
Required Equipment List: Large pot, wooden spoon, measuring cups, knife, cutting board
Cuisine Type: Indian-inspired
Buttermilk Vegetable Curry is a creamy and flavorful dish that isn’t only comforting but also packed with nutrients. This curry blends a variety of vegetables with the tangy richness of buttermilk, creating a delightful sauce that clings perfectly to rice or naan.
The use of traditional Indian spices like cumin, coriander, and turmeric infuses the dish with warmth and depth, making it an ideal choice for a satisfying weeknight dinner or a cozy gathering.
This recipe is versatile, allowing you to use whatever vegetables are in season or available in your pantry, whether it’s carrots, peas, bell peppers, or potatoes. The addition of buttermilk at the end of cooking gives the curry a luscious texture, balancing the spices with its creamy tang.
Serve it alongside basmati rice or warm naan to soak up all the delicious sauce, making every bite a flavorful experience.
Ingredients:
- 2 tablespoons vegetable oil
- 1 onion, chopped
- 2 garlic cloves, minced
- 1-inch piece of ginger, grated
- 1 teaspoon cumin seeds
- 1 teaspoon coriander powder
- 1/2 teaspoon turmeric powder
- 1/2 teaspoon chili powder (adjust to taste)
- 2 cups mixed vegetables (carrots, bell peppers, peas, etc.)
- 1 cup vegetable broth
- 1 cup buttermilk
- Salt, to taste
- Fresh cilantro, for garnish
Instructions:
- In a large pot, heat the vegetable oil over medium heat. Add the chopped onion and sauté until it becomes translucent, about 5 minutes. Then stir in the minced garlic and grated ginger, cooking for another minute until fragrant.
- Add the cumin seeds, coriander powder, turmeric powder, and chili powder to the pot. Stir well to combine with the onion mixture, allowing the spices to toast for about 1-2 minutes. This will enhance their flavors.
- Introduce the mixed vegetables to the pot and stir well to coat them in the spice mixture. Cook for about 5 minutes, allowing the vegetables to soften slightly before adding the vegetable broth.
- Pour in the vegetable broth and bring the mixture to a gentle simmer. Cover the pot and allow it to cook for 15-20 minutes, or until the vegetables are tender.
- Once the vegetables are cooked, reduce the heat to low and stir in the buttermilk. Heat through gently, ensuring not to boil, as this will prevent the buttermilk from curdling. Season with salt to taste.
- Serve the buttermilk vegetable curry hot, garnished with fresh cilantro. Pair it with basmati rice or naan to soak up the creamy sauce.
Extra Tips: To enhance the flavor of your curry, consider marinating the vegetables in a little buttermilk and spices for 30 minutes before cooking. This will add depth to the dish.
Additionally, feel free to customize the spice levels according to your taste preferences, and don’t hesitate to experiment with other vegetables or add chickpeas for extra protein. Enjoy your comforting and creamy buttermilk vegetable curry!
Buttermilk Lemon Herb Chicken

Title: Buttermilk Lemon Herb Chicken
Prep Time: 15 minutes
Cook Time: 30 minutes
Number of Servings: 4
Required Equipment List: Baking dish, mixing bowl, whisk, measuring cups, measuring spoons
Cuisine Type: American
Buttermilk Lemon Herb Chicken is a flavorful and juicy dish that brings together the tanginess of buttermilk and the freshness of herbs, making it a perfect option for a weeknight dinner or a weekend gathering.
Marinating the chicken in buttermilk not only tenderizes the meat but also infuses it with incredible flavor. The addition of lemon and fresh herbs elevates the taste, creating a delightful balance that’s sure to please everyone at the table.
This recipe isn’t only simple to prepare but also requires minimal active cooking time, allowing you to focus on other aspects of your meal. Serve this dish with a side of roasted vegetables or a fresh salad for a complete and satisfying meal. It’s a great way to incorporate buttermilk into your cooking, showcasing its versatility in savory dishes.
Ingredients:
- 4 boneless, skinless chicken breasts
- 1 cup buttermilk
- Zest and juice of 1 lemon
- 2 cloves garlic, minced
- 1 teaspoon dried thyme
- 1 teaspoon dried oregano
- 1 teaspoon paprika
- Salt and pepper to taste
- Fresh parsley, chopped (for garnish)
Instructions:
- In a mixing bowl, combine the buttermilk, lemon zest, lemon juice, minced garlic, dried thyme, dried oregano, paprika, salt, and pepper. Whisk the ingredients together until well combined, creating a flavorful marinade.
- Place the chicken breasts in a baking dish and pour the buttermilk marinade over them, ensuring that the chicken is fully coated. Cover the dish with plastic wrap or a lid and refrigerate for at least 30 minutes, or up to 4 hours for maximum flavor.
- Preheat your oven to 400°F (200°C). Remove the chicken from the marinade and let any excess drip off before placing the chicken in a clean baking dish. Discard the used marinade.
- Bake the chicken in the preheated oven for 25-30 minutes, or until the chicken is cooked through and has an internal temperature of 165°F (74°C). The chicken should be golden brown and juicy.
- Once cooked, remove the chicken from the oven and let it rest for a few minutes before slicing. This resting period allows the juices to redistribute, ensuring moist and flavorful chicken.
- Serve the Buttermilk Lemon Herb Chicken garnished with fresh parsley. Pair it with your favorite sides for a complete meal.
Extra Tips: For an extra layer of flavor, consider adding a tablespoon of honey or Dijon mustard to the marinade for a touch of sweetness and tang.
If you want to grill the chicken instead of baking, simply preheat your grill to medium-high heat and cook the marinated chicken for about 6-7 minutes on each side, or until fully cooked.
This recipe can also be adapted for chicken thighs or drumsticks, just adjust the cooking time as needed. Enjoy your delicious, herb-infused chicken!
Creamy Buttermilk Potato Soup

Title: Creamy Buttermilk Potato Soup
Prep Time: 15 minutes
Cook Time: 30 minutes
Number of Servings: 6
Required Equipment List: Large pot, cutting board, knife, potato peeler, immersion blender (or regular blender), measuring cups, ladle
Cuisine Type: American
Creamy Buttermilk Potato Soup is a comforting and hearty dish that’s perfect for chilly evenings. This soup is rich and velvety, thanks to the addition of buttermilk, which lends a tangy depth of flavor that perfectly complements the creamy texture. The potatoes provide a satisfying base, while herbs and spices enhance the overall profile, making it a delightful dish for family and friends alike.
This recipe isn’t only easy to prepare but also allows for customization. You can add your favorite toppings such as crispy bacon, chives, or shredded cheese to elevate the soup. Whether served as a main course or a side dish, this creamy potato soup is sure to warm you up and bring comfort to your dining experience.
Ingredients:
- 4 large potatoes, peeled and diced
- 1 medium onion, chopped
- 2 cloves garlic, minced
- 4 cups vegetable or chicken broth
- 1 cup buttermilk
- 2 tablespoons butter
- 1 teaspoon salt
- 1/2 teaspoon black pepper
- 1/2 teaspoon thyme (dried or fresh)
- Optional toppings: crispy bacon, chives, shredded cheese, sour cream
Instructions:
- In a large pot, melt the butter over medium heat. Add the chopped onion and minced garlic, sautéing until the onion becomes translucent and fragrant, about 5 minutes. This step builds the flavor foundation for your soup.
- Add the diced potatoes to the pot, stirring to combine with the onions and garlic. Pour in the vegetable or chicken broth, making sure the potatoes are fully submerged. Bring the mixture to a boil, then reduce the heat to a simmer. Cover and cook for about 20 minutes, or until the potatoes are tender.
- Once the potatoes are cooked through, use an immersion blender to carefully puree the soup until smooth. If you don’t have an immersion blender, you can transfer the soup in batches to a regular blender. Be cautious with hot liquids; allow the soup to cool slightly before blending.
- After pureeing, return the soup to the pot over low heat. Stir in the buttermilk, salt, black pepper, and thyme. Allow the soup to heat gently for a few minutes, but don’t let it boil, as this can cause the buttermilk to curdle.
- Taste and adjust the seasoning if needed. Serve the soup warm, garnished with your choice of crispy bacon, chives, shredded cheese, or a dollop of sour cream for added richness.
Extra Tips: To make the soup even creamier, consider adding a splash of heavy cream along with the buttermilk. You can also experiment with different herbs, such as rosemary or dill, for a unique twist. For a smokier flavor, try using smoked paprika or adding a bit of chipotle powder.
This soup can be stored in the refrigerator for up to three days, and the flavors often improve after a day, making it an excellent make-ahead option. Enjoy your delicious and creamy buttermilk potato soup!
Buttermilk Barbecue Ribs
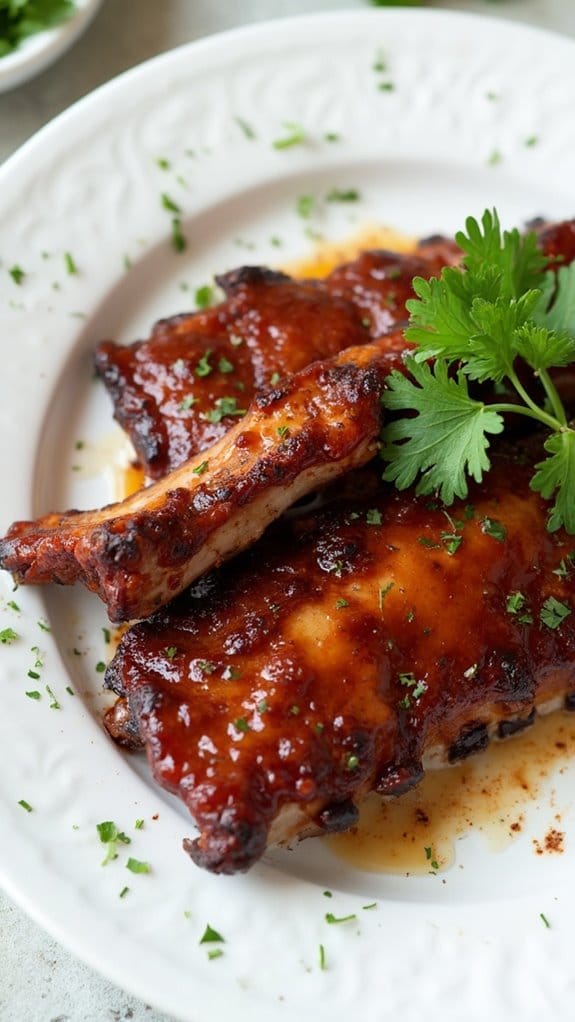
Title: Buttermilk Barbecue Ribs
Prep Time: 15 minutes
Cook Time: 3 hours
Number of Servings: 4
Required Equipment List: Grill or oven, aluminum foil, baking dish, mixing bowl, whisk, meat thermometer
Cuisine Type: American
Buttermilk Barbecue Ribs are a mouthwatering dish that takes the classic barbecue experience to a whole new level. The buttermilk marinade tenderizes the ribs, infusing them with a rich, tangy flavor that perfectly complements the smoky barbecue sauce. This recipe is ideal for weekend cookouts or family gatherings, where the tender, fall-off-the-bone ribs will be the star of the show.
Whether cooked on the grill or in the oven, these ribs promise to deliver a deliciously satisfying meal. The beauty of this recipe lies in its simplicity and the depth of flavor achieved through the buttermilk marinade. By allowing the ribs to soak in the buttermilk and spices overnight, you guarantee that each bite is bursting with flavor.
Once cooked, these ribs can be slathered with your favorite barbecue sauce for a sticky, savory finish. Serve them alongside classic sides like coleslaw and cornbread for a complete meal that captures the essence of summer barbecues, no matter the season.
Ingredients:
- 2 pounds baby back ribs
- 1 cup buttermilk
- 1 tablespoon paprika
- 1 tablespoon garlic powder
- 1 tablespoon onion powder
- 1 teaspoon cayenne pepper (optional)
- 1 teaspoon salt
- 1 teaspoon black pepper
- 1 cup barbecue sauce
Instructions:
- In a mixing bowl, whisk together the buttermilk, paprika, garlic powder, onion powder, cayenne pepper, salt, and black pepper to create a marinade. Place the ribs in a large resealable plastic bag and pour the marinade over them, ensuring they’re well coated. Seal the bag and refrigerate for at least 4 hours, preferably overnight.
- Preheat your grill or oven to 300°F (150°C). If using a grill, prepare it for indirect heat. Remove the ribs from the marinade and let them come to room temperature for about 30 minutes.
- Wrap the ribs tightly in aluminum foil, creating a packet to trap moisture. If using the oven, place them in a baking dish and cover with foil. This helps to steam the ribs, making them tender.
- Cook the ribs in the preheated grill or oven for approximately 2.5 to 3 hours, or until they’re tender and the meat pulls away from the bone easily. Use a meat thermometer to guarantee the internal temperature reaches at least 190°F (88°C) for peak tenderness.
- Once the ribs are done cooking, carefully remove them from the foil. Brush a generous amount of barbecue sauce over the ribs, coating them evenly. Return the ribs to the grill or oven for an additional 15-20 minutes, allowing the sauce to caramelize and develop a nice glaze.
- Remove the ribs from the heat and let them rest for about 10 minutes before slicing. Serve with extra barbecue sauce on the side for dipping.
Extra Tips: For an extra layer of flavor, consider adding a dry rub to the ribs before marinating them in buttermilk. You can also experiment with different barbecue sauces to find your favorite combination.
If you prefer a smoky flavor, adding wood chips to your grill during the last 15 minutes can enhance the taste. Additionally, for an oven-friendly version, you can broil the ribs for a few minutes after saucing to achieve a nice char. Enjoy your delicious buttermilk barbecue ribs!
Buttermilk Zucchini Fritters

Title: Buttermilk Zucchini Fritters
Prep Time: 15 minutes
Cook Time: 20 minutes
Number of Servings: 4
Required Equipment List: Mixing bowl, frying pan, spatula, grater, paper towels
Cuisine Type: American
Buttermilk Zucchini Fritters are a delightful way to enjoy this versatile vegetable, perfect for a light appetizer or a side dish. The zucchini is grated and combined with buttermilk, eggs, and a mix of herbs and spices, resulting in a creamy and flavorful batter.
When pan-fried until golden brown, these fritters develop a crispy exterior while maintaining a soft and moist interior, making them irresistible. They can be served warm with a dollop of sour cream or yogurt for dipping.
These fritters aren’t only delicious but also a great way to sneak in some veggies into your meals, especially for picky eaters. The buttermilk adds a tangy richness that complements the zucchini perfectly, while the addition of fresh herbs can elevate the flavor profile even further.
Whether enjoyed as a snack, a side, or even a light main course, Buttermilk Zucchini Fritters are sure to become a favorite in your kitchen.
Ingredients:
- 2 medium zucchinis, grated
- 1 cup buttermilk
- 1 large egg
- 1 cup all-purpose flour
- 1 teaspoon baking powder
- 1 teaspoon garlic powder
- 1 teaspoon onion powder
- Salt and pepper to taste
- 2 tablespoons fresh parsley, chopped (optional)
- Vegetable oil for frying
Instructions:
- Begin by grating the zucchinis using a box grater or food processor. Place the grated zucchini in a clean kitchen towel or cheesecloth and squeeze out excess moisture to prevent soggy fritters.
- In a mixing bowl, combine the grated zucchini, buttermilk, and egg. Whisk together until well incorporated.
- In a separate bowl, mix the flour, baking powder, garlic powder, onion powder, salt, and pepper. Gradually add the dry ingredients to the zucchini mixture, stirring until just combined. If desired, fold in the fresh parsley for added flavor.
- Heat a frying pan over medium heat and add enough vegetable oil to cover the bottom of the pan. Once the oil is hot, spoon about 2 tablespoons of the batter into the pan for each fritter, flattening them slightly with a spatula.
- Fry the fritters for about 3-4 minutes on each side or until they’re golden brown and crispy. Remove the fritters from the pan and place them on a paper towel-lined plate to absorb any excess oil.
- Serve the fritters warm, with a side of sour cream or yogurt for dipping if desired.
Extra Tips: To enhance the flavor, consider adding grated cheese, such as feta or Parmesan, to the batter for an extra creamy texture. You can also spice it up with red pepper flakes for a bit of heat.
If you’re looking for a healthier option, you can bake the fritters in the oven at 400°F (200°C) on a greased baking sheet, flipping halfway through, for about 20-25 minutes or until golden brown. Enjoy these fritters as a versatile dish that can be enjoyed for breakfast, lunch, or dinner!
Conclusion
So, there you have it! With these creamy buttermilk recipes, you’re not just cooking—you’re creating a comforting experience that warms the soul. Whether it’s cozying up with a bowl of soup or serving up a delicious casserole, each dish invites you to savor life’s little pleasures. Why not gather your loved ones and share a meal that whispers, “Everything’s going to be alright”? Immerse yourself in these recipes and let the magic of buttermilk transform your dinner table tonight!

