No products in the cart.

17 Easy No-Bake Christmas Candy Recipes
You’re in for a treat this holiday season with 17 easy no-bake Christmas candy recipes that will wow your friends and family without turning up the oven. Think about whipping up Chocolate Peanut Butter Balls or festive Peppermint Bark — both are super simple and satisfying! You can even make cute Marshmallow Snowmen for a touch of whimsy. These candies are perfect for parties or as sweet snacks, and let’s be honest, who doesn’t love a delicious bite-sized treat? If you’re enthusiastic to impress your loved ones with these easy recipes, stick around, and you’ll discover even more fun ideas!
Contents
hide
Chocolate Peanut Butter Balls

Title: Chocolate Peanut Butter Balls
Prep Time: 15 minutes
Cook Time: 0 minutes
Number of Servings: 24
Required Equipment List: Mixing bowl, baking sheet, parchment paper, refrigerator
Cuisine Type: American
Chocolate Peanut Butter Balls are a delightful no-bake treat that combines the rich flavors of chocolate and peanut butter into bite-sized bliss. Perfect for holiday gatherings or as a sweet snack, these treats are incredibly simple to make and require minimal ingredients.
The creamy peanut butter filling is enveloped in a rich chocolate coating, creating a decadent dessert that will satisfy any sweet tooth. These treats aren’t only easy to prepare but also versatile. You can customize them by rolling them in crushed nuts, sprinkles, or shredded coconut for added texture and flavor.
Whether you’re making them for a festive occasion or simply to indulge at home, Chocolate Peanut Butter Balls are sure to be a crowd-pleaser and a favorite among both kids and adults alike.
Ingredients:
- 1 cup creamy peanut butter
- 1/2 cup powdered sugar
- 1 teaspoon vanilla extract
- 1 1/2 cups graham cracker crumbs
- 1 1/2 cups semi-sweet chocolate chips
- 2 tablespoons coconut oil (optional)
Instructions:
- In a mixing bowl, combine the creamy peanut butter, powdered sugar, and vanilla extract. Mix until smooth and well combined. Gradually add the graham cracker crumbs, stirring until the mixture is fully incorporated and forms a thick dough.
- Using your hands, roll the peanut butter mixture into small balls, about 1 inch in diameter, and place them on a baking sheet lined with parchment paper. The mixture may be sticky, so you can slightly dampen your hands with water to make rolling easier.
- Once all the balls are formed, place the baking sheet in the refrigerator for about 30 minutes to allow them to firm up. This step is essential for ensuring that they hold their shape when dipped in chocolate.
- While the peanut butter balls are chilling, melt the semi-sweet chocolate chips and coconut oil (if using) in a microwave-safe bowl. Heat in 30-second intervals, stirring in between, until the mixture is smooth and fully melted.
- Remove the chilled peanut butter balls from the refrigerator. Using a fork or toothpick, dip each ball into the melted chocolate, allowing any excess chocolate to drip off before placing them back on the parchment-lined baking sheet.
- Once all the balls are coated in chocolate, return the baking sheet to the refrigerator for about 15 minutes, or until the chocolate has hardened. They can be stored in an airtight container in the fridge for up to a week.
Extra Tips: For a delightful twist, try adding a pinch of sea salt on top of the chocolate before it sets for a sweet and salty flavor combination.
You can also experiment with different types of chocolate, such as dark or white chocolate, for a unique taste experience. If you’d like to make these treats even more festive, consider using colored sprinkles or crushed candy canes for decoration during the holiday season. Enjoy your delicious homemade Chocolate Peanut Butter Balls!
Peppermint Bark
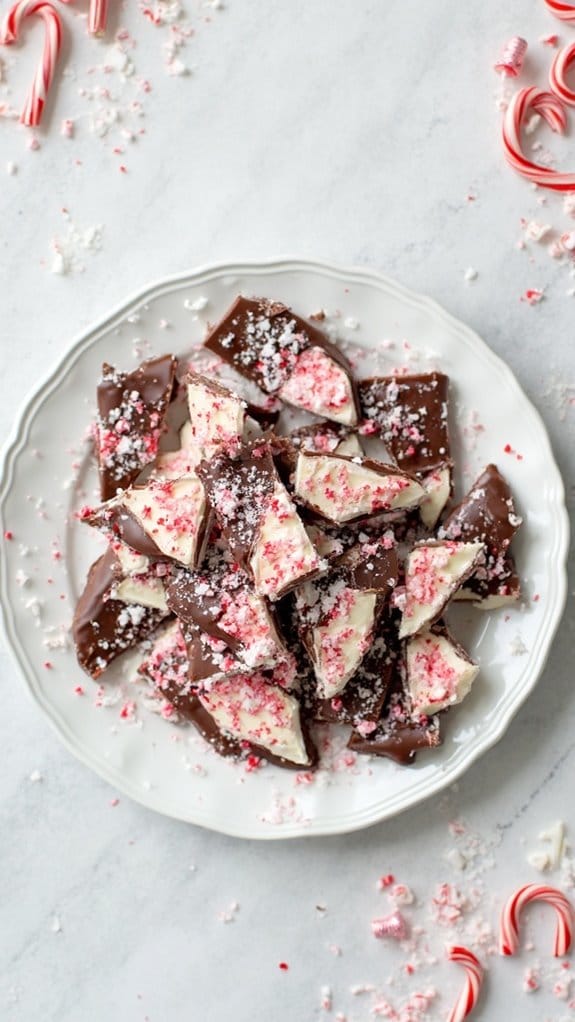
Title: Peppermint Bark
Prep Time: 15 minutes
Cook Time: 0 minutes
Number of Servings: 12
Required Equipment List: Baking sheet, parchment paper, microwave-safe bowl, spatula, knife
Cuisine Type: American
Peppermint bark is a festive treat that perfectly captures the spirit of the holiday season. This no-bake candy features layers of dark and white chocolate, topped with crushed peppermint candies for a delightful crunch and invigorating flavor. The contrast between the rich chocolate and the cool peppermint makes it an irresistible addition to any holiday dessert table or a thoughtful DIY gift for friends and family.
The beauty of peppermint bark lies in its simplicity and the ease with which it can be made. It requires no baking, just a bit of melting and mixing, making it a perfect project for kids or anyone looking to whip up something sweet in no time.
With its striking appearance and delicious taste, this peppermint bark is sure to become a holiday favorite for years to come.
Ingredients:
- 12 ounces dark chocolate chips
- 12 ounces white chocolate chips
- 1/2 cup crushed peppermint candies (plus extra for garnish)
- 1 teaspoon peppermint extract (optional)
Instructions:
- Begin by preparing a baking sheet by lining it with parchment paper. This will prevent the bark from sticking and make it easier to remove once set.
- In a microwave-safe bowl, melt the dark chocolate chips in 30-second intervals, stirring in between each interval until fully melted and smooth. If desired, stir in the peppermint extract for an extra boost of flavor.
- Once melted, pour the dark chocolate onto the prepared baking sheet and spread it out evenly with a spatula to form a rectangle about 1/4 inch thick. Allow the chocolate to cool and set for about 10 minutes at room temperature.
- While the dark chocolate is setting, melt the white chocolate chips using the same microwave method as before. Stir until the white chocolate is smooth and creamy.
- Pour the melted white chocolate over the set dark chocolate layer, spreading it evenly with a spatula. Immediately sprinkle the crushed peppermint candies over the top, pressing them down gently to confirm they adhere.
- Place the baking sheet in the refrigerator for about 30 minutes or until the chocolate is completely set. Once set, remove the bark from the parchment paper and cut it into pieces using a sharp knife.
Extra Tips: For a more festive touch, consider adding a drizzle of melted chocolate over the top of the peppermint bark before it sets. You can also customize the flavor by using different types of chocolate, such as milk chocolate or even flavored white chocolate, to create your own unique twist on this classic treat.
Store the peppermint bark in an airtight container at room temperature for up to two weeks, or in the refrigerator for a longer shelf life. Enjoy this delightful holiday candy with family and friends!
Coconut Snowballs
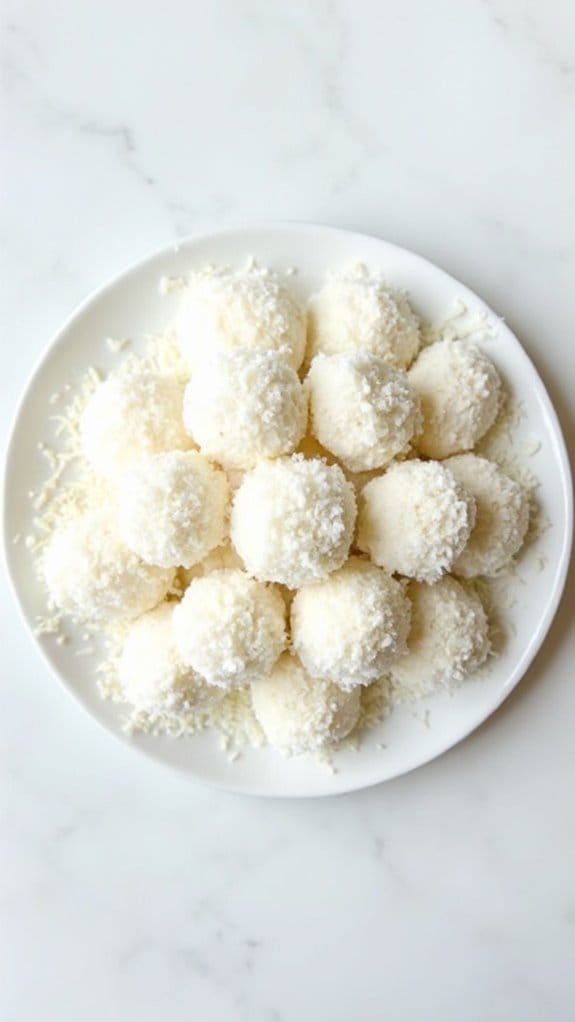
Title: Coconut Snowballs
Prep Time: 20 minutes
Cook Time: 0 minutes
Number of Servings: 24
Required Equipment List: Mixing bowl, baking sheet, parchment paper, plastic wrap
Cuisine Type: American
Coconut Snowballs are a delightful no-bake treat that captures the essence of winter holidays with their snowy white appearance and sweet coconut flavor. These creamy, sweet confections are made with simple ingredients and are perfect for holiday gatherings or as a special treat for yourself.
The combination of shredded coconut and sweetened condensed milk creates a rich and chewy texture, while the rolling in additional coconut gives them their signature snowy look.
These treats aren’t only easy to make but also incredibly versatile. You can customize them by adding chocolate chips, nuts, or even a touch of rum or vanilla extract for added flavor. Perfect for kids to help with, Coconut Snowballs make for a fun and festive activity during the holiday season. They’re sure to be a hit at any holiday party or as a sweet gift for friends and family.
Ingredients:
- 2 cups shredded coconut (sweetened)
- 1 cup sweetened condensed milk
- 1 teaspoon vanilla extract
- 1/4 cup powdered sugar
- Additional shredded coconut for rolling
Instructions:
- In a mixing bowl, combine the shredded coconut, sweetened condensed milk, vanilla extract, and powdered sugar. Mix well until all ingredients are thoroughly combined and a sticky mixture forms.
- Using your hands, scoop out about a tablespoon of the coconut mixture and roll it into a ball. Repeat this process until all the mixture is formed into balls, placing them on a baking sheet lined with parchment paper.
- Once all the balls are formed, roll each one in additional shredded coconut until fully coated. This will give them their snowy appearance.
- Place the baking sheet in the refrigerator for at least 30 minutes to allow the Coconut Snowballs to firm up. Once chilled, they’ll hold their shape better.
- After chilling, transfer the Coconut Snowballs to a serving platter or store them in an airtight container. They can be kept in the refrigerator for up to a week.
Extra Tips: For an added twist, consider mixing in some mini chocolate chips or chopped nuts to the coconut mixture before rolling them into balls. You can also dip half of each snowball in melted chocolate for a delicious chocolate-covered variation.
When storing, make sure to layer them with parchment paper to prevent sticking. Enjoy these delicious treats as a delightful festive snack or a sweet gift!
Christmas M&M Treats
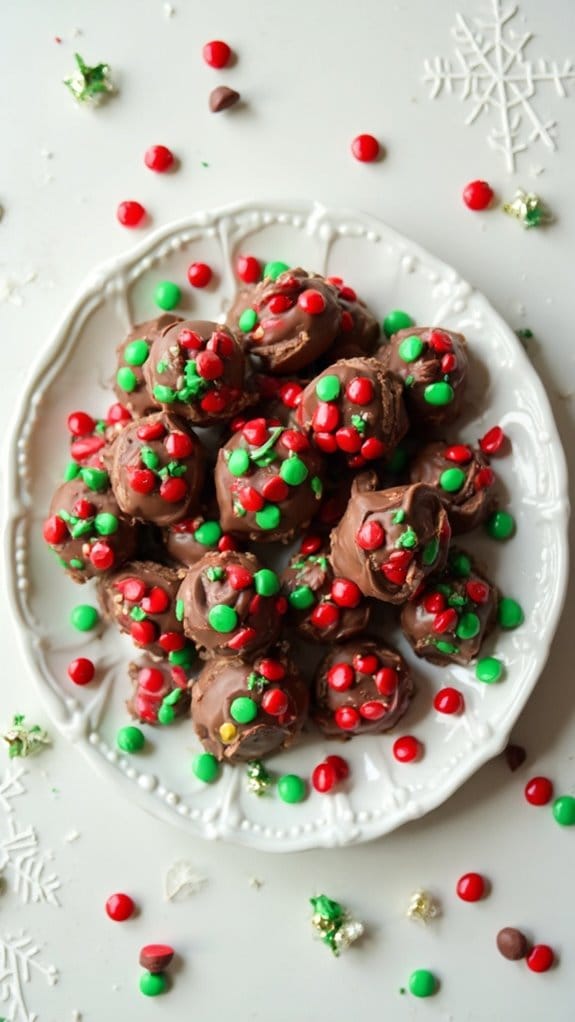
Title: Christmas M&M Treats
Prep Time: 10 minutes
Cook Time: 0 minutes
Number of Servings: 24
Required Equipment List: Mixing bowl, baking sheet, parchment paper
Cuisine Type: American
Christmas M&M Treats are a festive and colorful no-bake Christmas candy dessert perfect for the holiday season. With their crunchy texture and sweet chocolate flavor, these treats are a hit with both kids and adults alike. The vibrant colors of the M&M candies make them not only delicious but also a visually appealing addition to your holiday dessert table.
This recipe is incredibly simple to make, requiring just a few ingredients and minimal preparation time, making it a great choice for busy holiday schedules. These treats can be modified to include your favorite mix-ins, whether you prefer nuts, pretzels, or even festive sprinkles.
They’re fun to make with family or friends, allowing everyone to get creative with their own combinations. Perfect for holiday parties, gift giving, or simply enjoying at home, Christmas M&M Treats are sure to bring joy to your celebrations.
Ingredients:
- 2 cups chocolate chips (milk or semi-sweet)
- 1 cup peanut butter
- 3 cups crispy rice cereal
- 1 cup Christmas M&M candies
- 1 teaspoon vanilla extract
- Pinch of salt
Instructions:
- In a mixing bowl, combine the chocolate chips and peanut butter. Microwave the mixture in 30-second intervals, stirring in between, until fully melted and smooth. This usually takes about 1-2 minutes depending on your microwave’s power.
- Once melted, add the vanilla extract and a pinch of salt to the chocolate-peanut butter mixture. Stir well to combine the flavors evenly.
- Gently fold in the crispy rice cereal, ensuring that all the cereal is coated with the chocolate and peanut butter mixture. Be careful not to crush the cereal too much as you mix.
- Finally, add the Christmas M&M candies to the mixture and fold them in gently to distribute them throughout the batch.
- Line a baking sheet with parchment paper. Using a spoon or your hands, scoop out small amounts of the mixture and shape them into bite-sized clusters. Place them on the prepared baking sheet.
- Refrigerate the clusters for about 30 minutes or until they’re firm. Once set, remove them from the refrigerator and store them in an airtight container until ready to serve.
Extra Tips: For a fun twist, consider adding crushed pretzels or nuts to the mixture for extra crunch. You can also drizzle melted white chocolate over the top of the clusters for a decorative and tasty finish.
These treats can be made in advance and stored in the refrigerator, making them a perfect option for holiday gatherings. Enjoy your festive creation!
Rice Krispie Treats
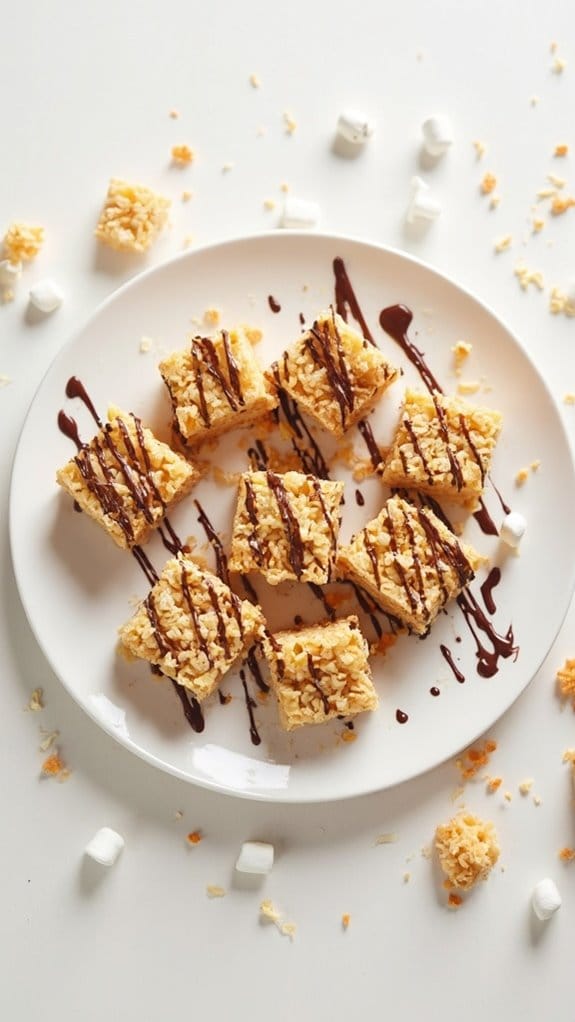
Title: No-Bake Rice Krispie Treats
Prep Time: 10 minutes
Cook Time: 0 minutes
Number of Servings: 12
Required Equipment List: Large mixing bowl, microwave-safe bowl, spatula, 9×13-inch baking pan
Cuisine Type: American
No-Bake Rice Krispie Treats are a classic, nostalgic treat that brings back childhood memories with every bite. This simple recipe combines crispy Rice Krispies with gooey marshmallows and buttery goodness, making it a favorite among both kids and adults.
The best part about these treats is that they require no baking, making them an ideal choice for quick holiday gifts or last-minute party snacks. Making these treats is incredibly straightforward and only requires a few ingredients that you likely already have in your pantry.
The combination of melted marshmallows and butter creates a sticky, sweet mixture that binds the Rice Krispies together, resulting in a deliciously chewy and crunchy texture. You can also customize them by adding chocolate chips, sprinkles, or even drizzling melted chocolate on top for an extra special touch.
Ingredients:
- 6 cups Rice Krispies cereal
- 4 cups mini marshmallows
- 3 tablespoons unsalted butter
- 1 teaspoon vanilla extract (optional)
- Cooking spray or parchment paper (for greasing the pan)
Instructions:
- Begin by greasing a 9×13-inch baking pan with cooking spray or lining it with parchment paper. This will help prevent the treats from sticking and make for easier cutting once set.
- In a microwave-safe bowl, combine the unsalted butter and mini marshmallows. Microwave on high for 30 seconds, then stir. Continue to microwave in 15-second intervals, stirring after each, until the mixture is completely melted and smooth.
- If using, stir in the vanilla extract to the melted marshmallow mixture for added flavor.
- Immediately pour the melted mixture over the Rice Krispies cereal in a large mixing bowl. Using a spatula, gently fold the cereal into the marshmallow mixture until all the cereal is evenly coated.
- Transfer the mixture into the prepared baking pan, pressing it down firmly and evenly with the spatula. Make sure to compact the mixture well so that the treats hold together once set.
- Allow the Rice Krispie Treats to cool at room temperature for about 30 minutes, or until they’re firm. Once set, cut them into squares and serve.
Extra Tips: For a fun twist, consider adding mix-ins like chocolate chips, M&M’s, or nuts to the cereal before pouring in the marshmallow mixture.
If you want to achieve a more decorative look, melt some chocolate and drizzle it over the top once the treats have cooled. Store any leftovers in an airtight container at room temperature for up to a week, although they’re usually gobbled up much faster! Enjoy your no-bake creation!
No-Bake Cheesecake Bites
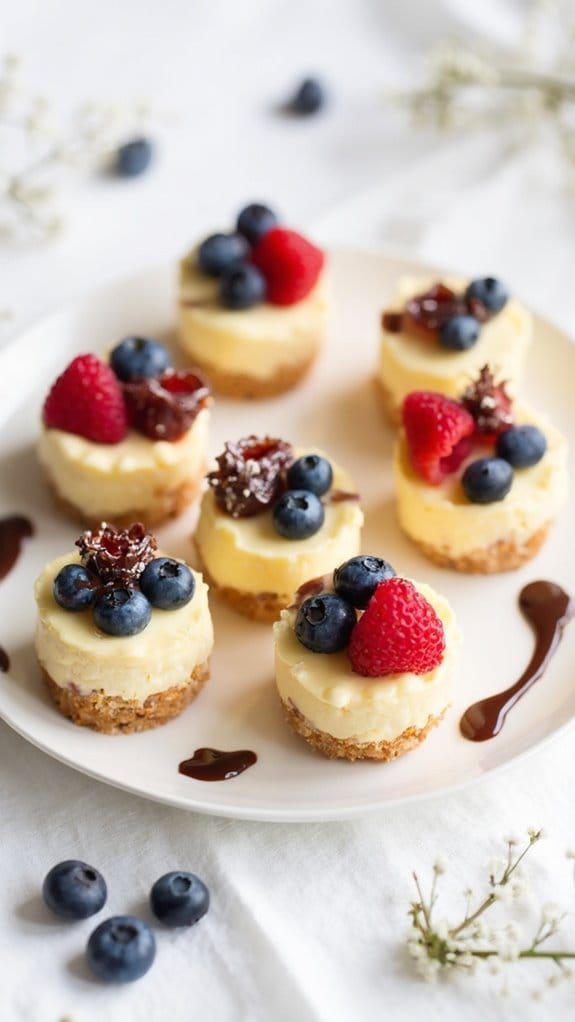
Title: No-Bake Cheesecake Bites
Prep Time: 20 minutes
Cook Time: 0 minutes
Number of Servings: 16 bites
Required Equipment List: Mixing bowl, electric mixer or whisk, silicone mold or mini muffin tin, spatula
Cuisine Type: American
No-Bake Cheesecake Bites are the ultimate sweet treat for any festive occasion, especially during the holiday season. These delightful little bites combine the creamy texture of traditional cheesecake with the convenience of no-baking required.
With a buttery graham cracker crust and a luscious cream cheese filling, they’re easy to prepare and perfect for sharing with family and friends. Each bite is a mini explosion of flavors that will leave everyone wanting more.
These cheesecake bites aren’t only delicious but also highly customizable, allowing you to infuse your favorite flavors like chocolate, fruit, or even caramel. They set up beautifully in the fridge, making them an excellent make-ahead dessert option for holiday parties or gatherings.
Topped with fresh berries or a drizzle of chocolate sauce, these bites are sure to impress and satisfy any sweet tooth.
Ingredients:
- 1 cup graham cracker crumbs
- 1/4 cup granulated sugar
- 1/2 cup unsalted butter, melted
- 8 ounces cream cheese, softened
- 1/2 cup powdered sugar
- 1 teaspoon vanilla extract
- 1 cup whipped cream (store-bought or homemade)
- Fresh berries or chocolate sauce for topping (optional)
Instructions:
- In a mixing bowl, combine the graham cracker crumbs, granulated sugar, and melted butter. Mix until all the crumbs are evenly coated and the mixture resembles wet sand. This will form the crust for the cheesecake bites.
- Press the crumb mixture firmly into the bottom of each cavity of a silicone mold or mini muffin tin, creating an even layer. Use the back of a spoon or your fingers to pack it down tightly. Place the crust-filled mold in the refrigerator to set while you prepare the filling.
- In a separate mixing bowl, use an electric mixer or a whisk to beat the softened cream cheese until smooth and creamy. Gradually add the powdered sugar and vanilla extract, mixing until well combined and fluffy.
- Gently fold in the whipped cream into the cream cheese mixture until no streaks remain. This will give the filling a light and airy texture that’s characteristic of cheesecake.
- Spoon the cream cheese filling into each crust-filled cavity, smoothing the tops with a spatula. Cover the mold with plastic wrap and refrigerate for at least 2 hours or until the bites are fully set.
- Once set, carefully remove the cheesecake bites from the mold or muffin tin. Garnish with fresh berries or a drizzle of chocolate sauce if desired before serving.
Extra Tips: To guarantee easy removal of the cheesecake bites, consider lightly greasing the silicone mold or muffin tin with cooking spray before adding the crust.
You can experiment with different flavors by adding lemon juice or zest for a citrus twist, or even melted chocolate to the filling for a rich chocolate cheesecake. For a fun variation, try mixing in crushed candy canes or seasonal spices to elevate the festive spirit of these bites. Enjoy your delicious no-bake treats!
Chocolate Dipped Pretzels

Title: Chocolate Dipped Pretzels
Prep Time: 20 minutes
Cook Time: 10 minutes
Number of Servings: 12
Required Equipment List: Baking sheet, parchment paper, microwave-safe bowl, fork, small saucepan
Cuisine Type: American
Chocolate Dipped Pretzels are the perfect combination of sweet and salty, making them an irresistible treat during the holiday season. These easy-to-make snacks feature crunchy pretzels coated in rich melted chocolate, creating a delightful contrast in textures.
You can customize them with various toppings, such as sprinkles, crushed nuts, or even drizzles of white chocolate, adding a festive touch to your dessert table. This no-bake recipe is incredibly simple and requires minimal ingredients, making it a great option for holiday parties or last-minute gifts.
The versatility of chocolate-dipped pretzels allows you to tailor them to your taste, whether you prefer classic semi-sweet chocolate or want to try something different like white chocolate or dark chocolate. They’re sure to be a hit with both kids and adults alike!
Ingredients:
- 2 cups pretzel rods or twists
- 1 ½ cups semi-sweet chocolate chips
- 1 tablespoon coconut oil (optional, for smooth melting)
- Assorted toppings (sprinkles, crushed nuts, etc.)
Instructions:
- Begin by lining a baking sheet with parchment paper to prevent the chocolate-dipped pretzels from sticking as they cool. Set the lined baking sheet aside for later use.
- In a microwave-safe bowl, combine the semi-sweet chocolate chips and coconut oil (if using). Microwave in 30-second intervals, stirring after each interval, until the chocolate is completely melted and smooth. Be careful not to overheat, as chocolate can seize up if cooked too long.
- Once the chocolate is melted, dip each pretzel rod or twist into the chocolate, ensuring it’s fully coated. You can use a fork to help tap off any excess chocolate before placing it on the prepared baking sheet.
- While the chocolate is still wet, sprinkle your desired toppings over the pretzels. This step allows the toppings to adhere to the chocolate as it sets.
- Once all pretzels are dipped and decorated, place the baking sheet in the refrigerator for about 10-15 minutes, or until the chocolate has completely hardened.
Extra Tips: For an elegant touch, consider drizzling melted white chocolate over the dipped pretzels using a piping bag or a fork. If you want to create a more festive look, use holiday-themed sprinkles or colored sugar.
Be sure to store any leftover pretzels in an airtight container at room temperature, where they’ll stay fresh for up to a week. Enjoy making these delightful treats with friends and family!
Salted Caramel Pretzel Bark
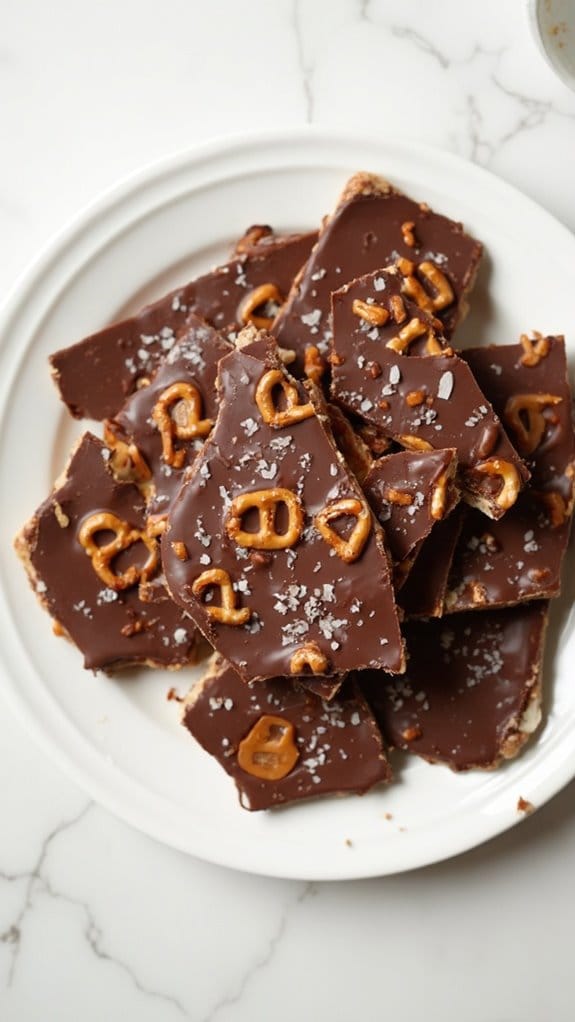
Title: Salted Caramel Pretzel Bark
Prep Time: 15 minutes
Cook Time: 10 minutes
Number of Servings: 12
Required Equipment List: Baking sheet, parchment paper, saucepan, spatula, measuring cups
Cuisine Type: American
Salted Caramel Pretzel Bark is a delightful no-bake treat that combines the perfect balance of sweet and salty flavors. This simple yet indulgent dessert features a buttery pretzel base topped with a rich layer of homemade caramel and finished with a sprinkle of flaky sea salt.
It’s an excellent option for holiday gatherings or as a sweet snack to enjoy any time of the year. The crunch of the pretzels contrasts beautifully with the smooth caramel, creating a satisfying treat that everyone will love.
Making this bark is quick and easy, requiring only a few ingredients and minimal effort. The combination of pretzels and caramel is a classic pairing, and with the addition of chocolate, you can elevate this treat to gourmet status.
Once prepared, simply break the bark into pieces and watch it disappear at your next festive event or family gathering.
Ingredients:
- 2 cups pretzel sticks
- 1 cup sugar
- 1/2 cup unsalted butter
- 1/4 cup heavy cream
- 1 teaspoon vanilla extract
- 1 cup chocolate chips (milk or dark)
- Flaky sea salt (for topping)
Instructions:
- Preheat your oven to 350°F (175°C). Line a baking sheet with parchment paper, making sure that the paper hangs over the edges for easy removal later.
- Spread the pretzel sticks evenly across the prepared baking sheet, making certain they’re in a single layer. This will form the base of your bark.
- In a medium saucepan, combine the sugar and butter over medium heat. Stir continuously until the mixture comes to a boil and the sugar has dissolved, about 5 minutes. Be careful not to let it burn.
- Once boiling, add the heavy cream and vanilla extract to the saucepan, stirring until fully combined. Continue boiling for an additional 2-3 minutes until the caramel thickens slightly.
- Pour the hot caramel over the pretzel base, spreading it evenly to cover all the pretzels. Use a spatula to make sure that the pretzels are well coated.
- Sprinkle the chocolate chips over the caramel layer, allowing them to melt for a minute before spreading them evenly with a spatula. Sprinkle the flaky sea salt generously on top.
- Place the baking sheet in the oven for 5-10 minutes, just until the chocolate is melted and shiny. Remove from the oven and let it cool at room temperature for about 30 minutes.
- Once cooled, lift the bark out of the baking sheet using the parchment paper. Break it into pieces and serve.
Extra Tips: For an extra decadent touch, you can drizzle additional melted chocolate over the top after the bark has cooled. This recipe is very versatile; feel free to add chopped nuts or dried fruit to the pretzel base for added texture and flavor.
Store any leftover bark in an airtight container at room temperature, and it will stay fresh for up to a week. Enjoy this sweet and salty indulgence!
Oreo Truffles

Title: Oreo Truffles
Prep Time: 30 minutes
Cook Time: 0 minutes
Number of Servings: 24 truffles
Required Equipment List: Mixing bowl, food processor, baking sheet, parchment paper, refrigerator
Cuisine Type: American
Oreo Truffles are a delightful no-bake treat that combines the beloved flavors of chocolate and cream, making them a perfect addition to your holiday dessert table. These indulgent bites are made by crushing Oreo cookies and mixing them with cream cheese to create a rich filling, which is then rolled into balls and coated in chocolate.
Not only are they incredibly easy to make, but they also require no baking, making them a convenient option for busy holiday schedules. These truffles are versatile and can be customized with different types of chocolate coatings, such as milk, dark, or white chocolate.
You can also sprinkle crushed Oreos or festive toppings on top for an added touch. Whether you’re making them for a holiday gathering, a gift, or simply to enjoy at home, Oreo Truffles are sure to impress everyone with their decadent flavor and beautiful presentation.
Ingredients:
- 1 package (15.25 oz) Oreo cookies
- 8 oz cream cheese, softened
- 16 oz chocolate (milk, dark, or white) for coating
- Optional toppings (crushed Oreos, sprinkles, or cocoa powder)
Instructions:
- Begin by placing the Oreo cookies in a food processor and pulse until they’re finely crushed. Alternatively, you can place them in a zip-top bag and crush them with a rolling pin if you don’t have a food processor.
- In a mixing bowl, combine the crushed Oreos with the softened cream cheese. Mix well until the mixture is smooth and fully incorporated. You can use a spatula or your hands for this step, but be sure to get everything well combined.
- Once the mixture is ready, use your hands to form small balls, about 1 inch in diameter, and place them on a baking sheet lined with parchment paper. Make sure to space them out evenly to prevent sticking.
- After all the truffles are formed, place the baking sheet in the refrigerator for about 15-20 minutes to allow them to firm up. This step is important for easier coating in chocolate.
- While the truffles are chilling, melt your choice of chocolate in a microwave-safe bowl or using a double boiler. If using a microwave, heat in 30-second intervals, stirring in between until completely melted and smooth.
- Once the truffles are firm, remove them from the refrigerator. Dip each truffle into the melted chocolate, using a fork to let any excess chocolate drip off before placing them back onto the parchment-lined baking sheet.
- If desired, sprinkle the tops of the truffles with crushed Oreos or your choice of toppings while the chocolate is still wet. Allow the chocolate to set at room temperature or in the refrigerator until firm.
Extra Tips: To make the process easier, consider using a cookie scoop to portion out the truffles for uniform size. You can also experiment with flavor variations by adding a splash of peppermint extract or almond extract to the cream cheese mixture for a unique twist.
For a smoother finish, verify your chocolate is fully melted and at a proper dipping temperature. Enjoy your delicious Oreo Truffles!
Almond Joy Fudge
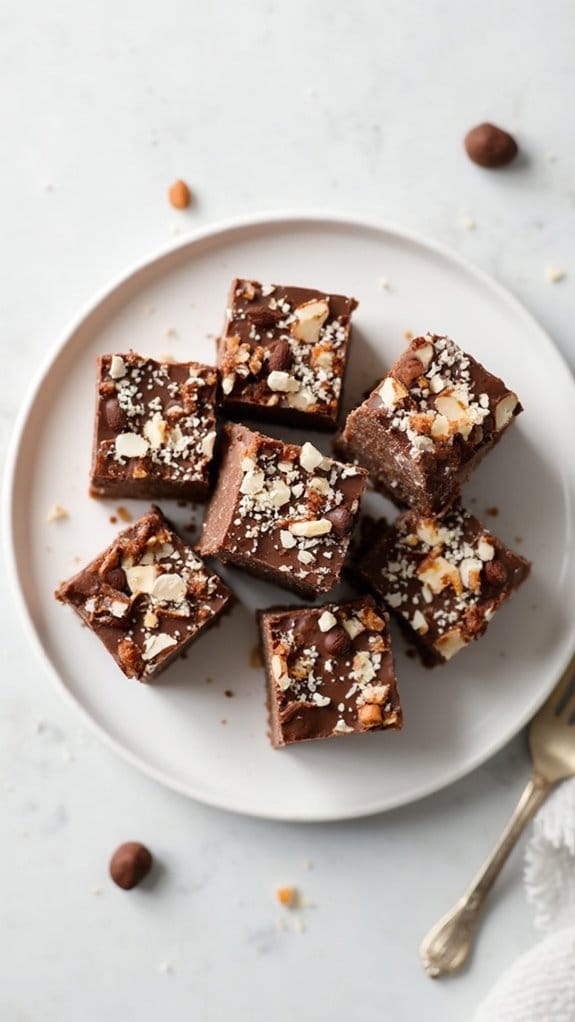
Title: Almond Joy Fudge
Prep Time: 15 minutes
Cook Time: 0 minutes
Number of Servings: 16
Required Equipment List: Mixing bowl, spatula, parchment paper, 8×8 inch baking dish
Cuisine Type: American
Almond Joy Fudge is a decadent and delicious no-bake treat that captures the classic flavors of the beloved candy bar. With layers of creamy chocolate, sweet coconut, and crunchy almonds, this fudge is sure to satisfy your sweet tooth and impress your friends and family during the holiday season.
The best part? It comes together in just a few minutes, making it the perfect last-minute addition to your holiday dessert table. This fudge not only delights with its taste but also with its simplicity. There’s no complicated baking process involved; instead, you simply melt, mix, and chill.
The combination of rich chocolate and chewy coconut gives this fudge a wonderful texture, while the almonds add that delightful crunch. Once chilled, you can cut it into squares and enjoy a bite of nostalgia that will transport you back to those childhood candy bar moments.
Ingredients:
- 2 cups semi-sweet chocolate chips
- 1 cup sweetened shredded coconut
- 1/2 cup sweetened condensed milk
- 1/2 teaspoon vanilla extract
- 1/2 cup whole almonds (or almond slivers)
- 1/4 cup chopped almonds (for topping)
Instructions:
- Begin by preparing your 8×8 inch baking dish by lining it with parchment paper, allowing some overhang for easy removal later. This will guarantee that your fudge comes out easily and maintains its shape.
- In a microwave-safe bowl, combine the semi-sweet chocolate chips and sweetened condensed milk. Heat in the microwave in 30-second intervals, stirring in between, until the chocolate is completely melted and the mixture is smooth.
- Once melted, stir in the shredded coconut and vanilla extract until fully incorporated. This will create a luscious, creamy base for your fudge that captures the essence of an Almond Joy.
- Gently fold in the whole almonds, ensuring they’re evenly distributed throughout the chocolate-coconut mixture. This adds that signature almond crunch in every bite.
- Pour the chocolate mixture into the prepared baking dish, spreading it out evenly with a spatula. Sprinkle the chopped almonds on top for an extra crunch and press them lightly into the fudge.
- Refrigerate the fudge for at least 2 hours or until fully set. Once firm, lift the fudge out of the baking dish using the parchment overhang and cut it into squares.
Extra Tips: For an extra touch of flavor, consider adding a pinch of sea salt on top just before chilling, as it will enhance the sweetness and richness of the fudge.
Feel free to experiment with different types of chocolate; dark chocolate can provide a more intense flavor, while milk chocolate will make it sweeter. Store any leftovers in an airtight container in the refrigerator, where they’ll keep well for up to a week. Enjoy your homemade Almond Joy Fudge throughout the holidays!
White Chocolate Cranberry Clusters
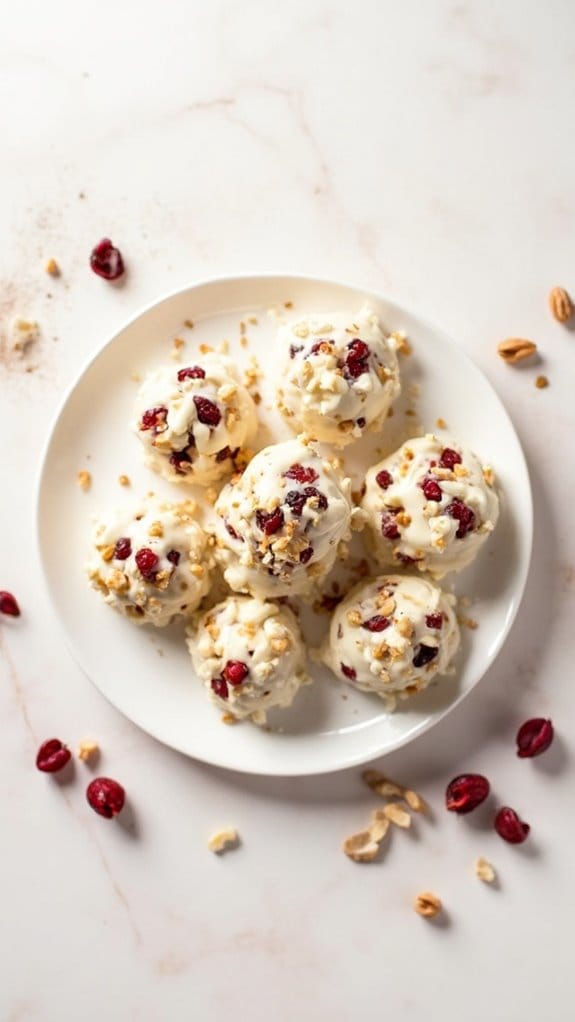
Title: White Chocolate Cranberry Clusters
Prep Time: 15 minutes
Cook Time: 0 minutes
Number of Servings: 24 clusters
Required Equipment List: Microwave-safe bowl, baking sheet, parchment paper, spoon
Cuisine Type: American
White Chocolate Cranberry Clusters are a delightful and festive treat that combines the creamy sweetness of white chocolate with the tartness of dried cranberries. This no-bake recipe is incredibly easy to prepare, making it perfect for busy holiday seasons when you need a quick and impressive dessert.
The clusters not only look beautiful on a holiday platter but also offer a satisfying crunch with each bite, thanks to the addition of nuts or crispy rice. These clusters are versatile and can be customized based on your preferences. You can use a mix of your favorite dried fruits, like cherries or apricots, and even add a sprinkle of sea salt on top to balance the sweetness.
They make a wonderful gift when packaged in a decorative box, or simply enjoyed at home with family and friends during the festive season.
Ingredients:
- 2 cups white chocolate chips
- 1 cup dried cranberries
- 1 cup nuts (such as pecans or almonds), chopped
- 1 cup crispy rice cereal
- 1 teaspoon vanilla extract
Instructions:
- Begin by preparing your workspace. Line a baking sheet with parchment paper to prevent the clusters from sticking once they set. This will also make for an easy cleanup later.
- In a microwave-safe bowl, combine the white chocolate chips. Heat in the microwave in 30-second intervals, stirring in between, until the chocolate is fully melted and smooth. Be careful not to overheat as white chocolate can scorch easily.
- Once melted, stir in the vanilla extract, followed by the dried cranberries and chopped nuts. Mix well to guarantee that all the ingredients are evenly coated in the melted chocolate.
- Gently fold in the crispy rice cereal until it’s well combined with the chocolate mixture. This will add a delightful crunch to your clusters.
- Using a spoon, drop heaping tablespoons of the mixture onto the prepared baking sheet, shaping them into clusters. Leave some space between each cluster as they may spread slightly.
- Allow the clusters to cool at room temperature until the chocolate has fully set. If you’re in a hurry, you can place them in the refrigerator for about 30 minutes to speed up the process.
Extra Tips: For a decorative touch, consider drizzling some melted dark chocolate over the top of each cluster before they set. You can also experiment with other dried fruits and nuts to create your personalized version of these tasty treats.
Store the finished clusters in an airtight container at room temperature for up to a week, or refrigerate them for longer freshness. Enjoy sharing these festive goodies with friends and family!
Gingerbread Energy Bites
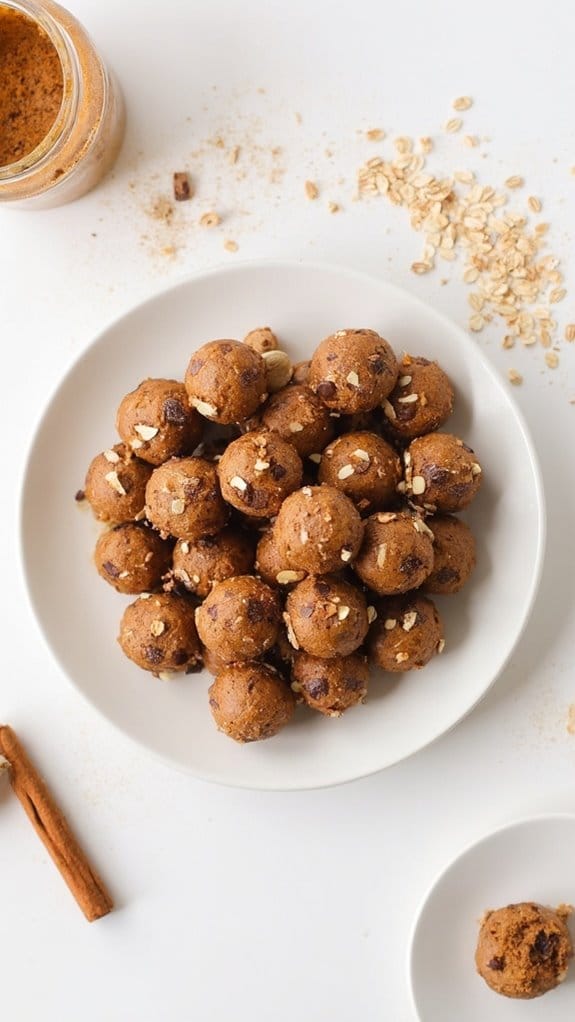
Title: Gingerbread Energy Bites
Prep Time: 15 minutes
Cook Time: 0 minutes
Number of Servings: 12
Required Equipment List: Mixing bowl, measuring cups, measuring spoons, baking sheet, parchment paper
Cuisine Type: American
Gingerbread Energy Bites are a festive and nutritious treat that captures the essence of the holiday season without the need for baking. These delightful bites are packed with wholesome ingredients, including oats, nut butter, and warm spices, making them a perfect snack for both kids and adults.
With the rich flavors of ginger, cinnamon, and molasses, they provide the comforting taste of gingerbread in a convenient, energy-boosting form. Not only do these energy bites satisfy your sweet tooth, but they also provide a great source of fiber and protein, making them an ideal snack to keep your energy levels up during the busy holiday season.
They’re quick to prepare and can be stored in the refrigerator for a grab-and-go option throughout the week. Enjoy them as a post-workout snack, a midday treat, or as a healthy dessert alternative at your holiday gatherings.
Ingredients:
- 1 cup rolled oats
- 1/2 cup almond butter (or any nut butter of choice)
- 1/4 cup honey or maple syrup
- 1 teaspoon ground ginger
- 1 teaspoon ground cinnamon
- 1/2 teaspoon nutmeg
- 1/4 teaspoon salt
- 1/4 cup molasses
- 1/4 cup mini chocolate chips (optional)
- 1/4 cup chopped nuts (optional)
Instructions:
- In a mixing bowl, combine the rolled oats, ground ginger, ground cinnamon, nutmeg, and salt. Stir the dry ingredients together until well mixed, ensuring the spices are evenly distributed throughout the oats.
- In a separate bowl, mix together the almond butter and molasses until smooth. If using honey or maple syrup, add it to this mixture and stir until fully incorporated.
- Pour the wet mixture into the bowl with the dry ingredients and mix thoroughly until everything is evenly combined. If desired, fold in the mini chocolate chips and chopped nuts for added texture and flavor.
- Once the mixture is well combined, use your hands to form small balls, about 1 inch in diameter. Place each energy bite onto a baking sheet lined with parchment paper.
- After forming all the bites, refrigerate them for at least 30 minutes to help them firm up. This step is essential for maintaining their shape.
- Once chilled, store the energy bites in an airtight container in the refrigerator for up to one week. Enjoy them as a quick snack whenever you need a boost of energy.
Extra Tips: Feel free to customize these energy bites by adding dried fruits, seeds, or different types of nut butters according to your preferences. If you prefer a spicier kick, consider adding a pinch of cayenne pepper.
These bites also make great gifts when packaged in a festive container, making them a thoughtful and healthy treat for friends and family during the holiday season.
No-Bake Peanut Butter Fudge
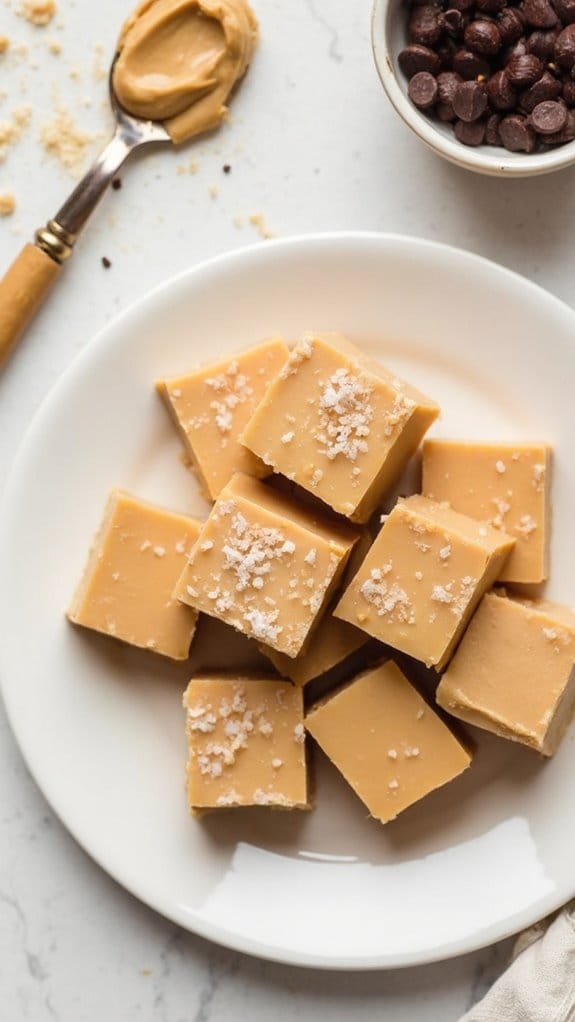
Title: No-Bake Peanut Butter Fudge
Prep Time: 10 minutes
Cook Time: 0 minutes
Number of Servings: 16
Required Equipment List: Mixing bowl, spatula, 8×8 inch baking pan, parchment paper, refrigerator
Cuisine Type: American
No-Bake Peanut Butter Fudge is a rich and indulgent treat that requires no cooking, making it a perfect dessert for the holiday season or any time you crave something sweet. The creamy combination of peanut butter and powdered sugar creates a velvety texture that melts in your mouth.
This fudge isn’t only easy to prepare but also incredibly versatile; you can customize it with chocolate chips, nuts, or even a sprinkle of sea salt on top for an extra flavor boost.
This recipe is perfect for those busy days when you want to whip up a quick dessert without turning on the oven. The fudge sets in the refrigerator, allowing you to enjoy a decadent treat within a couple of hours. It’s a great option for holiday gifting or to bring to parties, allowing you to share the joy of homemade sweetness with your loved ones.
Ingredients:
- 1 cup creamy peanut butter
- 1/2 cup unsalted butter, softened
- 2 cups powdered sugar
- 1 teaspoon vanilla extract
- 1/4 teaspoon salt (optional)
- 1/2 cup chocolate chips (optional)
Instructions:
- In a mixing bowl, combine the creamy peanut butter and softened unsalted butter. Use a spatula to mix them together until the mixture is smooth and well combined. The butter should be at room temperature to guarantee a creamy consistency.
- Gradually add the powdered sugar to the peanut butter mixture, stirring continuously until fully incorporated. The fudge mixture will become thick and sticky, so be patient as you mix.
- Stir in the vanilla extract and salt (if using) to enhance the flavors. If you want to add chocolate chips for extra richness, fold them into the mixture at this stage.
- Line an 8×8 inch baking pan with parchment paper, allowing some overhang for easy removal later. Pour the fudge mixture into the prepared pan, spreading it evenly with a spatula to guarantee a smooth surface.
- Refrigerate the fudge for at least 2 hours, or until it’s firm enough to cut into squares. Once set, lift the fudge out of the pan using the parchment paper and cut it into 16 squares or desired sizes.
Extra Tips: To make cutting the fudge easier, you can warm the knife slightly under hot water before slicing. If you want to add a decorative touch, consider drizzling melted chocolate over the top of the fudge before refrigerating.
This no-bake treat can be stored in an airtight container in the refrigerator for up to two weeks, making it a great make-ahead option for holiday gatherings. Enjoy your delicious no-bake peanut butter fudge!
Rocky Road Bars
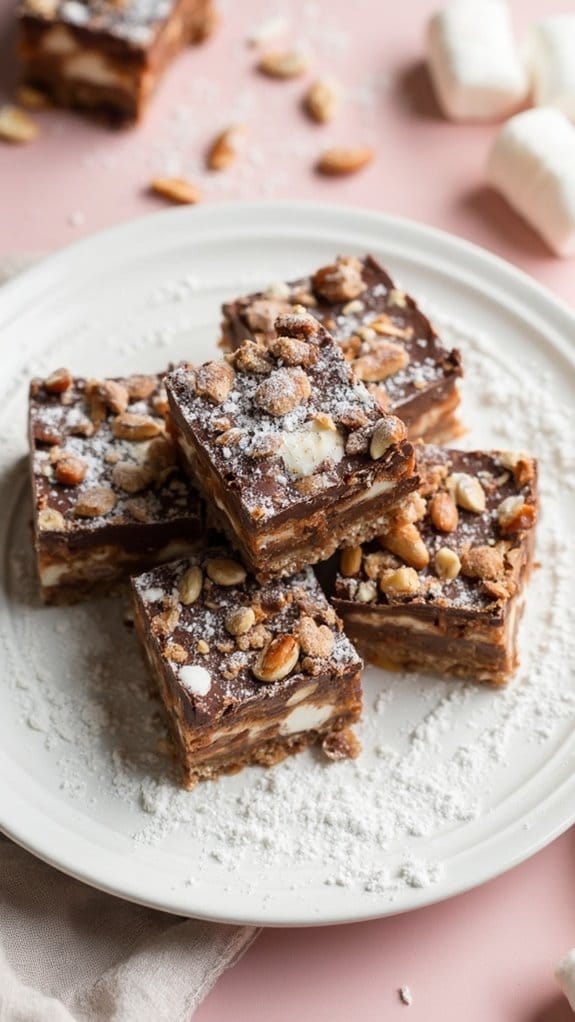
Title: Rocky Road Bars
Prep Time: 15 minutes
Cook Time: 0 minutes
Number of Servings: 12
Required Equipment List: 9×9-inch baking pan, mixing bowl, spatula, microwave-safe bowl
Cuisine Type: American
Rocky Road Bars are a delightful no-bake treat that combines the rich flavors of chocolate, marshmallows, and nuts into a chewy, satisfying dessert. Perfect for holiday gatherings or a sweet snack any time of year, these bars are incredibly easy to prepare.
The base is made from melted chocolate mixed with graham cracker crumbs, providing a delicious crunch that complements the gooey marshmallows and crunchy nuts. What makes these bars so appealing isn’t just their flavor but also their versatility.
You can customize them by adding your favorite nuts, such as almonds or walnuts, or even including other mix-ins like dried fruit or coconut. This recipe guarantees a crowd-pleasing dessert that can be made in under 15 minutes, leaving you with more time to enjoy the festivities.
Ingredients:
- 1 cup semi-sweet chocolate chips
- 1/2 cup unsalted butter
- 2 cups graham cracker crumbs
- 1 cup mini marshmallows
- 1/2 cup chopped nuts (walnuts or almonds)
- 1/2 teaspoon vanilla extract
- 1/4 cup powdered sugar (for dusting, optional)
Instructions:
- Begin by greasing a 9×9-inch baking pan with a little butter or lining it with parchment paper for easy removal. This will guarantee your bars come out smoothly once they set.
- In a microwave-safe bowl, combine the semi-sweet chocolate chips and unsalted butter. Heat in the microwave in 30-second intervals, stirring in between, until the mixture is completely melted and smooth.
- Once the chocolate and butter are melted, remove from the microwave and stir in the graham cracker crumbs until well combined. This will create a thick, crumbly mixture that serves as the base of the bars.
- Gently fold in the mini marshmallows and chopped nuts, making sure they’re evenly distributed throughout the mixture. This adds texture and flavor to the bars.
- Pour the mixture into the prepared baking pan, pressing it down firmly with a spatula to create an even layer. Make sure to pack it tightly to guarantee the bars hold together once set.
- Place the baking pan in the refrigerator for at least 2 hours or until the bars are firm. Once set, lift the bars out of the pan using the edges of the parchment paper, if used, and cut them into squares.
Extra Tips: For an extra layer of flavor, consider drizzling some melted chocolate over the top of the bars before refrigerating. You can also experiment with different types of chocolate, such as dark or white chocolate, for a unique twist.
If you’re feeling adventurous, add a pinch of sea salt on top for a delightful sweet-salty contrast. These bars can be stored in an airtight container in the fridge for up to a week, making them a perfect treat for holiday snacking!
Nutty Chocolate Clusters
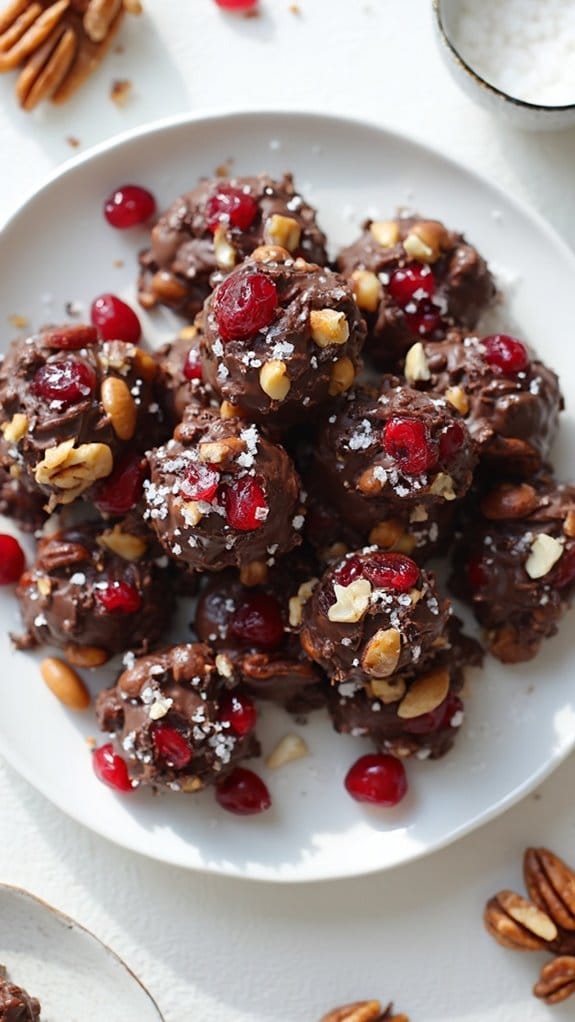
Title: Nutty Chocolate Clusters
Prep Time: 15 minutes
Cook Time: 0 minutes
Number of Servings: 12
Required Equipment List: Mixing bowl, baking sheet, parchment paper, spoon
Cuisine Type: American
Nutty Chocolate Clusters are the perfect festive treat that combines the rich, indulgent flavor of chocolate with the crunch of nuts. This no-bake recipe is incredibly simple, making it ideal for the busy holiday season when you want to whip up something special without spending hours in the kitchen.
These clusters aren’t only delicious but also customizable, allowing you to use your favorite nuts and chocolate types for a personalized touch. These delightful bites make excellent gifts for friends and family or can be a sweet addition to your holiday dessert table.
With just a few ingredients and minimal preparation, you can create these decadent treats that are sure to impress. The combination of chocolate and nuts provides a satisfying texture and flavor, making them an irresistible snack at any holiday gathering.
Ingredients:
- 2 cups chocolate chips (dark, milk, or white)
- 1 cup mixed nuts (such as almonds, walnuts, and pecans)
- 1/2 cup dried fruit (such as cranberries or raisins)
- 1/4 cup shredded coconut (optional)
- Sea salt (for sprinkling on top, optional)
Instructions:
- Begin by preparing a baking sheet lined with parchment paper. This will prevent the chocolate clusters from sticking and make for easy cleanup once they’re set.
- In a mixing bowl, combine the chocolate chips and place them in the microwave. Heat in 30-second intervals, stirring in between, until the chocolate is completely melted and smooth. Be careful not to overheat the chocolate, as this can cause it to seize.
- Once the chocolate is melted, add the mixed nuts, dried fruit, and shredded coconut (if using) to the bowl. Stir everything together until the nuts and fruit are thoroughly coated in chocolate.
- Using a spoon, drop spoonfuls of the chocolate-nut mixture onto the prepared baking sheet. Leave some space between each cluster, as they’ll spread slightly as they set.
- If desired, sprinkle a pinch of sea salt over the top of each cluster before the chocolate sets. This adds a delightful contrast to the sweetness of the chocolate.
- Allow the clusters to cool at room temperature for about 15-20 minutes, or until the chocolate has fully hardened. For a quicker setting, you can place the baking sheet in the refrigerator for about 10 minutes.
Extra Tips: To add an extra layer of flavor, consider toasting the nuts in a dry skillet over medium heat for a few minutes before adding them to the chocolate. This will enhance their flavor and crunch.
You can also experiment with different flavors of chocolate chips, such as peanut butter or butterscotch, to create unique variations of these clusters. Store the finished clusters in an airtight container at room temperature for up to a week, or in the refrigerator for longer freshness.
Holiday Fruit and Nut Bark
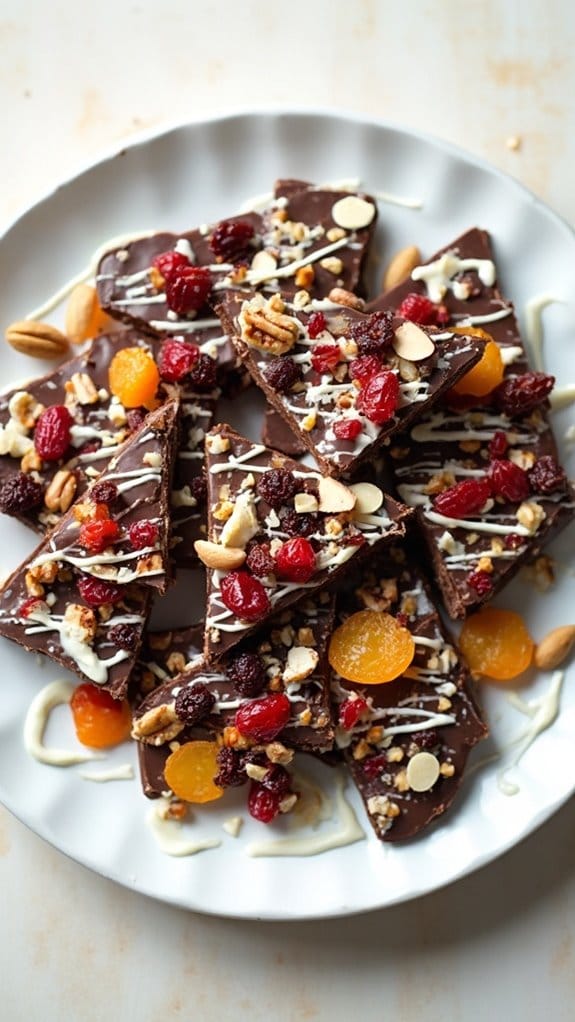
Title: Holiday Fruit and Nut Bark
Prep Time: 15 minutes
Cook Time: 0 minutes
Number of Servings: 12
Required Equipment List: Baking sheet, parchment paper, microwave-safe bowl, spatula
Cuisine Type: American
Holiday Fruit and Nut Bark is a delightful and festive treat that combines the rich flavors of chocolate with a variety of nuts and dried fruits. This no-bake recipe is incredibly easy to make and requires minimal effort, making it an ideal addition to your holiday dessert table.
The vibrant colors of the fruits and nuts create a visually appealing presentation, perfect for gifting or serving at gatherings. This bark not only satisfies your sweet tooth but also offers a satisfying crunch and a blend of textures.
With the versatility to customize the ingredients based on your preference, you can create a unique version each time you make it. Whether enjoyed as a snack or as a holiday gift, this Holiday Fruit and Nut Bark is sure to spread joy and cheer during the festive season.
Ingredients:
- 12 ounces dark chocolate, chopped or chocolate chips
- 1 cup mixed nuts (almonds, walnuts, pecans)
- 1 cup dried fruits (cranberries, apricots, raisins)
- 1/2 cup white chocolate, chopped or white chocolate chips (optional)
- Sea salt (for garnish, optional)
Instructions:
- Line a baking sheet with parchment paper, guaranteeing the paper hangs over the edges for easy removal later. This will be the base for your bark.
- In a microwave-safe bowl, melt the dark chocolate in 30-second intervals, stirring in between, until completely smooth. Be cautious not to overheat the chocolate, as it can burn easily.
- Once melted, pour the dark chocolate onto the prepared baking sheet and spread it evenly with a spatula to your desired thickness. A thickness of about 1/4 inch is ideal for sturdy bark.
- Sprinkle the mixed nuts and dried fruits evenly over the melted chocolate, gently pressing them down to confirm they adhere to the chocolate. If using white chocolate, you can also melt it and drizzle it over the top for a decorative finish.
- Allow the chocolate to set at room temperature for about 30 minutes, or place it in the refrigerator for quicker setting. Once firm, use the parchment paper to lift the bark off the baking sheet and break it into pieces.
- If desired, sprinkle a pinch of sea salt over the top for a touch of flavor contrast before serving or storing.
Extra Tips: Feel free to customize your bark by adding ingredients such as shredded coconut, pretzels, or even a sprinkle of your favorite spices for an extra kick.
For a healthier version, use dark chocolate with a high cacao content and opt for unsweetened dried fruits. This bark can be stored in an airtight container at room temperature for up to two weeks, making it a perfect make-ahead holiday treat!
Marshmallow Snowmen Treats
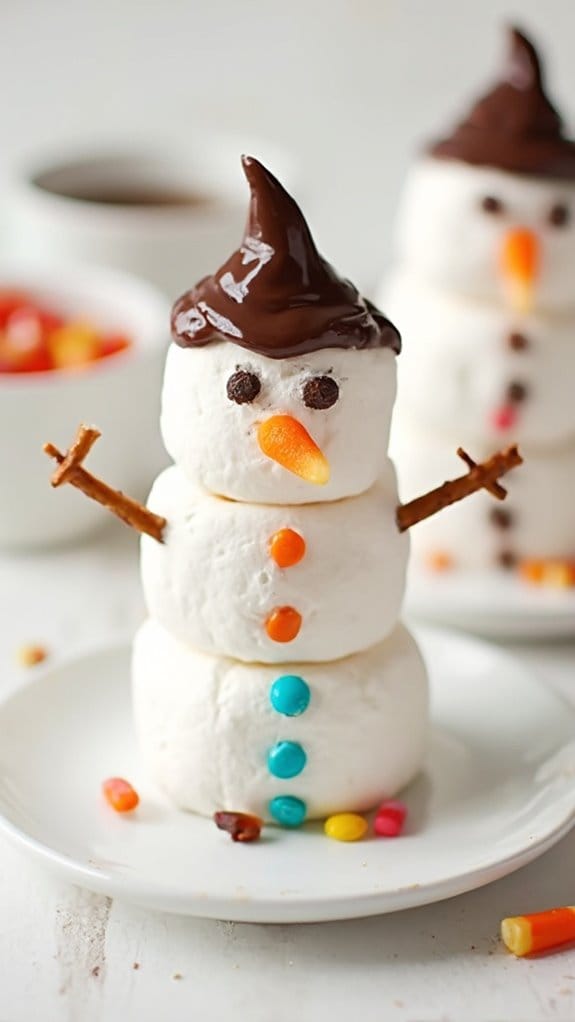
Title: Marshmallow Snowmen Treats
Prep Time: 15 minutes
Cook Time: 0 minutes
Number of Servings: 6
Required Equipment List: Skewers, microwave-safe bowl, scissors, small plates
Cuisine Type: American
Marshmallow Snowmen Treats are a fun and festive no-bake treat that will delight kids and adults alike during the holiday season. These adorable snowmen are easy to assemble and require minimal ingredients, making them perfect for last-minute holiday gatherings or as a fun activity with children.
The fluffy marshmallows stacked together create a whimsical character that can be decorated to your liking, bringing joy and creativity to your holiday festivities. These treats aren’t only visually appealing but also provide a deliciously sweet bite with each marshmallow layer.
You can customize the decorations using various candies and edible accessories to add personality to your snowmen. Whether displayed on a festive platter or handed out as gifts, these Marshmallow Snowmen Treats are sure to spread holiday cheer!
Ingredients:
- 18 large marshmallows
- 6 mini chocolate chips (for eyes)
- 6 orange candy corns (for noses)
- 6 pretzel sticks (for arms)
- 6 small candies (for buttons)
- 1 cup melted chocolate or white chocolate (for coating)
- Decorative sprinkles (optional)
Instructions:
- Begin by preparing your work area with a clean surface and all your ingredients laid out. If you’re using melted chocolate, melt it in a microwave-safe bowl in 30-second intervals, stirring in between until smooth.
- Take three large marshmallows and stack them vertically to form the body of the snowman. Use a skewer to pierce through the center of the marshmallows to hold them together securely.
- Once the marshmallows are stacked, dip the top of the snowman into the melted chocolate to create a “hat” effect. You can also drizzle chocolate over the top and let it set for a more decorative look.
- Attach the mini chocolate chips on the top marshmallow for eyes and the orange candy corn for the nose. Gently press them into the marshmallow to secure them in place.
- Insert the pretzel sticks into the sides of the middle marshmallow to act as arms. You can snap the pretzel sticks in half if they’re too long for your snowman.
- Finally, place a few small candies on the front of the bottom marshmallow to serve as buttons. If desired, sprinkle some decorative sprinkles on the snowman for added flair before serving.
Extra Tips: For a fun twist, consider using different types of candies for the eyes, noses, and buttons to give each snowman a unique personality. Additionally, you can place the finished snowmen in the refrigerator for a few minutes to help the chocolate set more quickly.
These treats can be made ahead of time and stored in an airtight container, making them a great addition to your holiday celebrations!
Conclusion
So, there you have it! With these 17 easy no-bake Christmas candy recipes, you’ve got everything you need to spread some holiday cheer. Isn’t it great how a little chocolate or a sprinkle of peppermint can transform the season? Plus, who doesn’t love a quick treat that’s as fun to make as it is to eat? Gather your friends or family, and plunge into these delicious delights—it’s bound to become a cherished holiday tradition!

