No products in the cart.

18 Unique Air Fryer Dessert Recipes You Haven’t Tried Yet
Looking to sweeten up your dessert game? You’ve got to try these 18 unique air fryer dessert recipes! How about a gooey Air Fryer Chocolate Lava Cake or crispy Cinnamon Sugar Churros? Ever tasted a Berry Crisp whipped up in just 25 minutes? Donuts made light and fluffy without the guilt? These treats not only save time but also use less oil, keeping things healthier. You’ll impress your friends and family with Mini Cheesecakes or Nutella Puff Pastries. So, are you ready to explore delicious creations that are so easy to make? There’s much more to discover!
Contents
hide
Air Fryer Chocolate Lava Cake
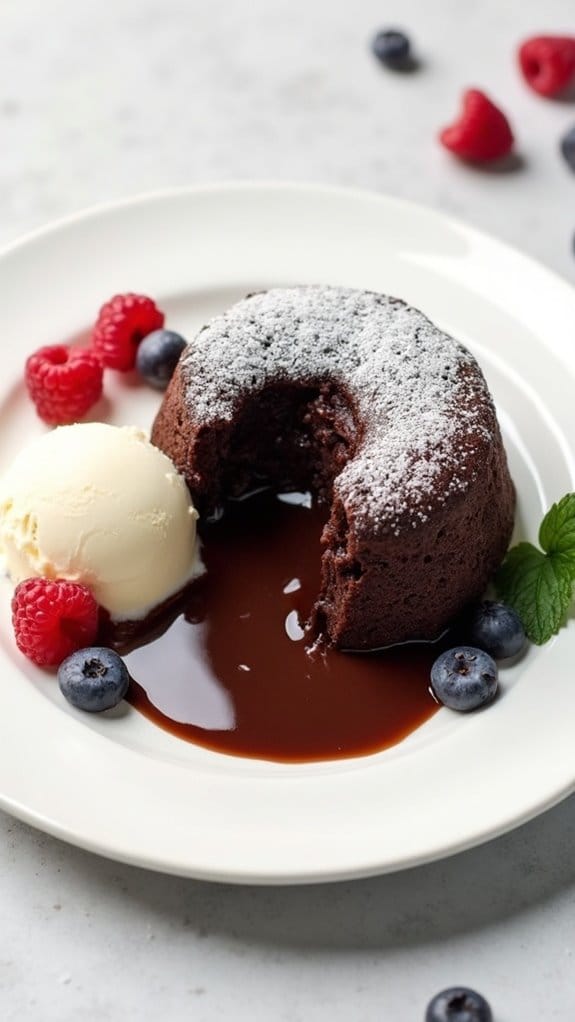
Title: Air Fryer Chocolate Lava Cake
Prep Time: 15 minutes
Cook Time: 12 minutes
Number of Servings: 4
Required Equipment List: Air fryer, mixing bowls, whisk, ramekins, cooking spray
Cuisine Type: American
Indulge your sweet tooth with this decadent Air Fryer Chocolate Lava Cake, a delightful dessert that boasts a rich, molten center. Perfectly portioned in individual ramekins, these cakes are quick to prepare and require minimal ingredients that you may already have in your pantry.
The air fryer cooks these cakes to perfection, creating a beautifully crispy exterior while keeping the inside gooey and luscious. Ideal for special occasions or a cozy night in, this dessert is sure to impress your loved ones.
The beauty of this chocolate lava cake lies not only in its flavor but also in its simplicity. With just a few steps, you can create a restaurant-quality dessert right in your own kitchen. Serve it warm, dusted with powdered sugar, and paired with a scoop of vanilla ice cream for the ultimate treat.
Whether you’re celebrating a birthday, anniversary, or simply craving something sweet, this dessert will elevate any occasion.
Ingredients:
- 1/2 cup unsalted butter
- 1 cup semi-sweet chocolate chips
- 2 large eggs
- 2 large egg yolks
- 1/4 cup granulated sugar
- 2 tablespoons all-purpose flour
- 1 teaspoon vanilla extract
- Cooking spray
- Powdered sugar (for dusting, optional)
Instructions:
- Begin by preheating your air fryer to 350°F (175°C). While it heats up, melt the unsalted butter and semi-sweet chocolate chips together in a microwave-safe bowl. Heat in 30-second intervals, stirring between each, until fully melted and smooth.
- In another mixing bowl, whisk together the eggs, egg yolks, and granulated sugar until the mixture is thick and pale. This process incorporates air, which contributes to the cake’s texture.
- Pour the melted chocolate mixture into the egg mixture, then add in the flour and vanilla extract. Gently fold the ingredients together until just combined, being careful not to overmix.
- Lightly grease four ramekins with cooking spray to prevent sticking. Divide the batter evenly among the ramekins, filling each about 3/4 full. This allows room for the cakes to rise.
- Place the ramekins in the air fryer basket, ensuring they don’t touch each other for even cooking. Cook at 350°F (175°C) for about 10-12 minutes, or until the edges are set but the center is still soft.
- Once cooked, carefully remove the ramekins from the air fryer and let them cool for 1-2 minutes. To serve, run a knife around the edges to loosen the cakes, then invert them onto plates. Dust with powdered sugar if desired and serve warm.
Extra Tips: For an extra touch of flavor, consider adding a pinch of sea salt on top of the molten cake before serving, or incorporate a tablespoon of espresso powder into the batter for a deeper chocolate flavor.
If you prefer a fruity contrast, serve with fresh berries or a raspberry sauce. Keep in mind that cooking times may vary depending on the size of your ramekins and your specific air fryer model, so keep an eye on them as they cook! Enjoy your delicious creation!
Cinnamon Sugar Air Fryer Churros
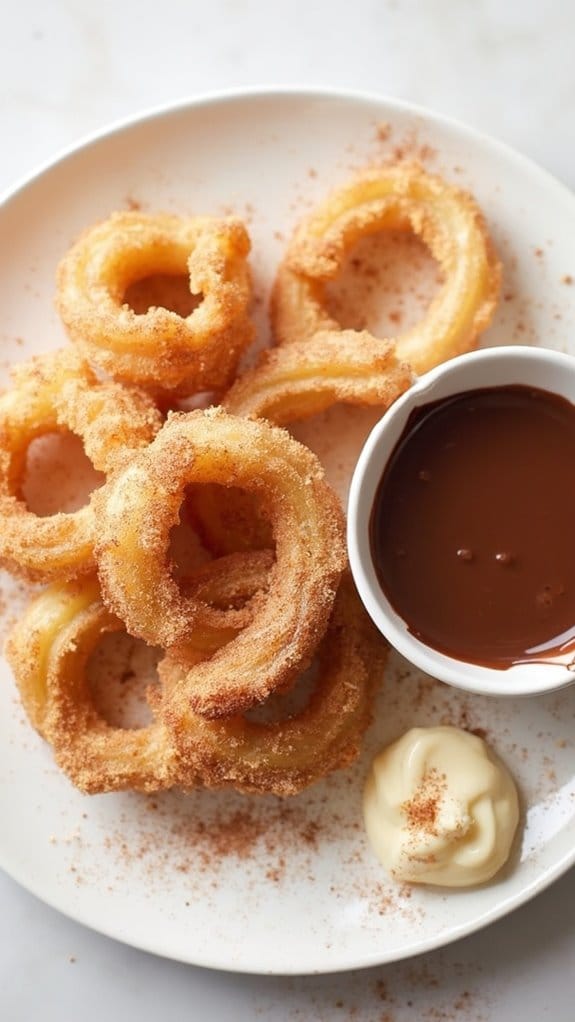
Title: Cinnamon Sugar Air Fryer Churros
Prep Time: 15 minutes
Cook Time: 10 minutes
Number of Servings: 6
Required Equipment List: Air fryer, mixing bowls, piping bag or plastic zip-top bag, parchment paper
Cuisine Type: Mexican
Cinnamon Sugar Air Fryer Churros are a delicious and healthier take on the classic deep-fried treat. With a crispy exterior and a soft, fluffy interior, these churros are coated in a sweet cinnamon-sugar mix, making them irresistible.
Using an air fryer allows you to enjoy the same delectable taste and texture while notably reducing the amount of oil typically used in frying. Perfect for dessert or a sweet snack, these churros are sure to impress your family and friends.
The preparation is simple and quick, making it an ideal recipe for beginner bakers or those looking to whip up a tasty treat in no time. With just a few ingredients and minimal cleanup, these churros can be ready in under 30 minutes.
Serve them warm with a side of chocolate sauce or dulce de leche for dipping, and watch them disappear quickly at your next gathering or family movie night!
Ingredients:
- 1 cup water
- 2 tablespoons sugar
- 1/2 teaspoon salt
- 1/3 cup unsalted butter
- 1 cup all-purpose flour
- 2 large eggs
- 1 teaspoon vanilla extract
- 1/2 cup sugar (for coating)
- 1 tablespoon cinnamon (for coating)
Instructions:
- In a medium saucepan, combine the water, 2 tablespoons of sugar, salt, and butter. Heat over medium heat until the mixture comes to a boil. Once boiling, remove from heat and stir in the flour until the mixture forms a ball and pulls away from the sides of the pan.
- Allow the dough to cool for about 5 minutes. Then, add the eggs one at a time, mixing well after each addition. Stir in the vanilla extract until the dough is smooth and well combined.
- Transfer the dough to a piping bag fitted with a star tip or use a plastic zip-top bag with a corner snipped off. Preheat your air fryer to 375°F (190°C) while you prepare the churros.
- Line the air fryer basket with parchment paper to prevent sticking. Pipe the churro dough into 6-inch long strips, cutting them with scissors as you go. Make sure to leave some space between each churro for even cooking.
- Air fry the churros for 8-10 minutes, flipping them halfway through, until they’re golden brown and crispy. Keep an eye on them to prevent overcooking.
- While the churros are air frying, combine the 1/2 cup of sugar and cinnamon in a shallow dish. Once the churros are done, remove them from the air fryer and immediately coat them in the cinnamon-sugar mixture.
Extra Tips: For an extra indulgent treat, consider serving your churros with a side of melted chocolate or caramel sauce for dipping. If you want to experiment with flavors, try adding a teaspoon of nutmeg or a splash of orange extract to the dough for a unique twist.
Store any leftover churros in an airtight container for up to two days, but they’re best enjoyed fresh. Enjoy your delicious homemade churros!
Berry Crisp in the Air Fryer
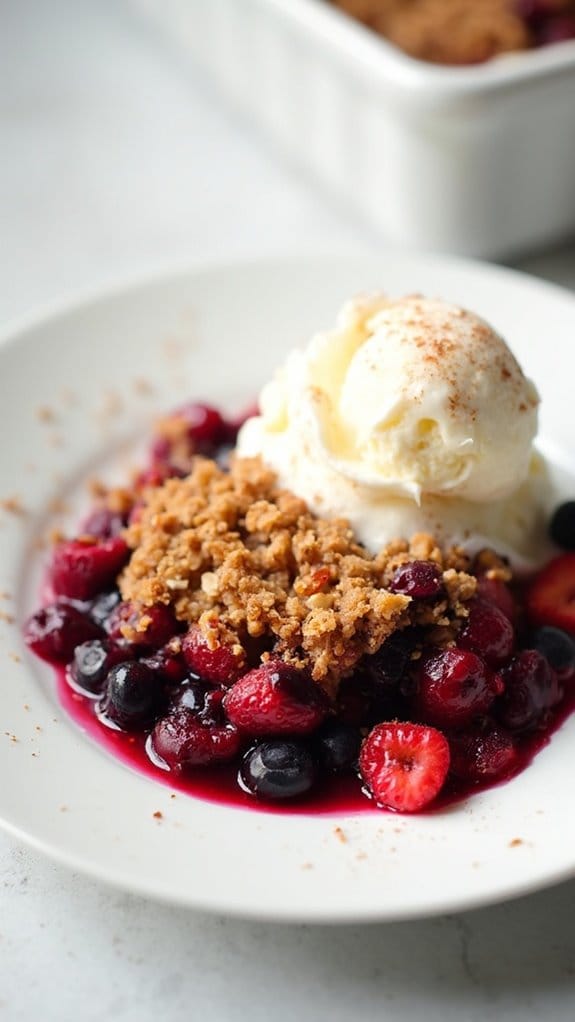
Title: Berry Crisp in the Air Fryer
Prep Time: 15 minutes
Cook Time: 25 minutes
Number of Servings: 4
Required Equipment List: Air fryer, mixing bowl, spoon, measuring cups, and spatula
Cuisine Type: American
This Berry Crisp in the Air Fryer is a delightful dessert that perfectly showcases the natural sweetness of berries combined with a crumbly oat topping. The air fryer cooks the crisp to golden perfection while keeping the berries juicy and tender.
This recipe isn’t only quick and easy to prepare but also a healthier alternative to traditional baking methods, making it ideal for a weeknight treat or a special occasion.
The combination of mixed berries, such as blueberries, raspberries, and strawberries, brings a burst of flavor and color to the dish. Topped with a crunchy oat mixture and a hint of cinnamon, this berry crisp is sure to satisfy your sweet tooth without being overly indulgent.
Serve it warm with a scoop of vanilla ice cream or a dollop of whipped cream for an irresistible dessert that everyone will love.
Ingredients:
- 2 cups mixed berries (fresh or frozen)
- 1/2 cup rolled oats
- 1/2 cup all-purpose flour
- 1/3 cup brown sugar
- 1/2 teaspoon ground cinnamon
- 1/4 cup unsalted butter, melted
- 1 teaspoon vanilla extract
- Pinch of salt
Instructions:
- Begin by preheating your air fryer to 320°F (160°C). This guarantees that the crisp will cook evenly and achieve that desirable golden-brown color on top.
- In a mixing bowl, combine the mixed berries, brown sugar, and a pinch of salt. If using frozen berries, there’s no need to thaw them; they’ll cook perfectly in the air fryer. Gently toss the berries to coat them in the sugar.
- In another bowl, mix together the rolled oats, flour, ground cinnamon, and melted butter. Stir until the mixture is crumbly and well combined. This will form the topping for your berry crisp.
- Spread the berry mixture evenly in the bottom of the air fryer basket, then sprinkle the oat topping generously over the berries, ensuring an even layer.
- Cook the berry crisp in the air fryer for 20-25 minutes or until the topping is golden brown and the berries are bubbling. Check it halfway through to guarantee even cooking, and shake the basket gently if needed.
- Once cooked, carefully remove the berry crisp from the air fryer and let it cool for a few minutes. Serve warm with ice cream or whipped cream, if desired.
Extra Tips: For added flavor, consider mixing in some chopped nuts or coconut flakes into the oat topping for extra crunch.
If you prefer a sweeter crisp, you can adjust the amount of brown sugar to your liking. Additionally, feel free to experiment with different berry combinations, such as adding peaches or apples for a twist on the classic recipe.
Enjoy your delicious and easy air fryer dessert!
Air Fryer Donuts With Glaze
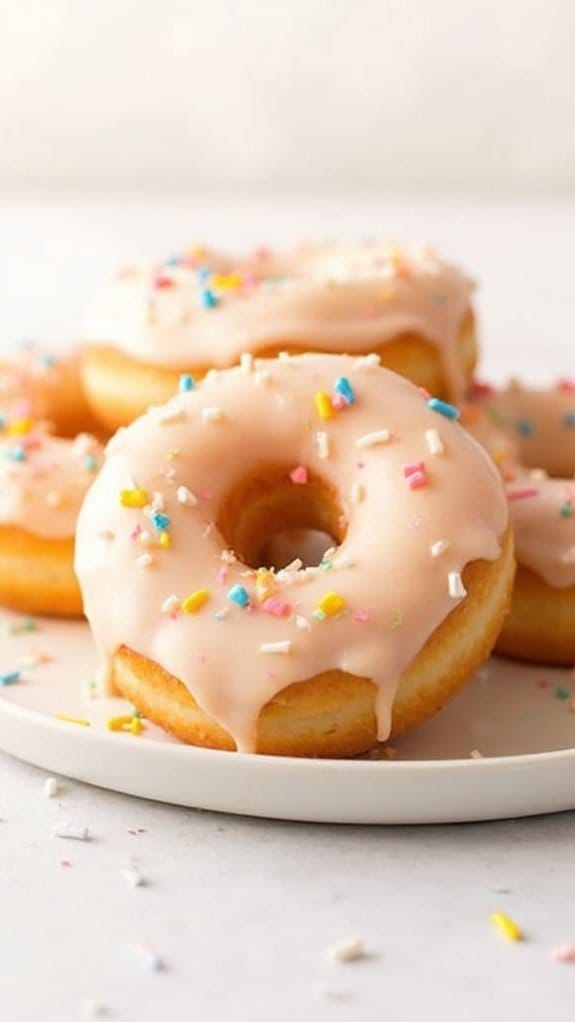
Title: Air Fryer Donuts With Glaze
Prep Time: 20 minutes
Cook Time: 10 minutes
Number of Servings: 12
Required Equipment List: Air fryer, mixing bowls, whisk, silicone donut mold, cooling rack
Cuisine Type: American
Air Fryer Donuts with Glaze are a delightful treat that brings the joy of freshly baked donuts into your home without the guilt of deep frying. These donuts are light, fluffy, and incredibly easy to make, perfect for a weekend breakfast or a sweet snack.
The air fryer gives them a perfect golden-brown exterior while keeping them moist on the inside. Once baked, they’re topped with a sweet, glossy glaze that makes them irresistible.
This recipe is simple enough for even novice bakers, requiring just a few pantry staples. The dough comes together quickly, and with the help of a silicone mold, you can create perfectly shaped donuts that look as good as they taste.
Whether you’re enjoying them fresh out of the air fryer or saving them for later, these air fryer donuts are sure to become a favorite in your household.
Ingredients:
- 1 cup all-purpose flour
- 1/2 cup granulated sugar
- 1 1/2 teaspoons baking powder
- 1/4 teaspoon salt
- 1/2 teaspoon ground nutmeg
- 1/2 cup milk
- 1 large egg
- 2 tablespoons melted butter
- 1 teaspoon vanilla extract
For the Glaze:
- 1 cup powdered sugar
- 2 tablespoons milk
- 1/2 teaspoon vanilla extract
Instructions:
- In a mixing bowl, combine the flour, granulated sugar, baking powder, salt, and nutmeg. Whisk together until well blended to guarantee an even distribution of dry ingredients.
- In another bowl, whisk together the milk, egg, melted butter, and vanilla extract until fully combined. Gradually add the wet ingredients to the dry ingredients, stirring until just combined. Be careful not to overmix; some lumps are okay.
- Lightly grease a silicone donut mold with cooking spray or oil. Using a piping bag or spoon, fill each mold with the batter, about 2/3 full to allow room for rising.
- Preheat the air fryer to 350°F (175°C) for about 5 minutes. Once heated, place the filled donut mold in the air fryer basket and cook for 8-10 minutes, or until the donuts are golden brown and a toothpick inserted in the center comes out clean.
- While the donuts are cooking, prepare the glaze by whisking together the powdered sugar, milk, and vanilla extract in a small bowl until smooth. Adjust the consistency by adding more milk if necessary.
- Once the donuts are finished cooking, remove them from the mold and let them cool on a wire rack for a few minutes. Dip the tops of the warm donuts into the glaze, allowing the excess to drip off before placing them back on the rack to set.
Extra Tips: For added flavor, consider mixing in spices such as cinnamon or using flavored extracts in the glaze.
You can also customize your donuts by adding toppings like sprinkles, chopped nuts, or even a dusting of powdered sugar after glazing. Make certain to let the donuts cool slightly before glazing to prevent the glaze from melting off.
Enjoy experimenting with different flavors and toppings to make these donuts your own!
Mini Air Fryer Cheesecakes
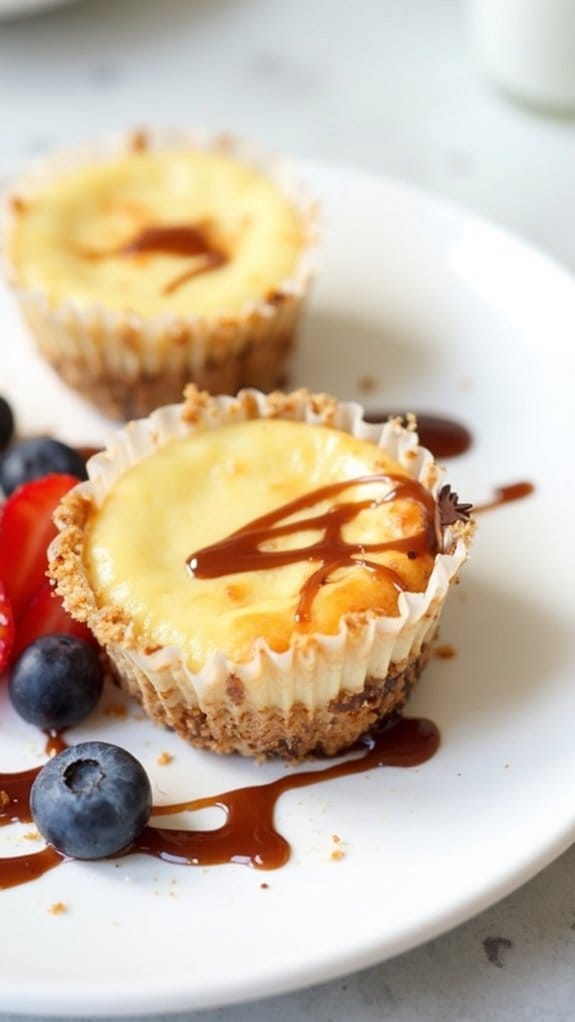
Title: Mini Air Fryer Cheesecakes
Prep Time: 15 minutes
Cook Time: 15 minutes
Number of Servings: 4
Required Equipment List: Mini air fryer, mixing bowls, electric mixer, measuring cups, measuring spoons, muffin liners
Cuisine Type: American
Mini Air Fryer Cheesecakes are a delightful and easy dessert that brings a creamy, rich flavor to your table without the hassle of traditional baking. These individual-sized cheesecakes are perfect for satisfying sweet cravings and can be topped with your favorite fruits or sauces. The air fryer creates a perfect texture, allowing the cheesecakes to set beautifully while maintaining a light and fluffy consistency.
This recipe isn’t only quick to prepare but also versatile. You can customize the flavors by adding different extracts, such as vanilla or almond, or mix in chocolate chips or fruit purees for added sweetness. With minimal ingredients and a short cooking time, these mini cheesecakes are an excellent choice for a dinner party, holiday gathering, or simply a treat for yourself.
Ingredients:
- 8 oz cream cheese, softened
- 1/4 cup granulated sugar
- 1/4 cup sour cream
- 1 teaspoon vanilla extract
- 1 large egg
- 1/2 cup graham cracker crumbs
- 2 tablespoons melted butter
- Optional toppings: fresh fruit, chocolate sauce, or caramel sauce
Instructions:
- In a mixing bowl, beat the softened cream cheese and granulated sugar together using an electric mixer until smooth and creamy. Make certain there are no lumps for a velvety cheesecake texture.
- Add the sour cream, vanilla extract, and egg to the cream cheese mixture, and continue to beat until everything is fully combined and smooth. Be careful not to overmix, as this can incorporate too much air into the batter.
- In another bowl, mix the graham cracker crumbs and melted butter until the crumbs are evenly coated. Line your mini air fryer basket with muffin liners and evenly distribute the crumb mixture at the bottom of each liner, pressing down to form a firm crust.
- Pour the cheesecake batter over the crusts in the lined muffin cups, filling each about 3/4 of the way full to allow room for rising.
- Preheat your air fryer to 300°F (150°C) and place the filled muffin liners in the basket. Cook for 12-15 minutes or until the edges are set and the center has a slight jiggle. Allow the cheesecakes to cool in the air fryer for a few minutes before transferring them to the fridge to chill for at least an hour.
- Once chilled, remove the cheesecakes from the muffin liners and serve with your choice of toppings, such as fresh fruit, chocolate sauce, or caramel sauce.
Extra Tips: To guarantee your cheesecakes turn out perfectly, make sure all ingredients are at room temperature before mixing. This helps to create a smoother batter.
If you prefer a firmer cheesecake, you can increase the cooking time by a couple of minutes, but keep a close eye on them to prevent overcooking. Additionally, these cheesecakes can be made ahead of time and stored in the refrigerator for up to three days, making them a convenient dessert option. Enjoy your delicious mini air fryer cheesecakes!
Peanut Butter Cup Brownies
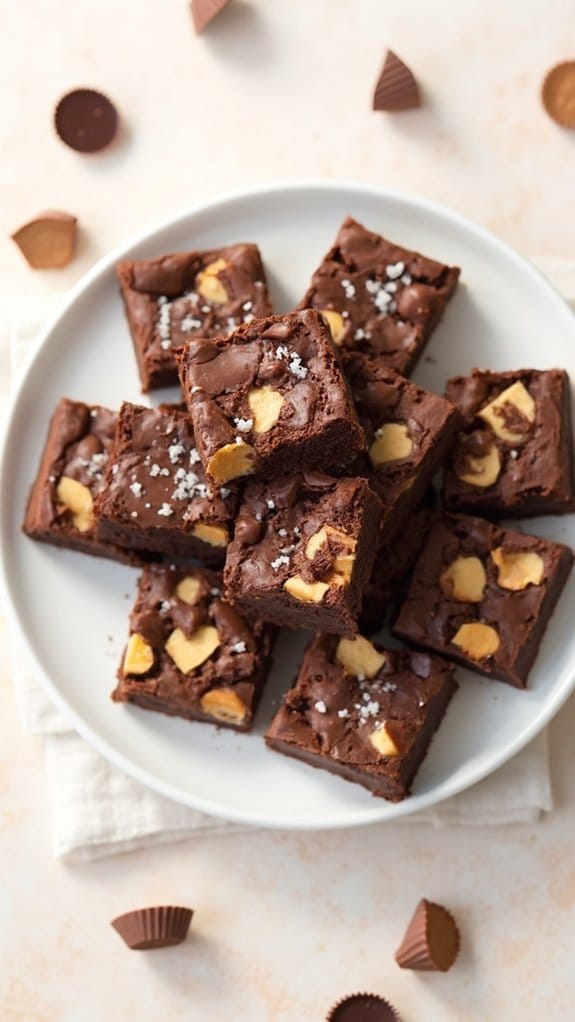
Title: Peanut Butter Cup Brownies
Prep Time: 15 minutes
Cook Time: 20 minutes
Number of Servings: 12
Required Equipment List: Mixing bowl, whisk, 8×8-inch baking pan, parchment paper, air fryer
Cuisine Type: American
These Peanut Butter Cup Brownies are a decadent treat that combines the rich flavors of chocolate and peanut butter, making them a perfect dessert for any occasion. The brownies are dense and fudgy, with gooey peanut butter cups nestled throughout, creating delightful pockets of creamy goodness. Topped with a sprinkle of sea salt, these brownies are sure to satisfy your sweet tooth and impress your family and friends.
Using an air fryer to prepare these brownies not only saves time but also guarantees a perfectly baked texture without the risk of overcooking. The simplicity of the ingredients allows for quick preparation, making these brownies an ideal choice for a last-minute dessert. Whether enjoyed as an after-dinner treat or shared at a gathering, these Peanut Butter Cup Brownies are a guaranteed crowd-pleaser.
Ingredients:
- 1/2 cup unsalted butter, melted
- 1 cup granulated sugar
- 2 large eggs
- 1 teaspoon vanilla extract
- 1/3 cup unsweetened cocoa powder
- 1/2 cup all-purpose flour
- 1/4 teaspoon salt
- 1/4 teaspoon baking powder
- 1 cup peanut butter cups, chopped
- Sea salt for sprinkling
Instructions:
- In a mixing bowl, combine the melted butter and granulated sugar. Whisk together until well combined and smooth. This will create a rich base for your brownies.
- Add the eggs and vanilla extract to the butter-sugar mixture. Whisk until fully incorporated, making sure that the eggs are well blended into the mixture.
- In a separate bowl, mix the cocoa powder, flour, salt, and baking powder. Gradually add this dry mixture to the wet ingredients, stirring until just combined. Be careful not to overmix, as this can result in tougher brownies.
- Gently fold in the chopped peanut butter cups, making sure they’re evenly distributed throughout the batter. This will give your brownies the delicious pockets of peanut butter goodness.
- Line an 8×8-inch baking pan with parchment paper and pour the brownie batter into the pan, smoothing it out evenly. Sprinkle a pinch of sea salt on top for that extra flavor boost.
- Preheat your air fryer to 320°F (160°C). Place the baking pan in the air fryer basket and cook for 15-20 minutes, or until a toothpick inserted into the center comes out with a few moist crumbs. Keep an eye on the brownies to prevent overcooking.
- Once cooked, carefully remove the brownies from the air fryer and let them cool in the pan for about 10 minutes before lifting them out using the parchment paper. Allow them to cool completely on a wire rack before cutting into squares.
Extra Tips: For an even more indulgent treat, consider drizzling melted chocolate over the top of the brownies after they’ve cooled. You can also experiment with different types of candy or add nuts for an extra crunch. If you like your brownies extra fudgy, reduce the cooking time slightly, checking for doneness earlier. Enjoy your homemade Peanut Butter Cup Brownies!
Air Fryer Apple Fritters
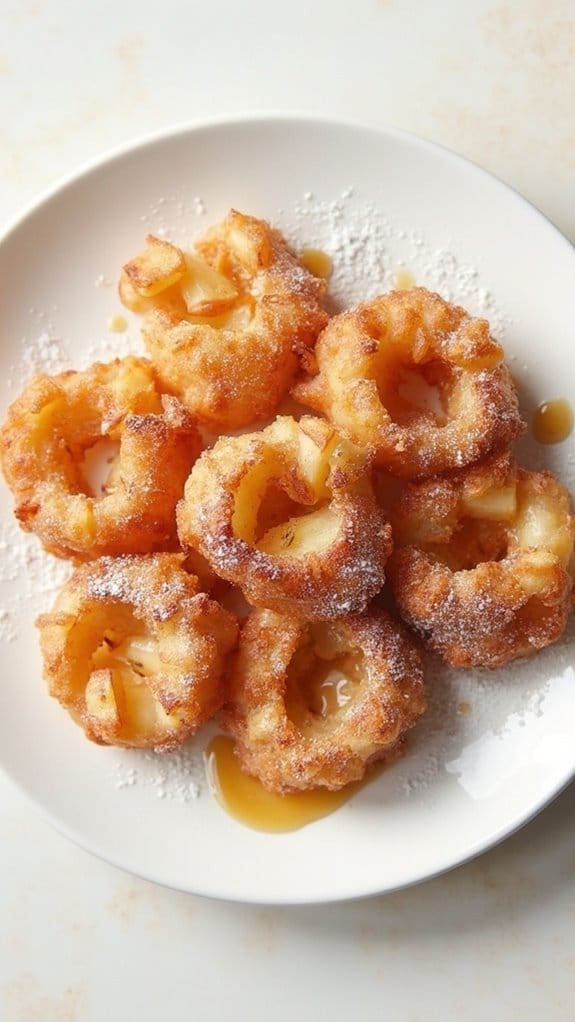
Title: Air Fryer Apple Fritters
Prep Time: 15 minutes
Cook Time: 12 minutes
Number of Servings: 6
Required Equipment List: Air fryer, mixing bowl, whisk, measuring cups, measuring spoons, parchment paper
Cuisine Type: American
Air Fryer Apple Fritters are a delicious and healthier version of the traditional deep-fried treat. These fluffy, cinnamon-infused fritters are packed with tender apple pieces and are incredibly easy to make. By using the air fryer, you achieve that golden, crispy exterior without the excess oil, making these fritters a guilt-free indulgence.
Perfect for breakfast, dessert, or a sweet snack, these fritters are sure to please everyone in the family. The combination of fresh apples, warm spices, and a light glaze gives these fritters a delightful flavor that evokes the essence of fall.
They’re quick to prepare and can be enjoyed warm right out of the air fryer or dusted with powdered sugar for an elegant touch. Whether you’re hosting a brunch or simply craving something sweet, these Air Fryer Apple Fritters will be a hit!
Ingredients:
- 2 medium apples, peeled and diced
- 1 cup all-purpose flour
- 1/4 cup granulated sugar
- 1 teaspoon baking powder
- 1/2 teaspoon ground cinnamon
- 1/4 teaspoon salt
- 1/4 cup milk
- 1 large egg
- 1 teaspoon vanilla extract
- 1 tablespoon melted butter
- Powdered sugar (for dusting, optional)
Instructions:
- In a mixing bowl, combine the flour, granulated sugar, baking powder, cinnamon, and salt. Whisk together until well mixed. This will be the dry mixture for the fritters.
- In a separate bowl, whisk together the milk, egg, vanilla extract, and melted butter until fully combined. This will be your wet mixture that adds moisture to the fritters.
- Gradually add the wet mixture to the dry mixture, stirring until just combined. Be careful not to overmix. Gently fold in the diced apples, ensuring they’re evenly distributed throughout the batter.
- Preheat your air fryer to 350°F (175°C). Line the air fryer basket with parchment paper to prevent sticking.
- Using a spoon or an ice cream scoop, drop spoonfuls of the batter into the air fryer basket, leaving space between each fritter for even cooking.
- Air fry the fritters for about 10-12 minutes, flipping them halfway through, until they’re golden brown and cooked through. A toothpick inserted into the center should come out clean.
- Once cooked, remove the fritters from the air fryer and let them cool for a few minutes. If desired, dust with powdered sugar before serving.
Extra Tips: For extra flavor, consider adding chopped nuts or raisins to the batter along with the apples. You can also experiment with different spices such as nutmeg or allspice to create your own unique twist.
Serve these fritters warm with a side of caramel sauce for dipping or a scoop of vanilla ice cream for an elevated dessert experience. Enjoy your delightful and healthier treat!
Coconut Macaroons With Chocolate
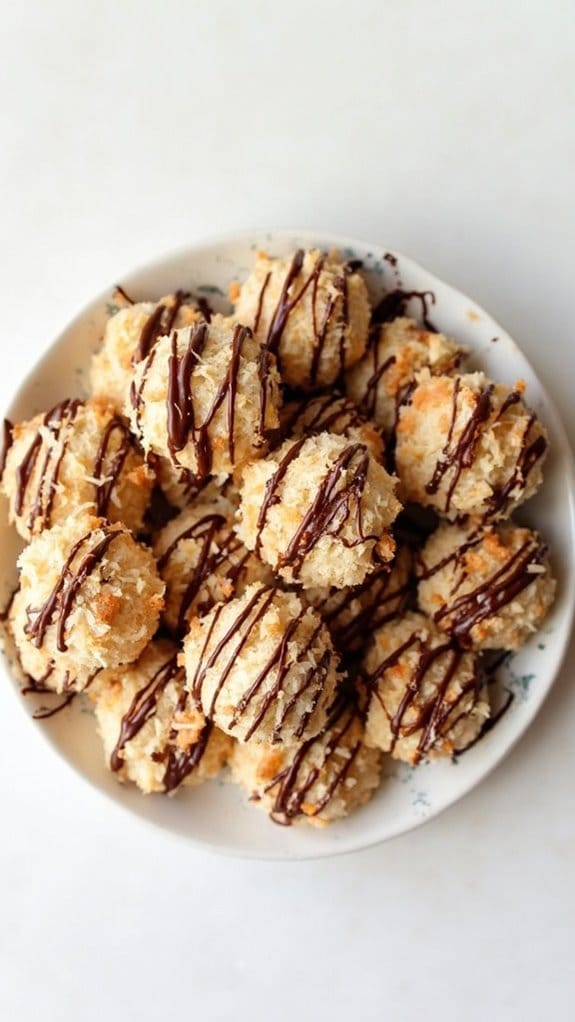
Title: Coconut Macaroons With Chocolate
Prep Time: 15 minutes
Cook Time: 12 minutes
Number of Servings: 12
Required Equipment List: Mixing bowl, baking sheet, parchment paper, air fryer
Cuisine Type: American
Coconut Macaroons with Chocolate are a delightful treat that combines the chewy texture of shredded coconut with the rich flavor of chocolate. These sweet, moist macaroons are perfect for those who crave a bite-sized dessert that’s both satisfying and simple to make.
The air fryer method allows for a quicker cooking time while maintaining that chewy interior and crispy exterior that macaroons are known for, making them an ideal option for a quick dessert fix or a sweet snack. The addition of melted chocolate drizzled over the top adds an indulgent touch, elevating these coconut macaroons into a more decadent dessert.
Whether you’re preparing them for a special occasion or simply to satisfy your sweet tooth, these treats are sure to impress. Plus, they’re naturally gluten-free, making them a great choice for those with dietary restrictions.
Ingredients:
- 3 cups shredded coconut
- 2/3 cup sweetened condensed milk
- 1 teaspoon vanilla extract
- 1/4 teaspoon salt
- 4 ounces semi-sweet chocolate, melted
Instructions:
- In a mixing bowl, combine the shredded coconut, sweetened condensed milk, vanilla extract, and salt. Stir until the mixture is well combined and the coconut is fully coated in the condensed milk.
- Preheat your air fryer to 325°F (160°C). While the air fryer is heating up, line a baking sheet with parchment paper for easy transfer of the macaroons.
- Using a small cookie scoop or your hands, form the coconut mixture into small mounds and place them on the prepared baking sheet. Make sure to leave some space between each mound, as they’ll expand slightly during cooking.
- Carefully transfer the baking sheet into the preheated air fryer basket. Cook the macaroons for about 10-12 minutes, or until they’re golden brown on top. Keep an eye on them to prevent overcooking.
- Once cooked, remove the macaroons from the air fryer and allow them to cool completely on the baking sheet. Meanwhile, melt the semi-sweet chocolate in a microwave-safe bowl, stirring every 30 seconds until smooth.
- Once cooled, drizzle the melted chocolate over the macaroons using a fork or a piping bag for a more decorative touch. Allow the chocolate to set before serving.
Extra Tips: For added flavor, consider incorporating a sprinkle of toasted coconut on top of the chocolate drizzle for texture and visual appeal. You can also experiment with different types of chocolate, such as dark or white chocolate, to find your favorite combination.
Store any leftover macaroons in an airtight container at room temperature for up to a week, but they’re best enjoyed fresh!
Air Fryer S’mores Bites
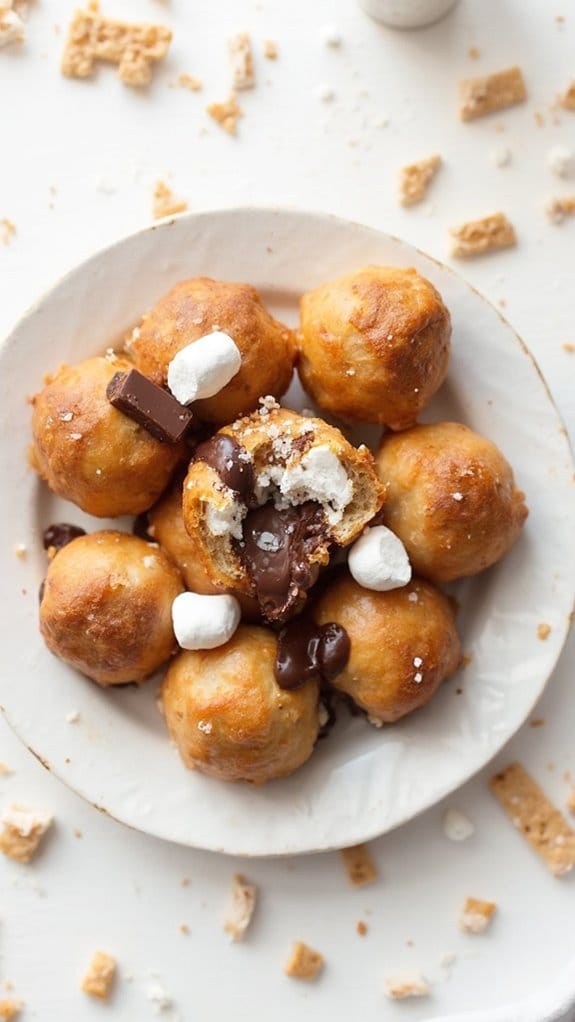
Title: Air Fryer S’mores Bites
Prep Time: 10 minutes
Cook Time: 8 minutes
Number of Servings: 4
Required Equipment List: Air fryer, mixing bowl, parchment paper, spatula
Cuisine Type: American
Air Fryer S’mores Bites are a fun and easy twist on the classic campfire treat, perfect for satisfying your sweet tooth without the need for an open flame. These delightful bites combine the rich flavors of chocolate, gooey marshmallows, and crunchy graham crackers, all wrapped up in a convenient, bite-sized package.
Using the air fryer guarantees that the bites are perfectly crispy on the outside while remaining warm and melty on the inside, making them a great option for a quick dessert or a movie night snack.
This recipe is incredibly versatile and can be customized based on your personal preferences. You can experiment with different chocolates, add peanut butter for an extra layer of flavor, or even use flavored marshmallows. The best part? These S’mores Bites can be prepared in just a matter of minutes, making them an ideal treat for both kids and adults alike.
Enjoy them right out of the air fryer, or pair them with a scoop of ice cream for an indulgent dessert experience.
Ingredients:
- 1 cup mini marshmallows
- 1 cup chocolate chips (milk or dark)
- 1 cup crushed graham crackers
- 1 package refrigerated crescent roll dough
- Cooking spray
- Parchment paper (optional)
Instructions:
- Preheat your air fryer to 350°F (175°C) for about 5 minutes. This step guarantees that the S’mores Bites cook evenly and develop a nice golden color.
- While the air fryer is preheating, open the crescent roll dough and separate it into triangles. On a clean surface, lightly flatten each triangle with your fingers to create a slightly larger base.
- In a mixing bowl, combine the mini marshmallows and chocolate chips. Spoon a small amount of the mixture onto the wider end of each crescent roll triangle, making sure not to overfill.
- Carefully fold the sides of the triangle over the filling to create a pocket and pinch the edges to seal them tightly. This helps to prevent the filling from leaking out during cooking.
- Spray the air fryer basket lightly with cooking spray or line it with parchment paper. Place the filled and sealed S’mores Bites into the basket in a single layer, leaving space between each bite for proper air circulation.
- Cook the S’mores Bites in the preheated air fryer for 6-8 minutes, or until they’re golden brown and the marshmallows are gooey. Keep an eye on them to confirm they don’t overcook.
- Once cooked, carefully remove the S’mores Bites from the air fryer using a spatula. Allow them to cool slightly before serving, as the filling will be hot.
Extra Tips: To enhance the flavor, consider adding a sprinkle of sea salt on top of the S’mores Bites just after they come out of the air fryer. This will bring out the sweetness and provide a delightful contrast.
If you want to make a larger batch, you can easily double the recipe, but remember to cook them in batches to avoid overcrowding the air fryer. Enjoy your delicious and easy S’mores Bites!
Lemon Poppy Seed Muffins

Title: Lemon Poppy Seed Muffins
Prep Time: 15 minutes
Cook Time: 15 minutes
Number of Servings: 12
Required Equipment List: Mixing bowl, muffin tin, whisk, measuring cups, measuring spoons, silicone spatula
Cuisine Type: American
These Lemon Poppy Seed Muffins are a delightful treat that brings a burst of citrus flavor to your breakfast or snack time. The combination of zesty lemon juice and fragrant lemon zest creates a rejuvenating taste that perfectly complements the slight crunch of poppy seeds.
With their moist and fluffy texture, these muffins aren’t only easy to make but also a fantastic way to brighten up your day. Baked in an air fryer, these muffins come out perfectly golden and fluffy, making them a quick and healthier alternative to traditional oven baking.
Whether enjoyed warm with a smear of butter or as a grab-and-go snack, these muffins are sure to please anyone who loves the classic combination of lemon and poppy seeds. They’re perfect for brunch gatherings or as a delightful addition to your breakfast routine.
Ingredients:
- 1 ½ cups all-purpose flour
- ½ cup granulated sugar
- 1 tablespoon poppy seeds
- 2 teaspoons baking powder
- ½ teaspoon salt
- ½ cup milk
- ⅓ cup vegetable oil
- 1 large egg
- Zest of 1 lemon
- 2 tablespoons lemon juice
Instructions:
- In a mixing bowl, combine the flour, sugar, poppy seeds, baking powder, and salt. Whisk the dry ingredients together until well blended.
- In another bowl, whisk together the milk, vegetable oil, egg, lemon zest, and lemon juice until fully combined. This mixture will create the wet base for your muffins.
- Pour the wet ingredients into the bowl with the dry ingredients. Gently fold the mixture together using a silicone spatula until just combined. Be careful not to overmix, as this can lead to dense muffins.
- Preheat your air fryer to 320°F (160°C). While it’s heating, line a muffin tin with paper liners or grease it lightly. Evenly distribute the muffin batter into the prepared muffin cups, filling each about ¾ full.
- Place the muffin tin in the air fryer basket and bake at 320°F (160°C) for about 12-15 minutes, or until a toothpick inserted into the center of a muffin comes out clean. Adjust the cooking time as necessary based on your air fryer model.
- Once baked, remove the muffins from the air fryer and let them cool in the tin for a few minutes before transferring them to a wire rack to cool completely.
Extra Tips: For an extra burst of flavor, consider adding a glaze made from powdered sugar and lemon juice to the cooled muffins. You can also substitute half of the all-purpose flour with whole wheat flour for a healthier option.
If you want to experiment, try adding a handful of blueberries or raspberries for a fruity twist. These muffins can be stored in an airtight container for up to three days, making them a great make-ahead option!
Air Fryer Chocolate Chip Cookies

Title: Air Fryer Chocolate Chip Cookies
Prep Time: 10 minutes
Cook Time: 8 minutes
Number of Servings: 12 cookies
Required Equipment List: Air fryer, mixing bowl, spoon, measuring cups, measuring spoons, parchment paper
Cuisine Type: American
Air Fryer Chocolate Chip Cookies are a quick and delicious treat that can be made in no time at all! These cookies are soft, chewy, and filled with gooey chocolate chips, making them the perfect dessert for any occasion.
The air fryer not only speeds up the cooking process but also gives the cookies a wonderfully crispy exterior while keeping the inside tender and moist. This recipe is perfect for those who crave homemade cookies but don’t want to spend too much time in the kitchen.
With just a few simple ingredients, you can whip up a batch of these delectable cookies that will delight your family and friends. The air fryer allows for even cooking and eliminates the need to preheat the oven, making this an ideal recipe for a quick snack or dessert.
Enjoy them fresh out of the air fryer or store them for later—if they last that long!
Ingredients:
- 1 cup all-purpose flour
- 1/2 teaspoon baking soda
- 1/4 teaspoon salt
- 1/2 cup unsalted butter, softened
- 1/2 cup brown sugar
- 1/4 cup granulated sugar
- 1 teaspoon vanilla extract
- 1 large egg
- 1 cup chocolate chips
Instructions:
- In a mixing bowl, whisk together the all-purpose flour, baking soda, and salt. Set this dry mixture aside as you prepare the wet ingredients.
- In another bowl, cream together the softened butter, brown sugar, and granulated sugar until smooth and fluffy. This should take about 2-3 minutes. Then, mix in the vanilla extract and the egg until fully combined.
- Gradually add the dry mixture to the wet ingredients, stirring until just combined. Be careful not to overmix. Finally, fold in the chocolate chips to distribute them evenly throughout the cookie dough.
- Preheat your air fryer to 320°F (160°C) for about 5 minutes. While it preheats, line the air fryer basket with parchment paper, making sure to leave some edges exposed for easy removal of the cookies.
- Scoop tablespoon-sized portions of the cookie dough and place them into the air fryer basket, ensuring there’s enough space between each cookie for them to spread. You may need to work in batches depending on the size of your air fryer.
- Cook the cookies in the air fryer for 6-8 minutes or until they’re golden brown around the edges. Keep an eye on the cookies, as cooking times may vary depending on your specific air fryer model.
- Once done, remove the cookies from the air fryer and let them cool on a wire rack for a few minutes before enjoying. This will allow them to set and become perfectly chewy.
Extra Tips: For an extra depth of flavor, consider adding a pinch of cinnamon or a handful of chopped nuts to the dough. If you prefer your cookies to be less sweet, you can reduce the amount of sugar slightly.
Always remember to allow the cookies to cool before storing them in an airtight container to maintain their freshness. Enjoy these delightful treats warm with a glass of milk or as an afternoon snack!
Caramelized Banana Bites
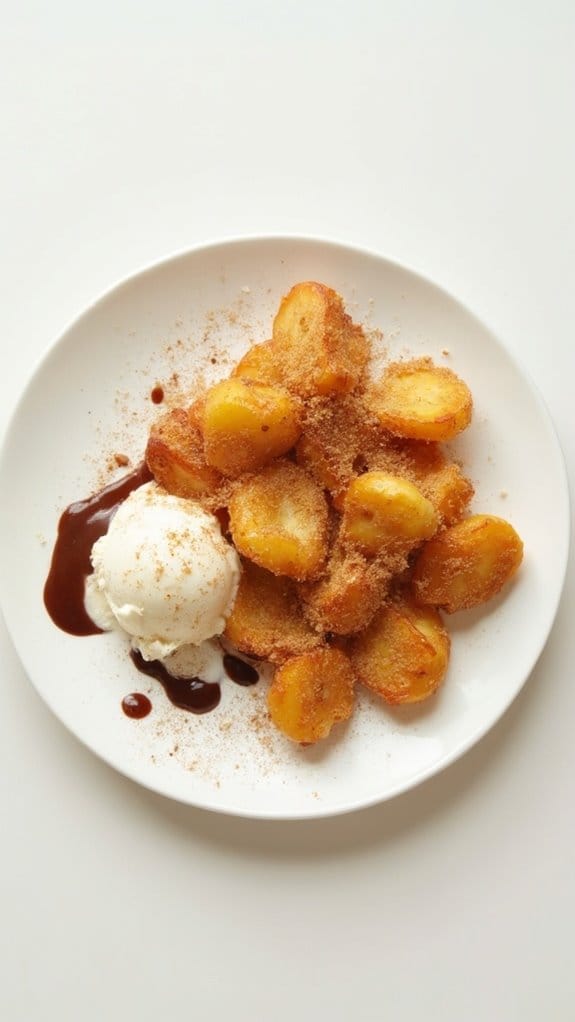
Title: Caramelized Banana Bites
Prep Time: 10 minutes
Cook Time: 10 minutes
Number of Servings: 4
Required Equipment List: Air fryer, cutting board, knife, serving plate
Cuisine Type: American
Caramelized Banana Bites are a delicious and quick dessert that transforms simple bananas into a sweet treat with a delightful crispy exterior. This recipe takes advantage of the air fryer, which allows the bananas to caramelize beautifully while keeping them tender and flavorful.
Perfect for serving as a dessert or a sweet snack, these bites are sure to satisfy any sweet tooth. In just 20 minutes, you can whip up these delectable bites using only a few staple ingredients. The combination of brown sugar and cinnamon enhances the natural sweetness of the bananas, creating a dessert that feels indulgent without being overly complicated.
Serve them warm with a scoop of ice cream or a drizzle of chocolate sauce for an extra special touch that everyone will love.
Ingredients:
- 2 ripe bananas
- 2 tablespoons brown sugar
- 1 teaspoon cinnamon
- 1 tablespoon butter, melted
- Optional: vanilla ice cream or chocolate sauce for serving
Instructions:
- Begin by peeling the bananas and cutting them into bite-sized pieces, about 1-inch thick. This will allow for even cooking and easy snacking.
- In a medium mixing bowl, combine the brown sugar and cinnamon. Toss the banana pieces in the melted butter, then sprinkle the sugar mixture over the bananas, ensuring they’re evenly coated.
- Preheat your air fryer to 350°F (175°C). Once heated, arrange the banana pieces in a single layer in the air fryer basket, making sure they aren’t overcrowded to allow for proper air circulation.
- Cook the bananas in the air fryer for about 5-7 minutes, shaking the basket halfway through to promote even cooking. The bananas should become golden brown and caramelized when done.
- Once cooked, carefully remove the banana bites from the air fryer and place them on a serving plate. They can be served warm on their own or topped with a scoop of vanilla ice cream or a drizzle of chocolate sauce for an additional treat.
Extra Tips: For an added layer of flavor, consider adding a pinch of nutmeg or a splash of vanilla extract to the sugar mixture before coating the bananas.
If you prefer a healthier option, you can use honey or maple syrup instead of brown sugar. These caramelized banana bites are best enjoyed fresh but can also be stored in an airtight container in the refrigerator for up to two days.
Reheat them briefly in the air fryer before serving to regain their warmth and texture. Enjoy your sweet creation!
Air Fryer Pumpkin Spice Muffins
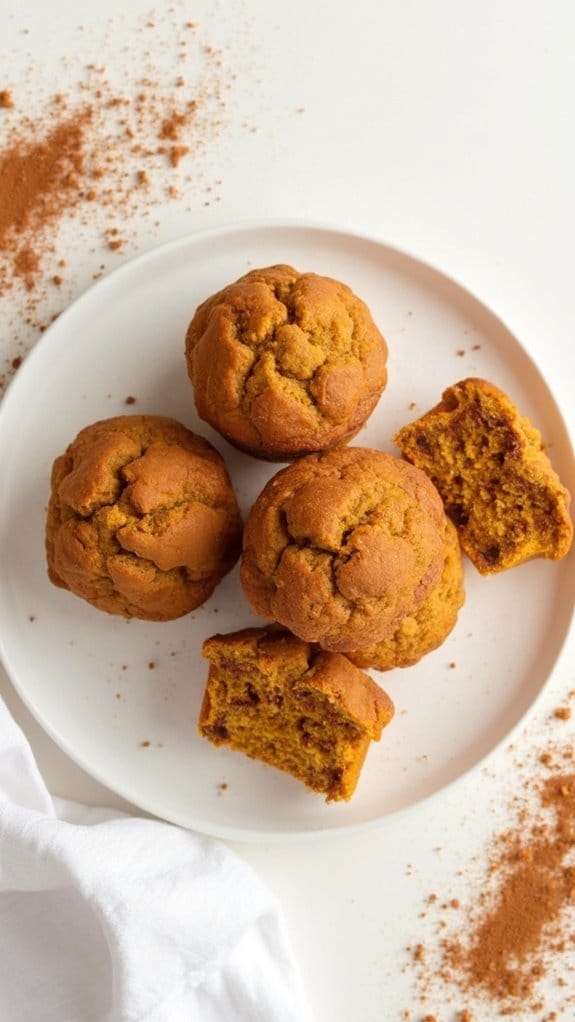
Title: Air Fryer Pumpkin Spice Muffins
Prep Time: 15 minutes
Cook Time: 15 minutes
Number of Servings: 12
Required Equipment List: Air fryer, mixing bowls, whisk, muffin tin, measuring cups and spoons
Cuisine Type: American
These Air Fryer Pumpkin Spice Muffins are a delightful way to embrace the flavors of fall, combining the warm spices of cinnamon and nutmeg with the rich, creamy goodness of pumpkin puree. Perfect for breakfast, brunch, or an afternoon snack, these muffins are both moist and flavorful, making them a favorite among pumpkin lovers.
The air fryer method guarantees that they come out fluffy and perfectly cooked, with a beautifully golden top that’s simply irresistible. Making these muffins is a breeze, as they require simple ingredients that you likely already have in your pantry.
Mixing the wet and dry ingredients separately before combining them guarantees a smooth batter, while the air fryer cooks them evenly and quickly, allowing you to enjoy fresh muffins in no time. Whether you’re hosting a gathering or simply treating yourself, these pumpkin spice muffins are sure to become a seasonal staple.
Ingredients:
- 1 1/2 cups all-purpose flour
- 1 teaspoon baking powder
- 1/2 teaspoon baking soda
- 1/2 teaspoon salt
- 1 teaspoon ground cinnamon
- 1/2 teaspoon ground nutmeg
- 1/4 teaspoon ground ginger
- 1/2 cup granulated sugar
- 1/2 cup brown sugar, packed
- 1/2 cup vegetable oil
- 1 cup pumpkin puree
- 2 large eggs
- 1 teaspoon vanilla extract
- Optional: chopped nuts or chocolate chips for added texture
Instructions:
- Begin by preheating your air fryer to 320°F (160°C). This will guarantee that your muffins have a consistent cooking temperature for even baking.
- In a mixing bowl, whisk together the flour, baking powder, baking soda, salt, cinnamon, nutmeg, and ginger. This will help to evenly distribute the leavening agents and spices throughout the muffins.
- In a separate bowl, mix the granulated sugar, brown sugar, vegetable oil, pumpkin puree, eggs, and vanilla extract until well combined. This wet mixture will provide moisture and flavor to your muffins.
- Gradually add the dry ingredients to the wet mixture, stirring gently until just combined. Be careful not to overmix, as this can result in dense muffins. If desired, fold in nuts or chocolate chips at this stage.
- Grease a muffin tin or line it with muffin liners. Spoon the batter into each muffin cup, filling them about two-thirds full to allow room for rising.
- Place the muffin tin in the preheated air fryer and cook for 12-15 minutes, or until a toothpick inserted into the center of a muffin comes out clean. You may need to cook in batches depending on the size of your air fryer.
- Once cooked, carefully remove the muffins from the air fryer and let them cool in the tin for a few minutes before transferring them to a wire rack to cool completely.
Extra Tips: To enhance the flavor, consider adding a tablespoon of pumpkin spice mix for an extra kick. If you prefer a sweeter muffin, you can increase the sugar slightly.
Be sure to check the muffins a few minutes before the recommended cooking time, as air fryer models can vary in temperature. These muffins store well in an airtight container for up to three days, and they can also be frozen for longer storage. Enjoy your pumpkin spice treats!
Air Fryer Rice Pudding

Title: Air Fryer Rice Pudding
Prep Time: 10 minutes
Cook Time: 25 minutes
Number of Servings: 4
Required Equipment List: Air fryer, mixing bowl, measuring cups, measuring spoons, spoon
Cuisine Type: American
Air Fryer Rice Pudding is a comforting and creamy dessert that takes advantage of the air fryer’s unique cooking capabilities to create a delightful treat with minimal fuss. This recipe combines glutinous rice with milk, sugar, and a hint of vanilla, resulting in a rich and satisfying pudding that’s perfect for a cozy night in or a special occasion.
The air fryer guarantees even cooking and a lovely texture without the need for constant stirring, making it an ideal option for busy home cooks. The beauty of this rice pudding lies in its versatility; you can customize it with your favorite toppings such as cinnamon, raisins, or fresh fruit.
The air fryer not only speeds up the cooking process but also enhances the flavors by concentrating them, resulting in a dessert that’s both delicious and easy to make. Treat yourself and your loved ones to this delightful dessert that will surely evoke fond memories of traditional rice pudding.
Ingredients:
- 1 cup Arborio rice
- 2 cups milk (whole or coconut milk)
- 1/2 cup sugar
- 1 teaspoon vanilla extract
- 1/4 teaspoon salt
- 1/2 teaspoon ground cinnamon (optional)
- 1/4 cup raisins or dried fruit (optional)
- Fresh fruit or nuts for topping (optional)
Instructions:
- Begin by rinsing the Arborio rice under cold water in a fine-mesh strainer until the water runs clear. This helps remove excess starch and guarantees that the rice cooks evenly and becomes creamy.
- In a mixing bowl, combine the rinsed rice, milk, sugar, vanilla extract, and salt. If you prefer a spiced version, add the ground cinnamon at this stage. Mix well to combine all the ingredients thoroughly.
- Preheat your air fryer to 320°F (160°C). Once heated, pour the rice mixture into a suitable air fryer-safe baking dish or a silicone mold that fits your air fryer basket.
- Cook the rice pudding in the preheated air fryer for 20-25 minutes, checking for doneness halfway through. Stir the pudding gently to guarantee even cooking and prevent it from sticking to the sides of the dish.
- Once the pudding is set and has reached your desired creaminess, carefully remove it from the air fryer. If using raisins or dried fruit, fold them in now. Let the pudding cool for a few minutes before serving.
- Serve the rice pudding warm or chilled, topped with fresh fruit, nuts, or a sprinkle of cinnamon for extra flavor. Enjoy this delicious dessert as a comforting finish to your meal!
Extra Tips: For a creamier texture, you can substitute part of the milk with heavy cream or half-and-half. Additionally, feel free to experiment with different flavorings such as almond extract or a dash of nutmeg.
To make it even more indulgent, serve your rice pudding with a dollop of whipped cream or a scoop of ice cream on top. Store any leftovers in an airtight container in the refrigerator for up to three days.
Strawberry Shortcake Cups
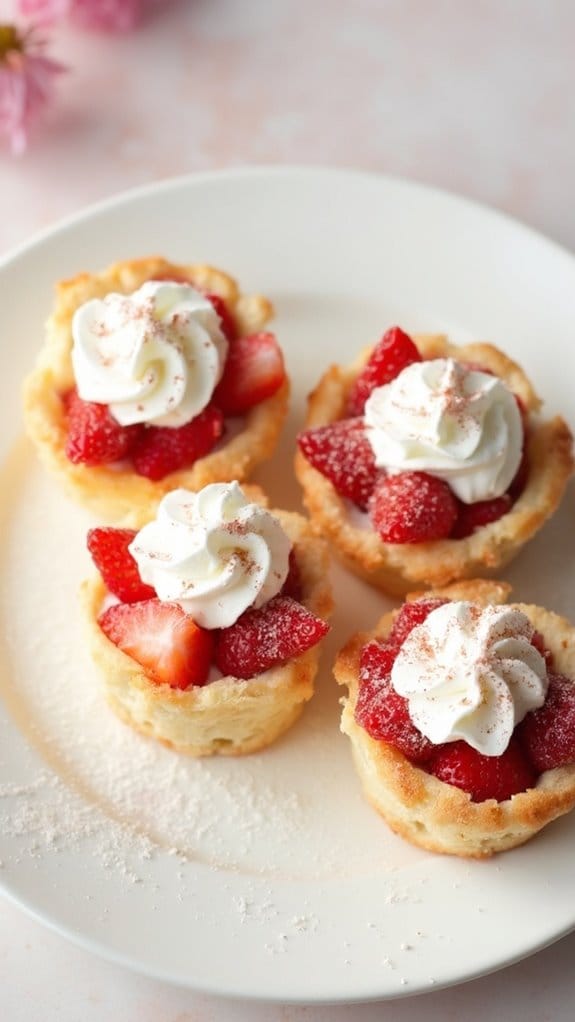
Title: Strawberry Shortcake Cups
Prep Time: 15 minutes
Cook Time: 10 minutes
Number of Servings: 4
Required Equipment List: Air fryer, mixing bowls, spoon, measuring cups, muffin tin
Cuisine Type: American
Strawberry Shortcake Cups are a delightful, bite-sized version of the classic dessert, offering all the sweetness of strawberries and whipped cream in a convenient cup form. This recipe utilizes an air fryer to create golden, fluffy biscuit cups that perfectly cradle fresh strawberries and whipped cream.
Ideal for a summer gathering or a sweet treat any day of the week, these cups are as visually appealing as they’re delicious. The combination of tender biscuit cups and juicy strawberries makes for a revitalizing dessert that can be enjoyed by all.
The air fryer not only speeds up the cooking process but also guarantees that the biscuit cups are crispy on the outside while remaining soft and airy on the inside. With a dollop of whipped cream on top, these Strawberry Shortcake Cups are sure to be a hit at any occasion.
Ingredients:
- 1 cup all-purpose flour
- 1 tablespoon baking powder
- 1/4 cup sugar
- 1/4 teaspoon salt
- 1/4 cup cold butter, cubed
- 1/2 cup milk
- 2 cups fresh strawberries, sliced
- 1 cup whipped cream
- 1 tablespoon powdered sugar (for topping)
Instructions:
- In a mixing bowl, combine the flour, baking powder, sugar, and salt. Stir until well combined. Add the cold, cubed butter and mix using a pastry cutter or your fingers until the mixture resembles coarse crumbs.
- Pour in the milk and stir gently until just combined, being careful not to overmix. The dough should be slightly sticky but manageable. If it’s too wet, add a little more flour as needed.
- Divide the dough into four equal parts and shape each portion into a small cup by pressing it into the greased muffin tin. Guarantee the dough covers the bottom and sides evenly to form a cup shape.
- Preheat your air fryer to 320°F (160°C). Place the muffin tin in the air fryer basket and cook for about 8-10 minutes or until the cups are golden brown and cooked through. Let them cool slightly before removing.
- While the biscuit cups are cooling, prepare the strawberries by mixing them with a tablespoon of sugar to release their juices. Allow them to sit for about 5 minutes.
- Once the cups have cooled, fill each with the sliced strawberries and top generously with whipped cream. For added sweetness, dust the tops with powdered sugar before serving.
Extra Tips: For an extra layer of flavor, consider adding a splash of vanilla extract to the biscuit dough or mixing a bit of lemon juice with the strawberries. You can also customize these cups by incorporating other fruits like blueberries or peaches.
If you’re short on time, store-bought biscuit dough can be used as a convenient alternative for the cups. Enjoy your delightful Strawberry Shortcake Cups!
Air Fryer Peanut Butter Cookies
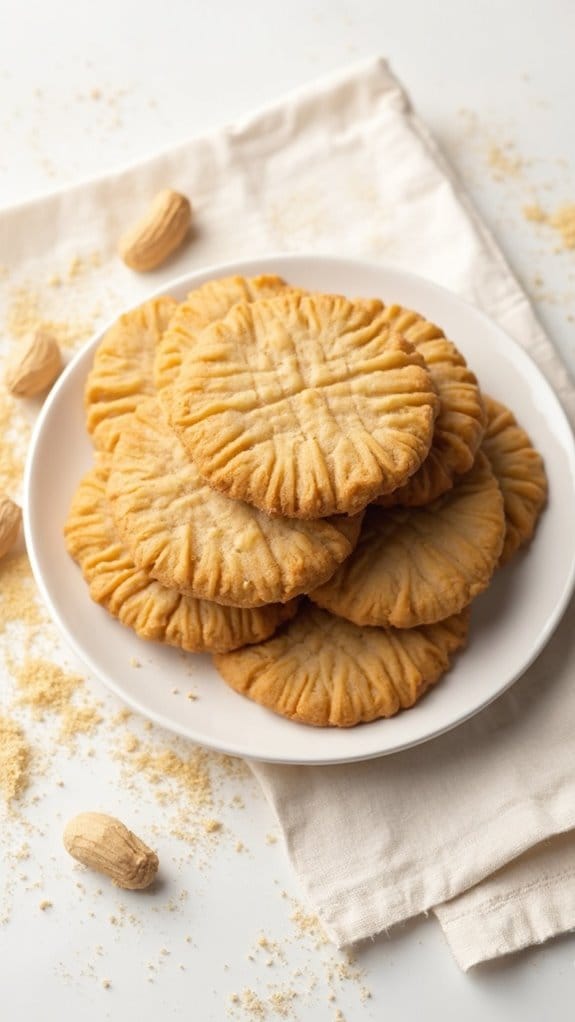
Title: Air Fryer Peanut Butter Cookies
Prep Time: 10 minutes
Cook Time: 8 minutes
Number of Servings: 12 cookies
Required Equipment List: Air fryer, mixing bowl, measuring cups and spoons, spatula, parchment paper
Cuisine Type: American
Air Fryer Peanut Butter Cookies are a delightful treat that brings together the rich, nutty flavor of peanut butter with a soft, chewy texture. This quick and easy recipe allows you to whip up a batch of cookies in no time, making it perfect for satisfying your sweet tooth or sharing with friends and family.
The air fryer not only cooks the cookies evenly but also gives them a slightly crisp exterior while keeping the inside wonderfully soft. What sets these cookies apart is their simplicity and the fact that they require just a handful of ingredients.
With no need for flour, these gluten-free cookies aren’t only delicious but also cater to those with dietary restrictions. The recipe is beginner-friendly, making it an excellent choice for kids and novice bakers who want to get involved in the kitchen.
Ingredients:
- 1 cup creamy peanut butter
- 1 cup granulated sugar
- 1 large egg
- 1 teaspoon vanilla extract
- 1/2 teaspoon baking soda
- 1/4 teaspoon salt
Instructions:
- In a mixing bowl, combine the creamy peanut butter and granulated sugar until well mixed. The mixture should be smooth and creamy, which will help guarantee the cookies maintain a soft consistency.
- Add the egg, vanilla extract, baking soda, and salt to the peanut butter mixture. Stir until all ingredients are fully incorporated and the dough comes together. The dough will be slightly sticky but manageable.
- Preheat your air fryer to 350°F (175°C) for about 3-5 minutes. While it preheats, line the air fryer basket with parchment paper to prevent the cookies from sticking.
- Using a tablespoon or cookie scoop, portion out the dough and roll it into balls. Place the dough balls in the air fryer basket, leaving enough space between each cookie for them to spread slightly while cooking.
- Flatten each dough ball slightly with the back of a fork, creating a criss-cross pattern on top. This step not only adds a decorative touch but also helps the cookies cook evenly.
- Air fry the cookies for 6-8 minutes, or until the edges are lightly golden brown. Keep an eye on them as cooking times may vary depending on your air fryer model.
- Once cooked, remove the cookies from the air fryer and let them cool in the basket for a few minutes before transferring them to a wire rack to cool completely.
Extra Tips: To enhance the flavor of your cookies, consider adding a handful of chocolate chips or chopped nuts to the dough before cooking. If you prefer a sweeter cookie, you can increase the sugar slightly, but keep in mind that the cookies will be quite sweet as-is.
Store any leftover cookies in an airtight container at room temperature for up to a week, and enjoy them as a delightful treat any time of day!
Nutella Stuffed Puff Pastries
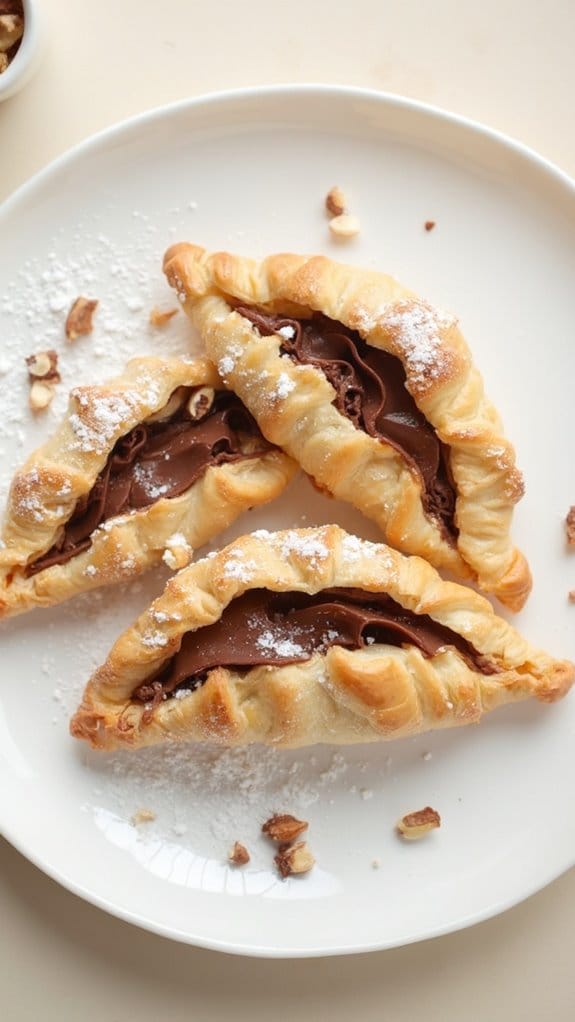
Title: Nutella Stuffed Puff Pastries
Prep Time: 15 minutes
Cook Time: 12 minutes
Number of Servings: 4
Required Equipment List: Air fryer, rolling pin, baking sheet, parchment paper, pastry brush
Cuisine Type: French-inspired
Nutella Stuffed Puff Pastries are an irresistible treat that combines the flaky, buttery goodness of puff pastry with the rich, chocolatey flavor of Nutella. These pastries are quick to prepare and cook in an air fryer, making them a perfect dessert for any occasion, whether it’s a cozy family gathering or a special celebration.
The smell of freshly baked pastries emanating from your kitchen will have everyone enthusiastic for their first bite. This recipe allows for plenty of creativity; feel free to add your favorite toppings or fillings, such as banana slices or chopped nuts, to enhance the flavor profile.
The golden, crispy exterior contrasts beautifully with the gooey Nutella center, making these pastries not just delicious but also visually appealing. Serve them warm with a dusting of powdered sugar or a scoop of vanilla ice cream for an extra decadent dessert.
Ingredients:
- 1 sheet of puff pastry (thawed)
- 1/2 cup Nutella
- 1 egg (beaten, for egg wash)
- Powdered sugar (for dusting)
- Optional: chopped hazelnuts or banana slices
Instructions:
- Begin by rolling out the thawed puff pastry sheet on a lightly floured surface to smooth out any creases. Cut the pastry into equal squares, approximately 4 inches by 4 inches, to guarantee uniform pastries.
- Place a tablespoon of Nutella in the center of each square. If desired, you can also add chopped hazelnuts or banana slices on top of the Nutella for added texture and flavor.
- Fold the pastry square over to create a triangle, ensuring the Nutella is sealed inside. Press the edges firmly with your fingers or use a fork to crimp and seal the edges, preventing any filling from leaking out during cooking.
- Preheat your air fryer to 375°F (190°C). While the air fryer heats up, brush the top of each pastry with the beaten egg to give them a golden color when baked.
- Arrange the pastries in a single layer in the air fryer basket, making sure not to overcrowd them. Cook for about 10 to 12 minutes or until they’re puffed and golden brown, checking halfway through to guarantee even cooking.
- Once cooked, carefully remove the pastries from the air fryer and let them cool slightly. Dust with powdered sugar before serving for a delightful finishing touch.
Extra Tips: For an added flavor twist, consider mixing a pinch of cinnamon into the Nutella before filling the pastries. If you’re feeling adventurous, try adding a layer of raspberry or strawberry jam along with the Nutella for a fruity contrast.
These pastries are best enjoyed warm but can be stored in an airtight container for a day or two; simply reheat them in the air fryer for a few minutes to regain their crispiness. Enjoy your delicious Nutella stuffed puff pastries!
Air Fryer Fruit Tart
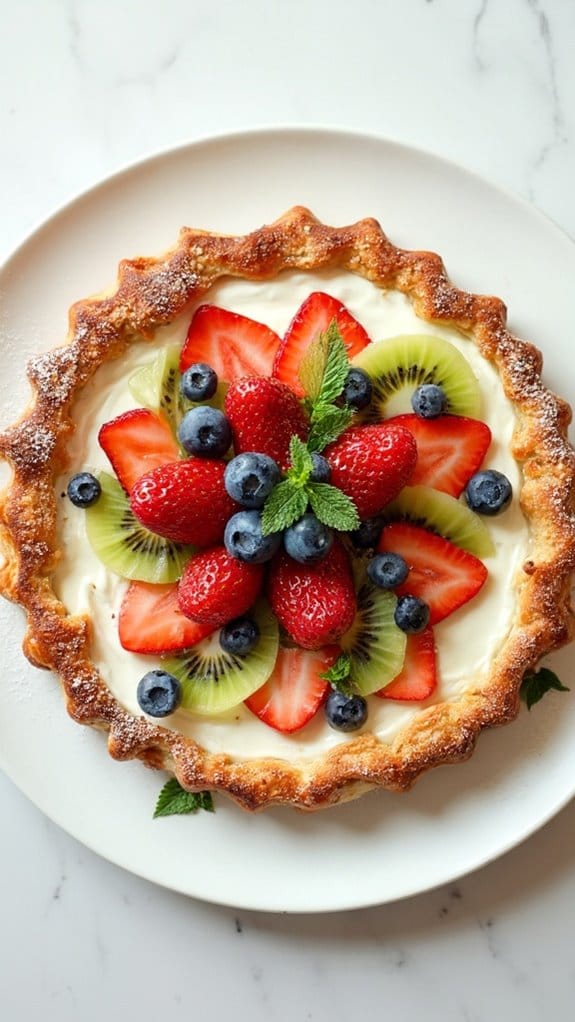
Title: Air Fryer Fruit Tart
Prep Time: 20 minutes
Cook Time: 15 minutes
Number of Servings: 6
Required Equipment List: Air fryer, mixing bowl, tart pan, rolling pin, parchment paper
Cuisine Type: Dessert
This Air Fryer Fruit Tart is a delightful dessert that combines a flaky, buttery crust with a creamy filling and a vibrant assortment of fresh fruits. The air fryer makes it easy to achieve a perfectly golden crust without the need for an oven, making this tart a quick and efficient treat for any occasion.
The use of seasonal fruits not only enhances the visual appeal but also brings a burst of flavor that complements the creamy filling beautifully. Perfect for gatherings or a casual family dinner, this fruit tart can be customized with your favorite fruits, allowing you to create a unique dessert each time.
The simple yet delicious combination of flavors makes this tart a crowd-pleaser, and with the air fryer method, you can enjoy a homemade dessert in less time than traditional baking methods.
Ingredients:
- 1 cup all-purpose flour
- 1/4 cup unsalted butter, cold and cubed
- 1/4 cup sugar
- 1/4 teaspoon salt
- 1 egg yolk
- 2 tablespoons cold water
- 1/2 cup cream cheese, softened
- 1/4 cup powdered sugar
- 1 teaspoon vanilla extract
- Assorted fresh fruits (strawberries, blueberries, kiwi, etc.)
- Mint leaves for garnish (optional)
Instructions:
- In a mixing bowl, combine the all-purpose flour, cold cubed butter, sugar, and salt. Use a pastry cutter or your fingers to work the butter into the flour until the mixture resembles coarse crumbs.
- Add the egg yolk and cold water to the mixture, stirring until the dough comes together. If the dough is too crumbly, add a little more cold water, one teaspoon at a time.
- Shape the dough into a disc, wrap it in plastic wrap, and refrigerate for about 15 minutes to firm up. Meanwhile, prepare your filling by mixing the softened cream cheese, powdered sugar, and vanilla extract in a bowl until smooth.
- Once the dough is chilled, roll it out on a lightly floured surface to fit your tart pan. Press the dough into the pan evenly, trimming any excess. Prick the bottom with a fork to prevent puffing during cooking.
- Place the tart shell in the air fryer basket lined with parchment paper. Air fry at 320°F (160°C) for 10-15 minutes or until golden brown. Keep an eye on it to avoid overcooking.
- After the tart shell is cooked, remove it from the air fryer and let it cool completely. Once cooled, spread the cream cheese filling evenly over the crust and top with assorted fresh fruits.
Extra Tips: For a more flavorful crust, consider adding a teaspoon of lemon zest to the dough. You can also brush the crust with a light glaze made from melted apricot jam to give it a beautiful shine after baking.
Feel free to experiment with different types of fruits based on what’s in season or your personal preferences, and don’t forget to let the tart chill for a bit before serving for the best texture. Enjoy your delicious air fryer fruit tart!
Conclusion
So, why settle for the same old desserts when you can whip up something extraordinary in your air fryer? From ooey-gooey chocolate lava cakes to light and airy mini cheesecakes, there’s a world of flavor waiting for you. You’ve got the recipes, now it’s time to get cooking! After all, who wouldn’t want to indulge in a warm, cinnamon-sugar churro after a long day? Immerse yourself in these treats and elevate your dessert game today!

