No products in the cart.

9 Twix Inspired Dessert Recipes
You might not realize that Twix bars have been around since the late 1960s, yet their unique combination of shortbread, caramel, and chocolate continues to inspire countless dessert creations. If you’re looking to elevate your baking game, exploring these 9 Twix-inspired dessert recipes could be the perfect way to impress friends and family. Each recipe captures that signature flavor profile while adding a twist of creativity that makes them stand out. Curious about how to transform these classic elements into something extraordinary?
Twix Cookie Bars
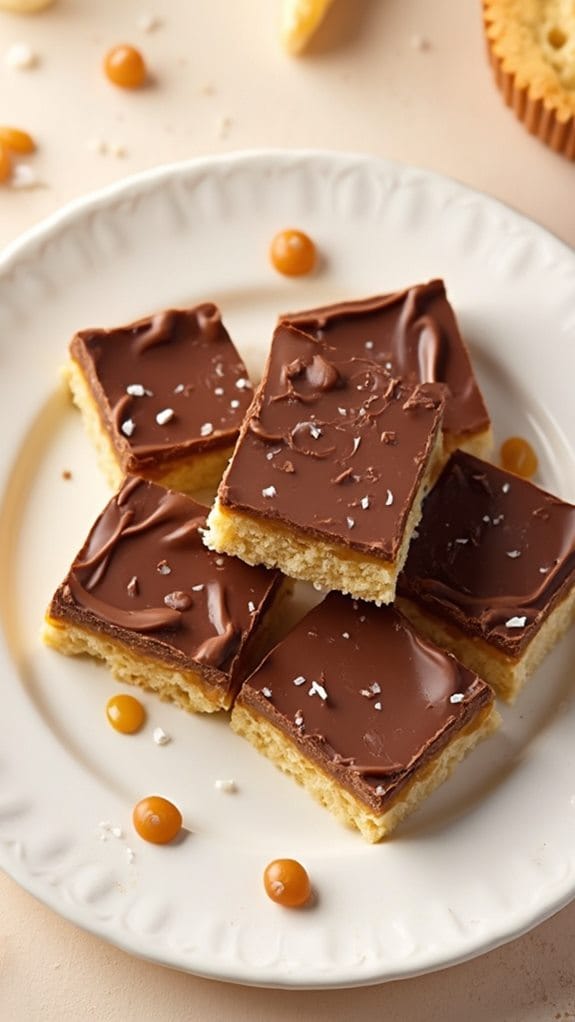
Title: Twix Cookie Bars
Prep Time: 20 minutes
Cook Time: 25 minutes
Number of Servings: 12
Required Equipment List: 9×13 inch baking pan, mixing bowl, electric mixer, spatula, parchment paper
Cuisine Type: American
Twix Cookie Bars are a delicious, indulgent treat that combines the flavors of a classic Twix candy bar into a simple cookie bar form. With a buttery shortbread base, a rich caramel layer, and a smooth chocolate topping, these bars are sure to satisfy any sweet tooth.
They’re perfect for parties, bake sales, or as a special dessert at home, bringing a taste of nostalgia to your kitchen. This recipe isn’t only easy to make but also allows you to enjoy the beloved combination of chocolate, caramel, and cookie in every bite.
The layers come together effortlessly, and while they do require a little time to set, the end result is a decadent dessert that’s well worth the wait. Once you serve these bars, they’ll quickly become a favorite among family and friends.
Ingredients:
- 1 cup unsalted butter, softened
- 1/2 cup granulated sugar
- 2 cups all-purpose flour
- 1/4 teaspoon salt
- 1 cup caramel candies, unwrapped
- 1/4 cup heavy cream
- 1 cup semi-sweet chocolate chips
Instructions:
- Preheat your oven to 350°F (175°C). Line a 9×13 inch baking pan with parchment paper, allowing some overhang for easy removal later. This will also help to prevent sticking.
- In a mixing bowl, cream together the softened butter and granulated sugar with an electric mixer until light and fluffy. This should take about 2-3 minutes.
- Gradually mix in the all-purpose flour and salt until a soft dough forms. Press this dough evenly into the bottom of the prepared baking pan to create the cookie base.
- Bake the cookie base in the preheated oven for 20 minutes, or until lightly golden. Remove from the oven and let it cool slightly while you prepare the caramel.
- In a small saucepan over low heat, combine the unwrapped caramel candies and heavy cream. Stir continuously until the caramel is fully melted and smooth. Pour the caramel mixture over the warm cookie base, spreading it evenly.
- In a microwave-safe bowl, melt the semi-sweet chocolate chips in the microwave in 30-second intervals, stirring in between until smooth. Once melted, pour the chocolate over the caramel layer and spread it evenly.
- Allow the cookie bars to cool at room temperature for about an hour, then refrigerate for at least 2 hours to set. Once set, lift the bars out of the pan using the overhanging parchment paper and cut into squares.
Extra Tips: For an added crunch, consider sprinkling some crushed nuts, like peanuts or almonds, over the caramel layer before adding the chocolate. If you want a more intense chocolate flavor, you can use dark chocolate chips instead of semi-sweet.
These bars can be stored in an airtight container in the refrigerator for up to a week, making them a great make-ahead dessert option. Enjoy your homemade Twix Cookie Bars!
No-Bake Twix Cheesecake
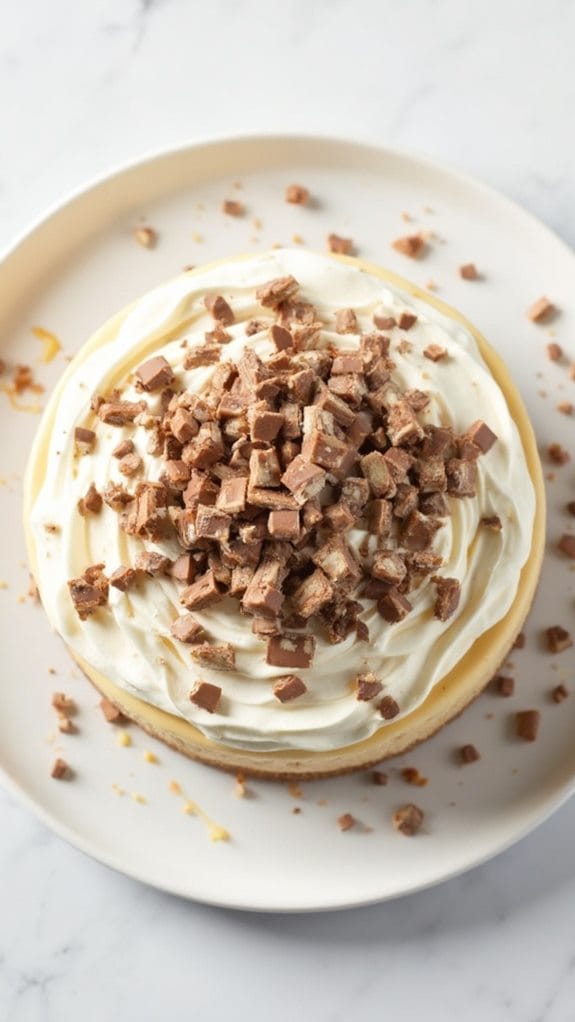
Title: No-Bake Twix Cheesecake
Prep Time: 30 minutes
Cook Time: 0 minutes
Number of Servings: 12
Required Equipment List: 9-inch springform pan, mixing bowls, electric mixer, spatula, measuring cups and spoons
Cuisine Type: American
This No-Bake Twix Cheesecake is the perfect dessert for those who love the delicious combination of caramel, chocolate, and crunchy textures. With a smooth and creamy cheesecake filling layered on a buttery cookie crust, this dessert isn’t only indulgent but also incredibly easy to make.
There’s no need to turn on the oven, making it a great choice for warm weather gatherings or any time you want a revitalizing treat. The addition of Twix candy bars adds a delightful crunch and bursts of caramel flavor that complement the rich cheesecake perfectly.
Topped with whipped cream and extra Twix pieces, this cheesecake is as visually appealing as it’s delicious. Whether you’re serving it at a birthday party, a holiday gathering, or just because, this no-bake cheesecake is sure to impress and satisfy any sweet tooth.
Ingredients:
- 1 ½ cups crushed graham crackers
- ½ cup unsalted butter, melted
- 1 cup powdered sugar
- 8 ounces cream cheese, softened
- 2 cups heavy whipping cream
- 1 teaspoon vanilla extract
- 4 full-size Twix bars, chopped
- Additional Twix bars for topping (optional)
Instructions:
- In a mixing bowl, combine the crushed graham crackers and melted butter, stirring until the mixture resembles wet sand. Press this mixture firmly into the bottom of a 9-inch springform pan to form the crust. Set aside to firm up while you prepare the filling.
- In a separate mixing bowl, beat the softened cream cheese with an electric mixer until smooth and creamy. Gradually add the powdered sugar, continuing to mix until fully incorporated and there are no lumps.
- In another bowl, whip the heavy cream and vanilla extract together until stiff peaks form. This will give the cheesecake its light and fluffy texture.
- Gently fold the whipped cream into the cream cheese mixture until fully combined. Be careful not to deflate the whipped cream; the goal is to keep the filling airy and light.
- Fold in the chopped Twix bars, ensuring they’re evenly distributed throughout the cheesecake filling. Pour this mixture over the prepared crust in the springform pan, smoothing the top with a spatula.
- Cover the cheesecake with plastic wrap and refrigerate for at least 4 hours, or overnight, until set. When ready to serve, remove the sides of the springform pan and top with additional whipped cream and chopped Twix bars if desired.
Extra Tips: For an extra layer of flavor, consider adding a layer of caramel sauce on top of the crust before pouring in the cheesecake filling. You can also experiment with other candy bars or toppings based on your preferences.
Make sure to let the cheesecake sit at room temperature for about 10-15 minutes before slicing to make cutting easier. Enjoy your delicious no-bake dessert!
Twix Brownies
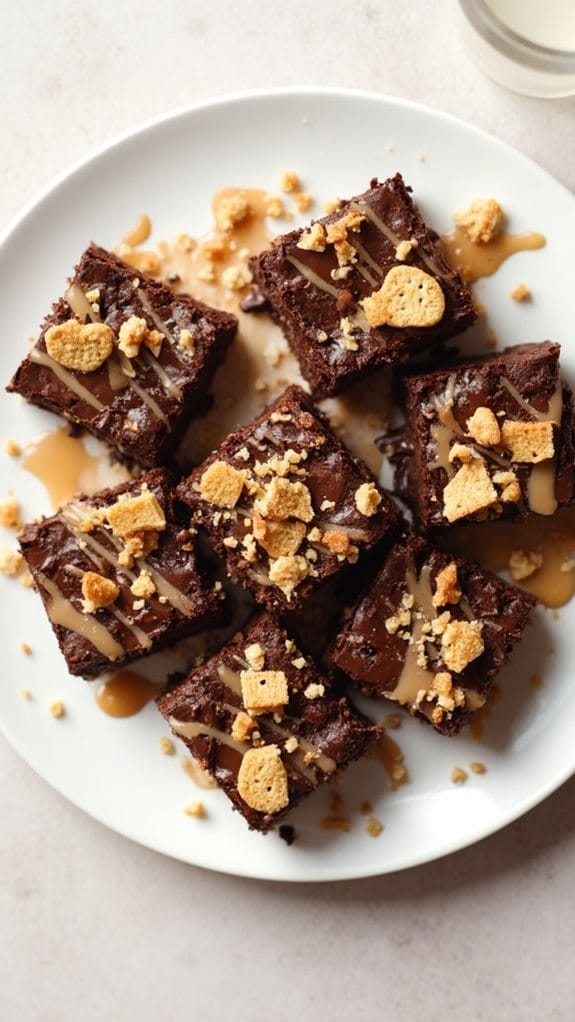
Title: Twix Brownies
Prep Time: 20 minutes
Cook Time: 30 minutes
Number of Servings: 12
Required Equipment List: 9×13 inch baking dish, mixing bowls, whisk, spatula, oven
Cuisine Type: American
Twix Brownies are a decadent dessert that combines the rich flavors of chocolate, caramel, and cookie crunch reminiscent of the beloved candy bar. This recipe features a fudgy brownie base topped with a layer of creamy caramel and a crumbled shortbread cookie crust, creating a delightful contrast of textures and flavors.
Perfect for satisfying your sweet tooth or impressing guests at a gathering, these brownies are sure to be a hit. The beauty of Twix Brownies lies not only in their taste but also in their simplicity. With just a handful of ingredients, you can create an indulgent treat that captures the essence of a Twix bar in a delightful brownie form.
These brownies are ideal for any occasion, from birthday parties to simple family dinners, and they can easily be made ahead of time for convenience.
Ingredients:
- 1 cup unsalted butter, melted
- 2 cups granulated sugar
- 4 large eggs
- 1 teaspoon vanilla extract
- 1 cup all-purpose flour
- 1/2 cup unsweetened cocoa powder
- 1/2 teaspoon salt
- 1 cup caramel sauce
- 1 cup crushed shortbread cookies
- 1 cup chocolate chips
Instructions:
- Preheat your oven to 350°F (175°C). Grease or line a 9×13 inch baking dish with parchment paper for easy removal after baking. This will guarantee that your brownies come out clean and intact.
- In a mixing bowl, whisk together the melted butter and granulated sugar until well combined. Add the eggs one at a time, mixing thoroughly after each addition, then stir in the vanilla extract to incorporate the flavors.
- In another bowl, sift together the flour, cocoa powder, and salt. Gradually fold the dry ingredients into the wet mixture until just combined, being careful not to overmix, as this will keep your brownies fudgy.
- Pour the brownie batter into the prepared baking dish, spreading it evenly. Bake in the preheated oven for 25 minutes, or until a toothpick inserted in the center comes out with a few moist crumbs.
- While the brownies are baking, prepare the topping by combining the caramel sauce and crushed shortbread cookies in a small bowl. Once the brownies are done baking, remove them from the oven and immediately spread the caramel mixture over the top.
- Sprinkle the chocolate chips evenly on top of the caramel layer, and return the dish to the oven for an additional 5-7 minutes until the chocolate chips are melted. Remove from the oven and let cool completely before slicing into squares.
Extra Tips: For an extra touch of flavor, you can add a pinch of sea salt on top of the caramel layer before adding the chocolate chips, which enhances the overall taste.
If you prefer a richer chocolate flavor, consider using dark chocolate chips instead of semi-sweet. These brownies can be stored in an airtight container for up to a week, but they’re best enjoyed fresh!
Twix Cupcakes

Title: Twix Cupcakes
Prep Time: 20 minutes
Cook Time: 25 minutes
Number of Servings: 12
Required Equipment List: Muffin tin, mixing bowls, electric mixer, spatula, cupcake liners, saucepan
Cuisine Type: American
These Twix Cupcakes are a decadent dessert that combines the rich flavors of chocolate, caramel, and cookie, inspired by the beloved candy bar. Each cupcake features a moist chocolate base that’s filled with a luscious caramel center, topped with a creamy chocolate frosting that mimics the smooth chocolate coating of a Twix.
With a sprinkle of crushed shortbread cookies on top, these cupcakes aren’t only delicious but also visually appealing, making them perfect for parties or special occasions.
The process of creating these cupcakes is straightforward, and the results are sure to be a hit with both kids and adults alike. By incorporating layers of flavor and texture, these Twix Cupcakes deliver a delightful experience with every bite.
Whether you’re celebrating a birthday, a holiday, or simply indulging your sweet tooth, these cupcakes are destined to impress your guests and leave them craving more.
Ingredients:
- 1 cup all-purpose flour
- 1/2 cup unsweetened cocoa powder
- 1 cup granulated sugar
- 1/2 teaspoon baking powder
- 1/2 teaspoon baking soda
- 1/4 teaspoon salt
- 1/2 cup unsalted butter, softened
- 2 large eggs
- 1 teaspoon vanilla extract
- 1/2 cup buttermilk
- 12 caramel candies, unwrapped
- 1 cup chocolate frosting (store-bought or homemade)
- 1/2 cup crushed shortbread cookies (for topping)
Instructions:
- Preheat your oven to 350°F (175°C) and line a muffin tin with cupcake liners. This will help your cupcakes maintain their shape and make for easy removal after baking.
- In a large mixing bowl, combine the flour, cocoa powder, sugar, baking powder, baking soda, and salt. Mix these dry ingredients together until well combined, verifying there are no lumps.
- Add the softened butter, eggs, vanilla extract, and buttermilk to the dry ingredients. Using an electric mixer, beat the mixture on medium speed until the batter is smooth and well combined, about 2-3 minutes.
- Fill each cupcake liner about halfway with the batter. Carefully place one unwrapped caramel candy in the center of each cupcake and then top with more batter until the liners are about three-quarters full. This guarantees that the caramel is enclosed during baking.
- Bake in the preheated oven for 20-25 minutes, or until a toothpick inserted into the center comes out clean. Allow the cupcakes to cool in the tin for 5 minutes before transferring them to a wire rack to cool completely.
- Once the cupcakes are completely cool, frost them generously with chocolate frosting using a spatula or piping bag. Sprinkle the crushed shortbread cookies on top for added texture and flavor.
Extra Tips: To enhance the caramel flavor, consider drizzling a little extra caramel sauce over the frosted cupcakes before adding the crushed cookies. If you want a richer chocolate flavor, you can substitute part of the all-purpose flour with additional cocoa powder.
Make certain to store any leftover cupcakes in an airtight container to keep them fresh and moist for several days. Enjoy your delicious Twix-inspired treats!
Twix Ice Cream Sundae

Title: Twix Ice Cream Sundae
Prep Time: 10 minutes
Cook Time: 0 minutes
Number of Servings: 4
Required Equipment List: Ice cream scoop, serving bowls, spoon, knife
Cuisine Type: American
The Twix Ice Cream Sundae is a decadent dessert that brings the beloved flavors of the classic candy bar to a delightful bowl of ice cream. With layers of creamy vanilla ice cream, rich caramel sauce, crunchy crushed cookies, and a drizzle of chocolate, this sundae is a perfect treat for any occasion.
Whether it’s a family movie night, a summer barbecue, or just a sweet indulgence, this dessert is sure to satisfy your sweet tooth. Making this sundae is incredibly simple and requires no cooking, allowing you to whip it up in just a few minutes.
The combination of textures – the smoothness of the ice cream, the crunch of the cookie pieces, and the gooey caramel – creates a delightful experience in every spoonful. Customize it to your liking by adding whipped cream, nuts, or your favorite toppings to make it uniquely yours.
Ingredients:
- 4 cups vanilla ice cream
- 1 cup caramel sauce
- 1 cup chocolate sauce
- 1 cup crushed shortbread cookies (or Twix bars)
- Whipped cream (optional)
- Maraschino cherries (optional for garnish)
Instructions:
- Begin by scooping the vanilla ice cream into serving bowls, filling each bowl with about a cup of ice cream. Use an ice cream scoop for perfectly rounded servings.
- Drizzle a generous amount of caramel sauce over the ice cream in each bowl. Make sure to cover the top evenly, allowing the caramel to seep into the ice cream for added flavor.
- Next, sprinkle the crushed shortbread cookies or Twix pieces over the caramel layer. Be generous, as this will provide a delightful crunch to each bite.
- Follow up by drizzling chocolate sauce over the top, creating a beautiful layer that complements the caramel and cookies. You can use as much or as little as you like depending on your chocolate preference.
- If desired, add a dollop of whipped cream on top of each sundae for an extra creamy finish. You can also crown your creation with a maraschino cherry for a classic sundae look.
Extra Tips: For an extra layer of flavor, consider adding a pinch of sea salt on top of the caramel sauce to enhance its sweetness. If you want to make this sundae even more indulgent, try adding additional toppings like chopped nuts, sprinkles, or even a drizzle of peanut butter.
Enjoy this delicious dessert immediately after preparation for the best experience!
Twix Rice Krispie Treats
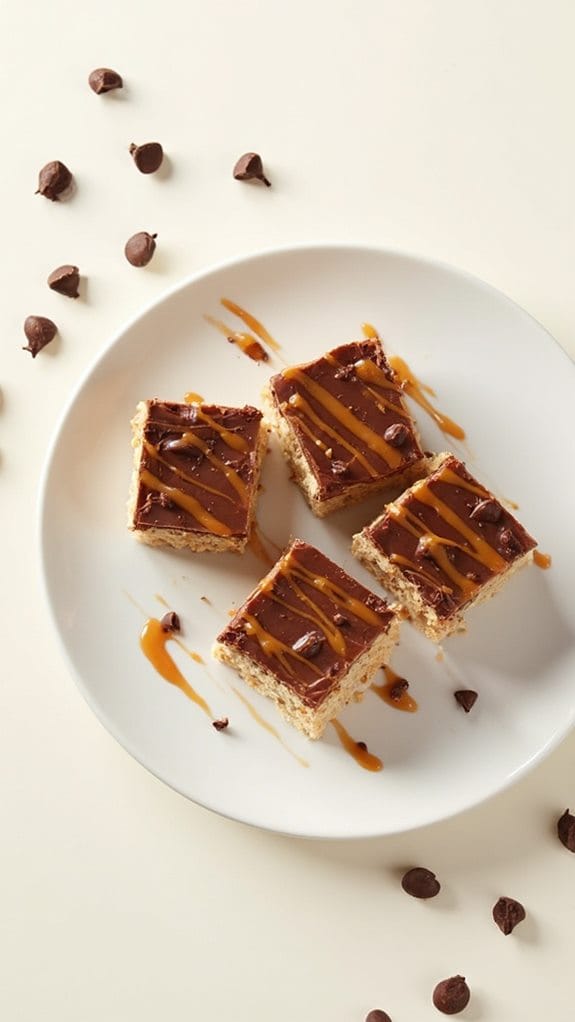
Title: Twix Rice Krispie Treats
Prep Time: 15 minutes
Cook Time: 10 minutes
Number of Servings: 12
Required Equipment List: Large mixing bowl, saucepan, spatula, 9×13-inch baking dish
Cuisine Type: American
Twix Rice Krispie Treats combine the beloved flavors of Twix candy bars with the classic marshmallow and rice cereal treat, creating an irresistible dessert that’s perfect for sharing. The layers of buttery, gooey marshmallow, crispy rice cereal, and decadent chocolate and caramel mimic the deliciousness of the original candy bar.
This recipe isn’t only simple to make but also a fun twist that will delight both kids and adults alike. These treats are ideal for parties, school lunches, or simply as a sweet snack at home. With their crunchy texture and creamy layers, they’re sure to become a favorite among your friends and family.
Plus, they can be made ahead of time and stored for later, making them a convenient dessert option for any occasion.
Ingredients:
- 6 cups Rice Krispies cereal
- 4 cups mini marshmallows
- 3 tablespoons unsalted butter
- 1 cup caramel sauce
- 1 cup milk chocolate chips
- 1/4 cup heavy cream
- 1/2 teaspoon salt
Instructions:
- In a large saucepan over low heat, melt the unsalted butter and mini marshmallows, stirring constantly until smooth and fully combined. This combination will form the base for your Rice Krispie treats.
- Once the mixture is melted and smooth, remove it from the heat and fold in the Rice Krispies cereal until evenly coated. Be gentle to avoid crushing the cereal too much.
- Grease a 9×13-inch baking dish and press the Rice Krispie mixture into the dish evenly. Use a spatula to smooth the top and guarantee it’s packed tightly.
- Drizzle the caramel sauce over the cooled Rice Krispie layer, spreading it evenly with a spatula. This will add that signature Twix flavor to your treats.
- In a microwave-safe bowl, combine the milk chocolate chips and heavy cream. Microwave in 30-second intervals, stirring in between, until the chocolate is melted and smooth. This will create a luscious chocolate topping.
- Pour the melted chocolate over the caramel layer, spreading it evenly with a spatula. Allow the treats to cool completely at room temperature before cutting them into squares.
Extra Tips: For a decorative touch, consider sprinkling a few sea salt flakes on top of the chocolate layer before it sets. This will enhance the flavor and give a nod to the salty-sweet balance found in Twix bars.
If you want to make these treats even more indulgent, you can add crushed pretzels or chopped nuts into the Rice Krispie mixture for an extra crunch. Enjoy your delicious Twix-inspired creation!
Twix Milkshake

Title: Twix Milkshake
Prep Time: 10 minutes
Cook Time: 0 minutes
Number of Servings: 2
Required Equipment List: Blender, measuring cups, serving glasses, straw (optional)
Cuisine Type: American
Indulge in the creamy, chocolatey goodness of this Twix Milkshake, a perfect treat for any dessert lover. This milkshake captures all the delightful flavors of the iconic candy bar, combining rich chocolate, buttery caramel, and crunchy biscuit in one deliciously invigorating drink.
It’s an easy recipe that can be whipped up in just a few minutes, making it an ideal choice for an afternoon snack, a party treat, or a special dessert for movie nights.
The beauty of this Twix Milkshake lies in its simplicity and versatility. You can easily adjust the ingredients to suit your preferences, whether you want it richer, sweeter, or with a bit more crunch.
The addition of whipped cream and extra crushed Twix on top makes it not only tasty but also visually appealing, so you can enjoy it while impressing your family and friends with this delightful twist on a classic shake.
Ingredients:
- 2 cups vanilla ice cream
- 1 cup milk
- 4 Twix bars, chopped
- Whipped cream (for topping)
- Extra chopped Twix bars (for garnish)
Instructions:
- In a blender, combine the vanilla ice cream and milk. Blend on medium speed until smooth and creamy, ensuring there are no lumps remaining. You can adjust the amount of milk based on how thick you prefer your milkshake.
- Once the ice cream and milk are well mixed, add in the chopped Twix bars. Pulse the blender a few times to incorporate the candy pieces, allowing some larger chunks to remain for texture.
- Taste the milkshake and adjust sweetness if necessary by adding more ice cream or a drizzle of chocolate syrup, if desired. Blend again briefly to combine any additional ingredients.
- Pour the milkshake into two tall serving glasses, leaving some space at the top for whipped cream.
- Top each milkshake with a generous swirl of whipped cream and sprinkle the extra chopped Twix bars on top for a delightful finishing touch. Serve immediately with a straw or a spoon.
Extra Tips: For an extra indulgent twist, consider adding a tablespoon of chocolate syrup or caramel sauce into the blender before mixing to enhance the flavor.
You can also freeze the glasses beforehand for an extra frosty experience. If you’re feeling adventurous, try blending in a scoop of peanut butter for a delicious variation that mimics the flavors of a Twix while adding an extra layer of richness! Enjoy your sweet treat!
Twix Tart
Title: Twix Tart
Prep Time: 20 minutes
Cook Time: 30 minutes
Number of Servings: 8
Required Equipment List: 9-inch tart pan, mixing bowl, saucepan, whisk, oven
Cuisine Type: American
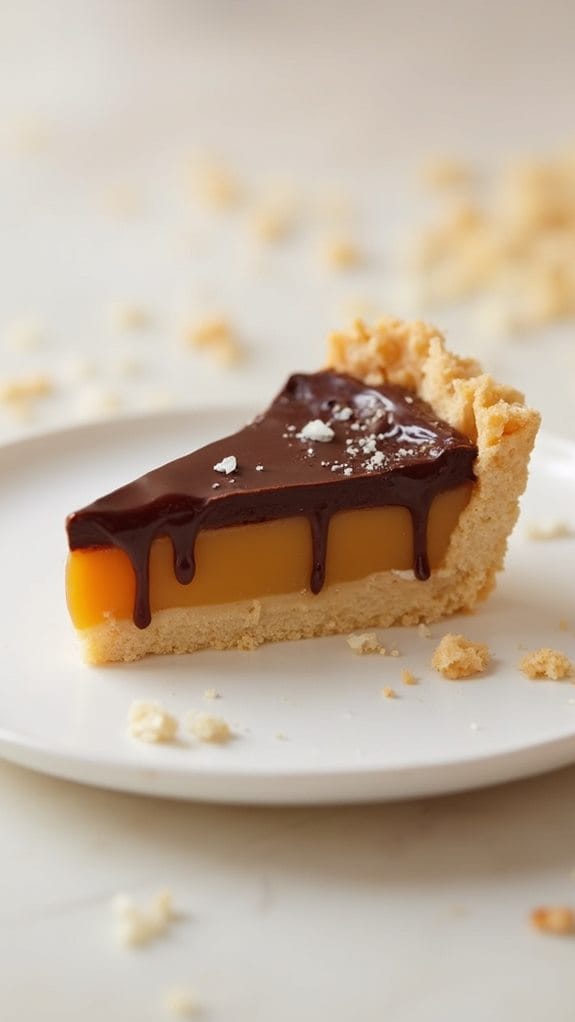
This Twix Tart is a decadent dessert that captures the essence of the beloved candy bar in a stunning tart form. With a buttery shortbread crust, a rich caramel layer, and a smooth chocolate ganache topping, every bite is a delightful combination of flavors and textures. Perfect for special occasions or simply to satisfy your sweet tooth, this tart is sure to impress anyone who tries it.
Creating this Twix Tart at home is easier than you might think. The shortbread crust serves as a perfect base, while the homemade caramel adds a luxurious touch that elevates the dessert to gourmet status. Topped off with a glossy chocolate ganache, this treat isn’t only a feast for the taste buds but also a visual delight.
Whether served at a party or enjoyed as an indulgent treat after dinner, this Twix Tart will leave everyone craving more.
Ingredients:
- 1 ½ cups all-purpose flour
- ½ cup unsalted butter, softened
- ¼ cup powdered sugar
- 1/4 teaspoon salt
- 1 can (14 oz) sweetened condensed milk
- 1 cup granulated sugar
- ½ cup corn syrup
- ½ cup heavy cream
- 1 teaspoon vanilla extract
- 1 cup semi-sweet chocolate chips
Instructions:
- Preheat your oven to 350°F (175°C). In a mixing bowl, combine the flour, softened butter, powdered sugar, and salt. Mix until the ingredients come together to form a dough.
- Press the dough into the bottom and up the sides of a 9-inch tart pan, ensuring it’s evenly distributed. Prick the bottom with a fork to prevent bubbling, and bake in the preheated oven for about 15 minutes or until lightly golden.
- While the crust is baking, prepare the caramel layer. In a saucepan over medium heat, combine the sweetened condensed milk, granulated sugar, corn syrup, and heavy cream. Stir constantly until the mixture comes to a gentle boil, then continue cooking for an additional 5 minutes until thickened.
- Remove the tart crust from the oven and pour the warm caramel over the baked crust, spreading it evenly. Allow the caramel layer to cool and set for about 10-15 minutes.
- In a clean saucepan, melt the chocolate chips over low heat, stirring until smooth. Remove from heat and add the vanilla extract, mixing well. Pour the chocolate ganache over the cooled caramel layer, spreading it evenly.
- Refrigerate the tart for at least 2 hours until the chocolate is set. Once firm, slice the tart into wedges and serve.
Extra Tips: For an extra indulgent touch, consider sprinkling a pinch of sea salt on top of the chocolate ganache before refrigerating. This will enhance the flavors and add a delightful contrast to the sweetness.
If you want to save time, you can use store-bought caramel sauce instead of making it from scratch, but homemade caramel definitely takes the tart to the next level. Enjoy this delicious treat with a cup of coffee or tea for a perfect afternoon delight!
Twix Stuffed Cookies

Title: Twix Stuffed Cookies
Prep Time: 20 minutes
Cook Time: 12 minutes
Number of Servings: 12
Required Equipment List: Mixing bowl, baking sheet, parchment paper, oven, cookie scoop
Cuisine Type: American
Twix Stuffed Cookies are a heavenly combination of soft, chewy cookie dough and the delicious flavors of caramel and chocolate found in the classic Twix bar. These cookies are perfect for satisfying your sweet tooth and are sure to impress anyone who tries them.
The addition of a piece of Twix candy in the center creates a delightful surprise as you bite into the cookie, revealing the gooey goodness inside. These cookies are easy to prepare and can be made in no time, making them a great option for parties, family gatherings, or just a cozy night in.
The rich buttery flavor of the cookie dough pairs perfectly with the chocolate and caramel filling, creating a treat that’s irresistibly delicious. Bake a batch of these Twix Stuffed Cookies, and watch them disappear in no time!
Ingredients:
- 1 cup unsalted butter, softened
- 3/4 cup granulated sugar
- 3/4 cup brown sugar, packed
- 1 teaspoon vanilla extract
- 2 large eggs
- 2 1/4 cups all-purpose flour
- 1 teaspoon baking soda
- 1/2 teaspoon salt
- 12 fun-sized Twix bars, unwrapped
- Sea salt for sprinkling (optional)
Instructions:
- Preheat your oven to 350°F (175°C) and line a baking sheet with parchment paper. This will help prevent the cookies from sticking and make for easy cleanup.
- In a large mixing bowl, cream together the softened butter, granulated sugar, and brown sugar until light and fluffy. This process usually takes about 2-3 minutes and is essential for the right texture in your cookies.
- Add the vanilla extract and eggs to the butter mixture, one at a time, mixing well after each addition. This will guarantee that the ingredients are well incorporated and will help create a moist cookie.
- In a separate bowl, whisk together the all-purpose flour, baking soda, and salt. Gradually add this dry mixture to the wet ingredients, mixing until just combined. Be careful not to overmix, as this can result in tough cookies.
- Using a cookie scoop or your hands, take a small amount of cookie dough and flatten it into a disc. Place a Twix bar in the center, then wrap the dough around it, rolling it into a ball. Place the ball onto the prepared baking sheet, spacing them about 2 inches apart.
- Bake in the preheated oven for 10-12 minutes, or until the edges are lightly golden but the centers are still soft. Remove the cookies from the oven and let them cool on the baking sheet for a few minutes before transferring to a wire rack to cool completely.
If desired, sprinkle a pinch of sea salt on top of the warm cookies for an added touch.
Extra Tips: For an extra layer of flavor, consider adding a handful of chopped nuts or chocolate chips to the cookie dough. If you want a more intense chocolate flavor, you can dip the cooled cookies in melted chocolate after baking.
Store any leftovers in an airtight container to keep them fresh for days, though they’re unlikely to last that long! Enjoy your delicious Twix Stuffed Cookies!
Conclusion
Now that you’ve got the inside scoop on these irresistible Twix-inspired desserts, it’s time to roll up your sleeves and get baking. You’ll find that whipping up a batch of Twix Cookie Bars or indulging in a No-Bake Twix Cheesecake will not only satisfy your sweet tooth but also impress anyone lucky enough to share in your creations. Picture the smiles on your friends’ faces as they dig into your Twix Stuffed Cookies, each bite revealing that gooey, delicious surprise. So, grab your apron, put on your favorite playlist, and let the kitchen become your playground. Trust me, there’s no better way to elevate your entertaining game than with these delightful treats—your next gathering is going to be epic!

