No products in the cart.
19 Prosperous New Year’s Day Fish Recipes for Abundance and Wealth
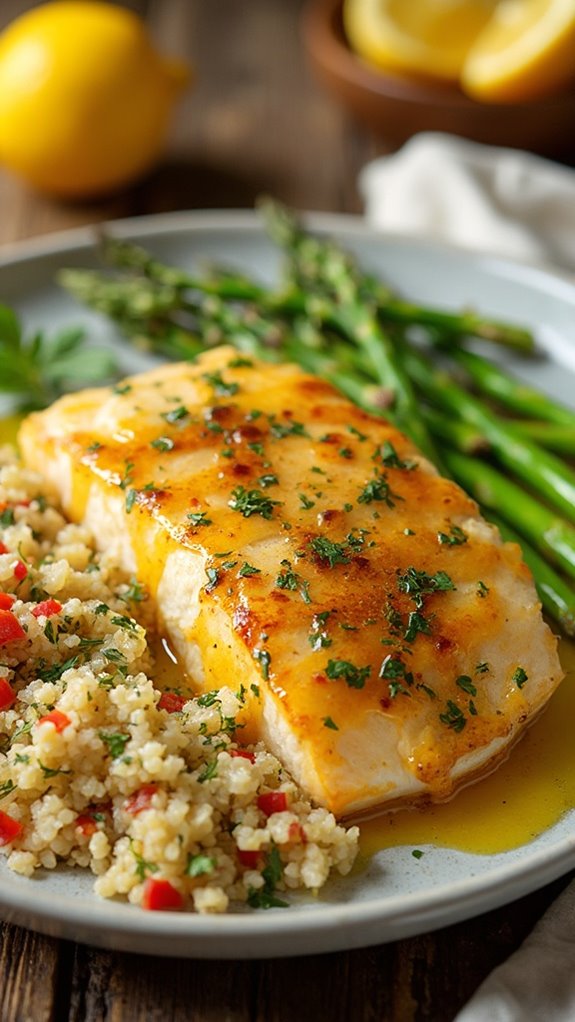
Looking to kick off the new year with a splash of prosperity? Fish is your go-to ingredient! Recipes like Grilled Salmon with herbs, Baked Cod with lemon butter, and Thai Spiced Fish Curry not only taste amazing but also carry a rich symbolism of abundance. Whether it’s zesty ceviche or savory fish kebabs, these dishes bring flavor and meaning to your New Year’s celebration. Plus, they’re usually packed with nutrients, supporting your health goals too! Intrigued by ideas for how to prepare these dishes? Stick around to discover even more delectable options to spice up your table!
Contents
hide
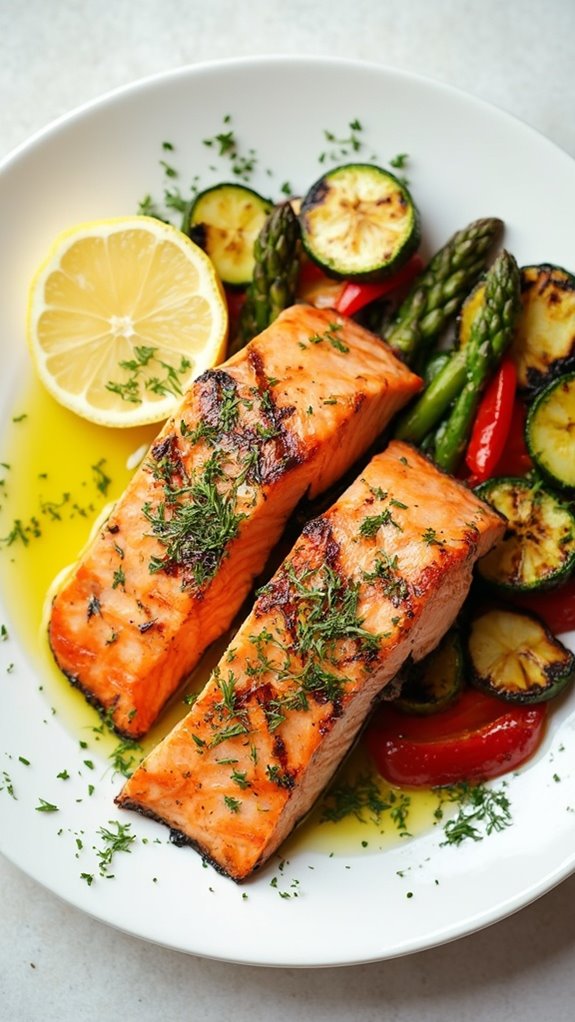
Grilled Salmon With Herbs
Title: Grilled Salmon With Herbs
Prep Time: 10 minutes
Cook Time: 15 minutes
Number of Servings: 4
Required Equipment List: Grill or grill pan, tongs, mixing bowl, basting brush
Cuisine Type: American
Grilled Salmon With Herbs is a simple yet elegant dish that showcases the natural flavors of fresh salmon paired with fragrant herbs. This recipe is perfect for a healthy dinner option, packed with omega-3 fatty acids and proteins.
The vibrant combination of herbs, such as dill, parsley, and thyme, elevates the salmon to a whole new level, making each bite a delightful experience. The grilling process adds a smoky flavor, enhancing the overall taste of the dish, making it ideal for summer barbecues or cozy family dinners.
This recipe isn’t only quick to prepare but also allows for customization based on your herb preferences. Whether you choose to marinate the salmon briefly before grilling or simply let the herbs shine through, the result will be a tender and flaky fish that’s both satisfying and nutritious.
Serve it alongside a fresh salad or grilled vegetables for a complete meal that’s sure to impress your guests.
Ingredients:
- 4 salmon fillets
- 2 tablespoons olive oil
- 2 tablespoons fresh dill, chopped
- 2 tablespoons fresh parsley, chopped
- 1 tablespoon fresh thyme, chopped
- 2 cloves garlic, minced
- Juice of 1 lemon
- Salt and pepper to taste
Instructions:
- Preheat your grill or grill pan over medium-high heat. Make sure the grill grates are clean and lightly oiled to prevent sticking. This will guarantee perfect grilling conditions for the salmon.
- In a mixing bowl, combine the olive oil, chopped dill, parsley, thyme, minced garlic, lemon juice, salt, and pepper. Whisk together until well mixed. This herby marinade will give the salmon a delicious flavor.
- Place the salmon fillets in the bowl with the marinade, making sure to coat each fillet evenly. Let the salmon marinate for about 5 minutes to absorb the flavors. If you have more time, letting it sit for up to 30 minutes in the refrigerator can enhance the taste even further.
- Carefully place the marinated salmon fillets on the preheated grill, skin side down. Grill for about 6-7 minutes per side, or until the salmon is cooked through and flakes easily with a fork. Avoid flipping too soon to prevent the fish from breaking apart.
- Once the salmon is done, remove it from the grill and allow it to rest for a couple of minutes. This resting period helps the juices redistribute throughout the fish, guaranteeing a moist and flavorful result.
Extra Tips: When grilling salmon, look for fillets that are similar in thickness for even cooking. You can also add a sprinkle of lemon zest over the grilled salmon for an extra layer of citrus flavor.
If you prefer a bit of heat, consider adding a pinch of red pepper flakes to the marinade. Serve your grilled salmon with a side of quinoa or roasted vegetables to create a well-rounded meal. Enjoy your delicious and healthy dish!
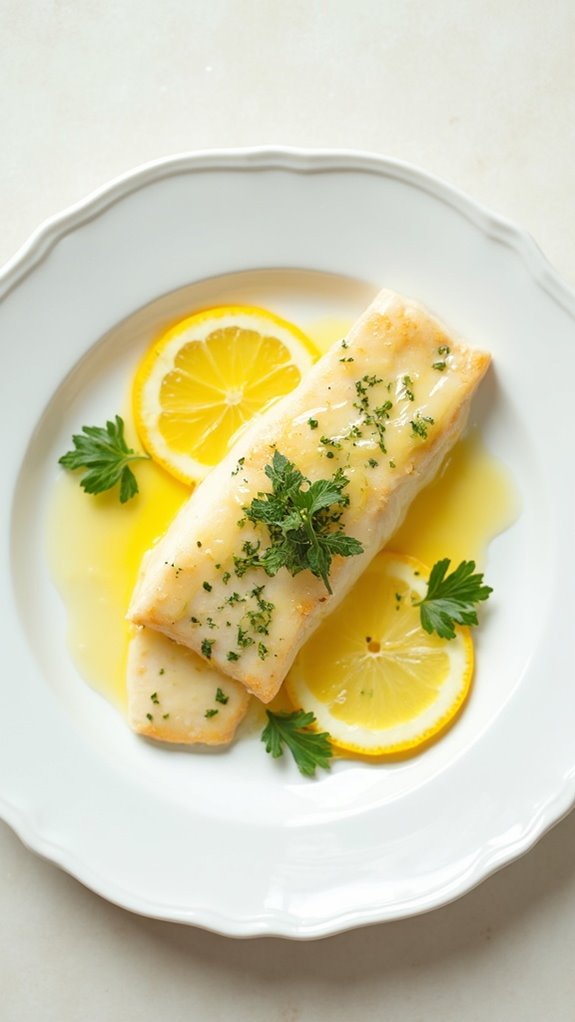
Baked Cod With Lemon Butter
Title: Baked Cod With Lemon Butter
Prep Time: 10 minutes
Cook Time: 20 minutes
Number of Servings: 4
Required Equipment List: Baking dish, measuring spoons, oven, knife, cutting board
Cuisine Type: American
Baked Cod With Lemon Butter is a simple yet elegant dish that showcases the delicate flavors of cod enhanced by the brightness of lemon and the richness of butter. This recipe is perfect for a quick weeknight dinner or a special occasion, as it’s easy to prepare and requires minimal ingredients. The result is flaky fish that melts in your mouth, paired beautifully with a zesty lemon butter sauce that elevates the dish to new heights.
The combination of fresh lemon juice, melted butter, and aromatic garlic creates a delicious sauce that infuses the cod with flavor while keeping it moist during baking. This dish can be served alongside a variety of sides, such as steamed vegetables or fluffy rice, making it versatile and appealing to all palates. With its light and invigorating profile, Baked Cod With Lemon Butter is sure to become a favorite in your household.
Ingredients:
- 4 cod fillets (about 6 ounces each)
- 4 tablespoons unsalted butter, melted
- Juice of 1 lemon
- 2 cloves garlic, minced
- Salt and pepper to taste
- Fresh parsley, chopped (for garnish)
- Lemon slices (for serving)
Instructions:
- Preheat your oven to 400°F (200°C). Prepare a baking dish by lightly greasing it with cooking spray or a small amount of melted butter. This will prevent the fish from sticking to the dish during baking.
- In a small bowl, combine the melted butter, lemon juice, minced garlic, salt, and pepper. Stir the mixture well to confirm that the garlic is evenly distributed throughout the sauce. This will be poured over the cod for added flavor.
- Place the cod fillets in the prepared baking dish, arranging them in a single layer. Pour the lemon butter mixture over the fish, confirming that each fillet is well coated. This will help keep the fish moist and flavorful as it bakes.
- Bake the cod in the preheated oven for 15-20 minutes, or until the fish flakes easily with a fork and is opaque throughout. The exact cooking time may vary depending on the thickness of the fillets, so keep an eye on them to avoid overcooking.
- Once the cod is cooked, remove it from the oven and let it rest for a couple of minutes. Garnish with fresh parsley and serve with lemon slices on the side for an extra burst of citrus flavor.
Extra Tips: For an added depth of flavor, consider adding a pinch of red pepper flakes to the lemon butter mixture for a subtle kick. You can also experiment with different herbs such as dill or thyme, which pair wonderfully with fish. If you have leftover lemon butter sauce, it can be drizzled over steamed vegetables or used as a dip for crusty bread. Enjoy your deliciously baked cod!
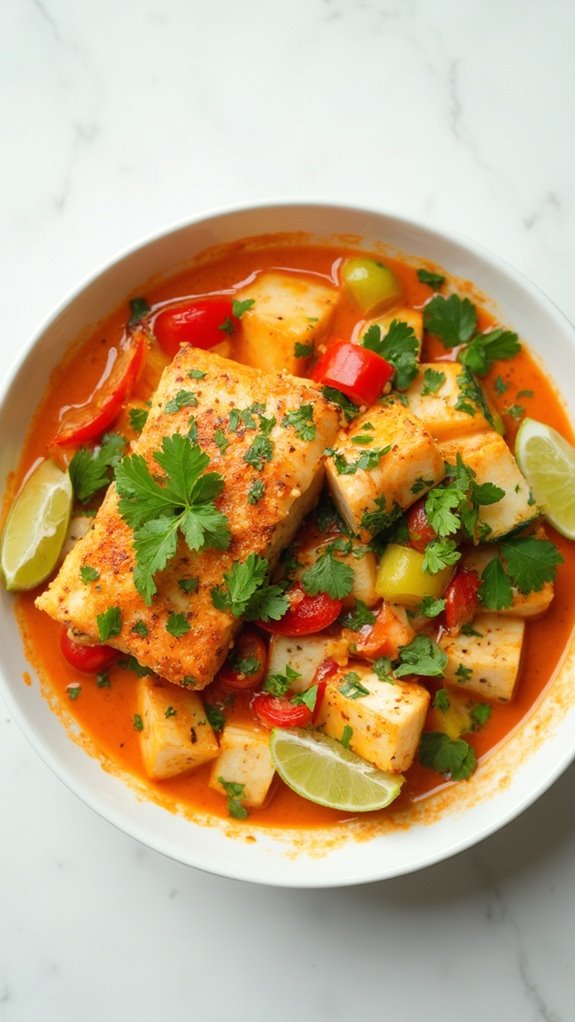
Thai Spiced Fish Curry
Title: Thai Spiced Fish Curry
Prep Time: 15 minutes
Cook Time: 30 minutes
Number of Servings: 4
Required Equipment List: Large pot or Dutch oven, cutting board, knife, measuring cups, measuring spoons, wooden spoon
Cuisine Type: Thai
This Thai Spiced Fish Curry is a vibrant and aromatic dish that captures the essence of Thai cuisine. With its rich coconut milk base infused with fragrant spices like lemongrass, ginger, and kaffir lime leaves, this curry isn’t only flavorful but also incredibly comforting. The addition of fresh fish, such as salmon or tilapia, guarantees that the dish remains light and healthy while absorbing the delightful curry flavors.
Perfect for a special occasion or a cozy family dinner, this recipe will transport your taste buds straight to Thailand. The beauty of this recipe lies in its simplicity and versatility. You can easily customize the vegetables to include your favorites or whatever you have on hand, such as bell peppers, spinach, or zucchini.
Serve this curry over a bed of steamed jasmine rice or with warm naan bread to soak up the delicious sauce. This dish is sure to become a new favorite in your household, combining ease of preparation with an explosion of flavors.
Ingredients:
- 1 pound firm white fish (like salmon or tilapia), cut into chunks
- 1 can (14 oz) coconut milk
- 2 tablespoons red curry paste
- 1 tablespoon fish sauce
- 1 tablespoon brown sugar
- 1 tablespoon lime juice
- 1 tablespoon vegetable oil
- 1 onion, sliced
- 2 cloves garlic, minced
- 1 inch piece fresh ginger, grated
- 1 stalk lemongrass, smashed and chopped
- 2-3 kaffir lime leaves (optional)
- 1 cup mixed vegetables (bell peppers, zucchini, etc.)
- Fresh cilantro for garnish
- Lime wedges for serving
Instructions:
- In a large pot or Dutch oven, heat the vegetable oil over medium heat. Add the sliced onion and sauté for about 5 minutes until softened. Stir in the minced garlic, grated ginger, and chopped lemongrass, cooking for another minute until fragrant.
- Add the red curry paste to the pot and stir well to coat the onion mixture. Cook for about 2 minutes, allowing the spices to bloom and develop their flavor.
- Pour in the coconut milk, fish sauce, brown sugar, and lime juice. Stir everything together and bring the mixture to a gentle simmer. Add the kaffir lime leaves if using, and let it simmer for about 5 minutes to allow the flavors to meld.
- Add the mixed vegetables to the pot and continue to simmer for an additional 10 minutes, until the vegetables are tender but still vibrant in color.
- Gently add the fish chunks to the curry and cook for another 5-7 minutes until the fish is cooked through and flakes easily with a fork. Be careful not to overcook the fish to keep it tender.
- Remove the pot from the heat and discard the kaffir lime leaves. Taste and adjust seasoning with more fish sauce, brown sugar, or lime juice as needed. Serve the curry hot, garnished with fresh cilantro and lime wedges on the side.
Extra Tips: For an extra layer of flavor, consider adding a splash of coconut aminos or soy sauce. If you like your curry spicier, feel free to add sliced Thai chilies when sautéing the onions.
This dish can also be made ahead of time and reheated, but be gentle with the fish to prevent it from breaking apart. Enjoy with a side of jasmine rice or crusty bread to soak up the delicious sauce!
Honey Garlic Glazed Trout
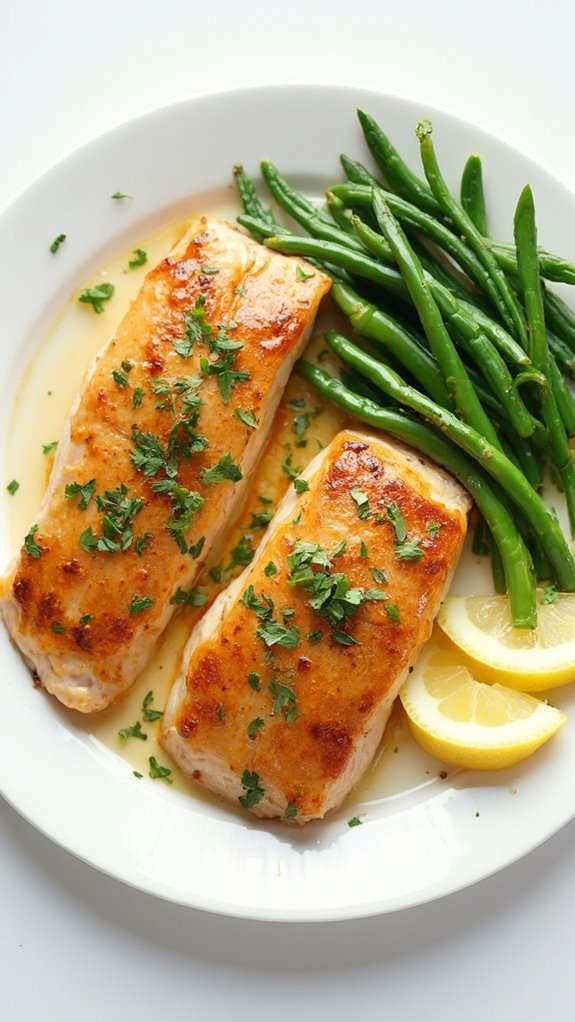
Title: Honey Garlic Glazed Trout
Prep Time: 10 minutes
Cook Time: 15 minutes
Number of Servings: 4
Required Equipment List: Baking sheet, parchment paper, mixing bowl, whisk, spatula
Cuisine Type: American
Honey Garlic Glazed Trout is a delightful dish that combines the sweet and savory flavors of honey and garlic to enhance the natural taste of fresh trout. This dish isn’t only easy to prepare but also incredibly flavorful, making it a perfect choice for a special occasion or a simple weeknight dinner.
The glaze caramelizes beautifully in the oven, resulting in a tender and juicy fish that’s bursting with flavor. This recipe showcases the health benefits of trout, a rich source of omega-3 fatty acids, and pairs perfectly with sides like steamed vegetables or rice.
With just a handful of ingredients, you can create a restaurant-quality meal that will impress your family and guests alike. The honey garlic glaze can also be used with other types of fish or chicken, making it a versatile addition to your culinary repertoire.
Ingredients:
- 4 trout fillets
- 1/4 cup honey
- 3 tablespoons soy sauce
- 2 cloves garlic, minced
- 1 tablespoon olive oil
- Salt and pepper to taste
- Fresh parsley, chopped (for garnish)
Instructions:
- Preheat your oven to 400°F (200°C). Line a baking sheet with parchment paper to prevent sticking and make cleanup easier. This step is essential for achieving a perfect texture without any mess.
- In a mixing bowl, whisk together the honey, soy sauce, minced garlic, and olive oil until well combined. This mixture will serve as the glaze that will infuse the trout with delicious flavors while it cooks.
- Season the trout fillets with salt and pepper on both sides, then place them skin-side down on the prepared baking sheet. This positioning allows the glaze to seep into the flesh of the fish, enhancing its taste.
- Pour the honey garlic glaze evenly over the trout fillets, ensuring each piece is generously coated. Let the fillets sit for about 5 minutes to absorb the flavors of the marinade before baking.
- Bake the trout in the preheated oven for 12-15 minutes, or until the fish flakes easily with a fork and is cooked through. The glaze will caramelize, creating a beautiful and flavorful crust on the fish.
- Once baked, remove the trout from the oven and let it rest for a minute. Garnish with freshly chopped parsley before serving for an added touch of freshness and color.
Extra Tips: For an extra layer of flavor, consider marinating the trout in the honey garlic mixture for 30 minutes before baking. You can also add some red pepper flakes to the glaze for a bit of heat.
This dish pairs wonderfully with a side of sautéed green beans or a light salad, making it a well-rounded meal. Enjoy your honey garlic glazed trout!
Mediterranean Stuffed Sole
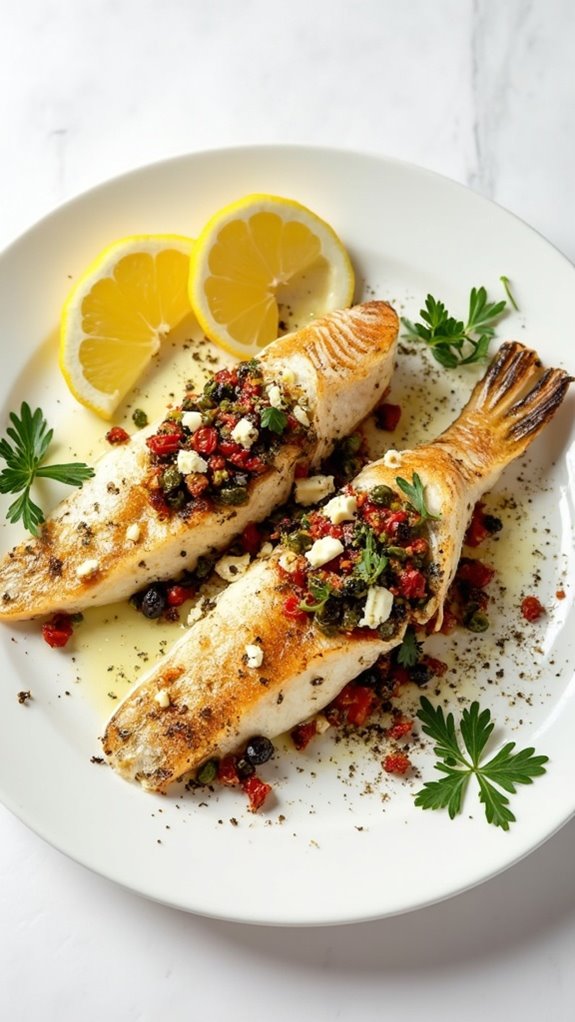
Title: Mediterranean Stuffed Sole
Prep Time: 20 minutes
Cook Time: 25 minutes
Number of Servings: 4
Required Equipment List: Baking dish, mixing bowl, oven, measuring cups, measuring spoons, knife
Cuisine Type: Mediterranean
Mediterranean Stuffed Sole is a delightful dish that brings the flavors of the Mediterranean right to your dinner table. This recipe features fresh sole fillets stuffed with a savory mixture of herbs, sun-dried tomatoes, olives, and feta cheese, creating a deliciously light and flavorful meal.
Perfect for special occasions or a weeknight dinner, this dish is both impressive and easy to prepare, making it a favorite among seafood lovers. The blend of ingredients in the stuffing not only complements the delicate flavor of the sole but also adds a vibrant touch to the dish.
Baking the stuffed fillets allows the flavors to meld together beautifully, creating a satisfying and wholesome meal that can be served with a side of roasted vegetables or a fresh salad. This Mediterranean-inspired dish is sure to impress your family and friends with its colorful presentation and delicious taste.
Ingredients:
- 4 sole fillets
- 1/2 cup sun-dried tomatoes, chopped
- 1/2 cup pitted olives, chopped
- 1/2 cup feta cheese, crumbled
- 1/4 cup fresh parsley, chopped
- 2 cloves garlic, minced
- 2 tablespoons olive oil
- 1/2 teaspoon dried oregano
- Salt and pepper to taste
- Lemon wedges (for serving)
Instructions:
- Preheat your oven to 375°F (190°C) and lightly grease a baking dish with olive oil to prevent sticking. This will help achieve a beautiful golden crust on the stuffed sole fillets.
- In a mixing bowl, combine the chopped sun-dried tomatoes, olives, feta cheese, parsley, minced garlic, olive oil, dried oregano, salt, and pepper. Mix well until all ingredients are evenly combined. This stuffing will add a burst of Mediterranean flavor to the sole.
- Lay the sole fillets flat on a clean surface, skin side down. Spoon an equal amount of the stuffing mixture onto the center of each fillet. Carefully fold the fillets over the stuffing, creating a pocket to hold the filling. Secure with toothpicks if necessary to prevent the stuffing from spilling out during baking.
- Place the stuffed fillets seam side down in the prepared baking dish. Drizzle a little more olive oil on top and season with additional salt and pepper if desired. This will enhance the flavor and help the fillets cook evenly.
- Bake in the preheated oven for 20-25 minutes or until the sole is cooked through and flakes easily with a fork. The stuffing should be heated through, and the top should be slightly golden.
- Once baked, remove from the oven and let the dish cool for a minute. Serve warm with lemon wedges on the side for an extra zesty flavor, and enjoy your Mediterranean feast!
Extra Tips: To elevate the dish even further, consider adding some capers or fresh basil to the stuffing mixture for additional flavor. If you can’t find sole, other white fish like flounder or tilapia can work well as substitutes.
Pair the stuffed sole with a light white wine, such as Sauvignon Blanc, to complement the flavors beautifully. Enjoy your culinary adventure into the Mediterranean!
Blackened Catfish Tacos
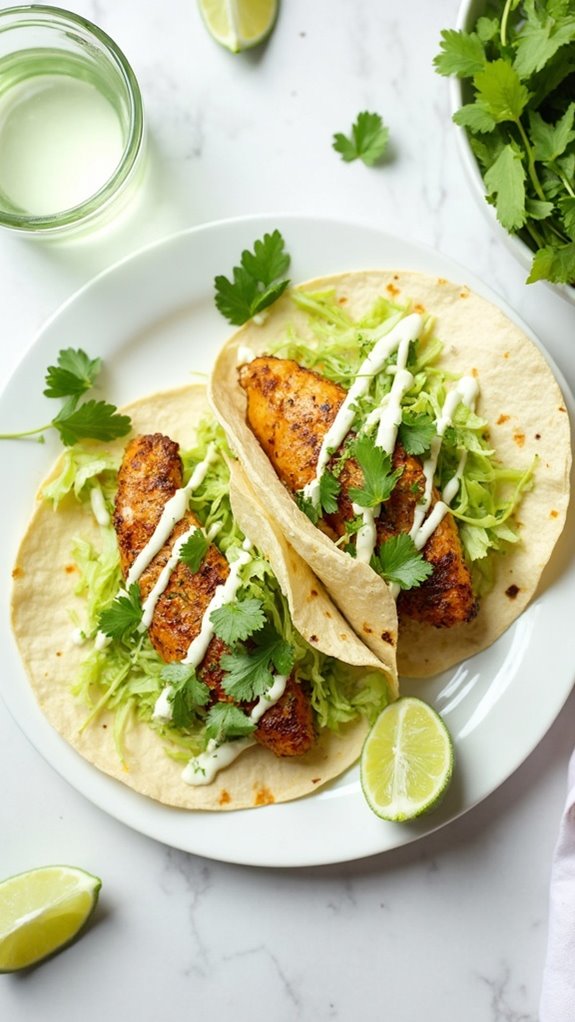
Title: Blackened Catfish Tacos
Prep Time: 15 minutes
Cook Time: 10 minutes
Number of Servings: 4
Required Equipment List: Skillet, spatula, mixing bowl, knife, cutting board
Cuisine Type: Southern
These Blackened Catfish Tacos are a delicious and spicy way to celebrate any occasion, especially New Year’s Day. The catfish fillets are coated with a homemade blackening spice blend that creates a flavorful crust when cooked, giving them a delightful smoky taste.
Paired with fresh toppings like cabbage slaw and a zesty lime crema, these tacos offer a perfect balance of flavors and textures. The recipe is quick and easy to prepare, making it ideal for a festive gathering or a cozy night in. You can customize the toppings to your liking, adding avocado, salsa, or any of your favorite condiments.
These tacos not only provide a satisfying meal but also introduce a touch of Southern flair to your dining experience.
Ingredients:
- 1 pound catfish fillets
- 2 tablespoons blackening seasoning
- 1 tablespoon olive oil
- 8 small corn tortillas
- 1 cup green cabbage, shredded
- 1/2 cup sour cream
- 2 tablespoons lime juice
- Salt and pepper to taste
- Fresh cilantro, for garnish
- Lime wedges, for serving
Instructions:
- Start by patting the catfish fillets dry with paper towels to remove any excess moisture. This helps the seasoning stick better and guarantees a crispy exterior when cooked.
- Sprinkle the blackening seasoning evenly over both sides of the catfish fillets, pressing gently to adhere. If you prefer a milder flavor, adjust the amount of seasoning to your taste.
- Heat the olive oil in a skillet over medium-high heat. Once the oil is hot, carefully add the catfish fillets to the skillet, cooking them for about 4-5 minutes on each side until they’re blackened and cooked through. The fish should easily flake with a fork when done.
- While the catfish is cooking, prepare the lime crema by mixing the sour cream and lime juice in a small bowl. Season with salt and pepper to taste, and set aside.
- Warm the corn tortillas in a separate pan or microwave for about 30 seconds until pliable. Assemble the tacos by placing a piece of blackened catfish on each tortilla, followed by a generous amount of shredded cabbage and a drizzle of the lime crema.
- Garnish the tacos with fresh cilantro and serve with lime wedges on the side for an added burst of flavor.
Extra Tips: To enhance the overall flavor of your tacos, consider adding additional toppings such as diced tomatoes, sliced jalapeños, or pickled onions.
If you want a bit more heat, you can use a spicy crema instead of the sour cream or add a dash of hot sauce. These tacos are best enjoyed fresh, but any leftover catfish can be flaked and stored in the refrigerator for use in salads or wraps the next day. Enjoy your flavorful culinary creation!
Teriyaki Salmon Bowls
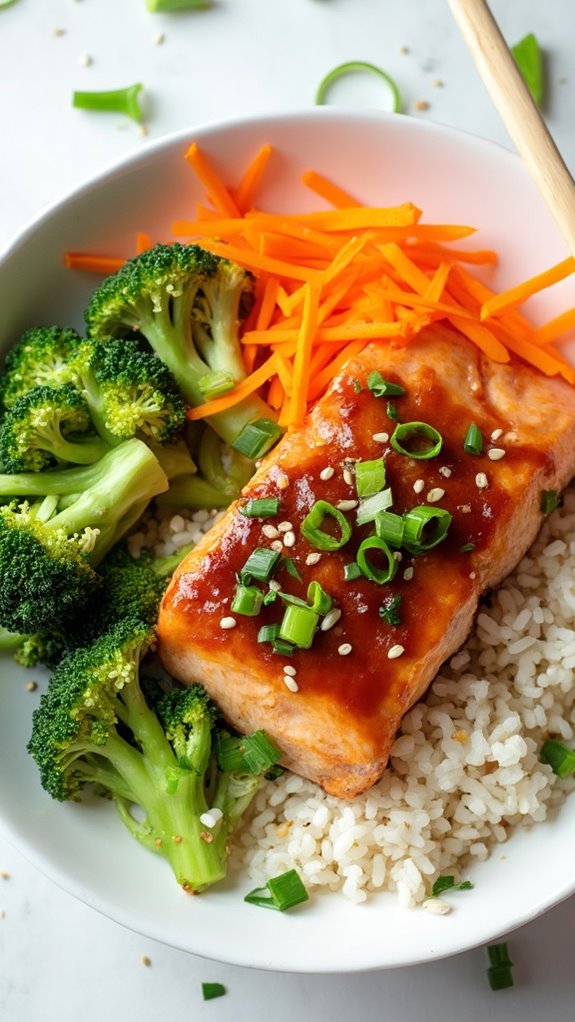
Title: Teriyaki Salmon Bowls
Prep Time: 10 minutes
Cook Time: 15 minutes
Number of Servings: 4
Required Equipment List: Baking sheet, mixing bowl, whisk, rice cooker (or pot), frying pan
Cuisine Type: Asian-inspired
These Teriyaki Salmon Bowls are a flavorful and nutritious option that’s perfect for a quick weeknight dinner or a meal prep option for the week ahead. The tender salmon fillets are marinated in a homemade teriyaki sauce that combines soy sauce, ginger, and garlic, infusing the fish with a delightful umami flavor.
Served over a bed of fluffy rice and topped with fresh vegetables, these bowls aren’t only delicious but also visually appealing, making them a winner for both families and gatherings. The simplicity of this dish makes it accessible for cooks of all skill levels.
Cooking the salmon and rice simultaneously allows for efficient preparation, while the vibrant array of toppings, such as sliced green onions and sesame seeds, adds texture and flavor. You can easily customize the bowls according to your preferences by adding other vegetables or even swapping out the salmon for chicken or tofu.
This recipe is a fantastic way to enjoy a healthy and satisfying meal in under 30 minutes.
Ingredients:
- 4 salmon fillets
- 1 cup soy sauce
- 1/4 cup honey
- 2 tablespoons rice vinegar
- 1 tablespoon grated fresh ginger
- 2 cloves garlic, minced
- 2 cups cooked rice (white or brown)
- 1 cup broccoli florets
- 1 cup shredded carrots
- 1/4 cup sliced green onions
- 2 tablespoons sesame seeds
Instructions:
- Preheat your oven to 400°F (200°C). In a mixing bowl, whisk together the soy sauce, honey, rice vinegar, ginger, and garlic to create the teriyaki marinade. Reserve a small amount of the marinade for drizzling later.
- Place the salmon fillets on a baking sheet lined with parchment paper. Pour the teriyaki marinade over the salmon, ensuring the fillets are evenly coated. Let the salmon marinate for about 10 minutes while the oven heats.
- Bake the salmon in the preheated oven for 12-15 minutes, or until the fish flakes easily with a fork. While the salmon is baking, prepare your rice according to package instructions.
- In a frying pan over medium heat, lightly sauté the broccoli florets and shredded carrots for about 3-4 minutes, just until they’re tender but still vibrant in color. Season with a pinch of salt if desired.
- To assemble the bowls, divide the cooked rice among four bowls. Top each bowl with a salmon fillet, sautéed vegetables, and a drizzle of the reserved teriyaki sauce. Finish with a sprinkle of sliced green onions and sesame seeds for garnish.
Extra Tips: For a more intense flavor, consider letting the salmon marinate for up to 30 minutes. You can also add additional toppings such as avocado slices, edamame, or pickled ginger for extra flavor and nutrition.
If you’re looking for a low-carb option, serve the salmon over cauliflower rice instead of traditional rice. Enjoy your delicious and healthy teriyaki salmon bowls!
Pan-Seared Mahi-Mahi
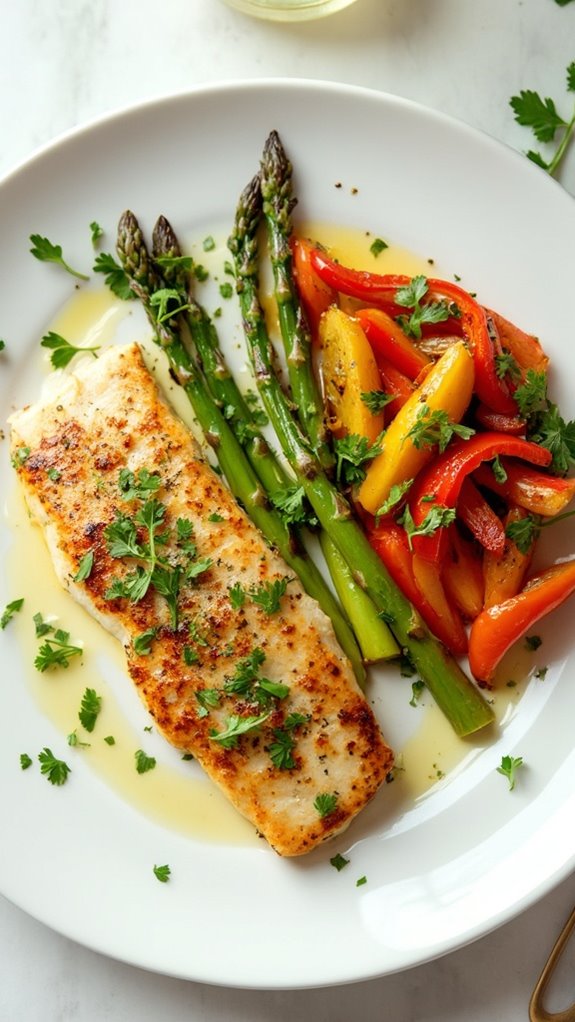
Title: Pan-Seared Mahi-Mahi
Prep Time: 10 minutes
Cook Time: 15 minutes
Number of Servings: 4
Required Equipment List: Skillet, spatula, measuring spoons, plate
Cuisine Type: Seafood
Pan-Seared Mahi-Mahi is a delicious and easy-to-make seafood dish that highlights the mild, buttery flavor of the fish. Perfect for a New Year’s Day celebration or any special occasion, this recipe allows the natural taste of mahi-mahi to shine through, complemented by a simple seasoning of salt, pepper, and a touch of lemon juice.
The pan-searing technique creates a beautifully golden crust while keeping the inside moist and flaky, making it a delightful main course. This dish pairs wonderfully with a variety of sides, such as sautéed vegetables, rice, or a fresh salad. Not only is it a quick and healthy option, but mahi-mahi is also a sustainable seafood choice, making it a responsible selection for the environmentally-conscious cook.
With just a few ingredients and minimal prep time, this recipe offers a satisfying way to enjoy seafood at home.
Ingredients:
- 4 mahi-mahi fillets
- 2 tablespoons olive oil
- Salt, to taste
- Black pepper, to taste
- Juice of 1 lemon
- Fresh parsley, chopped (for garnish)
Instructions:
- Start by patting the mahi-mahi fillets dry with paper towels to remove excess moisture. This step is vital for achieving a nice sear. Season both sides of the fillets with salt and black pepper according to your taste preferences.
- Heat the olive oil in a large skillet over medium-high heat. Once the oil is hot and shimmering, carefully add the seasoned mahi-mahi fillets to the skillet, ensuring not to overcrowd the pan. You may need to work in batches depending on the size of your skillet.
- Cook the fish for about 4-5 minutes on one side without moving it. This will help develop a golden-brown crust. Once you see the edges turning opaque, gently flip the fillets using a spatula.
- Continue cooking for an additional 3-4 minutes on the other side until the fish is cooked through and flakes easily with a fork. Squeeze fresh lemon juice over the fillets during the last minute of cooking for added flavor.
- Remove the mahi-mahi from the skillet and place it on a serving plate. Garnish with freshly chopped parsley for a pop of color and serve immediately with your choice of sides.
Extra Tips: To enhance the flavor of your mahi-mahi, consider marinating the fillets in a mixture of olive oil, lemon juice, and garlic for 30 minutes before cooking.
When selecting mahi-mahi, look for fillets that are firm and have a moist appearance. Feel free to experiment with different herbs and spices, such as paprika or cumin, to add a unique twist to the dish. Enjoy your pan-seared mahi-mahi with a crisp white wine for a perfect pairing!
Fish Chowder With Bacon
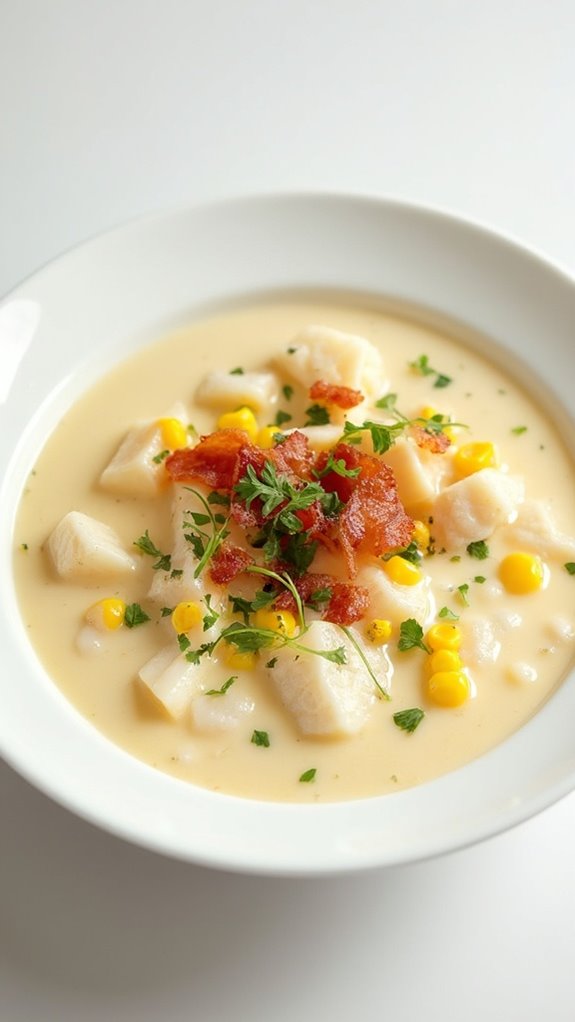
Title: Fish Chowder With Bacon
Prep Time: 15 minutes
Cook Time: 30 minutes
Number of Servings: 6
Required Equipment List: Large pot, ladle, cutting board, knife, measuring cups, measuring spoons
Cuisine Type: American
Fish Chowder with Bacon is a hearty and comforting dish that combines the rich flavors of fresh fish, crispy bacon, and a creamy base. This chowder is perfect for chilly days, making it a delightful way to celebrate New Year’s Day with family and friends.
The addition of bacon not only adds a savory flavor but also complements the fish beautifully, creating a satisfying and filling meal. Using fresh fish and a variety of vegetables, this chowder is both nutritious and delicious.
The creamy broth enriched with herbs and spices makes every spoonful a warm hug. This recipe is versatile and can be customized with your choice of fish, whether it’s cod, haddock, or even salmon. Serve it with crusty bread for a complete and comforting meal.
Ingredients:
- 4 slices of bacon, diced
- 1 medium onion, chopped
- 2 cloves garlic, minced
- 3 medium potatoes, diced
- 4 cups fish stock or vegetable broth
- 1 cup heavy cream
- 1 pound fresh fish fillets, cut into bite-sized pieces
- 1 cup corn kernels (fresh or frozen)
- 1 teaspoon dried thyme
- Salt and pepper to taste
- Fresh parsley, chopped (for garnish)
Instructions:
- In a large pot over medium heat, cook the diced bacon until crispy, about 5-7 minutes. Once cooked, remove the bacon with a slotted spoon and set aside, leaving the rendered fat in the pot.
- Add the chopped onion to the pot and sauté for about 3 minutes, until the onion is translucent. Stir in the minced garlic and cook for an additional minute, being careful not to let it burn.
- Add the diced potatoes to the pot and pour in the fish stock (or vegetable broth). Bring the mixture to a boil, then reduce the heat and let it simmer for 15 minutes or until the potatoes are tender.
- Stir in the heavy cream, followed by the fresh fish and corn. Add the dried thyme, and season with salt and pepper to taste. Cook for an additional 5-7 minutes, until the fish is cooked through and flakes easily.
- Once the chowder is ready, stir in the reserved bacon for added crunch and flavor. Serve the chowder hot, garnished with chopped parsley for a fresh touch.
Extra Tips: To enhance the chowder’s flavor, consider adding a splash of white wine or a tablespoon of Worcestershire sauce when adding the broth.
For a thicker consistency, you can mash some of the cooked potatoes before adding the cream. This chowder can be made ahead of time and reheated, although the fish is best when freshly cooked. Enjoy your warm and hearty fish chowder on New Year’s Day!
Lemon Dill Baked Haddock
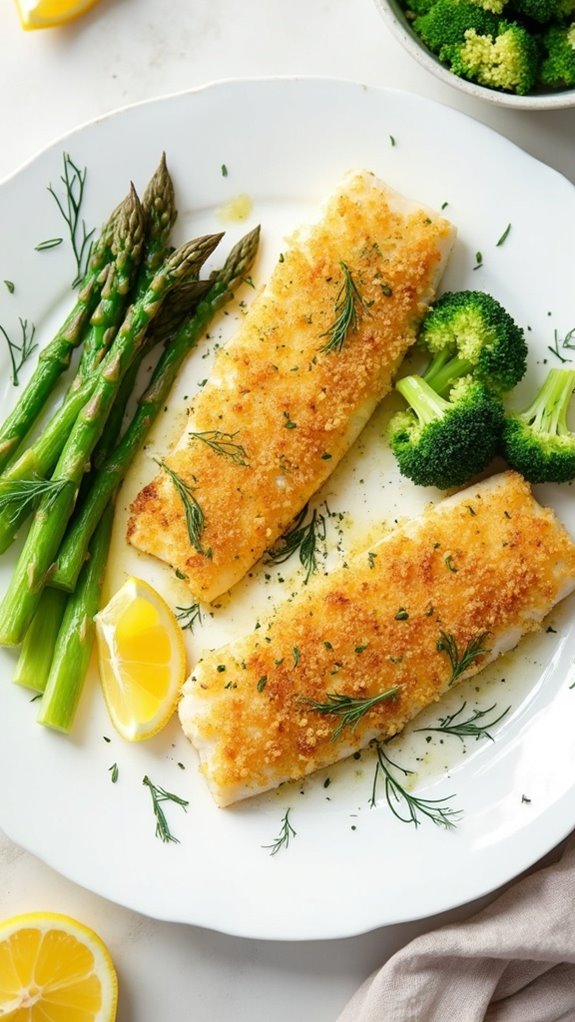
Title: Lemon Dill Baked Haddock
Prep Time: 10 minutes
Cook Time: 20 minutes
Number of Servings: 4
Required Equipment List: Baking dish, mixing bowl, oven, measuring spoons
Cuisine Type: Seafood
Lemon Dill Baked Haddock is a simple yet flavorful dish that showcases the delicate texture and mild flavor of haddock. This recipe combines the freshness of lemon juice with the aromatic notes of dill, creating a light and revitalizing meal that’s perfect for any occasion.
Whether you’re serving it for a special family dinner or a casual weeknight meal, this dish is sure to impress your guests with its vibrant flavors and minimal effort. Baking the haddock in the oven allows it to cook evenly while retaining moisture, resulting in a tender and flaky fish.
The addition of breadcrumbs gives a delightful crunch while the garlic and herbs elevate the overall taste. This dish pairs wonderfully with steamed vegetables or a fresh salad, making it a nutritious and satisfying option for seafood lovers.
Ingredients:
- 4 haddock fillets
- 2 tablespoons olive oil
- 2 tablespoons fresh lemon juice
- 1 teaspoon lemon zest
- 2 cloves garlic, minced
- 1 tablespoon fresh dill, chopped (or 1 teaspoon dried dill)
- Salt and pepper to taste
- 1/2 cup breadcrumbs
- Lemon wedges (for serving)
Instructions:
- Preheat your oven to 400°F (200°C). Lightly grease a baking dish with a little olive oil to prevent the fish from sticking during cooking.
- In a mixing bowl, combine the olive oil, lemon juice, lemon zest, minced garlic, chopped dill, salt, and pepper. Mix well to create a flavorful marinade for the fish.
- Place the haddock fillets in the prepared baking dish. Pour the marinade over the fillets, making sure they’re evenly coated. Allow them to marinate for about 5 minutes for the flavors to infuse.
- Sprinkle the breadcrumbs evenly over the marinated fish fillets, pressing gently to confirm they adhere to the surface. This will create a delicious golden crust as the fish bakes.
- Bake in the preheated oven for 15-20 minutes or until the fish is opaque and flakes easily with a fork. The breadcrumbs should be golden brown and crispy.
- Once done, remove the baking dish from the oven and let the fish rest for a minute. Serve warm with lemon wedges on the side for an extra burst of citrus flavor.
Extra Tips: For an extra burst of flavor, consider adding some grated Parmesan cheese to the breadcrumbs before sprinkling them on the fish. You can also switch up the herbs based on your preference; parsley or thyme also work beautifully with haddock.
If you don’t have fresh fish on hand, frozen haddock fillets can be used—just confirm they’re fully thawed before marinating. Enjoy this light and healthy dish with your favorite side for a complete meal!
Spicy Fish Tikka
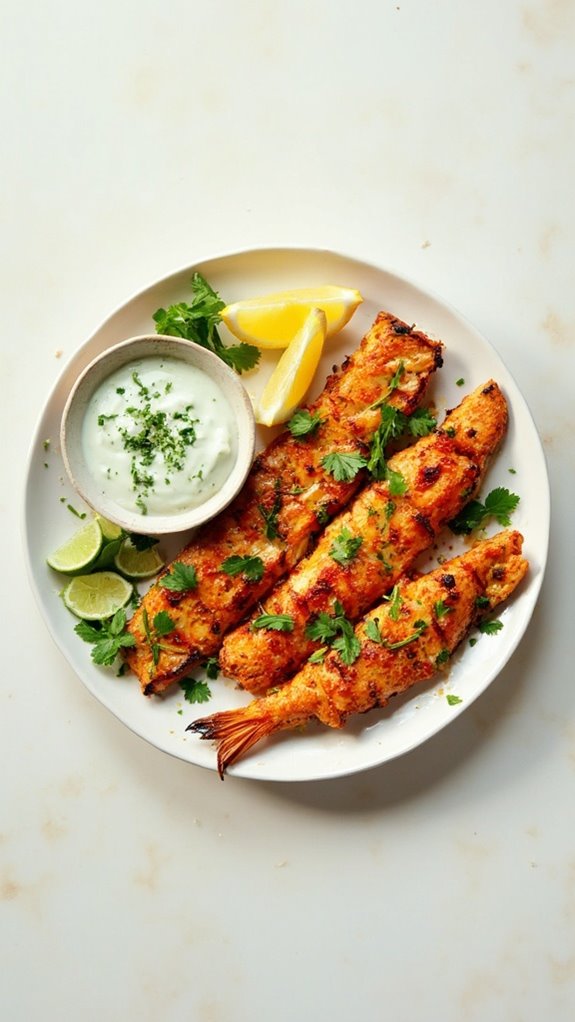
Title: Spicy Fish Tikka
Prep Time: 20 minutes
Cook Time: 15 minutes
Number of Servings: 4
Required Equipment List: Mixing bowl, skewers, grill or oven, baking sheet, brush
Cuisine Type: Indian
Spicy Fish Tikka is a delicious and fiery dish that brings the vibrant flavors of Indian cuisine right to your table. This recipe features tender pieces of fish marinated in a spicy yogurt-based mixture, which not only infuses the fish with flavor but also helps to keep it moist during cooking.
The dish is typically grilled or baked, resulting in a slightly charred exterior that enhances the overall taste. Perfect as an appetizer or a main course, Spicy Fish Tikka is sure to be a hit at any gathering.
This dish isn’t only packed with flavor but also incredibly quick to prepare, making it ideal for those busy weeknights or impromptu get-togethers. By using firm white fish like cod or tilapia, you guarantee that the fish holds up well on the grill or in the oven.
Serve the fish tikka with fresh lemon wedges and a side of cooling cucumber raita for a complete and satisfying meal that celebrates the essence of Indian cooking.
Ingredients:
- 1 pound firm white fish (such as cod or tilapia), cut into cubes
- 1 cup plain yogurt
- 2 tablespoons lemon juice
- 2 tablespoons ginger-garlic paste
- 1 tablespoon red chili powder
- 1 teaspoon turmeric powder
- 1 teaspoon garam masala
- 1 teaspoon cumin powder
- Salt to taste
- Fresh coriander leaves (for garnish)
- Lemon wedges (for serving)
Instructions:
- In a mixing bowl, combine the plain yogurt, lemon juice, ginger-garlic paste, red chili powder, turmeric powder, garam masala, cumin powder, and salt. Whisk together until smooth, creating a flavorful marinade for the fish.
- Add the cubed fish into the marinade, making sure each piece is well coated. Cover the bowl with plastic wrap and let it marinate in the refrigerator for at least 30 minutes, or up to a few hours for maximum flavor.
- Preheat your grill or oven to medium-high heat. If using skewers, soak wooden skewers in water for 15-20 minutes to prevent them from burning during cooking.
- Thread the marinated fish onto the skewers, leaving a little space between each piece for even cooking. If baking, arrange the fish cubes on a greased baking sheet.
- Grill the fish skewers for about 10-12 minutes, turning occasionally until they’re cooked through and slightly charred. If baking, place the baking sheet in the oven and cook for about 15 minutes, or until the fish flakes easily with a fork.
- Once cooked, remove the fish from the grill or oven and let it rest for a couple of minutes. Garnish with fresh coriander leaves and serve hot with lemon wedges on the side.
Extra Tips: For an even more intense flavor, consider adding a pinch of smoked paprika to the marinade for a smoky undertone.
You can also adjust the level of spiciness by increasing or decreasing the amount of red chili powder used. Pairing the Spicy Fish Tikka with naan or rice makes for a hearty meal, and don’t forget to include a revitalizing cucumber raita to balance out the heat! Enjoy your culinary adventure!
Fish En Papillote
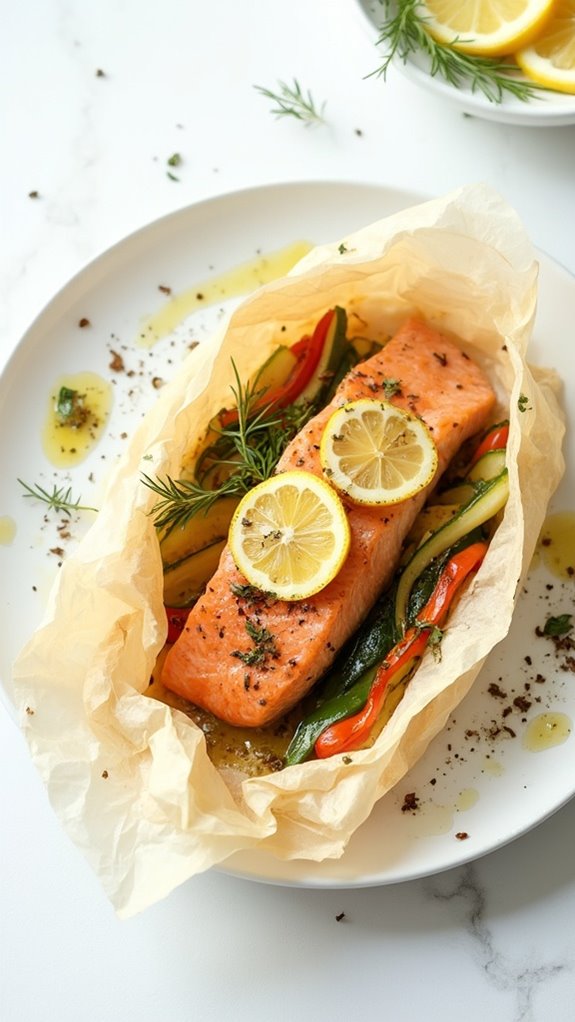
Title: Fish En Papillote
Prep Time: 15 minutes
Cook Time: 20 minutes
Number of Servings: 2
Required Equipment List: Parchment paper, baking sheet, knife, cutting board, oven
Cuisine Type: French
Fish En Papillote is a classic French cooking technique that translates to “fish in paper.” This method involves wrapping fish and vegetables in parchment paper, allowing them to steam in their own juices while locking in flavors and moisture. It’s a healthy and elegant dish that showcases the natural taste of the fish, enhanced by aromatic herbs and fresh vegetables.
The result is a tender, flaky fish that’s bursting with flavor, making it a perfect dish for special occasions or a simple weeknight dinner. The beauty of Fish En Papillote lies in its versatility. You can use any type of fish, such as salmon, cod, or tilapia, and customize the vegetables and herbs to suit your taste.
This cooking method isn’t only easy to prepare but also guarantees minimal cleanup, as each serving is neatly contained in its own packet. Serve with a side of rice or a light salad for a complete meal that’s as impressive as it’s delicious.
Ingredients:
- 2 fillets of fish (e.g., salmon, cod, or tilapia)
- 1 zucchini, thinly sliced
- 1 bell pepper, thinly sliced
- 1 small onion, thinly sliced
- 2 cloves garlic, minced
- 1 lemon, thinly sliced
- 2 tablespoons olive oil
- Fresh herbs (e.g., thyme, dill, or parsley)
- Salt and pepper to taste
Instructions:
- Preheat your oven to 400°F (200°C). While the oven is heating, prepare your parchment paper by cutting two large rectangles, about 12 inches long. These will be used to wrap the fish and vegetables.
- On each piece of parchment paper, layer the sliced zucchini, bell pepper, and onion in the center. This vegetable bed will provide flavor and moisture to the fish as it cooks.
- Place one fish fillet on top of the vegetable bed on each parchment rectangle. Season the fish with salt, pepper, and minced garlic. Add fresh herbs and a couple of lemon slices on top of each fillet to infuse the dish with aromatic flavors.
- Drizzle two tablespoons of olive oil over the fish and vegetables to enhance the cooking process. Next, fold the parchment paper over the fish and vegetables to create a sealed packet. Make sure to crimp the edges tightly to prevent steam from escaping.
- Place the packets on a baking sheet and bake in the preheated oven for about 20 minutes. The fish is done when it flakes easily with a fork and the vegetables are tender.
- Carefully remove the packets from the oven and allow them to rest for a minute before opening. Be cautious of the steam that will escape when you open the packets. Serve the fish directly in the parchment for an elegant presentation.
Extra Tips: To add extra flavor to your Fish En Papillote, consider incorporating other ingredients such as cherry tomatoes, olives, or capers into the vegetable mixture.
You can also experiment with different seasonings, like a splash of white wine or a sprinkle of red pepper flakes, to elevate the dish even further. This recipe is adaptable, so feel free to mix and match your favorite fish and vegetables for a personalized touch. Enjoy your delicious and healthy meal!
Fish and Vegetable Stir-Fry
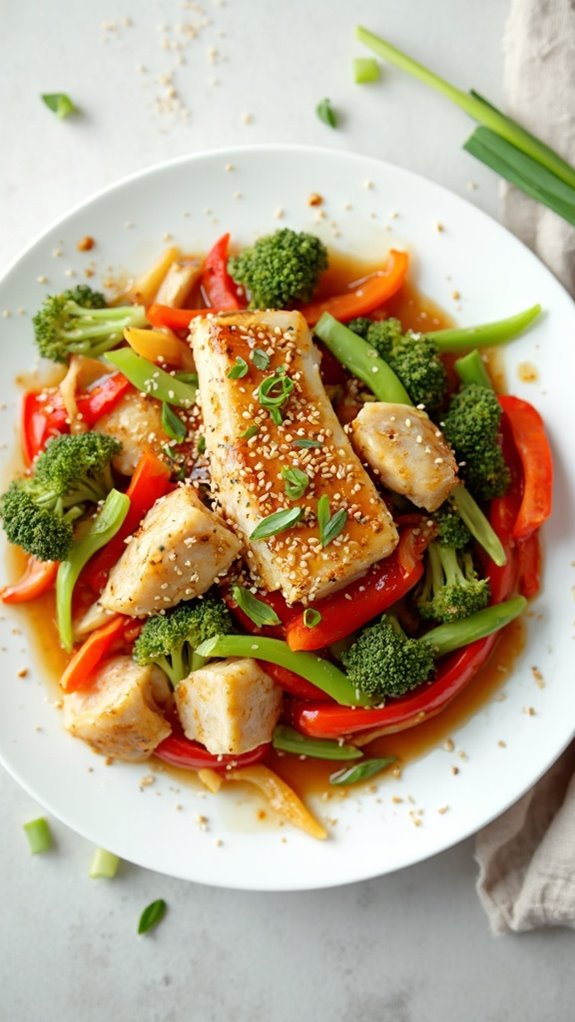
Title: Fish and Vegetable Stir-Fry
Prep Time: 15 minutes
Cook Time: 10 minutes
Number of Servings: 4
Required Equipment List: Wok or large skillet, spatula, cutting board, knife, measuring spoons
Cuisine Type: Asian
This Fish and Vegetable Stir-Fry is a quick and healthy dish that combines the delicate flavors of fish with a colorful array of vegetables, making it a perfect option for a light meal. The stir-frying method retains the nutrients of the vegetables while allowing the fish to absorb the vibrant flavors of the sauce and seasonings.
It’s an excellent choice for busy weeknights when you need something nutritious and satisfying on the table in no time. The beauty of this recipe lies in its versatility; you can use any firm white fish, such as cod or tilapia, and swap in your favorite seasonal vegetables.
With a simple stir-fry sauce made from soy sauce, ginger, and garlic, this dish packs a punch while remaining easy to prepare. Serve it over rice or noodles for a complete meal that your family will love.
Ingredients:
- 1 pound firm white fish (such as cod or tilapia), cut into bite-sized pieces
- 2 tablespoons vegetable oil
- 2 cups mixed vegetables (bell peppers, broccoli, snap peas, carrots)
- 2 cloves garlic, minced
- 1 tablespoon fresh ginger, minced
- 3 tablespoons soy sauce
- 1 tablespoon oyster sauce (optional)
- 1 teaspoon sesame oil
- Salt and pepper to taste
- Cooked rice or noodles for serving
Instructions:
- Begin by preparing all your ingredients. Cut the fish into bite-sized pieces and chop your vegetables into uniform sizes to guarantee even cooking. Mince the garlic and ginger, and set everything aside.
- Heat the vegetable oil in a wok or large skillet over medium-high heat. Once the oil is hot, add the fish pieces, seasoning them with salt and pepper. Cook the fish for about 3-4 minutes or until it starts to turn golden brown and is cooked through. Remove the fish from the pan and set it aside.
- In the same wok, add the minced garlic and ginger, stirring quickly to avoid burning. After about 30 seconds, add the mixed vegetables and stir-fry for 3-4 minutes until they’re tender-crisp.
- Return the cooked fish to the wok along with the soy sauce and oyster sauce (if using). Gently toss everything together to coat the fish and vegetables in the sauce. Cook for an additional 1-2 minutes until everything is heated through.
- Drizzle with sesame oil, give it a final toss, and taste for seasoning. Adjust with more salt or soy sauce if needed. Serve the stir-fry hot over cooked rice or noodles.
Extra Tips: For a more vibrant flavor, consider adding a splash of rice vinegar or a sprinkle of red pepper flakes for heat. You can also customize the vegetables based on what you have on hand or what’s in season, such as zucchini, bok choy, or mushrooms.
To save time, prep your ingredients in advance, and feel free to experiment with different types of fish or sauces to suit your taste preferences. Enjoy your healthy and colorful meal!
Garlic Butter Shrimp and Fish
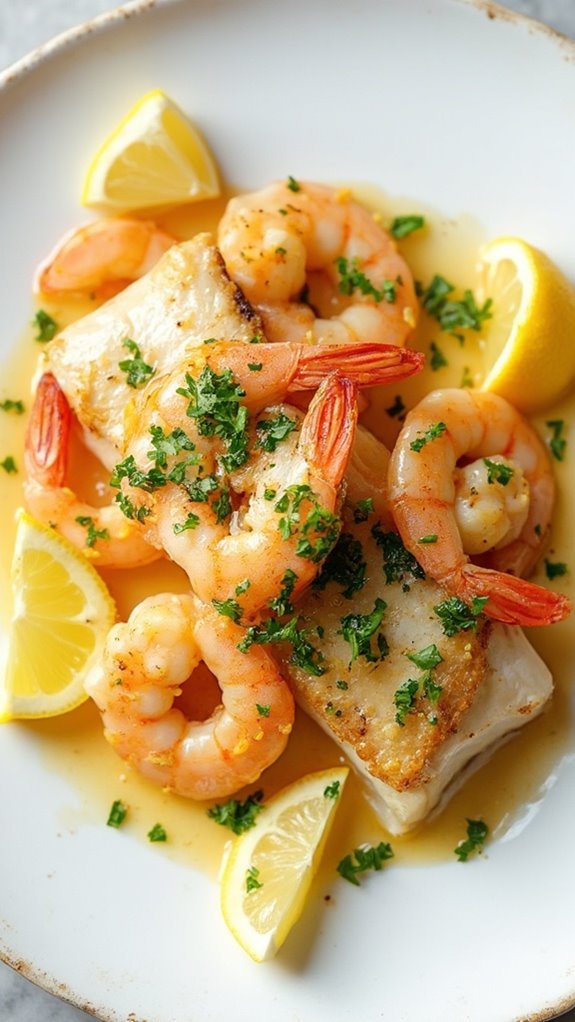
Title: Garlic Butter Shrimp and Fish
Prep Time: 10 minutes
Cook Time: 15 minutes
Number of Servings: 4
Required Equipment List: Large skillet, spatula, measuring spoons, serving plates
Cuisine Type: Seafood
Garlic Butter Shrimp and Fish is a delectable dish that brings the ocean’s flavors right to your dinner table. This recipe combines succulent shrimp and your choice of fish fillets, all sautéed in a rich garlic butter sauce that’s both aromatic and mouthwatering.
The simplicity of this dish makes it a perfect choice for a cozy family dinner or an impressive dish for entertaining guests. The combination of fresh herbs, lemon juice, and a touch of heat creates a symphony of flavors that complement the seafood beautifully.
What makes this dish stand out isn’t just the ease of preparation but also the versatility it offers. You can utilize whatever fish you have on hand, whether it’s tilapia, cod, or salmon, and adjust the seasonings to fit your personal taste.
Served over a bed of rice, pasta, or alongside a fresh salad, Garlic Butter Shrimp and Fish is sure to become a favorite in your household.
Ingredients:
- 1 pound shrimp, peeled and deveined
- 1 pound white fish fillets (such as tilapia or cod)
- 4 tablespoons unsalted butter
- 5 cloves garlic, minced
- 1 teaspoon red pepper flakes (optional)
- Juice of 1 lemon
- 1 tablespoon fresh parsley, chopped
- Salt and pepper to taste
Instructions:
- Begin by heating a large skillet over medium heat. Add the unsalted butter and let it melt, making sure it coats the bottom of the skillet evenly. The butter will provide a rich flavor base for the garlic and seafood.
- Once the butter has melted, add the minced garlic and red pepper flakes (if using) to the skillet. Sauté for about 1-2 minutes, or until the garlic becomes fragrant but not browned, as burnt garlic can impart a bitter taste.
- Next, gently add the shrimp to the skillet. Cook for about 2-3 minutes on each side, or until the shrimp turn pink and opaque. Be careful not to overcook them, as they can become tough.
- After the shrimp are cooked, add the fish fillets to the skillet, seasoning both the shrimp and fish with salt and pepper. Cook for an additional 3-4 minutes, flipping the fish halfway through, until the fish flakes easily with a fork.
- Squeeze the lemon juice over the shrimp and fish, and sprinkle with fresh parsley for a burst of freshness. Stir everything together gently to guarantee the flavors meld before removing from heat.
- Serve the Garlic Butter Shrimp and Fish immediately, either on its own or over a bed of rice, pasta, or with a side salad to complete the meal.
Extra Tips: To elevate the dish even further, consider adding a splash of white wine after sautéing the garlic for an added depth of flavor. If you prefer a creamier texture, you can stir in a bit of heavy cream at the end.
Adjust the amount of garlic and red pepper flakes to suit your taste, and feel free to garnish with lemon wedges for an extra pop of flavor!
Grilled Sardines With Chimichurri
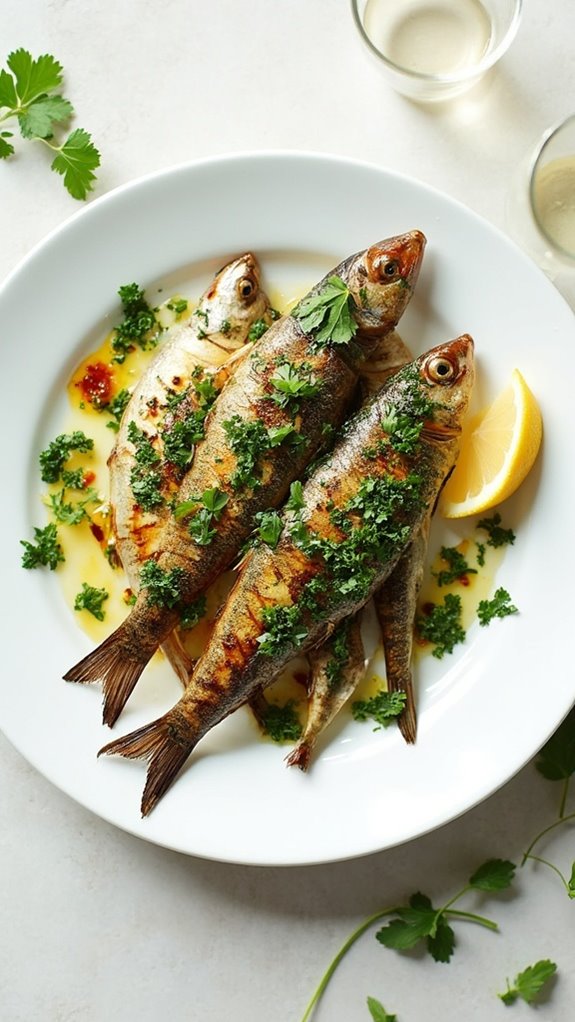
Title: Grilled Sardines With Chimichurri
Prep Time: 10 minutes
Cook Time: 10 minutes
Number of Servings: 4
Required Equipment List: Grill or grill pan, mixing bowl, whisk, tongs
Cuisine Type: Mediterranean
Grilled Sardines with Chimichurri is a simple yet flavorful dish that brings the taste of the Mediterranean right to your table. Sardines aren’t only delicious but also packed with omega-3 fatty acids, making them a healthy choice for any meal.
When grilled to perfection, their rich, oily flesh is complemented beautifully by the vibrant chimichurri sauce, which adds a zesty kick with its mix of herbs, garlic, and vinegar. This dish is perfect for a summer barbecue or a cozy dinner at home.
The beauty of this recipe lies in its simplicity. With just a few fresh ingredients, you can create a delightful dish that showcases the natural flavor of the sardines. The chimichurri can be made ahead of time, allowing the flavors to meld together, and the grilling process takes only minutes.
Serve these grilled sardines with a side of crusty bread or a fresh salad for a complete and satisfying meal.
Ingredients:
- 8 fresh sardines, cleaned and gutted
- Olive oil
- Salt and pepper to taste
- 1 cup fresh parsley, chopped
- 1/2 cup fresh cilantro, chopped
- 3 cloves garlic, minced
- 1/4 teaspoon red pepper flakes
- 1/4 cup red wine vinegar
- Zest and juice of 1 lemon
Instructions:
- Start by preheating your grill or grill pan over medium-high heat. While it heats up, pat the cleaned sardines dry with paper towels and drizzle them lightly with olive oil. Season with salt and pepper on both sides to enhance their natural flavor.
- In a mixing bowl, combine the chopped parsley, cilantro, minced garlic, red pepper flakes, red wine vinegar, lemon zest, and lemon juice. Whisk in a few tablespoons of olive oil until you achieve a sauce-like consistency. Adjust seasoning as needed and set aside to allow the flavors to develop.
- Once the grill is hot, place the sardines on the grill grates. Grill for about 3-4 minutes on each side, or until the skin is crispy and the fish is cooked through. Be careful when flipping them to avoid breaking the delicate fish.
- After grilling, remove the sardines from the grill and place them on a serving platter. Generously spoon the chimichurri sauce over the top of the sardines, allowing the vibrant flavors to soak into the fish.
- Serve the grilled sardines warm, garnished with additional herbs if desired, and enjoy with crusty bread or fresh vegetables to complement the meal.
Extra Tips: For the best flavor, try to use the freshest sardines you can find. If you can’t find fresh sardines, you can substitute with other types of small fish like mackerel or trout.
Keep an eye on the fish while grilling to prevent overcooking; they should be just opaque and flake easily. The chimichurri sauce can be made in advance and stored in the refrigerator for up to a week, making it a great versatile condiment for various grilled meats and vegetables. Enjoy your grilling experience!
Fish Ceviche With Avocado
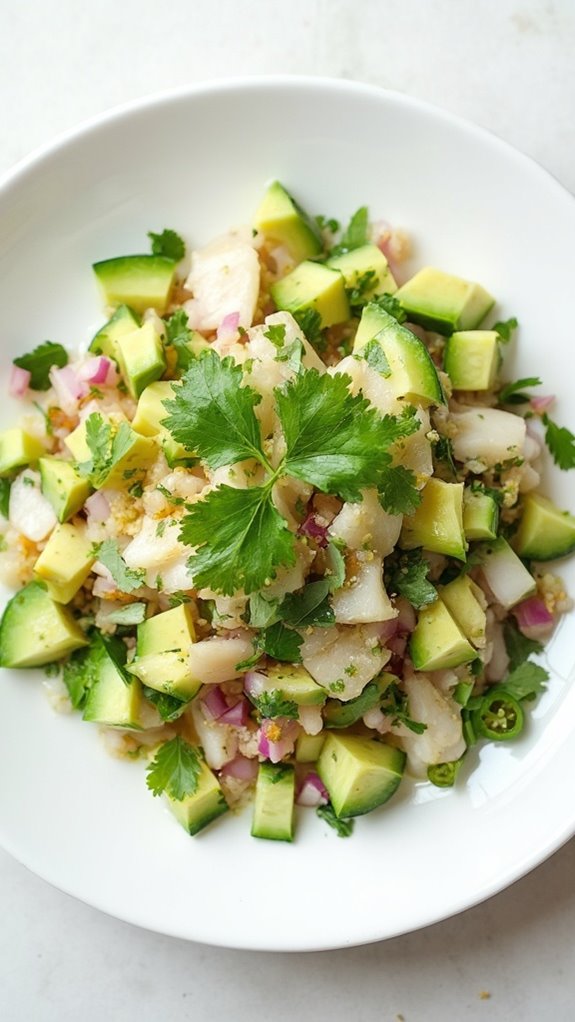
Title: Fish Ceviche With Avocado
Prep Time: 20 minutes
Cook Time: 0 minutes
Number of Servings: 4
Required Equipment List: Mixing bowl, knife, cutting board, serving dish
Cuisine Type: Latin American
Fish Ceviche With Avocado is a revitalizing and vibrant dish that captures the essence of coastal cuisine. This no-cook recipe features fresh fish marinated in zesty lime juice, which “cooks” the fish, giving it a tender texture and vibrant flavor. The addition of creamy avocado adds richness and balances the tanginess of the citrus, making this ceviche a perfect appetizer or light meal to celebrate New Year’s Day or any festive occasion.
The beauty of this dish lies in its simplicity and the use of high-quality, fresh ingredients. You can customize the recipe by adding your favorite vegetables, like diced tomatoes and red onion, or adjusting the level of heat with jalapeños.
Serve the ceviche chilled, garnished with cilantro and tortilla chips for a delightful crunch, and you’ll have a dish that’s sure to impress your guests.
Ingredients:
- 1 pound fresh white fish (such as snapper or tilapia), diced
- 1 cup fresh lime juice
- 1 avocado, diced
- 1/2 red onion, finely chopped
- 1 cup diced cucumber
- 1-2 jalapeños, seeded and minced (optional)
- Salt and pepper to taste
- Fresh cilantro, chopped (for garnish)
Instructions:
- Begin by preparing the fish. Dice the fresh white fish into small, bite-sized pieces and place it in a mixing bowl. Pour the fresh lime juice over the fish, ensuring that all pieces are submerged. Cover the bowl and let it marinate in the refrigerator for at least 15 minutes. The acidity from the lime juice will “cook” the fish.
- While the fish is marinating, prepare the other ingredients. Finely chop the red onion, dice the cucumber, and, if using, prepare the jalapeños by seeding and mincing them. Set these aside in a separate bowl for later.
- Once the fish has marinated for 15 minutes, remove it from the refrigerator. You should notice that the fish has turned opaque, indicating it’s “cooked.” Gently fold in the diced avocado, red onion, cucumber, and jalapeños to the fish mixture, being careful not to mash the avocado.
- Season the ceviche with salt and pepper to taste, mixing gently to combine all the ingredients without breaking up the avocado too much. If desired, add a bit more lime juice for extra flavor.
- Serve the ceviche immediately in a chilled serving dish, garnished with fresh cilantro. Accompany with tortilla chips for a delightful crunch and enjoy!
Extra Tips: For the best flavor, always use the freshest fish possible, and if you can, source it from a reliable fish market. You can also substitute lime juice with lemon juice for a different flavor profile.
Feel free to experiment with additional ingredients such as mango or pineapple for a tropical twist. This dish is best served fresh, so try to make it just before your guests arrive for the ultimate taste experience!
Smoked Salmon and Cream Cheese
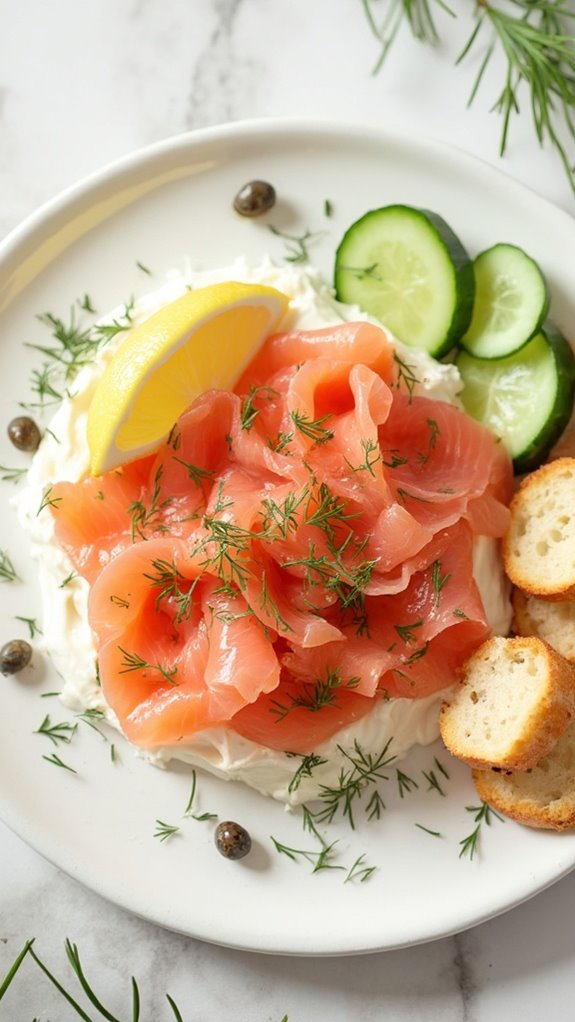
Title: Smoked Salmon and Cream Cheese
Prep Time: 10 minutes
Cook Time: 0 minutes
Number of Servings: 4
Required Equipment List: Serving platter, knife, cutting board, small bowl
Cuisine Type: American
Smoked Salmon and Cream Cheese is a classic appetizer that brings elegance to any gathering, especially on New Year’s Day. The combination of rich, velvety cream cheese and the delicate, smoky flavor of the salmon creates a delightful contrast that’s both satisfying and invigorating.
This dish isn’t only easy to prepare but also visually appealing, making it a perfect addition to your celebration table. This recipe allows for creativity and customization with various accompaniments, such as capers, dill, or fresh herbs.
It can be served on bagels, crackers, or even cucumber slices, offering a variety of textures and flavors. Whether you’re hosting a party or simply enjoying a quiet meal at home, Smoked Salmon and Cream Cheese is sure to impress your guests and elevate your dining experience.
Ingredients:
- 8 ounces smoked salmon, sliced
- 8 ounces cream cheese, softened
- 1 tablespoon capers (optional)
- 1 tablespoon fresh dill or chives, chopped (optional)
- 1 tablespoon lemon juice
- Fresh bagels, crackers, or cucumber slices for serving
Instructions:
- Start by placing the softened cream cheese in a small bowl. Add in the lemon juice and mix until well combined and smooth. This will enhance the flavor of the cream cheese and make it easier to spread.
- On a serving platter, spread the cream cheese mixture evenly. If desired, you can create a decorative swirl or pattern for added visual appeal.
- Carefully layer the smoked salmon slices over the cream cheese, ensuring even coverage. You can fold the salmon slices for a more elegant presentation.
- If using, sprinkle capers and fresh dill or chives over the top of the salmon for added flavor and garnish. These ingredients complement the richness of the salmon and cream cheese beautifully.
- Serve with your choice of bagels, crackers, or cucumber slices. Encourage guests to create their own bites by spreading cream cheese on the base of their choice and topping it with a piece of smoked salmon.
Extra Tips: For an added layer of flavor, consider seasoning the cream cheese mixture with freshly cracked black pepper or a pinch of smoked paprika.
If you’re hosting a larger gathering, you can also make a smoked salmon platter with an assortment of toppings such as sliced red onions, capers, and lemon wedges for guests to personalize their servings. Enjoy this elegant dish as a delightful start to your New Year’s celebration!
Fish Kebab With Yogurt Sauce
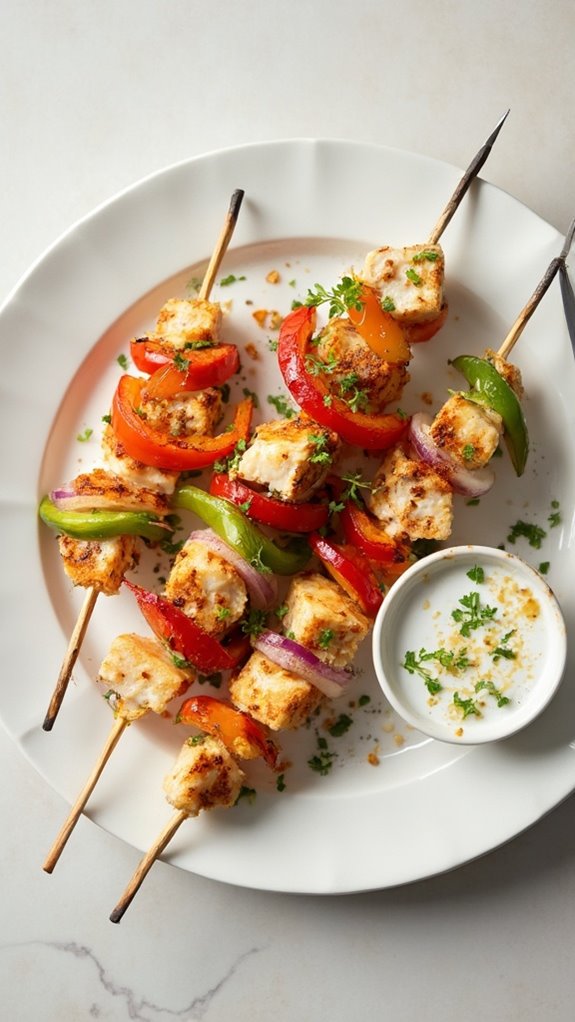
Title: Fish Kebab With Yogurt Sauce
Prep Time: 15 minutes
Cook Time: 10 minutes
Number of Servings: 4
Required Equipment List: Skewers, grill or grill pan, mixing bowl, whisk, knife, cutting board
Cuisine Type: Middle Eastern
Fish Kebab with Yogurt Sauce is a vibrant and flavorful dish that brings together the freshness of fish and the creaminess of yogurt. Marinated in a blend of spices and herbs, the fish is skewered and grilled to perfection, resulting in tender and juicy kebabs that are easy to prepare.
Served with a revitalizing yogurt sauce, this dish makes for a perfect appetizer or main course for any gathering, especially on New Year’s Day. This recipe is versatile and allows for the use of various types of fish, such as salmon, tilapia, or swordfish, depending on your preference.
The yogurt sauce, infused with garlic, lemon, and fresh herbs, complements the smoky flavors from the grill and adds a cooling element to the dish. Whether enjoyed with pita bread, alongside a fresh salad, or on its own, these fish kebabs are sure to be a hit at your table.
Ingredients:
- 1 pound firm white fish (such as cod or halibut), cut into 1-inch cubes
- 2 tablespoons olive oil
- 1 teaspoon cumin
- 1 teaspoon paprika
- 1 teaspoon garlic powder
- Salt and pepper to taste
- 4 skewers (if using wooden skewers, soak in water for 30 minutes)
- 1 cup plain yogurt
- 1 tablespoon lemon juice
- 1 clove garlic, minced
- 2 tablespoons chopped fresh parsley or dill
Instructions:
- In a mixing bowl, combine the olive oil, cumin, paprika, garlic powder, salt, and pepper. Add the fish cubes and toss gently to coat them evenly in the marinade. Let the fish marinate for about 10 minutes while you prepare the yogurt sauce.
- In another bowl, whisk together the plain yogurt, lemon juice, minced garlic, and chopped parsley or dill until well combined. Season with salt to taste and set aside in the refrigerator to keep it cool.
- Preheat your grill or grill pan over medium-high heat. Thread the marinated fish cubes onto the soaked skewers, leaving a little space between each piece for even cooking.
- Once the grill is hot, place the skewers on it and cook for about 3-4 minutes on each side, or until the fish is cooked through and has nice grill marks. Be careful not to overcook the fish, as it can become dry.
- Remove the skewers from the grill and let them rest for a minute before serving. Serve the fish kebabs with the yogurt sauce on the side for dipping and garnish with additional herbs if desired.
Extra Tips: For added flavor, consider incorporating vegetables such as bell peppers, onions, or zucchini on the skewers alongside the fish. This not only enhances the presentation but also adds a variety of textures and flavors to the dish.
If you’re short on time, you can also use store-bought tzatziki sauce as a quick alternative to the homemade yogurt sauce. Enjoy your delicious fish kebabs with a side of warm pita or a fresh salad!
Citrus Glazed Tilapia
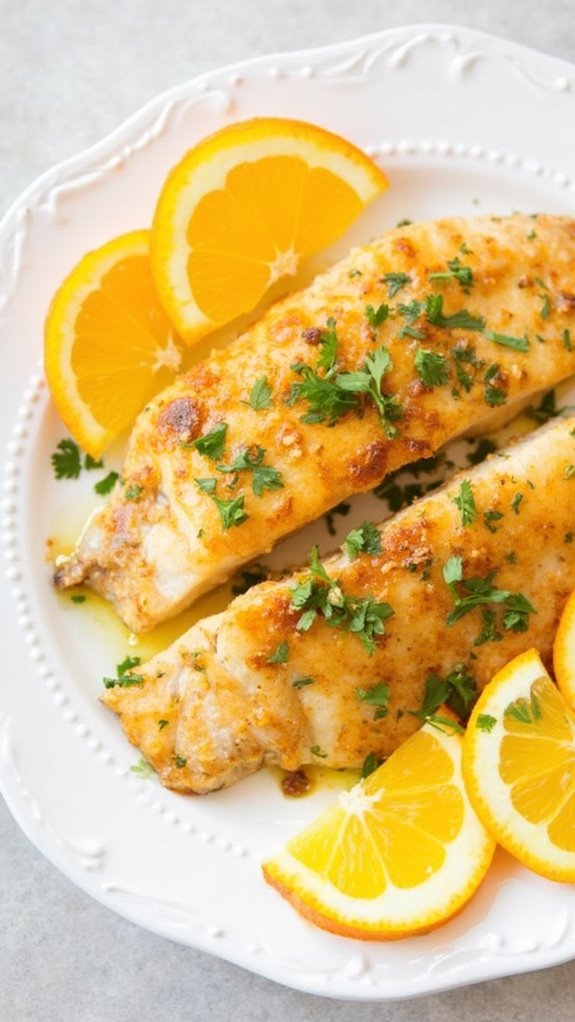
Title: Citrus Glazed Tilapia
Prep Time: 10 minutes
Cook Time: 15 minutes
Number of Servings: 4
Required Equipment List: Skillet, measuring cups, measuring spoons, spatula, serving plate
Cuisine Type: American
Citrus Glazed Tilapia is a vibrant and invigorating dish that brings the flavors of the sea to your dinner table with a zesty twist. The mild, flaky tilapia fillets are perfectly complemented by a bright citrus glaze made from fresh orange and lemon juice, along with a hint of honey for sweetness.
This dish isn’t only quick to prepare but also healthy, making it an excellent choice for a weeknight meal or a special occasion. The combination of citrus and honey creates a delightful balance of sweet and tangy flavors, while the tilapia cooks to a tender perfection in just minutes.
Pair this dish with a side of steamed vegetables or a light salad to round out your meal. Whether you’re a seafood lover or just looking to try something new, Citrus Glazed Tilapia is sure to become a favorite in your household.
Ingredients:
- 4 tilapia fillets
- 1/4 cup fresh orange juice
- 2 tablespoons fresh lemon juice
- 2 tablespoons honey
- 1 tablespoon olive oil
- Salt and pepper to taste
- Fresh parsley, chopped (for garnish)
Instructions:
- In a small bowl, whisk together the fresh orange juice, lemon juice, honey, salt, and pepper until well combined. This citrus glaze will add a burst of flavor to the tilapia as it cooks.
- Heat the olive oil in a skillet over medium heat. Once the oil is hot, carefully add the tilapia fillets to the skillet, cooking for about 3-4 minutes on each side until the fish is golden brown and flakes easily with a fork.
- Once the tilapia is nearly cooked through, pour the citrus glaze over the fish in the skillet. Allow the glaze to simmer for an additional 2-3 minutes, letting the flavors meld and the glaze thicken slightly.
- Remove the skillet from the heat and transfer the glazed tilapia to a serving plate. Spoon any remaining glaze from the skillet over the top of the fish for added flavor.
- Garnish the tilapia with freshly chopped parsley before serving. This will add a pop of color and a hint of freshness to the dish.
Extra Tips: For an added depth of flavor, consider marinating the tilapia in the citrus glaze for 30 minutes before cooking. This will allow the fish to absorb more of the zesty flavors.
Additionally, feel free to experiment with other fresh herbs like thyme or dill for a different herbal note. This dish pairs wonderfully with quinoa or wild rice, making it a versatile option for any meal. Enjoy your Citrus Glazed Tilapia!
Conclusion
So, as you whip up these delicious fish recipes for New Year’s Day, just remember: nothing says “wealth and abundance” quite like a plate of grilled salmon! Who knew that diving into a fish feast could be your secret to prosperity? While you might not find a treasure chest under your kitchen sink, at least you’ll have a tasty meal to enjoy. So go ahead, get cooking, and may your year be as rich as the flavors on your plate!

