No products in the cart.
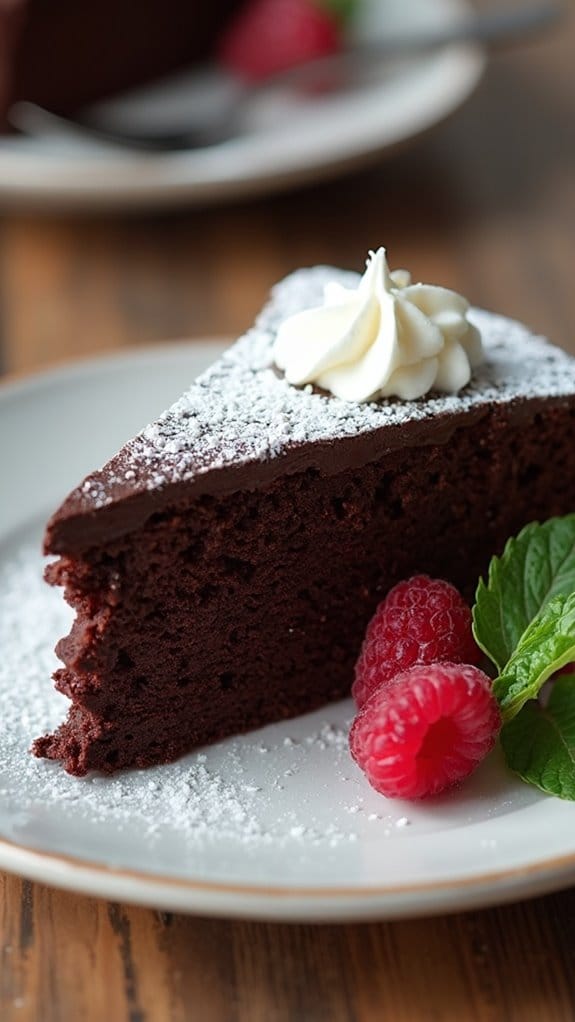
20 Shabbat Dinner Recipes To Celebrate Tradition
Are you ready to impress your family this Shabbat? With these 20 Shabbat dinner recipes, you can create unforgettable meals! Start with warm, homemade Challah Bread and flavorful Savory Brisket. Don’t forget the classic Chicken Soup With Matzo Balls to bring everyone together. Spice things up with Honey-Glazed Roast Chicken or traditional Stuffed Cabbage Rolls. For dessert, why not try Apple Strudel or Flourless Chocolate Cake? These dishes not only celebrate tradition, but they also spark joy among loved ones. Curious to discover more irresistible recipes and serving tips? Let’s explore the delicious possibilities to make your Shabbat special!
Contents
hide
Classic Challah Bread
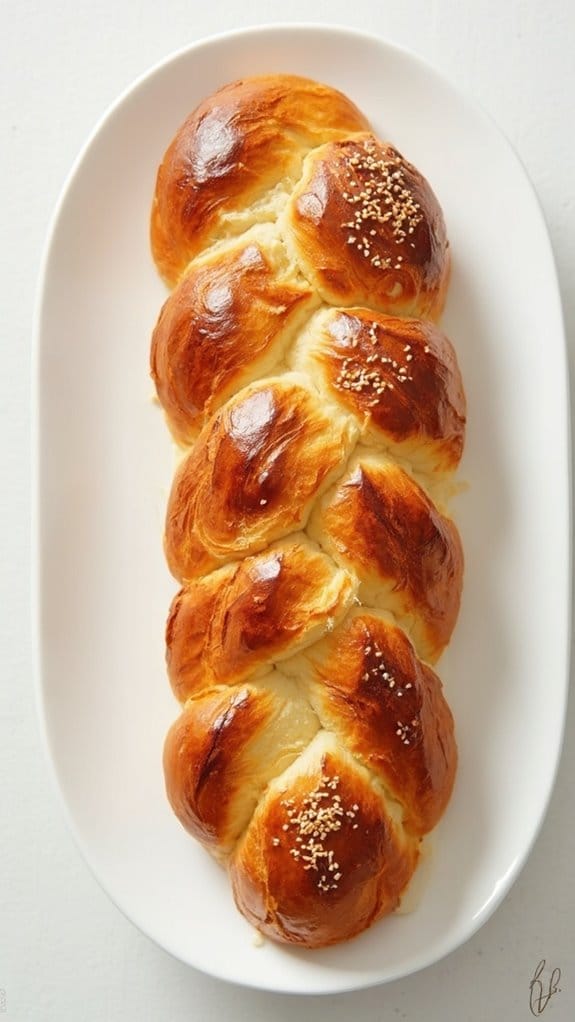
Title: Classic Challah Bread
Prep Time: 30 minutes
Cook Time: 30 minutes
Number of Servings: 12
Required Equipment List: Large mixing bowl, whisk, measuring cups, measuring spoons, baking sheet, parchment paper, oven
Cuisine Type: Jewish
Classic Challah bread is a beautifully braided loaf that’s both soft and slightly sweet, making it a cherished part of Jewish tradition, especially during Shabbat and holidays. The texture is light and fluffy, with a golden-brown crust that delights the senses.
This bread isn’t just a staple for the dinner table; it can also be used for French toast, bread pudding, or simply enjoyed with butter and jam. The process of making Challah involves a few key steps, including kneading the dough, allowing it to rise, and braiding the strands before baking.
While it may seem intimidating at first, the braiding technique can be mastered with practice, resulting in a striking centerpiece for any meal. The rich flavor of this bread comes from the use of eggs and honey, which lend a beautiful color and a hint of sweetness, making it irresistible.
Ingredients:
- 4 cups all-purpose flour
- 1 cup warm water
- 1/3 cup honey
- 1/4 cup vegetable oil
- 2 large eggs
- 1 tablespoon instant yeast
- 1 teaspoon salt
- 1 egg (for egg wash)
- Sesame seeds or poppy seeds (for topping, optional)
Instructions:
- In a large mixing bowl, combine the warm water, honey, and instant yeast. Let it sit for about 5 minutes until it becomes frothy, which indicates that the yeast is active.
- In another bowl, whisk together the eggs and vegetable oil. Once combined, add this mixture to the yeast mixture and stir well.
- Gradually add the flour and salt to the wet ingredients, mixing until a dough forms. You may need to use your hands to bring the dough together fully.
- Knead the dough on a floured surface for about 10 minutes, or until it’s smooth and elastic. Place the kneaded dough in a lightly oiled bowl, cover it with a damp cloth, and let it rise in a warm place for about 1-2 hours, or until it has doubled in size.
- Once the dough has risen, punch it down to release the air. Divide it into three equal pieces to create a three-strand braid. Roll each piece into long ropes, about 12-15 inches long.
- Braid the three strands together, pinching the ends to seal them. Place the braided loaf on a baking sheet lined with parchment paper, cover it, and let it rise again for about 30 minutes.
- Preheat your oven to 350°F (175°C). Brush the top of the loaf with the beaten egg for a shiny finish, and sprinkle sesame or poppy seeds on top if desired.
- Bake the Challah in the preheated oven for 25-30 minutes or until the bread is golden brown and sounds hollow when tapped on the bottom.
Extra Tips: For a richer flavor, you can replace some of the water with milk or add vanilla extract to the dough. If you want to experiment with different flavors, consider adding dried fruits or nuts to the dough before braiding.
To keep the bread fresh, store it in an airtight container at room temperature for a few days or freeze it for longer storage. Enjoy your Challah as part of your Shabbat dinner or any special occasion!
Savory Brisket
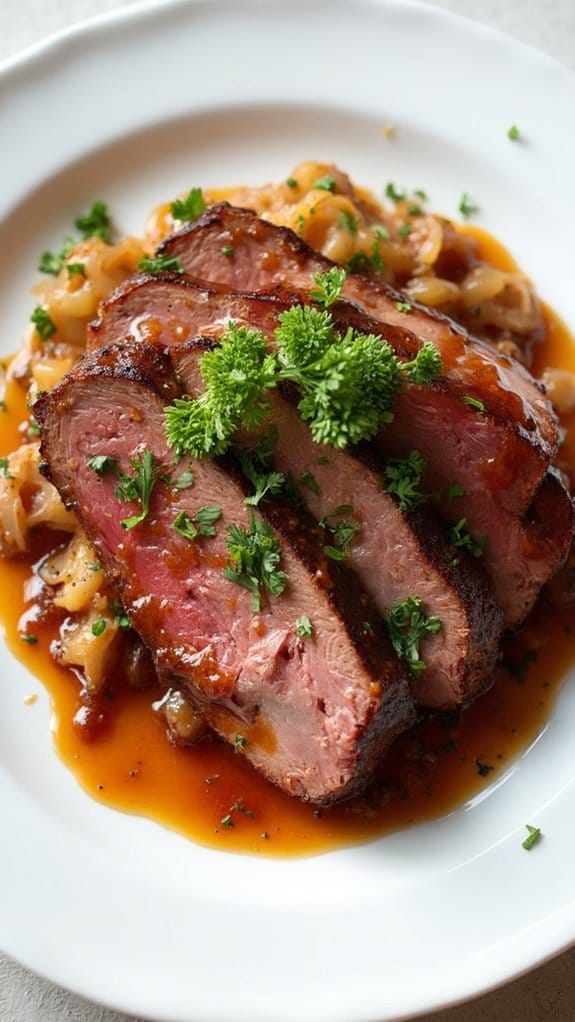
Title: Savory Brisket
Prep Time: 20 minutes
Cook Time: 300 minutes
Number of Servings: 8
Required Equipment List: Large roasting pan, heavy-duty aluminum foil, sharp knife, cutting board, serving platter
Cuisine Type: Jewish-American
Savory brisket is a classic dish that brings warmth and comfort to any Shabbat dinner table. This slow-cooked beef dish is known for its tender, melt-in-your-mouth texture and rich, savory flavors that develop over hours of cooking. The combination of spices, onions, and a hint of sweetness from the brown sugar creates a mouthwatering glaze that enhances the natural flavor of the beef. Perfectly paired with roasted vegetables or traditional sides like kugel, this brisket is sure to be the highlight of your meal.
The beauty of this brisket recipe lies in its simplicity and ability to feed a crowd. As it cooks, the aromas fill your kitchen, making it an inviting spot for family and friends to gather. While the preparation is minimal, the results are spectacular, allowing you to spend more time with your loved ones and less time in the kitchen. With the right seasoning and patience, this savory brisket will become a cherished staple at your Shabbat dinners for years to come.
Ingredients:
- 4-5 pounds beef brisket
- 2 large onions, sliced
- 4 cloves garlic, minced
- 2 cups beef broth
- 1 cup tomato sauce
- 1/4 cup brown sugar
- 2 tablespoons soy sauce
- 2 tablespoons Worcestershire sauce
- 1 tablespoon paprika
- 1 tablespoon dried thyme
- Salt and pepper to taste
- Fresh parsley (for garnish)
Instructions:
- Preheat your oven to 325°F (163°C). Start by seasoning the brisket generously with salt, pepper, and paprika on both sides. This will help to build a flavorful crust as it cooks.
- In a large roasting pan, arrange the sliced onions and minced garlic in an even layer. Place the seasoned brisket on top of the onions, fat side up. This will allow the fat to baste the meat as it cooks, keeping it moist and flavorful.
- In a separate bowl, mix together the beef broth, tomato sauce, brown sugar, soy sauce, Worcestershire sauce, and dried thyme. Pour this mixture over the brisket, ensuring that the meat is well-coated and that some of the liquid seeps down to the onions.
- Cover the roasting pan tightly with heavy-duty aluminum foil to trap in moisture. This is essential for tenderizing the brisket during the long cooking process. Place the pan in the preheated oven and cook for about 4-5 hours, or until the brisket is fork-tender.
- Once cooked, remove the brisket from the oven and let it rest for about 20 minutes before slicing. This allows the juices to redistribute, ensuring a moist and flavorful brisket. Slice against the grain for the best texture.
- Serve the brisket on a platter, spooning some of the sauce and onions over the top. Garnish with fresh parsley for a pop of color and enjoy with your favorite sides.
Extra Tips: To enhance the flavor even further, consider marinating the brisket overnight in the spice mixture and broth before cooking. This will allow the meat to absorb the flavors deeply.
If you have leftovers, they make for excellent sandwiches the next day. For a more intense flavor, you can add a splash of red wine to the cooking liquid or experiment with different herbs like rosemary or bay leaves. Enjoy your savory brisket at your Shabbat dinner!
Chicken Soup With Matzo Balls
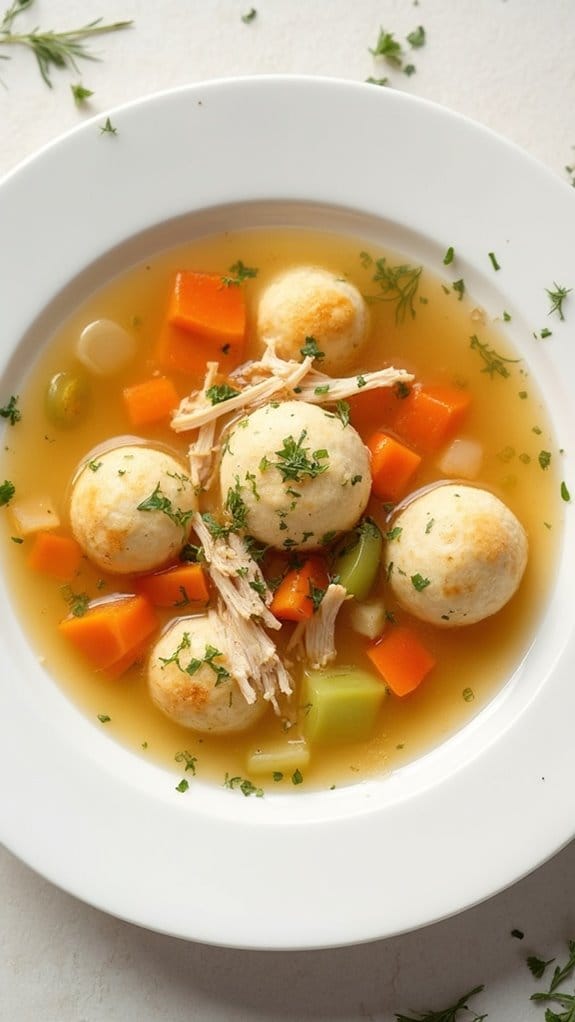
Title: Chicken Soup With Matzo Balls
Prep Time: 30 minutes
Cook Time: 90 minutes
Number of Servings: 6
Required Equipment List: Large pot, mixing bowl, whisk, spoon, slotted spoon, ladle
Cuisine Type: Jewish
Chicken Soup with Matzo Balls is a comforting and classic dish that warms the soul and brings family together, often served during Shabbat and holidays. This hearty soup features tender chunks of chicken simmered with aromatic vegetables, creating a rich and flavorful broth. The matzo balls, made from matzo meal, eggs, and fat, add a delightful texture that perfectly complements the soup. Together, they create a dish that isn’t only satisfying but also steeped in tradition.
The beauty of this recipe lies in its simplicity and the ability to adapt it to your taste. You can easily customize the soup by adding your favorite vegetables, herbs, or spices. Whether enjoyed on a chilly night or as part of a festive meal, this Chicken Soup with Matzo Balls is sure to become a beloved staple in your home, bringing warmth and joy to any gathering.
Ingredients:
- 1 whole chicken (3-4 pounds)
- 8 cups water
- 2 carrots, diced
- 2 celery stalks, diced
- 1 onion, quartered
- 4 cloves garlic, minced
- 1 bay leaf
- Salt and pepper to taste
- 1 cup matzo meal
- 4 large eggs
- 1/4 cup vegetable oil or melted chicken fat
- 1/4 cup water (for matzo balls)
- Fresh dill or parsley (for garnish)
Instructions:
- In a large pot, combine the whole chicken, water, diced carrots, diced celery, quartered onion, minced garlic, bay leaf, and season with salt and pepper. Bring the mixture to a boil over medium-high heat. Once boiling, reduce the heat to low and let it simmer for about 1 hour, skimming any foam that rises to the surface.
- After an hour, remove the chicken from the pot and set it aside to cool slightly. Strain the broth to remove the vegetables and bay leaf, then return the clear broth to the pot. Shred the chicken meat, discarding the skin and bones, and add the shredded chicken back into the broth. Keep the soup on low heat while you prepare the matzo balls.
- In a mixing bowl, combine the matzo meal, eggs, vegetable oil or chicken fat, water, and a pinch of salt. Mix until well combined and let the mixture rest for 30 minutes in the refrigerator. This resting period helps the matzo balls hold their shape during cooking.
- After resting, bring a separate pot of salted water to a gentle simmer. Wet your hands and shape the matzo meal mixture into balls, about 1 inch in diameter. Carefully drop the matzo balls into the simmering water. Cover the pot and cook for about 20 minutes, or until the matzo balls are puffed and cooked through.
- Once the matzo balls are done, use a slotted spoon to transfer them to the pot with the chicken soup. Allow the soup to simmer for an additional 10 minutes to meld the flavors together. Taste and adjust seasoning if needed.
- Serve the chicken soup hot, garnished with freshly chopped dill or parsley. Ladle the soup and matzo balls into bowls, and enjoy the comforting flavors of this traditional dish.
Extra Tips: For extra flavor, consider adding a few sprigs of fresh thyme or parsley to the broth while it simmers. If you prefer lighter matzo balls, you can add a splash of seltzer water to the mixture before shaping them. Additionally, feel free to add other vegetables like parsnips or zucchini for added nutrition and flavor.
This dish can be made ahead of time and freezes well, making it perfect for meal prep. Enjoy this delightful and heartwarming soup with your loved ones!
Honey-Glazed Roast Chicken
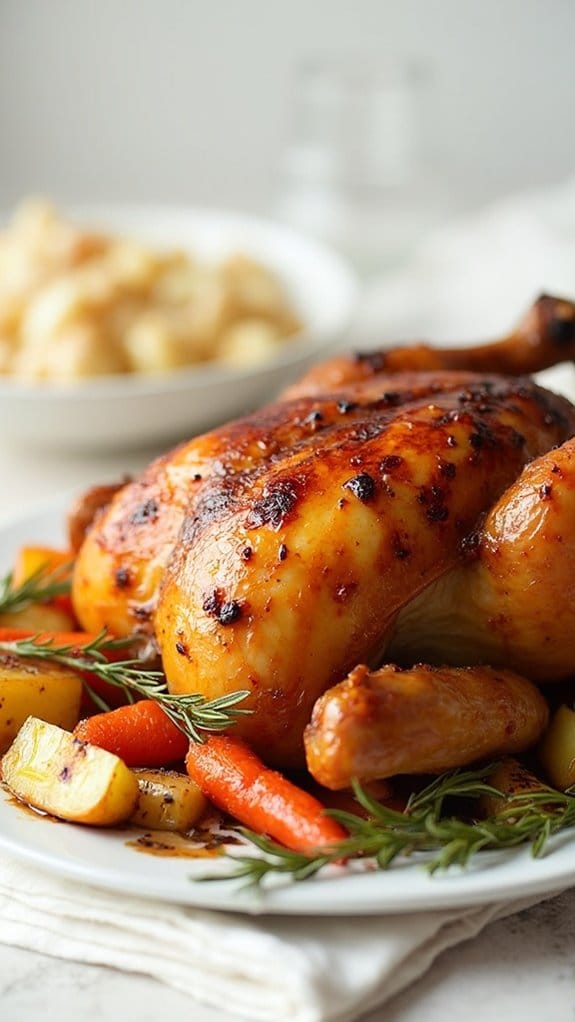
Title: Honey-Glazed Roast Chicken
Prep Time: 15 minutes
Cook Time: 1 hour 15 minutes
Number of Servings: 6
Required Equipment List: Roasting pan, basting brush, meat thermometer, cutting board, knife
Cuisine Type: Jewish-American
Honey-Glazed Roast Chicken is a classic dish that brings warmth and comfort to any Shabbat dinner table. This recipe features a beautifully roasted chicken coated in a sweet and sticky honey glaze, perfectly balanced with garlic and fresh herbs. The result is a tender and juicy chicken with a crispy skin that’s bursting with flavor, making it a centerpiece worthy of any festive occasion.
This dish not only pleases the palate but also fills the home with an irresistible aroma as it cooks. The honey glaze caramelizes beautifully in the oven, creating a delightful contrast between the sweetness of the honey and the savory flavors of the chicken. Serve it alongside roasted vegetables or fluffy potatoes for a complete and satisfying meal that will have your guests raving.
Ingredients:
- 1 whole chicken (about 4-5 pounds)
- 1/2 cup honey
- 1/4 cup soy sauce
- 4 cloves garlic, minced
- 2 tablespoons Dijon mustard
- 1 tablespoon olive oil
- 1 teaspoon salt
- 1/2 teaspoon black pepper
- Fresh herbs (such as thyme or rosemary, for garnish)
Instructions:
- Preheat your oven to 375°F (190°C). Pat the chicken dry with paper towels to guarantee a crispy skin during roasting. Place the chicken in a roasting pan, breast side up, and season generously with salt and pepper both inside and out.
- In a small bowl, whisk together the honey, soy sauce, minced garlic, Dijon mustard, and olive oil until well combined. This glaze will infuse the chicken with flavor and create a beautiful finish.
- Brush about half of the honey mixture over the chicken, making sure to coat it evenly. Reserve the remaining glaze for basting later in the cooking process. Insert a meat thermometer into the thickest part of the thigh, being careful not to touch the bone.
- Roast the chicken in the preheated oven for 1 hour. After 30 minutes, baste the chicken with the reserved glaze to enhance the flavor and promote even browning. Continue roasting until the thermometer registers 165°F (74°C).
- Once the chicken is cooked through, remove it from the oven and let it rest for 10-15 minutes before carving. This resting period allows the juices to redistribute, guaranteeing a moist and flavorful serving.
- Carve the chicken and arrange it on a serving platter. Drizzle any remaining pan juices over the top and garnish with fresh herbs for a pop of color. Serve warm and enjoy the delicious flavors of this honey-glazed roast chicken.
Extra Tips: For added depth of flavor, consider marinating the chicken in the honey glaze for a few hours or overnight in the refrigerator before roasting. This will allow the flavors to penetrate the meat more thoroughly.
Additionally, you can add vegetables like carrots and potatoes around the chicken in the roasting pan for a complete one-pan meal that soaks up all the delicious drippings. Enjoy your delightful Shabbat dinner!
Stuffed Cabbage Rolls
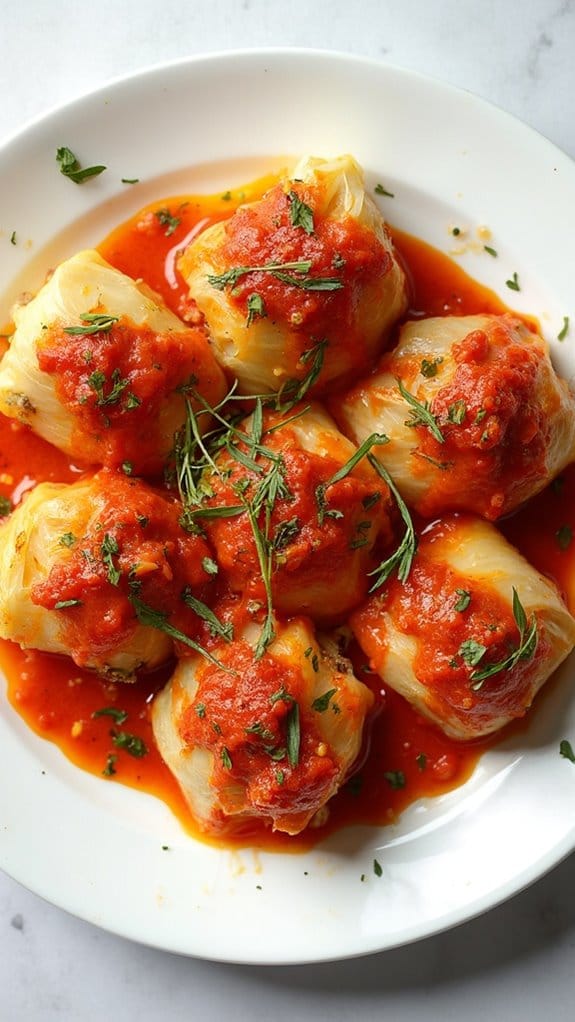
Title: Stuffed Cabbage Rolls
Prep Time: 30 minutes
Cook Time: 90 minutes
Number of Servings: 6
Required Equipment List: Large pot, mixing bowl, baking dish, foil, knife, cutting board
Cuisine Type: Eastern European
Stuffed cabbage rolls are a comforting and hearty dish, perfect for family gatherings or a cozy dinner at home. This recipe features tender cabbage leaves filled with a savory mixture of ground meat, rice, and spices, all simmered in a delectable tomato sauce. The combination of flavors melds beautifully as the cabbage cooks, resulting in a dish that’s both satisfying and full of warmth.
These rolls aren’t only delicious but also quite versatile. You can easily customize the filling with different types of meat or grains, depending on your dietary preferences. They can be made ahead of time and refrigerated or frozen, making them an excellent option for meal prep. Serve them with a dollop of sour cream or a sprinkle of fresh herbs for an extra touch.
Ingredients:
- 1 large head of cabbage
- 1 pound ground beef or turkey
- 1 cup cooked rice
- 1 small onion, finely chopped
- 2 cloves garlic, minced
- 1 egg, beaten
- 1 teaspoon paprika
- Salt and pepper to taste
- 2 cups tomato sauce
- 1 tablespoon olive oil
- 1 teaspoon dried oregano
Instructions:
- Begin by preparing the cabbage. Bring a large pot of salted water to a boil. Carefully remove the core of the cabbage and gently place the head in the boiling water. Blanch the cabbage for about 5 minutes, or until the leaves are pliable. Remove the cabbage from the pot and let it cool slightly before peeling off the leaves.
- In a mixing bowl, combine the ground meat, cooked rice, chopped onion, minced garlic, beaten egg, paprika, salt, and pepper. Mix well until all ingredients are thoroughly combined. This will be the filling for your cabbage rolls.
- Preheat your oven to 350°F (175°C). Prepare a baking dish by spreading a thin layer of tomato sauce on the bottom. Take one cabbage leaf, place about 2 tablespoons of the meat mixture at the base, and roll it up tightly, folding in the sides as you go. Repeat this process with the remaining leaves and filling.
- Place the stuffed cabbage rolls seam-side down in the prepared baking dish. Once all rolls are in place, pour the remaining tomato sauce over the top. Drizzle with olive oil and sprinkle dried oregano for added flavor. Cover the dish with foil.
- Bake in the preheated oven for about 60-75 minutes, or until the meat is cooked through and the cabbage is tender. Remove the foil during the last 15 minutes of baking for a slightly caramelized top.
- Once cooked, let the cabbage rolls rest for a few minutes before serving. They can be garnished with fresh herbs or a dollop of sour cream, if desired.
Extra Tips: To make the rolling process easier, you can freeze the cabbage head for a few hours before using it. This will make the leaves more pliable and easier to work with.
If you want to add a bit of sweetness to the dish, consider stirring a tablespoon of brown sugar into the tomato sauce. Leftover cabbage rolls can be stored in the fridge for up to three days or frozen for later enjoyment.
Herb-Crusted Salmon
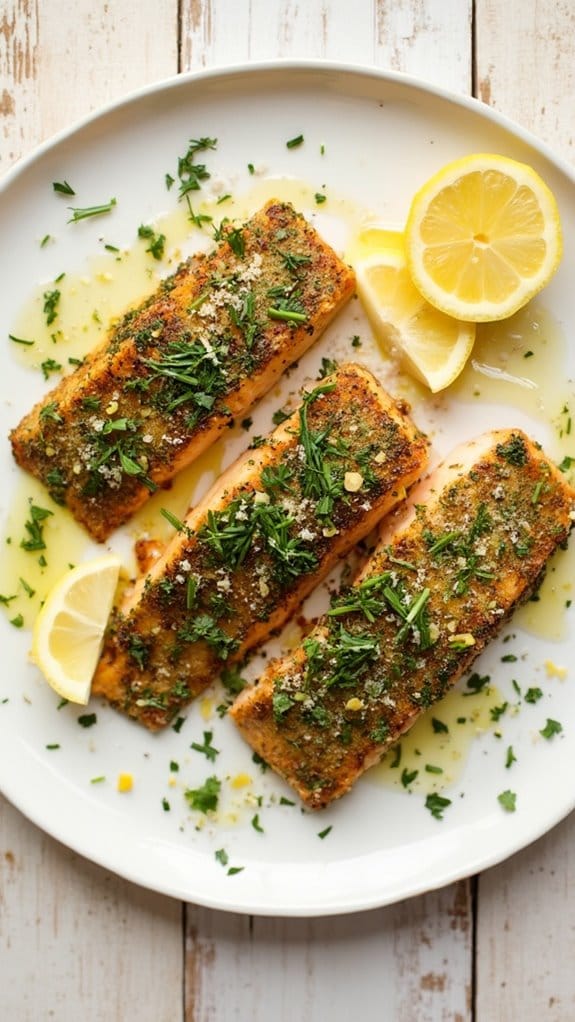
Title: Herb-Crusted Salmon
Prep Time: 10 minutes
Cook Time: 15 minutes
Number of Servings: 4
Required Equipment List: Baking sheet, parchment paper, mixing bowl, whisk, oven
Cuisine Type: Mediterranean
This Herb-Crusted Salmon is a delicious and healthy dish that brings a burst of flavor to your dinner table. The salmon fillets are coated in a mixture of fresh herbs, garlic, and lemon zest, creating a vibrant crust that enhances the natural richness of the fish.
This dish isn’t only easy to prepare but also takes minimal time to cook, making it perfect for a quick weeknight meal or a special occasion with friends and family. Baking the salmon on parchment paper guarantees a moist and flaky result while keeping cleanup to a minimum.
Serve this herb-crusted delight alongside your favorite vegetables or a light salad for a well-rounded meal. This recipe is adaptable, allowing you to use your choice of herbs based on what you have on hand, assuring that every bite is bursting with flavor.
Ingredients:
- 4 salmon fillets
- 1/4 cup fresh parsley, chopped
- 2 tablespoons fresh dill, chopped
- 2 tablespoons fresh chives, chopped
- 2 cloves garlic, minced
- Zest of 1 lemon
- 2 tablespoons olive oil
- Salt and pepper to taste
- Lemon wedges (for serving)
Instructions:
- Preheat your oven to 400°F (200°C). Line a baking sheet with parchment paper to prevent sticking and make cleanup easier. This will create a perfect environment for the salmon to roast evenly.
- In a mixing bowl, combine the chopped parsley, dill, chives, minced garlic, lemon zest, and olive oil. Stir the mixture until all the ingredients are well incorporated, creating a flavorful herb paste.
- Season the salmon fillets with salt and pepper on both sides. Place the fillets skin-side down on the prepared baking sheet, making sure they’re spaced apart for even cooking.
- Generously spread the herb mixture over the top of each salmon fillet, pressing it down slightly to make sure it adheres well to the fish. This herb crust will create a delicious layer of flavor as the salmon cooks.
- Bake the salmon in the preheated oven for 12-15 minutes or until the salmon flakes easily with a fork and is cooked through. The cooking time may vary depending on the thickness of your fillets, so keep an eye on them.
- Once cooked, remove the salmon from the oven and let it rest for a couple of minutes. Serve immediately with lemon wedges on the side for an added zest.
Extra Tips: For an extra layer of flavor, consider marinating the salmon in olive oil, lemon juice, and a pinch of salt for 30 minutes before applying the herb crust. This will infuse the fish with additional moisture and taste.
If you don’t have fresh herbs available, dried herbs can be used as a substitute, but reduce the amount since dried herbs are more concentrated. Pair your herb-crusted salmon with a side of roasted vegetables or a quinoa salad for a complete meal!
Ratatouille
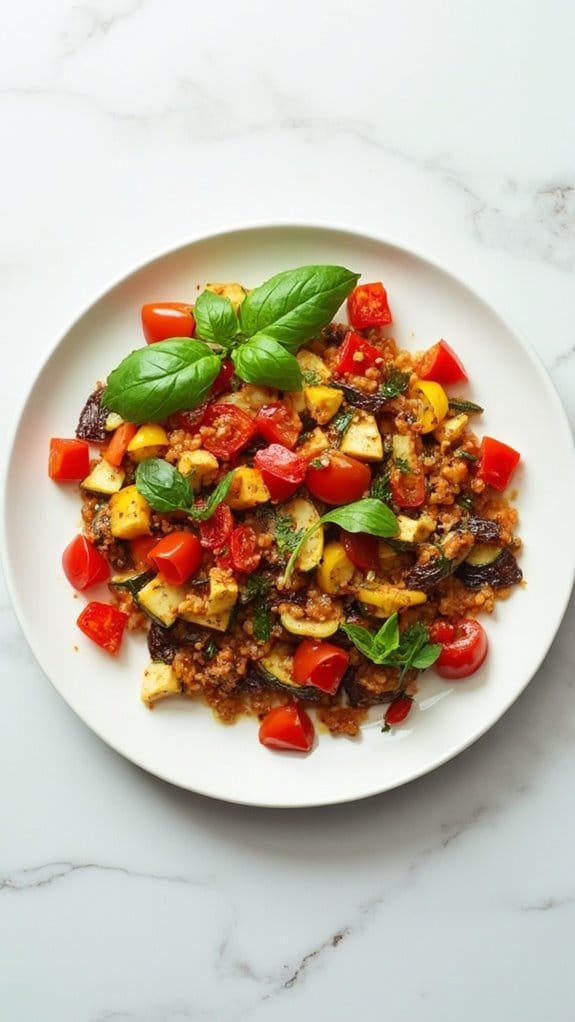
Title: Ratatouille
Prep Time: 20 minutes
Cook Time: 40 minutes
Number of Servings: 6
Required Equipment List: Large skillet or Dutch oven, cutting board, sharp knife, wooden spoon, measuring cups, and spoons
Cuisine Type: French
Ratatouille is a classic Provençal dish that showcases the vibrant flavors of summer vegetables. This rustic vegetable stew isn’t only beautifully colorful but also incredibly healthy, making it a perfect addition to any Shabbat dinner. Traditionally made with eggplant, zucchini, bell peppers, onions, and tomatoes, ratatouille is simmered together with aromatic herbs to create a medley of flavors that warms the soul.
It’s a delightful way to celebrate fresh produce and can be served warm or at room temperature. This recipe offers flexibility, allowing you to use any seasonal vegetables you have on hand. The key is to cut the vegetables into uniform pieces to guarantee even cooking. Ratatouille can be served as a side dish, a main course, or even as a filling for a savory tart.
Whether you’re a seasoned chef or a novice cook, this dish is easy to prepare and sure to impress your guests with its dazzling presentation and comforting taste.
Ingredients:
- 1 medium eggplant, diced
- 2 medium zucchinis, sliced
- 1 bell pepper (red or yellow), diced
- 1 medium onion, chopped
- 3 cloves garlic, minced
- 4 medium tomatoes, diced (or 1 can of diced tomatoes)
- 1/4 cup olive oil
- 1 teaspoon dried thyme
- 1 teaspoon dried basil
- Salt and pepper to taste
- Fresh basil leaves (for garnish, optional)
Instructions:
- Begin by preparing all your vegetables. Dice the eggplant, zucchini, bell pepper, and onion, and mince the garlic. If using fresh tomatoes, chop them into small pieces. This prep work will streamline the cooking process.
- In a large skillet or Dutch oven, heat the olive oil over medium heat. Add the chopped onion and garlic, sautéing for about 5 minutes until they become translucent and fragrant.
- Next, add the diced eggplant to the skillet and cook for an additional 5 minutes, stirring occasionally. The eggplant will absorb some of the oil and begin to soften.
- Add the zucchini and bell pepper to the skillet, stirring to combine. Cook for another 5-7 minutes until the vegetables are tender and the colors brighten.
- Finally, stir in the diced tomatoes, dried thyme, and dried basil. Season with salt and pepper to taste. Bring the mixture to a simmer, then reduce the heat to low and cover the skillet. Allow the ratatouille to cook for 20-25 minutes, stirring occasionally, until all the vegetables are tender and the flavors meld together.
- Once cooked, remove the skillet from heat and let the ratatouille sit for a few minutes before serving. Garnish with fresh basil leaves for an added touch of freshness.
Extra Tips: For a deeper flavor, consider roasting the vegetables in the oven before adding them to the stew. This can enhance their sweetness and caramelization.
Ratatouille can also be made a day ahead, as the flavors develop beautifully overnight. Serve it with crusty bread, over rice, or alongside grilled meats for a hearty meal. Enjoy the vibrant taste of summer all year round!
Potato Kugel
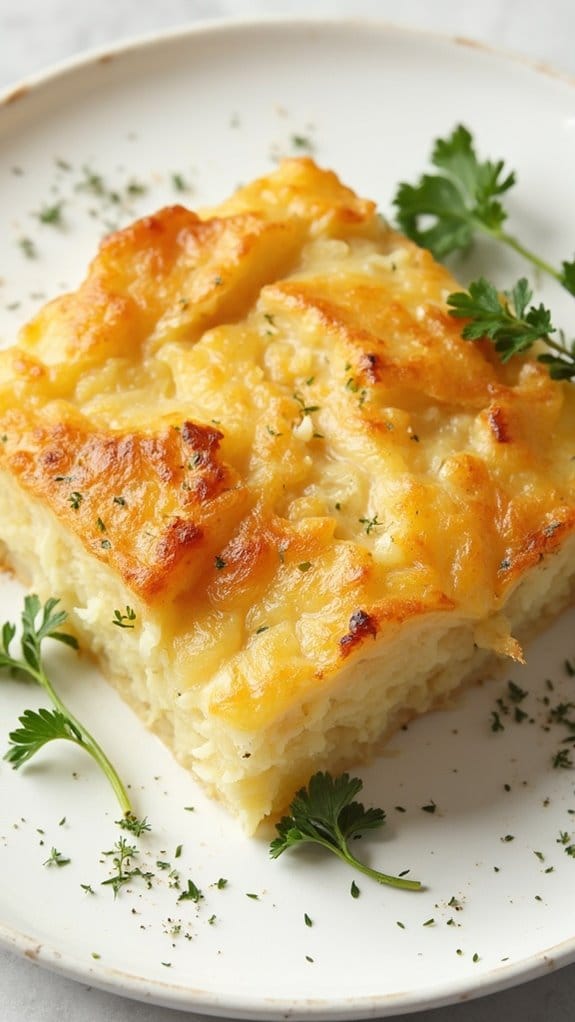
Title: Potato Kugel
Prep Time: 20 minutes
Cook Time: 60 minutes
Number of Servings: 8
Required Equipment List: Large mixing bowl, food processor or box grater, 9×13 inch baking dish, oven
Cuisine Type: Jewish
Potato Kugel is a traditional Jewish dish that’s often served during Shabbat and other festive occasions. This savory casserole is made with grated potatoes and onions, which are mixed with eggs and seasoning before being baked to perfection. The result is a crispy, golden-brown exterior with a soft and flavorful interior that’s sure to be a hit among family and friends.
With its simple ingredients and easy preparation, Potato Kugel is a comforting dish that brings warmth to any table. The versatility of Potato Kugel allows it to be served as a side dish or even as a main course. It pairs wonderfully with roasted meats, brisket, or can be enjoyed on its own with a dollop of sour cream or applesauce.
This dish embodies the essence of Jewish comfort food, making it a staple during holiday gatherings. Once you experience the delightful crunch and delicious flavors of this kugel, it will surely become a favorite in your culinary repertoire.
Ingredients:
- 6 medium potatoes, peeled and grated
- 1 large onion, grated
- 3 large eggs
- 1/4 cup vegetable oil
- 1 teaspoon salt
- 1/2 teaspoon black pepper
- 1/2 teaspoon garlic powder (optional)
Instructions:
- Preheat your oven to 375°F (190°C). Grease a 9×13 inch baking dish with a bit of vegetable oil to prevent sticking.
- In a large mixing bowl, combine the grated potatoes and onions. You can use a food processor for quicker preparation if you prefer. Make certain to squeeze out excess moisture from the grated potatoes using a clean kitchen towel.
- In a separate bowl, whisk together the eggs, vegetable oil, salt, pepper, and garlic powder (if using). Pour this egg mixture over the grated potatoes and onions, stirring well to combine all the ingredients.
- Transfer the potato mixture into the prepared baking dish, spreading it evenly. For an extra crispy top, drizzle a little more oil over the surface before baking.
- Bake in the preheated oven for about 60 minutes, or until the top is golden brown and crispy. You may want to check the kugel halfway through and give it a gentle stir to ascertain even cooking.
- Once baked, remove the Potato Kugel from the oven and let it cool for a few minutes before slicing. Serve warm, and enjoy with your favorite toppings.
Extra Tips: For added flavor, consider mixing in some finely chopped herbs like dill or parsley, or even diced bell peppers for a pop of color. If you prefer a richer texture, you can substitute some of the vegetable oil with melted butter.
Potato Kugel can also be prepared ahead of time; simply reheat in the oven before serving. Enjoy this classic dish that’s sure to bring a smile to your dining table!
Tzimmes
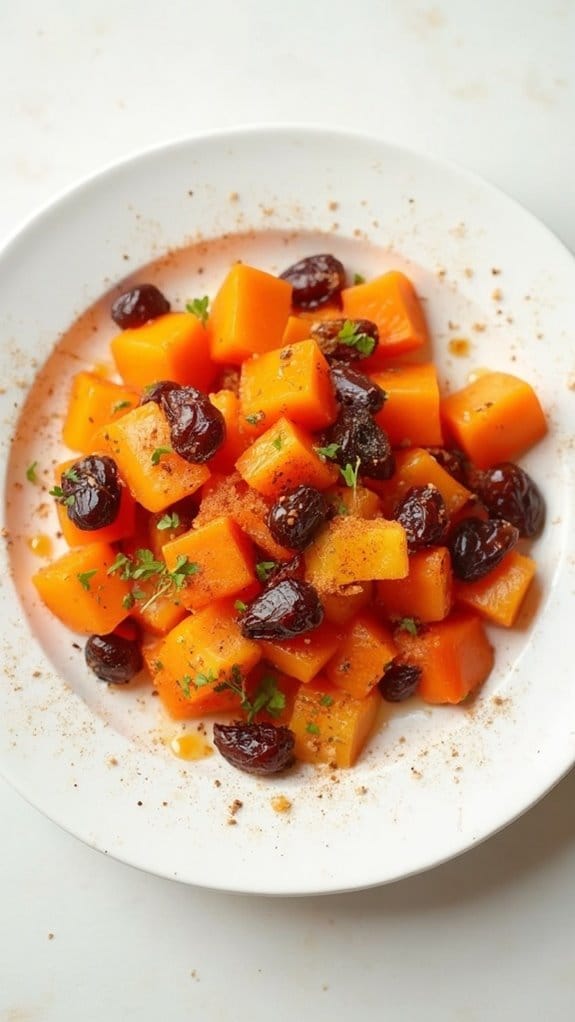
Title: Tzimmes
Prep Time: 20 minutes
Cook Time: 1 hour
Number of Servings: 6
Required Equipment List: Large pot, cutting board, knife, wooden spoon, measuring cups, serving dish
Cuisine Type: Jewish
Tzimmes is a traditional Jewish dish that beautifully combines sweet and savory flavors, making it a beloved staple for Shabbat dinners and festive occasions. This hearty stew typically features carrots and sweet potatoes, slow-cooked with dried fruits like prunes and apricots, along with a touch of honey and spices. The result is a comforting dish that’s not only delicious but also visually appealing, with its vibrant orange and golden hues.
This recipe for tzimmes is simple yet satisfying, allowing the natural sweetness of the vegetables and fruits to shine through. As it simmers, the flavors meld together, creating a dish that’s both sweet and savory. Perfect as a side dish or even as a main course for vegetarians, tzimmes is sure to warm hearts and bring a touch of tradition to your table.
Ingredients:
- 3 large carrots, peeled and sliced
- 2 large sweet potatoes, peeled and cubed
- 1 cup dried apricots, halved
- 1 cup prunes, pitted and halved
- 1/2 cup honey
- 1 teaspoon cinnamon
- 1/2 teaspoon nutmeg
- 1/4 teaspoon salt
- 2 cups vegetable broth or water
- 2 tablespoons olive oil
Instructions:
- In a large pot, heat the olive oil over medium heat. Add the sliced carrots and cubed sweet potatoes, stirring occasionally for about 5 minutes until they begin to soften slightly.
- Add the dried apricots and prunes to the pot, mixing them with the vegetables. This will allow the fruits to release their sweetness as they heat up.
- Pour in the vegetable broth (or water) and add the honey, cinnamon, nutmeg, and salt. Stir well to combine all the ingredients, ensuring that the honey is evenly distributed.
- Bring the mixture to a gentle boil, then reduce the heat to low and cover the pot. Let it simmer for about 45 minutes, stirring occasionally, until the vegetables are tender and the flavors have melded together.
- Once cooked, taste and adjust the seasoning if needed. Serve the tzimmes warm in a serving dish, garnished with a sprinkle of cinnamon if desired.
Extra Tips: To enhance the flavor profile, consider adding a splash of orange juice or zest for a citrusy twist. You can also experiment with different dried fruits such as raisins or figs, depending on your preference. Tzimmes can be made ahead of time and reheated, allowing the flavors to deepen even further. Enjoy this delicious dish as part of your Shabbat dinner or any festive gathering!
Quinoa Salad
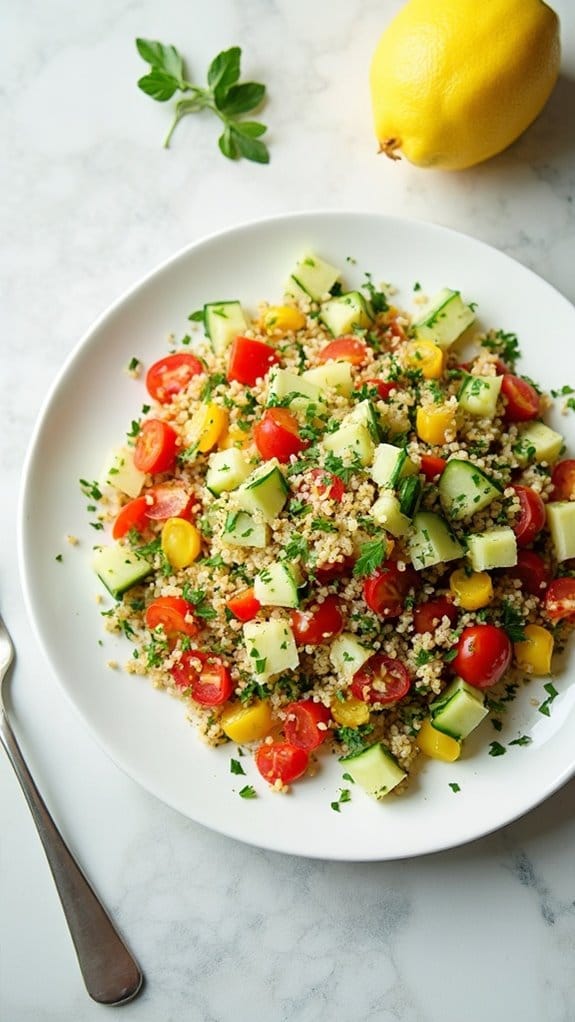
Title: Quinoa Salad
Prep Time: 15 minutes
Cook Time: 15 minutes
Number of Servings: 4
Required Equipment List: Medium pot, mixing bowl, spoon, cutting board, knife
Cuisine Type: Mediterranean
This Quinoa Salad is a revitalizing and nutritious dish that combines the nutty flavor of quinoa with a vibrant array of fresh vegetables and herbs. It’s perfect for a light lunch, a side dish at dinner, or a potluck offering.
The salad is versatile and can be easily customized with your favorite ingredients, making it an excellent option for both meal prep and gatherings. Packed with protein and fiber, quinoa serves as a wholesome base, while the addition of cucumbers, tomatoes, and bell peppers adds a satisfying crunch and a burst of color.
Tossed in a zesty lemon vinaigrette, this salad isn’t only delicious but also incredibly easy to prepare, making it a go-to recipe for any occasion.
Ingredients:
- 1 cup quinoa
- 2 cups water
- 1 cucumber, diced
- 1 cup cherry tomatoes, halved
- 1 bell pepper, diced
- 1/4 red onion, finely chopped
- 1/4 cup fresh parsley, chopped
- 1/4 cup olive oil
- 2 tablespoons lemon juice
- Salt and pepper to taste
Instructions:
- Rinse the quinoa under cold water in a fine-mesh strainer to remove its natural bitterness. In a medium pot, combine the rinsed quinoa and water. Bring to a boil over medium-high heat, then reduce the heat to low, cover, and simmer for about 15 minutes, or until the quinoa has absorbed all the water and is fluffy.
- Once the quinoa is cooked, remove it from the heat and let it sit for 5 minutes with the lid on. After resting, fluff the quinoa with a fork and transfer it to a large mixing bowl to cool.
- While the quinoa cools, prepare the vegetables. Dice the cucumber, bell pepper, and red onion, and halve the cherry tomatoes. Add all the chopped vegetables to the bowl with the quinoa.
- In a small bowl, whisk together the olive oil, lemon juice, salt, and pepper to create a vinaigrette. Pour the vinaigrette over the quinoa and vegetable mixture, and toss everything together until evenly coated.
- Finally, gently fold in the fresh parsley for added flavor and freshness. Taste and adjust the seasoning if necessary, then serve immediately or refrigerate for later.
Extra Tips: For a heartier salad, consider adding chickpeas, feta cheese, or avocado. This quinoa salad can be made ahead of time and stored in the fridge, allowing the flavors to meld together beautifully.
Feel free to experiment with different herbs and vegetables based on what’s in season or what you have on hand. Enjoy this nutritious and delicious salad as a meal on its own or as a delightful side dish!
Roasted Root Vegetables
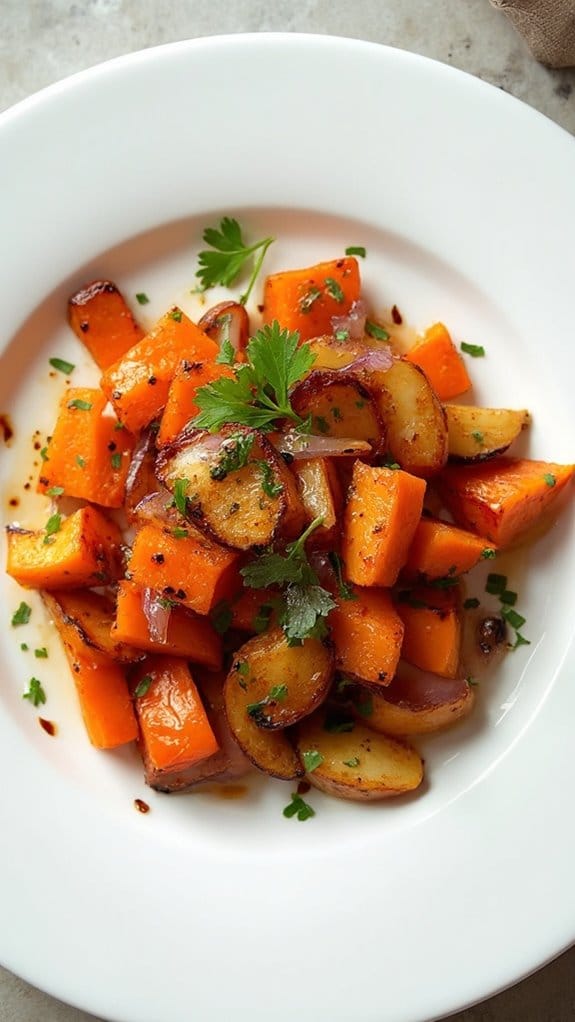
Title: Roasted Root Vegetables
Prep Time: 15 minutes
Cook Time: 45 minutes
Number of Servings: 6
Required Equipment List: Baking sheet, parchment paper, mixing bowl, knife, cutting board
Cuisine Type: Mediterranean
Roasted root vegetables are a hearty and colorful addition to your Shabbat dinner table, offering a deliciously sweet and savory flavor profile. This dish highlights the natural sweetness of seasonal vegetables such as carrots, parsnips, and sweet potatoes, which caramelize beautifully in the oven. Tossed with olive oil, herbs, and a hint of balsamic vinegar, these vegetables become tender and flavorful, making them a perfect side dish or a centerpiece for your meal.
Easy to prepare and incredibly versatile, this recipe can be adapted based on what root vegetables are in season or what you have on hand. Roasting not only enhances the flavors but also creates a beautiful golden-brown exterior, making these veggies visually appealing. Serve them alongside your favorite protein or as part of a vibrant vegetarian feast, and enjoy the comforting, earthy flavors that celebrate wholesome ingredients.
Ingredients:
- 3 medium carrots, peeled and chopped
- 2 medium parsnips, peeled and chopped
- 1 large sweet potato, peeled and cubed
- 1 medium red onion, cut into wedges
- 4 tablespoons olive oil
- 2 tablespoons balsamic vinegar
- 1 teaspoon dried thyme
- 1 teaspoon dried rosemary
- Salt and pepper to taste
- Fresh parsley for garnish (optional)
Instructions:
- Preheat your oven to 425°F (220°C). Line a large baking sheet with parchment paper for easy cleanup and to prevent the vegetables from sticking.
- In a mixing bowl, combine the chopped carrots, parsnips, sweet potato, and red onion. Drizzle with olive oil and balsamic vinegar, then sprinkle with dried thyme, rosemary, salt, and pepper. Toss well until all the vegetables are evenly coated.
- Spread the seasoned vegetables in a single layer on the prepared baking sheet. This guarantees that they roast evenly and become nicely caramelized.
- Roast the vegetables in the preheated oven for 30-40 minutes, stirring halfway through to promote even cooking. They should be golden brown and fork-tender when done.
- Once roasted, remove the vegetables from the oven and let them cool for a few minutes. Transfer to a serving dish and garnish with fresh parsley for a pop of color before serving.
Extra Tips: For added depth of flavor, consider adding minced garlic or a sprinkle of chili flakes to the vegetable mixture before roasting. Feel free to experiment with other root vegetables, such as beets or turnips.
If you prefer, you can also drizzle a touch of honey over the vegetables during the last 10 minutes of roasting for a sweeter finish. These roasted root vegetables can be made ahead of time and reheated, making them a convenient option for your Shabbat dinner. Enjoy!
Garlic Green Beans
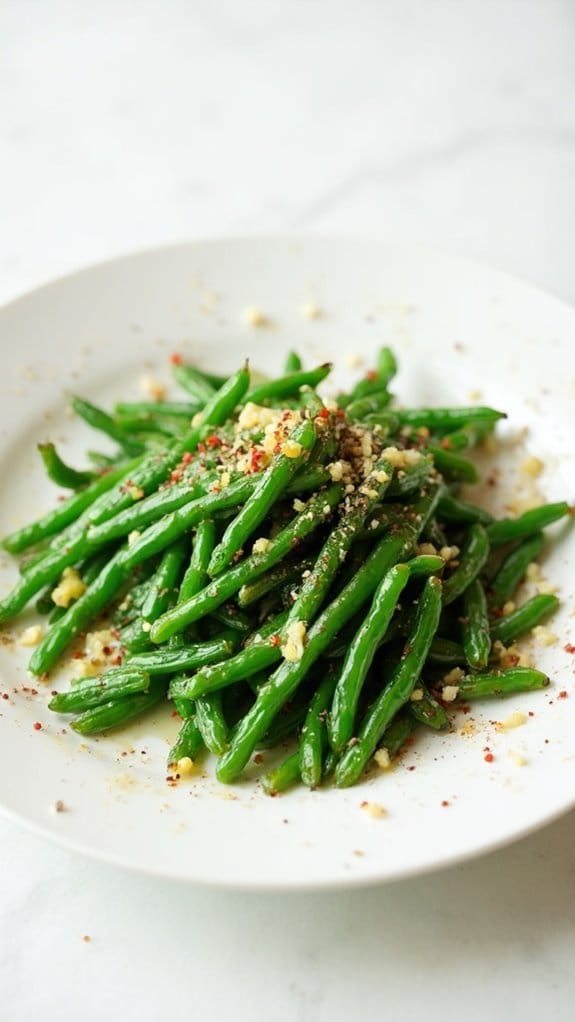
Title: Garlic Green Beans
Prep Time: 10 minutes
Cook Time: 15 minutes
Number of Servings: 4
Required Equipment List: Large skillet, spatula, measuring spoons
Cuisine Type: American
Garlic Green Beans are a simple yet flavorful side dish that perfectly complements any Shabbat dinner or family gathering. The vibrant green beans are sautéed with fresh garlic, which infuses them with a delightful aroma and taste.
This dish isn’t only quick to prepare but also offers a satisfying crunch, making it an excellent choice for those who appreciate both texture and flavor in their meals. This recipe highlights the natural sweetness of green beans, enhanced by the savory notes of garlic and a touch of olive oil.
It’s a versatile side that pairs beautifully with roasted meats, fish, or even as part of a vegetarian spread. With just a few ingredients and minimal cooking time, these Garlic Green Beans are sure to become a staple on your dinner table.
Ingredients:
- 1 pound fresh green beans, trimmed
- 3 tablespoons olive oil
- 4 cloves garlic, minced
- Salt and pepper to taste
- 1 tablespoon lemon juice (optional)
- 1 teaspoon red pepper flakes (optional)
Instructions:
- Begin by washing the green beans under cold water and trimming the ends. This guarantees that they’re clean and ready for cooking. Set them aside to dry while you prepare the other ingredients.
- In a large skillet, heat the olive oil over medium heat. Once the oil is hot, add the minced garlic to the skillet, stirring frequently to prevent it from burning. Cook until the garlic becomes fragrant and slightly golden, about 1-2 minutes.
- Add the trimmed green beans to the skillet, stirring well to coat them in the garlic oil. Season with salt and pepper to taste. Sauté the green beans for about 5-7 minutes, or until they’re tender-crisp and vibrant green.
- If desired, sprinkle in the red pepper flakes for a hint of heat, and cook for an additional minute. This step is optional but adds a nice kick to the dish.
- Remove the skillet from heat and drizzle the lemon juice over the green beans, stirring to distribute. This brightens the flavors and adds a touch of acidity that balances the dish beautifully.
Extra Tips: For an extra layer of flavor, consider adding sliced almonds or sesame seeds during the last few minutes of cooking for a delightful crunch.
If you prefer a more garlicky flavor, feel free to increase the amount of garlic used. These Garlic Green Beans can also be made ahead of time and reheated just before serving, making them a convenient side dish for busy dinner preparations. Enjoy!
Mediterranean Couscous
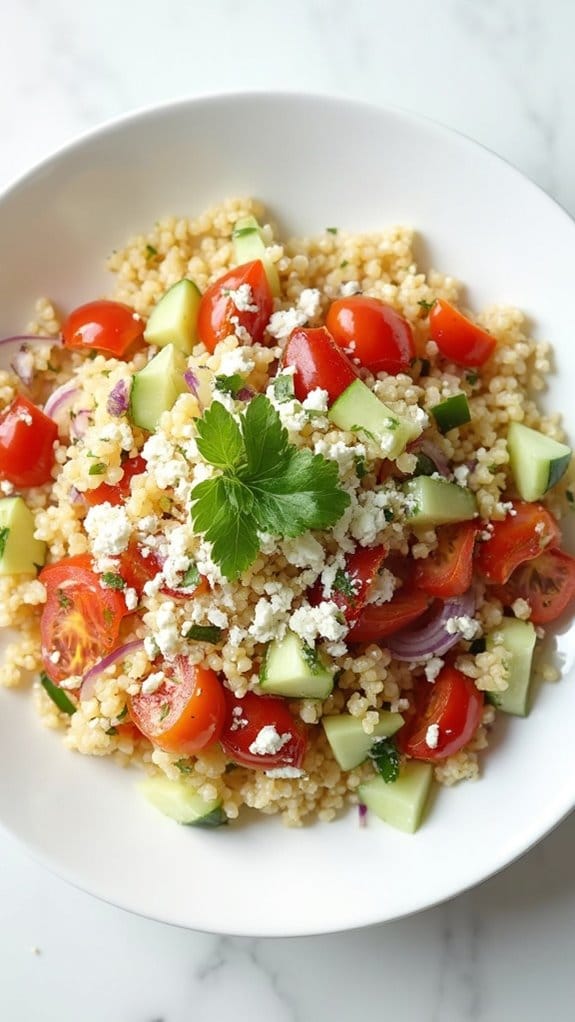
Title: Mediterranean Couscous
Prep Time: 10 minutes
Cook Time: 15 minutes
Number of Servings: 4
Required Equipment List: Medium saucepan, measuring cups, fork, serving bowl
Cuisine Type: Mediterranean
Mediterranean Couscous is a vibrant and flavorful dish that brings together the essence of the Mediterranean in every bite. This easy-to-make dish features fluffy couscous tossed with a medley of fresh vegetables, herbs, and a light dressing that perfectly complements its texture.
It’s an excellent side dish for your Shabbat dinner and can also be served as a main course or a light lunch option. The beauty of this Mediterranean Couscous lies in its versatility and ease of preparation. You can customize it by adding your favorite vegetables or proteins, making it a dish that can be enjoyed by everyone at the table.
With its bright colors and delicious flavors, this couscous is sure to be a hit at any gathering or family meal.
Ingredients:
- 1 cup couscous
- 1 1/4 cups vegetable broth
- 1 cup cherry tomatoes, halved
- 1 cucumber, diced
- 1/2 red onion, finely chopped
- 1/2 cup feta cheese, crumbled
- 1/4 cup fresh parsley, chopped
- 1/4 cup olive oil
- 2 tablespoons lemon juice
- Salt and pepper to taste
Instructions:
- In a medium saucepan, bring the vegetable broth to a boil. Once boiling, remove it from heat and stir in the couscous. Cover the saucepan with a lid and let it sit for about 5 minutes, allowing the couscous to absorb the liquid and become fluffy.
- After 5 minutes, use a fork to fluff the couscous, breaking up any clumps. Transfer the couscous to a large serving bowl and let it cool slightly while you prepare the vegetables.
- In a separate bowl, combine the cherry tomatoes, cucumber, red onion, feta cheese, and parsley. Mix well to combine all the ingredients, creating a revitalizing vegetable medley.
- In a small bowl, whisk together the olive oil, lemon juice, salt, and pepper to create a simple dressing. Drizzle the dressing over the couscous and vegetable mixture, tossing gently to combine everything evenly.
- Taste the couscous and adjust the seasoning with additional salt and pepper if needed. Serve the Mediterranean Couscous warm or at room temperature, garnished with extra parsley if desired.
Extra Tips: You can add additional ingredients such as olives or bell peppers for extra flavor and color. If you’re looking for a protein boost, consider adding cooked chickpeas or grilled chicken to the dish.
This couscous is best enjoyed fresh but can be stored in the refrigerator for a couple of days, making it a great option for meal prep.
Beet and Goat Cheese Salad
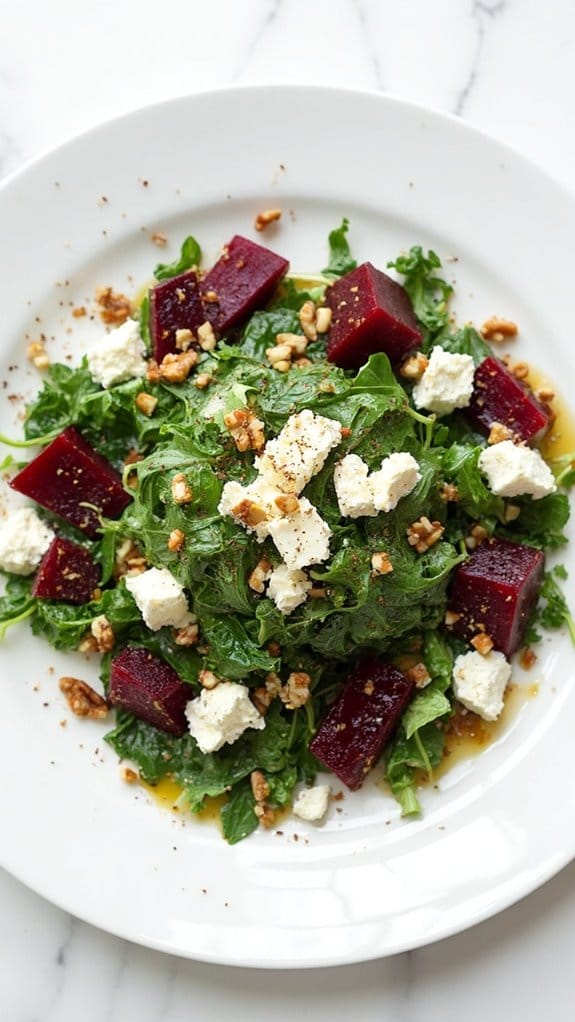
Title: Beet and Goat Cheese Salad
Prep Time: 15 minutes
Cook Time: 30 minutes
Number of Servings: 4
Required Equipment List: Baking sheet, mixing bowl, whisk, knife, cutting board
Cuisine Type: Mediterranean
This Beet and Goat Cheese Salad is a vibrant and nutritious dish that beautifully combines earthy roasted beets, creamy goat cheese, and fresh greens. The natural sweetness of the beets pairs perfectly with the tanginess of the goat cheese, while a simple vinaigrette adds a revitalizing touch.
This salad isn’t only visually stunning with its bold colors, but it’s also packed with flavor, making it an ideal starter or side for your Shabbat dinner. Roasting the beets brings out their sweetness and enhances their flavor, while the addition of nuts adds a delightful crunch.
This salad can be served warm or at room temperature, making it versatile for any occasion. It’s a simple yet elegant dish that’s sure to impress your guests and brighten up your table with its beautiful presentation.
Ingredients:
- 4 medium beets, peeled and diced
- 4 cups mixed greens (arugula, spinach, or baby kale)
- 4 ounces goat cheese, crumbled
- 1/4 cup walnuts or pecans, chopped
- 3 tablespoons olive oil
- 1 tablespoon balsamic vinegar
- Salt and pepper to taste
Instructions:
- Preheat your oven to 400°F (200°C). Spread the diced beets evenly on a baking sheet and drizzle with 2 tablespoons of olive oil. Season with salt and pepper, then toss to coat. Roast the beets in the preheated oven for 25-30 minutes or until tender, stirring halfway through.
- While the beets are roasting, prepare the dressing by whisking together the remaining 1 tablespoon of olive oil and balsamic vinegar in a small mixing bowl. Season with salt and pepper to taste. Set aside.
- In a large mixing bowl, combine the mixed greens with half of the prepared dressing. Toss gently to coat the greens evenly.
- Once the beets are done roasting, allow them to cool slightly. Add the warm beets to the bowl with the mixed greens, and gently toss to combine.
- Transfer the salad to a serving platter or individual plates. Sprinkle the crumbled goat cheese and chopped nuts over the top. Drizzle with the remaining dressing before serving.
Extra Tips: For added depth of flavor, consider adding some sliced red onion or fresh herbs like basil or parsley to the salad. If you prefer a bit of sweetness, a handful of dried cranberries or sliced apples can complement the beets nicely.
This salad can also be made ahead of time; just keep the dressing separate until ready to serve to avoid soggy greens. Enjoy this colorful and healthy dish as part of your Shabbat dinner!
Citrus-Glazed Carrots

Title: Citrus-Glazed Carrots
Prep Time: 10 minutes
Cook Time: 20 minutes
Number of Servings: 4
Required Equipment List: Large skillet, spatula, measuring cups, knife, cutting board
Cuisine Type: American
Citrus-Glazed Carrots are a vibrant and flavorful side dish that perfectly complements any Shabbat dinner. The combination of sweet carrots and tangy citrus creates a delightful balance that’s both invigorating and comforting. This dish isn’t only easy to prepare, but also brings a burst of color to your table, making it a visually appealing addition to your meal.
The glaze adds a touch of elegance, making these carrots a perfect choice for special occasions or family gatherings. The sweetness of the carrots is enhanced by the citrus glaze, which includes orange juice and zest, creating a harmonious blend of flavors.
This recipe is versatile and can be adjusted based on your preferences—feel free to experiment with different citrus fruits like lemon or lime for a unique twist. With just a few simple ingredients and quick cooking time, Citrus-Glazed Carrots are a fantastic way to elevate your Shabbat dinner experience.
Ingredients:
- 1 pound baby carrots
- 1 tablespoon olive oil
- 1/4 cup fresh orange juice
- Zest of 1 orange
- 2 tablespoons honey
- Salt and pepper to taste
- Fresh parsley, chopped (for garnish)
Instructions:
- Begin by washing the baby carrots thoroughly under cold water. If using larger carrots, peel and cut them into uniform sizes to guarantee even cooking. Pat them dry with a clean kitchen towel.
- In a large skillet, heat the olive oil over medium heat. Once hot, add the carrots and sauté for about 5 minutes, stirring occasionally until they begin to soften and become slightly caramelized.
- While the carrots are cooking, in a small bowl, whisk together the fresh orange juice, orange zest, honey, salt, and pepper until well combined. This will create a flavorful glaze to enhance the carrots.
- Pour the citrus glaze over the sautéed carrots in the skillet. Stir to coat the carrots evenly, then reduce the heat to low and cover the skillet. Let them simmer for 10-15 minutes, or until the carrots are tender and the glaze has thickened slightly.
- Once the carrots are cooked, remove the skillet from heat. Taste and adjust seasoning if needed, adding more salt or pepper to your liking. Transfer the carrots to a serving dish and garnish with freshly chopped parsley for a touch of color.
Extra Tips: For added depth of flavor, consider incorporating a pinch of cayenne pepper or red pepper flakes to the glaze for a hint of spice. You can also use a mixture of different colored carrots for a more vibrant presentation.
If you prefer a sweeter glaze, feel free to increase the amount of honey or even add a splash of maple syrup. These Citrus-Glazed Carrots pair beautifully with roasted meats or can be served alongside a grain dish for a delicious vegetarian option. Enjoy your meal!
Chocolate Babka
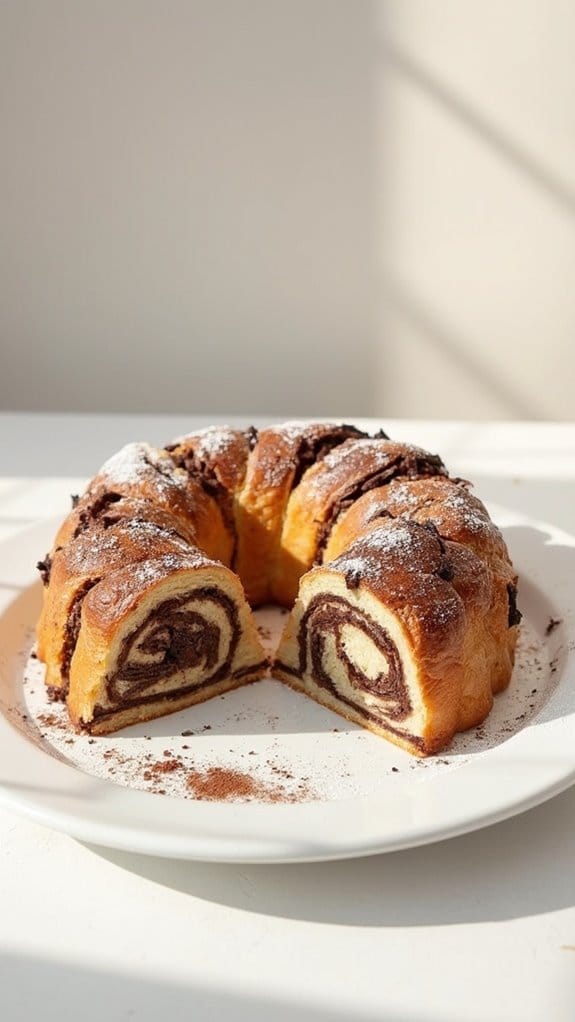
Title: Chocolate Babka
Prep Time: 30 minutes
Cook Time: 45 minutes
Number of Servings: 8
Required Equipment List: Mixing bowls, stand mixer (or mixing spoon), rolling pin, baking dish, parchment paper, oven
Cuisine Type: Jewish
Chocolate Babka is a delectable sweet bread that has its roots in Eastern European Jewish cuisine. This rich, buttery dough is layered with a decadent chocolate filling, twisted into beautiful swirls, and baked until golden brown. The result is an irresistible loaf that’s perfect for sharing with family on Shabbat or any festive occasion.
Its intricate layers not only make for a stunning presentation but also create a wonderfully moist and flavorful treat that pairs beautifully with coffee or tea. Making Chocolate Babka may seem challenging, but with the right techniques, it’s actually quite simple. The dough requires a bit of time for proofing, but once it’s ready, the assembly is a fun and creative process.
This recipe allows you to fill the babka with a rich chocolate mixture that melts into the bread as it bakes, creating an indulgent experience that will delight everyone at your table.
Ingredients:
- 4 cups all-purpose flour
- 1/2 cup granulated sugar
- 2 teaspoons active dry yeast
- 1 teaspoon salt
- 1 cup whole milk, warmed
- 1/2 cup unsalted butter, melted and cooled
- 3 large eggs
- 1 cup semi-sweet chocolate chips
- 1/4 cup unsweetened cocoa powder
- 1/4 cup powdered sugar (for dusting)
Instructions:
- In a mixing bowl, combine the warmed milk, sugar, and active dry yeast. Let it sit for about 5-10 minutes until it becomes frothy. This step is essential for activating the yeast and ensuring a good rise.
- In a large mixing bowl or stand mixer, combine the flour and salt. Add the yeast mixture, melted butter, and eggs. Mix until a dough forms. Knead the dough on a floured surface for about 8-10 minutes until it becomes smooth and elastic. Place it in a greased bowl, cover with a damp cloth, and let it rise in a warm place until doubled in size, about 1-2 hours.
- While the dough is rising, prepare the chocolate filling. In a separate bowl, combine the chocolate chips and cocoa powder. You can melt the chocolate chips slightly in the microwave for easier mixing. Set this mixture aside.
- Once the dough has risen, punch it down and roll it out on a floured surface into a rectangle, about 1/4 inch thick. Sprinkle the chocolate filling evenly over the dough, leaving a small border around the edges. Starting from one long side, carefully roll the dough into a tight log.
- Slice the rolled dough in half lengthwise, exposing the swirled filling inside. Twist the two halves together, creating a beautiful braid. Place the twisted dough into a greased baking dish, cover it, and let it rise again for about 30 minutes.
- Preheat your oven to 350°F (175°C). Bake the babka for 40-45 minutes or until golden brown and a toothpick inserted comes out clean. Allow it to cool in the pan for about 10 minutes before transferring to a wire rack.
- Dust the babka with powdered sugar before serving. Slice and enjoy the rich, chocolatey layers with your loved ones!
Extra Tips: For an extra touch, you can add chopped nuts or a sprinkle of cinnamon to the chocolate filling. If you prefer a more intense chocolate flavor, consider using dark chocolate instead of semi-sweet.
This babka can be stored at room temperature for a few days, or wrapped tightly and frozen for up to a month, making it a perfect make-ahead treat for special occasions. Enjoy the delightful flavors and textures of this classic Jewish bread!
Apple Strudel

Title: Apple Strudel
Prep Time: 30 minutes
Cook Time: 45 minutes
Number of Servings: 8
Required Equipment List: Rolling pin, baking sheet, parchment paper, mixing bowl, knife, oven
Cuisine Type: Austrian
Apple Strudel is a classic dessert that embodies the essence of Austrian cuisine with its flaky, golden pastry wrapped around a luscious filling of spiced apples. This delightful treat is perfect for any occasion, from a cozy family dinner to a festive gathering.
The combination of sweet and tart apples, cinnamon, and a hint of lemon zest creates a tantalizing flavor profile that pairs wonderfully with a scoop of vanilla ice cream or a dollop of whipped cream.
This recipe uses store-bought phyllo dough, making the preparation easier while still delivering that authentic strudel experience. The strudel is best enjoyed warm from the oven, and the aroma of baked apples and spices will fill your kitchen, inviting everyone to gather around for a slice.
Whether you’re an experienced baker or a novice in the kitchen, this apple strudel is sure to impress.
Ingredients:
- 1 package phyllo dough (16 oz), thawed
- 6 medium apples, peeled and thinly sliced
- 1/2 cup granulated sugar
- 1 teaspoon ground cinnamon
- 1 tablespoon lemon juice
- 1/4 cup raisins (optional)
- 1/4 cup chopped walnuts or pecans (optional)
- 1/4 cup melted butter (for brushing)
- Powdered sugar (for dusting)
Instructions:
- Preheat your oven to 375°F (190°C). Line a baking sheet with parchment paper to prevent sticking and guarantee easy cleanup.
- In a mixing bowl, combine the sliced apples, granulated sugar, ground cinnamon, lemon juice, raisins, and nuts if using. Toss until the apples are evenly coated with the mixture and set aside to let the flavors meld.
- On a clean surface, carefully unroll the phyllo dough. Take one sheet and brush it lightly with melted butter. Layer a second sheet on top and brush it again with butter. Repeat this process until you have 5-6 layers stacked.
- Spoon a portion of the apple mixture along one edge of the phyllo dough. Make sure to leave some space at the edges for folding. Begin to roll the phyllo dough tightly around the filling, tucking in the sides as you go to guarantee the filling is sealed inside.
- Place the rolled strudel seam-side down on the prepared baking sheet. Brush the top with more melted butter and make a few slits on top to allow steam to escape during baking.
- Bake in the preheated oven for 30-45 minutes, or until the strudel is golden brown and crispy. Once baked, remove from the oven and let it cool slightly before dusting with powdered sugar.
Extra Tips: To enhance the flavor of your apple strudel, consider adding a teaspoon of vanilla extract or a pinch of nutmeg to the apple mixture.
If you want to make the strudel extra crispy, you can bake it on a preheated pizza stone or cast-iron skillet. This dessert can also be made ahead of time; simply assemble it and refrigerate until ready to bake.
Enjoy your freshly baked apple strudel with a scoop of ice cream or a cup of coffee for a delightful treat!
Rugelach Cookies

Title: Rugelach Cookies
Prep Time: 30 minutes
Cook Time: 25 minutes
Number of Servings: 24 cookies
Required Equipment List: Mixing bowl, rolling pin, baking sheet, parchment paper, oven, pastry brush
Cuisine Type: Jewish
Rugelach cookies are a delightful pastry that originated in Eastern Europe and have become a beloved treat in Jewish cuisine. These small, crescent-shaped cookies are filled with a variety of delicious fillings, making them perfect for any occasion, particularly during Shabbat gatherings.
The combination of a buttery, flaky dough with sweet and nutty fillings creates a wonderful texture and flavor that’s hard to resist. Making rugelach is a rewarding process that allows for creativity in the choice of fillings. Traditional fillings include cinnamon sugar, chocolate, nuts, or fruit preserves, giving you the flexibility to customize each batch to your liking.
Once baked, these cookies aren’t only visually appealing but also perfect for sharing with family and friends. Enjoy them with a cup of tea or coffee for a delightful treat any time of day.
Ingredients:
- 1 cup unsalted butter, softened
- 8 ounces cream cheese, softened
- 2 cups all-purpose flour
- 1/4 teaspoon salt
- 1/4 cup granulated sugar
- 1 teaspoon vanilla extract
- 1/2 cup fruit preserves (such as apricot or raspberry)
- 1/2 cup chopped nuts (such as walnuts or pecans)
- 1 tablespoon cinnamon
- 1 egg, beaten (for egg wash)
- Powdered sugar (for dusting, optional)
Instructions:
- In a mixing bowl, cream together the softened butter and cream cheese until smooth. Add in the granulated sugar, vanilla extract, and salt, mixing until well combined. Gradually add the flour until a soft dough forms.
- Divide the dough into four equal pieces, wrap each in plastic wrap, and refrigerate for at least 2 hours.
- Preheat your oven to 350°F (175°C) and line a baking sheet with parchment paper. On a lightly floured surface, roll out one piece of dough into a circle about 1/8 inch thick. Spread a thin layer of fruit preserves over the surface.
- In a small bowl, combine the chopped nuts and cinnamon. Sprinkle the nut mixture evenly over the fruit preserves. Using a sharp knife or pizza cutter, cut the circle into 8 equal wedges.
- Starting from the wide end of each wedge, roll the dough toward the pointed end, creating a crescent shape. Place the rolled cookies on the prepared baking sheet, leaving space between them as they’ll spread while baking.
- Brush the tops of the cookies with the beaten egg for a golden finish. Bake in the preheated oven for 20-25 minutes or until the cookies are lightly golden. Remove from the oven and allow to cool on the baking sheet for a few minutes before transferring to a wire rack to cool completely.
- Once cooled, dust with powdered sugar if desired before serving.
Extra Tips: For added flavor, consider incorporating chocolate chips or using flavored preserves, such as orange marmalade. Make sure to chill the dough thoroughly before rolling it out, as this helps maintain the structure of the cookies while baking.
These rugelach cookies can also be stored in an airtight container for several days, making them an ideal make-ahead treat for gatherings. Enjoy your baking!
Berry Tart
Title: Berry Tart
Prep Time: 20 minutes
Cook Time: 30 minutes
Number of Servings: 8
Required Equipment List: Tart pan, mixing bowl, rolling pin, oven, whisk
Cuisine Type: French-inspired
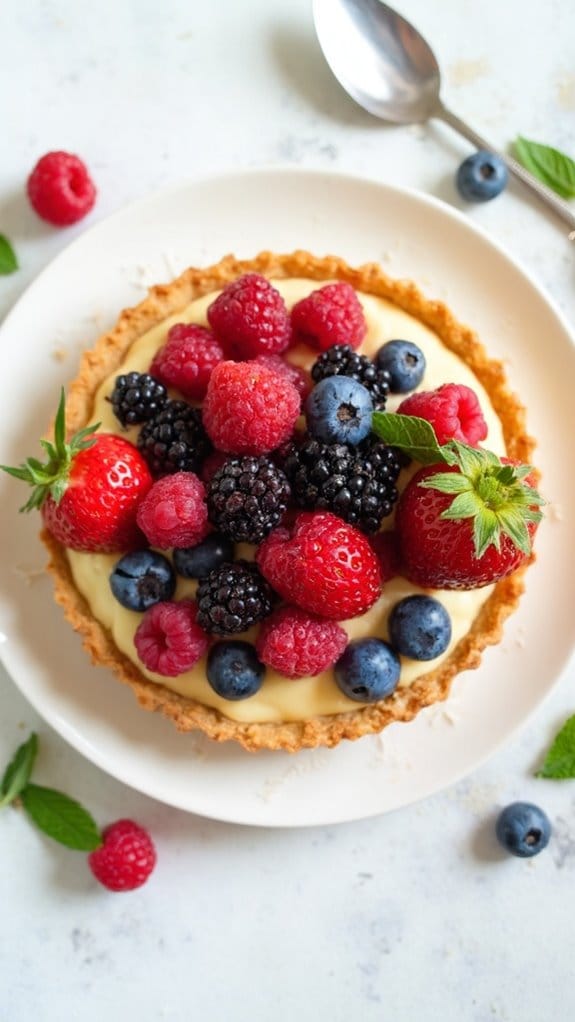
This Berry Tart is a delightful dessert that brings together a buttery, flaky crust filled with a creamy vanilla custard and topped with a vibrant assortment of fresh berries. Perfect for a Shabbat dinner or any special occasion, this tart offers a beautiful presentation that’s sure to impress your guests.
The combination of the crisp tart shell and the luscious filling, paired with the natural sweetness of the berries, creates a harmonious balance of flavors and textures. Creating this berry tart isn’t only fun but also allows for customization based on your favorite seasonal fruits.
Whether you use strawberries, blueberries, raspberries, or a mix of all three, the result is a stunning dessert that highlights the freshness of the ingredients. Serve it chilled, and you’ll have a rejuvenating end to your meal that everyone will love.
Ingredients:
- 1 ½ cups all-purpose flour
- ½ cup unsalted butter, chilled and cubed
- ¼ cup powdered sugar
- 1 large egg yolk
- 2 tablespoons cold water
- 1 cup heavy cream
- ½ cup milk
- ½ cup granulated sugar
- 3 tablespoons cornstarch
- 1 teaspoon vanilla extract
- 2 cups mixed fresh berries (e.g., strawberries, blueberries, raspberries)
- Mint leaves (for garnish, optional)
Instructions:
- Preheat your oven to 350°F (175°C). In a mixing bowl, combine the flour, powdered sugar, and cubed butter. Use a pastry cutter or your fingers to blend the mixture until it resembles coarse crumbs.
- Add the egg yolk and cold water to the flour mixture. Stir until the dough comes together. Shape the dough into a disk, wrap it in plastic wrap, and refrigerate for about 30 minutes.
- Once chilled, roll out the dough on a lightly floured surface to fit your tart pan. Carefully transfer the dough to the pan, trimming any excess if necessary. Prick the bottom with a fork to prevent bubbling and bake for about 20 minutes or until golden brown. Allow it to cool completely.
- In a saucepan over medium heat, whisk together the heavy cream, milk, granulated sugar, cornstarch, and vanilla extract. Stir continuously until the mixture thickens and just begins to boil. Remove from heat and let it cool slightly before pouring it into the cooled tart shell.
- Arrange the fresh berries on top of the custard filling, creating a beautiful design. Refrigerate the tart for at least 2 hours to allow the flavors to meld and the filling to set.
- Before serving, garnish with fresh mint leaves if desired. Slice the tart into wedges and serve chilled for a rejuvenating dessert experience.
Extra Tips: For an added touch of flavor, consider adding a splash of lemon juice to the custard mixture for a hint of tartness. You can also brush the berries with a light glaze made from apricot jam and water to give them a beautiful shine.
This berry tart can be made a day in advance, making it a perfect choice for busy schedules around holiday dinners. Enjoy your delicious creation!
Flourless Chocolate Cake
Title: Flourless Chocolate Cake
Prep Time: 15 minutes
Cook Time: 25 minutes
Number of Servings: 8
Required Equipment List: 9-inch round cake pan, mixing bowls, whisk, spatula, double boiler or microwave-safe bowl
Cuisine Type: Dessert
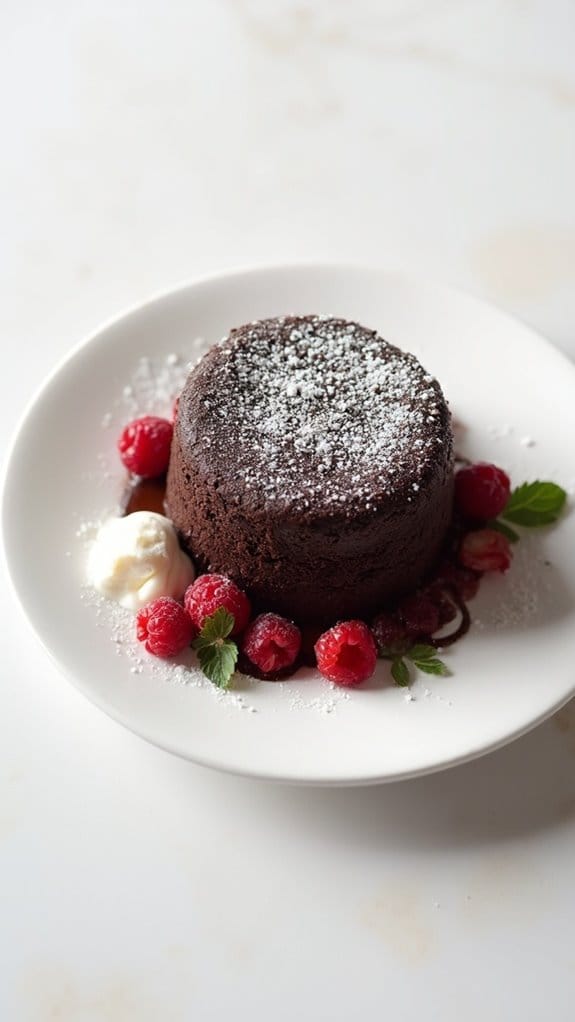
This Flourless Chocolate Cake is a rich and decadent dessert that’s perfect for any occasion, especially for Shabbat dinner. Made primarily with high-quality chocolate, eggs, and sugar, this cake isn’t only gluten-free but also incredibly easy to make. The result is a fudgy, moist cake that’s deeply chocolatey and truly satisfying for chocolate lovers.
It can be enjoyed on its own or with a dusting of powdered sugar, a dollop of whipped cream, or a scoop of vanilla ice cream. The simplicity of this recipe makes it a favorite among bakers of all levels. By using the double boiler method, you melt the chocolate and butter together, guaranteeing a smooth and glossy batter.
This cake is best served chilled or at room temperature, allowing the flavors to meld beautifully. Whether you’re celebrating a special occasion or just craving something sweet, this Flourless Chocolate Cake is sure to impress your guests.
Ingredients:
- 8 ounces high-quality dark chocolate (70% cocoa or higher)
- 1/2 cup unsalted butter
- 3/4 cup granulated sugar
- 1 teaspoon vanilla extract
- 4 large eggs
- 1/2 cup unsweetened cocoa powder
- Pinch of salt
- Powdered sugar (for dusting, optional)
Instructions:
- Preheat your oven to 350°F (175°C). Grease a 9-inch round cake pan with butter and line the bottom with parchment paper to guarantee easy removal after baking.
- In a double boiler or a microwave-safe bowl, melt the dark chocolate and unsalted butter together. If using a double boiler, stir continuously until melted and smooth. If using a microwave, heat in 30-second intervals, stirring in between, until fully melted.
- Once melted, remove from heat and whisk in the granulated sugar and vanilla extract until well combined. Allow the mixture to cool slightly before adding the eggs.
- Add the eggs one at a time, whisking well after each addition until the batter is glossy and smooth. Sift in the unsweetened cocoa powder and a pinch of salt, folding gently with a spatula until fully incorporated.
- Pour the batter into the prepared cake pan, smoothing the top with a spatula. Bake in the preheated oven for about 25 minutes, or until the edges are set while the center remains slightly soft. A toothpick inserted into the center should come out with moist crumbs.
- Remove the cake from the oven and let it cool in the pan for 10 minutes. Carefully invert the cake onto a wire rack to cool completely. Once cooled, dust with powdered sugar if desired before slicing and serving.
Extra Tips: For an extra touch of flavor, consider adding a teaspoon of espresso powder to the batter, which will enhance the chocolate flavor without adding any coffee taste.
This cake can also be stored in an airtight container in the refrigerator for up to a week, and it often tastes even better the next day as the flavors develop. Serve it with fresh berries or a drizzle of chocolate sauce for an elegant presentation. Enjoy your delightful flourless chocolate cake!
Conclusion
So, you might think preparing a Shabbat dinner is too challenging, right? But with these 20 Shabbat dinner recipe ideas, you’ll see it’s not just doable—it’s fun! Imagine the joy of sharing these delicious dishes with loved ones, all while creating lasting memories. Whether you’re a seasoned chef or a kitchen newbie, these recipes offer something for everyone. So, roll up those sleeves, get cooking, and bring a taste of tradition to your table this Shabbat!

