No products in the cart.

21 Creative New Year’s Eve Good Luck Food Recipes to Ring in the Year Ahead
Are you ready to ring in the New Year with some delicious good luck foods? You can’t go wrong with traditional dishes like Hoppin’ John, which brings prosperity through black-eyed peas, or savory pork and sauerkraut for fortune. Feeling adventurous? Try a zesty Thai pineapple fried rice or a hearty lentil soup. Don’t forget to throw together a revitalizing black-eyed peas salad—it’s a crowd-pleaser! With a mix of cozy, creative, and meaningful options, there’s something for everyone. So, if you want to keep the holiday spirit alive and discover even more tasty recipes, stick around!
Contents
hide
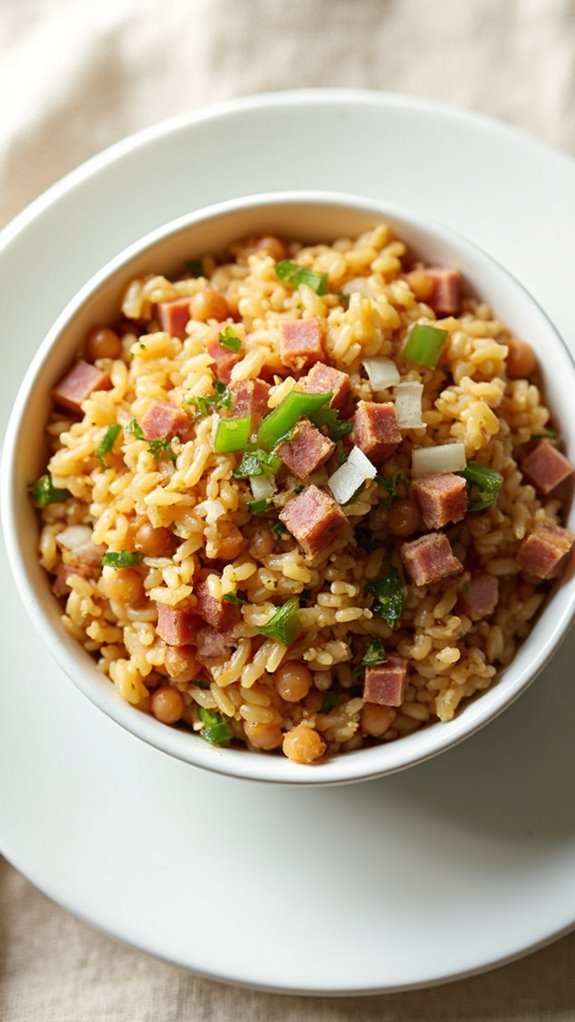
Hoppin’ John
Title: Hoppin’ John
Prep Time: 10 minutes
Cook Time: 40 minutes
Number of Servings: 6
Required Equipment List: Large pot, wooden spoon, measuring cups, measuring spoons
Cuisine Type: Southern
Hoppin’ John is a traditional Southern dish that embodies the flavors and ingredients of the region. This comforting one-pot meal consists of black-eyed peas, rice, and flavorful seasonings, making it a staple on New Year’s Eve as it symbolizes prosperity and good luck for the coming year.
The combination of tender peas and fluffy rice creates a satisfying dish that’s often enjoyed alongside collard greens or cornbread. This recipe isn’t only easy to prepare but also allows for variations based on personal taste. You can add smoked meat, such as ham hocks or bacon, for an extra depth of flavor, or opt for a vegetarian version by using vegetable broth.
The hearty nature of Hoppin’ John makes it a perfect dish for gatherings and celebrations, bringing friends and family together to share in its deliciousness.
Ingredients:
- 1 cup dried black-eyed peas
- 4 cups water
- 1 cup long-grain rice
- 1 medium onion, chopped
- 1 green bell pepper, chopped
- 2 cloves garlic, minced
- 1 teaspoon salt
- 1/2 teaspoon black pepper
- 1/2 teaspoon cayenne pepper (optional)
- 1 bay leaf
- 1 cup cooked ham, diced (optional)
- 2 tablespoons olive oil
Instructions:
- Rinse the dried black-eyed peas under cold water and remove any debris. In a large pot, combine the peas and 4 cups of water. Bring to a boil over medium-high heat, then reduce the heat and simmer for about 30 minutes, or until the peas are tender but not mushy.
- While the peas are simmering, heat the olive oil in a separate large pot over medium heat. Add the chopped onion and green bell pepper, sautéing until the vegetables are soft, about 5-7 minutes. Stir in the minced garlic and cook for an additional minute until fragrant.
- Once the black-eyed peas are cooked, drain them and add them to the pot with the sautéed vegetables. Stir in the rice, salt, black pepper, cayenne pepper (if using), bay leaf, and diced ham (if using). Pour in 2 cups of water and bring the mixture to a boil.
- After boiling, reduce the heat to low, cover the pot, and simmer for about 20 minutes, or until the rice is tender and has absorbed all the liquid. Avoid lifting the lid during cooking to guarantee proper steaming.
- Once cooked, remove the pot from heat and let it sit, covered, for an additional 5 minutes. Fluff the rice and peas with a fork, then remove the bay leaf and serve warm.
Extra Tips: To enhance the flavors of your Hoppin’ John, consider soaking the dried black-eyed peas overnight to reduce cooking time and improve digestibility. You can also experiment with different seasonings, such as adding a splash of hot sauce for some heat or fresh herbs for added freshness.
Serve with a side of cornbread and collard greens for a complete Southern feast that brings good fortune for the New Year!
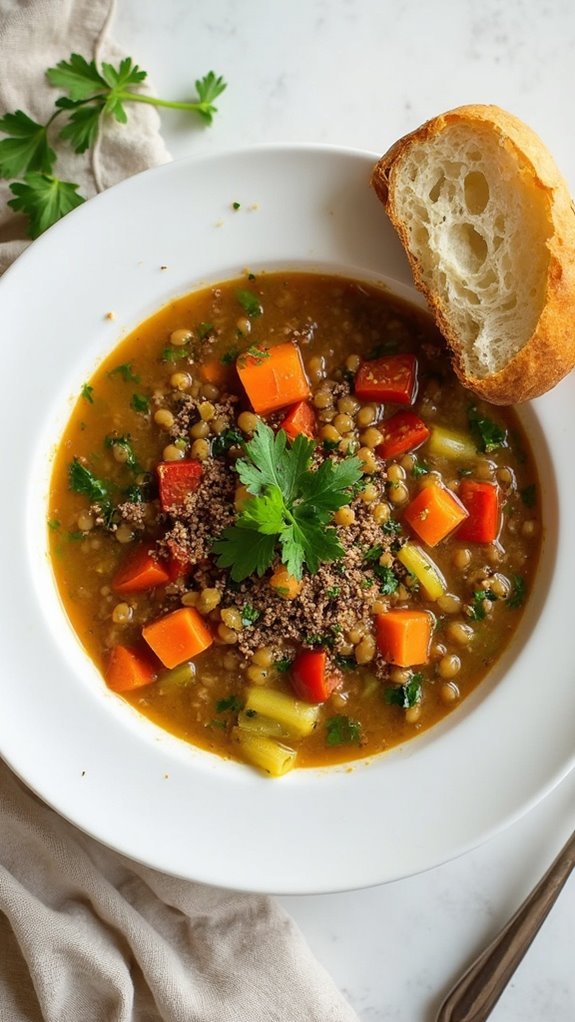
Lentil Soup
Title: Hearty Lentil Soup
Prep Time: 10 minutes
Cook Time: 30 minutes
Number of Servings: 6
Required Equipment List: Large pot, knife, cutting board, measuring cups, measuring spoons, wooden spoon
Cuisine Type: Comfort Food
This Hearty Lentil Soup is a warm and nourishing dish that’s perfect for chilly nights or gatherings with family and friends. Packed with protein-rich lentils and a medley of vegetables, this soup isn’t only satisfying but also incredibly healthy.
The combination of aromatic herbs and spices enhances the natural flavors of the ingredients, creating a comforting bowl that warms the soul. Ideal for meal prep, this soup stores well in the refrigerator or freezer, making it convenient for busy weeks.
The versatility of this recipe allows you to customize it with your favorite vegetables or spices, ensuring that every batch can have its own unique twist. Serve it with crusty bread for a complete meal that everyone will love.
Ingredients:
- 1 cup dried green or brown lentils, rinsed
- 1 medium onion, diced
- 2 carrots, diced
- 2 celery stalks, diced
- 3 cloves garlic, minced
- 1 can (14.5 ounces) diced tomatoes
- 6 cups vegetable broth
- 1 teaspoon dried thyme
- 1 teaspoon ground cumin
- Salt and pepper to taste
- 2 tablespoons olive oil
- Fresh parsley for garnish (optional)
Instructions:
- In a large pot, heat the olive oil over medium heat. Add the diced onion, carrots, and celery, and sauté for about 5 minutes or until the vegetables begin to soften. Stir frequently to prevent sticking.
- Add the minced garlic to the pot and sauté for another 1-2 minutes until fragrant. Be careful not to let the garlic burn, as it can turn bitter.
- Stir in the rinsed lentils, diced tomatoes (with their juice), vegetable broth, thyme, and cumin. Bring the mixture to a boil, then reduce the heat to low and cover the pot.
- Let the soup simmer for about 25-30 minutes, or until the lentils are tender. Stir occasionally and add additional broth or water if the soup becomes too thick.
- Once the lentils are cooked, season the soup with salt and pepper to taste. Remove from heat and let it sit for a few minutes before serving.
- Serve the soup warm, garnished with fresh parsley if desired, alongside a slice of crusty bread for dipping.
Extra Tips: For a heartier soup, consider adding diced potatoes or spinach during the last few minutes of cooking. If you prefer a spicier kick, toss in some red pepper flakes or a dash of hot sauce.
This soup tastes even better the next day, so feel free to make a larger batch and enjoy it throughout the week!
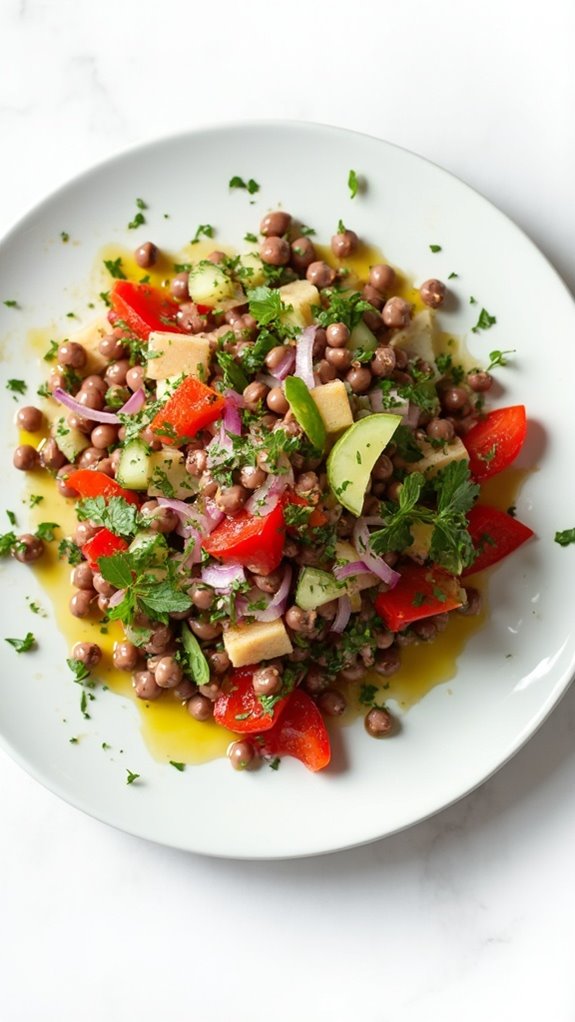
Black-Eyed Peas Salad
Title: Black-Eyed Peas Salad
Prep Time: 15 minutes
Cook Time: 0 minutes
Number of Servings: 6
Required Equipment List: Mixing bowl, spoon, knife, cutting board
Cuisine Type: Southern
Black-Eyed Peas Salad is a revitalizing and nutritious dish that pays homage to the Southern tradition of eating black-eyed peas on New Year’s Day for good luck. This vibrant salad features the earthy flavor of black-eyed peas combined with crunchy vegetables, fresh herbs, and a tangy dressing that elevates its taste.
It’s a perfect side dish for any gathering, providing a delightful contrast to heavier dishes typically served during the holiday season. This no-cook salad is incredibly easy to prepare, making it a great addition to your New Year’s Eve spread. The black-eyed peas provide protein and fiber, while the vegetables add a satisfying crunch and a burst of color.
Serve it chilled or at room temperature, and enjoy the delightful flavors as you celebrate the arrival of the new year!
Ingredients:
- 2 cups canned black-eyed peas, rinsed and drained
- 1 small red bell pepper, diced
- 1 small cucumber, diced
- 1/2 red onion, finely chopped
- 1/4 cup fresh parsley, chopped
- 1/4 cup olive oil
- 2 tablespoons apple cider vinegar
- 1 teaspoon Dijon mustard
- Salt and pepper to taste
Instructions:
- In a large mixing bowl, combine the rinsed and drained black-eyed peas with the diced red bell pepper, cucumber, and finely chopped red onion. Stir gently to mix the ingredients evenly.
- In a small bowl, whisk together the olive oil, apple cider vinegar, and Dijon mustard until well combined. This will serve as the dressing for the salad.
- Pour the dressing over the black-eyed pea mixture and toss gently to coat all the ingredients. Add salt and pepper to taste, adjusting the seasoning according to your preference.
- Fold in the chopped fresh parsley, stirring gently to incorporate it into the salad. The parsley will add a fresh flavor and a pop of color.
- Cover the salad and refrigerate for at least 30 minutes before serving to allow the flavors to meld together. Serve chilled or at room temperature.
Extra Tips: For added flavor, consider incorporating other ingredients such as diced avocado, corn, or even cherry tomatoes. If you prefer a spicier kick, add a finely chopped jalapeño or a dash of hot sauce to the dressing.
This salad can be made a day in advance, making it a perfect, hassle-free dish for your New Year’s Eve celebration. Enjoy your delicious and lucky Black-Eyed Peas Salad!
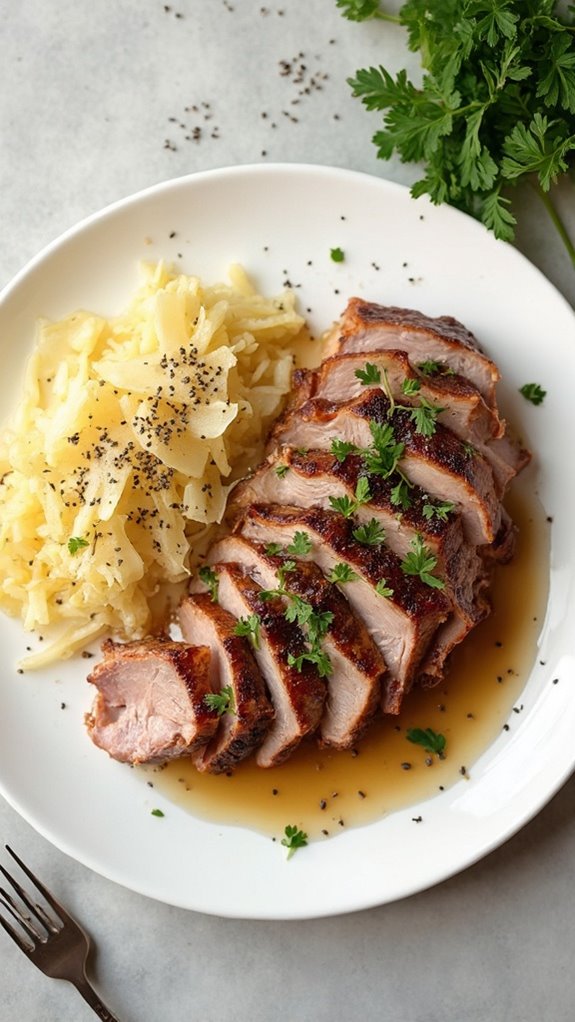
Pork and Sauerkraut
Title: Pork and Sauerkraut
Prep Time: 15 minutes
Cook Time: 2 hours
Number of Servings: 6
Required Equipment List: Large pot or Dutch oven, wooden spoon, measuring cups, serving dish
Cuisine Type: German-American
Pork and Sauerkraut is a classic dish that embodies comfort food at its finest. This hearty recipe features tender, slow-cooked pork paired with tangy sauerkraut, creating a delicious combination that’s both flavorful and satisfying.
Traditionally served on New Year’s Eve for good luck, this dish isn’t only a celebration of flavors but also a symbol of prosperity for the year ahead. The slow cooking process allows the flavors to meld beautifully, resulting in a dish that’s perfect for family gatherings or holiday celebrations.
The key to this dish lies in the quality of the pork and sauerkraut. A well-seasoned pork shoulder or loin becomes melt-in-your-mouth tender after simmering with the sauerkraut, while the natural acidity of the kraut cuts through the richness of the meat.
This recipe is simple to prepare, requiring minimal hands-on time, making it an excellent choice for busy cooks looking to impress their guests with a delightful and traditional meal.
Ingredients:
- 2 pounds pork shoulder or loin
- 1 can (14 oz) sauerkraut, drained
- 1 cup chicken broth
- 1 onion, sliced
- 2 cloves garlic, minced
- 1 tablespoon caraway seeds (optional)
- Salt and pepper to taste
- 1 tablespoon olive oil
Instructions:
- Begin by heating the olive oil in a large pot or Dutch oven over medium heat. Season the pork generously with salt and pepper on all sides, then sear it in the hot oil until browned, about 4-5 minutes per side. This step enhances the flavor of the meat and adds a nice color to the dish.
- Once the pork is browned, remove it from the pot and set it aside. In the same pot, add the sliced onion and minced garlic, sautéing until the onion is soft and translucent, about 3-4 minutes. This will create a flavorful base for the dish.
- Return the pork to the pot and add the drained sauerkraut and chicken broth. If desired, sprinkle the caraway seeds over the top for an additional layer of flavor. Bring the mixture to a simmer, then cover the pot with a lid.
- Reduce the heat to low and let the dish cook for about 2 hours, or until the pork is fork-tender. Make sure to check occasionally, adding more chicken broth if the mixture appears too dry.
- Once the pork is tender, remove it from the pot and let it rest for a few minutes before slicing. Serve the pork on a platter with the sauerkraut spooned over the top, garnished with fresh herbs if desired.
Extra Tips: For an extra layer of flavor, consider adding diced apples or a splash of apple cider to the sauerkraut while it cooks. This adds a hint of sweetness that balances the tanginess of the kraut.
Additionally, this dish pairs wonderfully with mashed potatoes or crusty bread, allowing you to soak up the delicious juices. Enjoy this hearty meal with family and friends, and may it bring you good fortune in the new year!
Thai Pineapple Fried Rice
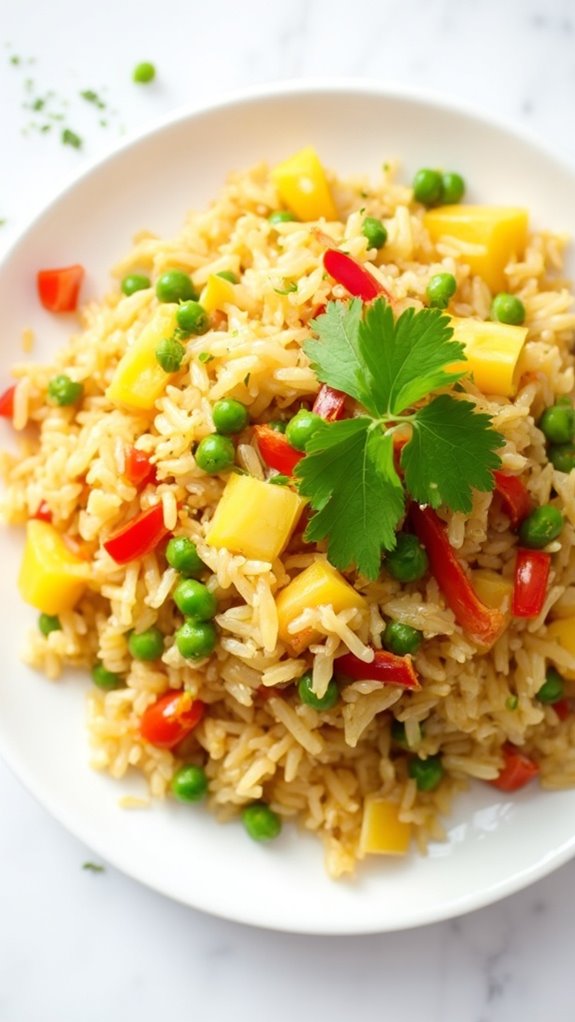
Title: Thai Pineapple Fried Rice
Prep Time: 15 minutes
Cook Time: 20 minutes
Number of Servings: 4
Required Equipment List: Wok or large skillet, spatula, measuring cups, knife, cutting board
Cuisine Type: Thai
Thai Pineapple Fried Rice is a vibrant and flavorful dish that combines the sweetness of fresh pineapple with savory elements of traditional fried rice. This dish is a creative way to incorporate fruit into a savory meal, making it both invigorating and satisfying. The combination of jasmine rice, vegetables, and protein, all tossed together with soy sauce and spices, creates a delightful harmony of flavors that’s perfect for any occasion, from a casual family dinner to a festive gathering.
What sets this fried rice apart isn’t just its delicious taste but also its beautiful presentation. The bright colors of the pineapple, bell peppers, and green onions create an eye-catching dish that will impress your guests. It’s a versatile recipe that can easily be adapted to include your choice of protein such as shrimp, chicken, or tofu, making it a customizable and approachable meal for everyone to enjoy.
Ingredients:
- 2 cups cooked jasmine rice (preferably chilled)
- 1 cup diced fresh pineapple
- 1/2 cup diced bell pepper (red or yellow)
- 1/2 cup frozen peas
- 1/2 cup chopped green onions
- 2 cloves garlic, minced
- 2 tablespoons soy sauce
- 1 tablespoon oyster sauce (optional)
- 2 tablespoons vegetable oil
- Salt and pepper to taste
- Fresh cilantro for garnish (optional)
Instructions:
- Begin by preparing all your ingredients. Make sure your jasmine rice is cooked and preferably chilled, as this will help prevent the rice from becoming mushy during frying. Dice the pineapple, bell pepper, and chop the green onions for easy access while cooking.
- Heat the vegetable oil in a wok or large skillet over medium-high heat. Once the oil is hot, add the minced garlic and sauté for about 30 seconds until fragrant, being careful not to burn it.
- Add the diced bell pepper to the wok and stir-fry for 2-3 minutes until it begins to soften. Next, incorporate the frozen peas and continue to stir-fry for another minute until heated through.
- Push the vegetables to one side of the wok and add the chilled jasmine rice to the other side. Use a spatula to break up any clumps of rice and stir-fry for about 2 minutes, allowing it to heat evenly.
- Combine the rice and vegetables by mixing them together in the wok. Pour in the soy sauce and oyster sauce (if using), and toss everything well to coat all the ingredients. Add the diced pineapple and chopped green onions, gently folding them in for another minute or two.
- Taste the fried rice and season with salt and pepper as needed. Once everything is heated through, remove from heat and transfer to a serving platter. Garnish with fresh cilantro if desired.
Extra Tips: For a bit of extra flavor, consider adding a teaspoon of curry powder or a splash of lime juice to the rice while cooking. If you prefer a spicier kick, chopped chili peppers or a drizzle of sriracha can be added to taste. This dish is best served immediately but can be stored in the refrigerator for up to two days. Reheat it gently to enjoy leftovers!
Twelve Grapes at Midnight

Title: Twelve Grapes at Midnight
Prep Time: 5 minutes
Cook Time: 0 minutes
Number of Servings: 1
Required Equipment List: Bowl
Cuisine Type: Spanish
Twelve Grapes at Midnight is a delightful Spanish tradition that marks the New Year with a burst of flavor and good fortune. According to the custom, at the stroke of midnight, each grape is eaten in time with the twelve chimes of the clock, symbolizing a wish for each month of the coming year.
This simple yet symbolic dish is a fun way to celebrate with family and friends, making it a perfect addition to any New Year’s Eve gathering. This festive practice not only brings luck but also encourages togetherness as everyone participates in the countdown.
The grapes, typically sweet and juicy, provide a revitalizing contrast to the celebratory toasts as the New Year begins. Whether you’re hosting a party or enjoying a quiet evening at home, incorporating Twelve Grapes at Midnight into your festivities is bound to create lasting memories.
Ingredients:
- 12 fresh grapes (preferably seedless)
- Optional: a glass of sparkling wine or cider for toasting
Instructions:
- Gather twelve fresh grapes and place them in a bowl. Make sure they’re washed and dried properly to guarantee freshness.
- As the clock approaches midnight, gather your friends and family to join in the tradition. Prepare a glass of sparkling wine or cider for the celebratory toast, if desired.
- When the clock strikes midnight, eat one grape for each chime of the clock, savoring the taste and making a silent wish for each month of the upcoming year.
- After all twelve grapes are consumed, raise your glass in a toast to the New Year, sharing hopes and wishes for the year ahead with your loved ones.
Extra Tips: Choose grapes that are sweet and juicy for the best experience, and consider using a mix of colors for added visual appeal.
If you want to make it more festive, you can pair the grapes with a fun toast or a short message about the upcoming year. Remember to practice timing your grape consumption to the chimes, as this is part of the fun! Enjoy the moment and celebrate the New Year with joy and laughter!
Soba Noodles
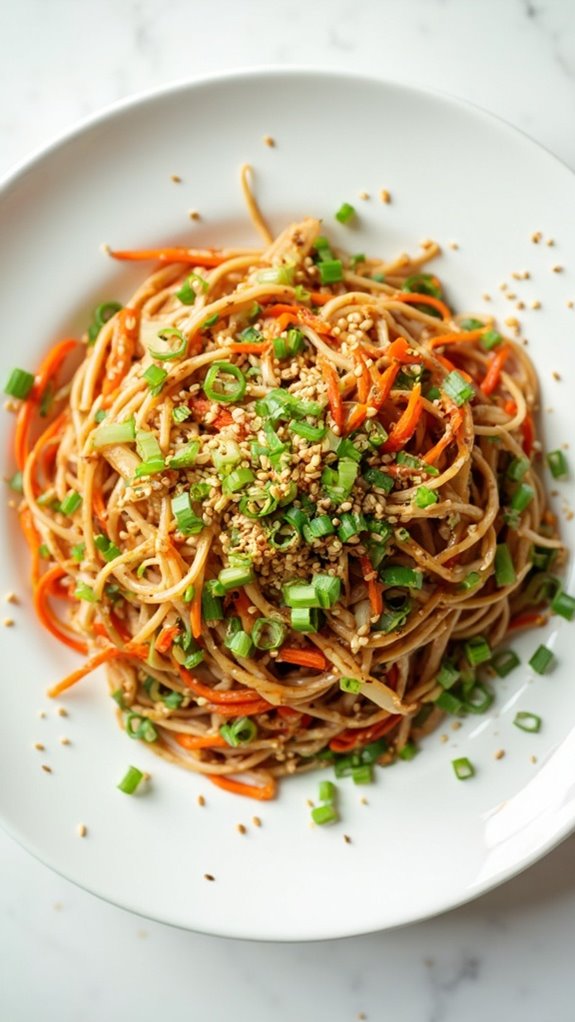
Title: Soba Noodles with Sesame Soy Sauce
Prep Time: 10 minutes
Cook Time: 10 minutes
Number of Servings: 4
Required Equipment List: Pot, colander, mixing bowl, whisk, serving bowl
Cuisine Type: Japanese
Soba Noodles with Sesame Soy Sauce is a quick and delicious dish that showcases the unique flavor of buckwheat noodles. These noodles aren’t only healthy but also versatile, making them perfect for a light lunch or a satisfying dinner. Tossed in a savory sesame soy sauce, this dish is both invigorating and flavorful, featuring a delightful combination of textures and tastes.
The addition of fresh vegetables and sesame seeds adds a nice crunch, making it a well-rounded meal. This recipe is incredibly simple and can be made in under 30 minutes, making it ideal for busy weeknights or last-minute gatherings. You can easily customize this dish by adding your favorite vegetables or proteins, such as grilled chicken, shrimp, or tofu.
Soba noodles are a great choice for those looking for a gluten-free option, as they’re made from buckwheat flour. Enjoy this dish warm or cold, as it’s delicious in both forms!
Ingredients:
- 8 ounces soba noodles
- 1/4 cup soy sauce
- 2 tablespoons sesame oil
- 1 tablespoon rice vinegar
- 1 tablespoon honey or maple syrup
- 1/2 cup sliced green onions
- 1 cup shredded carrots
- 1 cup cucumber, thinly sliced
- 2 tablespoons sesame seeds (toasted)
Instructions:
- Bring a large pot of water to a boil. Add the soba noodles and cook according to package instructions, typically about 4-6 minutes, until they’re tender but still have a slight bite. Be careful not to overcook them.
- Once the noodles are cooked, drain them in a colander and rinse under cold water to stop the cooking process. This also helps to remove excess starch, preventing the noodles from sticking together.
- In a mixing bowl, whisk together the soy sauce, sesame oil, rice vinegar, and honey (or maple syrup) until well combined. This sauce will impart a rich, savory flavor to the noodles.
- In a large serving bowl, combine the cooled soba noodles, sliced green onions, shredded carrots, and cucumber. Pour the sesame soy sauce over the noodles and toss gently until everything is evenly coated.
- Sprinkle the toasted sesame seeds on top for added flavor and crunch. Serve the dish immediately, or refrigerate for about 30 minutes for an invigorating cold noodle salad.
Extra Tips: To enhance the flavor even further, consider adding a sprinkle of chili flakes or chopped fresh herbs like cilantro for an extra kick. You can also experiment with different vegetables based on what you have on hand, such as bell peppers or snap peas.
For a protein boost, shredded chicken, edamame, or tofu can be added directly to the dish, making it a complete meal. Enjoy your soba noodles as a light lunch or serve them alongside grilled meats for a satisfying dinner!
Pomegranate Glazed Chicken
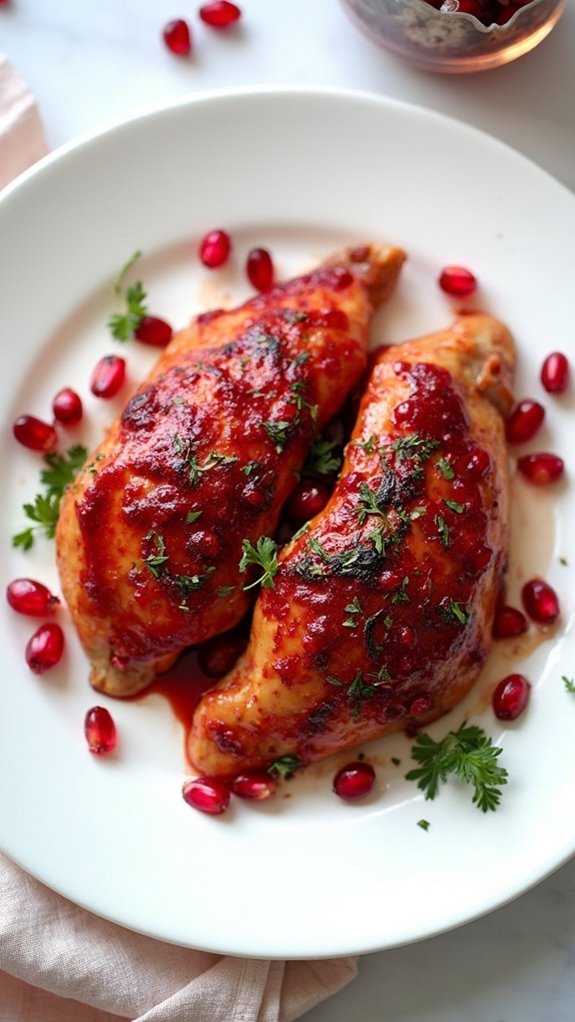
Title: Pomegranate Glazed Chicken
Prep Time: 15 minutes
Cook Time: 30 minutes
Number of Servings: 4
Required Equipment List: Baking sheet, mixing bowl, whisk, oven, skillet
Cuisine Type: American
Pomegranate Glazed Chicken is a festive dish that brings a splash of color and flavor to your dinner table, making it a perfect choice for New Year’s Eve celebrations. The sweet and tangy pomegranate glaze beautifully complements the juicy chicken, creating a delightful balance that’s both satisfying and elegant.
This dish not only looks stunning but also fills your home with a wonderful aroma, making it an ideal centerpiece for your holiday feast. This recipe is simple yet impressive, allowing you to spend more time enjoying the company of your guests.
The pomegranate glaze can be made ahead of time, reducing stress on the big night. Serve this dish with a side of roasted vegetables or fluffy rice to soak up the delicious glaze, and you have a meal that will leave everyone raving about your culinary skills.
Ingredients:
- 4 boneless, skinless chicken breasts
- 1 cup pomegranate juice
- 1/4 cup honey
- 2 tablespoons soy sauce
- 1 tablespoon Dijon mustard
- 2 cloves garlic, minced
- 1 teaspoon fresh ginger, grated
- Salt and pepper to taste
- Fresh pomegranate seeds and parsley for garnish
Instructions:
- Preheat your oven to 375°F (190°C). Prepare a baking sheet by lining it with parchment paper or lightly greasing it to prevent sticking.
- In a mixing bowl, whisk together the pomegranate juice, honey, soy sauce, Dijon mustard, minced garlic, and grated ginger. This will be your glaze, so make sure all ingredients are well combined.
- Season the chicken breasts with salt and pepper on both sides, then place them onto the prepared baking sheet. Pour half of the pomegranate glaze over the chicken, making certain they’re well coated.
- Bake the chicken in the preheated oven for 20 minutes. After 20 minutes, remove the chicken from the oven and brush the remaining glaze over the top.
- Return the chicken to the oven and bake for an additional 10 minutes, or until the chicken is cooked through and reaches an internal temperature of 165°F (75°C). The glaze should be sticky and caramelized at this point.
- Once baked, remove the chicken from the oven and let it rest for a few minutes before slicing. Garnish with fresh pomegranate seeds and chopped parsley for a beautiful presentation.
Extra Tips: For an extra layer of flavor, consider marinating the chicken in the pomegranate glaze for a few hours or overnight in the refrigerator before cooking. This will allow the flavors to penetrate the meat beautifully.
If you prefer a thicker glaze, you can simmer the glaze in a saucepan over medium heat until it reduces to your desired consistency before using it on the chicken. Enjoy this dish with a side of quinoa or a fresh salad to round out your meal.
Sweet Potato Casserole

Title: Sweet Potato Casserole
Prep Time: 20 minutes
Cook Time: 45 minutes
Number of Servings: 8
Required Equipment List: 9×13-inch baking dish, mixing bowl, fork, oven
Cuisine Type: American
Sweet Potato Casserole is a quintessential dish that brings warmth and nostalgia to any holiday gathering, especially on New Year’s Eve. This comforting casserole features a creamy blend of sweet potatoes, brown sugar, and warm spices, topped with a delightful pecan streusel that adds a satisfying crunch.
It’s a delightful way to showcase the natural sweetness of sweet potatoes while also providing a balance of flavor and texture that your guests will love. This recipe isn’t only delicious but also versatile. You can serve it as a side dish alongside your favorite proteins or enjoy it as a standalone delight.
The combination of sweet and savory elements makes it a crowd-pleaser, and it can be prepped ahead of time, allowing you to spend more time with your loved ones during the festivities. Whether it’s a holiday dinner or a family gathering, this Sweet Potato Casserole is sure to be a highlight on your table.
Ingredients:
- 4 medium sweet potatoes, peeled and cubed
- 1/2 cup brown sugar
- 1/4 cup milk
- 1/4 cup unsalted butter, melted
- 1 teaspoon vanilla extract
- 1 teaspoon ground cinnamon
- 1/2 teaspoon ground nutmeg
- 1/4 teaspoon salt
- 1 cup chopped pecans
- 1/2 cup flour
- 1/4 cup granulated sugar
Instructions:
- Preheat your oven to 350°F (175°C). Grease a 9×13-inch baking dish with non-stick spray or butter to prevent the casserole from sticking.
- In a large pot, bring water to a boil and add the cubed sweet potatoes. Cook for about 15-20 minutes or until fork-tender. Drain the sweet potatoes and return them to the pot.
- Add the brown sugar, milk, melted butter, vanilla extract, cinnamon, nutmeg, and salt to the pot with the sweet potatoes. Mash everything together until smooth and well combined. Transfer the sweet potato mixture to the prepared baking dish.
- In a mixing bowl, combine the chopped pecans, flour, and granulated sugar. Stir in the remaining melted butter until the mixture resembles coarse crumbs. Sprinkle the pecan mixture evenly over the sweet potato layer.
- Bake in the preheated oven for 30 minutes, or until the topping is golden brown and the sweet potato filling is heated through.
- Remove from the oven and let the casserole cool slightly before serving. This will allow the flavors to meld together beautifully.
Extra Tips: For a bit of added flavor, consider adding a splash of maple syrup to the sweet potato mixture or to the pecan topping. You can also experiment with different nuts, such as walnuts or almonds, for the topping.
If you prefer a creamier texture, feel free to add an extra splash of milk while mashing the sweet potatoes. This casserole can be made ahead of time and stored in the fridge; simply reheat it in the oven before serving. Enjoy this delicious dish with your loved ones!
Greens and Cornbread
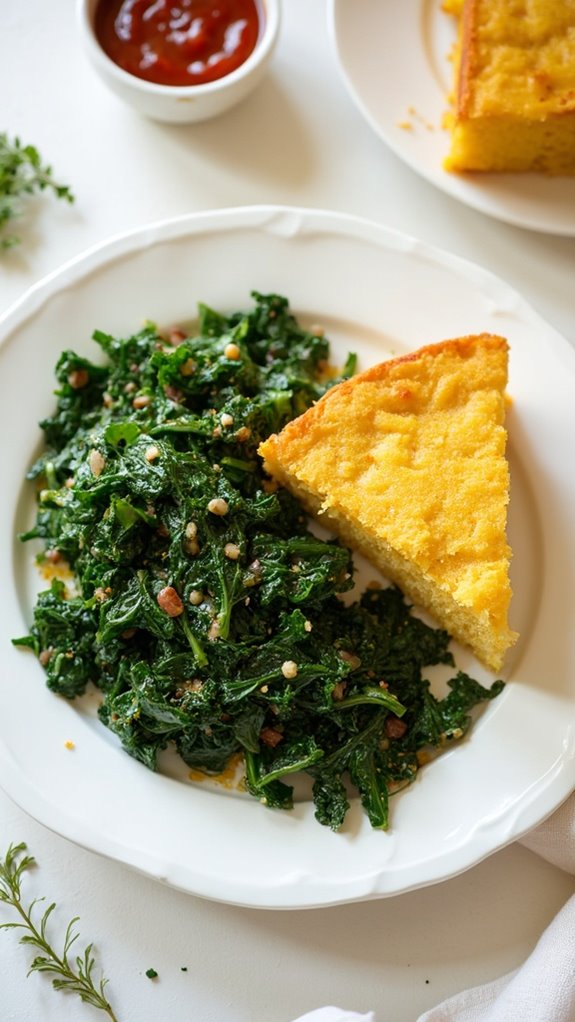
Title: Greens and Cornbread
Prep Time: 20 minutes
Cook Time: 30 minutes
Number of Servings: 6
Required Equipment List: Large mixing bowl, skillet, baking dish, whisk, oven
Cuisine Type: Southern
Greens and cornbread is a classic dish that embodies the heart and soul of Southern cooking. This comforting pairing features tender, sautéed greens seasoned to perfection, alongside a fluffy, golden cornbread that’s perfect for soaking up the juices. The greens, often a mix of collard greens, mustard greens, or kale, are cooked low and slow with aromatics and spices, creating a flavor-packed side dish that complements any meal.
The cornbread provides a delightful contrast with its sweet and savory notes, making it a staple for gatherings, holidays, and everyday dinners alike. This recipe isn’t only simple to prepare, but it also celebrates the use of fresh, wholesome ingredients. With just a handful of pantry staples, you can create a dish that’s both nourishing and delicious.
Enjoy this combination as a side to your favorite protein or as a standout dish on its own. Whether you’re serving it at a festive gathering or enjoying a quiet family meal, greens and cornbread are sure to bring warmth and satisfaction to your table.
Ingredients:
- 1 bunch collard greens, chopped
- 1 bunch mustard greens, chopped
- 1 onion, diced
- 2 cloves garlic, minced
- 2 tablespoons olive oil
- 1 teaspoon salt
- 1/2 teaspoon black pepper
- 1/4 teaspoon red pepper flakes (optional)
- 1 cup cornmeal
- 1 cup milk
- 1/4 cup sugar
- 1/4 cup melted butter
- 2 eggs
- 1 tablespoon baking powder
Instructions:
- Start by preparing the greens. In a large skillet, heat the olive oil over medium heat. Add the diced onion and sauté until translucent, about 5 minutes. Then, add the minced garlic and cook for another minute until fragrant.
- Add the chopped collard and mustard greens to the skillet, stirring well to combine with the onions and garlic. Season with salt, black pepper, and red pepper flakes if using. Cook the greens for about 10-15 minutes, stirring occasionally, until they’re tender and wilted. Set aside.
- Preheat your oven to 400°F (200°C) and lightly grease a baking dish. In a large mixing bowl, combine the cornmeal, sugar, baking powder, and a pinch of salt. In a separate bowl, whisk together the milk, melted butter, and eggs until well combined.
- Pour the wet ingredients into the dry ingredients, stirring until just combined. Be careful not to overmix, as this can lead to dense cornbread.
- Transfer the cornbread batter into the prepared baking dish and spread it evenly. Bake in the preheated oven for 20-25 minutes or until the top is golden brown and a toothpick inserted into the center comes out clean.
- Once the cornbread is finished baking, remove it from the oven and let it cool for a few minutes. Serve the warm cornbread alongside the sautéed greens for a delightful Southern meal.
Extra Tips: For added richness, consider stirring in some grated cheese or cooked bacon into the cornbread batter before baking. If you’re looking to enhance the flavor of the greens, a splash of vinegar or a squeeze of lemon juice just before serving can brighten everything up. Enjoy your greens and cornbread with a side of hot sauce for an extra kick!
Rice Cake With Toppings
Title: Rice Cake With Toppings
Prep Time: 20 minutes
Cook Time: 30 minutes
Number of Servings: 4
Required Equipment List: Mixing bowl, frying pan, spatula, knife, cutting board
Cuisine Type: Asian
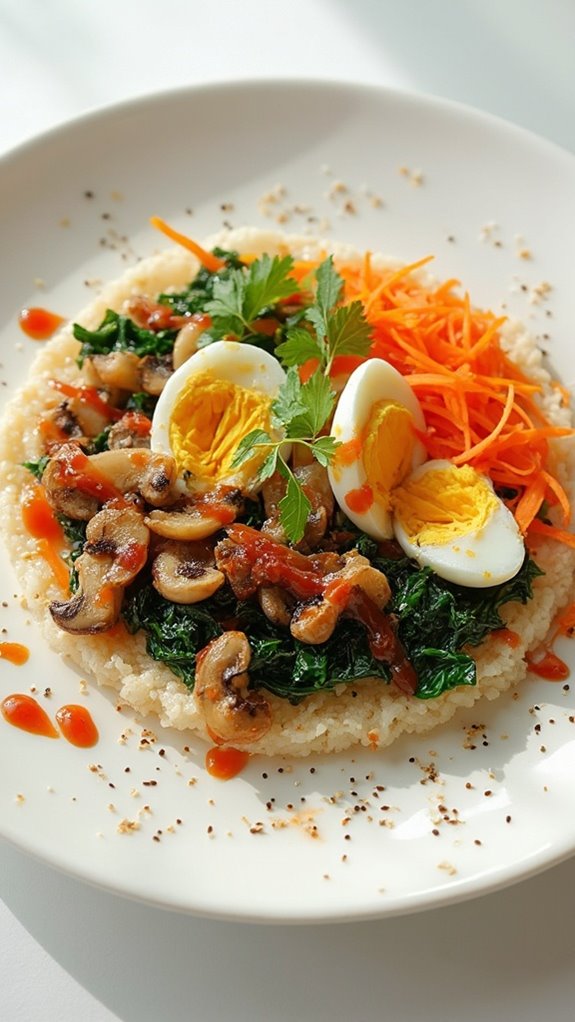
Rice Cake With Toppings is a delightful dish that showcases the versatility of rice cakes, commonly enjoyed in various Asian cuisines. These chewy, delicious rice cakes serve as a perfect canvas for a variety of toppings, allowing you to customize the flavor profile to suit your palate.
Whether you prefer savory ingredients like sautéed vegetables and proteins or a sweet twist with fruits and syrups, this dish is sure to please everyone at your New Year’s Eve gathering. The preparation is straightforward, making it an excellent option for both novice cooks and experienced chefs alike.
You can prepare the rice cakes in advance and simply add your desired toppings right before serving. This way, you can enjoy the festivities without being stuck in the kitchen. Plus, it’s a fun interactive meal where guests can choose their favorite toppings, making it a lively addition to your New Year’s celebration.
Ingredients:
- 1 pound rice cakes (fresh or dried)
- 2 tablespoons vegetable oil
- 1 cup sliced mushrooms
- 1 cup shredded carrots
- 1 cup chopped spinach
- 2 green onions, chopped
- 2 tablespoons soy sauce
- 1 tablespoon sesame oil
- Optional toppings: boiled eggs, chili sauce, sesame seeds, fresh herbs
Instructions:
- If using dried rice cakes, soak them in warm water for about 30 minutes until they become soft and pliable. Fresh rice cakes can be used directly without soaking.
- In a large frying pan, heat the vegetable oil over medium heat. Once hot, add the sliced mushrooms and sauté for about 3-4 minutes until they’re golden brown.
- Add the shredded carrots and chopped spinach to the pan, stirring for another 3-4 minutes until the vegetables are tender and the spinach has wilted.
- Add the soaked rice cakes to the pan, followed by the soy sauce and sesame oil. Toss everything together gently to combine and allow the rice cakes to heat through, about 5-7 minutes.
- Once heated, remove from heat and stir in the chopped green onions. Transfer the rice cakes to a serving platter and arrange your chosen toppings around them for guests to customize their servings.
Extra Tips: When making Rice Cake With Toppings, feel free to experiment with different vegetables and proteins based on what’s in season or your personal preferences. Leftover meats, tofu, or even seafood can be wonderful additions.
Additionally, if you want a bit of crunch, consider toasting some sesame seeds or adding crushed peanuts as a topping. This dish not only makes a great meal but can also be a fun activity for guests to assemble their own plates, fostering interaction and creativity during your New Year’s Eve celebration. Enjoy!
Fish Tacos With Mango Salsa
Title: Fish Tacos With Mango Salsa
Prep Time: 20 minutes
Cook Time: 10 minutes
Number of Servings: 4
Required Equipment List: Grill or skillet, mixing bowl, knife, cutting board, spatula
Cuisine Type: Mexican
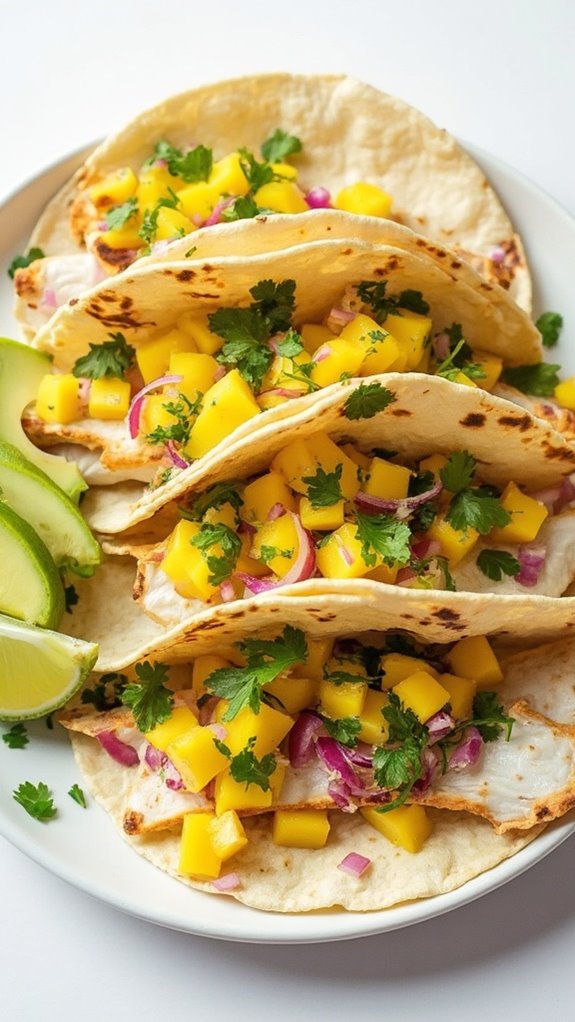
Fish tacos with mango salsa are a vibrant and flavorful dish that brings a taste of the coast to your table. The tender, flaky fish is perfectly seasoned and grilled to perfection, creating a delicious base for the fresh and zesty mango salsa. This dish isn’t only quick to prepare but also offers a delightful contrast of textures and flavors, making it a favorite for gatherings or weeknight dinners.
The mango salsa adds a burst of tropical sweetness, complemented by the freshness of lime juice and the crunch of red onion and cilantro. Wrapped in warm corn tortillas, these fish tacos are a fun and interactive meal that everyone can enjoy. Whether you choose to use grilled fish or a quick pan-sear, this recipe is sure to be a hit with family and friends.
Ingredients:
- 1 pound white fish fillets (e.g., tilapia or cod)
- 1 tablespoon olive oil
- 1 teaspoon chili powder
- 1/2 teaspoon cumin
- Salt and pepper to taste
- 8 small corn tortillas
- 1 ripe mango, diced
- 1/4 red onion, finely chopped
- 1/4 cup fresh cilantro, chopped
- Juice of 1 lime
- Optional: avocado slices and lime wedges for serving
Instructions:
- Begin by preheating your grill or skillet over medium-high heat. While it heats up, pat the fish fillets dry with paper towels and season both sides with olive oil, chili powder, cumin, salt, and pepper.
- Once the grill or skillet is hot, place the seasoned fish fillets on it. Cook for about 3-5 minutes on each side, or until the fish flakes easily with a fork and is cooked through. Remove from heat and let the fish rest for a couple of minutes.
- While the fish is resting, prepare the mango salsa. In a mixing bowl, combine the diced mango, red onion, cilantro, and lime juice. Gently toss the ingredients together until well mixed and season with salt to taste.
- Warm the corn tortillas on the grill or in a dry skillet for about 30 seconds on each side, until they’re pliable and slightly toasted. This step enhances their flavor and texture.
- To assemble the tacos, break the cooked fish into bite-sized pieces and divide them among the warmed tortillas. Top each taco generously with the mango salsa and, if desired, add avocado slices and a squeeze of lime juice.
Extra Tips: For added flavor, consider marinating the fish in lime juice, garlic, and spices for 15-30 minutes before cooking. If you can find fresh mango, it’s ideal, but you can also use frozen mango that has been thawed.
Feel free to customize your tacos with additional toppings such as shredded cabbage, sour cream, or a spicy sauce for a kick. Enjoy your delicious fish tacos with friends and family!
Coconut Macaroons

Title: Coconut Macaroons
Prep Time: 15 minutes
Cook Time: 20 minutes
Number of Servings: 24 macaroons
Required Equipment List: Mixing bowl, baking sheet, parchment paper, whisk, spoon, oven
Cuisine Type: American
Coconut macaroons are a delightful treat that combines the sweetness of coconut with a chewy texture, making them a favorite among cookie lovers. These little bites are incredibly simple to make and require only a handful of ingredients, making them a perfect addition to your New Year’s Eve celebration or any festive occasion.
The golden-brown exterior contrasts beautifully with the soft, moist inside, creating a deliciously satisfying cookie that’s both gluten-free and naturally sweetened. These treats can be enjoyed on their own or dipped in chocolate for an extra indulgent touch.
Their versatility allows you to customize them with different flavors like vanilla or almond extract, making them suitable for various palates. Whether you’re serving them at a party or gifting them to friends and family, coconut macaroons are sure to bring joy and sweetness to the festivities.
Ingredients:
- 2 2/3 cups sweetened shredded coconut
- 2/3 cup sweetened condensed milk
- 1 teaspoon vanilla extract
- 2 large egg whites
- 1/4 teaspoon salt
- 1/2 cup semi-sweet chocolate chips (optional for dipping)
Instructions:
- Preheat your oven to 325°F (163°C) and line a baking sheet with parchment paper. This will prevent the macaroons from sticking and guarantee easy cleanup.
- In a mixing bowl, combine the sweetened shredded coconut, sweetened condensed milk, and vanilla extract. Stir until the coconut is evenly coated with the condensed milk.
- In a separate bowl, use a whisk to beat the egg whites and salt until soft peaks form. This will add lightness to the macaroons.
- Gently fold the egg whites into the coconut mixture, being careful not to deflate the whipped egg whites. This will help the macaroons achieve a light and airy texture.
- Using a spoon or a small cookie scoop, drop heaping tablespoons of the mixture onto the prepared baking sheet, spacing them about 1 inch apart.
- Bake in the preheated oven for 18-20 minutes or until the macaroons are golden brown on the edges. Remove from the oven and let them cool on the baking sheet for a few minutes before transferring them to a wire rack to cool completely.
- If desired, melt the semi-sweet chocolate chips in a microwave-safe bowl. Dip the bottoms of each macaroon into the melted chocolate and place them back on the parchment-lined baking sheet to set.
Extra Tips: For a burst of flavor, try adding a teaspoon of almond extract or a pinch of coconut extract to the coconut mixture. If you prefer a more intense chocolate flavor, drizzle melted chocolate over the tops of the cooled macaroons instead of dipping them.
These macaroons can be stored in an airtight container for several days, making them a great make-ahead treat for your New Year’s Eve festivities. Enjoy!
Chocolate Lucky Coins
Title: Chocolate Lucky Coins
Prep Time: 20 minutes
Cook Time: 10 minutes
Number of Servings: 12
Required Equipment List: Double boiler or microwave-safe bowl, baking sheet, parchment paper, spatula, cookie cutter (coin shape)
Cuisine Type: American
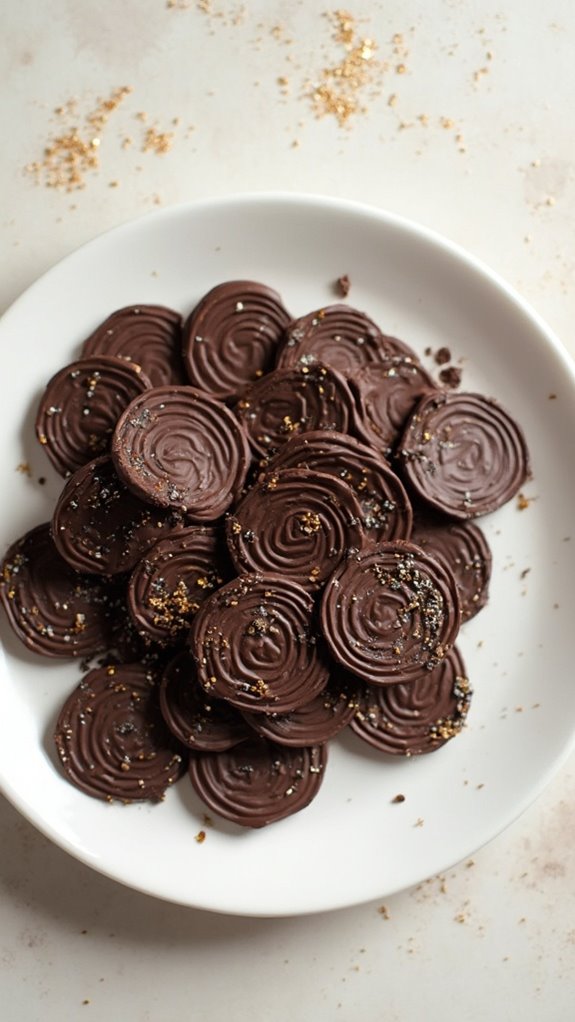
Chocolate Lucky Coins are a festive and fun treat that bring a touch of whimsy to any New Year’s Eve celebration. These delightful chocolate coins can be made easily at home, allowing you to customize the flavors and decorations to suit your party theme. Their shiny, metallic look and rich chocolate flavor make them an irresistible treat for both kids and adults alike.
Perfect for sharing, these chocolate coins can be used as party favors, dessert table decorations, or even as a fun addition to a game or scavenger hunt. With just a few simple ingredients, you can create an impressive and delicious treat that will surely delight your guests and bring a little extra luck to the New Year.
Ingredients:
- 1 cup semi-sweet chocolate chips
- 1 tablespoon coconut oil
- Gold edible glitter (optional)
- Silver edible glitter (optional)
- Parchment paper
Instructions:
- Begin by preparing your workspace. Line a baking sheet with parchment paper to prevent the chocolate from sticking. This will also make it easier to remove the coins once they’ve set.
- In a double boiler or microwave-safe bowl, combine the semi-sweet chocolate chips and coconut oil. If using a double boiler, heat the mixture over simmering water until melted, stirring occasionally. If using the microwave, heat in 30-second intervals, stirring in between until fully melted and smooth.
- Once the chocolate mixture is melted and smooth, remove it from the heat. Allow it to cool slightly for about 2-3 minutes, as this will help prevent the chocolate from losing its shape when poured into the molds.
- Using a spatula, carefully pour the melted chocolate onto the prepared baking sheet, spreading it into an even layer about 1/4 inch thick. Use a cookie cutter to cut out coin shapes while the chocolate is still soft. You can make different sizes for variety if desired.
- If desired, sprinkle the gold and silver edible glitter on top of the coins before the chocolate hardens. This will give them a festive and luxurious appearance. Allow the coins to set at room temperature for about 10-15 minutes or until completely hardened.
- Once set, gently lift the chocolate coins off the parchment paper. Store them in an airtight container at room temperature until you’re ready to serve them.
Extra Tips: To create a twist on the classic recipe, consider adding flavor extracts such as peppermint or orange to the melted chocolate for a unique taste.
You can also use molds in various shapes to create themed coins for your New Year’s Eve celebration. For an extra touch, package the coins in small bags or boxes with festive ribbons to make delightful party favors. Enjoy your delicious and luck-bringing chocolate creations!
Good Luck Charm Cookies

Title: Good Luck Charm Cookies
Prep Time: 20 minutes
Cook Time: 12 minutes
Number of Servings: 24
Required Equipment List: Mixing bowl, baking sheet, parchment paper, cookie cutter, cooling rack
Cuisine Type: American
Good Luck Charm Cookies are a delightful treat to celebrate New Year’s Eve and usher in good fortune for the upcoming year. These festive cookies aren’t only delicious but also customizable with various colorful sprinkles and decorations, making them perfect for the occasion.
The combination of buttery dough and sweet icing creates a delightful cookie that everyone will love, and the charm of these cookies lies in their vibrant appearance and fun shapes. Baked to a golden perfection, these cookies can be shaped into various symbols of good luck, such as lucky stars, four-leaf clovers, or traditional round cookies.
This recipe is ideal for baking with family or friends as you gather to celebrate the new year. With a touch of creativity, you’ll have a delightful platter of cookies that not only tastes great but also adds a festive cheer to your New Year’s celebration.
Ingredients:
- 2 ¾ cups all-purpose flour
- 1 teaspoon baking powder
- ½ teaspoon salt
- 1 cup unsalted butter, softened
- 1 cup granulated sugar
- 1 large egg
- 1 teaspoon vanilla extract
- 2 cups powdered sugar (for icing)
- 2-3 tablespoons milk (for icing)
- Assorted sprinkles and edible decorations
Instructions:
- Preheat your oven to 350°F (175°C) and line baking sheets with parchment paper to prevent sticking and guarantee easy cleanup.
- In a mixing bowl, whisk together the flour, baking powder, and salt. This dry mixture will provide the structure for your cookies.
- In a separate bowl, cream the softened butter and granulated sugar until light and fluffy. This process incorporates air into the mixture, resulting in tender cookies.
- Add the egg and vanilla extract to the butter mixture, beating until well combined. This will add moisture and flavor to the dough.
- Gradually mix the dry ingredients into the wet mixture until a soft dough forms. Be careful not to overmix, as this can lead to tough cookies.
- Roll out the dough on a lightly floured surface to about ¼ inch thick. Use cookie cutters to cut out your desired shapes and place them on the prepared baking sheets.
- Bake the cookies in the preheated oven for 10-12 minutes or until the edges are lightly golden. Allow the cookies to cool on the baking sheets for a few minutes before transferring them to a cooling rack.
- While the cookies are cooling, prepare the icing by mixing the powdered sugar with milk until you reach your desired consistency. You can adjust the thickness by adding more milk or sugar.
- Once the cookies are completely cool, decorate them with icing and assorted sprinkles to add a festive touch.
Extra Tips: For added flavor, consider incorporating a teaspoon of almond extract into the dough. When decorating, let your creativity shine—use different colors of icing and sprinkles to create a variety of designs.
These cookies can also be packaged in decorative bags or boxes as thoughtful gifts for friends and family as you ring in the new year. Enjoy baking and celebrating with these delightful Good Luck Charm Cookies!
Citrus and Herb Roasted Chicken
Title: Citrus and Herb Roasted Chicken
Prep Time: 20 minutes
Cook Time: 1 hour 15 minutes
Number of Servings: 6
Required Equipment List: Roasting pan, cutting board, sharp knife, measuring spoons, oven
Cuisine Type: American
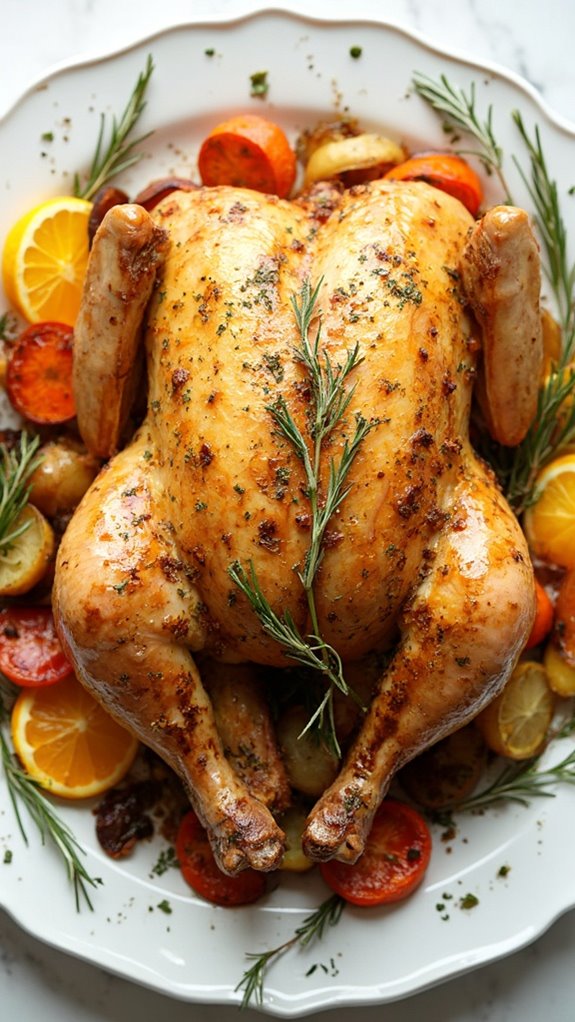
Citrus and Herb Roasted Chicken is a flavorful and aromatic dish that brings a burst of freshness to your dinner table. This easy-to-follow recipe combines the zest of lemon, orange, and fresh herbs, which infuse the chicken with a delightful citrusy aroma.
Roasting the chicken creates a beautifully golden and crispy skin while keeping the meat tender and juicy. Perfect for special occasions or a cozy family dinner, this dish is sure to impress everyone at your table.
The beauty of this roasted chicken recipe lies not only in its simplicity but also in its versatility. You can adjust the herbs and citrus according to your preference, adding your favorite flavors to create a unique twist.
Serve it alongside roasted vegetables or a fresh salad for a complete and satisfying meal. This dish also makes for excellent leftovers, providing flavorful chicken for sandwiches or salads throughout the week.
Ingredients:
- 1 whole chicken (about 4-5 pounds)
- 1 lemon, zested and quartered
- 1 orange, zested and quartered
- 4 cloves garlic, minced
- 1/4 cup olive oil
- 2 tablespoons fresh rosemary, chopped
- 2 tablespoons fresh thyme, chopped
- Salt and pepper to taste
- Fresh herbs for garnish (optional)
Instructions:
- Preheat your oven to 425°F (220°C). This high temperature will help achieve that crispy skin that everyone loves. Prepare a roasting pan by placing a rack inside if you have one; this will allow air to circulate around the chicken for even cooking.
- In a small bowl, combine the minced garlic, olive oil, rosemary, thyme, salt, and pepper to create an herb mixture. Use your fingers to loosen the skin on the chicken, creating pockets for the herb mixture.
- Rub half of the herb mixture directly under the skin of the chicken, distributing it evenly. Then, rub the remaining mixture all over the outside of the chicken. Place the quartered lemon and orange inside the cavity of the chicken to infuse it with flavor as it cooks.
- Place the chicken breast side up on the prepared roasting rack in the pan. Tuck the wing tips underneath the body to prevent them from burning.
- Roast the chicken in the preheated oven for about 1 hour and 15 minutes, or until the internal temperature reaches 165°F (75°C) when measured at the thickest part of the thigh. Baste the chicken with the pan juices halfway through cooking for added moisture and flavor.
- Once done, remove the chicken from the oven and let it rest for 10-15 minutes before carving. This resting period allows the juices to redistribute, ensuring each slice is juicy and tender. Garnish with fresh herbs if desired before serving.
Extra Tips: For an even more flavorful chicken, consider marinating the chicken in the herb and citrus mixture for a few hours or overnight before roasting. This will enhance the flavors deeply.
Additionally, you can add vegetables like carrots, potatoes, or onions to the roasting pan for a complete meal, soaking up all the delicious drippings from the chicken as it cooks. Enjoy your delicious Citrus and Herb Roasted Chicken!
Spinach and Feta Stuffed Peppers
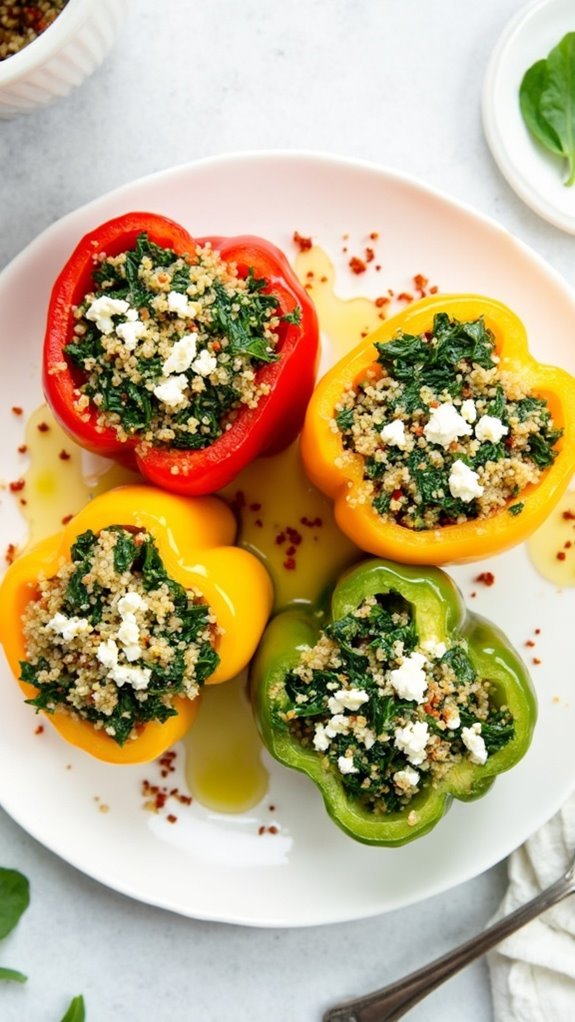
Title: Spinach and Feta Stuffed Peppers
Prep Time: 15 minutes
Cook Time: 30 minutes
Number of Servings: 4
Required Equipment List: Baking dish, mixing bowl, oven, knife, cutting board
Cuisine Type: Mediterranean
Spinach and Feta Stuffed Peppers are a delicious and healthy dish that brings together the vibrant flavors of fresh spinach and the tangy taste of feta cheese, all wrapped in a sweet bell pepper. This recipe is perfect for a festive New Year’s Eve gathering or as a wholesome meal option any night of the week.
The combination of ingredients creates a satisfying filling that’s both nutritious and flavorful, making it a crowd-pleaser for vegetarians and meat-lovers alike. The beauty of this dish lies in its versatility; you can easily adapt the filling by adding ingredients like cooked quinoa, rice, or even different herbs and spices based on your preferences.
These stuffed peppers aren’t only visually appealing, but they also offer a great opportunity to include more vegetables in your diet. Baked to perfection, the peppers become tender while the filling remains moist and bursting with flavor, making each bite a delightful experience.
Ingredients:
- 4 large bell peppers (any color)
- 2 cups fresh spinach, chopped
- 1 cup feta cheese, crumbled
- 1/2 cup cooked quinoa or rice
- 1/4 cup onion, finely chopped
- 2 cloves garlic, minced
- 1 teaspoon olive oil
- Salt and pepper to taste
- 1/2 teaspoon dried oregano
- 1/2 teaspoon red pepper flakes (optional)
Instructions:
- Preheat your oven to 375°F (190°C). While the oven is heating, prepare the bell peppers by slicing the tops off and removing the seeds and membranes. Arrange them upright in a baking dish, ready to be stuffed.
- In a mixing bowl, heat the olive oil over medium heat in a skillet. Add the chopped onion and minced garlic, sautéing until the onion is translucent, about 3-4 minutes.
- Add the chopped spinach to the skillet and cook until wilted, about 2-3 minutes. Remove from heat and let it cool slightly, then mix in the feta cheese, cooked quinoa or rice, oregano, red pepper flakes (if using), and season with salt and pepper to taste.
- Spoon the spinach and feta mixture into each prepared bell pepper, pressing down lightly to confirm they’re well-packed. Place the stuffed peppers in the baking dish and cover with aluminum foil.
- Bake the stuffed peppers in the preheated oven for 25 minutes covered, then remove the foil and bake for an additional 5-10 minutes until the peppers are tender and the tops are lightly golden.
- Remove the peppers from the oven and let them cool for a few minutes before serving. Enjoy your flavorful and nutritious stuffed peppers warm!
Extra Tips: If you prefer a bit of a crunch, consider topping the stuffed peppers with breadcrumbs mixed with a little olive oil before the final baking step. This will create a delightful crispy topping.
Additionally, feel free to experiment with different types of cheese or add cooked ground meat for a heartier filling. These stuffed peppers can be made ahead of time and stored in the refrigerator, then simply baked before serving for a quick and easy meal solution.
Maple-Glazed Brussels Sprouts
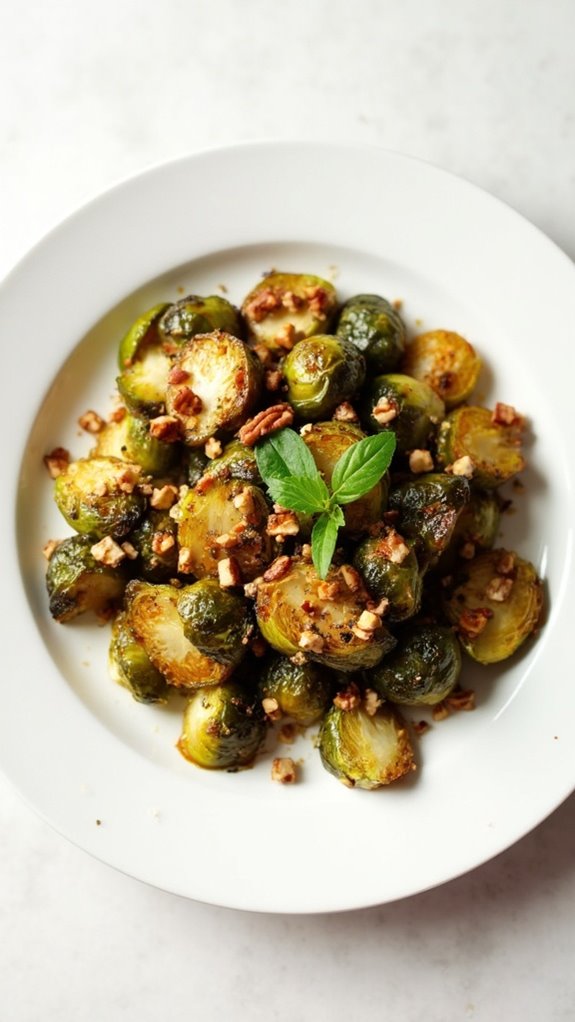
Title: Maple-Glazed Brussels Sprouts
Prep Time: 10 minutes
Cook Time: 25 minutes
Number of Servings: 4
Required Equipment List: Baking sheet, mixing bowl, oven, spatula
Cuisine Type: American
Maple-Glazed Brussels Sprouts are a delicious and visually appealing side dish that will elevate any meal, especially during the festive season. The natural bitterness of the Brussels sprouts is beautifully balanced by the sweet maple syrup, creating a harmony of flavors that’s both satisfying and comforting.
Roasting the sprouts in the oven not only enhances their natural sweetness but also gives them a delightful crispy texture, making them irresistible. This dish is perfect for New Year’s Eve gatherings or any special occasion when you want to impress your guests.
The combination of maple syrup, olive oil, and a touch of balsamic vinegar adds depth to the flavor profile, making these Brussels sprouts a standout addition to your holiday table. This recipe is simple yet elegant, allowing you to enjoy the holiday spirit without spending hours in the kitchen.
Whether you’re serving them alongside turkey, ham, or a vegetarian entrée, these Maple-Glazed Brussels Sprouts will surely become a favorite.
Ingredients:
- 1 pound Brussels sprouts, trimmed and halved
- 3 tablespoons olive oil
- 2 tablespoons maple syrup
- 1 tablespoon balsamic vinegar
- Salt and pepper to taste
- 1/4 cup chopped pecans (optional)
- Fresh thyme leaves for garnish (optional)
Instructions:
- Preheat your oven to 400°F (200°C). Line a baking sheet with parchment paper to prevent sticking and guarantee easy cleanup. This will also help the Brussels sprouts roast evenly.
- In a mixing bowl, combine the halved Brussels sprouts, olive oil, maple syrup, balsamic vinegar, salt, and pepper. Toss everything together until the Brussels sprouts are well coated with the mixture.
- Spread the Brussels sprouts in a single layer on the prepared baking sheet. Make sure they aren’t overcrowded, as this will help them roast properly and develop a nice caramelization.
- Roast in the preheated oven for about 20-25 minutes, tossing halfway through, until the Brussels sprouts are golden brown and tender. If you like them extra crispy, you can broil them for an additional 2-3 minutes at the end.
- If using, sprinkle the chopped pecans over the Brussels sprouts during the last 5 minutes of roasting to toast them lightly. Once done, remove the baking sheet from the oven and let it cool slightly before serving.
Extra Tips: For an extra flavor boost, consider adding a sprinkle of red pepper flakes for a touch of heat or a squeeze of fresh lemon juice before serving for a zesty finish.
These Brussels sprouts can be made ahead of time and reheated in the oven, making them a convenient option for holiday gatherings. Feel free to experiment with other nuts or add dried cranberries for a delightful contrast in flavor and texture. Enjoy!
Almonds and Dried Fruits
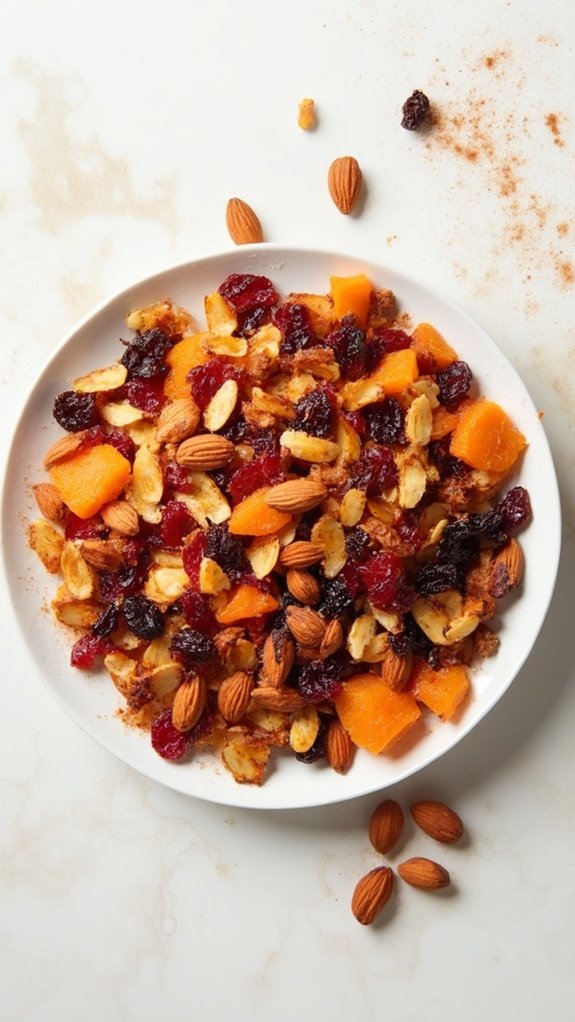
Title: Almonds and Dried Fruits Snack Mix
Prep Time: 10 minutes
Cook Time: 5 minutes
Number of Servings: 6
Required Equipment List: Baking sheet, mixing bowl, spatula, oven
Cuisine Type: Snack
This Almonds and Dried Fruits Snack Mix is a delightful and nutritious treat that’s perfect for any gathering, especially on New Year’s Eve. Combining crunchy almonds with a variety of sweet and chewy dried fruits, this snack mix isn’t only easy to prepare but also packed with energy-boosting ingredients.
The mix is versatile, allowing you to customize it with your favorite nuts and dried fruits, making it a great choice for both sweet and savory snack lovers. Roasting the almonds enhances their flavor and provides an irresistible crunch, while the dried fruits add a natural sweetness that balances the dish perfectly.
This snack mix is ideal for serving at parties, movie nights, or even for packing in lunchboxes. It’s a healthier alternative to traditional party snacks, guaranteeing you can indulge without the guilt.
Ingredients:
- 2 cups raw almonds
- 1 cup mixed dried fruits (such as cranberries, apricots, and raisins)
- 1 tablespoon honey (optional)
- 1/2 teaspoon cinnamon (optional)
- Pinch of salt
Instructions:
- Preheat your oven to 350°F (175°C). Line a baking sheet with parchment paper to prevent sticking and guarantee easy cleanup.
- Spread the raw almonds evenly on the prepared baking sheet. Optionally, drizzle the honey over the almonds for added sweetness and sprinkle with cinnamon and a pinch of salt to enhance flavor.
- Roast the almonds in the preheated oven for about 5-7 minutes, stirring halfway through to guarantee even toasting. Keep an eye on them to prevent burning, as nuts can toast quickly.
- Once the almonds are golden and fragrant, remove them from the oven and allow them to cool for a few minutes.
- In a mixing bowl, combine the roasted almonds with the mixed dried fruits. Toss thoroughly to guarantee even distribution of the ingredients.
- Serve the snack mix in a large bowl or portion it into smaller containers for easy snacking. Enjoy it fresh or store it in an airtight container for later.
Extra Tips: Feel free to experiment with different types of nuts, such as walnuts, pecans, or cashews, to create your perfect mix.
If you prefer a touch of saltiness, consider adding a handful of pretzels or popcorn for a sweet and salty combination. This snack mix can also be a great topping for yogurt or salads, adding texture and flavor to everyday meals.
Fortune Cookie Desserts

Title: Fortune Cookie Desserts
Prep Time: 20 minutes
Cook Time: 10 minutes
Number of Servings: 12
Required Equipment List: Baking sheet, parchment paper, mixing bowl, whisk, spatula, oven
Cuisine Type: Asian-American
Fortune Cookie Desserts are a delightful and whimsical treat perfect for celebrating New Year’s Eve or any festive occasion. These cookies aren’t only fun to make but also allow you to add a personal touch with your own messages inside. The crispy, light texture of the cookies paired with sweet, customizable fortunes makes them a unique dessert that will surely impress your guests.
With a hint of almond flavor and a satisfying crunch, these fortune cookies are a nostalgic nod to the classic Chinese restaurants that serve them. Making these cookies at home is easier than you might think and can be a fun activity for the whole family. You can get creative by adding colorful sprinkles or chocolate drizzles to make them visually appealing.
Additionally, the fortunes can range from inspirational quotes to jokes, providing a bit of entertainment for everyone at your gathering. Just remember to work quickly when shaping the cookies, as they harden fast once removed from the oven!
Ingredients:
- 3 egg whites
- 1 cup granulated sugar
- 1 cup all-purpose flour
- 1/2 cup unsalted butter, melted
- 1 teaspoon vanilla extract
- 1 teaspoon almond extract
- Pinch of salt
- 12 small strips of paper with fortunes
Instructions:
- Preheat your oven to 375°F (190°C) and line a baking sheet with parchment paper. This will help prevent the cookies from sticking and make cleanup easier.
- In a mixing bowl, whisk together the egg whites and sugar until frothy. This should take about 2-3 minutes. Then, add in the melted butter, vanilla extract, almond extract, and a pinch of salt. Mix until well combined.
- Gradually sift in the flour while stirring the mixture until it forms a smooth batter. The consistency should be similar to pancake batter, so ascertain there are no lumps.
- Drop tablespoon-sized portions of the batter onto the prepared baking sheet, leaving ample space between each cookie, as they’ll spread while baking. Use the back of a spoon to spread the batter into thin circles, about 3 inches in diameter.
- Bake the cookies in the preheated oven for about 8-10 minutes, or until the edges turn a light golden brown. Keep a close eye on them, as they can burn quickly.
- Remove the baking sheet from the oven and let the cookies cool for about 30 seconds. While they’re still warm and pliable, place a fortune in the center of each cookie. Fold the cookie in half and pinch the edges together to seal.
- To create the signature fortune cookie shape, gently bend the folded cookie over the edge of a cup or bowl. Hold it in place for a few seconds until it firms up.
Extra Tips: When making fortune cookies, it’s essential to work quickly while shaping them since they harden fast as they cool. You can prepare multiple fortunes in advance and have fun with the messages.
Consider adding food coloring to the batter for a festive touch or dipping the cooled cookies in chocolate for an extra treat. If you have leftover batter, simply store it in the refrigerator for up to two days and bake the cookies fresh as needed. Enjoy your homemade fortune cookies!
Prosperity Punch

Title: Prosperity Punch
Prep Time: 15 minutes
Cook Time: 0 minutes
Number of Servings: 8
Required Equipment List: Large pitcher, measuring cups, stirring spoon, ice cubes
Cuisine Type: Beverage
Prosperity Punch is a festive and invigorating drink that embodies the spirit of celebration, making it a perfect addition to your New Year’s Eve festivities. This vibrant punch combines the zesty flavors of citrus fruits with the sweetness of pomegranate juice, creating a delightful balance that will tantalize your taste buds.
Garnished with fresh mint and served over ice, this punch not only looks beautiful but is also incredibly easy to prepare, ensuring that you can spend less time in the kitchen and more time enjoying the party.
This non-alcoholic beverage can easily be made ahead of time, allowing the flavors to meld beautifully. You can also customize this punch by adding your favorite fruits or sparkling water for added fizz. Whether you’re hosting a large gathering or an intimate celebration, Prosperity Punch is a great way to toast to the New Year and share good fortune with family and friends.
Ingredients:
- 4 cups pomegranate juice
- 2 cups orange juice
- 1 cup pineapple juice
- 2 cups ginger ale (or club soda)
- 1 cup fresh strawberries, sliced
- 1 orange, sliced
- 1 lemon, sliced
- Fresh mint leaves (for garnish)
- Ice cubes
Instructions:
- In a large pitcher, combine the pomegranate juice, orange juice, and pineapple juice. Stir well to mix the juices thoroughly, creating a vibrant and flavorful base for your punch.
- Just before serving, add the ginger ale (or club soda) to the juice mixture. This will give your punch a lively fizz that enhances the overall drinking experience.
- To prepare the punch for serving, fill glasses with ice cubes. Pour the punch over the ice, allowing the cold drink to chill perfectly and keep it invigorating.
- Garnish each glass with a few slices of fresh strawberries, orange, and lemon. Adding these fruit slices not only looks festive but also infuses additional flavor into the punch.
- Finally, add a few fresh mint leaves to each glass for a touch of color and an aromatic finish. This will elevate the presentation and provide an invigorating scent with every sip.
Extra Tips:
For a fun twist, consider adding a splash of grenadine for added sweetness and a beautiful gradient effect in the punch. If you’re serving a mixed crowd, you can create an adult version by offering vodka or rum on the side, allowing guests to spike their drinks if they wish.
Prepare the juice mixture ahead of time and store it in the fridge, adding the ginger ale and garnishes just before serving to maintain the fizz. Enjoy your Prosperity Punch as you toast to the New Year!
Conclusion
As you gather around the table this New Year’s Eve, remember that each dish is like a tiny treasure chest, brimming with good fortune waiting to be opened. Whether you choose Hoppin’ John or a vibrant lentil soup, these recipes aren’t just about flavor—they’re about setting the stage for a prosperous year ahead. So, which dish will you plunge into first? Let’s make this celebration not just a feast, but a stepping stone into a year filled with abundance!

