No products in the cart.
21 Fun and Festive New Year’s Eve Party Recipes for Kids
New Year’s Eve is a fantastic opportunity to get the kids into the kitchen, and with these 21 fun and festive New Year’s Eve recipes for kids, they’ve got a chance to embrace their inner chefs! Think sparkling fruit punch that’s both invigorating and colorful, or confetti popcorn mix bursting with sweetness. Mini pizza bites can turn everyone’s favorites into delightful, bite-sized treats. Plus, a rainbow veggie platter makes eating healthy a blast! Wondering how to keep them entertained while cooking? These engaging recipes promote creativity and teamwork. Stick around, and you’ll discover even more delicious ideas to ring in the New Year with fun!
Contents
hide
Sparkling Fruit Punch
Title: Sparkling Fruit Punch
Prep Time: 10 minutes
Cook Time: 0 minutes
Number of Servings: 6
Required Equipment List: Large pitcher, measuring cups, stirring spoon, ice cube tray
Cuisine Type: American
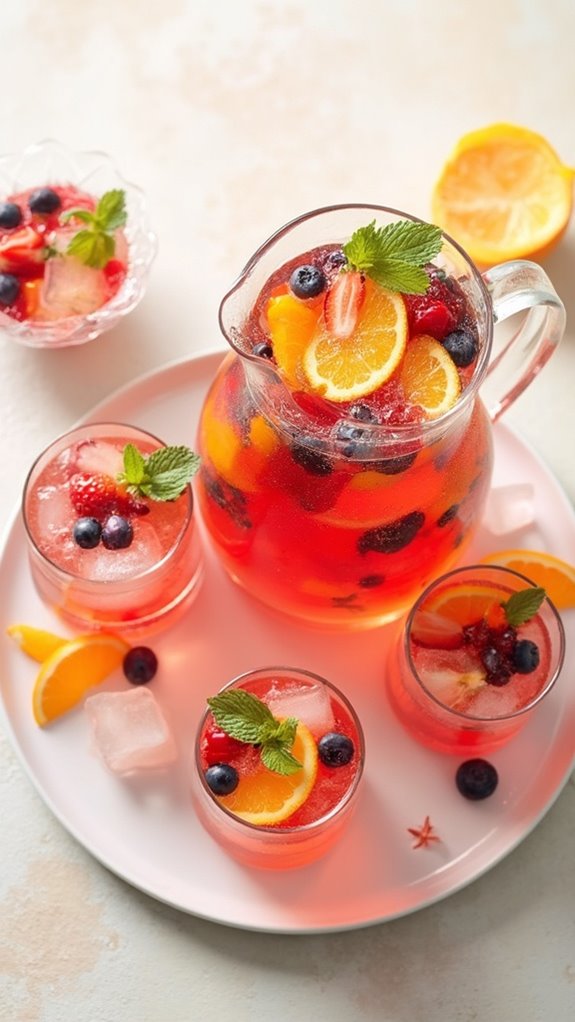
This Sparkling Fruit Punch is a festive and invigorating drink that kids will love, making it perfect for New Year’s Eve parties or any celebration. With its vibrant colors and bubbly texture, this punch is visually appealing and tantalizing to the taste buds.
The combination of fruity flavors from the juice and the fizz from the sparkling water creates a delightful drink that’s both fun and easy to prepare. What makes this punch even more exciting is the ability to customize it with your favorite fruits. Fresh fruits not only enhance the flavor but also add a beautiful touch to the presentation.
Serve it in a large pitcher and let the kids help mix it together; it’s a great way to get them involved in the festivities. This Sparkling Fruit Punch will surely be the highlight of any gathering, providing a delicious non-alcoholic option that everyone can enjoy.
Ingredients:
- 4 cups fruit juice (such as orange, pineapple, or cranberry)
- 2 cups sparkling water or lemon-lime soda
- 1 cup fresh fruit (such as oranges, strawberries, or blueberries)
- Ice cubes
- Fresh mint leaves (optional for garnish)
Instructions:
- Begin by preparing your fresh fruits. Wash the strawberries, blueberries, and any other fruits you choose to use. Slice the strawberries and oranges into thin rounds or wedges for a more appealing presentation.
- In a large pitcher, pour in the 4 cups of fruit juice. You can mix different types of juice to create a unique flavor combination, depending on your preferences.
- Next, add the 2 cups of sparkling water or lemon-lime soda to the pitcher. This will give your punch its delightful fizz, making it feel festive and bubbly.
- Gently stir the mixture with a spoon to combine the juices and the sparkling water. Be careful not to stir too vigorously, as you want to keep as much carbonation as possible.
- Add the prepared fresh fruits to the pitcher, allowing them to float and infuse their flavors into the punch. You can also add ice cubes directly into the pitcher or serve the punch over ice in individual glasses.
- For an extra touch, garnish with fresh mint leaves before serving to add a pop of color and an invigorating aroma.
Extra Tips: To elevate the punch, consider freezing some of the fruit slices in ice cubes ahead of time. This will keep the punch cool without diluting it.
You can also add a splash of grenadine for a sweeter flavor and a beautiful color gradient. Allow the kids to help with the fruit prep and mixing to make this a fun and interactive recipe for your New Year’s Eve celebration!
Confetti Popcorn Mix

Title: Confetti Popcorn Mix
Prep Time: 10 minutes
Cook Time: 5 minutes
Number of Servings: 6
Required Equipment List: Large mixing bowl, baking sheet, parchment paper, microwave-safe bowl
Cuisine Type: Snack
Confetti Popcorn Mix is a fun and festive treat that’s perfect for kids, especially during New Year’s Eve celebrations. This colorful mix combines light and fluffy popcorn with an assortment of sweet and crunchy ingredients, creating a delightful explosion of flavors and textures.
It’s a hit for parties and gatherings, making it easy for little hands to grab a handful of this delicious snack while they ring in the new year. This recipe isn’t only simple and quick to prepare, but it also encourages creativity. Kids can help by adding their favorite candies and sprinkles, making it a customizable treat that suits every taste.
With its vibrant colors and playful presentation, Confetti Popcorn Mix is sure to delight children and adults alike, serving as a perfect addition to any festive celebration.
Ingredients:
- 10 cups popped popcorn
- 1 cup mini marshmallows
- 1 cup colorful candy-coated chocolates (like M&Ms)
- 1/2 cup pretzel sticks, broken into pieces
- 1/2 cup rainbow sprinkles
- 1/4 cup melted white chocolate (optional)
Instructions:
- Start by popping the popcorn using your preferred method, whether it’s on the stovetop, in an air popper, or in the microwave. Once popped, transfer the popcorn to a large mixing bowl, ensuring there are no unpopped kernels mixed in.
- In a microwave-safe bowl, melt the white chocolate in 30-second intervals, stirring in between until smooth. If you choose not to use white chocolate, you can skip this step.
- Add the mini marshmallows, colorful candy-coated chocolates, pretzel sticks, and rainbow sprinkles to the bowl of popcorn. If you’re using melted white chocolate, drizzle it over the popcorn mixture at this stage for extra sweetness.
- Gently toss all the ingredients together using your hands or a large spatula until the popcorn is evenly coated and the mix is well combined. Be careful not to crush the popcorn while mixing.
- Spread the Confetti Popcorn Mix out onto a baking sheet lined with parchment paper to allow it to cool and set. If you used white chocolate, this will help it harden.
Extra Tips: For an extra crunch, consider adding nuts or seeds to the mix. Also, feel free to customize the ingredients based on seasonal candies or your child’s favorites.
Storing the Confetti Popcorn Mix in an airtight container will keep it fresh and crispy, making it a great snack for days after your party. Enjoy this colorful and festive treat!
Mini Pizza Bites
Title: Mini Pizza Bites
Prep Time: 10 minutes
Cook Time: 15 minutes
Number of Servings: 12 bites
Required Equipment List: Baking sheet, parchment paper, oven, mixing bowl, spoon
Cuisine Type: Italian-American
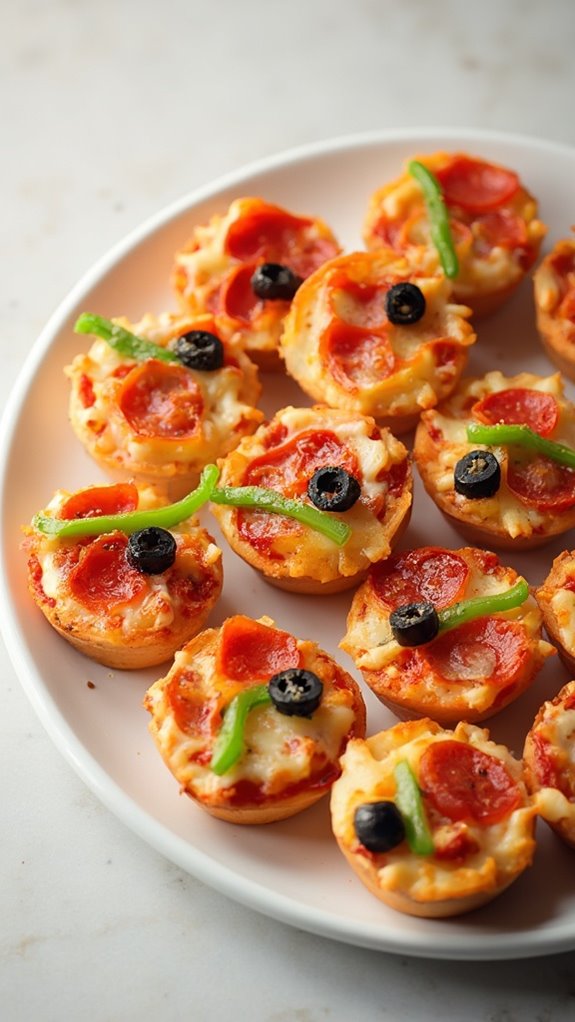
Mini Pizza Bites are a fun and easy way to get kids involved in the kitchen while allowing them to customize their own snack. These bite-sized treats are perfect for a New Year’s Eve party or any festive gathering, combining the classic flavors of pizza in a kid-friendly format.
With just a few simple ingredients, you can create a deliciously cheesy snack that will have everyone asking for more. These Mini Pizza Bites can be made with store-bought dough, making them quick to prepare. Kids can help sprinkle their favorite toppings, whether it’s pepperoni, bell peppers, or olives, encouraging creativity and making mealtime more interactive.
Plus, they’re baked until golden and bubbly, guaranteeing a crispy crust that’s sure to please even the pickiest eaters.
Ingredients:
- 1 package refrigerated pizza dough
- 1 cup pizza sauce
- 1 ½ cups shredded mozzarella cheese
- ½ cup sliced pepperoni (or any desired toppings)
- 1 teaspoon Italian seasoning
- Optional: sliced bell peppers, olives, or mushrooms
Instructions:
- Preheat your oven to 400°F (200°C). Line a baking sheet with parchment paper to prevent sticking and make cleanup easier.
- On a lightly floured surface, roll out the refrigerated pizza dough into a rectangular shape about ¼ inch thick. Using a cookie cutter or a knife, cut the dough into small squares or circles, approximately 2 inches in size.
- Place the cut dough pieces onto the prepared baking sheet, leaving some space between each piece. This will allow them to expand while baking.
- Spoon a small amount of pizza sauce onto each piece of dough, spreading it evenly but leaving a little space around the edges.
- Sprinkle shredded mozzarella cheese generously over the sauce on each bite, followed by your choice of toppings such as pepperoni and Italian seasoning.
- Bake in the preheated oven for 12-15 minutes, or until the cheese is melted and the edges of the dough are golden brown. Keep an eye on them to make sure they don’t over-bake.
- Once baked, remove the mini pizza bites from the oven and let them cool for a few minutes before serving.
Extra Tips: To make the Mini Pizza Bites even more appealing, consider using cookie cutters to shape the dough into fun shapes like stars or hearts.
You can also prepare a variety of sauces for dipping, such as ranch or garlic butter, to add an extra element of fun. Encourage kids to experiment with different toppings to create their perfect mini pizza bites!
Rainbow Veggie Platter

Title: Rainbow Veggie Platter
Prep Time: 15 minutes
Cook Time: 0 minutes
Number of Servings: 4
Required Equipment List: Cutting board, knife, serving platter, small bowls (optional)
Cuisine Type: American
The Rainbow Veggie Platter is a vibrant and visually appealing dish that promotes children to eat their vegetables while having fun. This platter features an assortment of colorful fresh vegetables that can be arranged in a variety of patterns, making it not only nutritious but also a delightful centerpiece for any New Year’s Eve party.
Pair it with a tasty dip, such as hummus or ranch dressing, to make it even more enticing for the little ones. This recipe is incredibly versatile, allowing you to use whatever vegetables you have on hand or that your kids enjoy. The bright colors and different shapes of the veggies will engage children’s imaginations, making them more likely to try new flavors.
This is a perfect way to promote healthy eating habits while celebrating the festive season with a fun and interactive dish!
Ingredients:
- 1 cup cherry tomatoes
- 1 cup baby carrots
- 1 cup cucumber, sliced
- 1 cup bell peppers (red, yellow, and green), sliced
- 1 cup broccoli florets
- 1 cup snap peas
- 1 cup celery sticks
- Hummus or ranch dressing (for dipping)
Instructions:
- Begin by washing all the vegetables thoroughly under cold water to remove any dirt or residues. Pat them dry with a clean kitchen towel or paper towels to guarantee they’re ready for serving.
- On a cutting board, slice the cucumbers and bell peppers into bite-sized pieces. Cut the celery into sticks, ensuring they’re uniform in size for easy handling.
- Arrange the prepared vegetables on a large serving platter in a rainbow pattern. Start with the cherry tomatoes for red, followed by orange baby carrots, yellow bell peppers, green cucumber, broccoli florets for green, and finally, finish with snap peas or celery sticks for the last layer.
- If desired, place small bowls of hummus or ranch dressing in the center of the platter or around the edge for easy dipping access. This adds a fun element to the platter and encourages kids to enjoy their veggies.
- Once everything is arranged, serve immediately or cover with plastic wrap and place in the refrigerator until ready to serve. This dish is best enjoyed fresh, but it can be made a couple of hours in advance.
Extra Tips: To make the Rainbow Veggie Platter even more engaging for kids, consider involving them in the preparation process. Allow them to help wash the vegetables, pick the colors they want to include, and arrange them on the platter.
This hands-on approach can increase their interest in eating vegetables. Additionally, you can add fun labels for each vegetable or create a little game where kids can guess the colors or names of the veggies. Enjoy your colorful and healthy creation!
Cheese and Cracker Stars
Title: Cheese and Cracker Stars
Prep Time: 10 minutes
Cook Time: 0 minutes
Number of Servings: 12
Required Equipment List: Star-shaped cookie cutter, serving platter
Cuisine Type: American
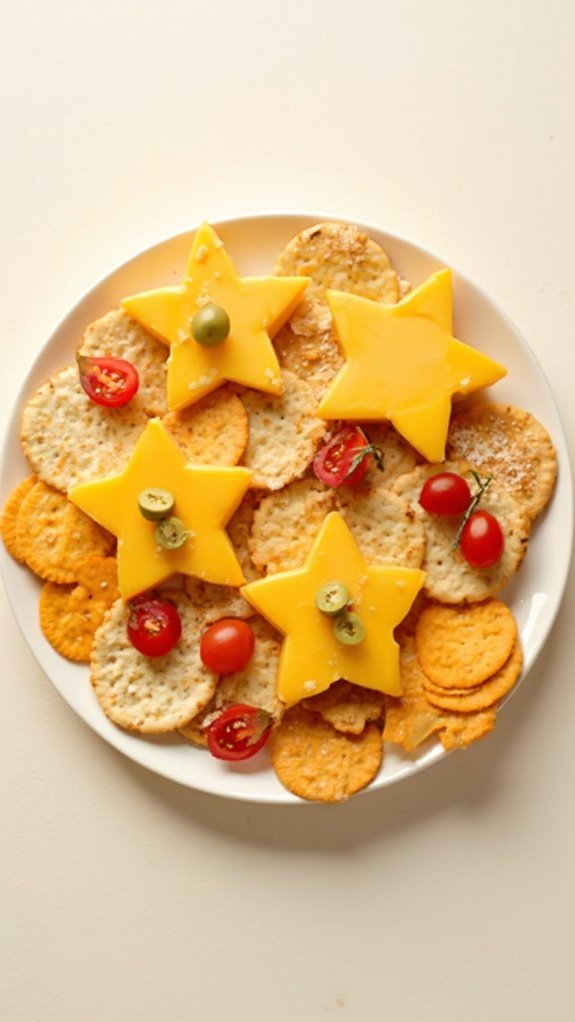
Cheese and Cracker Stars are a fun and delightful treat that kids will love to make and eat at any New Year’s Eve party. This no-cook recipe features simple ingredients that can be easily assembled, making it a perfect activity for children to participate in while enhancing their creativity.
The combination of different cheeses and crackers allows for various flavor profiles, and the star shape adds a festive touch that’s sure to impress guests of all ages. This recipe not only encourages kids to help in the kitchen but also helps them develop fine motor skills as they cut and assemble the stars.
You can customize the cheese and cracker combinations based on personal preference or dietary restrictions, ensuring that everyone can enjoy this playful snack. Serve these cheese and cracker stars as a fun appetizer or a whimsical addition to your New Year’s Eve spread.
Ingredients:
- 1 block of cheddar cheese
- 1 block of Swiss cheese
- 1 package of assorted crackers (like wheat, saltines, or butter crackers)
- Optional: sliced olives or cherry tomatoes for decoration
Instructions:
- Start by removing the wrappers from the cheddar and Swiss cheese blocks. Use a star-shaped cookie cutter to cut out star shapes from both cheeses. Aim for about 12 stars total, mixing and matching the flavors as desired.
- Once you have your cheese stars, arrange them on a serving platter. You can alternate the types of cheese or group them together for a colorful display.
- Take the assorted crackers and place them around the cheese stars on the platter to create a visually appealing presentation. Make sure to leave some space between them for easy grabbing.
- If you’d like to add a fun decorative touch, slice olives or cherry tomatoes in half and place them on top of the cheese stars or around the platter. This adds a pop of color and extra flavor.
- Finally, serve the cheese and cracker stars to the guests, encouraging them to mix and match with different cheeses and crackers for their own unique combinations.
Extra Tips: Feel free to get creative with the shapes and sizes of your cheese and cracker stars. You can also use a variety of other cheeses, such as gouda or pepper jack, for different flavors.
To make the stars even more festive, consider adding festive toothpicks or small flags to each star for a fun touch. These cheese and cracker stars are best enjoyed fresh, so prepare them close to serving time for maximum flavor and crunch!
Chocolate-Dipped Pretzels
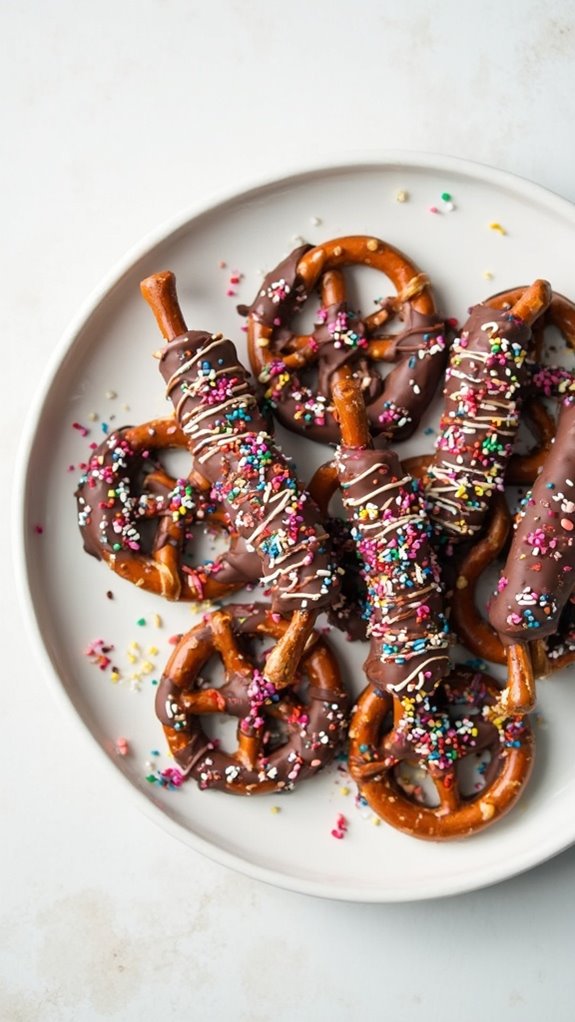
Title: Chocolate-Dipped Pretzels
Prep Time: 15 minutes
Cook Time: 10 minutes
Number of Servings: 12
Required Equipment List: Baking sheet, parchment paper, microwave-safe bowl, fork, cooling rack
Cuisine Type: American
Chocolate-Dipped Pretzels are a fun and festive treat that kids will love to make and enjoy. This simple recipe combines the crunch of pretzels with the sweetness of chocolate, creating a delightful snack that’s perfect for New Year’s Eve parties or any festive occasion.
The best part is that kids can get involved in the process, from dipping the pretzels to decorating them with sprinkles or drizzles of white chocolate. These chocolate-dipped delights aren’t only delicious but also visually appealing.
You can customize them with various toppings, such as colorful sprinkles, crushed nuts, or drizzles of contrasting chocolate, making them a hit at any gathering. Whether served as a party favor or enjoyed as a family treat, these pretzels are sure to bring smiles to everyone’s faces.
Ingredients:
- 2 cups pretzel rods or pretzel twists
- 1 cup semi-sweet chocolate chips
- 1 tablespoon coconut oil (optional, for smoother chocolate)
- Assorted sprinkles or toppings (optional)
Instructions:
- Line a baking sheet with parchment paper to prevent the pretzels from sticking. This will also make cleanup easier once you’re done.
- In a microwave-safe bowl, combine the semi-sweet chocolate chips and coconut oil (if using). Microwave in 30-second intervals, stirring in between, until the chocolate is completely melted and smooth. Be careful not to overheat the chocolate.
- Once the chocolate is melted, take a pretzel rod or twist and dip it into the chocolate, covering about two-thirds of the pretzel. Use a fork to lift it out, allowing any excess chocolate to drip back into the bowl.
- Place the dipped pretzel on the prepared baking sheet. If you’re adding sprinkles or toppings, do it immediately while the chocolate is still wet so they stick.
- Repeat the dipping process with the remaining pretzels, ensuring to leave some space between each one on the baking sheet. Once all the pretzels are dipped, place the baking sheet in the refrigerator for about 10 minutes to allow the chocolate to set.
- Once the chocolate has hardened, you can serve the pretzels immediately or store them in an airtight container at room temperature for a few days.
Extra Tips: To make the chocolate-dipped pretzels extra special, try using different types of chocolate, such as white chocolate or milk chocolate, for a variety of flavors.
You can also drizzle melted chocolate over the set pretzels for an eye-catching design. If you want to add a gourmet touch, consider sprinkling a little sea salt on top of the chocolate before it sets for a sweet and salty flavor combination. Enjoy this fun and easy treat!
Fruit Kabobs
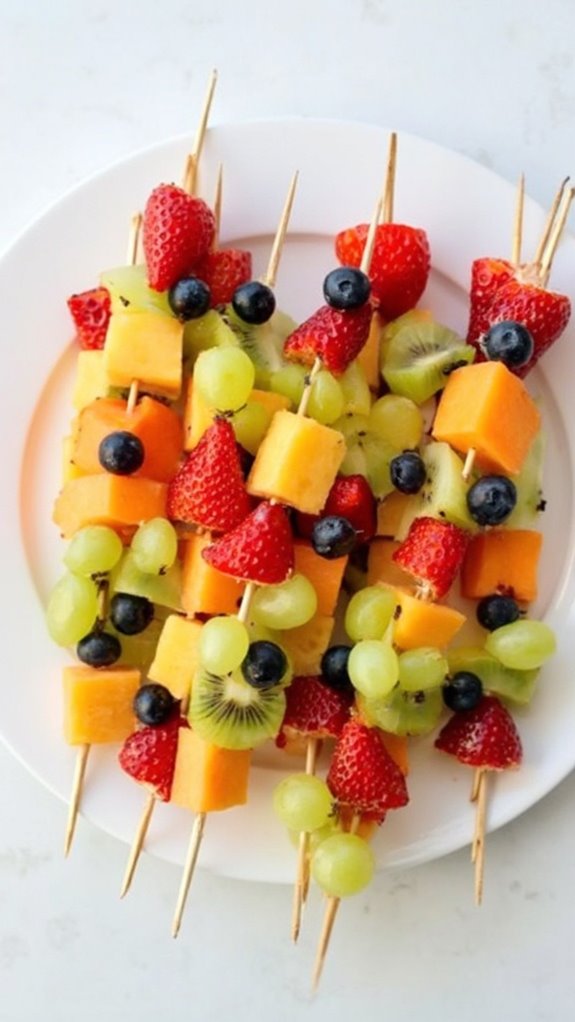
Title: Fun and Colorful Fruit Kabobs
Prep Time: 15 minutes
Cook Time: 0 minutes
Number of Servings: 6
Required Equipment List: Skewers, cutting board, knife, serving platter
Cuisine Type: American
Fruit kabobs are a delightful and healthy treat that kids will love at any New Year’s Eve party. These colorful skewers aren’t only visually appealing but also packed with vitamins and nutrients from a variety of fresh fruits. They can be customized with your child’s favorite fruits, making them a fun and interactive dish that encourages children to eat healthy.
Whether served as a snack or a dessert, fruit kabobs are the perfect way to celebrate the new year with a burst of natural sweetness. Creating these fruit kabobs is a simple and enjoyable process that can involve the whole family. Let the kids participate by choosing their favorite fruits and assembling their own skewers. Not only will they’ve fun, but they’ll also take pride in their creations.
For an extra touch, you can serve the kabobs with a yogurt dip or a drizzle of chocolate for a special treat, making this a versatile recipe that can cater to different tastes.
Ingredients:
- 1 cup strawberries, hulled and halved
- 1 cup pineapple, cut into chunks
- 1 cup grapes, halved if large
- 1 cup melon (cantaloupe or honeydew), cut into cubes
- 1 cup kiwi, peeled and sliced
- 1 cup blueberries
- Skewers (wooden or reusable)
- Optional: yogurt or chocolate for dipping
Instructions:
- Begin by washing all the fruits thoroughly under cold running water. This guarantees that any dirt or pesticides are removed, making the fruit safe and fresh for consumption.
- Prepare the fruits by cutting them into bite-sized pieces. Halve the strawberries, cube the melon, slice the kiwi, and chunk the pineapple. For grapes, cut them in half if they’re large, while blueberries can be left whole.
- Take a skewer and start assembling the fruit pieces in a colorful pattern. You can alternate different fruits for a vibrant look or let each child create their own unique combinations.
- Continue adding fruits to the skewer until it’s filled, leaving some space at the bottom for easy handling. Aim for a variety of colors and shapes to make the kabobs visually appealing.
- Once all the skewers are assembled, arrange them on a serving platter. If desired, you can provide a bowl of yogurt or melted chocolate for dipping alongside the kabobs.
Extra Tips: To keep the fruit kabobs looking fresh and vibrant, consider squeezing a bit of lemon or lime juice over the fruit to prevent browning, especially for apples and bananas.
If you’re preparing them ahead of time, store the kabobs in the refrigerator covered with plastic wrap to keep them fresh. These fruit kabobs can also be a great opportunity to introduce kids to new fruits, so feel free to experiment with seasonal or exotic fruits for added fun!
New Year’s Eve Cupcakes

Title: New Year’s Eve Cupcakes
Prep Time: 20 minutes
Cook Time: 20 minutes
Number of Servings: 12
Required Equipment List: Muffin tin, cupcake liners, mixing bowls, whisk, measuring cups, measuring spoons, cooling rack
Cuisine Type: American
These New Year’s Eve Cupcakes are a fun and festive treat perfect for celebrating the arrival of a new year. The cupcakes are light and fluffy, infused with vanilla flavor and topped with a colorful, sparkly frosting that will delight kids and adults alike.
With a hint of sprinkles and festive decorations, these cupcakes not only taste delicious but also look the part, making them a standout dessert for any New Year’s Eve party.
Making these cupcakes is a straightforward process that involves mixing basic ingredients and baking them to perfection. Once cooled, you can release your creativity by decorating them with vibrant frosting and festive toppings.
These cupcakes serve as a canvas for your imaginative designs, allowing everyone to personalize their sweet treats as they countdown to midnight.
Ingredients:
- 1 ½ cups all-purpose flour
- 1 cup granulated sugar
- 1 ½ teaspoons baking powder
- ½ teaspoon salt
- ½ cup unsalted butter, softened
- 2 large eggs
- 1 teaspoon vanilla extract
- ½ cup milk
- 2 cups buttercream frosting (store-bought or homemade)
- Food coloring (optional)
- Sprinkles and edible glitter for decoration
Instructions:
- Preheat your oven to 350°F (175°C). Line a muffin tin with cupcake liners to prepare for the batter. This will help prevent sticking and make for easy serving.
- In a large mixing bowl, combine the flour, sugar, baking powder, and salt. Whisk the dry ingredients together until evenly mixed, ensuring there are no lumps.
- Add the softened butter, eggs, vanilla extract, and milk to the dry ingredients. Mix with a whisk or electric mixer on medium speed until the batter is smooth and well combined, about 2-3 minutes.
- Carefully spoon the batter into the prepared cupcake liners, filling each about two-thirds full to allow for rising. Bake in the preheated oven for 18-20 minutes, or until a toothpick inserted into the center of a cupcake comes out clean.
- Once baked, remove the cupcakes from the oven and allow them to cool in the pan for 5 minutes. Then, transfer them to a cooling rack to cool completely before frosting.
- Once the cupcakes are completely cooled, divide the buttercream frosting into separate bowls if using food coloring. Tint the frosting with your desired colors and use a piping bag or knife to frost each cupcake. Finish with a sprinkle of festive decorations like sprinkles or edible glitter.
Extra Tips: To make your cupcakes extra special, consider adding a fun filling such as chocolate ganache or fruit preserves in the center before frosting.
If you’re short on time, pre-made frosting can be a lifesaver, but homemade buttercream allows for more customization. Don’t forget to let the kids help with the decorating; it adds to the fun and makes for a memorable celebration!
Enjoy your festive cupcakes as you ring in the new year!
Glittering Jello Cups
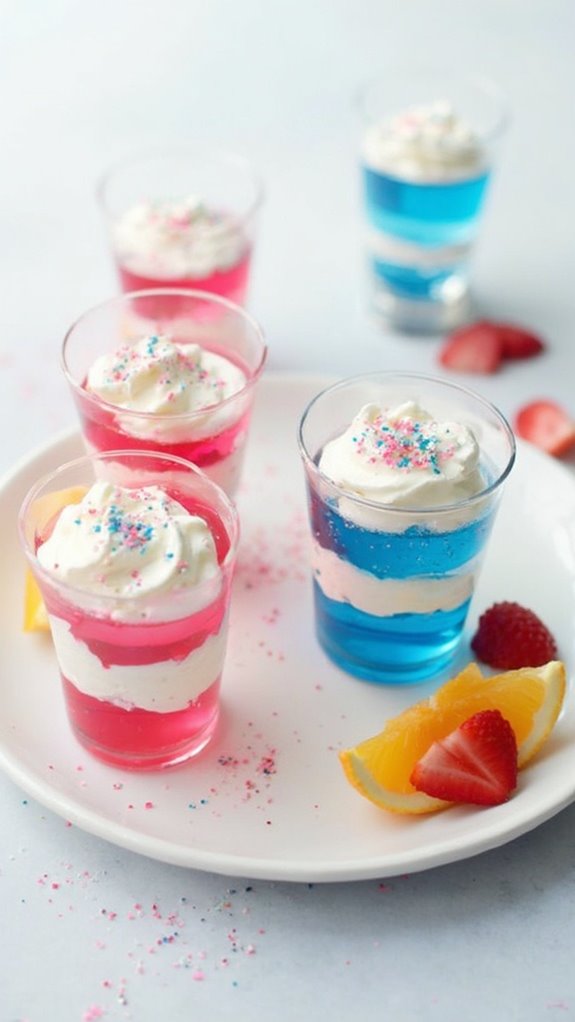
Title: Glittering Jello Cups
Prep Time: 15 minutes
Cook Time: 4 hours (chilling time)
Number of Servings: 6
Required Equipment List: Mixing bowls, measuring cups, whisk, cups or small dessert glasses, refrigerator
Cuisine Type: American
Glittering Jello Cups are a fun and visually appealing treat that kids will adore, making them perfect for any New Year’s Eve party or celebration. With vibrant colors and a sparkling finish, these colorful cups aren’t only easy to make but also provide a delightful burst of flavor that will keep the little ones entertained.
This recipe is perfect for engaging children in the kitchen, allowing them to help with the mixing and layering of the jello. The shimmering effect is achieved by adding edible glitter or sprinkles, transforming simple jello into a festive dessert. Layering different flavors and colors can create a rainbow effect, making these cups not just delicious but also a feast for the eyes.
Serve them on a dessert table or as individual servings for a charming addition to any party spread.
Ingredients:
- 2 cups boiling water
- 2 packets (3 oz each) flavored gelatin (your choice of flavors/colors)
- 2 cups cold water
- 1 cup whipped cream or whipped topping
- Edible glitter or sprinkles
- Fruit slices (optional, for garnish)
Instructions:
- In a mixing bowl, dissolve the flavored gelatin in 2 cups of boiling water. Stir well until the gelatin is completely dissolved, about 2-3 minutes. This step is vital to guarantee that your jello is smooth and free of any lumps.
- Add 2 cups of cold water to the gelatin mixture and stir to combine. Divide the mixture evenly into two different bowls if you’re using two flavors. Allow the bowls to cool to room temperature for about 10-15 minutes before proceeding.
- Pour the first layer of jello into your cups or dessert glasses, filling them about one-third full. Place the cups in the refrigerator and let them chill for about 1-2 hours until set.
- Once the first layer is firm, carefully spoon a layer of whipped cream over the top of the jello in each cup. This adds a creamy texture and balances the sweetness of the jello. Spread it evenly to create a smooth layer.
- Prepare the second flavor of jello in the same way as the first, allowing it to cool before pouring it over the whipped cream layer. Fill the cups to the top with this layer and return them to the refrigerator for another 1-2 hours to set completely.
- Once the final layer is fully set, remove the cups from the refrigerator. Before serving, sprinkle edible glitter or sprinkles on top for a festive touch. You can also add fruit slices for an extra decorative flair.
Extra Tips: To create a more visually striking effect, consider using clear cups so the layers are more visible. You can also experiment with different flavor combinations, such as mixing berry and citrus flavors for a revitalizing twist.
If you’re making these ahead of time, they can be stored in the refrigerator for up to 3 days, making them a great make-ahead dessert option for busy party planners. Enjoy your dazzling jello cups!
Festive Sandwiches
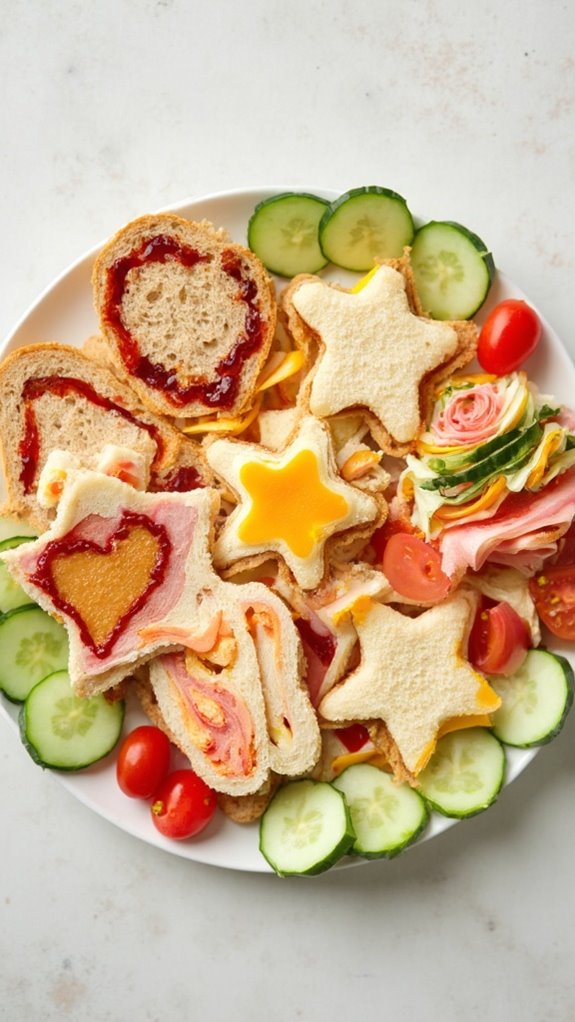
Title: Festive Sandwiches for Kids
Prep Time: 20 minutes
Cook Time: 0 minutes
Number of Servings: 8
Required Equipment List: Cutting board, knife, cookie cutters, plates
Cuisine Type: American
These Festive Sandwiches for Kids are a fun and creative way to celebrate New Year’s Eve, offering a colorful and delicious addition to any kid-friendly party spread. With an assortment of fillings and vibrant shapes, these sandwiches will surely be a hit among young guests.
Using cookie cutters to shape the sandwiches into stars, hearts, or other festive designs makes this a playful activity that kids can help with, turning meal prep into a delightful experience.
The recipe is highly customizable, allowing you to mix and match fillings based on what your children enjoy. From classic peanut butter and jelly to turkey and cheese or even hummus and veggies, the options are endless.
These sandwiches not only look festive but are also easy to eat, making them perfect for little hands. Pair them with some colorful fruit skewers or veggie sticks for a well-rounded festive platter.
Ingredients:
- 8 slices of bread (white, whole wheat, or gluten-free)
- 4 tablespoons peanut butter (or any nut/seed butter)
- 4 tablespoons jelly or jam
- 4 slices cheese (cheddar, American, or your choice)
- 4 slices turkey or ham (optional)
- 1 cucumber, thinly sliced
- Cherry tomatoes, halved
- Cookie cutters in festive shapes
Instructions:
- Start by laying out your slices of bread on a cutting board. Using cookie cutters, cut the bread into fun shapes like stars, hearts, or any festive design that appeals to kids. You can use different shapes for each sandwich to add variety.
- For the first type of sandwich, spread peanut butter on one slice of bread and jelly or jam on another slice. Press the two slices together to form a sandwich, and then cut it into a festive shape using the cookie cutter.
- For the next sandwich variation, spread a slice of cheese on one piece of bread and add a slice of turkey or ham if desired. Top it with another slice of bread, press together, and cut into a festive shape.
- For a healthier option, spread hummus on one slice of bread and layer with cucumber slices and cherry tomato halves. Place another slice of bread on top, and cut into your desired shape.
- Arrange the finished sandwiches on a large platter, mixing the various shapes and fillings for visual appeal. Encourage kids to help with decorating the platter to make it extra festive.
Extra Tips: To make the sandwiches more appealing, you can use colorful spreads like cream cheese mixed with a little food coloring or add a sprinkle of edible glitter on top.
If you have leftover crusts, consider making mini crust-less sandwiches or use them for a fun game of “sandwich art.” These sandwiches can also be made ahead of time and stored in an airtight container to keep them fresh until the party starts. Enjoy the festivities!
Edible Glitter Fruit Skewers
Title: Edible Glitter Fruit Skewers
Prep Time: 15 minutes
Cook Time: 0 minutes
Number of Servings: 6
Required Equipment List: Skewers, cutting board, knife, small bowl
Cuisine Type: Kid-friendly
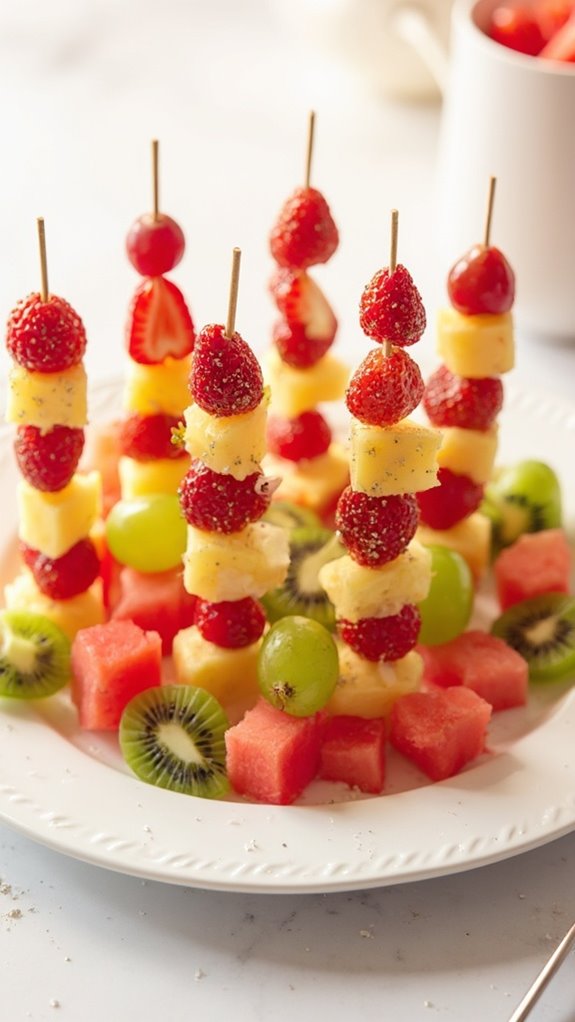
Edible Glitter Fruit Skewers are a fun and colorful treat that will delight kids at any New Year’s Eve party. These vibrant skewers combine a variety of fresh fruits with a sprinkle of edible glitter, making them not only a healthy snack but also an eye-catching centerpiece for your celebration.
The great thing about this recipe is its versatility; you can use any fruit your kids love, and the edible glitter adds a touch of magic that makes the fruit irresistible. Not only are these skewers easy to assemble, but they also encourage kids to enjoy eating fruits in a playful way.
You can involve your little ones in the preparation process by letting them choose their favorite fruits and helping to assemble the skewers. These Edible Glitter Fruit Skewers are perfect for adding a festive touch to your New Year’s Eve gathering, ensuring that kids will have a blast while celebrating the new year.
Ingredients:
- 1 cup strawberries, hulled and halved
- 1 cup pineapple, cut into chunks
- 1 cup grapes, whole
- 1 cup kiwi, peeled and sliced
- 1 cup watermelon, cut into cubes
- Edible glitter (various colors)
- Skewers (wooden or reusable)
Instructions:
- Prepare your fruits by washing and cutting them as necessary. Make sure to hull the strawberries, peel the kiwi, and cut the watermelon into bite-sized cubes. Having a colorful mix of fruits will make your skewers more appealing.
- Take a skewer and start by threading a piece of fruit onto the end. You can choose any order for the fruits, but alternating colors will create a visually stunning effect. Continue to add fruit pieces until the skewer is filled, leaving a little space at the end for holding.
- Once you have assembled your skewers, place them on a serving platter. This is where the fun begins! Lightly sprinkle the edible glitter over the skewers, ensuring that each piece of fruit gets a touch of sparkle.
- If you’re using multiple colors of edible glitter, you can create a gradient effect by using different colors on each skewer or by mixing them together. Be creative and have fun with it!
- Serve the Edible Glitter Fruit Skewers immediately or refrigerate them until your guests arrive. They’re best enjoyed fresh, but the vibrant colors and glitter will keep them looking festive for a while.
Extra Tips: When selecting your fruits, aim for a variety of colors and textures to make the skewers visually appealing. You can also experiment with adding marshmallows or mini cookies in between the fruit pieces for an extra sweet touch.
If you’re hosting a party, consider setting up a DIY skewer station where kids can create their own combinations, letting their creativity shine while they enjoy a healthy snack!
Birthday Cake Popcorn
Title: Birthday Cake Popcorn
Prep Time: 15 minutes
Cook Time: 10 minutes
Number of Servings: 6
Required Equipment List: Large mixing bowl, baking sheet, parchment paper, microwave-safe bowl, spoon
Cuisine Type: American
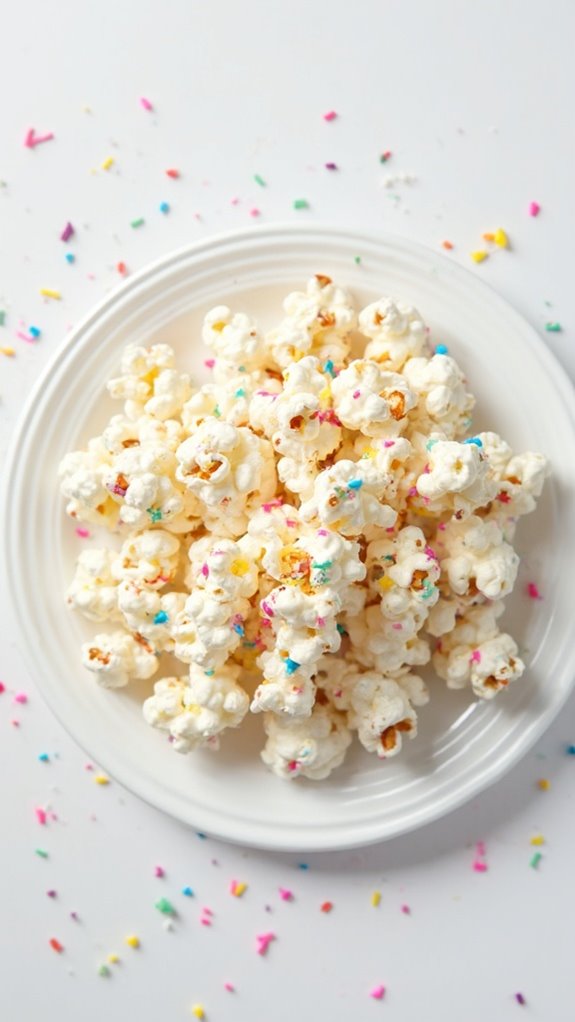
Birthday Cake Popcorn is a fun and festive treat that brings the joy of birthday cake to a crunchy snack. This delightful recipe combines popcorn with white chocolate and colorful sprinkles, creating a sweet and whimsical dessert that kids will love. Perfect for parties, movie nights, or just a fun afternoon treat, this popcorn will add a splash of color and excitement to any occasion.
The process is incredibly simple, making it an ideal recipe for little hands to help with. The combination of buttery popcorn and sweet chocolate coating gives a satisfying crunch, while the sprinkles mimic the festive look of a birthday cake. This treat isn’t only enjoyable to eat but also a fantastic activity for kids to participate in, allowing them to get creative with their toppings and decorations.
Ingredients:
- 10 cups popped popcorn (about 1/2 cup unpopped kernels)
- 1 cup white chocolate chips
- 1 tablespoon coconut oil
- 1/2 cup colorful sprinkles
- Pinch of salt
Instructions:
- Start by popping the popcorn using your preferred method, whether it be in an air popper or on the stove. Once popped, transfer the popcorn to a large mixing bowl and make certain to remove any unpopped kernels.
- In a microwave-safe bowl, combine the white chocolate chips and coconut oil. Microwave in 30-second intervals, stirring in between, until the mixture is fully melted and smooth. Be careful not to overheat the chocolate.
- Pour the melted chocolate mixture over the popcorn, then gently stir with a spoon to coat the popcorn evenly. Make sure that all the popcorn is covered in the delicious white chocolate.
- Line a baking sheet with parchment paper and spread the coated popcorn evenly across it. While the chocolate is still warm, sprinkle the colorful sprinkles over the popcorn, pressing them in gently to help them stick.
- Allow the popcorn to cool for about 10 minutes, or until the chocolate has set. Once cooled, break the popcorn into clusters and transfer to a serving bowl.
Extra Tips: For an extra burst of flavor, consider adding a few drops of almond or vanilla extract to the melted chocolate before mixing it with the popcorn. You can also experiment with different types of sprinkles or add-ins, like crushed cookies or mini marshmallows, to personalize your Birthday Cake Popcorn.
Store any leftovers in an airtight container to keep it fresh and crunchy! Enjoy this delightful treat at your next celebration!
Colorful Cheese Balls
Title: Colorful Cheese Balls
Prep Time: 20 minutes
Cook Time: 0 minutes
Number of Servings: 12
Required Equipment List: Mixing bowl, plastic wrap, serving platter, refrigerator
Cuisine Type: Snack/Appetizer
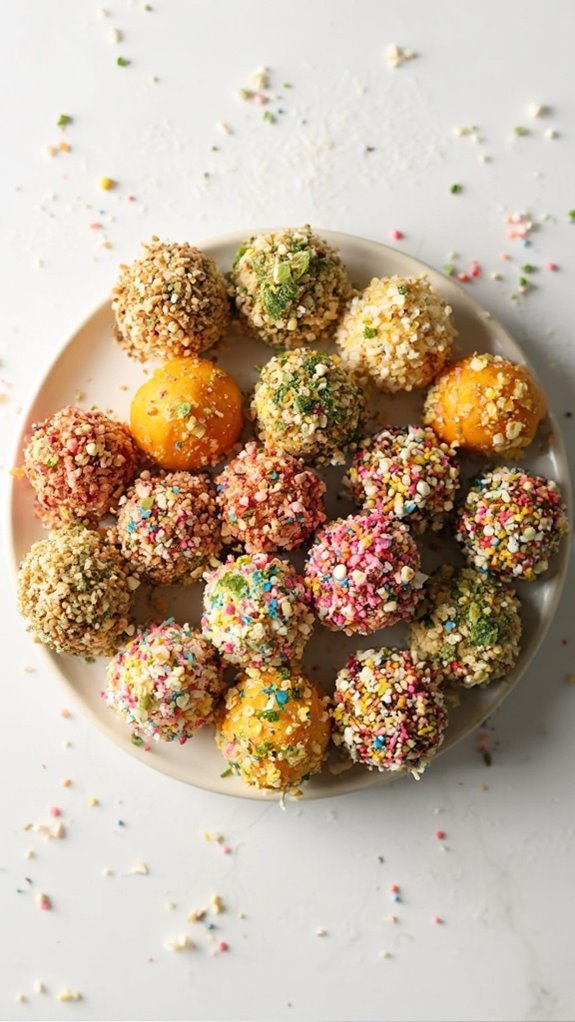
Colorful Cheese Balls are a fun and festive treat that kids will love to make and eat during New Year’s Eve parties. These bite-sized snacks aren’t only visually appealing with their vibrant colors, but they’re also delicious and packed with flavor. The combination of cream cheese and shredded cheese provides a creamy base, while the various coatings—like crushed nuts, herbs, and colorful sprinkles—add a delightful crunch and pop of color that will brighten up any party platter.
This recipe is incredibly versatile, allowing you to customize the flavors and toppings according to your preferences. Kids can get creative and even help in rolling the cheese balls and choosing their favorite toppings. Perfect for sharing, these colorful cheese balls are sure to be a hit with both kids and adults at your New Year’s Eve celebration!
Ingredients:
- 8 ounces cream cheese, softened
- 1 cup shredded cheddar cheese
- 1/2 cup grated Parmesan cheese
- 1/4 teaspoon garlic powder
- 1/4 teaspoon onion powder
- 1/4 teaspoon salt
- 1/4 teaspoon black pepper
- Assorted toppings (e.g., crushed nuts, chopped fresh herbs, colorful sprinkles)
Instructions:
- In a mixing bowl, combine the softened cream cheese, shredded cheddar cheese, grated Parmesan cheese, garlic powder, onion powder, salt, and black pepper. Mix well until all ingredients are fully combined and smooth.
- Using your hands, scoop out about a tablespoon of the cheese mixture and roll it into a ball. Repeat this process until all the cheese mixture is used up, making about 12 cheese balls.
- Prepare your assorted toppings in separate bowls. Roll each cheese ball in the desired topping, ensuring they’re fully coated. This adds flavor and fun texture to each bite.
- Once all the cheese balls are rolled and coated, place them on a serving platter. Cover with plastic wrap and refrigerate for at least 30 minutes to firm up before serving.
- Serve the colorful cheese balls chilled or at room temperature. They can be enjoyed on their own or paired with crackers, fresh vegetables, or fruit for a delightful snack.
Extra Tips: To make the cheese balls even more festive, consider adding food coloring to the cheese mixture before rolling them into balls, creating a rainbow effect. You can also experiment with different cheese varieties, such as pepper jack for a spicy kick or feta for a tangy flavor. For easy cleanup, use gloves while rolling the cheese balls, and have fun letting the kids choose their favorite toppings!
Joyful Nacho Bar
Title: Joyful Nacho Bar
Prep Time: 20 minutes
Cook Time: 10 minutes
Number of Servings: 6
Required Equipment List: Baking sheet, oven, serving platters, mixing bowls, spoon
Cuisine Type: Mexican-American
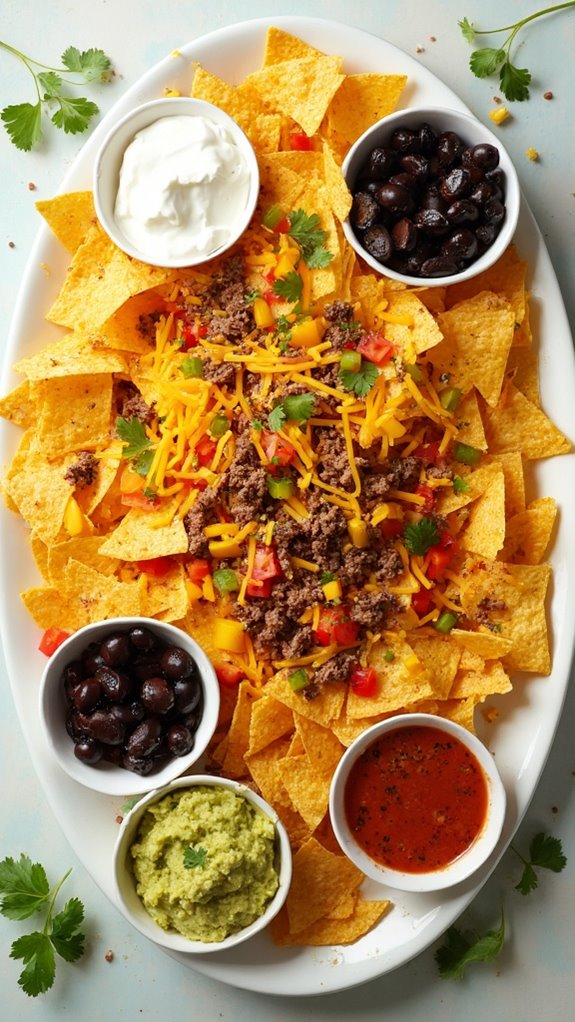
A Joyful Nacho Bar is the ultimate crowd-pleaser for any kids’ New Year’s Eve party! This interactive dish allows children to customize their nachos with a variety of toppings, making it not only delicious but also a fun activity that engages their creativity.
With crispy tortilla chips as the base, melted cheese, and a selection of toppings ranging from classic to adventurous, this nacho bar can cater to every taste preference. Setting up a nacho bar is straightforward, and the ingredients can easily be adjusted based on what you have on hand or what your kids prefer.
The combination of warm, gooey cheese and fresh toppings creates a delightful contrast that’s sure to be a hit among the little ones. Plus, it’s a fantastic way to encourage kids to explore new flavors and combinations, making New Year’s Eve a night of culinary adventure!
Ingredients:
- 1 large bag of tortilla chips
- 2 cups shredded cheddar cheese
- 1 cup cooked ground beef or shredded chicken (optional)
- 1 cup black beans, rinsed and drained
- 1 cup diced tomatoes
- 1 cup sliced black olives
- 1 cup diced bell peppers
- 1 cup guacamole
- 1 cup sour cream
- 1/2 cup salsa
- Fresh cilantro for garnish (optional)
Instructions:
- Preheat your oven to 350°F (175°C). Spread the tortilla chips evenly on a large baking sheet, ensuring they’re in a single layer for even melting. This will serve as the base for your nacho bar.
- Sprinkle the shredded cheddar cheese evenly over the tortilla chips. If using, add the cooked ground beef or shredded chicken on top of the cheese for an extra protein boost.
- Bake the nachos in the preheated oven for about 5-10 minutes, or until the cheese is melted and bubbly. Keep an eye on them to prevent burning, as the cooking time may vary depending on your oven.
- While the nachos are baking, prepare the toppings in separate bowls. Arrange the black beans, diced tomatoes, sliced black olives, diced bell peppers, guacamole, sour cream, and salsa on a table or countertop to create a vibrant nacho bar.
- Once the nachos are out of the oven, let them cool for a minute before serving. Place the baking sheet on the table and invite the kids to customize their nachos with their preferred toppings.
Extra Tips: To make the nacho bar even more exciting, consider providing a few unique toppings like jalapeños, corn, or different types of cheeses.
You can also set up a “build-your-own nacho” station with small cups for kids to mix and match their favorite toppings. Remember to have plenty of napkins on hand, as nachos can get a bit messy, which is all part of the fun! Enjoy the festivities and the delicious creations!
Cookie Decorating Station

Title: Cookie Decorating Station
Prep Time: 30 minutes
Cook Time: 10 minutes
Number of Servings: 12 cookies
Required Equipment List: Mixing bowl, baking sheet, parchment paper, rolling pin, cookie cutters, cooling rack, piping bags (optional)
Cuisine Type: American
Setting up a Cookie Decorating Station is a fantastic way to engage kids in the festive spirit of New Year’s Eve while indulging their creativity. This fun activity allows children to express their artistic flair by decorating freshly baked cookies with colorful icing, sprinkles, and various toppings.
It’s not only a delicious treat but also a hands-on experience that will keep them entertained and excited about the celebration. The beauty of this cookie decorating station is that it can be customized to fit any theme or occasion. By using simple sugar cookie dough as a base, you can create various shapes with cookie cutters, such as stars, hearts, or circles, and then let the kids go wild with their decorating ideas.
This interactive cooking experience will create lasting memories as they showcase their unique creations, which can also double as party favors or delightful snacks for guests.
Ingredients:
- 2 3/4 cups all-purpose flour
- 1 teaspoon baking powder
- 1/2 teaspoon salt
- 1 cup unsalted butter, softened
- 1 1/2 cups granulated sugar
- 1 egg
- 1 teaspoon vanilla extract
- Royal icing (store-bought or homemade)
- Food coloring
- Assorted sprinkles and edible decorations
Instructions:
- In a mixing bowl, whisk together the flour, baking powder, and salt. This dry mixture forms the foundation for your cookie dough and guarantees an even distribution of leavening agents.
- In another large bowl, cream together the softened butter and granulated sugar until light and fluffy. This process incorporates air into the mixture, resulting in tender cookies.
- Add the egg and vanilla extract to the butter mixture, mixing until well combined. The egg acts as a binding agent, while the vanilla adds a delightful flavor to the cookies.
- Gradually add the dry flour mixture to the wet ingredients, mixing until just combined. Avoid overmixing to keep the cookies from becoming tough. Once the dough comes together, wrap it in plastic wrap and refrigerate for at least 30 minutes.
- Preheat your oven to 350°F (175°C). Line a baking sheet with parchment paper. On a lightly floured surface, roll out the chilled cookie dough to about 1/4 inch thickness. Use cookie cutters to cut out shapes and place them on the prepared baking sheet.
- Bake the cookies in the preheated oven for 8-10 minutes or until the edges are firm and slightly golden. Allow the cookies to cool on the baking sheet for a few minutes before transferring them to a cooling rack to cool completely.
- Once the cookies are cooled, set up your decorating station with royal icing in piping bags, food coloring, and assorted sprinkles. Let the kids release their creativity by decorating the cookies as they please!
Extra Tips: To make the decorating process smoother, prepare the royal icing in different colors ahead of time and place them in piping bags with small tips for easy application. Encourage kids to mix colors and create their own designs!
If you want to make the cookies extra festive, consider adding edible glitter or themed decorations that suit your New Year’s Eve celebration. Enjoy the fun, and don’t forget to take pictures of their delicious masterpieces!
New Year’s Eve Trail Mix
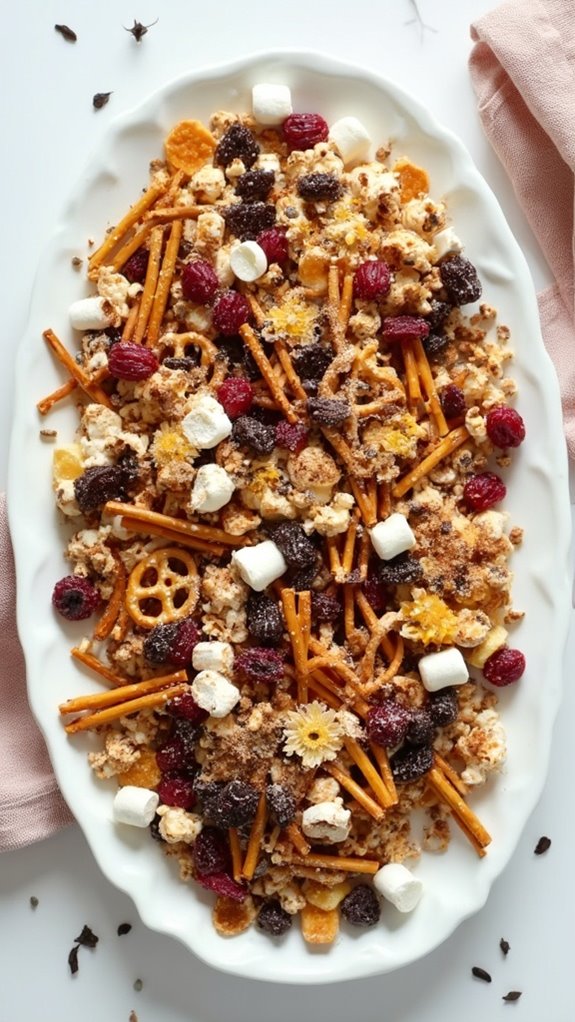
Title: New Year’s Eve Trail Mix
Prep Time: 10 minutes
Cook Time: 0 minutes
Number of Servings: 8
Required Equipment List: Mixing bowl, measuring cups, measuring spoons, airtight container
Cuisine Type: Snack
New Year’s Eve Trail Mix is a fun and festive snack perfect for kids and adults alike as you countdown to the new year. This colorful mix combines a variety of crunchy nuts, sweet dried fruits, and delightful chocolate treats, making it a perfect party snack that everyone can enjoy.
The vibrant colors and textures of the ingredients not only appeal to the eyes but also create a flavor explosion with every handful. This easy-to-make trail mix is a fantastic way to involve kids in the kitchen during the holiday season. They can help measure and mix the ingredients, making it a fun family activity.
You can also customize the trail mix by adding or substituting ingredients based on your family’s preferences. Whether you’re hosting a party or looking for a quick snack to keep energy levels up while celebrating, this New Year’s Eve Trail Mix is sure to be a hit!
Ingredients:
- 1 cup pretzel sticks
- 1 cup roasted almonds
- 1 cup dried cranberries
- 1 cup chocolate-covered raisins
- 1 cup popcorn (popped)
- 1/2 cup mini marshmallows
- 1/2 cup sunflower seeds
- 1/2 teaspoon cinnamon (optional)
Instructions:
- Gather all your ingredients and prepare a large mixing bowl. Make sure that everything is measured out and ready to go to create an efficient assembly line.
- Begin by adding the pretzel sticks to the mixing bowl. These will serve as a crunchy base for your trail mix and add a salty contrast to the sweet ingredients.
- Next, add the roasted almonds to the bowl. Their nutty flavor and crunch will complement the other ingredients perfectly, providing a satisfying texture.
- Pour in the dried cranberries and chocolate-covered raisins. These sweet elements will enhance the overall flavor profile of the trail mix, adding delightful bursts of sweetness.
- Add the popcorn to the mix, followed by the mini marshmallows and sunflower seeds. The popcorn adds a fun lightness while the marshmallows introduce a chewy texture that kids love.
- If desired, sprinkle the cinnamon over the mixture. This will add a warm spice that enhances the flavors without overpowering the sweetness.
- Use a spatula or your hands to gently toss all of the ingredients together until they’re well combined. Be careful not to crush the popcorn or marshmallows.
- Once mixed, transfer the trail mix to an airtight container for storage. This will keep it fresh and make it easy to serve throughout your New Year’s Eve celebration.
Extra Tips: Feel free to get creative with your trail mix by adding seasonal ingredients like colored chocolate candies or festive-shaped cereal to match the New Year’s theme.
If you have family members with nut allergies, you can swap out the nuts for additional seeds or crunchy cereal. This trail mix is also great for portioning into small bags or cups for a fun grab-and-go snack option during your festivities. Enjoy the celebration!
Mini Tacos
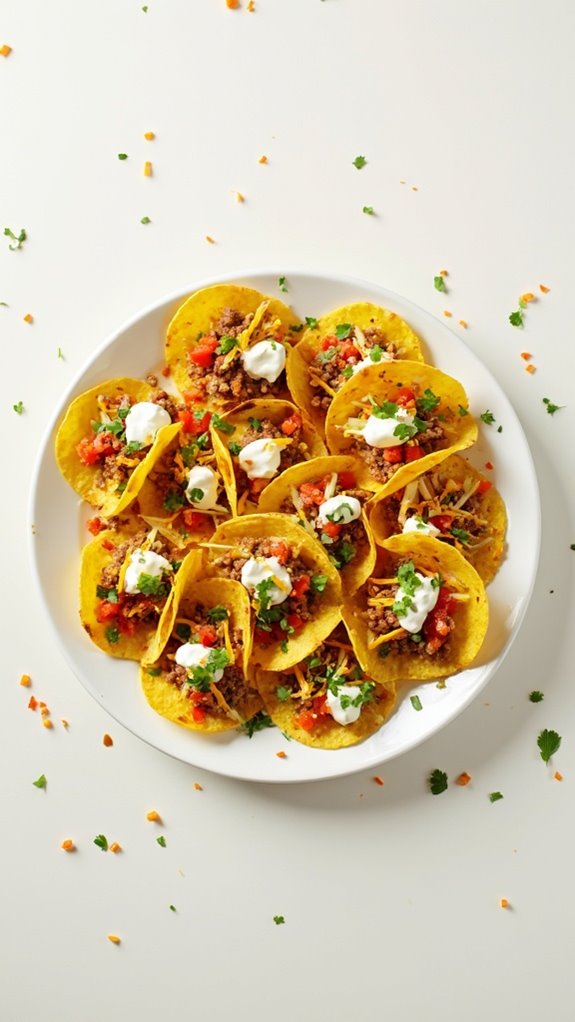
Title: Mini Tacos
Prep Time: 15 minutes
Cook Time: 10 minutes
Number of Servings: 12 mini tacos
Required Equipment List: Skillet, mixing bowl, spoon, small taco shell molds or baking sheet
Cuisine Type: Mexican
Mini Tacos are a fantastic and fun dish that kids will love to eat and help prepare. These bite-sized tacos are perfect for parties, especially on New Year’s Eve, as they’re easy to handle and can be filled with a variety of ingredients to suit everyone’s taste. The combination of seasoned ground meat, fresh toppings, and crunchy mini taco shells creates a delightful flavor explosion that will keep the little ones coming back for more.
Not only are these mini tacos delicious, but they also offer an interactive dining experience. Kids can customize their tacos with their favorite toppings, from cheese and lettuce to salsa and guacamole. This recipe is versatile and can be made with different proteins or vegetarian options, making it suitable for all dietary preferences. Get ready to have a taco party that’s sure to be a hit with kids and adults alike!
Ingredients:
- 1 pound ground beef or turkey
- 1 packet taco seasoning
- 12 mini taco shells (store-bought or homemade)
- 1 cup shredded lettuce
- 1 cup diced tomatoes
- 1 cup shredded cheese (cheddar or Mexican blend)
- 1/2 cup sour cream
- Salsa (optional)
- Chopped cilantro (for garnish, optional)
Instructions:
- In a skillet over medium heat, brown the ground beef or turkey until fully cooked, about 5-7 minutes. Use a spoon to break the meat into small pieces as it cooks for even browning.
- Once the meat is cooked, drain any excess grease and add the taco seasoning according to the package instructions. Stir in a bit of water if needed to help the seasoning blend evenly into the meat. Simmer for an additional 2-3 minutes until heated through.
- While the meat is simmering, prepare the mini taco shells according to the package instructions, or if making homemade shells, bake them in the oven until crispy.
- Assemble the mini tacos by placing a spoonful of the seasoned meat into each taco shell. Top with shredded lettuce, diced tomatoes, and cheese to your liking.
- Serve the tacos with sour cream and salsa on the side for dipping. Sprinkle with chopped cilantro for an extra touch of freshness if desired.
Extra Tips: To make the mini tacos even more fun, consider setting up a taco bar where kids can choose their own toppings. You can include options like diced avocados, black olives, or jalapeños for those who like a bit of heat.
If you’re short on time, using pre-cooked rotisserie chicken or canned beans can make the preparation even quicker. Enjoy the festive flavors and the smiles on the kids’ faces!
Fun Fruit Faces
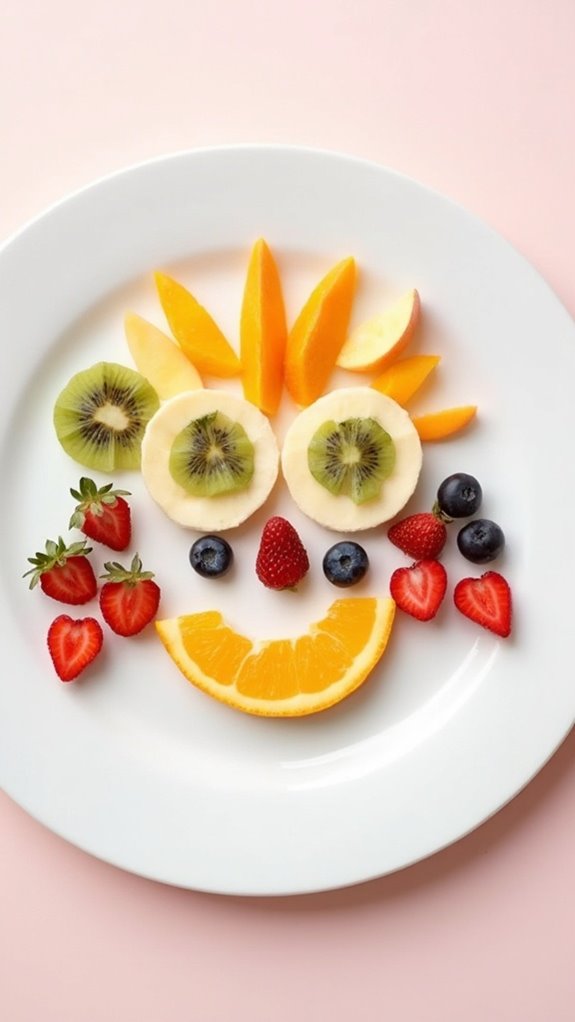
Title: Fun Fruit Faces
Prep Time: 10 minutes
Cook Time: 0 minutes
Number of Servings: 4
Required Equipment List: Cutting board, knife, small plates
Cuisine Type: Kid-friendly
Fun Fruit Faces are a delightful and interactive way to get kids excited about eating healthy. This no-cook recipe allows children to release their creativity by crafting whimsical faces using a variety of fruits. Not only does this snack provide essential vitamins and minerals, but it also encourages kids to explore different colors and shapes in their food, making it a fun learning experience in the kitchen.
Perfect for a New Year’s Eve party or any gathering, these fruity creations are sure to bring smiles and laughter. Creating Fun Fruit Faces is as simple as slicing up some fresh fruits and arranging them on a plate to resemble silly faces. Kids can customize their designs with their favorite fruits, making every plate unique.
This recipe can easily be adapted based on seasonal fruits or what you have on hand, allowing for endless possibilities. Whether it’s a banana for a smile or blueberries for eyes, the only limit is your imagination!
Ingredients:
- 1 banana
- 1 apple
- 1 orange
- 1 cup grapes
- 1 kiwi
- 1 cup strawberries
- 1 cup blueberries
- Toothpicks (optional)
Instructions:
- Start by washing all the fruits thoroughly. This guarantees they’re clean and safe for kids to handle. Once washed, set them on a cutting board for slicing.
- Using a knife, slice the banana into rounds for eyes and a smile. Cut the apple into wedges for ears or cheeks, and slice the kiwi into thin rounds for additional facial features.
- Cut the orange into segments that can be used for hair or bright accents. Strawberries can be sliced into hearts or triangles to create fun hats or noses, while grapes and blueberries can serve as eyes.
- On small plates, arrange the various fruit pieces to create faces. Let the kids get involved, encouraging them to mix and match fruits to design their own unique faces.
- For added fun, use toothpicks to hold fruits together or create additional features, like a nose made from a grape or a silly hat from a strawberry slice.
Extra Tips: Encourage kids to think outside the box and use their favorite fruits, as the goal is to have fun and be creative. If you have additional toppings like yogurt or granola, they can be used as accessories or backgrounds for the fruit faces.
This activity isn’t only a great way to promote healthy eating but also serves as a fun art project that can be enjoyed by the whole family!
Sparkly Marshmallow Pops
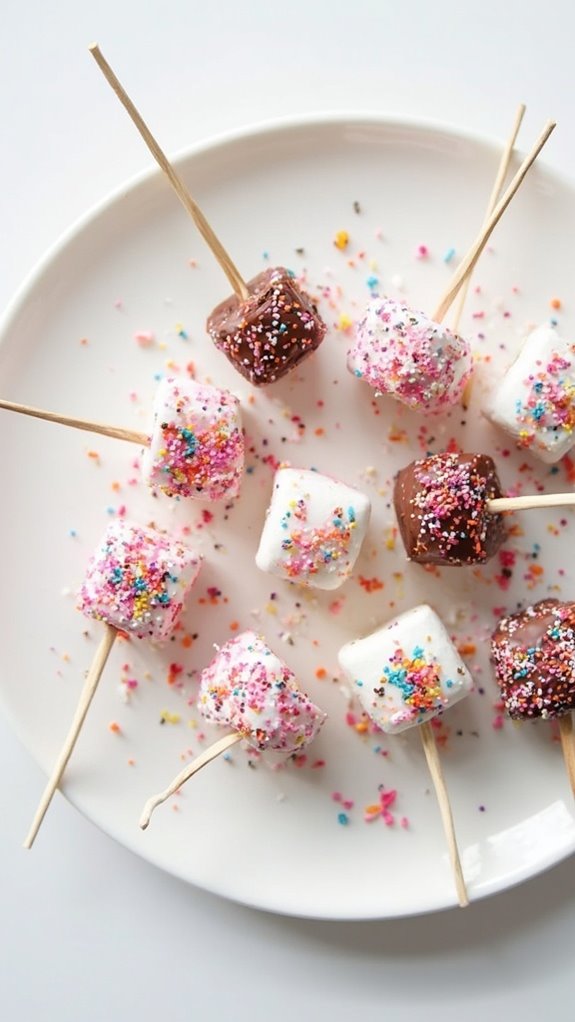
Title: Sparkly Marshmallow Pops
Prep Time: 15 minutes
Cook Time: 5 minutes
Number of Servings: 12
Required Equipment List: Baking sheet, parchment paper, microwave-safe bowl, wooden skewers or lollipop sticks
Cuisine Type: American
Sparkly Marshmallow Pops are a fun and festive treat that will delight kids of all ages, making them perfect for a New Year’s Eve party or any celebration. These pops are simple to make, requiring just a few ingredients, and they can be customized with different colors and flavors to suit any theme.
The fluffy marshmallows are coated in colorful melting chocolate and topped with edible glitter or sprinkles, creating a dazzling treat that catches the eye and tantalizes the taste buds. This easy recipe allows little chefs to get involved in the kitchen, making it a great bonding activity for families.
With the ability to personalize each pop, kids can release their creativity by choosing their favorite colors and toppings. These Sparkly Marshmallow Pops aren’t only visually appealing but also a sweet and satisfying snack that will be a hit at any gathering.
Ingredients:
- 12 large marshmallows
- 1 cup melting chocolate (white, milk, or dark)
- Edible glitter or sprinkles
- 12 wooden skewers or lollipop sticks
Instructions:
- Begin by lining a baking sheet with parchment paper to prevent the marshmallow pops from sticking. This will guarantee easy cleanup and keep your treats looking perfect.
- In a microwave-safe bowl, melt the chocolate according to the package instructions, stirring every 30 seconds until smooth and fully melted. Be careful not to overheat the chocolate, as it can burn easily.
- Once the chocolate is melted, take a wooden skewer and carefully insert it into the center of each marshmallow, pushing it about halfway through. This will create a handle for your pops.
- Dip each marshmallow into the melted chocolate, making sure that it’s fully coated. Allow any excess chocolate to drip off before placing the marshmallow pop onto the prepared baking sheet.
- While the chocolate is still wet, sprinkle edible glitter or sprinkles over the top of each pop, making sure they’re decorated to your liking. This is where kids can get creative with their designs!
- Let the marshmallow pops sit at room temperature for about 5-10 minutes, or until the chocolate hardens completely. If you’re short on time, you can place the tray in the refrigerator for a quicker set.
Extra Tips: For an extra flavor boost, consider adding a few drops of flavored extract (like vanilla or peppermint) to the melted chocolate. You can also use different types of chocolate for varied flavors and colors.
If you want to make these pops more festive, try using colored melting chocolate for holidays or special occasions. Enjoy making these delightful treats with your kids, and watch them light up with joy!
Countdown Cheese Quesadillas
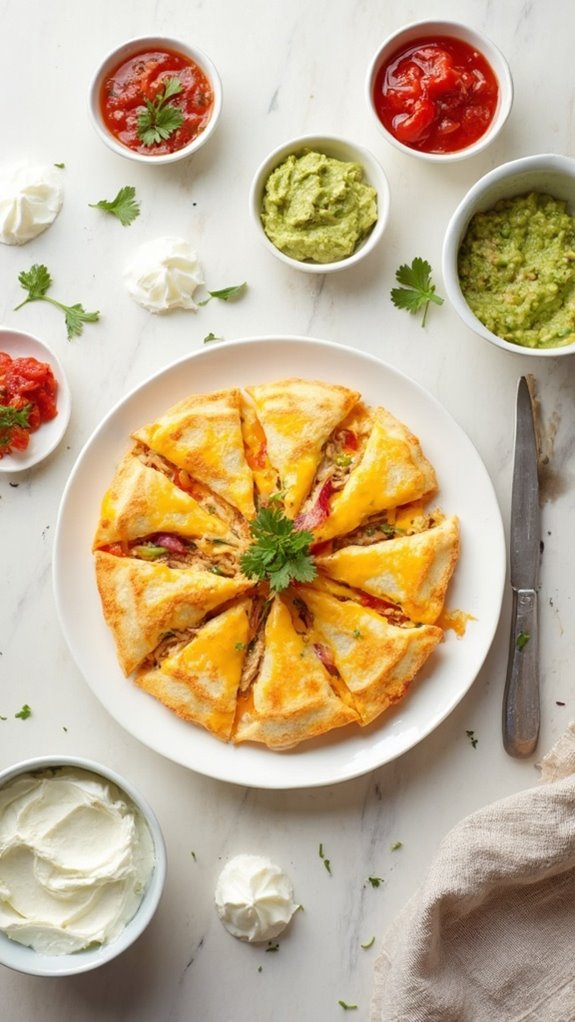
Title: Countdown Cheese Quesadillas
Prep Time: 10 minutes
Cook Time: 10 minutes
Number of Servings: 4
Required Equipment List: Skillet, spatula, knife, cutting board, cheese grater
Cuisine Type: Mexican
Countdown Cheese Quesadillas are a fun and interactive dish perfect for a New Year’s Eve celebration with kids. These cheesy delights can be customized with various fillings to suit everyone’s taste, making them a crowd-pleaser at any party.
As the clock ticks down to midnight, kids can enjoy these warm, gooey quesadillas while counting down to the New Year, adding an extra layer of excitement to the festivities. Making quesadillas is a simple and quick process, allowing you to whip them up just before the big countdown.
You can involve the kids in the preparation by letting them choose their favorite cheeses and fillings, encouraging creativity and participation. These quesadillas can be served with a variety of dips like salsa, guacamole, or sour cream, ensuring that every bite is packed with flavor and fun!
Ingredients:
- 4 large flour tortillas
- 2 cups shredded cheese (cheddar, mozzarella, or a blend)
- 1 cup cooked chicken or veggies (optional)
- 1 tablespoon olive oil
- Salsa, guacamole, or sour cream (for serving)
Instructions:
- Heat the skillet over medium heat and add the olive oil. Allow the oil to warm up for about a minute, creating a non-stick surface for the quesadillas.
- Place one tortilla in the skillet and sprinkle half of the shredded cheese evenly over the surface. If you’re adding any optional fillings like chicken or veggies, distribute them evenly over the cheese.
- Top with another tortilla and press gently to adhere. Cook for about 3-4 minutes, or until the bottom tortilla is golden brown and the cheese begins to melt.
- Carefully flip the quesadilla using a spatula and cook the other side for an additional 3-4 minutes, or until it’s golden brown and the cheese is fully melted.
- Remove the quesadilla from the skillet and let it sit for a minute before cutting it into wedges. Repeat the process with the remaining tortillas and fillings.
- Serve the quesadilla wedges with salsa, guacamole, or sour cream for dipping, and enjoy the cheesy goodness as you countdown to the New Year!
Extra Tips: For an extra flavor boost, consider adding spices like cumin or chili powder to the cheese before cooking. You can also experiment with different types of cheese or add fresh herbs for a gourmet twist.
If you’re making a large batch, keep the finished quesadillas warm in an oven set to low while you finish cooking the others. Enjoy this fun and tasty dish as part of your New Year’s Eve celebration!
Celebration Smoothie Bowls
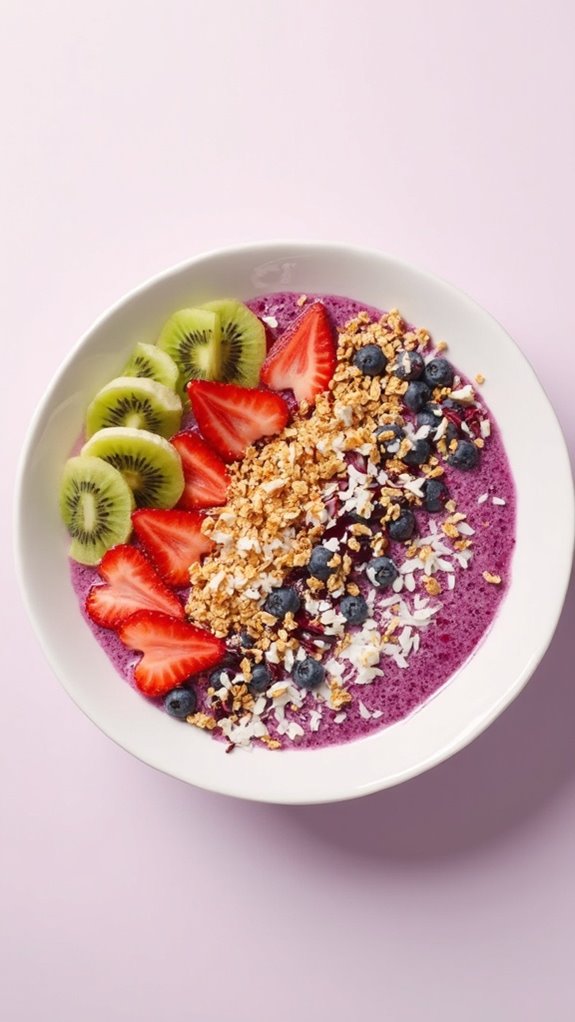
Title: Celebration Smoothie Bowls
Prep Time: 10 minutes
Cook Time: 0 minutes
Number of Servings: 4
Required Equipment List: Blender, bowls, measuring cups, spoon
Cuisine Type: Healthy Snack
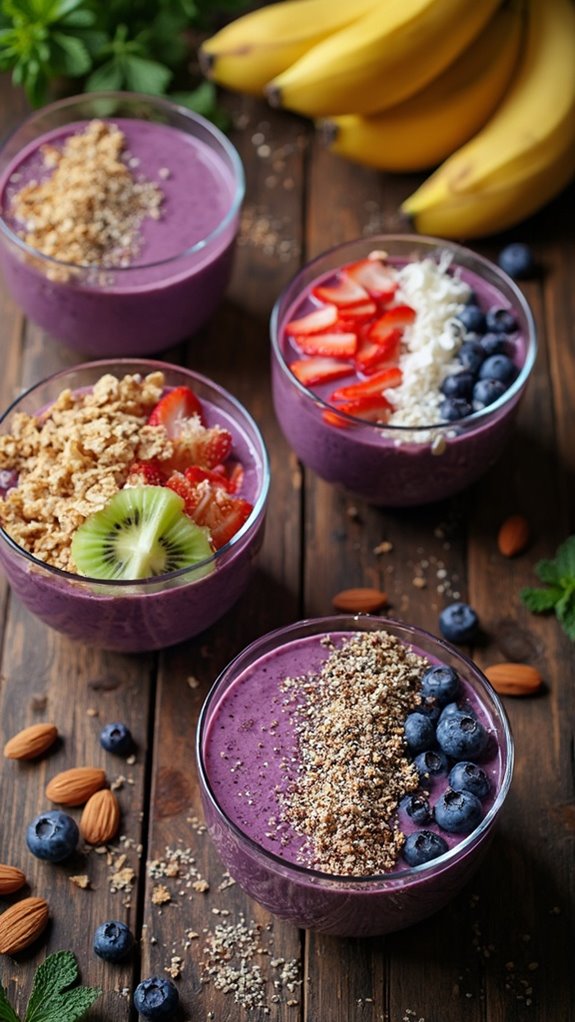
Celebration Smoothie Bowls are a colorful and nutritious way to ring in the New Year, perfect for kids and adults alike. These bowls aren’t only visually appealing with their vibrant colors but also packed with vitamins and minerals from a variety of fresh fruits. The base is a creamy blend of bananas and yogurt, which provides a deliciously smooth texture that contrasts beautifully with the crunchy toppings.
Kids will love getting involved in the process, from choosing their favorite fruits to decorating their own bowls. What makes these smoothie bowls extra special is the opportunity for creativity. Each bowl can be personalized with different toppings, allowing everyone to create their own unique masterpiece.
Whether you prefer granola, seeds, or an array of fruits, the options are endless. Serve these bowls at your New Year’s Eve party for a healthy yet festive treat that will keep everyone energized for the celebrations ahead.
Ingredients:
- 2 ripe bananas
- 1 cup Greek yogurt
- 1 cup spinach (optional)
- 1 cup almond milk (or any milk of choice)
- 1 cup frozen mixed berries
- Assorted toppings (granola, sliced fruits, nuts, seeds, coconut flakes, honey)
Instructions:
- Begin by peeling the ripe bananas and placing them into a blender. If you’d like to add a nutritional boost, toss in a cup of fresh spinach, which is nearly undetectable in flavor but adds a vibrant green color and health benefits.
- Next, pour in the Greek yogurt and almond milk. The yogurt adds creaminess, while the milk helps achieve a smoother consistency. Blend the mixture on high until smooth and creamy, ensuring there are no lumps.
- Once the mixture is well-blended, add in the frozen mixed berries. This won’t only give the smoothie bowl a beautiful purple hue but also enhance the flavor. Blend again until the berries are fully incorporated.
- Divide the smoothie mixture evenly among four bowls. Make sure to leave some space for the toppings, as they’ll add both texture and flavor to the bowls.
- Now comes the fun part! Let each person decorate their smoothie bowl with their choice of toppings. Encourage creativity by offering a variety of options like granola, sliced fruits, nuts, seeds, coconut flakes, and a drizzle of honey.
Extra Tips: For a thicker smoothie bowl, consider using frozen bananas instead of fresh ones or add more frozen berries to the mixture. If you want to make it extra decadent, you can swirl in a spoonful of nut butter before serving.
These bowls can also be prepared in advance; just store the base in the fridge and add the toppings just before serving to keep everything fresh and crunchy. Enjoy your festive and nutritious celebration!
Conclusion
As you gear up for a fun-filled New Year’s Eve, remember that just like building a tower of colorful blocks, each recipe adds a unique flavor to your celebration. These festive treats aren’t just food; they’re memories waiting to happen. So, gather your little chefs, mix up some joy, and watch as their creativity shines brighter than the fireworks outside. After all, isn’t it the laughter and delicious bites that truly make the countdown unforgettable? Cheers to a tasty new year!

