No products in the cart.
25 Antioxidant-Rich Ice Cubes Recipes For Health-Boosting Benefits
Want to spice up your drinks while boosting your health? Antioxidant-rich ice cubes are your answer! From Berry Blast to Tropical Pineapple, you can create cubes that not only cool your beverages but also pack a nutrient punch. These recipes take just minutes to prep and add vibrant flavors to everything from water to cocktails. Imagine sipping on a revitalizing drink and knowing you’re helping your body fight oxidative stress. Plus, there are plenty of creative combos to try! Ready to get started? You just might discover your new favorite recipe among the ideas ahead!
Contents
hide
Berry Blast Ice Cubes
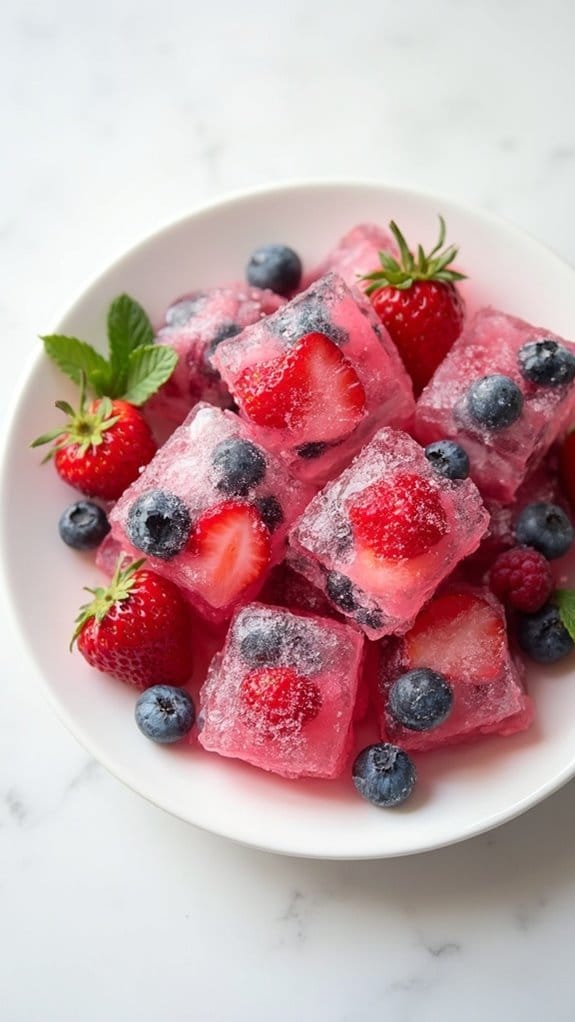
Title: Berry Blast Ice Cubes
Prep Time: 10 minutes
Cook Time: 2 hours
Number of Servings: 12 ice cubes
Required Equipment List: Ice cube tray, blender (optional), measuring cup
Cuisine Type: American
These Berry Blast Ice Cubes are a revitalizing and fun way to infuse your beverages with vibrant flavors and antioxidants. Made with an assortment of berries such as strawberries, blueberries, and raspberries, these ice cubes not only look beautiful but also add a burst of fruity goodness to your drinks.
Perfect for summer parties, picnics, or simply jazzing up your daily water intake, these ice cubes are easy to prepare and can be made ahead of time. The best part about these Berry Blast Ice Cubes is their versatility. You can use them in sparkling water, iced tea, lemonade, or even cocktails for a colorful twist.
You can blend the berries with a bit of water or juice for a smoother texture, or simply freeze whole berries for a chunkier style. Either way, these ice cubes are sure to impress guests and keep your drinks cool and flavorful.
Ingredients:
- 1 cup fresh strawberries, hulled and halved
- 1 cup fresh blueberries
- 1 cup fresh raspberries
- 1 cup water or fruit juice (such as apple or orange juice)
- Optional: Fresh mint leaves for garnish
Instructions:
- Begin by washing all the berries thoroughly under cold water. Make sure to hull the strawberries and cut them in half for easier freezing and a better presentation in the ice cubes.
- In a blender, combine the strawberries, blueberries, raspberries, and water or juice. Blend until the mixture is smooth. If you prefer a chunkier texture, you can skip the blending step and simply layer the berries in the ice cube tray.
- Carefully pour the berry mixture into an ice cube tray, filling each compartment about three-quarters full to allow for expansion during freezing. If you opted for whole berries, distribute them evenly throughout the tray.
- If desired, place a small mint leaf in each compartment for an aromatic touch. This will add a lovely visual element and a hint of mint flavor when the cubes melt.
- Transfer the ice cube tray to the freezer and allow the cubes to freeze for at least 2 hours or until fully solid. Once frozen, you can pop the cubes out and store them in a resealable plastic bag or airtight container for later use.
Extra Tips: Feel free to experiment with different combinations of berries or even add citrus slices for added zest. If you’re looking for a deeper flavor, consider adding a splash of vanilla extract or a teaspoon of honey to the berry mixture before freezing.
These ice cubes can also serve as a fun addition to smoothies or yogurt bowls, bringing a revitalizing and flavorful twist to your favorite recipes. Enjoy your Berry Blast Ice Cubes!
Citrus Zest Infused Cubes
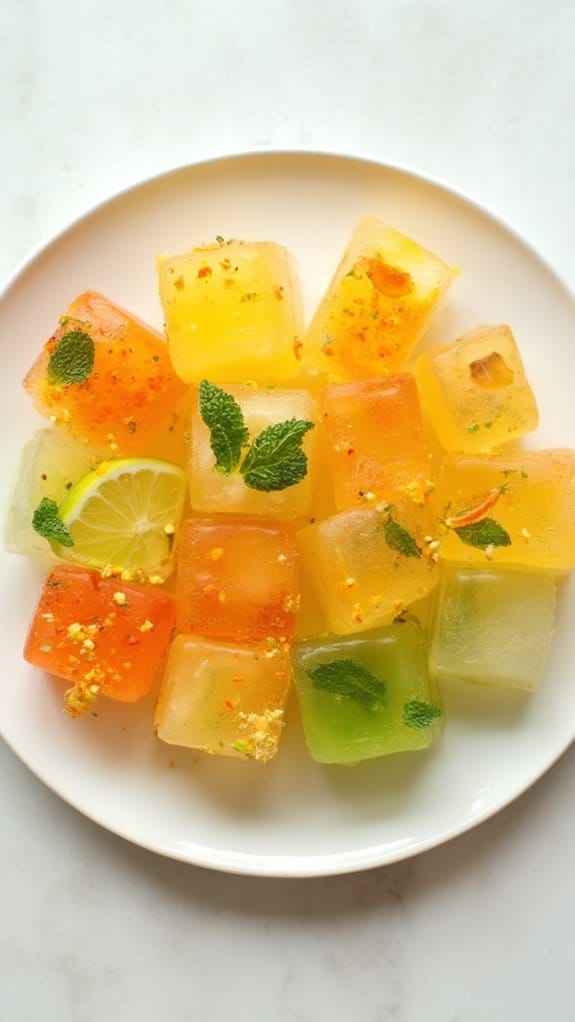
Title: Citrus Zest Infused Ice Cubes
Prep Time: 10 minutes
Cook Time: 0 minutes
Number of Servings: 12 ice cubes
Required Equipment List: Ice cube tray, measuring spoons, mixing bowl, citrus juicer (optional)
Cuisine Type: Fusion
Citrus Zest Infused Ice Cubes are a revitalizing and vibrant addition to your beverages, perfect for adding a burst of flavor to water, cocktails, or iced teas. Infused with the zesty goodness of oranges, lemons, and limes, these ice cubes not only look beautiful but also enhance your drinks with a lively citrus aroma.
They’re incredibly easy to make and serve as a delightful way to elevate any occasion, from casual get-togethers to elegant dinner parties. These ice cubes also offer a fun way to incorporate antioxidants into your diet, as citrus fruits are packed with vitamin C and other beneficial compounds.
By simply zesting and juicing your favorite citrus fruits, you can create a visually appealing and tasty addition to your ice tray. Enjoy the revitalizing taste of summer all year round with these simple yet effective citrus-infused ice cubes.
Ingredients:
- Zest of 1 orange
- Zest of 1 lemon
- Zest of 1 lime
- 1 cup water (or citrus juice for extra flavor)
- Optional: Fresh mint leaves
Instructions:
- Begin by thoroughly washing your citrus fruits to remove any wax or pesticides. Using a zester or fine grater, zest the orange, lemon, and lime, being careful to avoid the bitter white pith underneath.
- In a mixing bowl, combine the zest of all three fruits. If you prefer a more intense flavor, you can also squeeze the juice from the fruits and add it to the bowl. Mix well to combine the zest and juice.
- Slowly pour 1 cup of water into the bowl with the zest mixture. Stir gently to guarantee the zest is evenly distributed throughout the liquid. If desired, add a few fresh mint leaves for an extra layer of flavor.
- Carefully pour the citrus mixture into an ice cube tray, filling each compartment about three-quarters full to allow for expansion as they freeze. If you’re using mint leaves, place one in each compartment before pouring the liquid.
- Place the filled ice cube tray in the freezer and allow the cubes to freeze solid, which usually takes about 4-6 hours or overnight for best results. Once frozen, the cubes can be easily removed and stored in a resealable plastic bag.
Extra Tips: To make your citrus ice cubes even more visually appealing, consider layering the ingredients. Start with a layer of citrus juice, freeze it for an hour, then add the zest mixture on top.
Additionally, feel free to experiment with other fruits or herbs, such as berries or rosemary, to customize your ice cubes to your taste. These cubes can also be a lovely addition to cocktails, providing both flavor and a stunning presentation!
Green Tea Mint Cubes
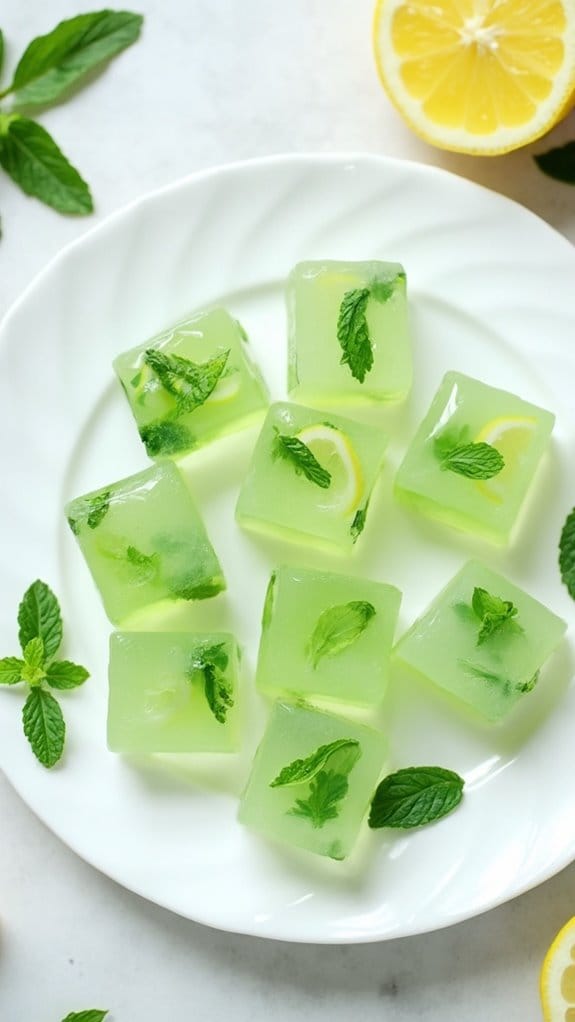
Title: Green Tea Mint Cubes
Prep Time: 10 minutes
Cook Time: 4 hours (freezing time)
Number of Servings: 12 cubes
Required Equipment List: Ice cube tray, measuring cups, blender, fine mesh strainer
Cuisine Type: Beverage
These Green Tea Mint Cubes are a revitalizing and versatile addition to your beverages, making them perfect for summer parties or simply to elevate your daily hydration routine. Made from freshly brewed green tea and infused with mint leaves, these ice cubes add a delightful flavor to water, iced tea, or cocktails without diluting them.
The antioxidants from the green tea combined with the cooling effect of mint create a thirst-quenching treat that will keep you invigorated all day. Creating these ice cubes is incredibly simple and requires just a few ingredients. You can enjoy them on their own or use them to enhance the flavor of your favorite drinks.
Additionally, they can be a fun and healthy way to encourage kids to drink more water. Just pop them into your drink of choice, and watch as they melt away, releasing a burst of minty green tea goodness.
Ingredients:
- 2 cups water
- 2 green tea bags
- 1/4 cup fresh mint leaves
- 1 tablespoon honey (optional)
- Lemon slices (for garnish, optional)
Instructions:
- Start by boiling 2 cups of water in a small saucepan. Once the water reaches a rolling boil, remove it from heat and add the green tea bags. Allow the tea to steep for about 3-5 minutes, depending on how strong you prefer the flavor.
- After steeping, remove the tea bags and stir in the honey (if using) until fully dissolved. This step is optional, but it adds a touch of sweetness that complements the mint nicely.
- Next, add the fresh mint leaves to the warm tea. Allow the mixture to cool down to room temperature, which will help to infuse the mint flavor into the tea.
- Once cooled, strain the mixture through a fine mesh strainer into a measuring cup to remove the mint leaves. This will give you a smooth tea base free from any bits of mint.
- Carefully pour the strained green tea mixture into an ice cube tray, filling each compartment about three-quarters full. If desired, you can place a small slice of lemon in each cube compartment for an extra burst of flavor.
- Place the ice cube tray in the freezer and allow the cubes to freeze for at least 4 hours or until completely solid. Once frozen, they can be popped out and stored in a resealable bag or container in the freezer for future use.
Extra Tips: To enhance the flavor further, consider adding other herbs such as basil or a splash of citrus juice to the tea mixture before freezing. These cubes can also be used in smoothies or as a creative way to cool down your favorite cocktails.
Enjoy experimenting with different flavors and combinations, and always keep a batch on hand for quick and revitalizing drinks!
Tropical Pineapple Cubes
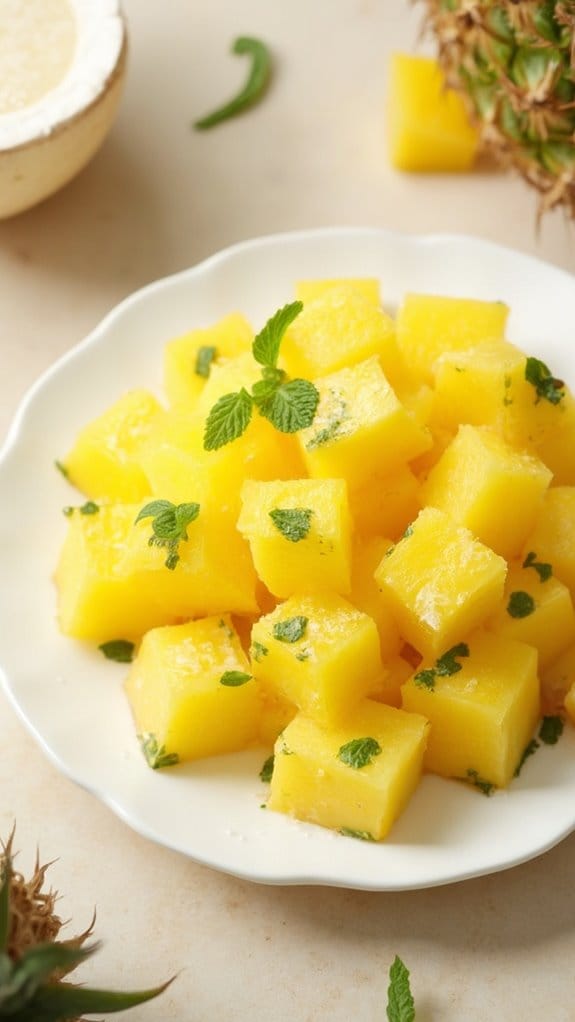
Title: Tropical Pineapple Cubes
Prep Time: 10 minutes
Cook Time: 0 minutes
Number of Servings: 8
Required Equipment List: Ice cube tray, blender, measuring cup
Cuisine Type: Tropical
These Tropical Pineapple Cubes are a revitalizing and antioxidant-rich treat that will elevate any beverage or snack. Made with fresh pineapple, these ice cubes aren’t only visually appealing but also packed with flavor. They’re perfect for cooling down your drinks on a hot day or can be enjoyed as a healthy and tasty snack on their own.
The natural sweetness of the pineapple combined with a hint of coconut or mint makes these cubes a delightful addition to your summer gatherings or as a healthy way to hydrate. Creating these Tropical Pineapple Cubes is incredibly easy and requires minimal preparation.
Simply blend fresh pineapple with a splash of coconut water or mint leaves, pour the mixture into ice cube trays, and freeze until solid. These vibrant cubes will add a tropical flair to your favorite beverages, making every sip feel like a mini-vacation. They can also be used in smoothies for added texture and flavor, or served in fruit salads for a fun twist.
Ingredients:
- 2 cups fresh pineapple, chopped
- 1/2 cup coconut water (or water)
- Fresh mint leaves (optional, for a revitalizing twist)
Instructions:
- Begin by cutting the fresh pineapple into small chunks, making sure you remove the tough core. This will make blending easier and result in a smoother texture for your ice cubes.
- In a blender, combine the chopped pineapple and coconut water. If you want to add a revitalizing mint flavor, toss in a few mint leaves as well. Blend until the mixture is completely smooth.
- Once blended, taste the mixture and adjust the sweetness if necessary. If you prefer a sweeter flavor, you can add a teaspoon of honey or agave syrup before blending again.
- Carefully pour the pineapple mixture into an ice cube tray, filling each compartment to the top. Tap the tray gently on the counter to eliminate any air bubbles and make sure an even distribution.
- Place the filled ice cube tray in the freezer and allow it to freeze for at least 4-6 hours or until the cubes are completely solid.
- Once frozen, remove the ice cubes from the tray by gently twisting it. If they’re stuck, you can run warm water over the bottom of the tray for a few seconds to help release them.
Extra Tips: For an extra twist, try mixing in other fruits such as mango or berries to create colorful, layered ice cubes. You can also experiment with different juices like orange or lime for a zesty flavor.
These Tropical Pineapple Cubes are best enjoyed within a week of making them to maintain maximum freshness, so plan ahead for your summer parties or everyday hydration needs!
Beetroot and Ginger Cubes
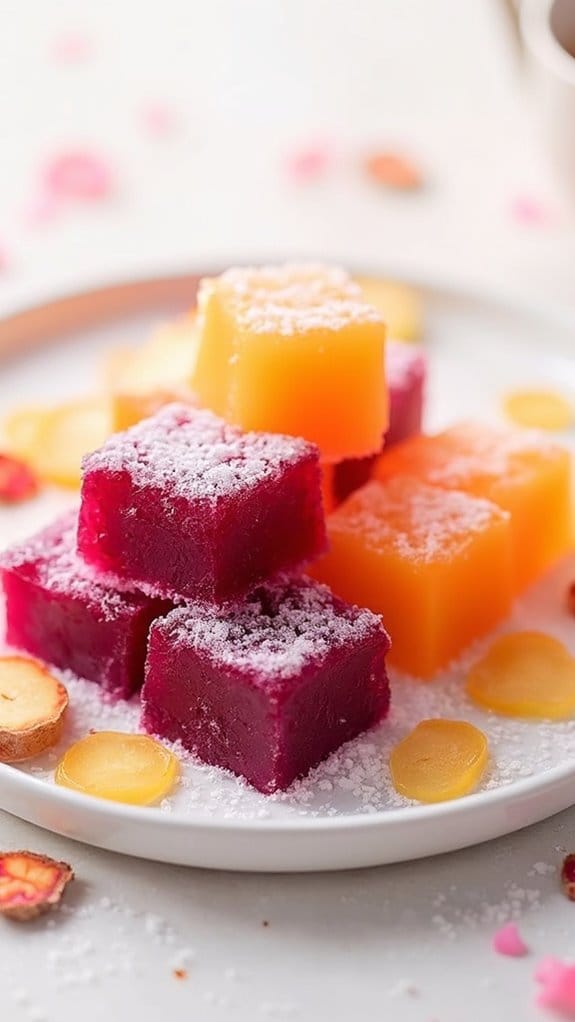
Title: Beetroot and Ginger Cubes
Prep Time: 10 minutes
Cook Time: 2 hours
Number of Servings: 10
Required Equipment List: Blender, ice cube tray, measuring cups, knife, cutting board
Cuisine Type: Vegan
Beetroot and Ginger Cubes are a revitalizing and nutritious way to incorporate antioxidants into your diet. These vibrant little cubes are easy to make and can be added to a variety of drinks or enjoyed as a healthy snack. The earthy sweetness of beetroot combined with the zingy spice of ginger creates a delightful flavor balance that can invigorate any beverage, from smoothies to cocktails.
Not only do these cubes add color and flavor, but they also provide a boost of nutrients that can help support your overall health. These ice cubes aren’t only visually appealing but also versatile in their uses. Simply drop a few into your favorite drinks for added taste and nutrition. You can even blend them into smoothies or use them as a base for revitalizing summer slushies.
The natural sweetness of the beetroot means you can enjoy them without any added sugars, making them a guilt-free treat for any occasion.
Ingredients:
- 1 large beetroot, peeled and chopped
- 1 tablespoon fresh ginger, peeled and chopped
- 2 cups water
- 1 tablespoon lemon juice (optional)
Instructions:
- Begin by peeling and chopping the beetroot into small chunks for easier blending. Also, peel and chop the fresh ginger. These steps will help guarantee a smooth consistency in your ice cubes.
- In a blender, combine the chopped beetroot, ginger, and water. Blend on high until the mixture is completely smooth, which should take about 1-2 minutes. If desired, add the lemon juice to enhance the flavor and preserve the vibrant color of the beetroot.
- Once blended, taste the mixture and adjust the flavor if necessary. If you find it too strong, you can add a bit more water until it reaches your desired taste and consistency.
- Carefully pour the mixture into an ice cube tray, filling each compartment to the top. Make sure to leave a little space at the top, as the liquid will expand when it freezes.
- Place the ice cube tray in the freezer and allow the cubes to freeze for at least 2 hours or until fully solid. Once frozen, you can pop out the cubes and store them in a freezer bag for longer shelf life.
Extra Tips: When preparing your beetroot and ginger cubes, consider using gloves while handling beetroot to avoid staining your hands. You can also experiment with adding other ingredients like mint or citrus fruits for additional flavors.
These cubes can be a fun addition to summer gatherings or a quick way to enhance your daily water intake by adding a pop of color and nutrients!
Pomegranate Power Cubes
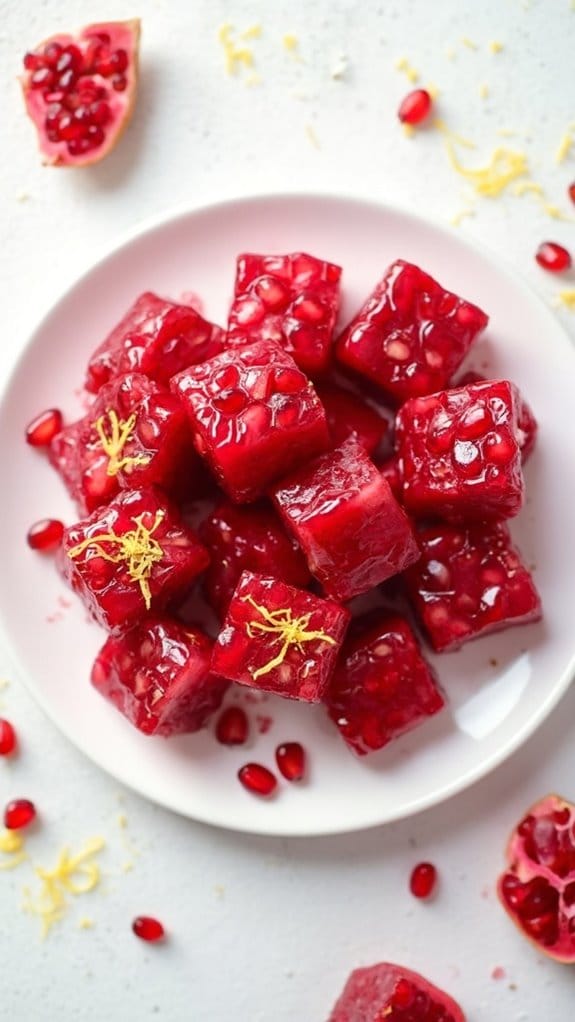
Title: Pomegranate Power Cubes
Prep Time: 10 minutes
Cook Time: 2 hours
Number of Servings: 12 cubes
Required Equipment List: Ice cube tray, blender, measuring cup, mixing spoon
Cuisine Type: Health-focused
Pomegranate Power Cubes are a revitalizing and nutritious way to incorporate the antioxidant-rich benefits of pomegranates into your daily routine. These vibrant ice cubes aren’t only visually appealing but also serve as a versatile addition to drinks, smoothies, or even as a healthy snack on their own.
Made from pure pomegranate juice, these cubes are bursting with flavor and loaded with vitamins and minerals, making them a guilt-free treat. Creating these power cubes is incredibly simple and requires minimal effort, allowing you to enjoy the health benefits of pomegranates at any time.
Just blend the juice with a touch of sweetness if desired, pour it into an ice cube tray, and freeze. Once frozen, these cubes can be added to water or sparkling beverages, or you can simply pop a few into your mouth for a revitalizing burst of flavor. Perfect for hot summer days or whenever you need a quick pick-me-up!
Ingredients:
- 2 cups pomegranate juice
- 1 tablespoon honey (optional)
- 1 tablespoon lemon juice (optional)
- Fresh pomegranate seeds (for garnish, optional)
Instructions:
- Start by gathering all your ingredients. If you’re using fresh pomegranates, extract the juice by blending the arils and straining it through a fine mesh sieve to remove the pulp. You can also use store-bought pomegranate juice for convenience.
- In a mixing bowl, combine the pomegranate juice, honey, and lemon juice. Stir well until the honey is fully dissolved. Adjust the sweetness to your liking, keeping in mind that a little sweetness can enhance the flavor of the cubes.
- Carefully pour the mixture into an ice cube tray, filling each compartment about three-quarters full to allow for expansion while freezing. If desired, sprinkle a few pomegranate seeds into each cube for an extra pop of flavor and visual appeal.
- Place the filled ice cube tray in the freezer and let it freeze for at least 2 hours or until the cubes are completely solid. This guarantees that they’ll hold their shape when removed from the tray.
- Once frozen, carefully remove the power cubes from the tray by twisting it gently. If they’re stuck, run warm water over the bottom of the tray for a few seconds to help release them.
Extra Tips: For a fun twist, consider blending the pomegranate juice with other fruit juices like orange or cranberry for a mixed flavor profile. You can also try adding herbs like mint or basil before freezing for an aromatic touch.
Store your power cubes in a freezer-safe bag or container to keep them fresh, and enjoy them in your favorite beverages or as a revitalizing snack whenever you need a boost!
Lavender Lemonade Cubes

Title: Lavender Lemonade Cubes
Prep Time: 10 minutes
Cook Time: 4 hours (freezing time)
Number of Servings: 10 cubes
Required Equipment List: Ice cube tray, small saucepan, measuring cups, stirring spoon
Cuisine Type: Beverage
Lavender Lemonade Cubes are a revitalizing and fragrant twist on traditional lemonade, perfect for adding a touch of elegance to your drinks. These ice cubes are infused with the calming scent of lavender, combined with the zesty brightness of lemon juice, making them ideal for cooling down your favorite beverages on a hot day.
Simply drop a cube into a glass of water, iced tea, or lemonade, and watch as it transforms your drink into a floral delight. This recipe is incredibly simple to prepare and can be made ahead of time, allowing you to have a batch ready whenever you need a revitalizing beverage.
The lavender not only adds a lovely aroma but also offers antioxidant benefits, making these lemonade cubes a healthy addition to your refreshment routine. Enjoy them at parties, picnics, or simply at home for a luxurious touch to any drink.
Ingredients:
- 1 cup water
- 2 tablespoons dried culinary lavender
- 1/2 cup fresh lemon juice
- 1/4 cup honey or agave syrup (adjust to taste)
- 1 cup additional water (for dilution)
Instructions:
- In a small saucepan, bring 1 cup of water to a boil. Once boiling, remove from heat and add the dried culinary lavender. Allow it to steep for about 10 minutes to extract the flavor and aroma.
- After steeping, strain the lavender-infused water through a fine-mesh strainer into a bowl to remove the lavender buds. Press the lavender with the back of a spoon to extract as much liquid as possible.
- In a separate bowl, combine the strained lavender water, fresh lemon juice, honey (or agave syrup), and an additional cup of water. Stir well until the honey is fully dissolved and the mixture is well combined.
- Carefully pour the lavender lemonade mixture into an ice cube tray, filling each compartment nearly to the top. Place the tray in the freezer and let it freeze for at least 4 hours or until solid.
- Once frozen, carefully remove the lavender lemonade cubes from the tray. Store them in an airtight container or a zip-top bag in the freezer until ready to use.
Extra Tips: For a more vibrant flavor, feel free to adjust the amount of honey or lemon juice according to your taste preference. You can also experiment with adding other herbs, such as mint or basil, to the mixture before freezing for a unique flavor twist.
These cubes aren’t just for drinks; use them to add a floral touch to your cocktails or even as a revitalizing addition to a fruit salad. Enjoy your lavender lemonade cubes all summer long!
Spinach and Kiwi Cubes
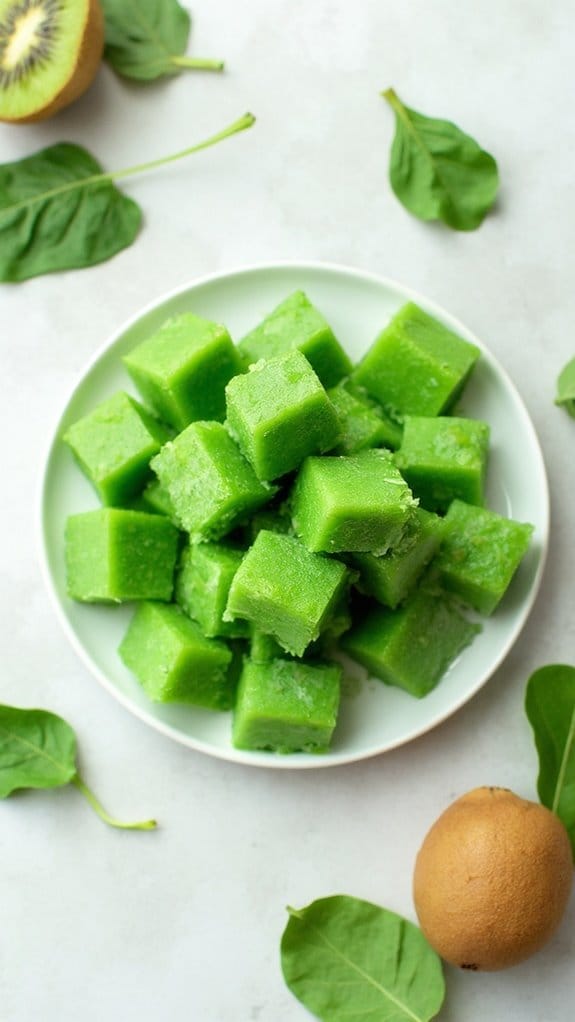
Title: Spinach and Kiwi Cubes
Prep Time: 10 minutes
Cook Time: 0 minutes
Number of Servings: 6
Required Equipment List: Blender, ice cube tray, measuring cups, spatula
Cuisine Type: Healthy Snack
Spinach and Kiwi Cubes are a revitalizing and nutritious treat that packs a punch of antioxidants and vitamins. This recipe combines the vibrant green goodness of spinach with the sweet, tangy flavor of kiwi, creating a delightful frozen snack that’s perfect for hot summer days or as a healthy addition to smoothies.
These cubes aren’t only easy to make but are also a fun way to sneak some extra greens into your diet. Making these spinach and kiwi cubes is a straightforward process that requires minimal ingredients and no cooking time. Simply blend the spinach and kiwi together and pour the mixture into ice cube trays.
Once frozen, these cubes can be enjoyed on their own or added to beverages, yogurt, or smoothie bowls for an extra nutritional boost. They’re perfect for kids and adults alike, making healthy eating enjoyable and convenient.
Ingredients:
- 2 cups fresh spinach, packed
- 2 ripe kiwis, peeled and chopped
- 1 cup coconut water or water
- 1 tablespoon honey or agave syrup (optional)
Instructions:
- Begin by rinsing the fresh spinach thoroughly under cold water to remove any dirt or grit. Pat it dry with a clean kitchen towel or spin it in a salad spinner to remove excess moisture.
- In a blender, combine the washed spinach, chopped kiwis, and coconut water (or water). If you prefer a sweeter taste, add honey or agave syrup at this stage. Blend the mixture on high speed until smooth and well combined.
- Once the mixture is fully blended, use a spatula to scrape down the sides of the blender to verify everything is incorporated. Blend again briefly if needed, until you achieve a consistent green puree.
- Carefully pour the spinach and kiwi mixture into an ice cube tray, filling each compartment to the top. Gently tap the tray on the counter to remove any air bubbles and verify even distribution.
- Place the ice cube tray in the freezer and allow the cubes to freeze completely, which typically takes about 4-6 hours. Once frozen solid, pop the cubes out of the tray and store them in a resealable plastic bag or airtight container in the freezer for later use.
Extra Tips: For an added nutritional boost, consider mixing in other fruits such as bananas or berries with the spinach and kiwi. You can also substitute coconut water with almond milk for a creamier texture.
These cubes can be enjoyed in a variety of ways, so feel free to experiment with different combinations or add-ins based on your personal preferences. Enjoy your healthy and revitalizing spinach and kiwi cubes!
Raspberry Coconut Cubes
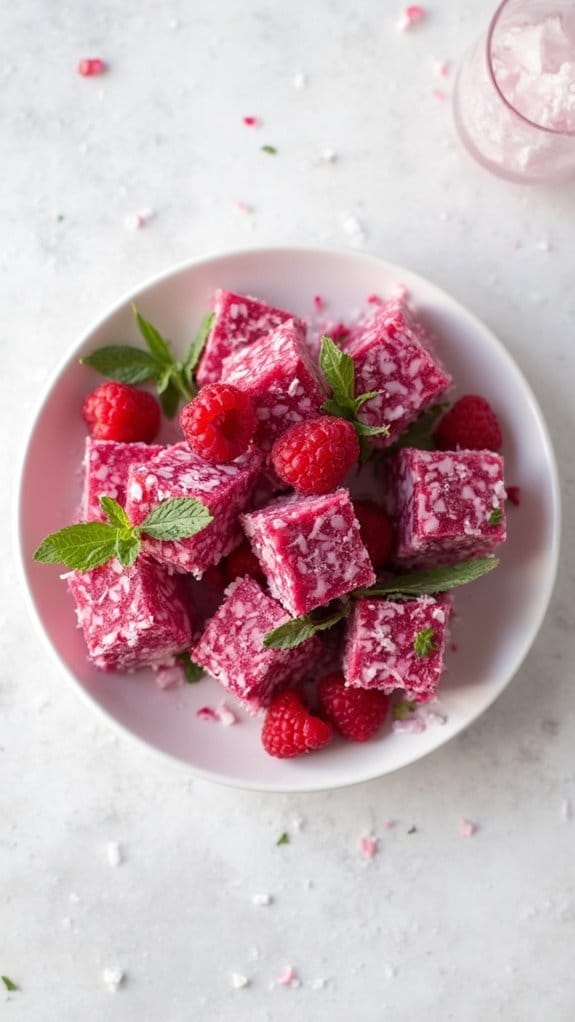
Title: Raspberry Coconut Cubes
Prep Time: 10 minutes
Cook Time: 2 hours (freezing time)
Number of Servings: 12 cubes
Required Equipment List: Blender, ice cube tray, measuring cups, mixing bowl
Cuisine Type: Dessert
Raspberry Coconut Cubes are a revitalizing and nutritious treat that combines the tartness of fresh raspberries with the creaminess of coconut milk. These delightful ice cubes aren’t only visually appealing but also packed with antioxidants, making them a perfect addition to your summer gatherings or a simple way to elevate your drinks.
They can be enjoyed on their own or added to beverages for a burst of flavor and color. The process is incredibly simple, requiring just a few ingredients that blend harmoniously together. Whether you’re looking for a quick snack or a fun way to chill your drinks, these Raspberry Coconut Cubes are versatile and easy to prepare.
Plus, they provide a delightful way to cool down on a hot day while indulging in the health benefits of both raspberries and coconut.
Ingredients:
- 1 cup fresh raspberries
- 1 cup coconut milk
- 2 tablespoons honey (or maple syrup for a vegan option)
- 1 teaspoon vanilla extract
- Fresh mint leaves (for garnish, optional)
Instructions:
- Begin by rinsing the fresh raspberries under cool water to remove any dirt or debris. Once clean, place them in a blender along with the coconut milk, honey, and vanilla extract. Blend until smooth and creamy, ensuring that no raspberry pieces remain.
- After blending, taste the mixture and adjust the sweetness if necessary by adding more honey or maple syrup. Blend again briefly to incorporate any additional sweetener.
- Pour the raspberry coconut mixture into an ice cube tray, filling each compartment evenly. If desired, you can add a few whole raspberries to each cube for a decorative touch.
- Carefully transfer the filled ice cube tray to the freezer and allow the cubes to freeze for at least 2 hours or until completely solid.
- Once frozen, remove the ice cubes from the tray by gently twisting it or running warm water over the bottom for a few seconds to help release them. Serve the Raspberry Coconut Cubes in a bowl or add them to your favorite beverages.
Extra Tips: You can easily customize these cubes by adding other fruits such as strawberries or blueberries for a mixed berry flavor. For an extra tropical twist, consider adding a splash of pineapple juice to the mixture before blending.
These cubes can also be used in smoothies or as a revitalizing snack on their own, making them a versatile addition to your kitchen. Enjoy your delicious and healthy Raspberry Coconut Cubes!
Turmeric Ginger Infusion
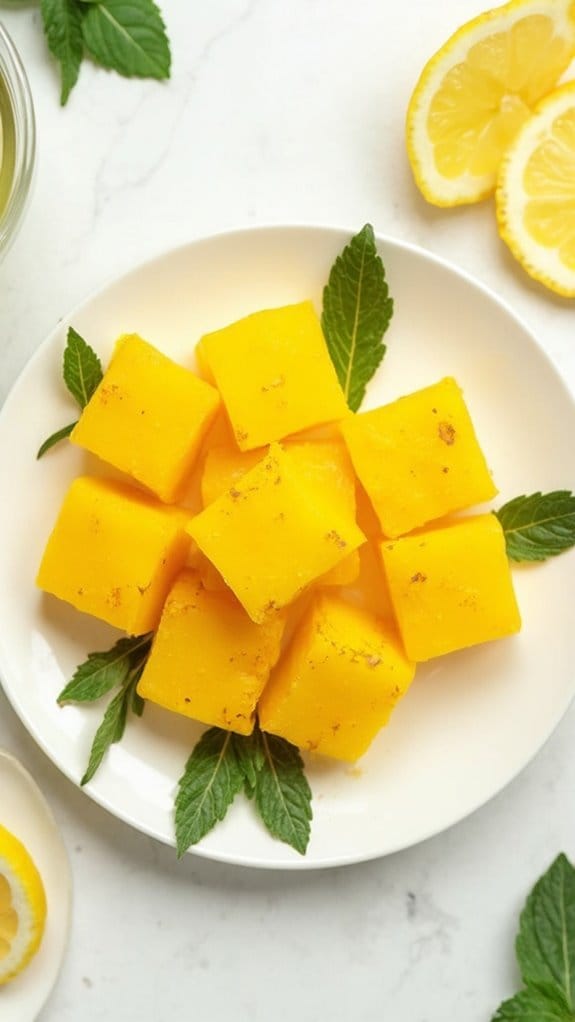
Title: Turmeric Ginger Infusion Ice Cubes
Prep Time: 10 minutes
Cook Time: 5 minutes
Number of Servings: 12 ice cubes
Required Equipment List: Small saucepan, ice cube tray, measuring cups, whisk
Cuisine Type: Health and Wellness
Turmeric Ginger Infusion Ice Cubes are a delightful and health-boosting addition to your beverage repertoire. This simple recipe combines the potent anti-inflammatory properties of turmeric and the digestive benefits of ginger into an easy-to-make infusion that can be frozen into ice cubes.
Perfect for adding to water, tea, or cocktails, these ice cubes not only enhance the flavor of your drinks but also pack a nutritious punch. The vibrant yellow color of the turmeric gives a sunny appearance to your beverages, making them visually appealing as well.
Each cube is a concentrated dose of health benefits that can help with inflammation, digestion, and overall wellness. Whether you’re looking to rejuvenate your daily hydration routine or impress guests with a unique drink, these Turmeric Ginger Infusion Ice Cubes are a fantastic choice.
Ingredients:
- 2 cups water
- 1 tablespoon ground turmeric
- 1 tablespoon freshly grated ginger
- 1 tablespoon honey (optional)
- Juice of 1 lemon
- Pinch of black pepper (to enhance turmeric absorption)
Instructions:
- In a small saucepan, bring 2 cups of water to a gentle simmer over medium heat. As the water heats up, prepare the turmeric and ginger by measuring out the ground turmeric and freshly grated ginger.
- Once the water is simmering, whisk in the ground turmeric and grated ginger. If desired, add honey for sweetness and stir until fully dissolved. Allow the mixture to simmer for about 5 minutes, allowing the flavors to meld.
- After 5 minutes, remove the saucepan from heat and let the infusion cool slightly. Stir in the lemon juice and a pinch of black pepper to enhance the absorption of the turmeric.
- Carefully strain the infusion through a fine mesh sieve into a measuring cup or bowl to remove the solid pieces of ginger. This will leave you with a smooth liquid that can be easily poured into the ice cube tray.
- Pour the strained turmeric ginger infusion into an ice cube tray, filling each compartment about three-quarters full. Place the tray in the freezer and allow the cubes to freeze completely, which usually takes about 4-6 hours.
Extra Tips:
For an extra layer of flavor, consider adding fresh herbs like mint or basil to the ice cube tray before pouring in the infusion. You can also experiment with different sweeteners, such as agave syrup or maple syrup, depending on your taste preferences.
These ice cubes are best enjoyed within a few weeks, so be sure to use them up in various drinks to reap the health benefits! Enjoy your invigorating and nutritious creations!
Watermelon Basil Cubes
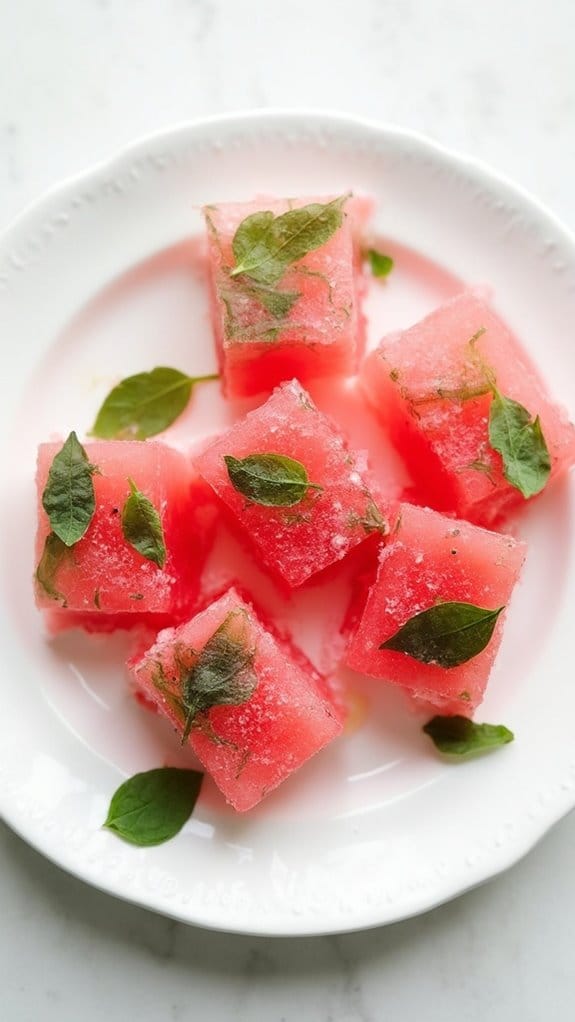
Title: Watermelon Basil Cubes
Prep Time: 10 minutes
Cook Time: 0 minutes
Number of Servings: 12 ice cubes
Required Equipment List: Ice cube tray, blender, mixing spoon
Cuisine Type: American
Watermelon Basil Cubes are a revitalizing and creative way to enjoy the sweet taste of watermelon while infusing it with the aromatic flavor of fresh basil. These ice cubes not only make a delightful addition to any drink but also provide a fun twist to your summer beverages, whether you’re hosting a party or simply enjoying a quiet afternoon.
The vibrant color of the watermelon combined with the green basil creates a visually appealing treat that’s sure to impress. The best part about this recipe is its simplicity – with just two main ingredients, you can whip up these ice cubes in no time. Perfect for adding to water, lemonade, or cocktails, these cubes will keep your drinks cool while imparting a subtle flavor that elevates your enjoyment experience.
Plus, watermelon is packed with antioxidants and hydration, making these ice cubes a healthy choice for hot days.
Ingredients:
- 2 cups cubed seedless watermelon
- 1/4 cup fresh basil leaves
- 1 tablespoon honey (optional)
- Water (as needed)
Instructions:
- Begin by placing the cubed watermelon into a blender. If you prefer a sweeter cube, add the honey at this stage. Blend until smooth, creating a watermelon puree that has a consistency similar to juice.
- Once the watermelon is blended, take a mixing spoon and gently stir in the fresh basil leaves. You can either leave the basil whole for visual appeal or chop them roughly for a more infused flavor, depending on your preference.
- Pour the watermelon-basil mixture into an ice cube tray, filling each compartment about three-quarters full. If the mixture is too thick, you can add a splash of water to achieve your desired consistency.
- Place the ice cube tray in the freezer and allow the mixture to freeze completely, which usually takes about 4-6 hours or overnight for best results.
- Once frozen, carefully remove the watermelon basil cubes from the tray and store them in a resealable freezer bag or container for easy access.
Extra Tips: To enhance the flavor, consider adding a squeeze of lime juice to the watermelon puree before blending. This will give your ice cubes a zesty kick.
For a visually stunning presentation, you can also freeze a few small basil leaves inside the cubes. These ice cubes can also be used in smoothies or blended with sparkling water for a revitalizing drink. Enjoy your antioxidant-rich treats!
Chia Seed Berry Cubes
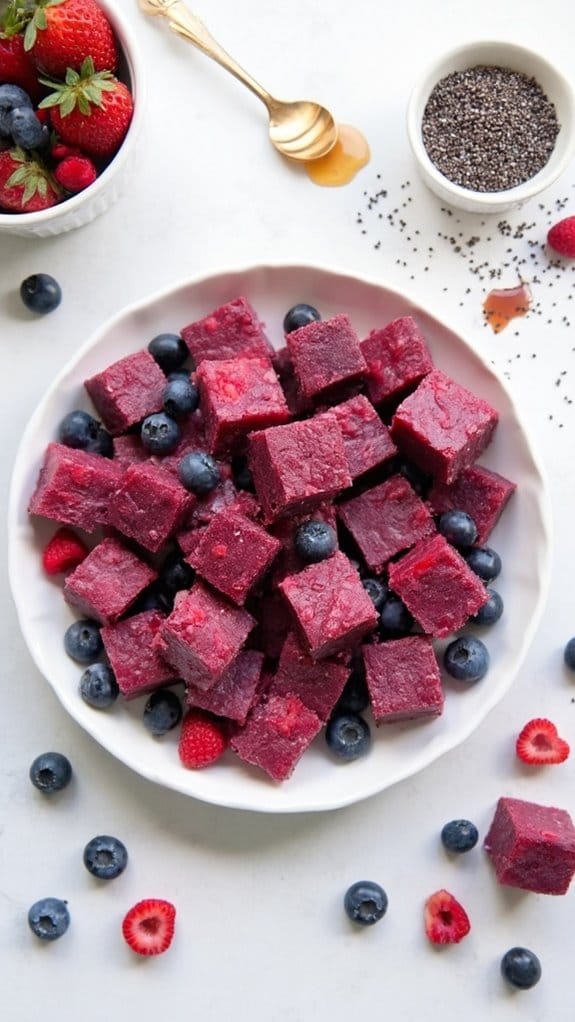
Title: Chia Seed Berry Cubes
Prep Time: 15 minutes
Cook Time: 0 minutes
Number of Servings: 12 cubes
Required Equipment List: Ice cube tray, blender, mixing bowl, measuring cups, spoon
Cuisine Type: Healthy Snack
Chia Seed Berry Cubes are a revitalizing and nutritious treat that can easily be added to smoothies, beverages, or enjoyed as a healthy snack on their own. Packed with antioxidants from berries and the added benefits of chia seeds, these ice cubes aren’t just delicious but also a great way to stay hydrated and energized.
They’re incredibly simple to make, and with just a handful of ingredients, you can create a delightful frozen snack that’s perfect for any time of the year. These cubes are versatile and can be customized based on your favorite berries or fruits.
Whether you choose strawberries, blueberries, or raspberries, the vibrant colors and flavors will brighten up your drinks and snacks. Plus, the chia seeds provide a satisfying texture and boost of healthy omega-3 fatty acids, fiber, and protein.
Freeze a batch ahead of time so you always have a revitalizing treat ready to go!
Ingredients:
- 1 cup mixed berries (fresh or frozen)
- 2 cups coconut water or water
- 1/4 cup chia seeds
- 1 tablespoon honey or maple syrup (optional)
- Juice of 1 lemon (optional)
Instructions:
- In a blender, combine the mixed berries and coconut water (or water). Blend until smooth, ensuring there are no large chunks of fruit left. If you prefer a chunkier texture, pulse the mixture a few times instead of blending completely.
- In a mixing bowl, combine the blended berry mixture with the chia seeds. If desired, add honey or maple syrup for sweetness and lemon juice for a hint of tang. Stir well until the chia seeds are evenly distributed throughout the mixture.
- Allow the mixture to sit for about 5-10 minutes. This will let the chia seeds absorb some liquid and expand, creating a thicker consistency.
- Once the mixture has thickened, pour it evenly into the ice cube tray, filling each compartment to the top. Use a spoon to scrape any excess mixture off the edges if necessary.
- Place the ice cube tray in the freezer and let it freeze for at least 4 hours or until solid. Once frozen, gently remove the chia seed berry cubes from the tray and store them in a resealable plastic bag or airtight container in the freezer for up to 3 months.
Extra Tips: Feel free to experiment with different types of liquids, such as almond milk or fruit juice, to create unique flavor combinations. You can also mix in other ingredients like shredded coconut or mint for added texture and taste.
These berry cubes are perfect for adding a nutritional boost to your favorite smoothies or even as a cool addition to water or lemonade on hot days. Enjoy your healthy and revitalizing snack!
Hibiscus Flower Cubes
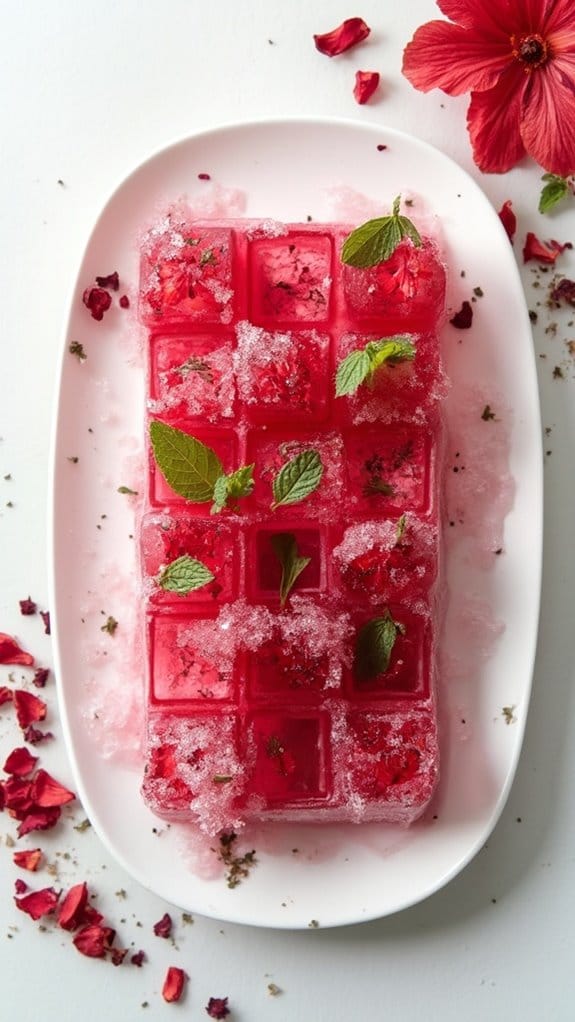
Title: Hibiscus Flower Ice Cubes
Prep Time: 10 minutes
Cook Time: 5 minutes
Number of Servings: 12 ice cubes
Required Equipment List: Ice cube tray, saucepan, measuring cups, stirring spoon
Cuisine Type: Beverage
Hibiscus Flower Ice Cubes are a stunning and invigorating addition to any drink, bringing both flavor and vibrant color to your beverages. These ice cubes are made from dried hibiscus flowers, which are known for their rich antioxidant properties and tart, fruity flavor. Not only do they enhance the aesthetic appeal of your drinks, but they also provide a delightful hint of hibiscus that pairs beautifully with water, iced tea, cocktails, or lemonade.
Creating these ice cubes is a simple process that requires minimal ingredients and equipment. By steeping the dried hibiscus flowers in hot water, you extract their natural flavors and colors, which are then frozen in ice cube trays. Once frozen, these cubes can be used to elevate any beverage, making them perfect for summer gatherings or just a revitalizing addition to your everyday drinks.
Ingredients:
- 1 cup dried hibiscus flowers
- 4 cups water
- 1-2 tablespoons sugar or honey (optional, to taste)
- Fresh mint leaves (for garnish, optional)
Instructions:
- In a saucepan, bring 4 cups of water to a boil. Make sure to use a medium-sized pot to allow for ample space for the dried hibiscus flowers to expand and release their flavor.
- Once the water is boiling, remove the saucepan from the heat and add 1 cup of dried hibiscus flowers. Stir the mixture gently to confirm the flowers are fully submerged in the water.
- Allow the hibiscus flowers to steep in the hot water for about 5-10 minutes, depending on how strong you want the flavor to be. The longer you steep, the more intense the flavor and color will be.
- After steeping, strain the mixture through a fine-mesh sieve to remove the hibiscus flowers, making sure that only the liquid remains. If desired, stir in sugar or honey to sweeten the liquid to your taste.
- Pour the strained hibiscus liquid into an ice cube tray, filling each compartment about three-quarters full. Place the tray in the freezer and allow the cubes to freeze completely, which usually takes about 4-6 hours.
- Once frozen, carefully remove the hibiscus ice cubes from the tray. You can store any leftover cubes in a zip-top bag in the freezer for future use. If desired, garnish drinks with fresh mint leaves for an added touch of vigor.
Extra Tips: To enhance the flavor profile, consider adding slices of citrus fruits, such as lime or orange, to the ice cube mixture before freezing. This not only adds a zesty twist but also creates visually appealing ice cubes.
These hibiscus cubes can also be used in smoothies or as a base for invigorating slushies. Enjoy experimenting with different drink combinations to make the most of your hibiscus flower ice cubes!
Matcha Green Tea Cubes
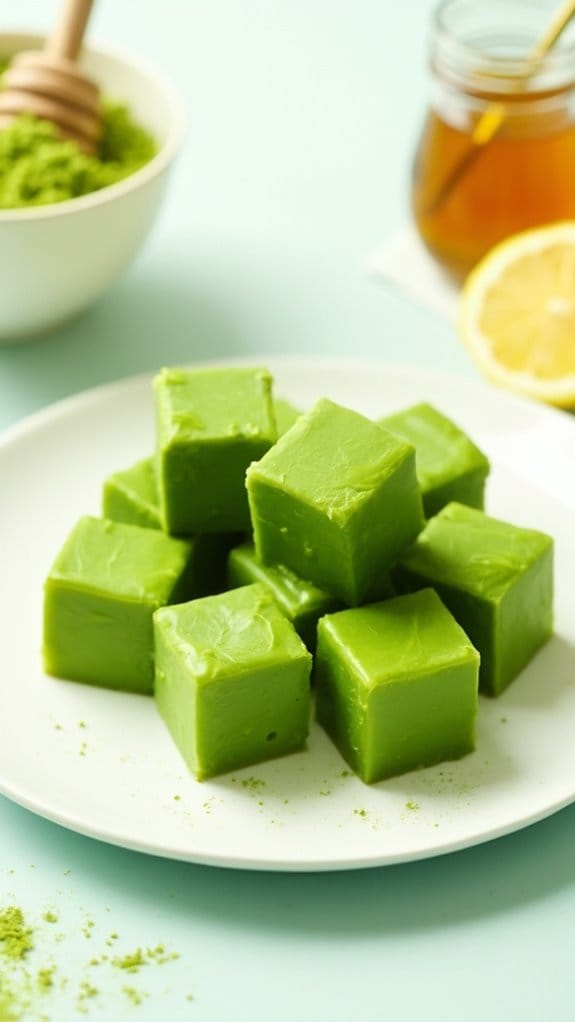
Title: Matcha Green Tea Cubes
Prep Time: 10 minutes
Cook Time: 0 minutes
Number of Servings: 12 cubes
Required Equipment List: Ice cube tray, mixing bowl, whisk, measuring cups
Cuisine Type: Japanese-inspired
Matcha Green Tea Cubes are a revitalizing and healthful way to enjoy the benefits of matcha in a creative form. These vibrant green cubes aren’t only visually appealing but also packed with antioxidants, making them a nutritious addition to your drinks or smoothies.
Simply freeze the matcha mixture, and you’ll have a delightful way to chill and enhance your beverages with a touch of earthy flavor. These ice cubes are perfect for adding to iced teas, lemonades, or even cocktails, providing a slow-release of matcha flavor as they melt.
They make a great addition to summer gatherings or a relaxing day at home, and can also be blended into smoothies for an extra nutrient boost. Embrace the versatility of matcha with this easy-to-make recipe!
Ingredients:
- 2 teaspoons matcha green tea powder
- 1 cup hot water (not boiling)
- 2 tablespoons honey or agave syrup (optional)
- 1 teaspoon lemon juice (optional)
Instructions:
- In a mixing bowl, whisk together the matcha green tea powder and hot water until the mixture is smooth and there are no lumps. Use a whisk or a milk frother for the best results, making sure that the matcha is fully dissolved.
- If desired, add honey or agave syrup to the mixture for sweetness, and whisk until fully combined. You can also add lemon juice at this stage for a revitalizing citrus flavor, which complements the matcha nicely.
- Carefully pour the matcha mixture into an ice cube tray, filling each compartment evenly. Tap the tray gently on the counter to remove any air bubbles and create a smooth surface.
- Place the ice cube tray in the freezer and allow the matcha cubes to freeze for at least 4 hours, or until completely solid. For best results, leave them overnight.
- Once frozen, pop the matcha cubes out of the tray and store them in a sealed bag or container in the freezer until you’re ready to use them.
Extra Tips: When preparing your matcha mixture, make sure to use hot water that’s just below boiling (around 175°F or 80°C) to prevent bitterness in the tea.
If you’re new to matcha, start with less powder and adjust according to your taste preference. These ice cubes can also be blended directly into smoothies for added flavor and nutrition, or used to make matcha lattes by combining them with warm milk or milk alternatives. Enjoy experimenting with this versatile ingredient!
Mango Mint Cubes
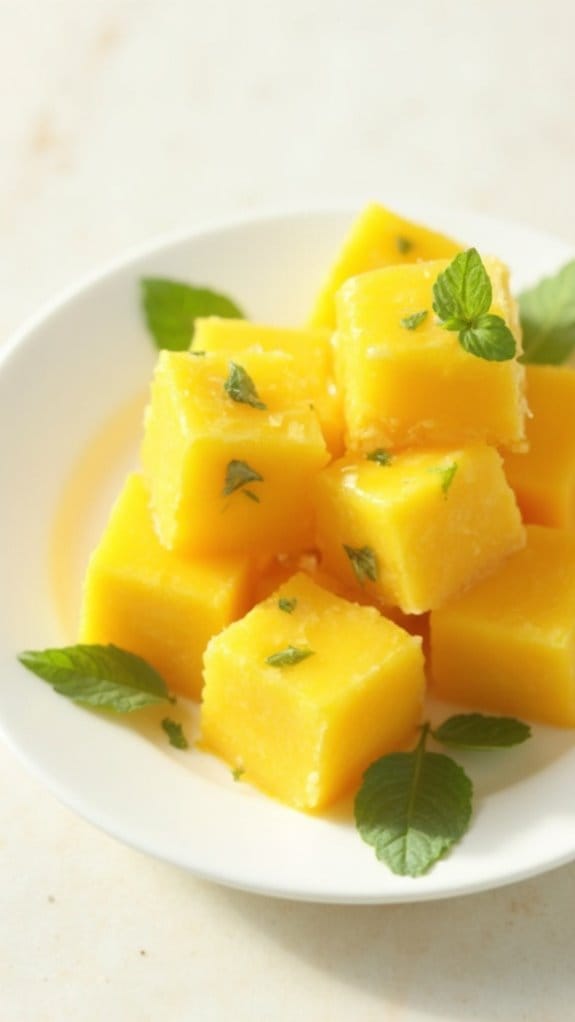
Title: Mango Mint Cubes
Prep Time: 10 minutes
Cook Time: 2 hours (for freezing)
umber of Servings: 8
Required Equipment List: Blender, ice cube trays, measuring cups, spoon
Cuisine Type: Beverage
Mango Mint Cubes are a revitalizing and vibrant addition to any drink, providing a burst of tropical flavor and a hint of minty freshness. These antioxidant-rich ice cubes aren’t only visually appealing but also incredibly easy to make.
Simply blend ripe mangoes with fresh mint and a little water, pour the mixture into ice cube trays, and freeze. The result is a delightful treat that can elevate your beverages, adding a touch of sweetness and a pop of color.
These mango mint cubes are perfect for infusing water, cocktails, or smoothies with a delicious flavor. They can also serve as a fun and healthy addition to summer parties or gatherings. Not only do these cubes taste great, but they also offer the nutritional benefits of fresh mangoes and mint, making them a guilt-free indulgence that everyone will enjoy.
Ingredients:
- 2 ripe mangoes, peeled and diced
- 1/4 cup fresh mint leaves
- 1/2 cup water
- 1 tablespoon lime juice (optional)
- Sweetener (optional, to taste)
Instructions:
- Begin by peeling and dicing the ripe mangoes. Make sure to select mangoes that are fully ripe for the best flavor and sweetness. Place the diced mangoes into a blender.
- Add the fresh mint leaves to the blender along with the water. If you prefer a zesty flavor, include the lime juice at this stage. Optionally, add a sweetener if desired, depending on your taste preference.
- Blend the mixture on high speed until it becomes smooth and well combined. Taste the mixture and adjust the sweetness if necessary before proceeding.
- Once blended, carefully pour the mango mint mixture into ice cube trays, filling each compartment evenly. You can use a spoon to help guide the mixture if needed.
- Place the filled ice cube trays in the freezer and allow them to freeze for at least 2 hours or until completely solid. Once frozen, pop the cubes out of the trays and store them in a freezer-safe bag or container.
Extra Tips: For a more visually appealing effect, you can layer the mint leaves at the bottom of the ice cube trays before pouring in the mango mixture. This will give the cubes a beautiful look when they’re frozen.
Additionally, consider experimenting with other fruits like pineapple or strawberries for varied flavors. These cubes can also be used in fruit salads or as a fun topping for desserts, making them a versatile addition to your culinary repertoire. Enjoy your mango mint cubes in any invigorating beverage!
Blueberry Lavender Cubes
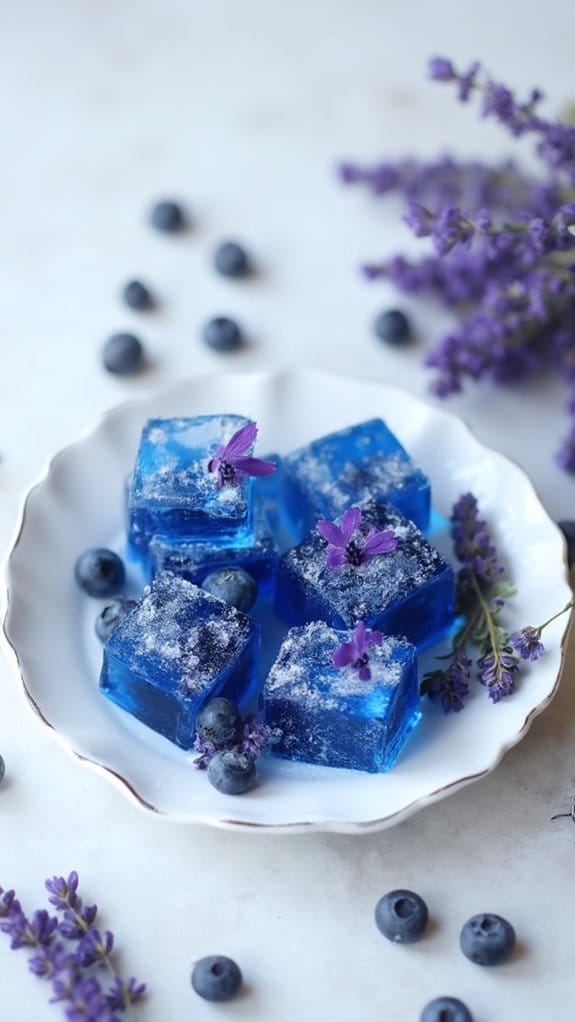
Title: Blueberry Lavender Cubes
Prep Time: 10 minutes
Cook Time: 0 minutes
Number of Servings: 10 cubes
Required Equipment List: Ice cube tray, blender, measuring cups, spoon
Cuisine Type: Beverage
Blueberry Lavender Cubes are a revitalizing and antioxidant-rich addition to your beverages, perfect for summer picnics or casual gatherings. These vibrant ice cubes not only add a pop of color but also infuse your drinks with a subtle floral and fruity flavor as they melt.
The combination of juicy blueberries, aromatic lavender, and a hint of sweetness makes them an elegant choice for enhancing water, lemonade, or cocktails. Making these ice cubes is incredibly simple and requires no cooking time, allowing you to prepare them in just a few minutes.
Once frozen, they can be stored for future use, making them a convenient option for anyone looking to elevate their hydration game. With just a handful of ingredients, these Blueberry Lavender Cubes are a delightful way to enjoy the benefits of antioxidants while staying cool.
Ingredients:
- 1 cup fresh blueberries
- 1 cup water
- 1 tablespoon dried culinary lavender
- 1 tablespoon honey (optional)
- Juice of 1/2 lemon
Instructions:
- In a small saucepan, heat the water over medium heat until it begins to simmer. Add the dried lavender and let it steep for about 5 minutes to infuse the flavor. Remove from heat and allow it to cool slightly.
- Strain the lavender-infused water through a fine-mesh sieve into a mixing bowl, discarding the lavender buds. Add the fresh blueberries, honey, and lemon juice to the bowl.
- Using a blender, puree the mixture until smooth. If you prefer a chunkier texture, you can blend it for a shorter time or pulse it a few times.
- Pour the blueberry-lavender mixture into an ice cube tray, filling each compartment evenly. Tap the tray gently on the counter to remove any air bubbles.
- Place the ice cube tray in the freezer and freeze for at least 4 hours, or until completely solid. Once frozen, the cubes can be removed and stored in a freezer bag for later use.
Extra Tips: To enhance the flavor, consider adding a few mint leaves or a splash of your favorite fruit juice to the mixture before blending.
If you don’t have culinary lavender, you can substitute with a few drops of lavender extract, but be cautious with the amount as it can be quite potent. These ice cubes are also great for garnishing desserts or as a fun addition to a brunch spread; simply drop them into sparkling water or your favorite cocktail for a revitalizing twist!
Cucumber Lime Refreshers
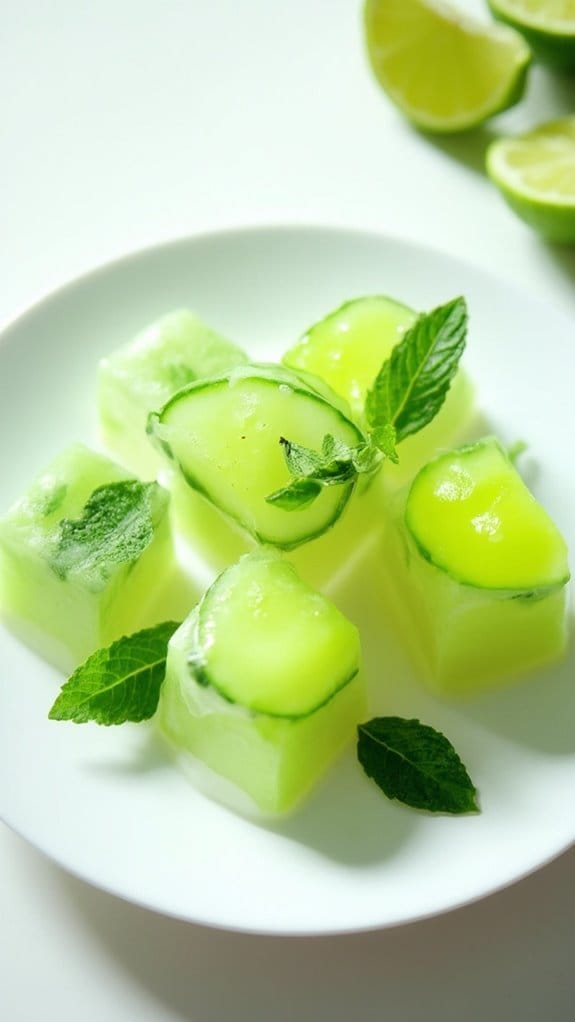
Title: Cucumber Lime Coolers
Prep Time: 10 minutes
Cook Time: 0 minutes
Number of Servings: 6
Required Equipment List: Ice cube tray, blender, measuring cups, spoon
Cuisine Type: Invigorating Beverage
Cucumber Lime Coolers are the perfect antidote to a hot summer day, combining the cooling properties of cucumber with the zesty brightness of lime. These invigorating ice cubes can be added to water, lemonade, or cocktails for an instant upgrade, making them a fantastic choice for gatherings or a simple afternoon sip.
The infusion of fresh ingredients not only enhances flavor but also packs in antioxidants, making this a hydrating treat that’s as good for you as it’s delicious. The process of making these ice cubes is incredibly simple and requires no cooking, just a bit of chopping and blending.
The cucumber provides hydration while the lime adds a tangy kick, creating a revitalizing drink that will keep you cool. Whether you’re entertaining guests or just treating yourself, these cucumber lime coolers will elevate your beverage game and impress everyone with their vibrant color and fresh taste.
Ingredients:
- 2 large cucumbers, peeled and chopped
- 1/4 cup fresh lime juice
- 1 tablespoon honey or agave syrup (optional)
- 1 cup water
- Fresh mint leaves (for garnish, optional)
Instructions:
- Start by peeling and chopping the cucumbers into smaller pieces to make them easier to blend. Place the chopped cucumbers in a blender along with the fresh lime juice, honey or agave syrup if using, and water.
- Blend the mixture on high speed until it’s completely smooth. This should take about 30 seconds to a minute, depending on your blender. If necessary, stop and scrape down the sides to verify everything is well combined.
- Once blended, taste the mixture and adjust the sweetness if desired, adding more honey or agave syrup as needed. If the mixture is too thick, feel free to add a bit more water to reach your preferred consistency.
- Carefully pour the cucumber-lime mixture into an ice cube tray, filling each compartment to the top. You can also add a small mint leaf into each compartment for an extra touch of flavor.
- Place the ice cube tray in the freezer and allow the mixture to freeze completely, which usually takes about 4-6 hours. Once solid, you can pop the cubes out and store them in a zip-top bag or airtight container in the freezer.
- To serve, add the cucumber lime ice cubes to your favorite beverages such as water, iced tea, or cocktails. Enjoy the invigorating burst of flavor as they melt!
Extra Tips: For an additional twist, consider adding other fruits like strawberries or oranges to the cucumber-lime mixture before blending for a unique flavor profile.
These ice cubes also make a great garnish for summer parties or picnics, adding an eye-catching touch to your drinks. If you’re looking to enhance the health benefits, consider adding a handful of spinach or kale into the blender for a nutritious boost.
Strawberry Basil Cubes
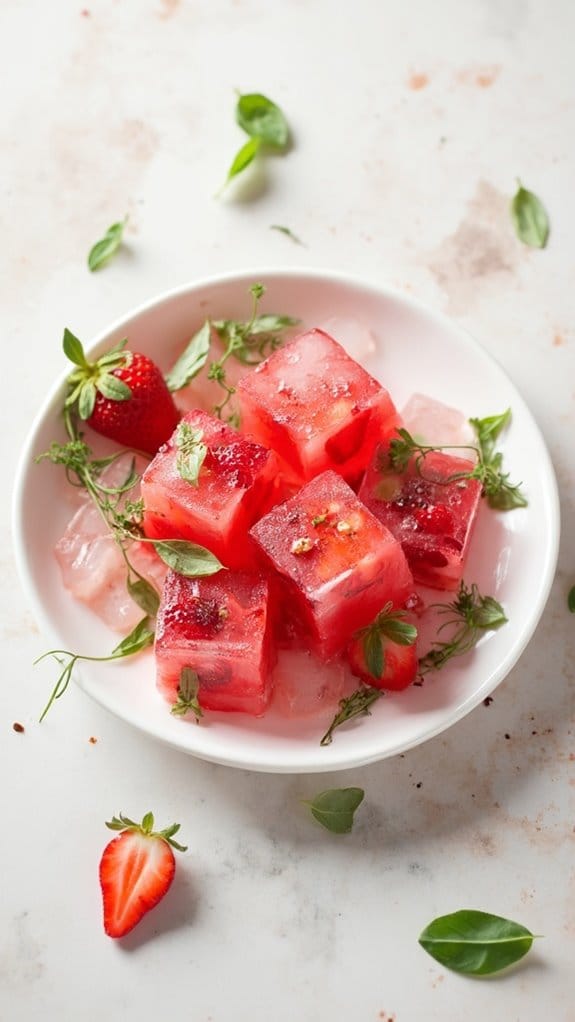
Title: Strawberry Basil Cubes
Prep Time: 10 minutes
Cook Time: 1 hour
Number of Servings: 12 ice cubes
Required Equipment List: Ice cube tray, blender or food processor, measuring cups, spoon
Cuisine Type: American
These Strawberry Basil Cubes are a revitalizing and antioxidant-rich addition to your beverages, perfect for summer parties or a simple way to elevate your daily hydration. Combining the sweetness of ripe strawberries with the aromatic notes of fresh basil, these ice cubes not only look beautiful but also impart a delightful flavor to water, lemonade, or cocktails.
They’re super easy to make and bring a unique twist to your usual ice cube routine. Versatile and vibrant, these ice cubes can also be used in smoothies or as a garnish for desserts. The process is quick, and you can easily make a large batch to keep in your freezer for whenever you need a revitalizing touch. Enjoy the burst of flavor and the health benefits that come from the antioxidants found in strawberries and the anti-inflammatory properties of basil.
Ingredients:
- 1 cup fresh strawberries, hulled and sliced
- 1/4 cup fresh basil leaves
- 1/2 cup water
- 1 tablespoon honey or maple syrup (optional)
Instructions:
- Begin by washing the fresh strawberries and basil leaves thoroughly under cold water. Hull the strawberries by removing the green tops and slicing them into smaller pieces for easier blending.
- In a blender or food processor, combine the sliced strawberries, fresh basil leaves, and water. If you prefer a sweeter taste, add the honey or maple syrup at this stage. Blend until the mixture is smooth and well combined.
- Taste the mixture and adjust sweetness if desired, then pour the blended strawberry-basil mixture into an ice cube tray. Fill each compartment, leaving a little space at the top to allow for expansion as they freeze.
- Carefully transfer the ice cube tray to the freezer and allow the cubes to freeze for at least 1 hour or until solid. For best results, leave them overnight if you have the time.
- Once frozen, remove the ice cubes from the tray by gently twisting or running warm water over the bottom of the tray for a few seconds. Store the cubes in a sealed container or freezer bag for easy access.
Extra Tips: To enhance the flavor, feel free to add other fruits such as lemons or limes to the blender along with the strawberries. You can also experiment with different herbs like mint for a revitalizing twist.
These cubes can last in the freezer for up to 3 months, so make a big batch and enjoy them throughout the summer!
Cranberry Orange Cubes
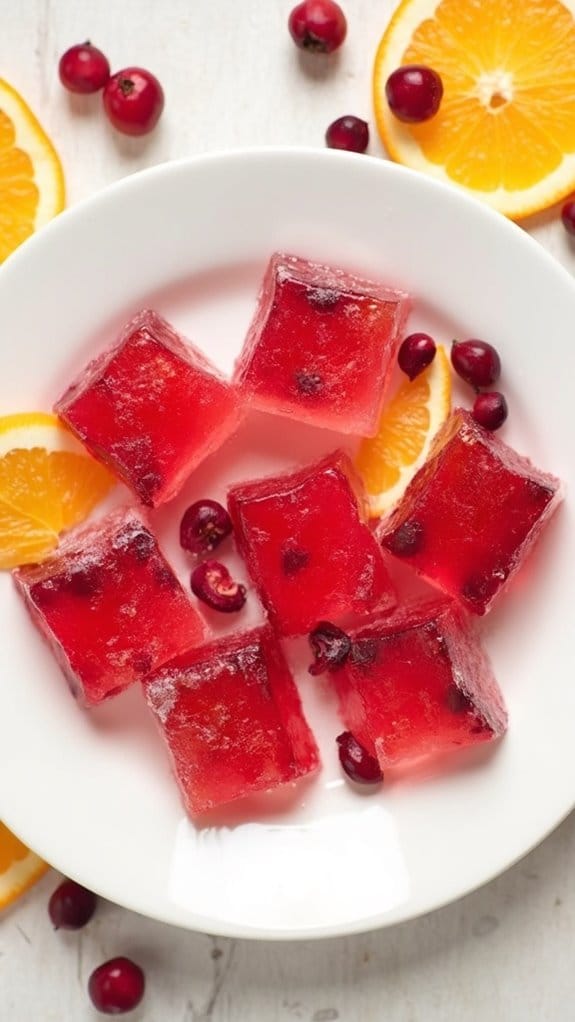
Title: Cranberry Orange Ice Cubes
Prep Time: 10 minutes
Cook Time: 0 minutes
Number of Servings: 12 ice cubes
Required Equipment List: Ice cube tray, measuring cups, mixing spoon
Cuisine Type: Beverage
Cranberry Orange Ice Cubes are a rejuvenating and antioxidant-rich addition to any drink, perfect for enhancing your favorite beverages or simply enjoying on their own. The vibrant tartness of cranberries combined with the zesty sweetness of oranges creates a delightful flavor that’s both invigorating and nutritious.
These ice cubes aren’t only beautiful, with their bright red and orange hues, but they also bring a burst of flavor to water, iced tea, or cocktails, making them an excellent choice for parties or casual gatherings. Making these ice cubes is incredibly simple and requires minimal ingredients.
With just fresh cranberries, orange juice, and a bit of water, you can create a stunning and healthy addition to your drinks. They’re a perfect way to jazz up your hydration routine or impress your guests with a unique and flavorful ice cube option.
Ingredients:
- 1 cup fresh cranberries
- 1 cup fresh orange juice
- 1 cup water
- Optional: orange slices for garnish
Instructions:
- Begin by rinsing the fresh cranberries under cold water to remove any impurities. Drain them well and set them aside. This step guarantees that your ice cubes are clean and fresh.
- In a mixing bowl, combine the fresh orange juice and water. Stir well to mix the two liquids thoroughly. This will create a rejuvenating base for your ice cubes, balancing the tartness of the cranberries.
- Place 2-3 cranberries in each compartment of your ice cube tray. If desired, you can also add a small slice of orange for an extra burst of color and flavor.
- Carefully pour the orange juice and water mixture into the ice cube tray, filling each compartment until just full. Be cautious not to overfill, as the liquid will expand when frozen.
- Once filled, transfer the ice cube tray to the freezer and allow it to freeze for at least 4-6 hours or until completely solid. This guarantees that your ice cubes are well-formed and easy to pop out.
- After the ice cubes are frozen, remove them from the tray by gently twisting it or running warm water on the bottom for a few seconds. Enjoy your cranberry orange ice cubes in your favorite beverages!
Extra Tips: To enhance the aesthetic appeal of your ice cubes, consider layering the ingredients by partially freezing the juice before adding more cranberries and juice.
You can also experiment with other fruits like blueberries or slices of lime to create a variety of flavors and colors. These cranberry orange ice cubes are perfect for summer parties, holiday gatherings, or even as a fun way to encourage hydration throughout the day. Enjoy the rejuvenating twist they bring to your drinks!
Grape and Rosemary Cubes
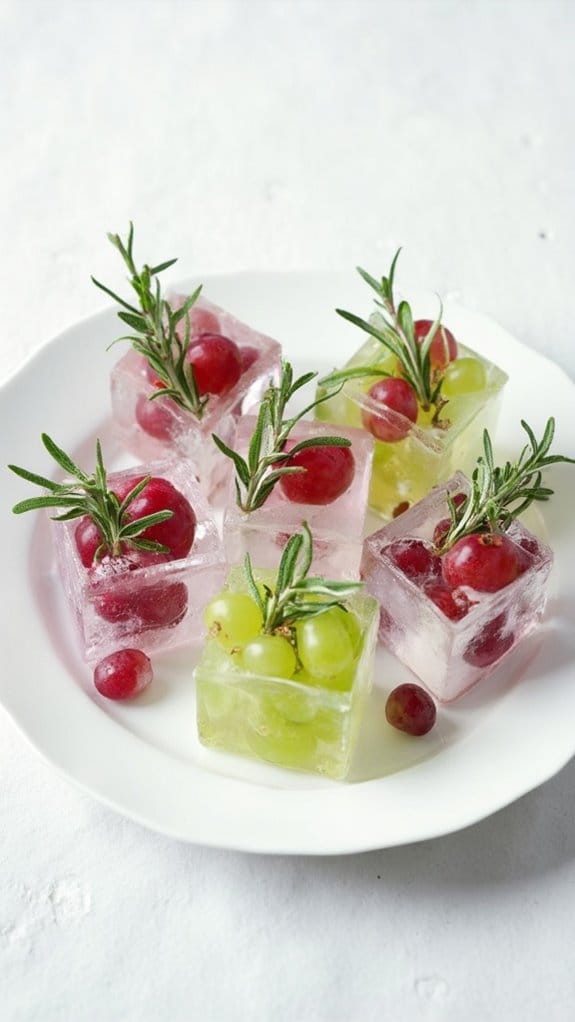
Title: Grape and Rosemary Ice Cubes
Prep Time: 10 minutes
Cook Time: 0 minutes
Number of Servings: 12 ice cubes
Required Equipment List: Ice cube tray, mixing bowl, measuring cup, spoon
Cuisine Type: Beverage Garnish
These Grape and Rosemary Ice Cubes are an invigorating and elegant addition to your beverages, perfect for adding a touch of sophistication to water, cocktails, or iced teas. The natural sweetness of the grapes combined with the earthy aroma of rosemary creates a delightful infusion that not only looks beautiful but also enhances the flavor of your drinks.
With the vibrant colors of the grapes and the aromatic herbs, these ice cubes are as pleasing to the eye as they’re to the palate. Making these ice cubes is incredibly simple and requires minimal effort. You can easily prepare them in advance and have them on hand for any occasion.
They’re perfect for summer gatherings, brunches, or even a cozy night in. Simply pop a few of these cubes in your glass, and enjoy the invigorating burst of flavor as they slowly melt.
Ingredients:
- 1 cup seedless grapes (red or green)
- 1 cup water
- 2-3 sprigs fresh rosemary
- Optional: Sweetener like honey or agave (to taste)
Instructions:
- Begin by washing the grapes thoroughly under cold water. If you prefer, you can slice the grapes in half to allow for more flavor infusion, but this is optional. Place the grapes in a mixing bowl after they’re cleaned.
- In a separate measuring cup, combine 1 cup of water with any sweetener if desired. Stir until the sweetener is fully dissolved. This will add a touch of sweetness to your ice cubes, enhancing the grape flavor.
- Arrange the grapes evenly into each compartment of the ice cube tray. For added flavor, place a sprig of fresh rosemary in each compartment along with the grapes. This will infuse the ice cubes with a lovely rosemary aroma as they freeze.
- Pour the sweetened water over the grapes and rosemary in the ice cube tray until each compartment is filled. Be careful not to overfill, as the water will expand when it freezes.
- Carefully place the ice cube tray in the freezer and allow it to freeze for at least 4 hours, or until completely solid. Once frozen, you can pop the cubes out and store them in a freezer bag for later use.
Extra Tips: To enhance the visual appeal of your ice cubes, consider using different colored grapes or adding edible flowers along with the rosemary. You can also experiment with other herbs like mint or basil for a different flavor profile.
These ice cubes can be used not only in drinks but can also be a fun addition to summer punch bowls or fruit salads. Enjoy the invigorating burst of flavor they bring!
Almond Vanilla Cubes
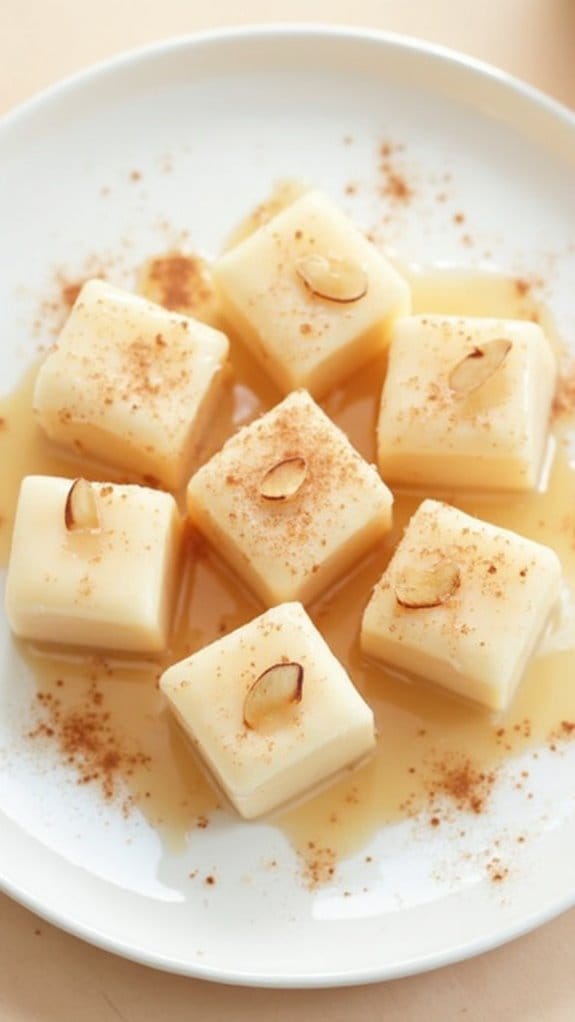
Title: Almond Vanilla Cubes
Prep Time: 10 minutes
Cook Time: 6 hours (freezing time)
Number of Servings: 12 cubes
Required Equipment List: Ice cube tray, measuring cups, mixing bowl, whisk
Cuisine Type: Fusion
Almond Vanilla Cubes are a revitalizing and antioxidant-rich treat that combines the nutty flavor of almonds with the sweet aroma of vanilla. This simple recipe utilizes almond milk as a base, which isn’t only dairy-free but also packed with essential vitamins and minerals.
The result is a creamy and subtly sweet ice cube that can be enjoyed on its own or added to your favorite beverages, smoothies, or even desserts. Perfect for hot summer days, these almond vanilla cubes provide a unique way to hydrate while enjoying the deliciously comforting flavors of almond and vanilla.
They’re versatile and can easily be customized with additional ingredients like honey or cinnamon for added depth. Whether you need a quick snack or a fun addition to your drinks, these cubes are a delightful option that everyone will love.
Ingredients:
- 2 cups almond milk
- 1 teaspoon vanilla extract
- 1 tablespoon maple syrup (optional)
- 1/4 cup sliced almonds (for garnish, optional)
Instructions:
- In a mixing bowl, combine the almond milk, vanilla extract, and maple syrup (if using). Whisk together until well combined and smooth. This mixture will serve as the base for your ice cubes.
- Carefully pour the almond milk mixture into an ice cube tray, filling each compartment about three-quarters full to allow for expansion as they freeze.
- If desired, sprinkle a few sliced almonds into each compartment for an added crunch and visual appeal. This step is optional, but it enhances the flavor and texture of the cubes.
- Place the ice cube tray in the freezer and allow the cubes to freeze for at least 6 hours or until fully solid. For best results, leave them overnight.
- Once frozen, remove the almond vanilla cubes from the tray by gently twisting or tapping the tray on the counter. You can run warm water over the bottom of the tray for easier removal if necessary.
Extra Tips: To enhance the flavor, feel free to add a pinch of cinnamon or a tablespoon of cocoa powder to the almond milk mixture before freezing. For a creamier texture, consider using unsweetened almond milk or adding a splash of coconut cream.
These cubes can also be blended into smoothies or used in iced coffee for a deliciously nutty flavor. Store any leftovers in a zip-lock bag in the freezer for easy access!
Passionfruit Citrus Cubes

Title: Passionfruit Citrus Cubes
Prep Time: 15 minutes
Cook Time: 4 hours (freezing time)
Number of Servings: 12 cubes
Required Equipment List: Ice cube tray, blender, measuring cups, mixing bowl
Cuisine Type: Tropical
These Passionfruit Citrus Cubes are a revitalizing and antioxidant-rich treat that will elevate your beverages or serve as a delightful snack on a hot day. Combining the tangy sweetness of passionfruit with a medley of citrus fruits, these ice cubes not only look vibrant but also pack a flavorful punch.
Simply blend the fruits together, pour into an ice cube tray, and freeze for a deliciously fruity surprise that will cool down any drink or can be enjoyed on their own. Perfect for summer gatherings or as a unique addition to your daily hydration routine, these cubes can be dropped into sparkling water, cocktails, or even enjoyed as a frozen snack.
The natural sweetness from the fruits makes them a healthier alternative to sugary treats, providing a burst of flavor and essential vitamins with every bite. Get ready to treat yourself to a tropical escape with these easy-to-make Passionfruit Citrus Cubes!
Ingredients:
- 1 cup fresh passionfruit pulp
- 1/2 cup orange juice
- 1/2 cup lemon juice
- 1 tablespoon honey (optional, for added sweetness)
- Zest of 1 lime
- Fresh mint leaves (optional, for garnish)
Instructions:
- Begin by cutting the passionfruits in half and scooping out the pulp into a mixing bowl. You’ll want to remove any seeds and collect the juicy flesh, which is the star of this recipe.
- In the mixing bowl, combine the passionfruit pulp with the orange juice, lemon juice, honey (if using), and lime zest. Use a fork or whisk to mix everything together until well combined, ensuring the honey is fully dissolved.
- Carefully pour the mixture into an ice cube tray, filling each compartment about three-quarters full to allow for expansion as they freeze. You can also add small pieces of fresh mint leaves to some of the compartments for an added flavor twist.
- Place the filled ice cube tray in the freezer and allow the cubes to freeze for at least 4 hours or until solid. If you’re in a hurry, you can freeze them overnight for best results.
- Once frozen, remove the ice cubes from the tray by gently twisting it or running warm water over the bottom for a few seconds. Store the cubes in a zip-top bag or airtight container in the freezer until ready to use.
Extra Tips: For a fun twist, consider mixing in other fruits like diced strawberries or kiwi to the cubes before freezing. This not only adds texture but also enhances the visual appeal.
If you prefer a sweeter flavor, feel free to adjust the amount of honey according to your taste. These Passionfruit Citrus Cubes can also be blended into smoothies for an extra fruity kick, or simply enjoyed on their own as a revitalizing snack!
Cherry Thyme Cubes
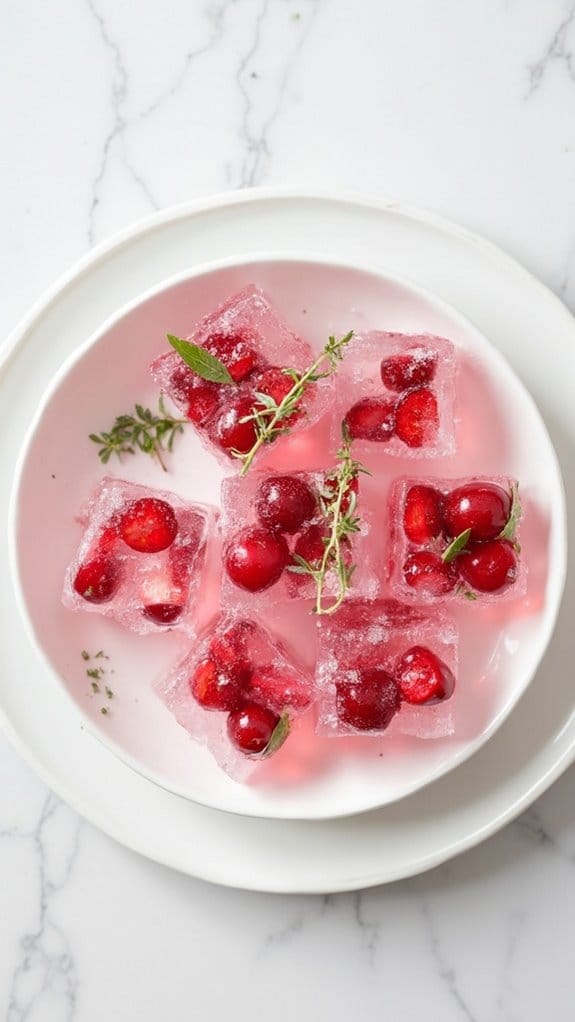
Title: Cherry Thyme Cubes
Prep Time: 10 minutes
Cook Time: 2 hours (freezing time)
Number of Servings: 12 cubes
Required Equipment List: Ice cube tray, measuring cups, mixing bowl, spoon
Cuisine Type: Fusion
Cherry Thyme Cubes are a revitalizing and antioxidant-rich addition to your beverages, perfect for summer cocktails or a simple glass of water. These ice cubes aren’t only beautiful to look at, with the vibrant color of cherries and the delicate green of thyme, but they also provide a burst of flavor as they melt. Infused with the sweet and tart essence of cherries and the aromatic hint of thyme, these ice cubes elevate any drink, making them a delightful treat for your guests or a simple way to enhance your hydration routine.
The preparation is incredibly easy and requires minimal ingredients, making it accessible for anyone looking to add a fancy touch to their drinks. Plus, they can be made ahead of time and stored in the freezer, allowing you to always have a revitalizing option on hand.
Whether you’re hosting a party or simply enjoying a quiet evening at home, Cherry Thyme Cubes are a unique and healthy way to cool down and enjoy your beverages.
Ingredients:
- 1 cup fresh cherries, pitted and halved
- 1 cup water
- 1 tablespoon fresh thyme leaves
- 1 tablespoon honey or agave syrup (optional)
Instructions:
- Begin by preparing your ingredients. Wash the fresh cherries thoroughly, then remove the pits and cut them in half. This will help release their juices into the ice cubes. Rinse the thyme leaves and set them aside.
- In a mixing bowl, combine the halved cherries and thyme leaves. If you prefer a touch of sweetness, add the honey or agave syrup to the mix and stir gently to combine. The honey will dissolve better in warm water, so feel free to microwave it for a few seconds if you’re using it.
- Next, pour the water into the bowl with the cherry-thyme mixture. Stir well to guarantee that the cherries and thyme are evenly distributed throughout the water.
- Carefully pour the mixture into an ice cube tray, filling each compartment to the top. You can use a spoon to add extra cherries and thyme leaves into each cube if desired for a more visually appealing result.
- Place the ice cube tray in the freezer and allow the cubes to freeze for at least 2 hours, or until solid. Once frozen, you can pop the cubes out and store them in a resealable plastic bag or container in the freezer for future use.
Extra Tips: To enhance the flavor even more, consider adding a splash of lemon juice or a few mint leaves to the mixture before freezing. These cubes can also be used in smoothies or as a fun addition to sparkling water. Experiment with different herbs or fruits to create your own unique flavor combinations. Enjoy your revitalizing Cherry Thyme Cubes!
Herbal Citrus Medley
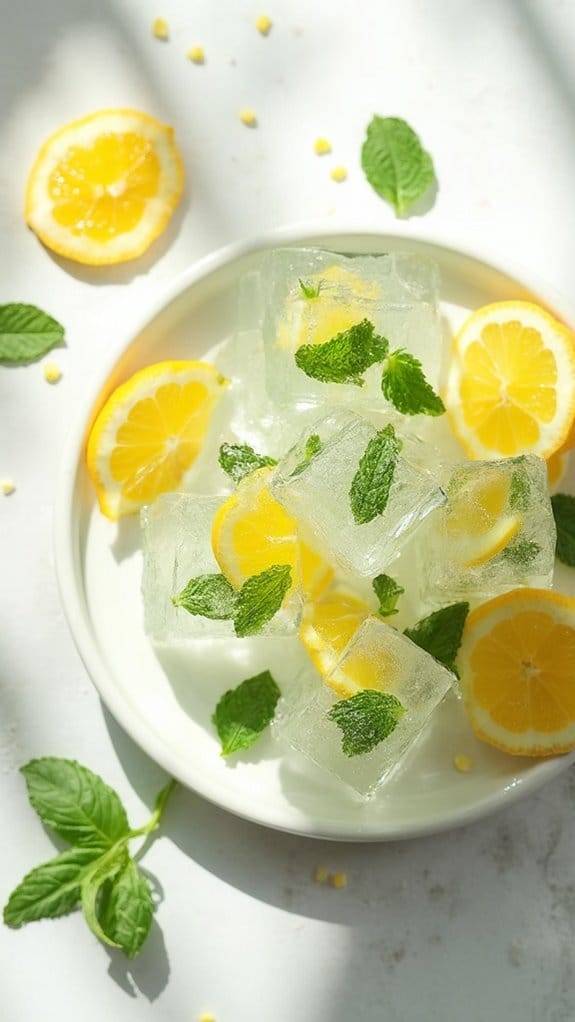
Title: Herbal Citrus Medley Ice Cubes
Prep Time: 10 minutes
Cook Time: 0 minutes
Number of Servings: 12 ice cubes
Required Equipment List: Ice cube tray, measuring cups, mixing bowl, stirring spoon
Cuisine Type: Beverage Enhancer
These Herbal Citrus Medley Ice Cubes are a revitalizing and vibrant addition to any drink, perfect for warm weather or entertaining guests. Infused with the zesty brightness of citrus fruits and the aromatic notes of fresh herbs, these ice cubes not only chill beverages but also elevate their flavor profile.
Whether it’s a simple glass of water, iced tea, or cocktails, these herbal citrus cubes add a burst of freshness that will impress anyone who tries them. Making these ice cubes is incredibly easy and requires minimal ingredients. You can customize the recipe based on your favorite herbs and citrus fruits, making it a versatile option for various occasions.
The combination of mint, lemon, and orange creates a perfect balance of flavors, while the ice cubes slowly release their essence as they melt, guaranteeing your drink stays flavorful and revitalizing until the last sip.
Ingredients:
- 1 cup water
- 1/2 cup fresh mint leaves
- 1/2 cup lemon slices
- 1/2 cup orange slices
- 1 tablespoon honey (optional)
Instructions:
- Begin by washing the fresh mint leaves thoroughly under cold water to remove any dirt or impurities. Pat them dry with a paper towel and set aside. This guarantees that your ice cubes are made with clean ingredients.
- In a mixing bowl, combine the water and honey if you’re using it. Stir well to dissolve the honey completely. This step is optional, but it adds a touch of sweetness to the ice cubes.
- Next, evenly distribute the fresh mint leaves, lemon slices, and orange slices into the compartments of the ice cube tray. Feel free to adjust the amounts according to your taste preferences.
- Pour the honey-water mixture over the herbs and citrus in the ice cube tray, filling each compartment until it’s nearly full. Be careful not to overfill, as the water will expand when frozen.
- Place the ice cube tray in the freezer and allow it to freeze for at least 4-6 hours or until completely solid. Once frozen, carefully remove the ice cubes from the tray and store them in a resealable bag or container for future use.
Extra Tips: For an added twist, consider incorporating other herbs like basil or rosemary, or even adding berries like raspberries or blueberries for extra color and flavor.
These ice cubes can last for up to three months in the freezer, making them a great make-ahead option. When serving, simply drop a few cubes into your favorite beverages for an instant flavor boost!
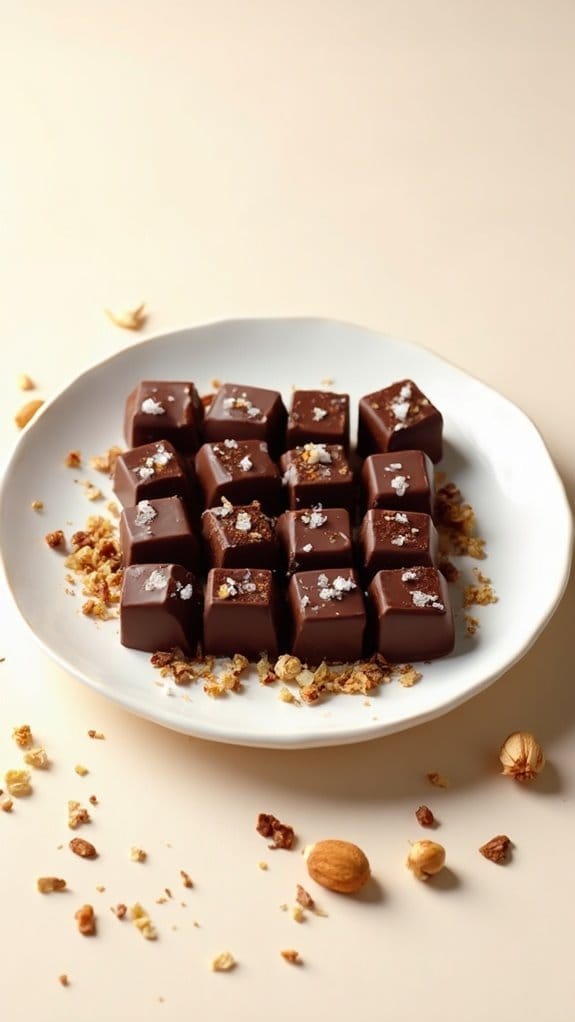
Nutty Chocolate Cubes
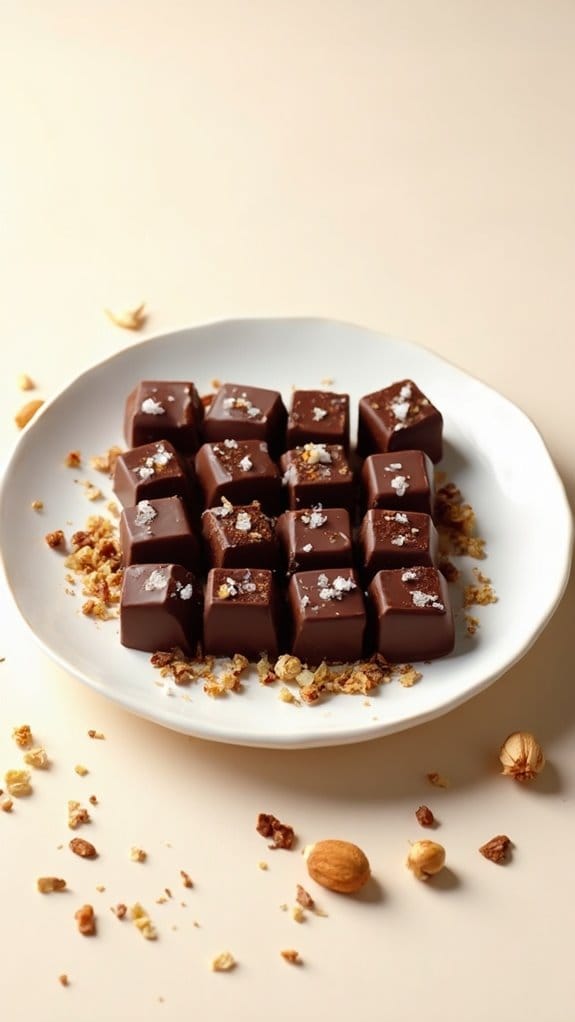
Title: Nutty Chocolate Cubes
Prep Time: 15 minutes
Cook Time: 30 minutes
Number of Servings: 12
Required Equipment List: Mixing bowl, silicone ice cube tray, saucepan, whisk, measuring cups, and spoons
Cuisine Type: Dessert
Nutty Chocolate Cubes are a delightful frozen treat that combines the rich, indulgent flavor of chocolate with the satisfying crunch of nuts. These cubes not only make for a revitalizing snack but also pack in antioxidants from dark chocolate and healthy fats from nuts, making them a guilt-free dessert option.
Perfect for hot summer days or as a sweet finish to any meal, these cubes are sure to impress both kids and adults alike. Making Nutty Chocolate Cubes is a simple process that requires minimal ingredients and effort. Just melt the chocolate, mix in the nuts, pour into an ice cube tray, and freeze.
The result is deliciously smooth chocolate with a nutty bite, providing a perfect balance of texture and flavor in each cube. They’re also customizable; feel free to mix and match your favorite nuts or even add a sprinkle of sea salt for that extra touch.
Ingredients:
- 1 cup dark chocolate chips
- 1/2 cup mixed nuts (such as almonds, walnuts, and hazelnuts), chopped
- 1 tablespoon coconut oil
- 1 teaspoon vanilla extract
- Sea salt (optional, for garnish)
Instructions:
- Begin by preparing your silicone ice cube tray by placing it on a flat surface where it can easily go into the freezer. This will make the pouring process easier and reduce the chance of spills.
- In a saucepan over low heat, combine the dark chocolate chips and coconut oil. Stir continuously with a whisk until the chocolate is completely melted and smooth. Make sure not to overheat the chocolate, as it can seize up if it gets too hot.
- Remove the saucepan from heat and stir in the vanilla extract. This will add an extra layer of flavor to your chocolate mixture. Once combined, fold in the chopped mixed nuts, ensuring they’re evenly distributed throughout the chocolate.
- Pour the chocolate-nut mixture into the prepared silicone ice cube tray, filling each compartment to the top. If desired, you can sprinkle a little sea salt on top of each cube for a sweet and salty contrast.
- Place the filled tray in the freezer and allow the chocolate cubes to freeze for at least 2 hours or until completely solid. Once frozen, gently pop the cubes out of the tray and store them in an airtight container in the freezer.
Extra Tips: To enhance the flavor, try using flavored chocolate, like salted caramel or mint chocolate, for a unique twist. You can also experiment with adding dried fruits like cranberries or apricots for a chewy texture.
For a fun presentation, serve the cubes in a decorative bowl and pair them with fresh fruit or a dollop of whipped cream for a delicious dessert experience. Enjoy your Nutty Chocolate Cubes as a quick snack or an elegant treat for gatherings!
Conclusion
So, why settle for boring old ice cubes when you can create these vibrant, antioxidant-packed gems? Picture yourself sipping a revitalizing drink, bursting with flavors that dance on your taste buds like a festival of health! With just a little effort, you’re not just chilling your beverages; you’re elevating them to superhero status. Ready to become the ice cube connoisseur of your circle? Go ahead, plunge into these recipes, and let your creativity run wild! Cheers to your health!

