No products in the cart.
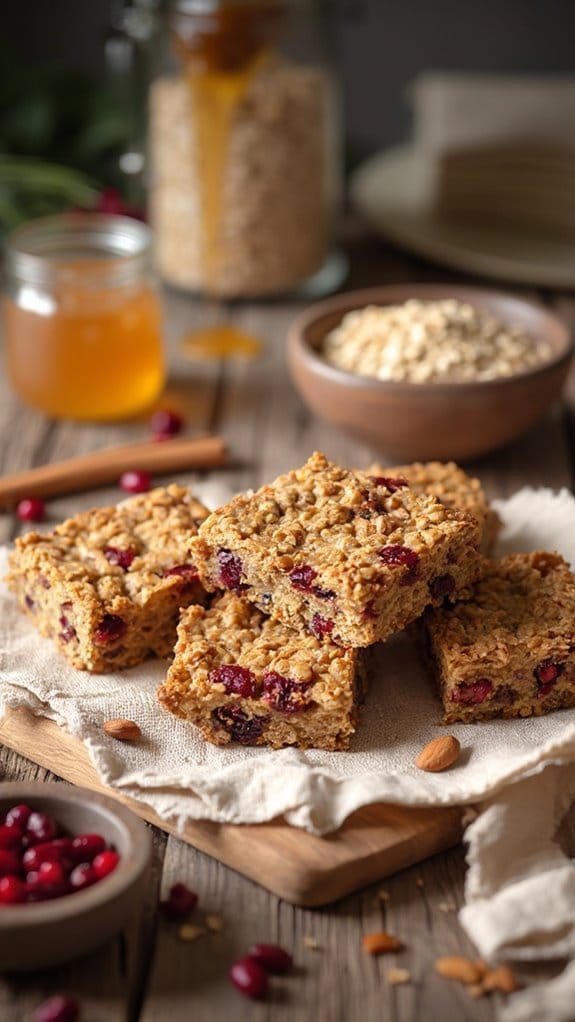
27 Delectable Christmas Leftover Dishes: From Sweet to Savory
Leftover Christmas dishes are like hidden treasures just waiting to be discovered! You can whip up comforting meals like Turkey Pot Pie or creative delights like Stuffing Waffles. Why not transform your cranberry sauce into mouthwatering muffins or mix those veggies into a hearty soup? Each flavor-packed option is an opportunity to savor the season’s best without the repetitive “holiday meals.” Plus, it’s a great way to get crafty in the kitchen! Curious about even more scrumptious Christmas leftover dishes that’ll keep the holiday spirit alive? There are so many inventive ways to recreate your festive favorites just waiting for you!
Contents
hide
Turkey Pot Pie
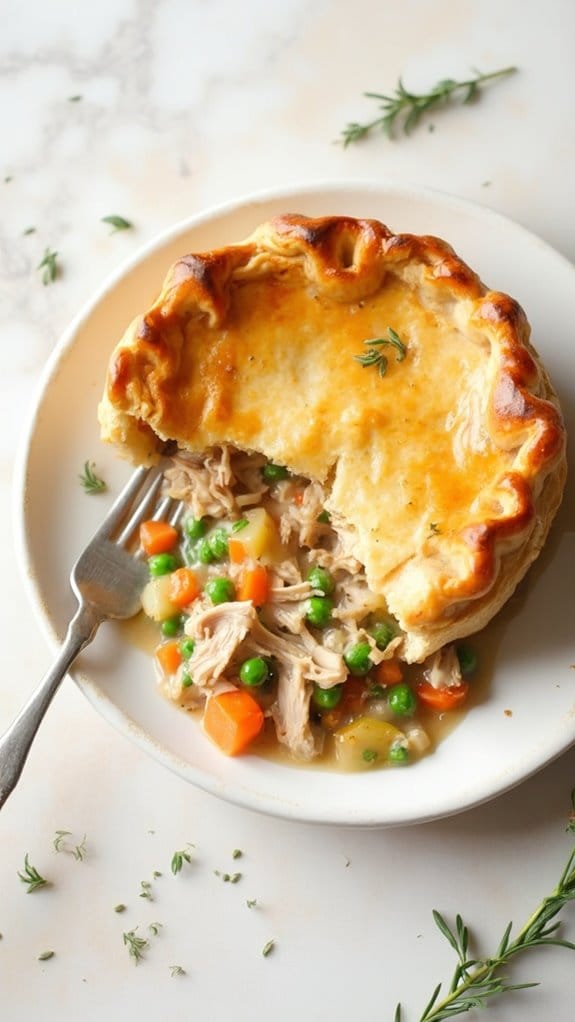
Title: Turkey Pot Pie
Prep Time: 20 minutes
Cook Time: 45 minutes
Number of Servings: 6
Required Equipment List: Oven, large skillet, mixing bowl, pie dish, rolling pin, knife
Cuisine Type: American
Turkey Pot Pie is a comforting and hearty dish that transforms your holiday leftovers into a warm and satisfying meal. This recipe takes tender turkey, fresh vegetables, and a creamy sauce, all encased in a flaky pie crust, making it an irresistible dish for any occasion. Not only does it taste delicious, but it also provides a perfect way to utilize your leftover turkey, turning it into a family favorite that everyone will love.
The beauty of this Turkey Pot Pie lies not only in its flavor but also in its versatility. You can easily adapt the recipe to include whatever vegetables you have on hand—peas, carrots, and green beans work particularly well. The rich and savory filling, combined with the buttery crust, creates a delightful contrast that makes each bite truly enjoyable.
Perfect for a cozy dinner, this dish can be prepared ahead of time and simply popped in the oven when you’re ready to eat.
Ingredients:
- 3 cups cooked turkey, shredded
- 1 cup frozen peas
- 1 cup diced carrots
- 1 cup diced potatoes
- 1 cup diced onion
- 1/3 cup butter
- 1/3 cup all-purpose flour
- 1 ½ cups chicken broth
- 1 cup milk
- 1 teaspoon garlic powder
- 1 teaspoon thyme
- Salt and pepper to taste
- 2 refrigerated pie crusts
Instructions:
- Preheat your oven to 425°F (220°C). In a large skillet over medium heat, melt the butter and sauté the diced onion and carrots until they’re softened, about 5 minutes. This will form the flavorful base of your pot pie filling.
- Stir in the flour, garlic powder, thyme, salt, and pepper to the skillet, cooking for another 2 minutes until the mixture is bubbly. This will help to thicken the sauce for your filling.
- Gradually add the chicken broth and milk to the skillet, stirring continuously to avoid lumps. Cook until the mixture thickens, about 5-7 minutes. Once thickened, add in the shredded turkey, frozen peas, and diced potatoes, mixing until everything is well combined.
- Roll out one of the refrigerated pie crusts and fit it into a pie dish. Pour the turkey filling into the crust, spreading it evenly. Cover the filling with the second pie crust, sealing the edges and cutting a few slits in the top to allow steam to escape.
- Bake the pot pie in the preheated oven for 25-30 minutes, or until the crust is golden brown. Keep an eye on it, and if the edges brown too quickly, cover them with foil to prevent burning.
- Once baked, remove the pot pie from the oven and let it cool for about 10 minutes before slicing. This will help the filling set and make it easier to serve.
Extra Tips: To enhance the flavor of your turkey pot pie, consider adding a splash of Worcestershire sauce or a teaspoon of Dijon mustard to the filling for a subtle tang. If you prefer a more golden crust, brush the top with an egg wash (beaten egg mixed with a tablespoon of water) before baking.
This pot pie can also be made in advance and stored in the refrigerator, making it a convenient meal for busy weeknights. Enjoy the comforting taste of home with this delicious turkey pot pie!
Cranberry Sauce Muffins

Title: Cranberry Sauce Muffins
Prep Time: 10 minutes
Cook Time: 25 minutes
Number of Servings: 12
Required Equipment List: Muffin tin, mixing bowls, whisk, measuring cups, measuring spoons, cooling rack
Cuisine Type: American
These Cranberry Sauce Muffins are a delightful way to repurpose your leftover cranberry sauce from the holiday feast. Moist and fluffy, these muffins are packed with the tartness of cranberries, making them a perfect breakfast treat or afternoon snack. The addition of spices will remind you of the warmth of the holiday season, while the sweetness of the muffin balances the tartness of the sauce beautifully.
Not only do these muffins make use of leftover cranberry sauce, but they also incorporate basic pantry staples, making them easy to whip up. They can be enjoyed fresh out of the oven or stored for a few days, maintaining their delicious flavor. Whether you have leftover cranberry sauce or simply crave a unique muffin, this recipe is sure to become a favorite.
Ingredients:
- 1 ½ cups all-purpose flour
- 1 teaspoon baking powder
- ½ teaspoon baking soda
- ½ teaspoon salt
- 1 teaspoon ground cinnamon
- ½ teaspoon ground nutmeg
- 1 cup leftover cranberry sauce
- ½ cup granulated sugar
- ½ cup vegetable oil
- 2 large eggs
- 1 teaspoon vanilla extract
- ½ cup chopped nuts (optional)
Instructions:
- Preheat your oven to 350°F (175°C). Prepare a muffin tin by greasing it lightly or lining it with paper muffin liners to prevent sticking.
- In a medium mixing bowl, whisk together the flour, baking powder, baking soda, salt, cinnamon, and nutmeg until well combined. This dry mixture will help guarantee even distribution of the leavening agents and spices.
- In a separate large bowl, combine the leftover cranberry sauce, granulated sugar, vegetable oil, eggs, and vanilla extract. Whisk together until the mixture is smooth and well blended.
- Gradually add the dry ingredients to the wet ingredients, stirring gently until just combined. Be careful not to overmix; a few lumps are okay. If desired, fold in the chopped nuts for added texture.
- Portion the batter evenly into the prepared muffin tin, filling each cup about two-thirds full. Bake in the preheated oven for 20-25 minutes, or until a toothpick inserted into the center comes out clean.
- Once baked, remove the muffins from the oven and allow them to cool in the tin for a few minutes before transferring them to a cooling rack to cool completely.
Extra Tips: For a bit of extra sweetness and a festive touch, consider adding a sprinkle of coarse sugar on top of the muffins before baking. If you prefer a more decadent muffin, you can mix in some chocolate chips along with the cranberry sauce.
These muffins are best enjoyed fresh but can also be frozen for later use—just make sure to wrap them tightly in plastic wrap to prevent freezer burn. Enjoy your delightful cranberry sauce muffins!
Ham and Cheese Quiche

Title: Ham and Cheese Quiche
Prep Time: 15 minutes
Cook Time: 45 minutes
Number of Servings: 6
Required Equipment List: Pie dish, mixing bowl, whisk, oven
Cuisine Type: French-American
Ham and Cheese Quiche is a classic dish that’s not only delicious but also a fantastic way to use up holiday leftovers. This savory pie is filled with a creamy mixture of eggs, milk, diced ham, and shredded cheese, all nestled in a buttery crust. It makes for a satisfying breakfast, brunch, or even a light dinner. The combination of flavors is comforting and familiar, making it a family favorite that can be enjoyed any time of the year.
This recipe is incredibly versatile, allowing you to customize the filling with your choice of vegetables or different types of cheese. Using pre-made pie crust saves time, but if you feel adventurous, you can make your own from scratch. Either way, this Ham and Cheese Quiche is sure to impress with its flaky crust and rich filling, making it a perfect dish for gatherings or a cozy night in.
Ingredients:
- 1 pre-made pie crust
- 6 eggs
- 1 cup milk
- 1 cup diced cooked ham
- 1 cup shredded cheese (cheddar, Swiss, or your choice)
- 1/2 cup chopped onions (optional)
- 1/2 teaspoon salt
- 1/4 teaspoon black pepper
- 1/4 teaspoon garlic powder (optional)
- Fresh herbs for garnish (optional)
Instructions:
- Preheat your oven to 375°F (190°C). Place the pie crust in a 9-inch pie dish and pierce the bottom with a fork to prevent it from puffing up during baking. Pre-bake the crust for about 10 minutes until it’s lightly golden and set aside to cool.
- In a mixing bowl, whisk together the eggs and milk until fully combined. Season the mixture with salt, black pepper, and garlic powder, if using. This will add flavor to the quiche base.
- Next, add the diced ham, shredded cheese, and chopped onions to the egg mixture. Stir everything together until evenly distributed. Feel free to include any other vegetables or ingredients you desire at this stage.
- Pour the ham and cheese mixture into the pre-baked pie crust, spreading it out evenly. The filling should be just below the edge of the crust to prevent any overflow while baking.
- Bake the quiche in the preheated oven for 30-35 minutes, or until the center is set and the top is golden brown. You can check for doneness by inserting a knife into the center; it should come out clean.
- Once baked, remove the quiche from the oven and allow it to cool for a few minutes before slicing. Garnish with fresh herbs if desired, and serve warm or at room temperature.
Extra Tips: For a richer flavor, consider adding a splash of cream in place of some of the milk. You can also experiment with different types of cheese like feta or goat cheese for a unique twist. If you’re short on time, using leftover holiday ham makes this dish even quicker to prepare. Quiche can be stored in the refrigerator for up to three days, making it a great make-ahead option. Enjoy your delicious quiche!
Stuffing Waffles
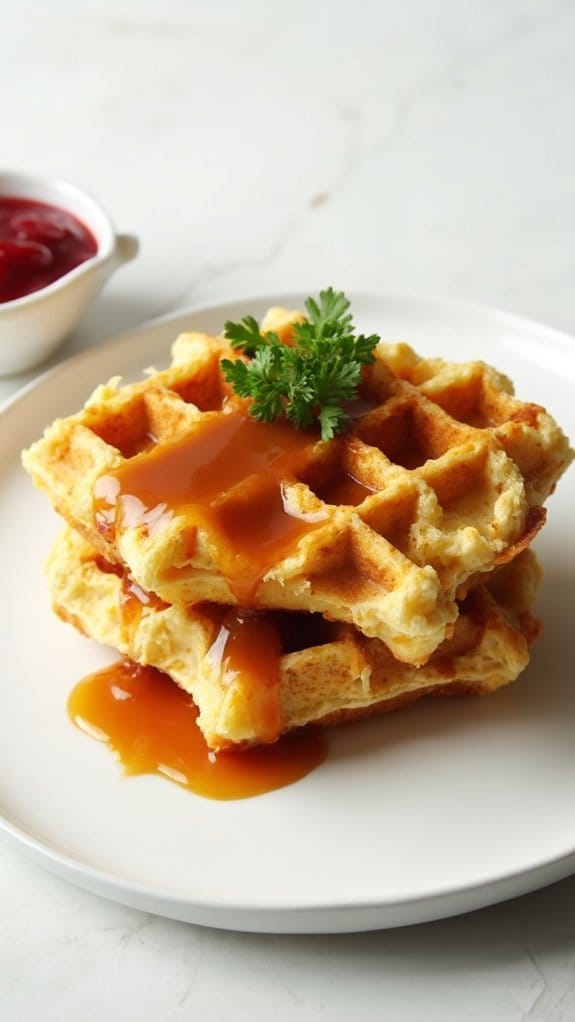
Title: Stuffing Waffles
Prep Time: 10 minutes
Cook Time: 10 minutes
Number of Servings: 4
Required Equipment List: Waffle iron, mixing bowl, spatula, measuring cups, and spoons
Cuisine Type: American
Stuffing Waffles are a creative and delicious way to repurpose your leftover holiday stuffing into a fun and crispy dish. This recipe takes your traditional stuffing and transforms it into a delightful waffle that can be enjoyed for breakfast, lunch, or dinner.
The waffle iron gives the stuffing a crispy exterior while keeping the inside soft and flavorful, making it a perfect canvas for toppings like gravy, cranberry sauce, or even a fried egg. Not only are these waffles a fantastic way to reduce food waste after the holiday season, but they also bring a unique twist to your meals.
They can be served as a side dish, a main course, or even as a fun appetizer at your next gathering. With minimal preparation and cook time, Stuffing Waffles are a great option for a quick meal that will impress your family and friends.
Ingredients:
- 4 cups leftover stuffing
- 2 large eggs
- 1/4 cup milk
- 1/2 teaspoon garlic powder
- 1/2 teaspoon onion powder
- Salt and pepper to taste
- Cooking spray or oil (for greasing the waffle iron)
Instructions:
- Preheat your waffle iron according to the manufacturer’s instructions. Make sure it’s well-greased with cooking spray or a light coat of oil to prevent sticking.
- In a mixing bowl, combine the leftover stuffing, eggs, milk, garlic powder, onion powder, salt, and pepper. Mix well until all ingredients are incorporated and the mixture is slightly moist. If the stuffing seems too dry, you can add a bit more milk.
- Once the waffle iron is heated, scoop about 1 cup of the stuffing mixture onto the center of the waffle iron, spreading it out slightly to guarantee even cooking. Close the lid and cook for about 5-7 minutes, or until the waffles are golden brown and crispy.
- Carefully remove the waffle using a spatula and repeat the process with the remaining stuffing mixture until all waffles are cooked. Keep the cooked waffles warm in a low oven if necessary.
- Serve the Stuffing Waffles warm with your choice of toppings, such as gravy, cranberry sauce, or even a dollop of sour cream. Enjoy!
Extra Tips: For an extra burst of flavor, consider adding some shredded cheese, cooked sausage, or herbs into the stuffing mixture before cooking.
You can also experiment with different types of stuffing, such as cornbread or wild rice, to create unique variations. These waffles can be made ahead of time and reheated in the toaster for a quick and tasty meal during the busy holiday season. Enjoy your creative culinary adventure!
Sweet Potato Hash
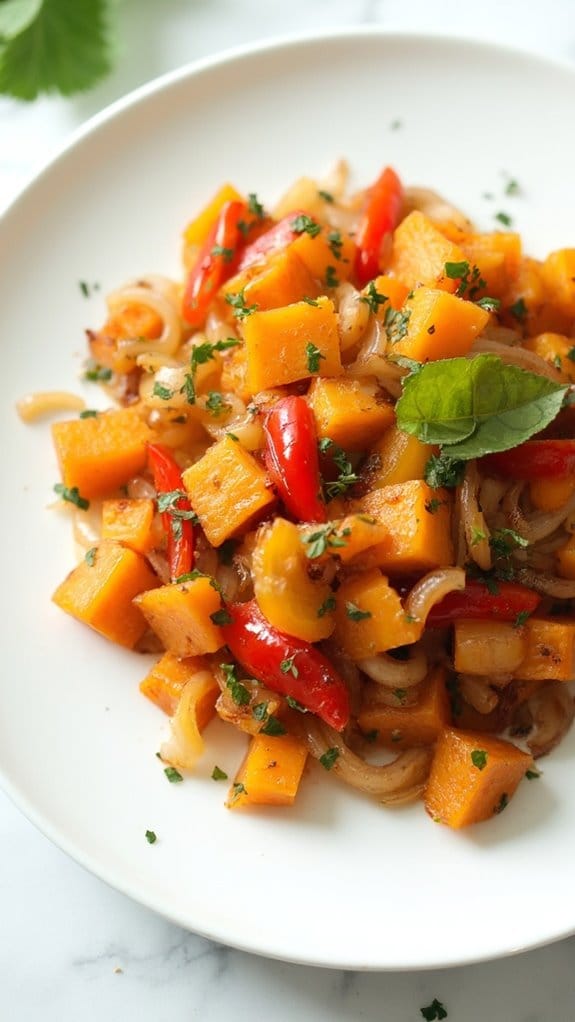
Title: Sweet Potato Hash
Prep Time: 10 minutes
Cook Time: 25 minutes
Number of Servings: 4
Required Equipment List: Large skillet, spatula, knife, cutting board
Cuisine Type: American
Sweet Potato Hash is a hearty and flavorful dish that transforms leftover sweet potatoes from your holiday feast into a delightful breakfast or brunch option. With the sweetness of the potatoes balanced by savory onions and bell peppers, this dish isn’t only delicious but also nutritious.
It’s versatile enough to be served as a side or as a main dish topped with eggs for a complete meal, making it a perfect way to utilize those leftovers. This recipe is quick to prepare and can be customized based on what you have on hand. You can add in leftover meats, such as ham or turkey, or toss in some fresh greens for added nutrition.
The vibrant colors and rich flavors of this sweet potato hash make it an appealing dish that everyone will love, ensuring that your holiday leftovers don’t go to waste.
Ingredients:
- 2 cups cooked sweet potatoes, diced
- 1 medium onion, diced
- 1 bell pepper, diced
- 2 tablespoons olive oil
- 1 teaspoon garlic powder
- 1 teaspoon paprika
- Salt and pepper to taste
- Fresh herbs for garnish (optional)
Instructions:
- In a large skillet, heat the olive oil over medium heat. Once hot, add the diced onion and bell pepper, sautéing for about 5 minutes until they become soft and translucent.
- Add the diced sweet potatoes to the skillet, stirring to combine with the onions and bell peppers. Season with garlic powder, paprika, salt, and pepper, mixing well to evenly coat the sweet potatoes.
- Continue to cook the mixture, stirring occasionally, for about 10-15 minutes or until the sweet potatoes are heated through and begin to slightly crisp on the edges. If needed, adjust the heat to prevent burning.
- Once cooked to your desired texture, taste and adjust the seasoning if necessary. If you like, you can add in any leftover meats at this stage, allowing them to heat through.
- Remove the skillet from the heat and transfer the sweet potato hash to a serving dish. Garnish with fresh herbs if desired and serve warm, optionally topped with fried or poached eggs for a complete meal.
Extra Tips: For added flavor, consider incorporating spices like cumin or chili powder to give your hash a bit of a kick. This dish is also great for meal prep; you can make a large batch and store it in the fridge for several days.
Reheat it in the skillet or microwave for a quick and satisfying meal any time. Enjoy your delicious sweet potato hash!
Holiday Vegetable Soup
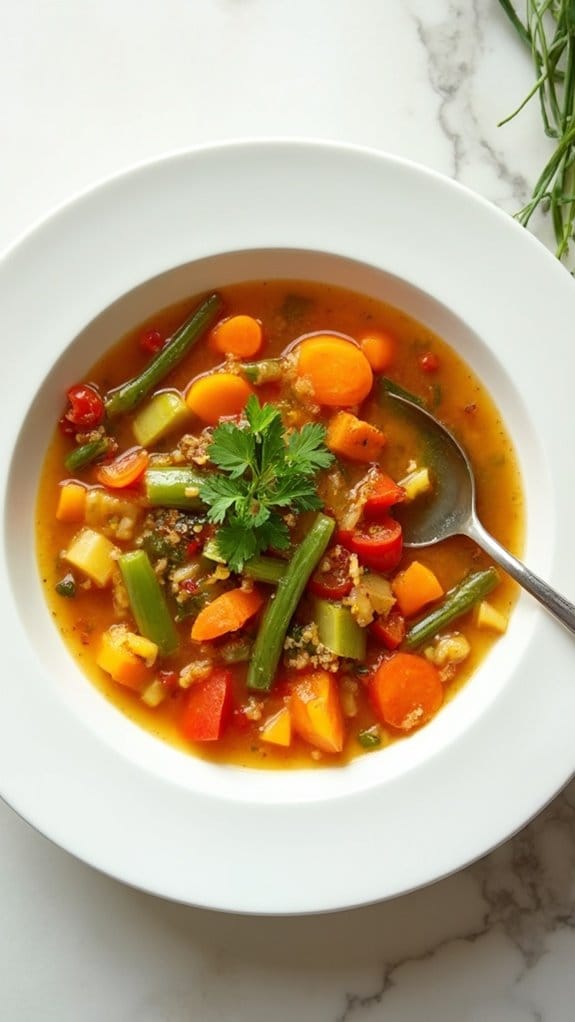
Title: Holiday Vegetable Soup
Prep Time: 15 minutes
Cook Time: 30 minutes
Number of Servings: 6
Required Equipment List: Large pot, cutting board, knife, wooden spoon, measuring cups, and ladle
Cuisine Type: American
Holiday Vegetable Soup is a comforting and nourishing dish that makes excellent use of leftover vegetables from your holiday feast. This recipe isn’t only a great way to reduce food waste but also allows you to enjoy a warm bowl of hearty soup filled with seasonal flavors.
With a medley of colorful veggies and aromatic herbs, this soup is sure to become a family favorite during the chilly winter months. This versatile recipe can be easily customized to include whatever vegetables you have on hand, making it both practical and delicious.
The addition of vegetable broth, along with herbs like thyme and rosemary, creates a fragrant base that enhances the natural sweetness of the vegetables. Serve it with crusty bread or crackers for a satisfying meal that warms the soul.
Ingredients:
- 2 tablespoons olive oil
- 1 onion, diced
- 2 carrots, diced
- 2 celery stalks, diced
- 3 cloves garlic, minced
- 4 cups vegetable broth
- 2 cups of leftover vegetables (e.g., green beans, potatoes, bell peppers)
- 1 can (14.5 oz) diced tomatoes, undrained
- 1 teaspoon dried thyme
- 1 teaspoon dried rosemary
- Salt and pepper to taste
- Fresh parsley for garnish (optional)
Instructions:
- In a large pot, heat the olive oil over medium heat. Add the diced onion, carrots, and celery, and sauté for about 5 minutes until the vegetables are tender and the onion is translucent.
- Stir in the minced garlic and cook for an additional minute until fragrant. Be careful not to burn the garlic, as it can turn bitter.
- Pour in the vegetable broth and add your leftover vegetables along with the diced tomatoes. Stir to combine, making sure to break up the tomatoes a bit for a more cohesive soup.
- Season the soup with dried thyme, dried rosemary, salt, and pepper. Bring the mixture to a boil, then reduce the heat to low and let it simmer for about 20 minutes. This allows the flavors to meld and the vegetables to soften.
- Taste the soup and adjust the seasoning as needed. If you prefer a thicker consistency, you can use an immersion blender to puree a portion of the soup, or simply mash some of the vegetables with a fork.
- Serve the soup hot, garnished with fresh parsley if desired. Enjoy it alongside your favorite bread or crackers for a complete meal.
Extra Tips:
Feel free to experiment with different combinations of vegetables based on what you have available. Leafy greens like spinach or kale can be added in the last few minutes of cooking for an extra nutrient boost.
To make this soup heartier, consider adding cooked grains such as quinoa or rice. This soup can also be frozen for later enjoyment; just remember to leave out any dairy toppings until you reheat it. Enjoy your warming bowl of holiday cheer!
Turkey and Rice Casserole
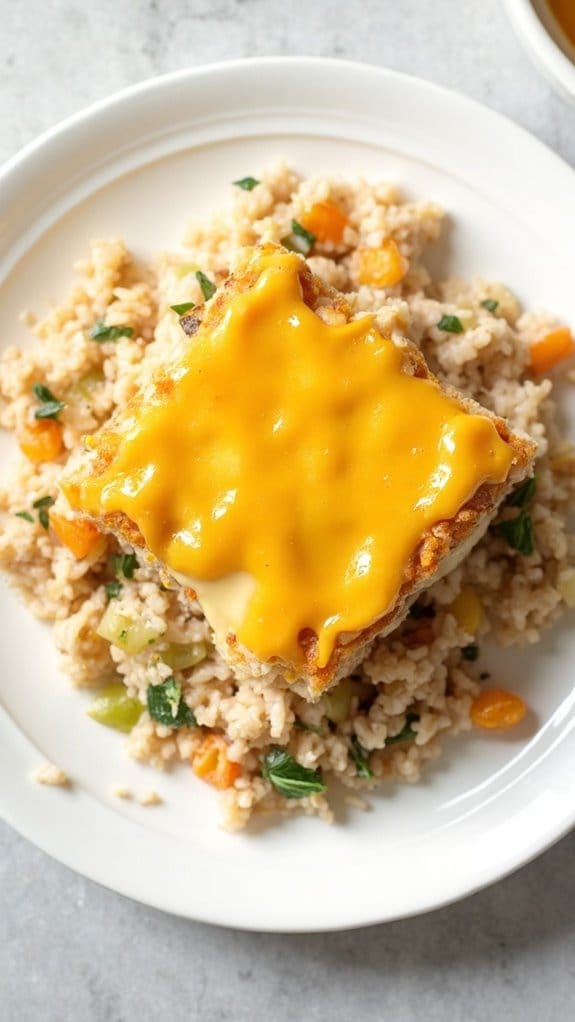
Title: Turkey and Rice Casserole
Prep Time: 15 minutes
Cook Time: 30 minutes
Number of Servings: 6
Required Equipment List: Oven-safe casserole dish, mixing bowl, spoon, measuring cups, measuring spoons
Cuisine Type: American
This Turkey and Rice Casserole is a comforting and hearty dish that’s perfect for utilizing leftover holiday turkey. The combination of tender turkey, fluffy rice, and a creamy sauce creates a satisfying meal that the whole family will enjoy. Topped with a golden crust, this casserole brings together familiar flavors in a new and exciting way, making it a wonderful choice for a cozy dinner any night of the week.
Not only is this casserole delicious, but it’s also incredibly versatile. You can easily adapt the ingredients based on what you have on hand, whether it be different vegetables or types of cheese. This recipe is a fantastic way to reduce food waste while creating a delightful dish that feels like a warm hug in a bowl.
Serve it with a simple salad or some crusty bread for a complete meal that will leave everyone asking for seconds.
Ingredients:
- 3 cups cooked turkey, shredded
- 2 cups cooked rice
- 1 cup cream of mushroom soup
- 1 cup chicken broth
- 1 cup frozen mixed vegetables (carrots, peas, corn)
- 1 teaspoon garlic powder
- 1 teaspoon onion powder
- 1 cup shredded cheddar cheese
- Salt and pepper to taste
- 1/2 cup breadcrumbs (optional, for topping)
Instructions:
- Preheat your oven to 350°F (175°C). Prepare your casserole dish by lightly greasing it with cooking spray or butter to prevent sticking.
- In a large mixing bowl, combine the shredded turkey, cooked rice, cream of mushroom soup, chicken broth, frozen mixed vegetables, garlic powder, onion powder, and half of the shredded cheddar cheese. Season with salt and pepper to taste, and mix well until all ingredients are evenly incorporated.
- Transfer the turkey and rice mixture into the prepared casserole dish, spreading it out evenly. Sprinkle the remaining cheddar cheese on top. If desired, add breadcrumbs to create a crunchy topping.
- Cover the casserole dish with aluminum foil and bake in the preheated oven for 20 minutes. This allows the flavors to meld together and the casserole to heat through.
- After 20 minutes, remove the foil and bake for an additional 10 minutes, or until the cheese is bubbly and lightly golden brown. If using breadcrumbs, they should also be golden and crispy.
- Once done, remove the casserole from the oven and let it sit for a few minutes before serving. This will help it set and make it easier to scoop out portions.
Extra Tips: To add more flavor, consider sautéing some diced onions and garlic in a skillet before mixing them into the casserole. You can also experiment with different cheeses such as mozzarella or pepper jack for a different flavor profile.
For a bit of spice, add some diced jalapeños or a dash of hot sauce to the mixture. This casserole can be made ahead of time and stored in the refrigerator; just increase the baking time if you’re cooking it straight from the fridge. Enjoy your comforting dish!
Mashed Potato Cakes

Title: Mashed Potato Cakes
Prep Time: 10 minutes
Cook Time: 15 minutes
Number of Servings: 4
Required Equipment List: Mixing bowl, frying pan, spatula, measuring cups and spoons
Cuisine Type: American
Mashed Potato Cakes are a delightful way to transform leftover mashed potatoes into a crispy, flavorful dish that can be served as a side or a main. These cakes are golden brown on the outside, with a creamy, comforting potato filling that makes them irresistible.
They’re perfect for brunch, lunch, or a cozy dinner, and can easily be paired with sour cream, applesauce, or a fresh salad for a complete meal. This recipe not only helps you utilize leftovers efficiently but also allows for customization according to your taste.
You can add ingredients like cheese, herbs, or chopped vegetables to enhance the flavor of the cakes. Whether you’re a mashed potato lover or just looking for a creative way to use up holiday leftovers, these mashed potato cakes are sure to be a hit!
Ingredients:
- 2 cups leftover mashed potatoes
- 1/2 cup all-purpose flour
- 1/4 cup grated cheese (cheddar or your choice)
- 1/4 cup chopped green onions or chives
- 1 egg, beaten
- Salt and pepper to taste
- 2 tablespoons butter or oil for frying
Instructions:
- In a mixing bowl, combine the leftover mashed potatoes, flour, grated cheese, chopped green onions, beaten egg, salt, and pepper. Mix until well combined. The mixture should be thick enough to hold its shape when formed into cakes.
- Heat a frying pan over medium heat and add the butter or oil, allowing it to melt and coat the bottom of the pan.
- While the pan heats, form the potato mixture into patties, about 1/2 inch thick and 2-3 inches in diameter. You can use your hands or a measuring cup to help shape them.
- Once the pan is hot, carefully place the potato cakes in the pan, making sure not to overcrowd them. Cook for 4-5 minutes on one side until golden brown, then flip and cook for another 4-5 minutes on the other side.
- Remove the cakes from the pan and place them on a paper towel-lined plate to absorb any excess oil. Serve warm, garnished with additional green onions or your favorite dipping sauce.
Extra Tips: For an extra crispy texture, try chilling the formed patties in the refrigerator for about 30 minutes before frying. This helps them hold their shape better during cooking.
You can also experiment with different seasonings, such as garlic powder or paprika, to give your cakes a unique flavor. If you want to make them ahead of time, you can freeze the uncooked cakes and fry them straight from the freezer when you’re ready to enjoy!
Cranberry BBQ Meatballs

Title: Cranberry BBQ Meatballs
Prep Time: 10 minutes
Cook Time: 20 minutes
Number of Servings: 6
Required Equipment List: Large mixing bowl, baking sheet, oven, saucepan
Cuisine Type: American
Cranberry BBQ Meatballs are the perfect way to transform your holiday leftovers into a delicious and easy dish that everyone will love. Combining the sweet and tangy flavors of cranberry sauce with zesty BBQ sauce, these meatballs aren’t only a fantastic appetizer but also a satisfying main course.
They can be served as finger food at parties or enjoyed over rice or pasta for a heartier meal. This recipe is incredibly versatile, allowing you to use leftover turkey or beef meatballs, or you can make a fresh batch from scratch.
The combination of the sauces creates a rich glaze that clings to the meatballs beautifully, ensuring every bite is packed with flavor. Whether you’re hosting a gathering or just looking for a quick weeknight dinner, these Cranberry BBQ Meatballs are sure to be a hit!
Ingredients:
- 1 pound cooked meatballs (homemade or frozen)
- 1 cup cranberry sauce
- 1/2 cup BBQ sauce
- 1 tablespoon Worcestershire sauce
- 1 teaspoon garlic powder
- 1 teaspoon onion powder
- Salt and pepper to taste
- Fresh parsley (for garnish, optional)
Instructions:
- Preheat your oven to 350°F (175°C). Line a baking sheet with parchment paper or lightly grease it to prevent sticking. This will make for an easy cleanup after cooking.
- In a large mixing bowl, combine the cranberry sauce, BBQ sauce, Worcestershire sauce, garlic powder, onion powder, salt, and pepper. Stir well until all the ingredients are fully incorporated, creating a tasty glaze for the meatballs.
- Add the cooked meatballs to the bowl with the sauce mixture, ensuring each meatball is evenly coated. If using frozen meatballs, there’s no need to thaw them first; they’ll cook through in the oven.
- Transfer the coated meatballs onto the prepared baking sheet, arranging them in a single layer. Bake in the preheated oven for 15-20 minutes or until the meatballs are heated through and the sauce is bubbly.
- Once cooked, remove the meatballs from the oven and let them cool for a few minutes. Serve warm, garnished with fresh parsley if desired, and enjoy as an appetizer or main dish.
Extra Tips: For an extra kick, consider adding a dash of hot sauce to the glaze mixture. You can also customize the flavors by using different types of BBQ sauce, such as smoky or spicy varieties.
These meatballs pair wonderfully with toothpicks for easy serving at parties, and any leftovers can be stored in an airtight container in the refrigerator for up to three days. Enjoy the deliciousness!
Pumpkin Pie Smoothie

Title: Pumpkin Pie Smoothie
Prep Time: 10 minutes
Cook Time: 0 minutes
Number of Servings: 2
Required Equipment List: Blender, measuring cups, measuring spoons, serving glasses
Cuisine Type: American
This Pumpkin Pie Smoothie is a delicious and nutritious way to enjoy the flavors of fall all year round. Combining the creamy texture of pumpkin puree with the warm spices of cinnamon and nutmeg, this smoothie captures the essence of a traditional pumpkin pie in a revitalizing drink.
With the addition of Greek yogurt, it also packs a protein punch, making it a perfect breakfast or snack option that will keep you feeling satisfied throughout the day. Not only is this smoothie easy to make, but it’s also highly customizable.
You can adjust the sweetness by adding more or less maple syrup, or even substitute it with honey or agave nectar. This recipe is a fantastic way to use up leftover pumpkin puree from your holiday baking, ensuring that nothing goes to waste while indulging in a delightful treat.
Ingredients:
- 1 cup pumpkin puree
- 1 banana, frozen
- 1 cup Greek yogurt
- 1 cup almond milk (or milk of choice)
- 2 tablespoons maple syrup (or sweetener of choice)
- 1 teaspoon vanilla extract
- 1/2 teaspoon ground cinnamon
- 1/4 teaspoon ground nutmeg
- Pinch of salt
- Whipped cream (for topping, optional)
Instructions:
- Begin by gathering all your ingredients. Make sure your banana is frozen for a creamier texture. If you don’t have frozen bananas, you can use fresh ones, but you may want to add some ice cubes to achieve the desired consistency.
- In a blender, combine the pumpkin puree, frozen banana, Greek yogurt, almond milk, maple syrup, and vanilla extract. Add the ground cinnamon, nutmeg, and a pinch of salt to enhance the flavors.
- Blend the mixture on high speed until smooth and creamy. If the smoothie is too thick for your liking, feel free to add a bit more almond milk until you reach your desired consistency.
- Once blended, taste the smoothie and adjust the sweetness if needed by adding more maple syrup or sweetener. Blend again briefly to combine any additional ingredients.
- Pour the smoothie into serving glasses and top with whipped cream if desired. You can also sprinkle a little extra cinnamon on top for an added touch.
Extra Tips: For a thicker smoothie, consider using more frozen banana or even adding ice cubes during blending. If you want to boost the nutritional value, throw in a handful of spinach or kale without greatly altering the flavor.
This Pumpkin Pie Smoothie can also be made ahead of time and stored in the refrigerator for a quick grab-and-go breakfast option. Enjoy the flavors of fall anytime!
Roast Vegetable Frittata

Title: Roast Vegetable Frittata
Prep Time: 15 minutes
Cook Time: 30 minutes
Number of Servings: 6
Required Equipment List: Oven-safe skillet, mixing bowl, whisk, knife, cutting board
Cuisine Type: Mediterranean
This Roast Vegetable Frittata is a versatile and satisfying dish that transforms your leftover holiday vegetables into a delicious meal. Packed with flavor and nutrients, it features a blend of roasted veggies, eggs, and cheese, all baked to perfection.
This frittata isn’t only a fantastic way to use up leftovers, but it also makes for a hearty breakfast, brunch, or light dinner option that can be served warm or at room temperature.
The beauty of this recipe lies in its flexibility; you can use any combination of roasted vegetables you have on hand, such as bell peppers, zucchini, or sweet potatoes. The frittata is simple to prepare, requiring minimal effort while delivering maximum flavor.
With its golden top and fluffy texture, this dish is sure to be a hit with family and friends, making it a perfect addition to your holiday menu.
Ingredients:
- 2 cups roasted vegetables (bell peppers, zucchini, spinach, etc.)
- 6 large eggs
- 1/2 cup milk
- 1 cup shredded cheese (cheddar, feta, or your choice)
- Salt and pepper to taste
- 1 tablespoon olive oil
- Fresh herbs for garnish (optional)
Instructions:
- Preheat your oven to 375°F (190°C). This temperature allows the frittata to cook evenly and develop a lovely golden color on top.
- In an oven-safe skillet, heat the olive oil over medium heat. Add the roasted vegetables and sauté for a few minutes until they’re warmed through and slightly caramelized, enhancing their flavors.
- In a mixing bowl, whisk together the eggs, milk, salt, and pepper until well combined. This mixture will create a light and fluffy texture for your frittata.
- Pour the egg mixture over the warmed vegetables in the skillet, ensuring the veggies are evenly distributed. Sprinkle the shredded cheese on top, allowing it to melt and bind the frittata together.
- Cook the frittata on the stove for about 5 minutes, or until the edges begin to set. Then transfer the skillet to the preheated oven and bake for 20-25 minutes, or until the center is firm and the top is lightly golden.
- Once baked, remove the frittata from the oven and let it cool for a few minutes before slicing. Garnish with fresh herbs if desired, and serve warm or at room temperature.
Extra Tips: For an extra flavor boost, consider adding sautéed onions or garlic to the vegetable mixture before adding the eggs. If you enjoy a bit of heat, you can include diced jalapeños or a sprinkle of red pepper flakes.
This frittata can also be made ahead of time and stored in the refrigerator, making it a convenient option for busy mornings or gatherings. Enjoy your delicious creation!
Pecan Pie Overnight Oats
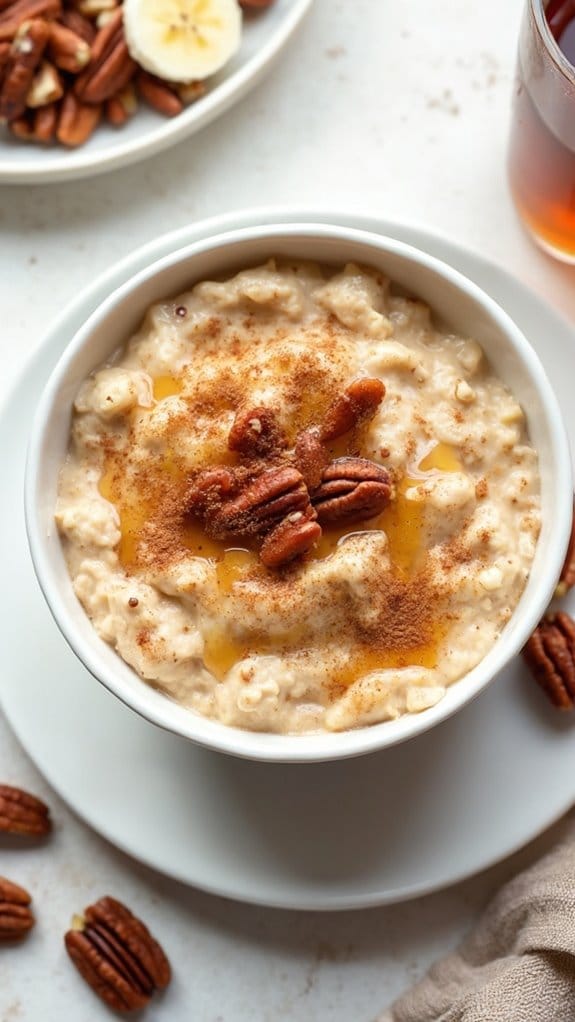
Title: Pecan Pie Overnight Oats
Prep Time: 10 minutes
Cook Time: 0 minutes
Number of Servings: 2
Required Equipment List: Mason jars or airtight containers, measuring cups, measuring spoons, spoon
Cuisine Type: American
Pecan Pie Overnight Oats are a delicious and healthy way to enjoy the flavors of pecan pie without the fuss of baking. This recipe combines the nutty goodness of pecans with the sweetness of maple syrup and a hint of vanilla, all mixed into creamy oats.
Perfect for busy mornings, these overnight oats can be prepared in just a few minutes the night before, allowing you to grab a nutritious breakfast on the go. With the addition of chia seeds for added texture and nutrition, these oats not only taste great but also provide a satisfying start to your day.
The recipe can easily be doubled or adjusted to suit your preferences, with optional toppings like whipped cream or fresh fruit for an extra touch. Indulging in this wholesome treat feels like having dessert for breakfast, making it a favorite among both kids and adults alike.
Ingredients:
- 1 cup rolled oats
- 1 cup milk (dairy or plant-based)
- 1 tablespoon chia seeds
- 2 tablespoons maple syrup
- 1 teaspoon vanilla extract
- 1/2 cup pecans, chopped
- 1/2 teaspoon ground cinnamon
- Pinch of salt
Instructions:
- In a mixing bowl, combine the rolled oats, chia seeds, ground cinnamon, and a pinch of salt. Stir the dry ingredients together to guarantee they’re evenly mixed, which will help distribute the flavors throughout the oats.
- In another bowl or a large measuring cup, whisk together the milk, maple syrup, and vanilla extract. This mixture will add a creamy and sweet base to your overnight oats. Make sure the maple syrup is well incorporated to avoid clumping.
- Pour the milk mixture over the dry ingredients and stir well to combine. Add the chopped pecans to the mixture, reserving a few for topping if desired. This will give your oats a delightful crunch.
- Divide the mixture evenly between two mason jars or airtight containers. Seal the jars and place them in the refrigerator overnight (or for at least 4 hours) to allow the oats to soak up the liquid and soften.
- In the morning, give the oats a good stir before serving. If the mixture is too thick, you can add a splash of milk to reach your desired consistency. Top with the reserved pecans, additional maple syrup, or your favorite toppings like whipped cream or fresh fruit.
Extra Tips: For a richer flavor, you can toast the pecans in a skillet for a few minutes before adding them to the mixture. This will enhance their nuttiness and add depth to your overnight oats.
Feel free to experiment with different flavors by adding spices like nutmeg or even a splash of bourbon for an adult treat. These overnight oats are versatile, so you can customize them to your taste preferences!
Turkey Tacos
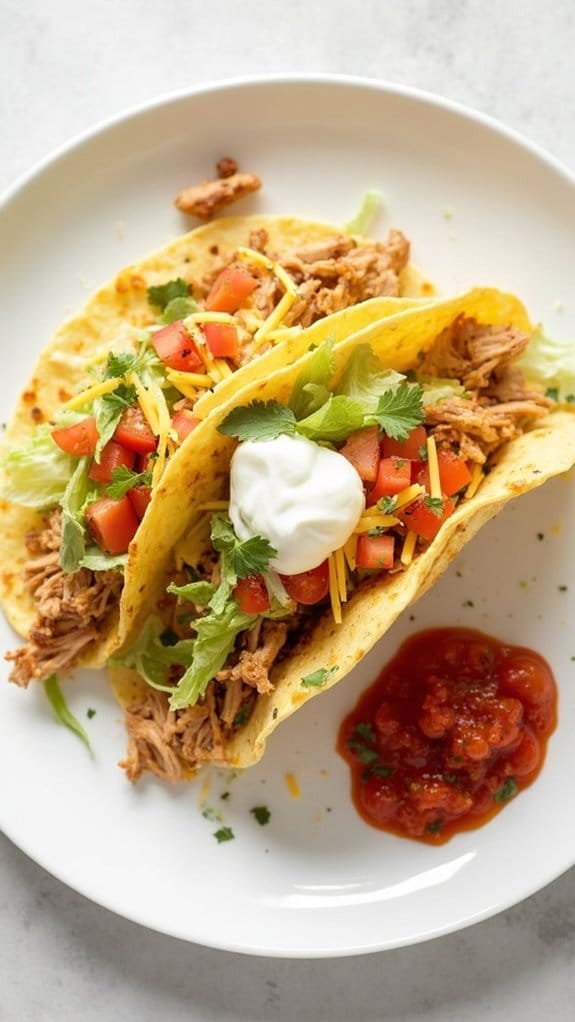
Title: Turkey Tacos
Prep Time: 10 minutes
Cook Time: 15 minutes
Number of Servings: 4
Required Equipment List: Skillet, spatula, serving plates, measuring cups, and spoons
Cuisine Type: Mexican-American
Turkey Tacos are a fantastic way to repurpose leftover turkey from your holiday feast into a delicious and satisfying meal. These tacos are quick to prepare, making them perfect for a busy weeknight dinner or a casual lunch.
The combination of seasoned turkey, fresh toppings, and flavorful sauces brings a delightful twist to traditional tacos, ensuring that every bite is packed with flavor. Using leftover turkey not only saves time but also reduces food waste, allowing you to enjoy a different spin on your holiday protein.
The recipe is easily customizable to suit your taste, whether you prefer mild or spicy flavors. Serve these turkey tacos with your favorite toppings such as avocado, salsa, or cheese, and enjoy a delightful meal that adds a festive flair to your regular taco night.
Ingredients:
- 2 cups shredded cooked turkey
- 1 tablespoon olive oil
- 1/2 onion, diced
- 2 cloves garlic, minced
- 1 tablespoon taco seasoning
- 1/2 cup chicken broth
- 8 small corn or flour tortillas
- 1 cup shredded lettuce
- 1 cup diced tomatoes
- 1/2 cup shredded cheese (cheddar or Mexican blend)
- Sour cream and salsa for serving
Instructions:
- Heat the olive oil in a skillet over medium heat. Add the diced onion and sauté for about 3-4 minutes until translucent. This will create a flavorful base for your turkey filling.
- Stir in the minced garlic and cook for an additional minute, until fragrant. Be careful not to burn the garlic, as it can turn bitter if cooked too long.
- Add the shredded turkey to the skillet, followed by the taco seasoning and chicken broth. Stir well to combine, allowing the turkey to absorb the flavors. Let it simmer for about 5-7 minutes, stirring occasionally, until heated through.
- While the turkey mixture is simmering, warm the tortillas in a separate skillet or microwave until soft and pliable. This will make them easier to fold and prevent tearing.
- To assemble the tacos, place a generous amount of the turkey mixture onto each tortilla. Top with shredded lettuce, diced tomatoes, and shredded cheese. Add a dollop of sour cream and your favorite salsa for extra flavor.
- Serve the tacos immediately, allowing everyone to customize their toppings as desired. Enjoy your delicious turkey tacos!
Extra Tips:
To add more flavor to your turkey filling, consider incorporating additional spices like cumin or chili powder. For a fun twist, you can also add black beans or corn to the turkey mixture for added texture and nutrition.
If you have any leftover toppings or sauces from your holiday meal, feel free to use them to enhance your tacos. Enjoy your creative leftover transformation!
Glazed Ham Sandwiches

Title: Glazed Ham Sandwiches
Prep Time: 15 minutes
Cook Time: 10 minutes
Number of Servings: 4
Required Equipment List: Skillet, spatula, knife, cutting board
Cuisine Type: American
Glazed Ham Sandwiches are a delightful way to repurpose your holiday ham leftovers into a satisfying meal. This recipe combines tender slices of glazed ham with melted cheese and a hint of sweetness from the glaze, all nestled between toasted bread.
Whether you’re enjoying this for lunch or a light dinner, these sandwiches are sure to please both kids and adults alike. The beauty of these sandwiches lies in their versatility; you can customize them with your favorite cheeses and toppings to suit your taste.
Pair them with a side of crispy chips or a fresh salad for a well-rounded meal. With minimal prep and cook time, Glazed Ham Sandwiches make for a quick and delicious option to use up those festive leftovers.
Ingredients:
- 8 slices of leftover glazed ham
- 4 slices of your favorite cheese (Swiss, cheddar, or gouda works well)
- 4 slices of bread (such as sourdough or whole wheat)
- 2 tablespoons of butter
- 1 tablespoon of Dijon mustard (optional)
- Lettuce or spinach leaves (optional)
- Tomato slices (optional)
Instructions:
- Begin by heating a skillet over medium heat. While the skillet warms up, prepare your sandwich by laying out the slices of bread on a cutting board. If you like a little extra flavor, spread a thin layer of Dijon mustard on one side of each slice.
- Place two slices of bread in the skillet, mustard side up, and layer each with two slices of glazed ham. Top the ham with a slice of cheese, allowing it to melt slightly as the sandwich cooks.
- Once the cheese begins to melt, place another slice of bread on top of each sandwich, creating a complete sandwich. Cook for about 3-4 minutes, or until the bottom slice of bread is golden brown and crispy.
- Carefully flip the sandwiches using a spatula, adding a tablespoon of butter to the skillet if desired. Cook the other side for an additional 3-4 minutes, until golden brown and the cheese is fully melted.
- Once cooked, remove the sandwiches from the skillet and let them cool for a minute. Slice them in half and, if you desire, add fresh lettuce and tomato slices before serving.
Extra Tips: For an extra layer of flavor, consider adding caramelized onions or pickles inside the sandwich. You can also use a panini press if you have one, which will give the sandwiches a nice grill mark and melt the cheese evenly.
Feel free to experiment with different types of bread or cheeses to create your own signature version of this delicious leftover dish!
Christmas Leftover Chili

Title: Christmas Leftover Chili
Prep Time: 15 minutes
Cook Time: 30 minutes
Number of Servings: 6
Required Equipment List: Large pot, wooden spoon, knife, cutting board, measuring cups, and spoons
Cuisine Type: American
Christmas Leftover Chili is a fantastic way to repurpose all of those festive leftovers into a hearty and comforting dish. This chili takes advantage of the extra meats, vegetables, and beans you may have after the holiday feast, transforming them into a rich and flavorful bowl of goodness.
The combination of spices with the savory notes of leftover meats creates a dish that’s perfect for cozy nights in, while also being a great way to delight family and friends with a new twist on leftovers. Not only is this chili easy to make, but it’s also highly customizable.
You can add any leftover vegetables or beans you have on hand, making it a versatile recipe that can accommodate whatever you need to use up. It’s a one-pot meal that warms the soul, and it can be served with toppings like shredded cheese, sour cream, and fresh cilantro for added flavor.
This post-holiday chili will keep everyone satisfied without the fuss of starting from scratch.
Ingredients:
- 2 cups leftover cooked meat (ham, turkey, or beef)
- 1 can (15 oz) diced tomatoes
- 1 can (15 oz) kidney beans, drained and rinsed
- 1 can (15 oz) black beans, drained and rinsed
- 1 medium onion, diced
- 2 cloves garlic, minced
- 1 bell pepper, diced
- 2 tablespoons chili powder
- 1 teaspoon cumin
- 1 teaspoon smoked paprika
- Salt and pepper to taste
- 1-2 cups chicken or vegetable broth
- Optional toppings: shredded cheese, sour cream, cilantro, jalapeños
Instructions:
- In a large pot, heat a splash of oil over medium heat. Add the diced onion and bell pepper, sautéing for about 5 minutes until they start to soften and the onion becomes translucent. Stir in the minced garlic and cook for another minute until fragrant.
- Add the leftover cooked meat to the pot, breaking it up with a wooden spoon if necessary. Stir in the chili powder, cumin, smoked paprika, salt, and pepper, allowing the spices to toast slightly for about 2 minutes to enhance their flavors.
- Pour in the diced tomatoes with their juice, along with the kidney beans and black beans. Stir well to combine all the ingredients, and then add enough chicken or vegetable broth to reach your desired consistency. Bring the mixture to a simmer.
- Reduce the heat to low and cover the pot, letting the chili simmer for about 20 minutes. This allows the flavors to meld together beautifully. Stir occasionally and add more broth if necessary to keep it from getting too thick.
- After 20 minutes, taste the chili and adjust the seasoning if needed. If you prefer a spicier kick, consider adding some chopped jalapeños or hot sauce. Serve the chili hot, garnished with your choice of toppings like shredded cheese, sour cream, and fresh cilantro.
Extra Tips: For a thicker chili, you can mash some of the beans against the side of the pot while cooking to create a creamier texture. Feel free to experiment with different spices or add fresh vegetables, such as corn or zucchini, to make it your own.
This chili can be refrigerated for up to a week or frozen for later enjoyment, making it a convenient option for busy days ahead!
Spinach and Feta Stuffed Peppers
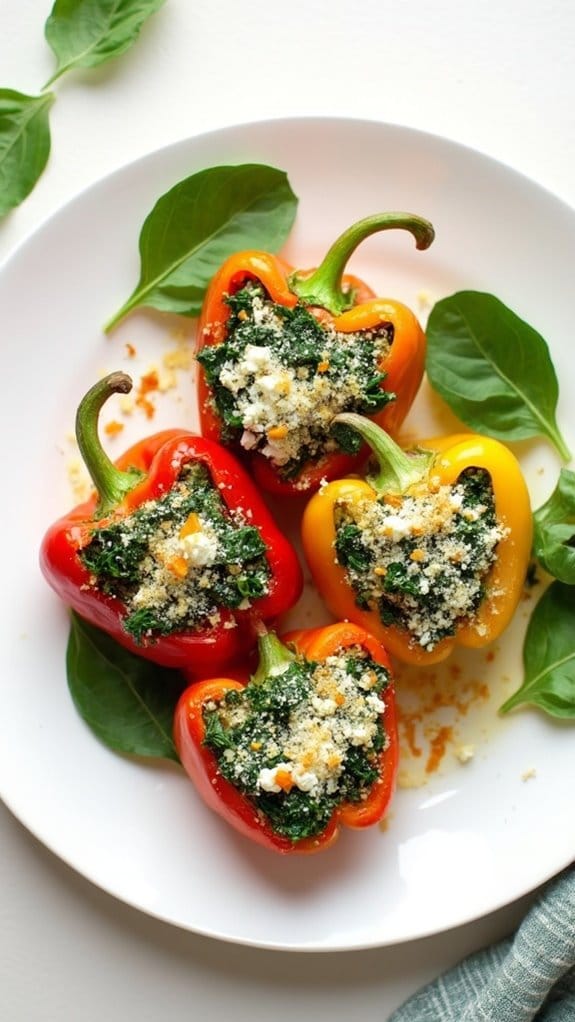
Title: Spinach and Feta Stuffed Peppers
Prep Time: 15 minutes
Cook Time: 30 minutes
Number of Servings: 4
Required Equipment List: Baking dish, mixing bowl, oven, knife, cutting board
Cuisine Type: Mediterranean
Spinach and Feta Stuffed Peppers are a delicious and nutritious dish that beautifully combines the earthy flavors of spinach with the tangy creaminess of feta cheese. These stuffed peppers aren’t only visually appealing but also packed with wholesome ingredients, making them an excellent choice for a satisfying meal.
The vibrant colors of the peppers are complemented by the bright green spinach and crumbly feta, creating a dish that’s both healthy and delicious. This recipe is perfect for using up any leftover spinach and feta you might’ve from holiday meals, and it can easily be customized with additional ingredients such as herbs, spices, or even grains like quinoa or rice.
Whether served as a main course or a side dish, these stuffed peppers are sure to impress with their bold flavors and hearty textures.
Ingredients:
- 4 large bell peppers (any color)
- 2 cups fresh spinach, chopped
- 1 cup feta cheese, crumbled
- 1/2 cup cooked rice (optional)
- 1/4 cup onion, finely chopped
- 2 cloves garlic, minced
- 1 teaspoon dried oregano
- 1 tablespoon olive oil
- Salt and pepper to taste
- 1/4 cup grated Parmesan cheese (for topping)
Instructions:
- Preheat your oven to 375°F (190°C). While the oven is heating, prepare the bell peppers by cutting the tops off and removing the seeds and membranes. Place the hollowed peppers upright in a baking dish.
- In a mixing bowl, heat the olive oil over medium heat and sauté the chopped onion and garlic until they’re translucent and fragrant, about 3-4 minutes. This will add a great depth of flavor to the filling.
- Add the chopped spinach to the skillet and cook until wilted, about 2-3 minutes. Remove from heat and let it cool slightly before mixing in the crumbled feta cheese, cooked rice (if using), dried oregano, salt, and pepper.
- Stuff each prepared bell pepper generously with the spinach and feta mixture, packing it down slightly to guarantee the filling stays in place. Once filled, sprinkle the grated Parmesan cheese on top of each pepper for an extra cheesy finish.
- Cover the baking dish with aluminum foil and bake in the preheated oven for 25 minutes. After 25 minutes, remove the foil and bake for an additional 5-10 minutes, or until the peppers are tender and the tops are golden brown.
- Remove the stuffed peppers from the oven and let them cool slightly before serving. These can be enjoyed warm or at room temperature, making them a versatile option for any meal.
Extra Tips: For a little extra kick, consider adding some crushed red pepper flakes to the filling mixture. You can also experiment with different types of cheese, such as goat cheese or mozzarella, based on your taste preference.
Leftovers can be stored in the refrigerator for up to three days and reheated in the oven or microwave for a quick meal. Enjoy your delicious Spinach and Feta Stuffed Peppers!
Sweet Potato Pancakes

Title: Sweet Potato Pancakes
Prep Time: 10 minutes
Cook Time: 15 minutes
Number of Servings: 4
Required Equipment List: Mixing bowl, whisk, frying pan, spatula, measuring cups, measuring spoons
Cuisine Type: American
Sweet Potato Pancakes are a delicious and nutritious option for breakfast or brunch, especially after the holiday season when you might’ve leftover sweet potatoes. These pancakes are fluffy and subtly sweet, bringing a delightful twist to traditional pancakes. The addition of spices like cinnamon and nutmeg enhances the flavor, making them perfect for warm, cozy mornings.
These pancakes aren’t only easy to make but also versatile. You can top them with maple syrup, yogurt, or a sprinkle of nuts for added texture. They’re a great way to incorporate leftover sweet potatoes into a meal that feels indulgent yet healthy. Whether enjoyed plain or dressed up with toppings, these sweet potato pancakes are sure to be a hit with everyone at the table.
Ingredients:
- 1 cup mashed sweet potatoes (cooked)
- 1 cup all-purpose flour
- 1 tablespoon baking powder
- 1 teaspoon cinnamon
- 1/2 teaspoon nutmeg
- 1/4 teaspoon salt
- 1 cup milk (or milk alternative)
- 2 large eggs
- 2 tablespoons butter (melted)
- Maple syrup (for serving)
Instructions:
- In a mixing bowl, combine the mashed sweet potatoes, milk, eggs, and melted butter. Whisk together until smooth and well combined. This mixture should be creamy and free of lumps, ensuring a fluffy pancake texture.
- In a separate bowl, whisk together the all-purpose flour, baking powder, cinnamon, nutmeg, and salt. Mixing the dry ingredients separately helps to evenly distribute the leavening agent and spices throughout the batter.
- Gradually add the dry mixture to the sweet potato mixture, stirring gently until just combined. Be careful not to overmix; it’s okay if there are a few lumps. This will help keep the pancakes light and airy.
- Heat a frying pan or griddle over medium heat and lightly grease it with butter or cooking spray. Pour about 1/4 cup of batter onto the pan for each pancake. Cook for 2-3 minutes, or until bubbles form on the surface and the edges look set.
- Flip the pancakes and cook for another 2-3 minutes on the other side until golden brown. Repeat with the remaining batter, adjusting the heat as necessary to prevent burning.
- Serve the pancakes warm, drizzled with maple syrup or topped with your favorite ingredients like yogurt, nuts, or fresh fruit.
Extra Tips: For an added touch of flavor, consider mixing in some chopped pecans or walnuts into the batter before cooking. You can also experiment with spices by adding a pinch of ginger or allspice for a different flavor profile.
If you have leftover pancakes, they can be stored in the fridge and reheated later, making them a convenient choice for busy mornings. Enjoy your sweet potato pancakes!
Cranberry Cream Cheese Dip
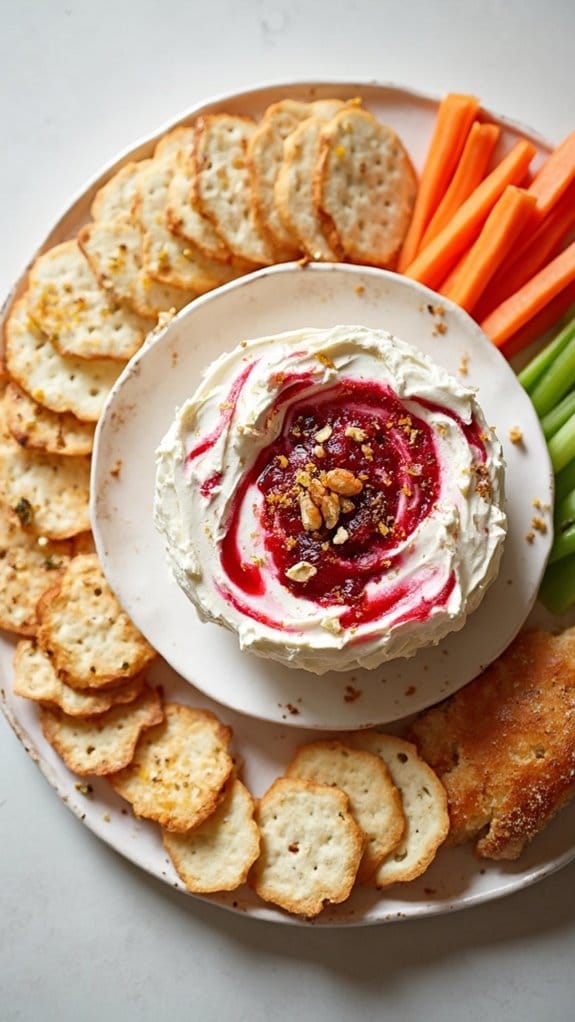
Title: Cranberry Cream Cheese Dip
Prep Time: 10 minutes
Cook Time: 0 minutes
Number of Servings: 8
Required Equipment List: Mixing bowl, spatula, serving dish
Cuisine Type: American
Cranberry Cream Cheese Dip is the perfect festive treat that brings the flavors of the holiday season to your table. This dip combines the tartness of cranberries with the creamy richness of cream cheese, creating a delightful balance that’s both sweet and savory.
It’s an easy-to-make appetizer that requires minimal prep time, making it an excellent choice for holiday gatherings or casual get-togethers with friends and family. The vibrant colors and flavors of this dip make it a standout addition to any spread.
Served with crackers, toasted bread, or fresh vegetables, this Cranberry Cream Cheese Dip isn’t only visually appealing but also incredibly delicious. Whether you have leftover cranberry sauce from your holiday feast or want to whip up a fresh batch, this dip is sure to be a hit among guests of all ages.
Ingredients:
- 8 ounces cream cheese, softened
- 1 cup cranberry sauce (homemade or store-bought)
- 1/2 cup chopped pecans or walnuts (optional)
- 1 tablespoon fresh orange juice
- 1 teaspoon orange zest
- Salt to taste
Instructions:
- In a mixing bowl, combine the softened cream cheese with the cranberry sauce. Use a spatula to mix until well blended, ensuring the cream cheese is fully incorporated with the cranberry sauce for a smooth consistency.
- Add the chopped nuts if you’re using them, along with the fresh orange juice and orange zest. These ingredients will add a lovely citrus note and crunch to the dip, enhancing its overall flavor profile.
- Season the mixture with a pinch of salt to taste. This will help balance the sweetness of the cranberries and elevate the overall flavors of the dip.
- Transfer the dip into a serving dish, smoothing the top with a spatula. If desired, you can garnish the top with a few extra chopped nuts or a sprinkle of orange zest for added flair.
- Serve immediately with a selection of crackers, sliced baguette, or fresh vegetable sticks. Alternatively, you can refrigerate the dip for about an hour to allow the flavors to meld further before serving.
Extra Tips: For a twist on this dip, consider adding a dash of cinnamon or nutmeg for a warm, spiced flavor. If you prefer a bit of heat, a pinch of cayenne pepper can also elevate the dip.
This dip can be made ahead of time and stored in the refrigerator, making it a convenient option for busy holiday preparations. Just give it a good stir before serving to refresh its texture. Enjoy!
Turkey Salad Lettuce Wraps
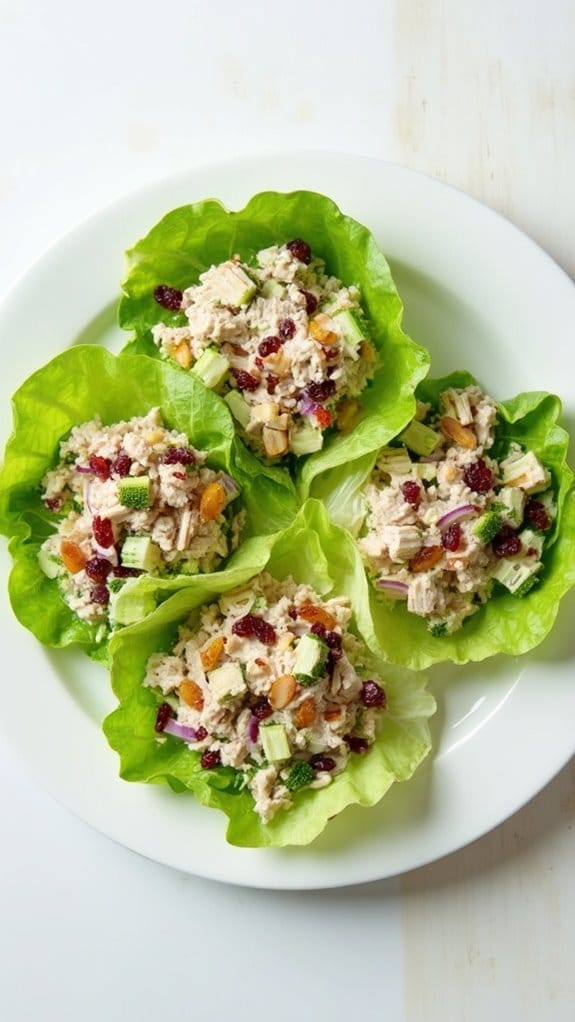
Title: Turkey Salad Lettuce Wraps
Prep Time: 15 minutes
Cook Time: 0 minutes
Number of Servings: 4
Required Equipment List: Mixing bowl, spoon, cutting board, knife
Cuisine Type: American
Turkey Salad Lettuce Wraps are an invigorating and light dish that makes perfect use of leftover turkey from your holiday feast. This recipe combines shredded turkey with crisp vegetables and a creamy dressing, all served in crunchy lettuce leaves for a healthy and satisfying meal.
These wraps aren’t just delicious; they’re also quick to prepare, making them ideal for busy weeknights or as a fun addition to your lunch rotation. The versatility of this recipe allows for endless customization, so feel free to add your favorite ingredients or adjust the seasoning to suit your taste.
Whether you’re looking for a low-carb meal or simply a flavorful way to enjoy your leftovers, these turkey salad lettuce wraps are sure to be a hit. They can be served as an appetizer, a light lunch, or even a main dish, offering a nutritious option that doesn’t compromise on flavor.
Ingredients:
- 2 cups cooked turkey, shredded
- 1/2 cup celery, diced
- 1/2 cup red onion, diced
- 1/2 cup mayonnaise
- 1 tablespoon Dijon mustard
- 1 teaspoon lemon juice
- Salt and pepper to taste
- 1 head of romaine or butter lettuce, leaves separated
- Optional toppings: sliced almonds, dried cranberries, or fresh herbs
Instructions:
- In a mixing bowl, combine the shredded turkey, diced celery, and diced red onion. These ingredients will provide a nice crunch and flavor to the salad.
- In a separate small bowl, mix together the mayonnaise, Dijon mustard, lemon juice, salt, and pepper. This creamy dressing will bring all the elements of the salad together.
- Pour the dressing over the turkey mixture and stir until everything is well coated. Taste and adjust seasoning if necessary, adding more salt, pepper, or lemon juice to your preference.
- To serve, take a lettuce leaf and spoon a generous amount of the turkey salad into the center. You can top it with optional toppings like sliced almonds, dried cranberries, or fresh herbs for added flavor and texture.
- Repeat the process with the remaining lettuce leaves and turkey salad mixture. Enjoy your wraps immediately or store any leftovers in the refrigerator for later.
Extra Tips: For added crunch, consider mixing in some diced apples or grapes to the turkey salad. If you prefer a lighter dressing, Greek yogurt can be used in place of mayonnaise.
Be sure to choose sturdy lettuce leaves that can hold the filling well, and experiment with different types of lettuce for varied flavors and textures. These wraps are also great for meal prep; just keep the turkey salad and lettuce leaves separate until you’re ready to serve. Enjoy your healthy and delicious meal!
Chocolate Peppermint Bark

Title: Chocolate Peppermint Bark
Prep Time: 15 minutes
Cook Time: 10 minutes
Number of Servings: 12
Required Equipment List: Baking sheet, parchment paper, microwave-safe bowl, spatula, refrigerator
Cuisine Type: American
Chocolate Peppermint Bark is a festive and decadent treat that combines the rich flavors of dark and white chocolate with the invigorating essence of peppermint. This simple yet elegant dessert is perfect for holiday gatherings, gift-giving, or simply enjoying at home.
The vibrant layers of chocolate create a beautiful contrast, while the crushed peppermint candies add a delightful crunch and seasonal flair. Making this chocolate bark isn’t only easy but also a fun activity to involve friends and family in during the holidays.
With just a few ingredients and minimal effort, you can create a deliciously indulgent snack that captures the spirit of Christmas. Whether served as a dessert or used as a topping for ice cream, this Chocolate Peppermint Bark is sure to be a hit.
Ingredients:
- 8 ounces dark chocolate, chopped
- 8 ounces white chocolate, chopped
- 1 teaspoon peppermint extract
- 1/2 cup crushed peppermint candies (or candy canes)
- Additional crushed peppermint for garnish (optional)
Instructions:
- Line a baking sheet with parchment paper, ensuring it’s flat and smooth for easy release later on. This step is essential to prevent the bark from sticking to the sheet.
- In a microwave-safe bowl, combine the chopped dark chocolate. Microwave in 30-second intervals, stirring in between, until the chocolate is completely melted and smooth. Be careful not to overheat, as chocolate can burn easily.
- Once the dark chocolate is melted, stir in 1/2 teaspoon of peppermint extract for an invigorating flavor. Pour the melted chocolate onto the prepared baking sheet and spread it into an even layer using a spatula. Place it in the refrigerator for about 15-20 minutes to set.
- Meanwhile, melt the white chocolate in a separate microwave-safe bowl, following the same method as the dark chocolate. Once melted, stir in the remaining 1/2 teaspoon of peppermint extract.
- Remove the dark chocolate layer from the refrigerator once set. Pour the melted white chocolate over the dark chocolate layer and spread it evenly. Immediately sprinkle the crushed peppermint candies over the top before the white chocolate sets.
- Return the baking sheet to the refrigerator for another 30 minutes or until the bark is completely firm. Once set, break the bark into pieces and store it in an airtight container.
Extra Tips: For a more intense peppermint flavor, consider using peppermint oil instead of extract, but be sure to use it sparingly, as it’s much more potent. You can also experiment with drizzling melted chocolate over the top for an extra decorative touch.
This bark can be stored at room temperature or in the refrigerator, but be mindful of humidity, as it can cause the chocolate to bloom. Enjoy your delicious creation throughout the holiday season!
Holiday Bread Pudding
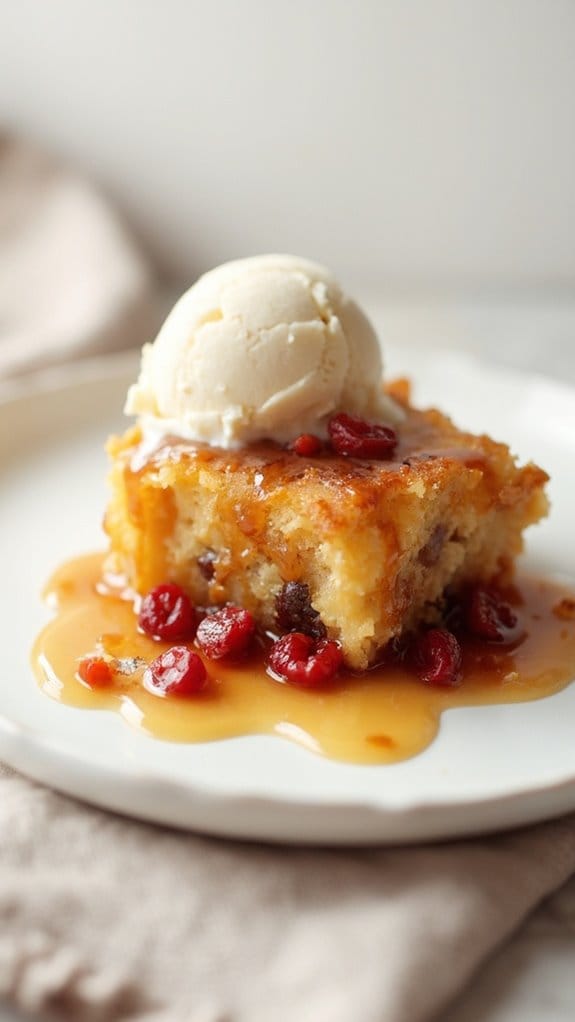
Title: Holiday Bread Pudding
Prep Time: 20 minutes
Cook Time: 45 minutes
Number of Servings: 8
Required Equipment List: Baking dish, mixing bowl, whisk, oven
Cuisine Type: American
Holiday Bread Pudding is a comforting and delicious dessert that transforms leftover holiday bread into a delightful treat. This recipe is perfect for utilizing stale bread, whether it’s from a festive loaf, brioche, or even panettone. The warm custard mixture, infused with spices like cinnamon and nutmeg, soaks into the bread, creating a rich and satisfying dish that’s perfect for the winter season.
Topped with a drizzle of warm caramel sauce or a scoop of vanilla ice cream, this bread pudding is sure to become a holiday favorite. This recipe not only makes use of leftover bread but also allows for endless customization. You can add dried fruits, nuts, or even chocolate chips to enhance the flavor and texture.
The result is a decadent dessert that’s easy to prepare and impressively delicious, making it a great addition to your holiday festivities or a cozy family gathering.
Ingredients:
- 6 cups cubed stale bread
- 4 large eggs
- 2 cups milk
- 1 cup heavy cream
- 1 cup granulated sugar
- 2 teaspoons vanilla extract
- 1 teaspoon ground cinnamon
- 1/2 teaspoon ground nutmeg
- 1/4 teaspoon salt
- 1 cup raisins or dried cranberries (optional)
- Butter (for greasing the baking dish)
Instructions:
- Preheat your oven to 350°F (175°C). Grease a 9×13-inch baking dish with butter to prevent sticking. Set aside while you prepare the custard mixture.
- In a large mixing bowl, whisk together the eggs, milk, heavy cream, sugar, vanilla extract, cinnamon, nutmeg, and salt until well combined. This will create a rich custard base for the bread pudding.
- Add the cubed stale bread to the custard mixture, making sure all pieces are well coated. If using, fold in the raisins or dried cranberries at this stage. Allow the mixture to sit for about 10 minutes to let the bread absorb the custard.
- Pour the bread mixture into the prepared baking dish, spreading it evenly. Press down gently on the bread to guarantee it’s submerged in the custard.
- Bake in the preheated oven for 40-45 minutes, or until the top is golden brown and a knife inserted in the center comes out clean. If the top browns too quickly, you can cover it loosely with aluminum foil.
- Once baked, remove the bread pudding from the oven and allow it to cool for a few minutes before serving. Drizzle with caramel sauce or serve with a scoop of vanilla ice cream for an extra indulgent treat.
Extra Tips: For added flavor, consider soaking the dried fruits in a splash of rum or whiskey before incorporating them into the pudding. You can also experiment with different spices, like cardamom or ginger, to create your own unique twist.
If you have leftover holiday pastries, feel free to mix them into the bread pudding for a delightful surprise. Enjoy this cozy dish as a comforting dessert or a sweet breakfast treat!
Spiced Eggnog French Toast

Title: Spiced Eggnog French Toast
Prep Time: 10 minutes
Cook Time: 15 minutes
Number of Servings: 4
Required Equipment List: Shallow dish, frying pan, spatula, whisk, measuring cups, measuring spoons
Cuisine Type: American
Spiced Eggnog French Toast is a delightful holiday breakfast that transforms leftover eggnog into a deliciously rich and creamy treat. The combination of eggnog, cinnamon, nutmeg, and vanilla creates a festive batter that soaks perfectly into slices of bread, resulting in a warm and comforting dish that’s perfect for the holiday season.
This recipe isn’t only simple but also an excellent way to use up leftover eggnog while impressing your family and friends with a gourmet breakfast.
This French toast is wonderfully versatile; you can serve it with a dusting of powdered sugar, a drizzle of maple syrup, or even a dollop of whipped cream for extra indulgence. Pair it with fresh fruit like berries or bananas for a pop of color and added flavor.
Whether it’s Christmas morning or a cozy winter weekend, this Spiced Eggnog French Toast will surely bring warmth and cheer to your breakfast table.
Ingredients:
- 1 cup eggnog
- 2 large eggs
- 1 teaspoon vanilla extract
- 1 teaspoon ground cinnamon
- 1/4 teaspoon ground nutmeg
- 1/4 teaspoon salt
- 8 slices of bread (thick-cut, like challah or brioche)
- Butter (for frying)
- Maple syrup (for serving)
- Powdered sugar (for garnish, optional)
Instructions:
- In a shallow dish, whisk together the eggnog, eggs, vanilla extract, cinnamon, nutmeg, and salt until well combined. This will be your soaking mixture for the bread.
- Preheat a frying pan over medium heat and add a tablespoon of butter, allowing it to melt and coat the bottom of the pan. You may need to add more butter as you cook the toast, depending on how many slices you’re making.
- Dip a slice of bread into the eggnog mixture, ensuring both sides are well coated but not overly soggy. Allow any excess liquid to drip off before placing it in the frying pan.
- Cook the soaked bread in the pan for about 3-4 minutes on each side, or until golden brown and cooked through. Repeat this process with the remaining slices of bread, adding more butter to the pan as needed.
- Once all the French toast slices are cooked, serve them warm with a dusting of powdered sugar and a drizzle of maple syrup. You can also top them with fresh fruit if desired.
Extra Tips: For an extra touch of flavor, consider adding a splash of bourbon or rum to the eggnog mixture for a festive kick. If you prefer a thicker crust, you can use stale bread, as it will absorb the eggnog mixture better.
Additionally, feel free to experiment with different spices, such as ginger or allspice, to personalize your French toast. Enjoy this delightful dish with a warm cup of coffee or hot chocolate for the perfect holiday morning!
Leftover Stuffing Casserole

Title: Leftover Stuffing Casserole
Prep Time: 15 minutes
Cook Time: 30 minutes
Number of Servings: 6
Required Equipment List: 9×13 inch baking dish, mixing bowl, spoon, oven
Cuisine Type: American
Leftover Stuffing Casserole is a fantastic way to transform your holiday stuffing into a comforting and hearty dish. This recipe combines leftover stuffing with eggs, cheese, and various vegetables to create a delicious casserole that’s perfect for breakfast, lunch, or dinner. The result is a flavorful and satisfying dish that allows you to enjoy those holiday flavors long after the celebrations have ended.
It’s also incredibly easy to prepare, making it ideal for busy weeknights. This casserole isn’t only versatile but also a great way to minimize food waste. You can customize it based on what you have on hand—add leftover turkey, vegetables, or even some gravy to elevate the flavors.
The cheesy, eggy goodness binds everything together, creating a delightful texture that will leave your taste buds singing. Top it off with fresh herbs or a sprinkle of your favorite cheese for an extra touch that will impress your family and friends.
Ingredients:
- 4 cups leftover stuffing
- 4 large eggs
- 1 cup milk
- 1 cup shredded cheese (cheddar or your choice)
- 1 cup cooked vegetables (such as spinach, mushrooms, or bell peppers)
- Salt and pepper to taste
- Fresh herbs for garnish (optional)
Instructions:
- Preheat your oven to 350°F (175°C). Grease a 9×13 inch baking dish with non-stick spray or butter to prevent sticking and make for easier cleanup.
- In a mixing bowl, combine the leftover stuffing, cooked vegetables, and half of the shredded cheese. Mix well to ascertain everything is evenly distributed throughout the stuffing.
- In another bowl, whisk together the eggs, milk, salt, and pepper until fully combined. Pour this egg mixture over the stuffing and vegetable mixture, stirring gently to combine.
- Transfer the stuffing mixture into the prepared baking dish, spreading it out evenly. Top with the remaining shredded cheese, making sure it covers the surface for a delicious, cheesy crust.
- Bake in the preheated oven for 25-30 minutes or until the casserole is set in the center and the cheese is melted and bubbly. You can check for doneness by inserting a knife into the center; it should come out clean.
- Once baked, remove the casserole from the oven and let it cool for a few minutes before slicing. Garnish with fresh herbs if desired and serve warm.
Extra Tips: To make this casserole even heartier, consider adding leftover meats like turkey or ham into the mixture. For added flavor, you can also mix in some spices like garlic powder or dried thyme.
This casserole is perfect for meal prep; simply store any leftovers in an airtight container in the fridge and reheat for an easy meal throughout the week. Enjoy your deliciously revamped holiday leftovers!
Gingerbread Cookie Trifle

Title: Gingerbread Cookie Trifle
Prep Time: 20 minutes
Cook Time: 0 minutes
Number of Servings: 6
Required Equipment List: Mixing bowl, trifle dish or individual cups, spatula, whisk
Cuisine Type: American
This Gingerbread Cookie Trifle is a festive and delightful dessert that makes perfect use of those leftover gingerbread cookies from your holiday celebrations. Layered with rich, spiced whipped cream and creamy vanilla pudding, this trifle isn’t only visually appealing but also a treat for the taste buds.
It’s a wonderful way to bring the warmth of gingerbread flavors to the table while showcasing the textures of the cookies against a backdrop of smooth, velvety cream. Assembling this trifle is incredibly simple, allowing you to whip it up in no time, and it can be made ahead of time, which is perfect for holiday gatherings.
The combination of gingerbread, whipped cream, and pudding creates a harmonious blend of flavors, making each bite a delightful experience. Whether served at a holiday party or as a special dessert for your family, this gingerbread cookie trifle is sure to become a new seasonal favorite.
Ingredients:
- 2 cups gingerbread cookies, crumbled
- 2 cups whipped cream (store-bought or homemade)
- 1 cup vanilla pudding (instant or homemade)
- 1 teaspoon ground cinnamon
- 1/2 teaspoon ground nutmeg
- 1/2 cup caramel sauce (optional)
- Mint leaves for garnish (optional)
Instructions:
- In a mixing bowl, prepare the vanilla pudding according to package instructions if using instant pudding, or make it from scratch. Once ready, set it aside to cool slightly while you prepare the whipped cream.
- In a separate bowl, gently fold the whipped cream with ground cinnamon and nutmeg to infuse it with warm spice flavors. This will add depth to the trifle and complement the gingerbread cookies beautifully.
- Begin layering the trifle by placing a layer of crumbled gingerbread cookies at the bottom of your trifle dish or individual cups. Follow this with a layer of spiced whipped cream, then a layer of vanilla pudding. Repeat the layers until all ingredients are used, finishing with a layer of whipped cream on top.
- If desired, drizzle caramel sauce over the top layer of whipped cream for added sweetness and a beautiful presentation. You can also sprinkle some additional crumbled gingerbread cookies on top for texture.
- Cover the trifle with plastic wrap and refrigerate for at least 2 hours before serving. This chilling time allows the flavors to meld and the cookies to soften slightly, enhancing the overall taste.
Extra Tips: For a fun twist, consider adding layers of fruits like sliced bananas or berries to your trifle for a burst of freshness. Additionally, if you prefer a stronger gingerbread flavor, you can enhance the whipped cream or pudding with a teaspoon of gingerbread spice mix.
Don’t hesitate to get creative with your garnishes—chopped nuts or chocolate shavings can also make excellent toppings! Enjoy your delicious gingerbread trifle!
Roasted Veggie Quesadillas

Title: Roasted Veggie Quesadillas
Prep Time: 10 minutes
Cook Time: 15 minutes
Number of Servings: 4
Required Equipment List: Skillet, spatula, cutting board, knife, cheese grater (optional)
Cuisine Type: Mexican-American
Roasted Veggie Quesadillas are a delicious and versatile dish that transforms your holiday leftovers into a satisfying meal. By utilizing roasted vegetables, such as bell peppers, zucchini, and onions, these quesadillas are packed with flavor and nutrition.
The addition of cheese creates a melty texture that complements the roasted veggies perfectly. With a crisp tortilla shell on the outside, each bite is a delightful contrast of textures and tastes, making it an ideal comfort food option for any time of the year.
This recipe isn’t only easy to prepare but also allows for customization based on what leftovers you have on hand. Feel free to swap in any roasted vegetables or cheese varieties you prefer.
Serve them with salsa, guacamole, or sour cream for a delicious dipping experience. Perfect for a quick lunch or dinner, Roasted Veggie Quesadillas are sure to become a favorite in your home.
Ingredients:
- 4 flour tortillas
- 2 cups roasted mixed vegetables (bell peppers, zucchini, onions)
- 1 cup shredded cheese (cheddar, Monterey Jack, or your choice)
- 1 tablespoon olive oil
- Salt and pepper to taste
- Salsa, guacamole, or sour cream for serving
Instructions:
- Start by heating a skillet over medium heat and adding the olive oil. Once hot, add the roasted mixed vegetables to the skillet and sauté for 2-3 minutes, season with salt and pepper to taste. This will help enhance their flavors before assembling the quesadillas.
- Place one tortilla in the skillet once the vegetables are heated through, and sprinkle half of the shredded cheese evenly over the tortilla. Then, add half of the sautéed vegetables on top of the cheese, followed by another layer of cheese to help everything stick together.
- Carefully place a second tortilla on top of the filled tortilla, pressing down gently. Cook for about 3-4 minutes until the bottom tortilla is golden brown and crispy. Use a spatula to carefully flip the quesadilla over and cook for an additional 3-4 minutes until the other side is also golden and the cheese has melted.
- Once cooked, remove the quesadilla from the skillet and let it cool for a minute before cutting it into wedges. Repeat the process with the remaining tortillas and filling to make a second quesadilla.
- Serve the quesadillas warm with your choice of salsa, guacamole, or sour cream for dipping. Enjoy the crispy, cheesy goodness!
Extra Tips: For extra flavor, consider adding spices such as cumin or chili powder to the roasted vegetables while sautéing. If you prefer a bit of heat, you can also add sliced jalapeños or hot sauce into the quesadilla filling.
Adjust the cooking time based on the heat of your stove, ensuring the tortillas are crispy and the cheese is fully melted. Enjoy your Roasted Veggie Quesadillas as a delightful way to repurpose your holiday leftovers!
Turkey Fried Rice

Title: Turkey Fried Rice
Prep Time: 10 minutes
Cook Time: 15 minutes
Number of Servings: 4
Required Equipment List: Large skillet or wok, spatula, measuring cups, cutting board, knife
Cuisine Type: Asian-inspired
Turkey Fried Rice is a fantastic way to utilize your holiday turkey leftovers while creating a delicious and satisfying meal. This dish combines tender pieces of turkey with colorful vegetables and fragrant rice, all stir-fried together for a quick and easy weeknight dinner. The addition of soy sauce and sesame oil brings depth and umami to the dish, making it a standout choice for any meal.
This recipe isn’t only economical but also highly customizable. You can easily swap in different vegetables based on what you have on hand, whether it’s peas, carrots, or bell peppers. Plus, it’s a great way to introduce some fresh flavors with herbs or green onions, adding brightness and texture. Enjoy this comforting fried rice as a main dish or as a delightful side.
Ingredients:
- 2 cups cooked rice (preferably day-old)
- 1 cup cooked turkey, diced
- 1 cup mixed vegetables (carrots, peas, corn)
- 2 eggs, beaten
- 3 tablespoons soy sauce
- 1 tablespoon sesame oil
- 2 green onions, sliced
- Salt and pepper to taste
- Cooking oil (for frying)
Instructions:
- Begin by heating a large skillet or wok over medium-high heat. Add a tablespoon of cooking oil and let it heat until shimmering. This will create a non-stick surface for your stir-fry and guarantee that the ingredients cook evenly.
- Once the oil is hot, pour in the beaten eggs and scramble them until fully cooked. Transfer the scrambled eggs to a plate and set aside. This step adds richness and protein to the dish.
- In the same skillet, add another tablespoon of cooking oil if necessary, then toss in the diced turkey and mixed vegetables. Stir-fry for about 3-4 minutes or until the vegetables are tender and the turkey is heated through.
- Add the cooked rice to the skillet, breaking up any clumps with your spatula. Pour the soy sauce and sesame oil over the rice, mixing everything together thoroughly. Stir-fry for an additional 3-5 minutes, allowing the rice to become slightly crispy and well-coated in the sauces.
- Finally, return the scrambled eggs to the skillet along with the sliced green onions. Toss everything together to combine and season with salt and pepper to taste. Cook for another minute to heat through, then remove from the heat.
Extra Tips: For the best texture, use day-old rice as it’s drier and less sticky, allowing for better frying. Feel free to add other proteins such as shrimp or tofu to diversify the dish. If you like a bit of spice, consider adding some sriracha or red pepper flakes during the cooking process. Serve your turkey fried rice with a sprinkle of sesame seeds for added crunch and flavor!
Cranberry Almond Granola Bars
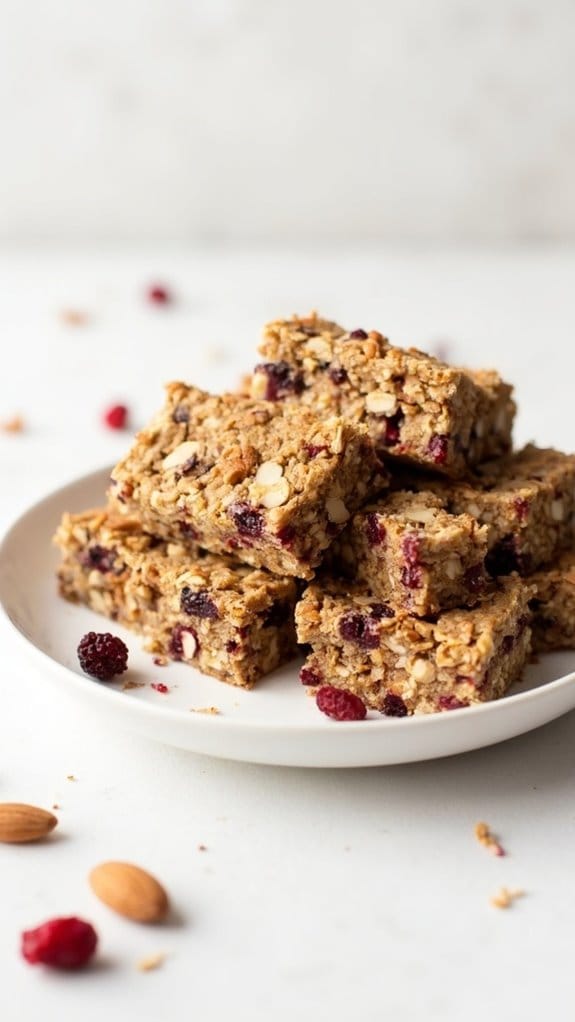
Title: Cranberry Almond Granola Bars
Prep Time: 15 minutes
Cook Time: 20 minutes
Number of Servings: 12
Required Equipment List: Mixing bowl, baking dish, oven, spatula, parchment paper
Cuisine Type: American
These Cranberry Almond Granola Bars are a delicious and healthy way to use up leftover holiday ingredients. Packed with chewy dried cranberries, crunchy almonds, and oats, they make for a perfect snack or breakfast option. The combination of flavors and textures makes these bars both satisfying and nutritious, providing a great energy boost that can be enjoyed on the go.
Making these granola bars is simple and requires just a few ingredients, most of which you may already have in your pantry. They can be customized with your favorite nuts or dried fruits, making them a versatile treat. Plus, they’re free from preservatives and added sugars that are often found in store-bought granola bars, allowing you to feel good about what you’re eating.
Ingredients:
- 2 cups rolled oats
- 1 cup almonds, chopped
- 1 cup dried cranberries
- 1/2 cup honey or maple syrup
- 1/4 cup nut butter (peanut, almond, or cashew)
- 1 teaspoon vanilla extract
- 1/2 teaspoon salt
Instructions:
- Preheat your oven to 350°F (175°C). Line an 8×8-inch baking dish with parchment paper, leaving some overhang on the sides to make it easier to lift the bars out once they’re cooled.
- In a large mixing bowl, combine the rolled oats, chopped almonds, dried cranberries, and salt. Stir the dry ingredients together until they’re evenly mixed.
- In a small saucepan over low heat, combine the honey (or maple syrup) and nut butter. Stir until the mixture is smooth and well combined, then remove from heat and add in the vanilla extract.
- Pour the warm nut butter mixture over the dry ingredients. Use a spatula to mix everything together until the oats and nuts are fully coated and the mixture holds together.
- Transfer the mixture to the prepared baking dish and press it down firmly into an even layer. This helps the bars hold their shape when cooled and cut.
- Bake in the preheated oven for 15-20 minutes, or until the edges are golden brown. Keep an eye on them to avoid over-baking, as they can become too hard.
- Remove the baking dish from the oven and allow the bars to cool completely in the dish. Once cooled, use the parchment paper to lift the bars out and place them on a cutting board. Cut into squares or rectangles for serving.
Extra Tips: For an extra flavor boost, consider adding a pinch of cinnamon to the dry ingredients or some chocolate chips for a sweet touch. These granola bars can be stored in an airtight container for up to a week, making them a great make-ahead snack.
Feel free to experiment with different nuts and dried fruits to suit your taste preferences or to use up any leftovers you have on hand. Enjoy!
Conclusion
Whether you’re transforming that turkey into a savory pot pie or whipping up sweet cranberry muffins, you’ve got endless possibilities to enjoy the flavors of the season. So, why let those leftovers languish in the fridge? Immerse yourself and get creative! You might just discover a new favorite dish that brings a little extra joy to your post-holiday meals. Happy cooking!

