No products in the cart.
27 Irresistible Christmas Dessert Recipes: From Classic Cookies to Indulgent Cakes
Ready to satisfy your sweet tooth? Immerse yourself in 27 irresistible Christmas dessert recipes that span from classic gingerbread cookies to lush eggnog cheesecakes. Each recipe bursts with festive flavors, perfect for creating lasting memories this holiday season. You can whip up spiced apple crisp or try some fudgy peppermint bark brownies, making your dessert table the talk of the gathering. Got a knack for decorating? You’ll love customizing cookies and cakes to impress your family and friends. Who said holiday baking can’t be fun? Stick around, and discover even more mouthwatering favorites to elevate your celebrations!
Contents
hide
Classic Gingerbread Cookies
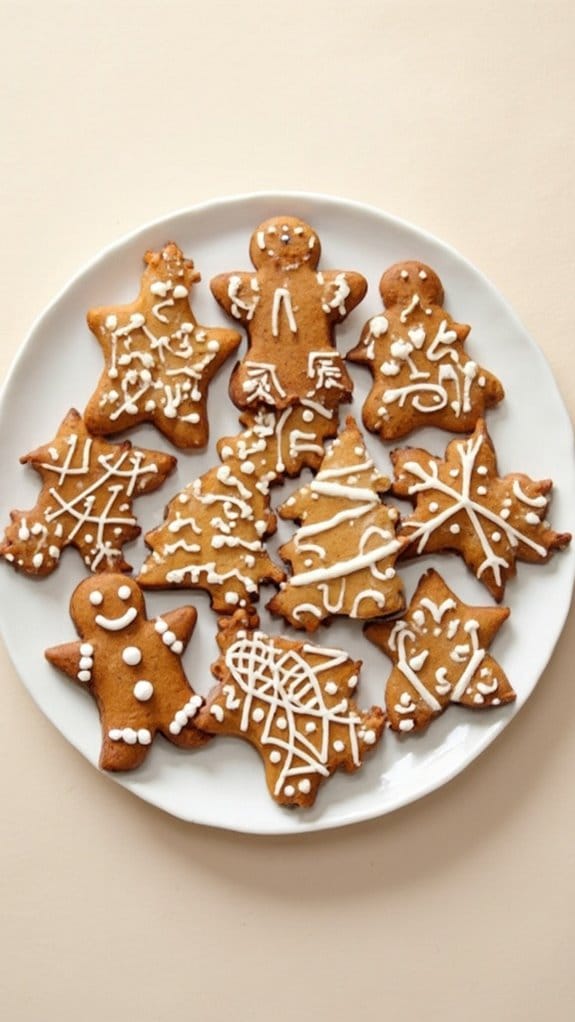
Title: Classic Gingerbread Cookies
Prep Time: 20 minutes
Cook Time: 10 minutes
Number of Servings: 24 cookies
Required Equipment List: Mixing bowl, measuring cups, measuring spoons, baking sheet, parchment paper, rolling pin, cookie cutters
Cuisine Type: American
Classic Gingerbread Cookies are a holiday favorite, known for their warm spices and delightful aroma that fills your kitchen as they bake. These cookies are perfect for decorating with icing, making them a fun activity for families and friends during the festive season.
Their rich flavor of molasses combined with a blend of spices such as ginger, cinnamon, and nutmeg creates a classic treat that’s both chewy and crisp. These cookies not only taste amazing but also bring a sense of nostalgia, as they’re often associated with holiday traditions and gatherings.
Whether you enjoy them plain, decorated, or as a part of a gingerbread house, they’re sure to add a festive touch to your celebrations. Baking gingerbread cookies is a wonderful way to get into the holiday spirit, and they also make great gifts or decorations for your holiday table.
Ingredients:
- 3 cups all-purpose flour
- 1 teaspoon baking soda
- 2 teaspoons ground ginger
- 1 teaspoon ground cinnamon
- 1/2 teaspoon ground nutmeg
- 1/4 teaspoon ground cloves
- 1/2 teaspoon salt
- 3/4 cup unsalted butter, softened
- 1 cup brown sugar, packed
- 1/2 cup unsulfured molasses
- 1 large egg
- Royal icing (for decorating, optional)
Instructions:
- In a mixing bowl, whisk together the flour, baking soda, ginger, cinnamon, nutmeg, cloves, and salt until well combined. Set this dry mixture aside as you prepare the wet ingredients.
- In a separate large bowl, cream together the softened butter and brown sugar using a mixer until light and fluffy. This should take about 2-3 minutes. Then, add the molasses and egg, mixing until fully incorporated.
- Gradually add the dry flour mixture to the wet ingredients, mixing on low speed until combined. The dough will be thick. If necessary, use your hands to knead it slightly until it comes together.
- Divide the dough into two equal parts, flatten each into a disk, and wrap in plastic wrap. Refrigerate for at least 1 hour, or until firm enough to roll out.
- Preheat your oven to 350°F (175°C) and line baking sheets with parchment paper. On a lightly floured surface, roll out one disk of dough to about 1/4 inch thickness. Use cookie cutters to cut out shapes and place them on the prepared baking sheets.
- Bake the cookies in the preheated oven for 8-10 minutes, or until the edges are firm but the centers are still soft. Remove from the oven and allow them to cool on the baking sheets for a few minutes before transferring to wire racks to cool completely.
- Once cooled, you can decorate the gingerbread cookies with royal icing or enjoy them plain as a delicious holiday treat.
Extra Tips: For a more intense flavor, consider adding finely chopped crystallized ginger to the dough. If you want your cookies to have a softer texture, make sure not to overbake them; they should still be slightly soft in the center when you take them out.
When decorating, let your icing dry completely before stacking the cookies to avoid smudging. Enjoy the festive spirit as you bake and decorate these delightful gingerbread cookies!
Peppermint Bark Brownies
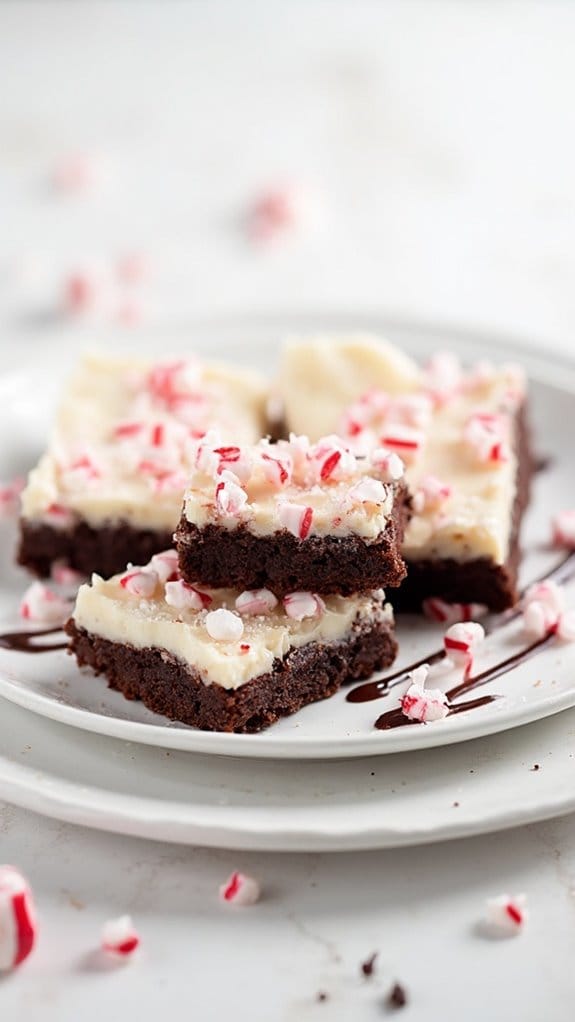
Title: Peppermint Bark Brownies
Prep Time: 20 minutes
Cook Time: 30 minutes
Number of Servings: 12
Required Equipment List: 9×13 inch baking pan, mixing bowls, whisk, spatula, double boiler or microwave-safe bowl, parchment paper
Cuisine Type: American
These Peppermint Bark Brownies are a festive twist on the classic brownie, perfect for the holiday season. With a rich chocolate base that’s fudgy and dense, each bite is infused with the invigorating flavor of peppermint. Topped with a layer of creamy white chocolate and crushed peppermint candies, these brownies not only taste incredible but also look stunning, making them a perfect addition to your holiday dessert table or a thoughtful gift for friends and family.
The combination of dark chocolate and peppermint creates a delightful balance, while the white chocolate layer adds sweetness and a beautiful contrast. Easy to make and sure to impress, these brownies are a fun way to celebrate the season. Whether you serve them at a holiday gathering or enjoy them with a cozy cup of cocoa, they’re bound to become a seasonal favorite.
Ingredients:
- 1 cup unsalted butter
- 2 cups granulated sugar
- 4 large eggs
- 2 teaspoons vanilla extract
- 1 cup all-purpose flour
- 1 cup unsweetened cocoa powder
- 1/2 teaspoon salt
- 1/2 teaspoon baking powder
- 1 cup white chocolate chips
- 1/2 teaspoon peppermint extract
- Crushed peppermint candies (for topping)
Instructions:
- Preheat your oven to 350°F (175°C). Line a 9×13 inch baking pan with parchment paper, allowing some overhang for easy removal later. This will help to guarantee that the brownies bake evenly and can be easily lifted out of the pan.
- In a medium saucepan, melt the unsalted butter over low heat. Once melted, remove it from the heat and stir in the granulated sugar until combined. Allow the mixture to cool slightly before adding the eggs and vanilla extract. Whisk until everything is well mixed.
- In a separate bowl, sift together the flour, cocoa powder, salt, and baking powder. Gradually add the dry ingredients to the wet ingredients, stirring until just combined. Be careful not to overmix; the batter should be thick and fudgy.
- Pour the brownie batter into the prepared baking pan, smoothing it out with a spatula. Bake in the preheated oven for 25-30 minutes, or until a toothpick inserted in the center comes out with a few moist crumbs. Allow the brownies to cool completely in the pan.
- While the brownies are cooling, prepare the peppermint bark topping. In a double boiler or microwave-safe bowl, melt the white chocolate chips with the peppermint extract until smooth. Stir frequently to avoid burning. Once melted, pour the white chocolate over the cooled brownies and spread it evenly.
- Immediately sprinkle the crushed peppermint candies over the white chocolate layer before it sets. Allow the brownies to cool completely and the white chocolate to harden before lifting them out of the pan and cutting them into squares.
Extra Tips: For an extra touch of festivity, consider drizzling some melted dark chocolate over the top of the white chocolate layer before adding the crushed peppermint candies. If you can’t find peppermint candies, crushed candy canes work beautifully too.
These brownies can be stored in an airtight container for up to a week, making them a perfect make-ahead dessert for holiday parties. Enjoy the delightful combination of flavors!
Eggnog Cheesecake
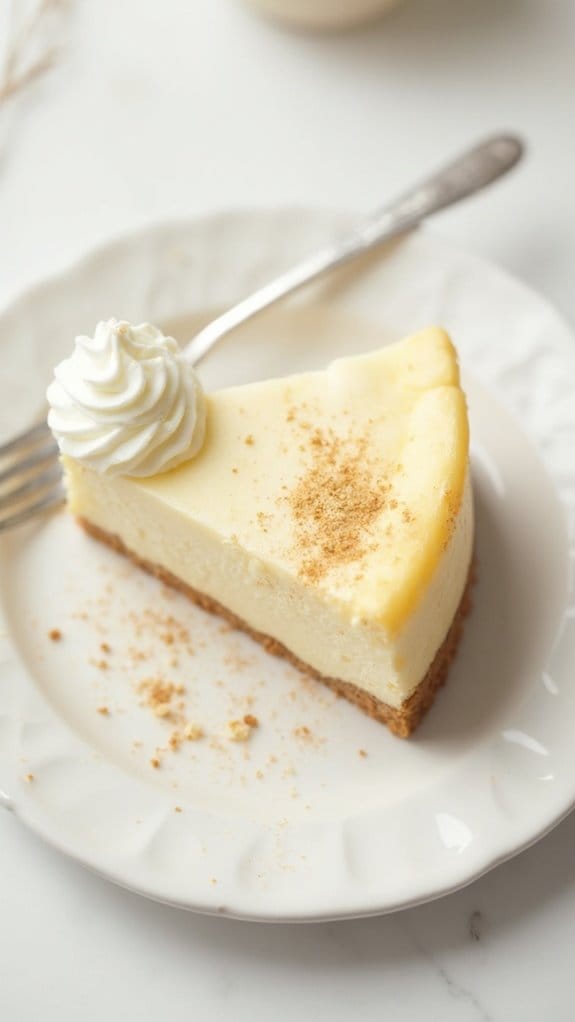
Title: Eggnog Cheesecake
Prep Time: 20 minutes
Cook Time: 60 minutes
Number of Servings: 12
Required Equipment List: 9-inch springform pan, mixing bowls, electric mixer, spatula, oven
Cuisine Type: American
Eggnog Cheesecake is a delightful holiday dessert that combines the creamy richness of cheesecake with the festive flavors of eggnog, nutmeg, and vanilla. This decadent dessert is perfect for holiday gatherings, family celebrations, or simply indulging in the spirit of the season.
The creamy filling sits atop a buttery graham cracker crust, making each slice a delightful experience that captures the essence of Christmas in every bite. Baking this cheesecake is a bit of a labor of love, but the end result is well worth the effort.
The use of eggnog gives it a distinct taste that pairs beautifully with the smooth texture of the cream cheese, while the nutmeg adds a warm spice that makes it feel like a cozy winter treat. Serve it chilled, topped with whipped cream or a sprinkle of nutmeg for an elegant finish.
Ingredients:
- 1 ½ cups graham cracker crumbs
- ½ cup unsalted butter, melted
- 2 tablespoons sugar
- 4 (8-ounce) packages cream cheese, softened
- 1 cup sugar
- 1 cup eggnog
- 4 large eggs
- 1 teaspoon vanilla extract
- 1 teaspoon ground nutmeg
- Whipped cream (for serving, optional)
Instructions:
- Preheat the oven to 325°F (160°C). In a mixing bowl, combine the graham cracker crumbs, melted butter, and 2 tablespoons of sugar. Mix until the crumbs are evenly coated, then press the mixture firmly into the bottom of a 9-inch springform pan to form the crust. Set aside.
- In a large mixing bowl, beat the softened cream cheese with an electric mixer until smooth and creamy. Gradually add in 1 cup of sugar, mixing until well combined and there are no lumps.
- Mix in the eggnog, ensuring it’s fully incorporated. Then add the eggs, one at a time, mixing on low speed after each addition until just combined. Be careful not to overmix. Finally, stir in the vanilla extract and ground nutmeg.
- Pour the cheesecake filling over the prepared crust in the springform pan, smoothing the top with a spatula. Tap the pan gently on the counter to release any air bubbles.
- Bake in the preheated oven for 55-60 minutes, or until the edges are set and the center is slightly jiggly. Turn off the oven and crack the door open, allowing the cheesecake to cool in the oven for about 1 hour. This helps prevent cracking.
- Once cooled, refrigerate the cheesecake for at least 4 hours, or preferably overnight, to let it set completely. Before serving, remove the sides of the springform pan and top with whipped cream and a sprinkle of nutmeg if desired.
Extra Tips: To enhance the flavor, consider using a spiced rum eggnog for an extra festive touch. Be sure to let the cheesecake cool slowly in the oven to minimize cracks on the surface.
If you want to make this a day ahead, it holds well in the fridge, allowing the flavors to deepen and develop further. Enjoy your delicious Eggnog Cheesecake this holiday season!
Cranberry Orange Muffins
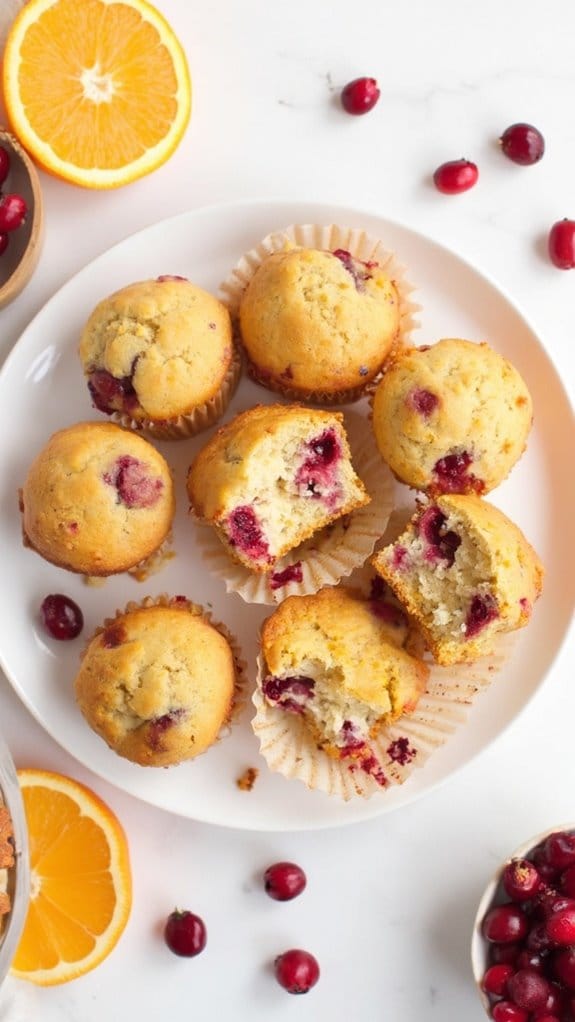
Title: Cranberry Orange Muffins
Prep Time: 15 minutes
Cook Time: 20 minutes
Number of Servings: 12
Required Equipment List: Muffin tin, mixing bowls, whisk, measuring cups, measuring spoons, spatula
Cuisine Type: American
Cranberry Orange Muffins are a delightful seasonal treat that combine the tartness of fresh cranberries with the bright, citrusy flavor of oranges. These muffins are perfect for breakfast, brunch, or as a snack, providing a wonderful balance of sweet and tangy flavors.
The zesty orange juice and zest infuse the muffins with a revitalizing taste that complements the chewy cranberries beautifully, making them a holiday favorite or a year-round indulgence.
These muffins aren’t only delicious but also easy to prepare, making them a great option for busy mornings or holiday gatherings. With simple ingredients and straightforward instructions, you can whip up a batch of these muffins in no time. Enjoy them warm from the oven or store them for a quick grab-and-go snack throughout the week.
Ingredients:
- 2 cups all-purpose flour
- 1 cup fresh cranberries (or frozen, thawed)
- 1/2 cup granulated sugar
- 1/2 cup orange juice
- Zest of 1 orange
- 1/4 cup vegetable oil
- 1 large egg
- 1 tablespoon baking powder
- 1/2 teaspoon salt
- 1/2 teaspoon cinnamon (optional)
Instructions:
- Preheat your oven to 375°F (190°C) and line a muffin tin with paper liners or grease it lightly with non-stick spray to prevent sticking.
- In a large mixing bowl, whisk together the flour, sugar, baking powder, salt, and cinnamon (if using). Make sure all the dry ingredients are well combined.
- In a separate bowl, mix together the orange juice, orange zest, vegetable oil, and egg. Whisk until the mixture is smooth and fully combined.
- Pour the wet ingredients into the dry ingredients and gently fold them together using a spatula. Be careful not to overmix; it’s okay if there are a few lumps remaining.
- Gently fold in the fresh or thawed cranberries until evenly distributed throughout the batter.
- Divide the batter evenly among the prepared muffin cups, filling each about two-thirds full. Bake in the preheated oven for 18-20 minutes, or until a toothpick inserted into the center of a muffin comes out clean.
- Once baked, remove the muffins from the oven and let them cool in the tin for a few minutes before transferring them to a wire rack to cool completely.
Extra Tips: To enhance the flavor of your muffins, consider adding a sprinkle of coarse sugar on top before baking for a sweet crunch.
If you’re using frozen cranberries, don’t thaw them before adding to the batter; this helps prevent the muffins from turning a pink hue.
These muffins store well in an airtight container for up to three days or can be frozen for longer storage. Enjoy with a pat of butter or a drizzle of honey for an extra treat!
Chocolate Chip Snowballs
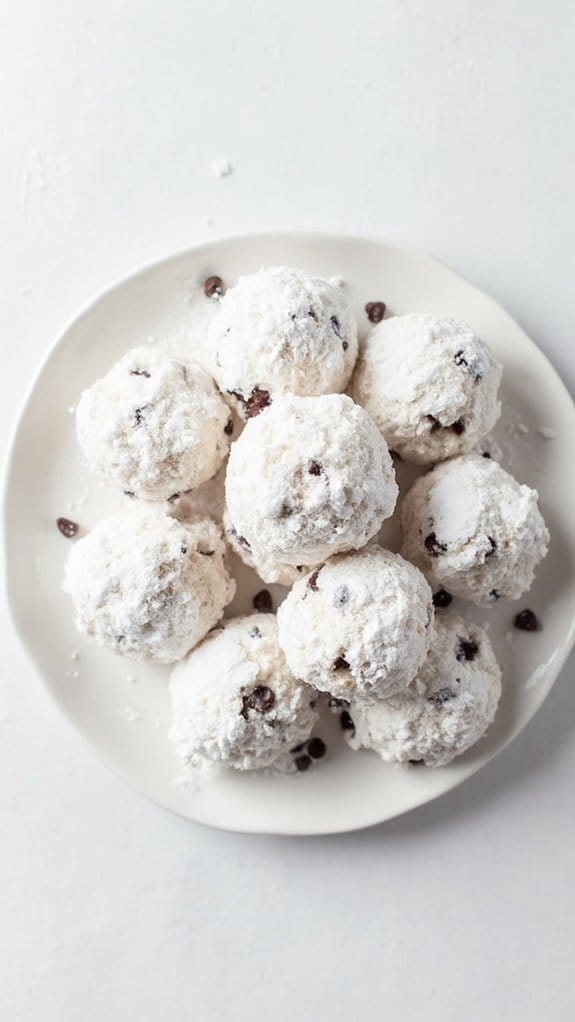
Title: Chocolate Chip Snowballs
Prep Time: 15 minutes
Cook Time: 12 minutes
Number of Servings: 24
Required Equipment List: Mixing bowl, baking sheet, parchment paper, whisk, measuring cups and spoons
Cuisine Type: American
Chocolate Chip Snowballs are a delightful festive treat that perfectly captures the essence of the holiday season. These buttery, melt-in-your-mouth cookies are studded with chocolate chips and rolled in powdered sugar, resembling delightful little snowballs.
With their light texture and sweet flavor, they’re sure to please crowds at holiday gatherings or serve as a sweet surprise in a cookie tin. The beauty of these snowballs lies in their simplicity. Made with basic pantry ingredients, they come together quickly and are perfect for baking with family.
Once they come out of the oven, the cookies are immediately rolled in powdered sugar, creating a snowy exterior that makes them look as charming as they taste. Enjoy them with a cup of hot cocoa or coffee for a truly festive experience.
Ingredients:
- 1 cup unsalted butter, softened
- 1/2 cup powdered sugar (plus extra for rolling)
- 1 teaspoon vanilla extract
- 2 cups all-purpose flour
- 1/4 teaspoon salt
- 1 cup semi-sweet chocolate chips
- 1/2 cup chopped nuts (optional)
Instructions:
- Preheat your oven to 350°F (175°C) and line a baking sheet with parchment paper to prevent sticking and enable easy cleanup.
- In a mixing bowl, cream together the softened butter and 1/2 cup powdered sugar using a whisk until light and fluffy. Add the vanilla extract and mix until well combined.
- Gradually add the flour and salt to the butter mixture, stirring until just combined. Be careful not to overmix, as this can make the cookies tough.
- Fold in the chocolate chips and nuts (if using) until evenly distributed throughout the dough. The dough should be soft but manageable.
- Using a tablespoon or cookie scoop, portion out the dough and roll it into small balls, about 1 inch in diameter. Place them on the prepared baking sheet, leaving some space between each cookie.
- Bake in the preheated oven for 10-12 minutes, or until the edges are lightly golden. Remove from the oven and let them cool slightly on the baking sheet before transferring them to a wire rack.
- While the cookies are still warm, roll each one in powdered sugar until fully coated. Allow them to cool completely before serving or storing.
Extra Tips: For an extra festive touch, consider adding a pinch of cinnamon or nutmeg to the dough for some warm spice flavor.
If you find your dough is too soft to handle, chill it in the refrigerator for about 30 minutes before rolling. These snowballs can be stored in an airtight container for up to a week, making them perfect for holiday gifting!
Sugar Cookie Cutouts

Title: Sugar Cookie Cutouts
Prep Time: 20 minutes
Cook Time: 10 minutes
Number of Servings: 24
Required Equipment List: Mixing bowl, rolling pin, cookie cutters, baking sheet, parchment paper, cooling rack
Cuisine Type: American
Sugar Cookie Cutouts are a festive classic that brings joy to the holiday season. These cookies are soft, chewy, and can be shaped into various fun designs using cookie cutters, making them perfect for decorating and gifting. The subtle sweetness of these cookies is enhanced by a hint of vanilla, creating a delightful treat that everyone will love.
Once baked, they can be frosted and adorned with colorful sprinkles, adding an extra touch of holiday cheer. This recipe isn’t only simple but also versatile. You can customize the flavors by adding different extracts or spices, and the dough can be prepared ahead of time and stored in the refrigerator for a quick baking session.
Whether you’re hosting a holiday party or just looking to spread some festive spirit, these Sugar Cookie Cutouts are sure to become a cherished tradition in your home.
Ingredients:
- 2 3/4 cups all-purpose flour
- 1 teaspoon baking soda
- 1/2 teaspoon baking powder
- 1 cup unsalted butter, softened
- 1 1/2 cups white sugar
- 1 egg
- 1 teaspoon vanilla extract
- 1/2 teaspoon almond extract (optional)
- 3 to 4 tablespoons milk
- Decorating sugar or icing (for finishing)
Instructions:
- Preheat your oven to 375°F (190°C). Line a baking sheet with parchment paper to prevent the cookies from sticking and to guarantee easy cleanup.
- In a mixing bowl, whisk together the flour, baking soda, and baking powder. Set this mixture aside as you prepare the wet ingredients.
- In a separate bowl, cream together the softened butter and white sugar until the mixture is light and fluffy. This will take about 2-3 minutes with an electric mixer.
- Beat in the egg, vanilla extract, and almond extract (if using) until well blended. Gradually add the dry flour mixture, mixing just until incorporated. If the dough is too crumbly, add milk one tablespoon at a time until it holds together.
- Roll out the dough on a lightly floured surface to about 1/4 inch thick. Use cookie cutters to cut out shapes and place them onto the prepared baking sheet.
- Bake in the preheated oven for 8 to 10 minutes or until the edges are lightly golden. Remove from the oven and allow the cookies to cool on the baking sheet for a few minutes before transferring them to a cooling rack.
- Once cooled, decorate the cookies with icing or sprinkle with decorating sugar as desired. Let the decorations set before storing.
Extra Tips: To achieve perfectly shaped cookies, make sure to chill the dough for at least 30 minutes before rolling it out. This helps the cookies maintain their shape during baking.
If you’re decorating with icing, consider using a piping bag for more intricate designs. Store the baked cookies in an airtight container to keep them fresh, and they can also be frozen for longer storage, making them perfect for preparing ahead of time for the holidays. Enjoy your baking!
Red Velvet Cupcakes
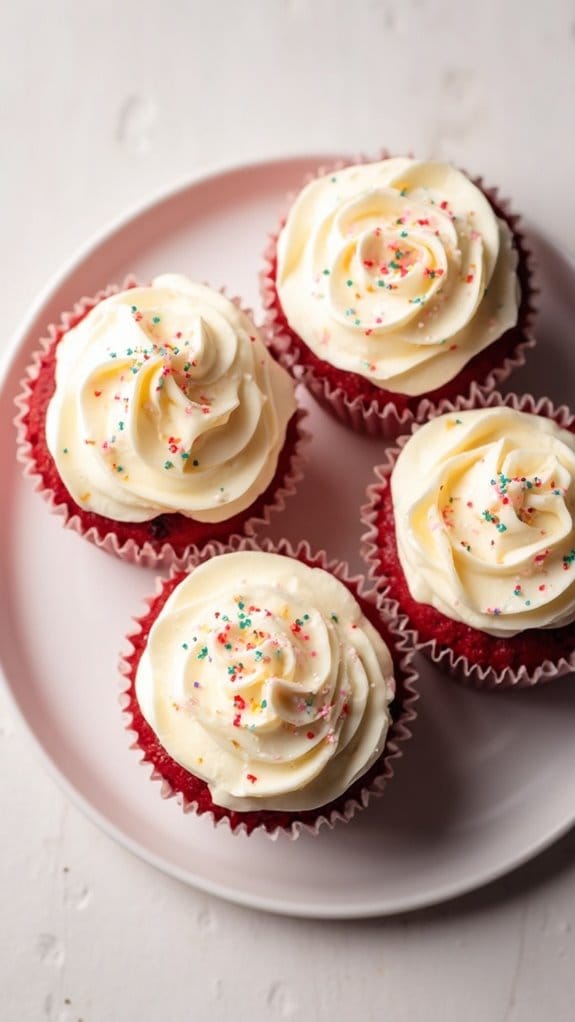
Title: Red Velvet Cupcakes
Prep Time: 20 minutes
Cook Time: 20 minutes
Number of Servings: 12
Required Equipment List: Muffin tin, mixing bowls, electric mixer, measuring cups, measuring spoons, cooling rack
Cuisine Type: American
Red Velvet Cupcakes are a festive and delicious treat that’s perfect for any holiday celebration. These vibrant red cupcakes have a subtle cocoa flavor and a velvety texture that makes them a favorite among dessert lovers. Topped with a rich cream cheese frosting, these cupcakes aren’t only visually stunning but also incredibly indulgent. Their striking red color will add a pop of cheer to your holiday dessert table.
Making red velvet cupcakes from scratch is simpler than it may seem. This recipe uses common ingredients that you likely have on hand, and the process is straightforward. Whether you’re baking for a Christmas gathering or simply treating yourself and loved ones, these cupcakes are sure to impress with their unique flavor and festive appearance.
Ingredients:
- 1 ½ cups all-purpose flour
- 1 cup granulated sugar
- 1 teaspoon baking soda
- 1 teaspoon salt
- 1 teaspoon cocoa powder
- 1 cup vegetable oil
- 1 cup buttermilk, room temperature
- 2 large eggs, room temperature
- 2 tablespoons red food coloring
- 1 teaspoon vanilla extract
- 1 teaspoon white vinegar
For the Cream Cheese Frosting:
- 8 ounces cream cheese, softened
- ½ cup unsalted butter, softened
- 4 cups powdered sugar
- 1 teaspoon vanilla extract
- Pinch of salt
Instructions:
- Preheat your oven to 350°F (175°C) and line a muffin tin with cupcake liners. This will guarantee that the cupcakes don’t stick to the pan and will make it easy to remove them once baked.
- In a large mixing bowl, sift together the flour, sugar, baking soda, salt, and cocoa powder. Sifting helps to combine the dry ingredients evenly and provides a lighter texture to the cupcakes.
- In another bowl, whisk together the vegetable oil, buttermilk, eggs, food coloring, vanilla extract, and vinegar until well combined. The vinegar will react with the baking soda to create a fluffy texture in the cupcakes.
- Gradually add the wet ingredients to the dry ingredients, mixing with an electric mixer on medium speed until just combined. Be careful not to overmix, as this can lead to dense cupcakes.
- Divide the batter evenly among the cupcake liners, filling each about two-thirds full. Bake in the preheated oven for 18-20 minutes, or until a toothpick inserted into the center of a cupcake comes out clean.
- Once baked, remove the cupcakes from the oven and allow them to cool in the pan for about 5 minutes before transferring them to a cooling rack to cool completely.
- For the cream cheese frosting, beat the softened cream cheese and butter together in a mixing bowl until smooth and creamy. Gradually add the powdered sugar, vanilla extract, and a pinch of salt, mixing until well blended.
- Once the cupcakes are completely cool, frost them generously with the cream cheese frosting using a piping bag or a spatula. Decorate with sprinkles or festive decorations, if desired.
Extra Tips: To enhance the flavor of your red velvet cupcakes, consider adding a teaspoon of espresso powder to the dry ingredients to deepen the cocoa flavor. Confirm that your ingredients are at room temperature for better mixing and a smoother batter. For an added touch, you can sprinkle crushed pecans or walnuts on top of the cream cheese frosting for a delightful crunch. Enjoy your festive baking!
Pecan Pie Bars
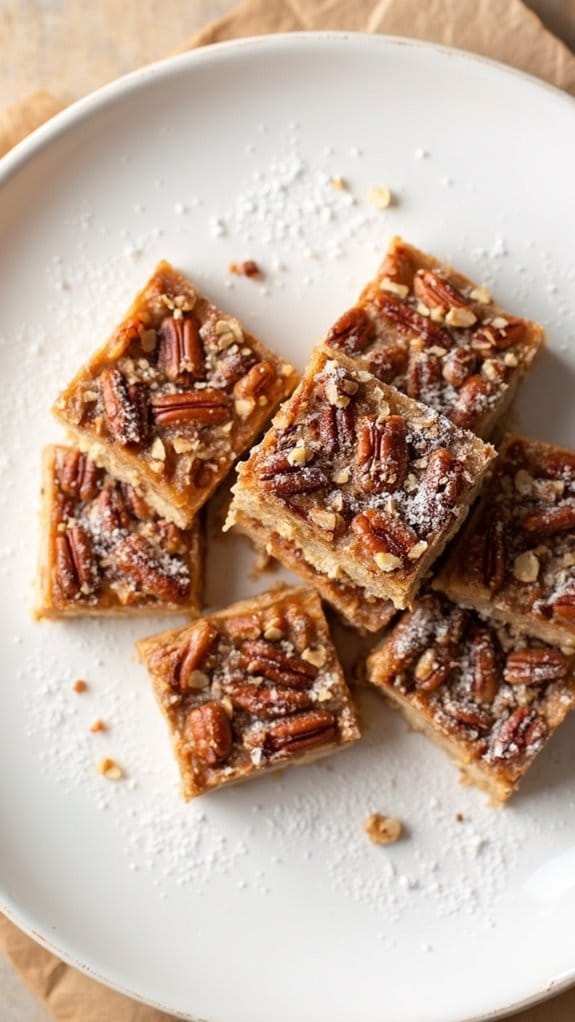
Title: Pecan Pie Bars
Prep Time: 15 minutes
Cook Time: 25 minutes
Number of Servings: 12
Required Equipment List: Baking dish, mixing bowl, whisk, measuring cups, measuring spoons, oven
Cuisine Type: American
Pecan Pie Bars are a delightful twist on the traditional pecan pie, offering all the rich and nutty flavors in a convenient bar form. These bars feature a buttery, crumbly crust that perfectly complements the gooey, caramel-like filling packed with crunchy pecans.
Ideal for holiday gatherings or as a sweet treat to enjoy at home, these bars are sure to be a hit with both family and friends. The preparation is simple, requiring a few basic ingredients that come together quickly.
Once baked, these bars can be cut into squares and served as a delightful dessert or snack. The combination of sweet and nutty flavors, along with the rich texture, makes these Pecan Pie Bars a perfect addition to your holiday dessert table or any special occasion.
Ingredients:
- 1 cup unsalted butter, softened
- 1/2 cup granulated sugar
- 1/2 cup brown sugar, packed
- 2 cups all-purpose flour
- 1/4 teaspoon salt
- 3 large eggs
- 1 cup corn syrup
- 1 teaspoon vanilla extract
- 2 cups pecans, chopped
Instructions:
- Preheat your oven to 350°F (175°C). Grease a 9×13 inch baking dish.
- In a mixing bowl, cream together the softened butter, granulated sugar, and brown sugar until the mixture is light and fluffy. This should take about 2-3 minutes using a hand mixer or whisk.
- Gradually add the flour and salt to the butter mixture, mixing until just combined. The dough will be crumbly but should hold together when pressed. Press this mixture evenly into the bottom of the prepared baking dish to form the crust.
- In another bowl, whisk together the eggs, corn syrup, and vanilla extract until combined. Stir in the chopped pecans, ensuring they’re evenly distributed throughout the filling mixture.
- Pour the pecan filling over the crust, spreading it evenly. Bake in the preheated oven for about 25 minutes, or until the filling is set and the top is golden brown. Make sure to keep an eye on it to avoid over-baking.
- Once baked, remove from the oven and allow the bars to cool completely in the baking dish. Once cooled, cut into squares and serve.
Extra Tips: For an extra touch of flavor, consider adding a teaspoon of bourbon or maple syrup to the filling mixture. You can also toast the pecans before adding them to enhance their flavor.
These bars are best stored in an airtight container at room temperature for up to a week, making them a great make-ahead dessert option for your holiday festivities.
Spiced Apple Crisp
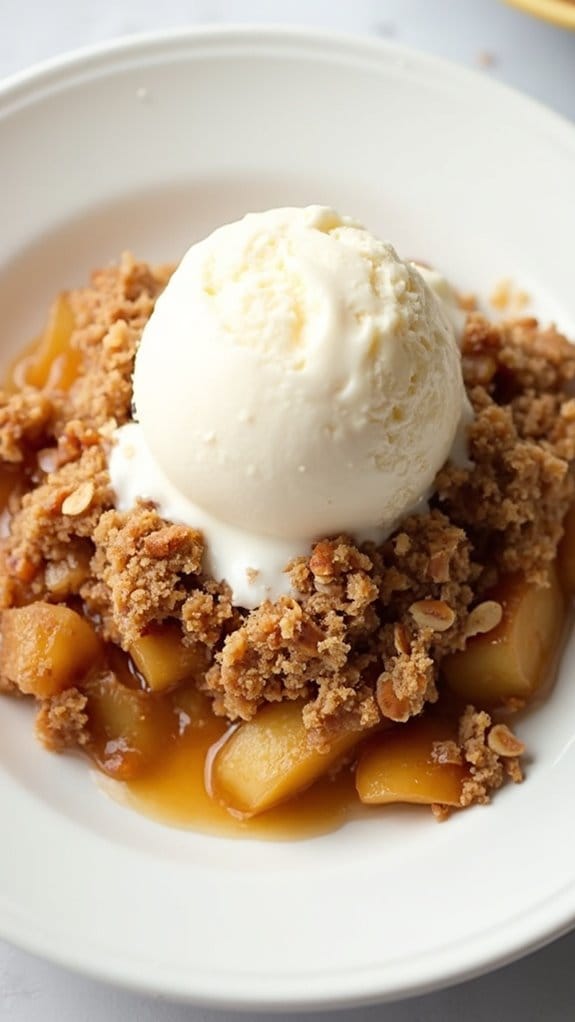
Title: Spiced Apple Crisp
Prep Time: 15 minutes
Cook Time: 45 minutes
Number of Servings: 8
Required Equipment List: Baking dish, mixing bowl, oven, knife, cutting board, whisk
Cuisine Type: American
Spiced Apple Crisp is a warm and comforting dessert that celebrates the flavors of fall with its aromatic spices and sweet, juicy apples. The dish features tender apples coated in a blend of cinnamon, nutmeg, and brown sugar, all topped with a crunchy oat and pecan crumble. This dessert is perfect for holiday gatherings or cozy family dinners, providing a delightful contrast between the warm, spiced fruit and the crisp topping.
Served warm with a scoop of vanilla ice cream or a dollop of whipped cream, it’s a dessert that’s sure to please everyone at the table. This recipe isn’t only delicious but also versatile, allowing you to use different types of apples based on your preference or what you have on hand. Granny Smith apples give a nice tartness, while Honeycrisp or Fuji apples add sweetness.
The crisp topping, made with oats, flour, and nuts, provides a satisfying crunch that complements the soft apples beautifully. Easy to prepare and bake, Spiced Apple Crisp is a go-to dessert for any occasion.
Ingredients:
- 6 cups apples, peeled, cored, and sliced
- 1 tablespoon lemon juice
- 1/2 cup brown sugar
- 1 teaspoon ground cinnamon
- 1/4 teaspoon ground nutmeg
- 1/4 teaspoon salt
- 1 cup rolled oats
- 1/2 cup all-purpose flour
- 1/2 cup chopped pecans
- 1/2 cup unsalted butter, melted
Instructions:
- Preheat your oven to 350°F (175°C). In a large mixing bowl, combine the sliced apples with lemon juice, brown sugar, cinnamon, nutmeg, and salt. Toss the apples until they’re well coated with the sugar and spices.
- Transfer the apple mixture to a greased baking dish, spreading it evenly across the bottom. This will be the base of your crisp, allowing the flavors to meld as it bakes.
- In the same mixing bowl, combine rolled oats, flour, chopped pecans, and melted butter. Stir until the mixture is crumbly and well combined. This will form the topping for your apple crisp.
- Evenly sprinkle the oat mixture over the apple filling in the baking dish. Make sure to cover the apples completely for a nice, crunchy texture.
- Bake in the preheated oven for 35-45 minutes or until the apples are tender and the topping is golden brown. Keep an eye on it to prevent over-browning, and cover with foil if necessary.
- Once done, remove the apple crisp from the oven and allow it to cool for a few minutes before serving. For a delicious finish, serve warm with vanilla ice cream or whipped cream on top.
Extra Tips: For an extra layer of flavor, consider adding a tablespoon of vanilla extract to the apple mixture or a pinch of ground ginger for additional warmth. You can also experiment with different nuts in the topping – walnuts or almonds work well too.
If you have leftovers, store them in an airtight container in the refrigerator for up to three days; simply reheat in the oven or microwave before serving. Enjoy this delightful dessert that captures the essence of the season!
Chocolate Peppermint Layer Cake
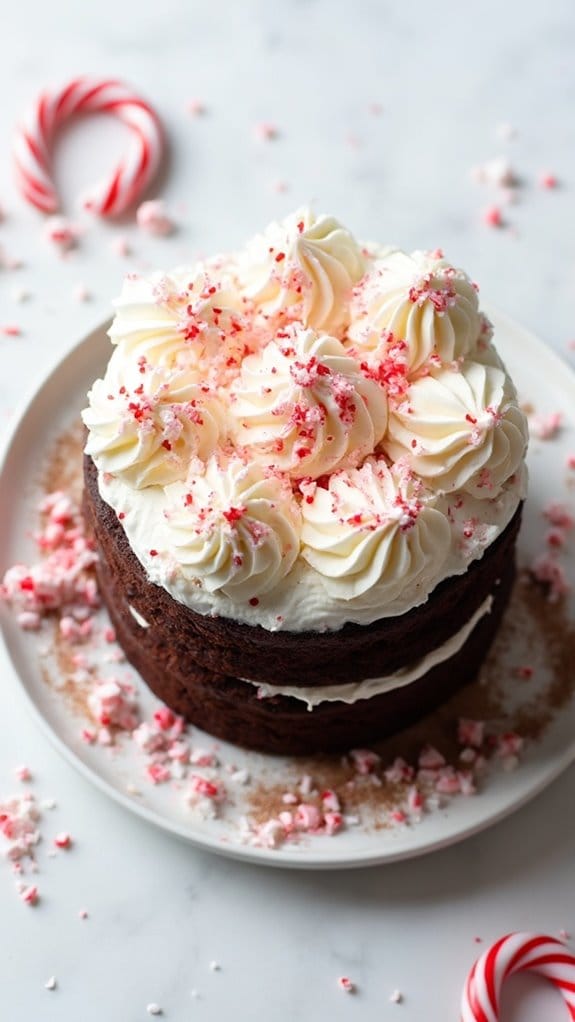
Title: Chocolate Peppermint Layer Cake
Prep Time: 30 minutes
Cook Time: 35 minutes
Number of Servings: 10
Required Equipment List: Two 9-inch round cake pans, mixing bowls, electric mixer, spatula, cooling rack
Cuisine Type: American
This Chocolate Peppermint Layer Cake is a festive showstopper for any holiday gathering. With rich, moist chocolate layers infused with a hint of peppermint, this cake combines the classic flavors of Christmas into a delightful dessert.
The layers are generously frosted with creamy peppermint buttercream and topped with crushed candy canes, making it as visually appealing as it’s delicious. This cake is sure to become a holiday favorite, bringing joy and sweetness to your celebrations.
Perfect for both the chocolate lover and those who enjoy a revitalizing minty twist, this cake is a great way to impress your guests. The combination of chocolate and peppermint is a classic pairing that resonates with the spirit of the season.
Whether served at a festive dinner or as a centerpiece at a holiday party, this layer cake is bound to create lasting memories and satisfy sweet cravings.
Ingredients:
- 1 ¾ cups all-purpose flour
- 1 ½ cups granulated sugar
- ¾ cup unsweetened cocoa powder
- 1 ½ teaspoons baking powder
- 1 ½ teaspoons baking soda
- 1 teaspoon salt
- 2 large eggs
- 1 cup whole milk
- ½ cup vegetable oil
- 2 teaspoons vanilla extract
- 1 cup boiling water
- 1 teaspoon peppermint extract
- 1 cup unsalted butter, softened
- 4 cups powdered sugar
- 2 tablespoons heavy cream
- Crushed candy canes (for garnish)
Instructions:
- Preheat your oven to 350°F (175°C). Grease and flour two 9-inch round cake pans to prevent the cake from sticking. You can also line the bottoms with parchment paper for easier removal.
- In a large mixing bowl, combine the flour, sugar, cocoa powder, baking powder, baking soda, and salt. Whisk together until well blended. This dry mixture will form the base of your cake batter.
- Add the eggs, milk, vegetable oil, and vanilla extract to the dry ingredients. Using an electric mixer, beat on medium speed for about 2 minutes until smooth. Then carefully stir in the boiling water and peppermint extract until fully combined; the batter will be thin.
- Pour the batter evenly into the prepared cake pans. Bake in the preheated oven for 30-35 minutes, or until a toothpick inserted in the center comes out clean. Once baked, remove from the oven and allow the cakes to cool in the pans for 10 minutes before transferring them to a wire rack to cool completely.
- While the cakes cool, prepare the peppermint buttercream. In a mixing bowl, beat the softened butter until creamy. Gradually add the powdered sugar, mixing on low speed until incorporated. Add the heavy cream and peppermint extract, then beat on high speed until the frosting is light and fluffy.
- Once the cakes are completely cooled, place one layer on a serving plate. Spread a generous layer of peppermint buttercream on top, then place the second layer on top and frost the top and sides of the cake. Garnish with crushed candy canes for an extra festive touch.
Extra Tips: For an added burst of flavor, consider mixing a bit of the crushed candy canes into the frosting for a crunchy texture. If you want to make the cake ahead of time, you can bake the layers a day in advance and store them wrapped in plastic wrap in the refrigerator.
This cake also pairs wonderfully with a scoop of vanilla ice cream for an extra indulgent dessert option. Enjoy this festive treat!
Maple Walnut Fudge
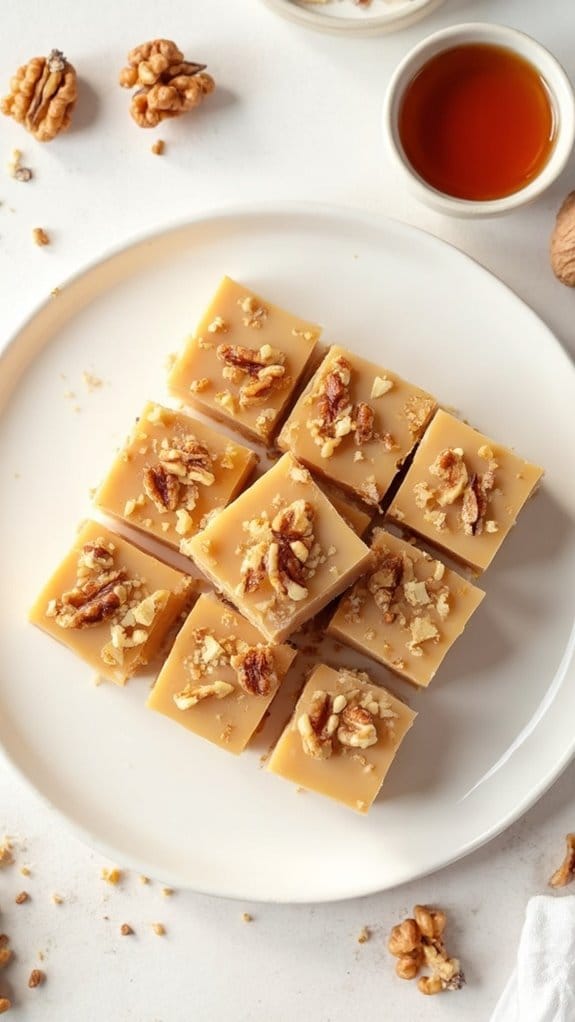
Title: Maple Walnut Fudge
Prep Time: 15 minutes
Cook Time: 20 minutes
Number of Servings: 16
Required Equipment List: Medium saucepan, candy thermometer, 9×9 inch baking pan, parchment paper, wooden spoon
Cuisine Type: American
Maple Walnut Fudge is a rich and creamy treat that captures the essence of holiday flavors in every bite. The combination of pure maple syrup and crunchy walnuts creates a deliciously sweet and nutty dessert that’s perfect for sharing during the festive season.
This fudge isn’t only easy to make but also requires minimal ingredients, making it an ideal choice for both novice and experienced bakers looking to impress their guests. The process of making this fudge is straightforward, yet it yields an indulgent result that can be enjoyed on its own or used as a delightful gift.
Once set, the fudge can be cut into squares and stored in an airtight container, ensuring that you have a sweet treat on hand throughout the holidays. This maple walnut fudge is sure to become a cherished recipe in your holiday baking lineup.
Ingredients:
- 2 cups granulated sugar
- 1 cup pure maple syrup
- 1/2 cup unsweetened evaporated milk
- 1/4 cup butter
- 1 teaspoon vanilla extract
- 1 cup chopped walnuts
Instructions:
- In a medium saucepan, combine the granulated sugar, pure maple syrup, and evaporated milk. Stir the mixture over medium heat until the sugar has completely dissolved, making sure to scrape the sides of the pan to prevent crystallization.
- Once the mixture comes to a boil, insert a candy thermometer and continue to cook, stirring frequently, until it reaches the soft-ball stage (around 234°F or 112°C). This step is essential for achieving the right texture in your fudge.
- Remove the saucepan from the heat and add the butter and vanilla extract. Don’t stir the mixture at this point; instead, allow it to cool to about 110°F (43°C) without stirring, which will take approximately 10-15 minutes.
- Once cooled, use a wooden spoon to stir the mixture vigorously until it thickens and loses its gloss, which should take about 5-10 minutes. Fold in the chopped walnuts during this process.
- Line a 9×9 inch baking pan with parchment paper for easy removal, then pour the fudge mixture into the pan, spreading it evenly. Let it cool at room temperature for several hours or until fully set before cutting it into squares.
Extra Tips: For a different flavor twist, consider adding a pinch of sea salt to enhance the sweetness of the fudge. If you want to incorporate more texture, try mixing in some chocolate chips or dried fruit along with the walnuts.
When storing your fudge, keep it in an airtight container at room temperature to maintain its soft and creamy consistency. Enjoy sharing this delightful treat with friends and family!
Snowman Cake Pops

Title: Snowman Cake Pops
Prep Time: 30 minutes
Cook Time: 15 minutes
Number of Servings: 12
Required Equipment List: Baking sheet, mixing bowl, microwave-safe bowl, cake pop sticks, melting chocolate, styrofoam block (for drying), piping bags
Cuisine Type: American
Snowman Cake Pops are a charming and festive treat perfect for holiday gatherings and celebrations. These delightful pops aren’t only visually appealing but also offer a delicious combination of cake and chocolate that everyone will love.
Rolling the cake into balls and decorating them like snowmen adds a fun twist to traditional cake, making them a hit with both kids and adults alike. Each bite brings a moist cake texture combined with the sweetness of chocolate, creating a memorable holiday dessert.
The versatility of cake pops allows you to use any cake flavor you desire, making it easy to customize based on your preferences. The process of decorating these snowmen can be a family activity, encouraging creativity and teamwork in the kitchen.
With just a few simple steps, you can create an enchanting dessert that will surely impress your guests during the festive season.
Ingredients:
- 1 box cake mix (any flavor)
- 1 cup frosting (store-bought or homemade)
- 12 oz white melting chocolate
- Cake pop sticks
- Mini chocolate chips (for eyes and buttons)
- Orange candy corn (for noses)
- Black icing (for mouth)
- Sprinkles (for decoration, optional)
Instructions:
- Prepare the cake according to the instructions on the box and let it cool completely. Once cooled, crumble the cake into a large mixing bowl until it resembles fine crumbs. This texture is essential for shaping the cake pops.
- Add the frosting to the crumbled cake and mix well until the mixture holds together. You want a consistency that’s moldable but not too sticky. If the mixture is too dry, add a bit more frosting until you achieve the right texture.
- Using your hands, scoop out about a tablespoon of the cake mixture and roll it into a ball. Repeat this process until all the cake mixture is shaped into balls. Place the balls on a baking sheet lined with parchment paper and freeze for about 15 minutes to firm up.
- While the cake pops are chilling, melt the white chocolate in a microwave-safe bowl, heating in 30-second intervals and stirring until smooth. Dip the tip of each cake pop stick into the melted chocolate, then insert it halfway into each cake ball. This helps to secure the stick in place.
- Once the cake balls are firm, dip each one into the melted chocolate, ensuring they’re fully coated. Tap off any excess chocolate and place the pops upright in a styrofoam block to dry completely.
- Once the chocolate has set, decorate each snowman cake pop. Use mini chocolate chips for the eyes and buttons, an orange candy corn for the nose, and black icing to create a mouth. Feel free to use sprinkles for extra flair!
Extra Tips: To enhance the flavor of your snowman cake pops, consider using flavored frosting that complements the cake mix, such as chocolate frosting with vanilla cake. If you want a more vibrant appearance, you can dye the white melting chocolate with food coloring.
Also, be creative with your decorations—try adding scarves made from fondant or edible glitter for a festive touch! Enjoy your delightful snowman cake pops this holiday season!
Coconut Macaroons
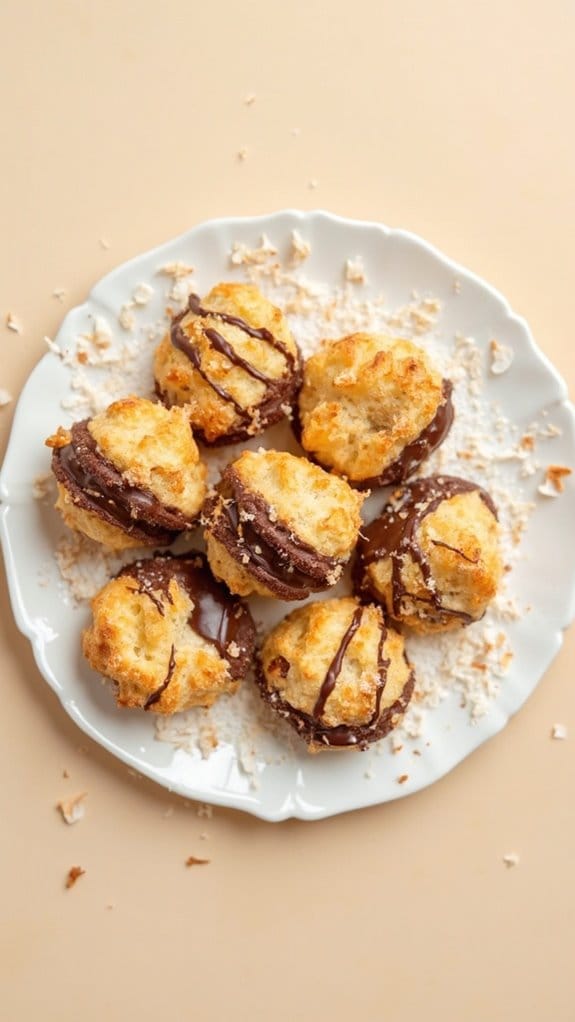
Title: Coconut Macaroons
Prep Time: 15 minutes
Cook Time: 25 minutes
Number of Servings: 20
Required Equipment List: Mixing bowl, baking sheet, parchment paper, whisk, spatula
Cuisine Type: American
Coconut macaroons are a delightful and chewy treat that are perfect for the holiday season or any special occasion. These sweet bites are made primarily from shredded coconut, which gives them a fantastic texture and a tropical flavor. With just a few simple ingredients, you can whip up a batch of these delicious cookies that are sure to impress friends and family alike.
The combination of sweetened condensed milk and egg whites binds the shredded coconut together, creating a moist and satisfying cookie that’s both crispy on the outside and chewy on the inside.
What makes coconut macaroons even more enticing is their versatility. You can dip them in chocolate for an added touch of decadence or leave them plain for a simpler treat. They’re naturally gluten-free, making them a great option for those with dietary restrictions.
Whether you’re serving them at a festive gathering or enjoying them with a cup of tea, these macaroons are a guaranteed crowd-pleaser.
Ingredients:
- 3 cups shredded sweetened coconut
- 1 cup sweetened condensed milk
- 2 large egg whites
- 1 teaspoon vanilla extract
- 1/4 teaspoon salt
- 1 cup semi-sweet chocolate chips (optional, for dipping)
Instructions:
- Preheat your oven to 325°F (160°C). Line a baking sheet with parchment paper to prevent sticking and guarantee easy removal of the macaroons once baked.
- In a large mixing bowl, combine the shredded coconut, sweetened condensed milk, egg whites, vanilla extract, and salt. Mix well with a whisk or spatula until all the ingredients are fully incorporated and the coconut is evenly coated.
- Using a tablespoon or a small cookie scoop, drop mounds of the coconut mixture onto the prepared baking sheet, spacing them about 1 inch apart. You can shape them into balls or pyramids for a more traditional look.
- Bake the macaroons in the preheated oven for 20-25 minutes or until the tops are golden brown. Keep an eye on them towards the end to guarantee they don’t over-bake.
- Once baked, remove the macaroons from the oven and let them cool on the baking sheet for about 5 minutes before transferring them to a wire rack to cool completely.
- If desired, melt the chocolate chips in a microwave or double boiler until smooth. Dip the bottoms of each macaroon in the chocolate or drizzle it over the tops, then let them set on parchment paper until the chocolate hardens.
Extra Tips: To enhance the flavor of your macaroons, consider adding a sprinkle of almond extract or incorporating finely chopped nuts into the mixture. If you prefer a more tropical twist, you can mix in some crushed pineapple or chopped mango.
These macaroons can be stored in an airtight container at room temperature for up to a week, making them perfect for make-ahead holiday treats or gifts. Enjoy your delicious coconut macaroons!
Holiday Fruitcake
Title: Holiday Fruitcake
Prep Time: 30 minutes
Cook Time: 120 minutes
Number of Servings: 12
Required Equipment List: Mixing bowls, loaf pan, oven, spoon, measuring cups and spoons
Cuisine Type: Traditional Holiday
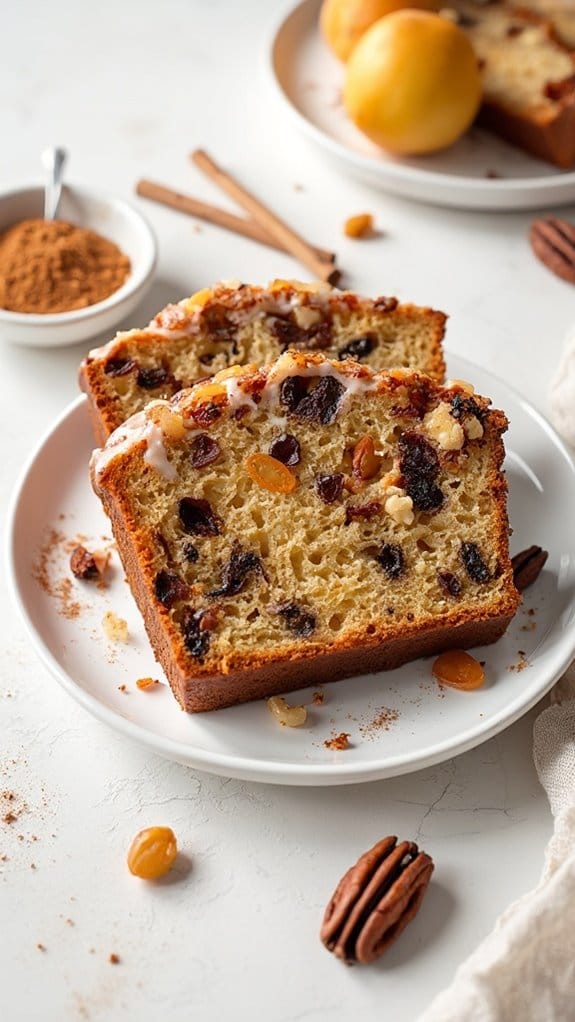
Holiday Fruitcake is a classic dessert that brings the warmth and joy of the festive season to your table. This rich, dense cake is packed with a variety of dried fruits, nuts, and warm spices, making it a delightful treat that evokes nostalgia and holiday cheer. The combination of flavors creates a beautiful medley that not only tastes great but also looks stunning when presented. Perfect for gatherings or as a gift, this fruitcake is bound to become a cherished holiday tradition.
While fruitcake often gets a bad reputation, this recipe is sure to change your mind. By using high-quality ingredients and allowing the cake to mature, you can create a moist and flavorful dessert that improves with age. The addition of a splash of brandy or rum enhances the taste, making it a truly indulgent treat. This fruitcake can be made ahead of time and stored, allowing the flavors to meld beautifully, making it an ideal choice for busy holiday schedules.
Ingredients:
- 2 cups mixed dried fruits (raisins, currants, chopped dried apricots, etc.)
- 1 cup chopped nuts (walnuts, pecans, or almonds)
- 1/2 cup brandy or rum
- 1 cup unsalted butter, softened
- 1 cup brown sugar, packed
- 4 large eggs
- 2 cups all-purpose flour
- 1 teaspoon baking powder
- 1 teaspoon ground cinnamon
- 1/2 teaspoon ground nutmeg
- 1/2 teaspoon ground ginger
- 1/4 teaspoon salt
- Zest of 1 orange
Instructions:
- Begin by preheating your oven to 325°F (165°C). Grease and line a 9×5 inch loaf pan with parchment paper, allowing some overhang to make it easier to remove the cake later.
- In a small bowl, combine the mixed dried fruits and chopped nuts. Pour the brandy or rum over the fruit and nuts, stirring to coat everything evenly. Let this mixture sit for at least 15 minutes to allow the flavors to infuse.
- In a large mixing bowl, cream together the softened butter and brown sugar until light and fluffy. This process adds air to the batter, which is essential for a good texture.
- Add the eggs one at a time, mixing well after each addition. Make sure to scrape down the sides of the bowl to guarantee everything is well incorporated.
- In another bowl, whisk together the flour, baking powder, spices, and salt. Gradually add this dry mixture to the wet ingredients, stirring until just combined. Don’t overmix.
- Fold in the soaked fruit and nut mixture along with the orange zest. Carefully mix until everything is evenly distributed throughout the batter.
- Pour the batter into the prepared loaf pan and smooth the top with a spatula. Bake in the preheated oven for 1 hour and 30 minutes, or until a toothpick inserted in the center comes out clean.
- Once baked, remove the fruitcake from the oven and let it cool in the pan for about 10 minutes. Then, carefully lift it out using the parchment overhang and place it on a wire rack to cool completely.
Extra Tips: For an even richer flavor, consider soaking the dried fruits overnight in the brandy or rum. This allows for deeper flavor absorption.
Additionally, if you prefer a less sweet cake, you can reduce the amount of brown sugar slightly. To store, wrap the cooled fruitcake in wax paper followed by aluminum foil, and place it in an airtight container. It can be kept in a cool, dark place for several weeks, or even frozen for longer preservation. Enjoy the delightful taste of holiday traditions with every slice!
Molasses Cookies
Title: Molasses Cookies
Prep Time: 15 minutes
Cook Time: 10 minutes
Number of Servings: 24 cookies
Required Equipment List: Mixing bowl, baking sheet, parchment paper, whisk, measuring cups, measuring spoons
Cuisine Type: American
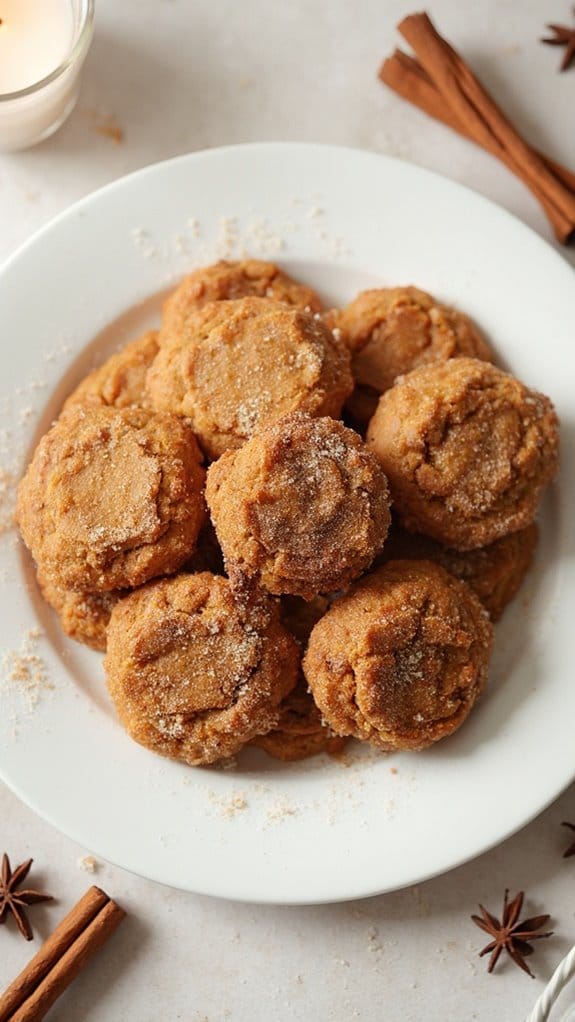
Molasses cookies are a delightful treat that brings warmth and spice to your holiday gatherings. These chewy cookies are packed with rich molasses flavor and a blend of warm spices like ginger, cinnamon, and cloves, making them a nostalgic favorite for many.
Their soft texture and slightly crisp edges make them not only delicious but also perfect for sharing with friends and family during the festive season. This recipe is simple to follow, allowing even novice bakers to whip up a batch of these tasty cookies in no time.
The combination of brown sugar and molasses gives these cookies a deep, caramel-like sweetness, while the spices create a cozy aroma that fills your kitchen. Enjoy them fresh out of the oven or with a glass of milk for a classic treat that will surely bring joy to your holiday celebrations.
Ingredients:
- 3/4 cup unsalted butter, softened
- 1 cup brown sugar, packed
- 1/2 cup molasses
- 1 large egg
- 2 1/4 cups all-purpose flour
- 2 teaspoons baking soda
- 1 teaspoon ground ginger
- 1 teaspoon ground cinnamon
- 1/2 teaspoon ground cloves
- 1/2 teaspoon salt
- 1/4 cup granulated sugar (for rolling)
Instructions:
- Preheat your oven to 350°F (175°C) and line a baking sheet with parchment paper. This will prevent the cookies from sticking and guarantee they bake evenly.
- In a mixing bowl, cream together the softened butter and brown sugar until light and fluffy. Add the molasses and the egg, mixing until well combined. This will create a rich and flavorful base for your cookies.
- In a separate bowl, whisk together the flour, baking soda, ginger, cinnamon, cloves, and salt. Gradually add the dry ingredients to the wet mixture, stirring until just combined. Be careful not to overmix, as this can affect the texture of the cookies.
- Using a cookie scoop or tablespoon, drop rounded balls of dough onto the prepared baking sheet, spacing them about 2 inches apart. Roll each ball in granulated sugar before placing them on the baking sheet for a sweet, sparkling finish.
- Bake the cookies in the preheated oven for 8-10 minutes, or until the edges are firm and the centers look slightly underbaked. They’ll continue to firm up as they cool. Let them cool on the baking sheet for a few minutes before transferring to a wire rack.
Extra Tips: To enhance the flavor of your molasses cookies, consider adding a pinch of black pepper or a few chopped nuts like walnuts or pecans for added texture.
Store the cookies in an airtight container to keep them soft and chewy for days. These cookies also freeze well, so you can make a double batch and save some for later enjoyment!
Almond Joy Truffles
Title: Almond Joy Truffles
Prep Time: 20 minutes
Cook Time: 0 minutes
Number of Servings: 12
Required Equipment List: Mixing bowl, baking sheet, parchment paper, food processor, spoon
Cuisine Type: American
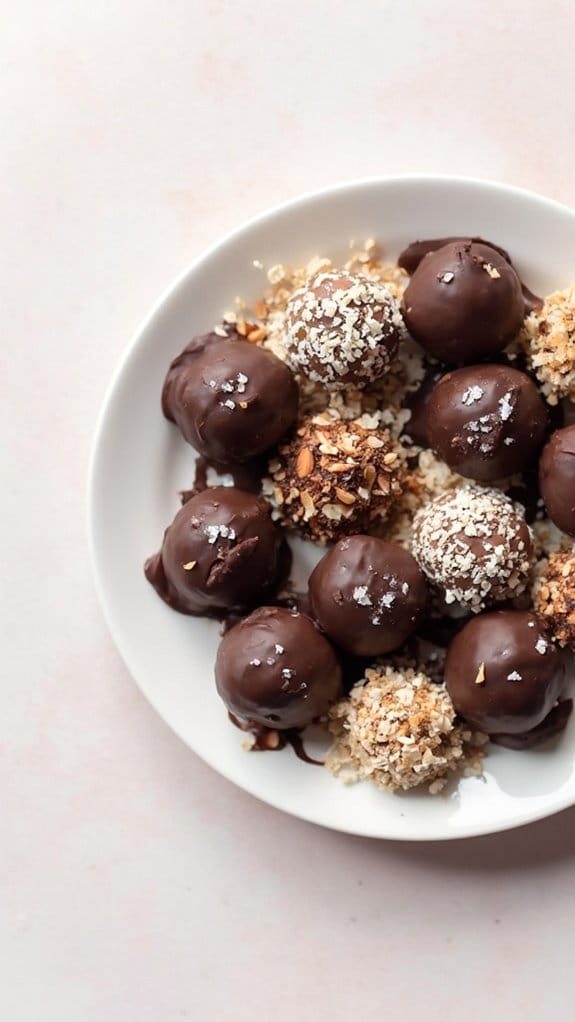
These Almond Joy Truffles are a deliciously indulgent treat that captures the beloved flavors of the classic chocolate bar. Combining creamy chocolate, toasted coconut, and crunchy almonds, these truffles aren’t only easy to make but are also perfect for gifting during the holiday season or serving at festive gatherings.
With no baking required, they come together quickly, making them an ideal last-minute dessert option that will impress family and friends alike. The secret to these truffles is the rich mixture of ingredients that creates a perfect balance of sweetness and texture.
Each bite bursts with the flavors of almond and coconut, coated in a luscious layer of dark chocolate. Whether you’re a fan of the original Almond Joy candy or just love chocolate and coconut, these truffles are sure to become a favorite in your dessert repertoire.
Ingredients:
- 1 cup sweetened shredded coconut
- 1 cup almond butter
- 1/4 cup honey or maple syrup
- 1 teaspoon vanilla extract
- 1/2 cup almonds, chopped
- 8 ounces dark chocolate, chopped (or chocolate chips)
- Sea salt (for garnish, optional)
Instructions:
- In a mixing bowl, combine the sweetened shredded coconut, almond butter, honey (or maple syrup), and vanilla extract. Stir well until all the ingredients are fully combined and you have a thick, sticky mixture.
- Gently fold in the chopped almonds, ensuring they’re evenly distributed throughout the mixture. This will add a delightful crunch to your truffles.
- Using your hands, scoop out small amounts of the mixture and roll them into bite-sized balls, about 1 inch in diameter. Place each truffle on a baking sheet lined with parchment paper as you go.
- Once all the mixture has been rolled into truffles, place the baking sheet in the freezer for about 15-20 minutes to firm them up. This will make them easier to coat in chocolate.
- While the truffles are chilling, melt the dark chocolate in a microwave-safe bowl or using a double boiler, stirring until smooth and completely melted.
- Remove the chilled truffles from the freezer and dip each one into the melted chocolate, making sure they’re fully coated. Use a fork to lift them out, allowing any excess chocolate to drip off before returning them to the parchment-lined baking sheet.
- If desired, sprinkle a pinch of sea salt on top of each truffle before the chocolate sets. Once all the truffles are coated, place them in the refrigerator for about 30 minutes to allow the chocolate to harden.
Extra Tips: For a festive touch, consider rolling the truffles in additional shredded coconut or crushed almonds before the chocolate sets. If you prefer a sweeter chocolate coating, milk chocolate or a chocolate blend can be used instead of dark chocolate.
These truffles can be stored in an airtight container in the refrigerator for up to a week, allowing you to enjoy them throughout the holiday season!
Pumpkin Spice Latte Cake
Title: Pumpkin Spice Latte Cake
Prep Time: 20 minutes
Cook Time: 35 minutes
Number of Servings: 8
Required Equipment List: Mixing bowls, electric mixer, measuring cups, measuring spoons, 9-inch round cake pans, cooling rack
Cuisine Type: American
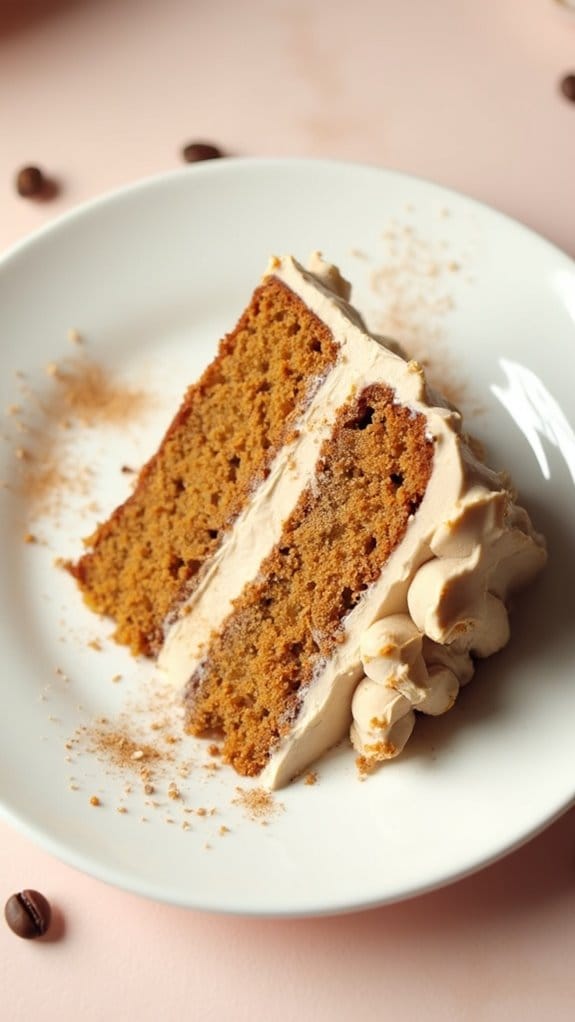
This Pumpkin Spice Latte Cake is the perfect dessert to celebrate the fall season, combining the rich flavors of pumpkin, warm spices, and the beloved taste of coffee. The moist and tender cake layers are infused with pumpkin puree, cinnamon, nutmeg, and espresso, creating a delightful treat that’s sure to please your taste buds.
Topped with a creamy espresso buttercream frosting, this cake is a showstopper for holiday gatherings and special occasions. Not only is this cake delicious, but it also captures the essence of cozy autumn days with every slice. As you take a bite, the combination of spices and coffee will transport you to a pumpkin patch on a crisp morning.
Whether served at a festive gathering or enjoyed with a cup of coffee at home, this Pumpkin Spice Latte Cake is a delightful way to embrace the flavors of the season.
Ingredients:
- 2 cups all-purpose flour
- 1 ½ teaspoons baking powder
- 1 teaspoon baking soda
- 1 teaspoon ground cinnamon
- ½ teaspoon ground nutmeg
- ½ teaspoon ground ginger
- ½ teaspoon salt
- 1 cup granulated sugar
- ½ cup brown sugar
- 1 cup pumpkin puree
- ½ cup vegetable oil
- 3 large eggs
- 1 teaspoon vanilla extract
- 1/2 cup brewed espresso, cooled
For the Frosting:
- 1 cup unsalted butter, softened
- 4 cups powdered sugar
- 2 tablespoons brewed espresso, cooled
- 1 teaspoon vanilla extract
- Pinch of salt
Instructions:
- Preheat your oven to 350°F (175°C). Grease and flour two 9-inch round cake pans to prevent sticking. This preparation will guarantee that the cakes come out easily once baked.
- In a medium mixing bowl, whisk together the all-purpose flour, baking powder, baking soda, cinnamon, nutmeg, ginger, and salt. This step combines the dry ingredients and helps to distribute the spices evenly throughout the cake.
- In a large mixing bowl, use an electric mixer to beat the granulated sugar, brown sugar, pumpkin puree, vegetable oil, eggs, and vanilla extract until well combined and smooth. This mixture will form the base for your cake batter.
- Gradually add the dry ingredient mixture to the wet ingredients, alternating with the cooled espresso, mixing gently until just combined. Be careful not to overmix, as this can lead to a dense cake.
- Divide the batter evenly between the prepared cake pans. Smooth the tops with a spatula and bake for 30-35 minutes, or until a toothpick inserted into the center comes out clean. Allow the cakes to cool in the pans for 10 minutes before transferring them to a cooling rack.
- While the cakes are cooling, prepare the frosting by beating the softened butter in a large bowl until creamy. Gradually add the powdered sugar, mixing until smooth. Stir in the cooled espresso, vanilla extract, and a pinch of salt to taste.
- Once the cakes are completely cooled, place one layer on a serving plate. Spread a generous amount of frosting on top, then carefully place the second layer on top. Frost the top and sides of the cake as desired, and decorate with additional pumpkin spice or coffee beans if desired.
Extra Tips: To enhance the flavor of your Pumpkin Spice Latte Cake, consider adding a pinch of espresso powder to the cake batter for an extra coffee kick. Make sure to let the cake cool completely before frosting to prevent melting the buttercream. This cake can be made a day in advance; simply store it in an airtight container at room temperature, and it will taste just as fresh the next day!
Vanilla Bean Panna Cotta
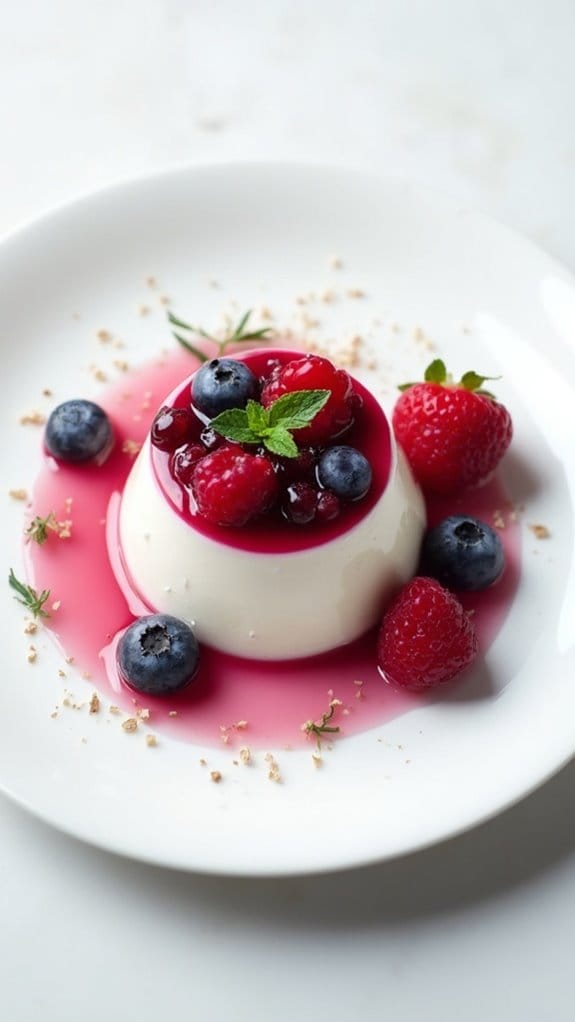
Title: Vanilla Bean Panna Cotta
Prep Time: 15 minutes
Cook Time: 4 hours (chilling time)
Number of Servings: 6
Required Equipment List: Medium saucepan, mixing bowl, whisk, measuring cups, ramekins or dessert cups
Cuisine Type: Italian
Vanilla Bean Panna Cotta is a classic Italian dessert that embodies elegance and simplicity. Made with just a few high-quality ingredients, this creamy, custard-like treat is infused with the rich flavors of real vanilla beans, making it a luxurious indulgence that’s perfect for any festive occasion.
The silky texture and mild sweetness of panna cotta provide a delightful contrast when paired with fresh fruits or sauces, enhancing its appeal as a versatile dessert. This panna cotta can be prepared ahead of time, making it an ideal choice for holiday gatherings or dinner parties.
Once set, it can be served plain or topped with seasonal fruits, chocolate sauce, or a berry compote, allowing you to customize it to suit your taste. The ease of preparation and the impressive presentation make Vanilla Bean Panna Cotta a show-stopping dessert that’s sure to impress your guests.
Ingredients:
- 2 cups heavy cream
- 1 cup whole milk
- 1/2 cup sugar
- 1 tablespoon gelatin powder
- 1 tablespoon cold water
- Seeds from 1 vanilla bean (or 1 teaspoon vanilla extract)
- Pinch of salt
Instructions:
- In a medium saucepan, combine the heavy cream, whole milk, sugar, and a pinch of salt. Heat the mixture over medium heat, stirring gently until the sugar is fully dissolved and the mixture is hot but not boiling. Remove from heat.
- In a small bowl, sprinkle the gelatin powder over the cold water and let it sit for about 5 minutes until it becomes fully softened. Once softened, whisk it into the warm cream mixture until completely dissolved.
- Add the vanilla bean seeds to the cream mixture, stirring well to guarantee an even distribution of flavor. If using vanilla extract instead, add it now.
- Pour the mixture into ramekins or dessert cups, leaving a little space at the top for any toppings you may wish to add later. Cover each cup with plastic wrap and refrigerate for at least 4 hours, or until the panna cotta is fully set.
- Once set, carefully unmold the panna cotta by running a knife around the edge of the cup and inverting it onto a plate, or serve directly in the cups. Top with fresh fruits, chocolate sauce, or a berry compote as desired.
Extra Tips: To achieve the best flavor, use high-quality vanilla beans, as they provide a depth of taste that vanilla extract can’t match.
If you prefer a more decadent panna cotta, substitute some of the whole milk with additional heavy cream. For an added layer of flavor, consider infusing the cream with citrus zest or herbs like mint before straining and mixing in the gelatin. Enjoy your elegant and creamy dessert!
Candy Cane Crunch Bars
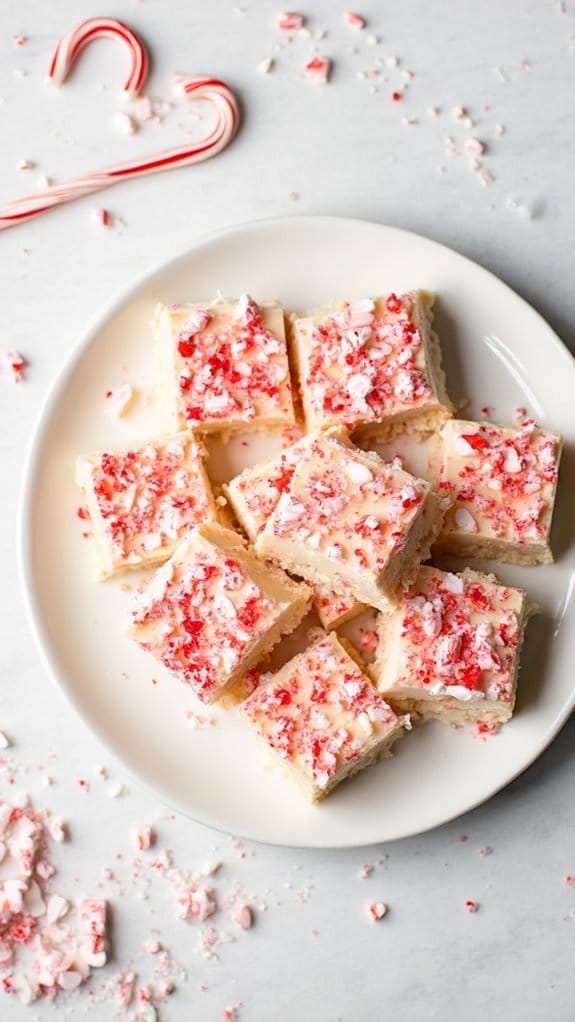
Title: Candy Cane Crunch Bars
Prep Time: 20 minutes
Cook Time: 30 minutes
Number of Servings: 12
Required Equipment List: 9×13 inch baking pan, mixing bowl, spatula, saucepan, parchment paper
Cuisine Type: American
Candy Cane Crunch Bars are a festive and delightful treat that captures the spirit of the holiday season. These no-bake bars combine the rich flavors of white chocolate and crushed candy canes, creating a perfect balance of sweetness and minty freshness.
They’re easy to prepare and make for an ideal dessert to share at holiday gatherings, parties, or as a sweet gift for friends and family.
The base of these bars is made from a combination of crushed graham crackers and melted butter, providing a crunchy and buttery foundation. Topped with a creamy white chocolate layer and finished with a generous sprinkle of candy cane pieces, these bars aren’t only delicious but also visually appealing.
The bright red and white colors make them a festive addition to any dessert platter.
Ingredients:
- 1 ½ cups graham cracker crumbs
- ½ cup unsalted butter, melted
- 2 cups white chocolate chips
- 1 cup sweetened condensed milk
- 1 teaspoon vanilla extract
- ½ cup crushed candy canes (plus extra for topping)
- Pinch of salt
Instructions:
- Preheat your oven to 350°F (175°C). Line a 9×13 inch baking pan with parchment paper, allowing some overhang on the sides for easy removal later. This will make it easier to cut and serve the bars once they’re set.
- In a mixing bowl, combine the graham cracker crumbs and melted butter. Stir until the crumbs are evenly coated and resemble wet sand. Press this mixture firmly into the bottom of the prepared baking pan to form an even layer, and bake in the preheated oven for 10 minutes. Remove from the oven and let cool.
- In a saucepan over low heat, melt the white chocolate chips and sweetened condensed milk together, stirring constantly until smooth and well combined. Remove from heat and stir in the vanilla extract, crushed candy canes, and a pinch of salt to enhance the flavors.
- Pour the white chocolate mixture over the cooled graham cracker crust, spreading it evenly with a spatula. Sprinkle additional crushed candy canes on top for a festive touch and extra crunch. Allow the bars to cool at room temperature for about 15 minutes, then refrigerate for at least 2 hours until fully set.
- Once set, lift the bars out of the pan using the parchment overhang and place on a cutting board. Cut into squares or rectangles, and serve chilled or at room temperature.
Extra Tips:
To make the candy cane crunch bars even more festive, consider drizzling some melted dark chocolate over the top before sprinkling the crushed candy canes. This adds a beautiful contrast and enhances the flavor.
For a fun twist, try using different types of chocolate, such as milk chocolate or semi-sweet, to suit your taste preferences.
These bars will keep well in an airtight container in the refrigerator for up to a week, making them perfect for holiday snacking!
Nutella-Stuffed Cookies
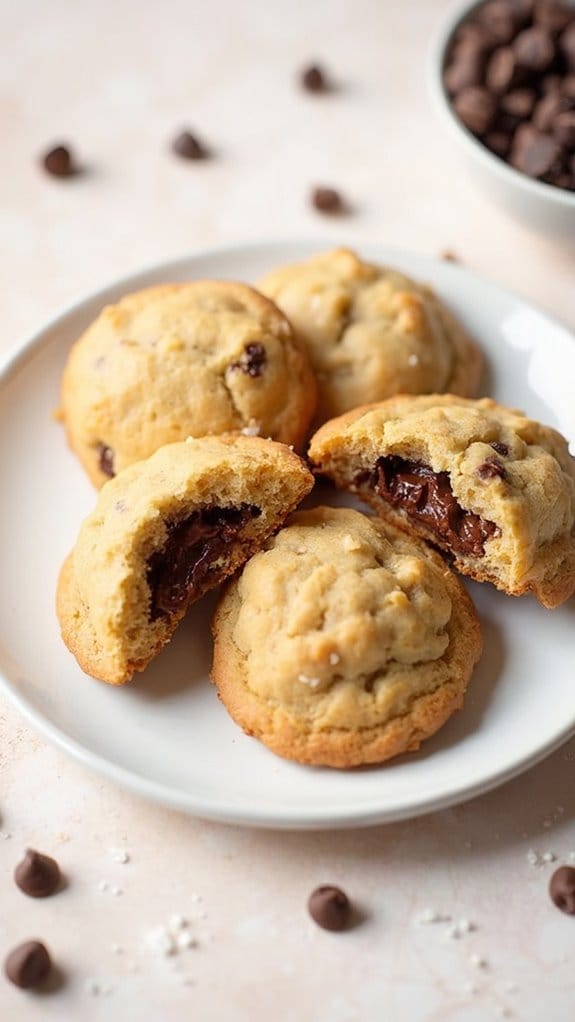
Title: Nutella-Stuffed Cookies
Prep Time: 15 minutes
Cook Time: 12 minutes
Number of Servings: 24 cookies
Required Equipment List: Mixing bowl, baking sheet, parchment paper, cookie scoop, oven
Cuisine Type: American
Nutella-Stuffed Cookies are a delightful treat that combines the rich, creamy goodness of Nutella with the soft, chewy texture of classic chocolate chip cookies. This indulgent dessert is perfect for holiday gatherings or cozy nights in, featuring a hidden surprise of Nutella in each bite.
The contrast of the warm, gooey chocolate-hazelnut filling with the buttery cookie dough makes these cookies a favorite among both kids and adults alike. The beauty of Nutella-Stuffed Cookies lies in their simplicity and the joy of discovery when you bite into one.
With just a handful of ingredients, you can create a batch of cookies that will impress your family and friends. These cookies aren’t only delicious but also versatile; feel free to customize them by adding nuts, chocolate chips, or sea salt on top for an extra flavor boost.
Ingredients:
- 1 cup unsalted butter, softened
- 1 cup brown sugar, packed
- 1/2 cup granulated sugar
- 2 large eggs
- 2 teaspoons vanilla extract
- 3 cups all-purpose flour
- 1 teaspoon baking soda
- 1/2 teaspoon salt
- 1 cup Nutella (or similar chocolate-hazelnut spread)
Instructions:
- Preheat your oven to 350°F (175°C) and line a baking sheet with parchment paper to prevent sticking and make cleanup easier.
- In a mixing bowl, cream together the softened butter, brown sugar, and granulated sugar until the mixture is light and fluffy. This should take about 2-3 minutes using an electric mixer.
- Add the eggs one at a time, mixing well after each addition, followed by the vanilla extract. Continue to beat the mixture until well combined.
- In a separate bowl, whisk together the flour, baking soda, and salt. Gradually add this dry mixture to the wet ingredients, mixing until just combined. Avoid overmixing to keep the cookies tender.
- Using a cookie scoop or tablespoon, take a portion of dough and flatten it in the palm of your hand. Place about a teaspoon of Nutella in the center and fold the dough around the Nutella, rolling it into a ball. Repeat this process for the remaining dough.
- Place the cookie dough balls on the prepared baking sheet, spacing them about 2 inches apart. Bake in the preheated oven for 10-12 minutes, or until the edges are lightly golden but the centers are still soft.
- Once baked, remove the cookies from the oven and let them cool on the baking sheet for 5 minutes before transferring them to a wire rack to cool completely.
Extra Tips: For an added touch, consider sprinkling a little sea salt on top of the cookies just before baking to enhance the flavor contrast between the sweet cookie and the rich Nutella.
If you prefer a more decadent version, you can mix in chocolate chips into the cookie dough for an extra chocolatey experience. These cookies can be stored in an airtight container for up to a week, but they’re best enjoyed fresh out of the oven!
Chocolate Mousse Cups
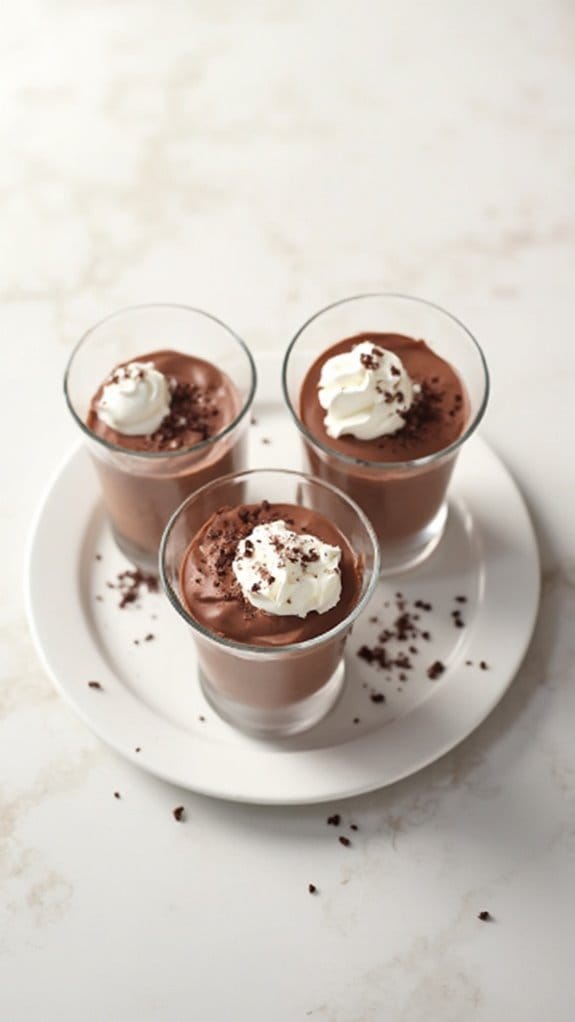
Title: Chocolate Mousse Cups
Prep Time: 20 minutes
Cook Time: 0 minutes
Number of Servings: 6
Required Equipment List: Mixing bowls, electric mixer, spatula, serving cups or glasses, refrigerator
Cuisine Type: French
Chocolate mousse cups are a luxurious and indulgent dessert that bring a touch of elegance to any occasion. With their rich, creamy texture and intense chocolate flavor, these mousse cups are sure to impress your guests. The beauty of this recipe lies in its simplicity, as it requires no baking and can be prepared in under 30 minutes.
Once prepared, simply refrigerate the cups until you’re ready to serve, making them an excellent choice for dinner parties or festive gatherings. The mousse is made from just a few key ingredients: high-quality dark chocolate, heavy cream, and egg whites. The chocolate is melted and folded into whipped cream and beaten egg whites, creating a light and airy texture that melts in your mouth.
By serving the mousse in individual cups or glasses, you not only enhance the presentation but also make it easy for guests to enjoy their own portion. Top each cup with whipped cream and chocolate shavings for an extra touch of decadence.
Ingredients:
- 8 ounces dark chocolate (at least 70% cocoa), chopped
- 2 cups heavy cream, divided
- 3 large egg whites
- 1/4 cup granulated sugar
- 1 teaspoon vanilla extract
- Whipped cream (for topping, optional)
- Chocolate shavings or cocoa powder (for garnish, optional)
Instructions:
- Begin by melting the chopped dark chocolate in a heatproof bowl placed over a pot of simmering water (double boiler method). Stir occasionally until completely melted and smooth. Remove from heat and let it cool slightly.
- In a separate mixing bowl, whip 1 cup of heavy cream until soft peaks form. Be careful not to overwhip, as the cream should still be light and airy. Set aside.
- In another bowl, beat the egg whites with an electric mixer until foamy. Gradually add the granulated sugar while continuing to beat until stiff peaks form and the mixture is glossy. This step guarantees that your mousse will be light and fluffy.
- Gently fold the melted chocolate into the whipped cream until well combined. Then, carefully fold in the beaten egg whites in three additions. Use a spatula to combine, being cautious not to deflate the mixture.
- Once fully combined, spoon the mousse into serving cups or glasses, filling them about three-quarters full. Cover with plastic wrap and refrigerate for at least 2 hours or until set.
- Just before serving, top each mousse cup with a dollop of whipped cream and garnish with chocolate shavings or a dusting of cocoa powder for an elegant finish.
Extra Tips: For an extra layer of flavor, consider adding a splash of liqueur, such as coffee or orange liqueur, to the melted chocolate before folding in the other ingredients. Ascertain that the chocolate has cooled slightly before adding any liquid to prevent it from seizing.
If you want to make this dessert ahead of time, the mousse can be prepared a day in advance and stored in the refrigerator. Enjoy this decadent treat as a delightful end to your holiday meals!
Toffee Pudding Cake
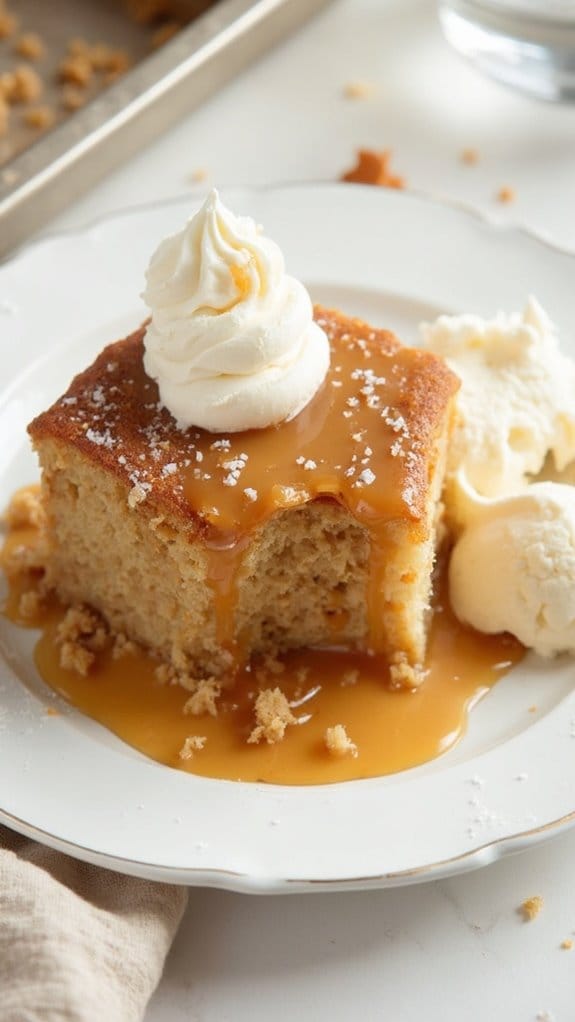
Title: Toffee Pudding Cake
Prep Time: 20 minutes
Cook Time: 50 minutes
Number of Servings: 8
Required Equipment List: Mixing bowl, whisk, 9-inch round cake pan, saucepan, serving dish
Cuisine Type: British
Toffee Pudding Cake is a classic British dessert that combines a rich, moist sponge cake with a luscious toffee sauce, creating a decadent treat that’s perfect for the holiday season. This cake is wonderfully indulgent and pairs beautifully with a scoop of vanilla ice cream or a dollop of whipped cream.
Its warm, gooey texture makes it a comforting dessert sure to delight any guest at your holiday gatherings. The preparation of this cake involves simple ingredients, but the result is nothing short of spectacular. The toffee sauce, made from butter, brown sugar, and cream, seeps into the cake as it bakes, creating a moist and flavorful dessert.
Once inverted onto a serving dish, the cake is covered in the remaining sauce, making it an irresistible centerpiece for your dessert table.
Ingredients:
- 1 cup all-purpose flour
- 1 teaspoon baking powder
- 1/2 teaspoon baking soda
- 1/4 teaspoon salt
- 1/2 cup unsalted butter, softened
- 1 cup brown sugar, packed
- 2 large eggs
- 1 teaspoon vanilla extract
- 1/2 cup milk
- 1 cup brown sugar (for toffee sauce)
- 1/2 cup unsalted butter (for toffee sauce)
- 1 cup heavy cream
Instructions:
- Preheat your oven to 350°F (175°C). Grease a 9-inch round cake pan with butter and lightly dust it with flour to prevent sticking.
- In a mixing bowl, whisk together the flour, baking powder, baking soda, and salt. Set aside. In another bowl, cream together the softened butter and brown sugar until light and fluffy.
- Add the eggs, one at a time, beating well after each addition. Stir in the vanilla extract. Gradually add the dry ingredients to the wet mixture, alternating with the milk, and mix until just combined.
- Pour the batter into the prepared cake pan and smooth the top. Bake in the preheated oven for about 30-35 minutes or until a toothpick inserted into the center comes out clean. While the cake is baking, prepare the toffee sauce.
- In a saucepan over medium heat, combine the brown sugar and butter for the toffee sauce. Stir until the butter has melted and the mixture is smooth. Gradually add the heavy cream while continuing to stir, and bring the mixture to a gentle boil. Remove from heat and set aside.
- Once the cake is done baking, remove it from the oven and let it cool for about 10 minutes. Carefully invert the cake onto a serving dish and pour half of the toffee sauce over the top, allowing it to soak in. Serve warm with the remaining sauce on the side.
Extra Tips: To enhance the flavor of your Toffee Pudding Cake, consider adding a pinch of sea salt to the toffee sauce for a salted caramel twist. If you want to impress your guests further, serve the cake with freshly whipped cream or vanilla ice cream.
This dessert can also be made a day ahead; simply reheat it gently in the oven before serving to enjoy its warm, gooey goodness.
Sticky Toffee Pudding
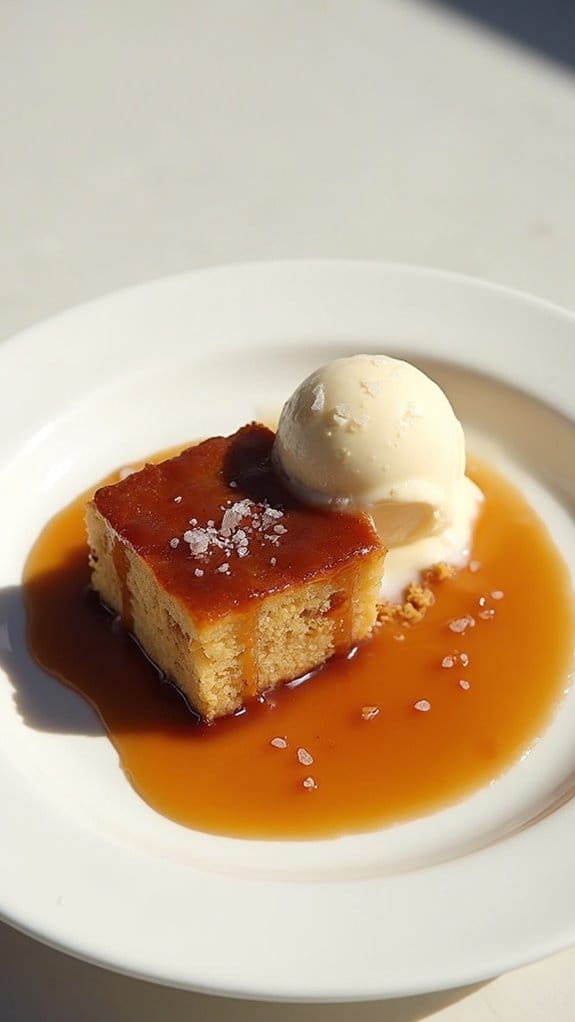
Title: Sticky Toffee Pudding
Prep Time: 20 minutes
Cook Time: 50 minutes
Number of Servings: 8
Required Equipment List: Mixing bowls, whisk, measuring cups, measuring spoons, 9-inch square baking dish, oven
Cuisine Type: British
Sticky Toffee Pudding is a classic British dessert that has captured the hearts of many with its rich flavors and comforting texture. This indulgent treat features a moist sponge cake made with finely chopped dates, which not only lends a sweet caramel flavor but also keeps the pudding incredibly tender.
Once baked, it’s drenched in a luscious toffee sauce, making it an ideal dessert for any festive occasion or family gathering. This dessert is a delightful combination of warm and gooey, perfectly paired with a scoop of vanilla ice cream or a dollop of whipped cream.
The toffee sauce is the star of the show, balancing the sweetness of the pudding and providing a rich, velvety finish that will have everyone coming back for seconds. With straightforward ingredients and simple steps, Sticky Toffee Pudding is a must-try recipe that will impress both family and guests alike.
Ingredients:
- 1 cup chopped dates
- 1 teaspoon baking soda
- 1 cup boiling water
- 1/3 cup unsalted butter, softened
- 1 cup brown sugar, packed
- 2 large eggs
- 1 teaspoon vanilla extract
- 1 cup all-purpose flour
- 1 teaspoon baking powder
- Pinch of salt
For the Toffee Sauce:
- 1 cup brown sugar, packed
- 1/2 cup heavy cream
- 1/4 cup unsalted butter
- 1 teaspoon vanilla extract
Instructions:
- Preheat your oven to 350°F (175°C). Grease a 9-inch square baking dish and set it aside. In a mixing bowl, add the chopped dates and baking soda, then pour the boiling water over them. Allow this mixture to sit and soften for about 15 minutes.
- In another mixing bowl, cream together the softened butter and brown sugar until light and fluffy. This should take about 2-3 minutes. Then, add the eggs one at a time, mixing well after each addition, followed by the vanilla extract.
- Gradually fold the flour, baking powder, and salt into the butter mixture until just combined. Be careful not to overmix. Once incorporated, gently fold in the softened date mixture, ensuring everything is well combined and smooth.
- Pour the batter into the prepared baking dish and spread it evenly. Bake in the preheated oven for 40-45 minutes or until a toothpick inserted into the center comes out clean. Once baked, remove from the oven and let it cool slightly.
- While the pudding is cooling, prepare the toffee sauce. In a saucepan over medium heat, combine the brown sugar, heavy cream, butter, and vanilla extract. Stir continuously until the mixture comes to a gentle boil. Allow it to simmer for about 3-5 minutes until it thickens slightly.
- To serve, cut the warm pudding into squares and place them on plates. Drizzle generously with the warm toffee sauce, and if desired, serve with vanilla ice cream or whipped cream on the side.
Extra Tips: For an extra touch, consider adding a sprinkle of sea salt on top of the toffee sauce before serving to enhance the flavors. You can also experiment with different types of dried fruits, such as raisins or prunes, to give the pudding a unique twist.
If you have leftovers, store them in an airtight container in the refrigerator, and gently reheat in the microwave before serving. Enjoy this delightful treat with loved ones during the festive season!
White Chocolate Raspberry Cheesecake
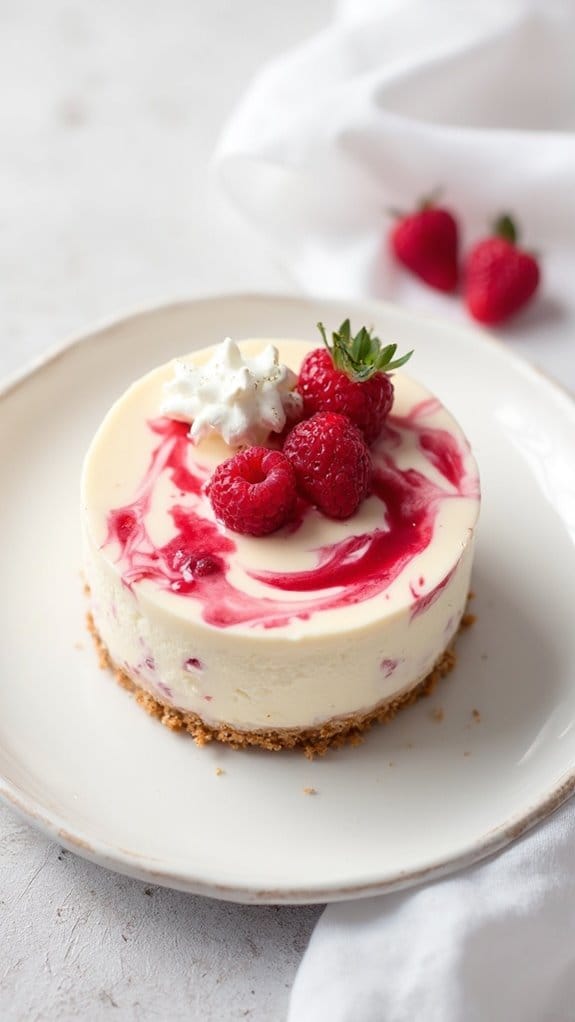
Title: White Chocolate Raspberry Cheesecake
Prep Time: 30 minutes
Cook Time: 60 minutes
Number of Servings: 12
Required Equipment List: Springform pan, mixing bowls, electric mixer, rubber spatula, oven
Cuisine Type: American
This White Chocolate Raspberry Cheesecake is a decadent dessert that combines the creamy richness of white chocolate with the tartness of fresh raspberries, creating an irresistible treat that’s perfect for any festive occasion. The smooth, velvety texture of the cheesecake pairs beautifully with the vibrant raspberry sauce that swirls throughout, making it not only delicious but also visually stunning.
Whether served at Christmas, birthdays, or a casual dinner party, this cheesecake is sure to be the star of the dessert table. The base of this cheesecake is made from crushed graham crackers mixed with melted butter, providing a deliciously buttery crunch that complements the creamy filling perfectly.
Baking the cheesecake in a water bath guarantees even cooking and a silky texture, while the raspberry topping adds a burst of flavor and color. With a little patience and the right technique, you can create a show-stopping dessert that will have everyone coming back for seconds.
Ingredients:
- 1 ½ cups graham cracker crumbs
- ½ cup unsalted butter, melted
- 1 cup white chocolate chips
- 3 (8-ounce) packages cream cheese, softened
- 1 cup granulated sugar
- 3 large eggs
- 1 teaspoon vanilla extract
- 1 cup fresh raspberries
- ½ cup raspberry puree (store-bought or homemade)
- 2 tablespoons cornstarch
- Whipped cream (for serving, optional)
Instructions:
- Preheat your oven to 325°F (160°C). Grease a 9-inch springform pan and wrap the outside with aluminum foil to prevent water from leaking in during baking. Set aside.
- In a mixing bowl, combine the graham cracker crumbs and melted butter until the mixture resembles wet sand. Press the mixture firmly into the bottom of the prepared springform pan to create an even crust. Bake the crust for 10 minutes, then allow it to cool while preparing the filling.
- In a microwave-safe bowl, melt the white chocolate chips in 30-second intervals, stirring until smooth. Set aside to cool slightly.
- In a large mixing bowl, beat the softened cream cheese and granulated sugar with an electric mixer until creamy and smooth. Add the eggs one at a time, mixing on low speed after each addition. Stir in the vanilla extract and melted white chocolate until fully incorporated.
- Gently fold in the fresh raspberries and cornstarch, being careful not to break the berries too much. Pour the cheesecake filling over the cooled crust, smoothing the top with a rubber spatula.
- Place the springform pan inside a larger baking dish and fill the outer dish with hot water until it reaches halfway up the sides of the springform pan. Bake for 50-60 minutes, or until the center is set but still slightly jiggly. Turn off the oven and leave the cheesecake inside for an additional hour to cool gradually.
- Once cooled, remove the cheesecake from the water bath and refrigerate for at least 4 hours or overnight. Before serving, top with raspberry puree and whipped cream if desired.
Extra Tips: To make your raspberry puree, simply blend fresh raspberries with a little sugar until smooth, then strain to remove the seeds. For a more intense raspberry flavor, you can swirl additional raspberry puree into the cheesecake batter before baking.
If you want a firmer cheesecake, consider adding an extra egg or chilling the cheesecake longer. This dessert pairs beautifully with a glass of dessert wine or a cup of coffee. Enjoy!
Mincemeat Tartlets
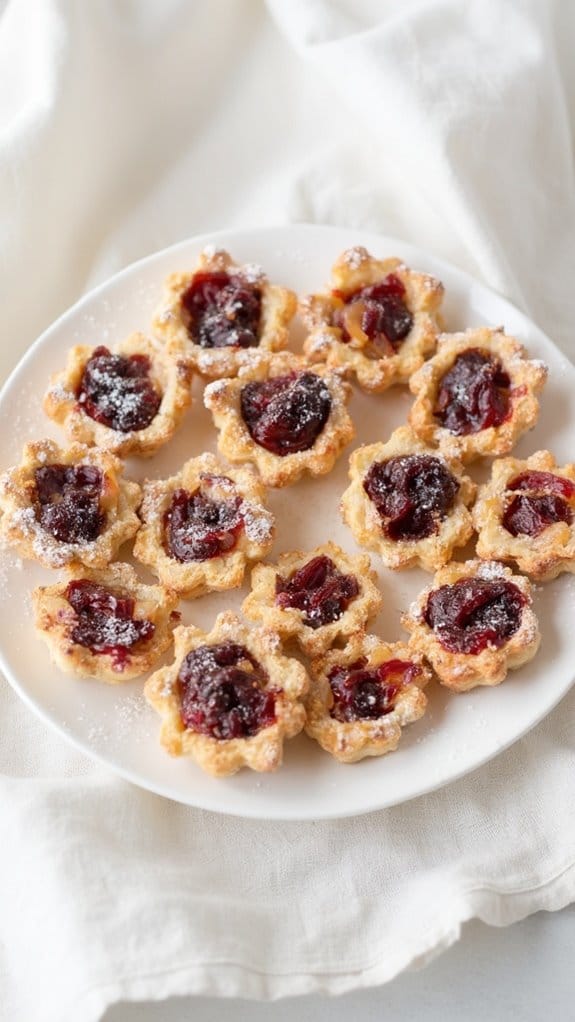
Title: Mincemeat Tartlets
Prep Time: 20 minutes
Cook Time: 25 minutes
Number of Servings: 12
Required Equipment List: Tartlet pans, mixing bowl, rolling pin, baking sheet, oven
Cuisine Type: British
Mincemeat Tartlets are a classic holiday treat that beautifully combines the rich flavors of dried fruits, spices, and a hint of brandy, all encased in a crisp pastry shell. These delightful little desserts are perfect for sharing during festive gatherings or as a sweet addition to your holiday dessert table.
The buttery, flaky pastry complements the sweet and tangy mincemeat filling, making each bite a perfect harmony of textures and flavors. Making mincemeat tartlets is simpler than it may seem, and they can be made ahead of time to save you stress during the holiday rush.
With just a handful of ingredients, this recipe isn’t only delicious but also allows for creativity in presentation. You can dust the finished tartlets with powdered sugar or serve them with a dollop of whipped cream for an extra touch of indulgence.
Ingredients:
- 1 cup mincemeat filling (store-bought or homemade)
- 1 ½ cups all-purpose flour
- ½ cup unsalted butter, chilled and cubed
- ¼ cup granulated sugar
- 1 egg yolk
- 2 tablespoons cold water
- ½ teaspoon vanilla extract
- Powdered sugar (for dusting, optional)
Instructions:
- Preheat your oven to 375°F (190°C). Grease your tartlet pans with a little butter or non-stick spray to guarantee easy removal after baking.
- In a mixing bowl, combine the flour and sugar. Add the chilled, cubed butter and use a pastry cutter or your fingers to blend until the mixture resembles coarse crumbs.
- Stir in the egg yolk, vanilla extract, and cold water until the dough begins to come together. If the dough is too dry, add a little more water, one teaspoon at a time.
- Turn the dough out onto a lightly floured surface and knead it gently just until it forms a ball. Wrap it in plastic wrap and refrigerate for about 15 minutes to firm up.
- On a floured surface, roll out the chilled dough to about 1/8 inch thick. Cut out circles large enough to fit into your tartlet pans and press the circles into the pans to create a crust.
- Fill each tartlet with a generous spoonful of mincemeat filling, being careful not to overfill.
- Bake in the preheated oven for about 20-25 minutes or until the pastry is golden brown. Remove from the oven and let them cool slightly before carefully removing from the pans.
- Once cooled, dust with powdered sugar if desired and serve warm or at room temperature.
Extra Tips: For added flavor, consider adding a pinch of ground cinnamon or nutmeg to the pastry dough. If you prefer a sweeter filling, you can mix in a tablespoon of brown sugar with the mincemeat.
These tartlets can be stored in an airtight container for a few days and taste even better the next day as the flavors meld together. Enjoy this festive treat with a cup of tea or mulled wine for the perfect holiday indulgence!
S’mores Christmas Trifle
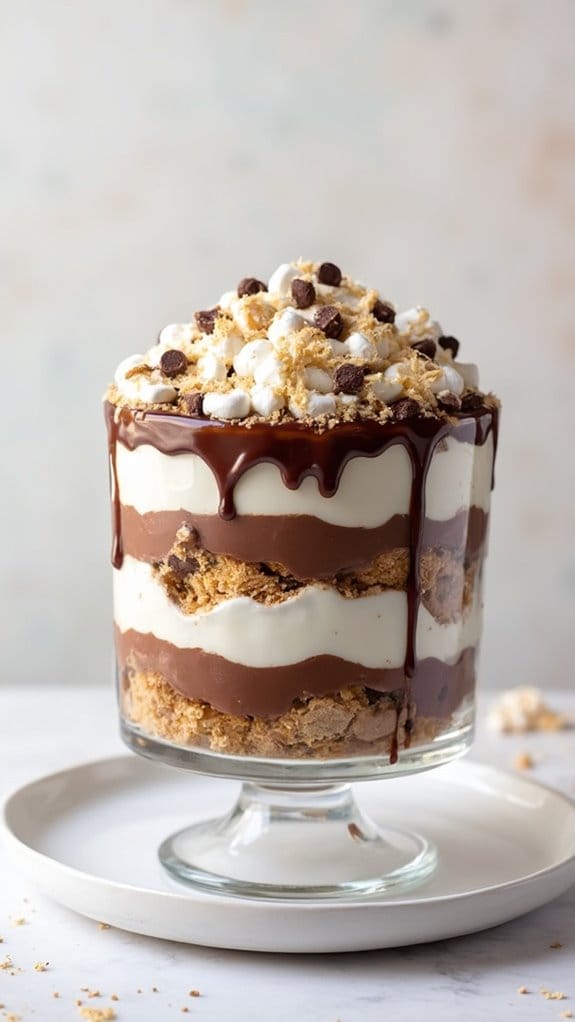
Title: S’mores Christmas Trifle
Prep Time: 20 minutes
Cook Time: 10 minutes
Number of Servings: 6
Required Equipment List: Trifle dish or large glass bowl, mixing bowls, whisk, spatula, measuring cups and spoons
Cuisine Type: American
The S’mores Christmas Trifle is a festive, indulgent dessert that combines the classic flavors of s’mores with a delightful twist. Layers of chocolate pudding, fluffy whipped cream, graham cracker crumbs, and mini marshmallows come together to create a visually appealing and delicious treat that’s perfect for holiday gatherings.
This trifle not only captures the essence of a campfire favorite but also adds a touch of elegance with its layered presentation, making it a show-stopping dessert for any occasion. What sets this trifle apart is its ease of preparation, allowing you to create a stunning dessert without the need for baking.
You can prepare the components ahead of time and assemble them just before serving, ensuring a fresh and creamy texture. This S’mores Christmas Trifle is sure to be a hit with both kids and adults alike, making it a must-have addition to your holiday dessert table.
Ingredients:
- 1 box chocolate pudding mix
- 2 cups milk
- 1 cup whipped cream (store-bought or homemade)
- 1 cup graham cracker crumbs
- 1 cup mini marshmallows
- 1/2 cup chocolate chips
- Extra mini marshmallows for topping
- Chocolate syrup for drizzling
Instructions:
- In a mixing bowl, prepare the chocolate pudding according to the package instructions, using 2 cups of milk. Whisk until well combined and smooth, then refrigerate for about 5-10 minutes to set.
- Once the pudding is set, begin assembling the trifle. Start with a layer of graham cracker crumbs at the bottom of the trifle dish or glass bowl, spreading an even layer to create a base.
- Next, add a layer of the prepared chocolate pudding on top of the graham cracker crumbs, smoothing it out gently with a spatula.
- Follow the pudding layer with a layer of whipped cream. You can either dollop it on or spread it evenly across the pudding layer for a smooth finish.
- Sprinkle a layer of mini marshmallows over the whipped cream, followed by a handful of chocolate chips for added texture and flavor. Repeat the layering process until you reach the top of the dish, finishing with a final layer of whipped cream.
- For the topping, add extra mini marshmallows and drizzle chocolate syrup over the top. You can also use a kitchen torch to lightly toast the marshmallows for a s’mores effect, if desired.
Extra Tips: To save time, you can use instant pudding mix and skip the refrigeration step, but allowing it to set will result in a creamier texture.
Feel free to customize this trifle by adding layers of caramel or peanut butter for an extra twist. This dessert can be made a few hours in advance, but it’s best enjoyed the same day to keep the graham crackers from getting too soggy. Enjoy your festive creation!
Cranberry Almond Biscotti
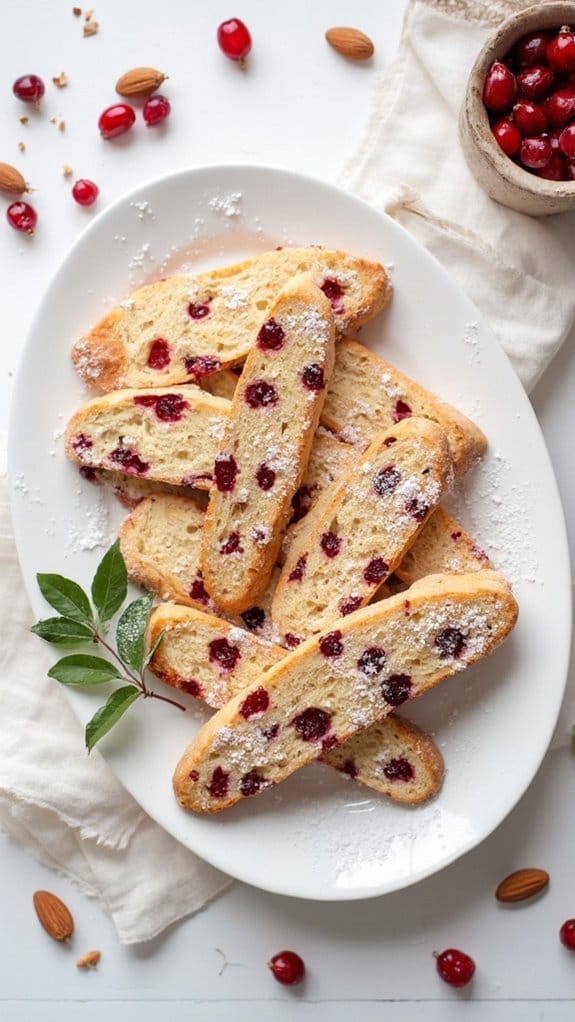
Title: Cranberry Almond Biscotti
Prep Time: 15 minutes
Cook Time: 40 minutes
Number of Servings: 24
Required Equipment List: Baking sheet, mixing bowl, whisk, spatula, knife, cooling rack
Cuisine Type: Italian
Cranberry Almond Biscotti are delightful Italian cookies that are perfect for the holiday season or any time you crave a crunchy, sweet treat. The combination of tart cranberries and nutty almonds creates a wonderful flavor contrast that’s complemented by a hint of vanilla.
These biscotti are perfect for dipping in coffee or tea, making them an excellent addition to your dessert table or a thoughtful homemade gift for friends and family. Making biscotti may seem intimidating, but this recipe is straightforward and yields delicious results.
The twice-baked process gives these cookies their signature crunch, while the addition of dried cranberries and sliced almonds adds both texture and flavor. Enjoy them as a snack, dessert, or alongside your favorite warm beverage for a cozy experience.
Ingredients:
- 2 cups all-purpose flour
- 1 cup granulated sugar
- 1 teaspoon baking powder
- 1/2 teaspoon salt
- 3 large eggs
- 1 teaspoon vanilla extract
- 1/2 teaspoon almond extract
- 1 cup dried cranberries
- 1 cup sliced almonds
Instructions:
- Preheat your oven to 350°F (175°C) and line a baking sheet with parchment paper. This will prevent the biscotti from sticking to the pan and guarantee easy cleanup.
- In a mixing bowl, whisk together the flour, sugar, baking powder, and salt until well combined. This dry mixture will form the base for your biscotti.
- In a separate bowl, beat the eggs with the vanilla and almond extracts until well blended. Gradually add the egg mixture to the dry ingredients, stirring until a thick dough forms.
- Fold in the dried cranberries and sliced almonds, confirming they’re evenly distributed throughout the dough. The dough will be sticky, so use a spatula to help incorporate the mix.
- Transfer the dough onto the prepared baking sheet and shape it into a log about 12 inches long and 3 inches wide. Smooth out the surface with a spatula for an even bake.
- Bake the log in the preheated oven for 25-30 minutes, or until it’s lightly golden and firm to the touch. Remove from the oven and let it cool on the baking sheet for about 10 minutes.
- Once cooled, use a serrated knife to slice the log into 1/2-inch thick pieces. Arrange the slices cut side down back on the baking sheet.
- Return the biscotti to the oven and bake for an additional 10-15 minutes, flipping them halfway through, until crispy and golden brown.
- Remove from the oven and let cool completely on a wire rack before serving or storing.
Extra Tips: For a more intense almond flavor, consider toasting the sliced almonds before adding them to the dough. You can also dip the cooled biscotti in melted chocolate for an extra festive touch.
Store your biscotti in an airtight container to maintain their crunch, and they’ll keep well for several weeks, making them perfect for holiday gifting or enjoying throughout the winter months.
Conclusion
So, as you whip up these 27 irresistible Christmas desserts, imagine the joy on your friends’ faces when they bite into those classic gingerbread cookies or dig into an eggnog cheesecake. Isn’t it funny how a simple treat can spark such happiness? Whether you’re baking solo or with family, these recipes are bound to create sweet memories. So, why not start a new holiday tradition this year? After all, who wouldn’t want a little more sweetness during the season?

