No products in the cart.
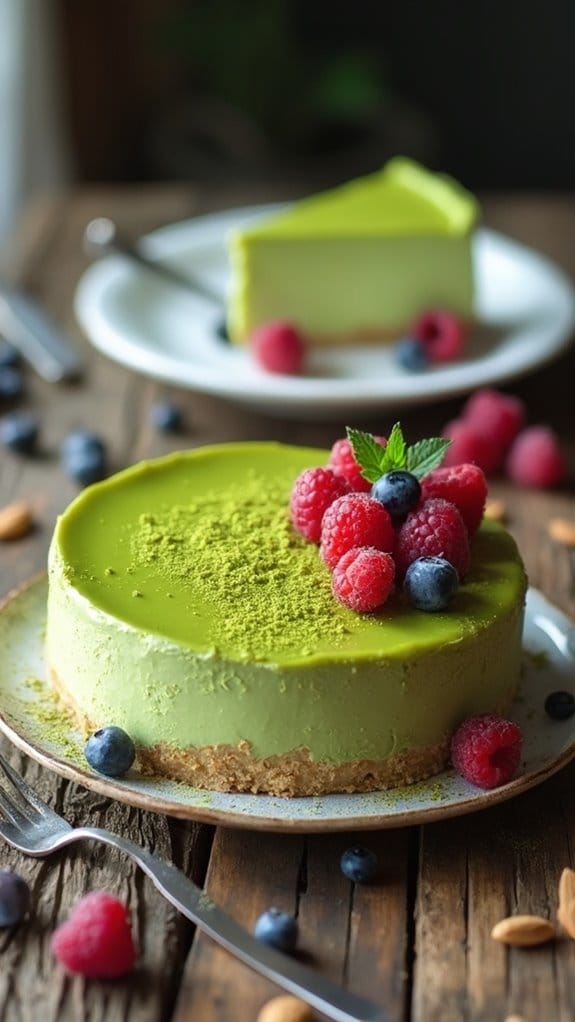
27 Scrumptious Keto Valentine’s Desserts: Sweeten Your Day the Healthy Way
Looking to sweeten up your Valentine’s Day without compromising your health goals? You’ll love these 27 scrumptious keto Valentine’s desserts! Imagine whipping up a rich Chocolate Lava Cake with a gooey center or a revitalizing Raspberry Almond Cheesecake that’s as beautiful as it is tasty. Or how about some Coconut Flour Chocolate Cookies for a guilt-free snack? Each dessert packs flavor while keeping carbs low, so you can indulge without the worry. Ready to impress your loved one with your culinary skills? Keep going, and you’ll discover even more delicious keto treats that’ll make your day extra special!
Contents
hide
Keto Chocolate Lava Cake
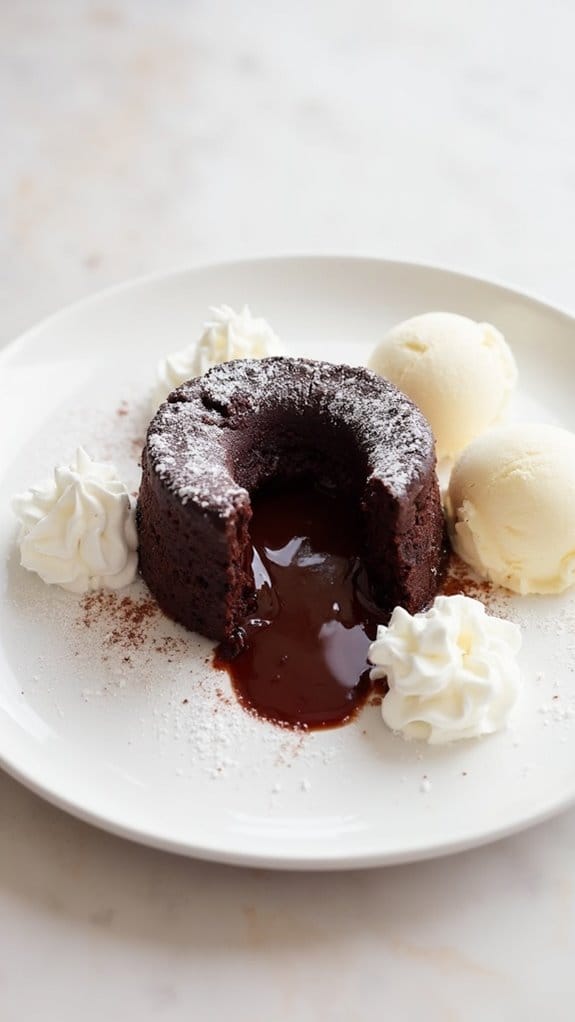
Title: Keto Chocolate Lava Cake
Prep Time: 15 minutes
Cook Time: 20 minutes
Number of Servings: 4
Required Equipment List: Ramekins, mixing bowl, whisk, baking sheet, oven
Cuisine Type: Keto, Dessert
This Keto Chocolate Lava Cake is a decadent and indulgent dessert that satisfies any chocolate craving while adhering to a low-carb lifestyle. With its rich, gooey center and a slightly crisp outer layer, this cake is perfect for a romantic occasion like Valentine’s Day or an elegant dinner party.
Made with almond flour and sugar-free chocolate, it offers a guilt-free way to enjoy a classic dessert without compromising your dietary goals. What makes this dessert truly special is its molten center that flows out when you cut into it, creating a delightful experience for your taste buds.
Paired with a dollop of whipped cream or a scoop of low-carb ice cream, this Keto Chocolate Lava Cake will impress your guests and leave them asking for seconds. It’s quick to prepare and bakes in just 20 minutes, making it an ideal choice for unexpected guests or a special treat for yourself.
Ingredients:
- 1/2 cup unsalted butter
- 1 cup sugar-free dark chocolate chips
- 2 large eggs
- 2 large egg yolks
- 1/4 cup erythritol or other keto-friendly sweetener
- 1 teaspoon vanilla extract
- 1/4 cup almond flour
- 1/4 teaspoon salt
Instructions:
- Preheat your oven to 425°F (220°C) and grease four ramekins with butter. Place them on a baking sheet to make transferring them in and out of the oven easier.
- In a microwave-safe bowl, melt the unsalted butter and sugar-free dark chocolate chips together in 30-second intervals, stirring between each until smooth and fully combined. Set aside to cool slightly.
- In a mixing bowl, whisk together the eggs, egg yolks, erythritol, and vanilla extract until well combined and slightly frothy. This will help create a light texture in the cake.
- Pour the melted chocolate mixture into the egg mixture and stir until just combined. Then, gently fold in the almond flour and salt until no lumps remain, being careful not to overmix.
- Divide the batter evenly among the prepared ramekins, filling each about 3/4 full. Bake in the preheated oven for 12-14 minutes, or until the edges are set but the center remains soft and jiggly.
- Once baked, remove the ramekins from the oven and let them cool for 1-2 minutes. Carefully run a knife around the edges to loosen the cake, then invert onto plates. Serve immediately, optionally topped with whipped cream or low-carb ice cream.
Extra Tips: To guarantee the molten center, be careful not to overbake the lava cakes. Timing is key, so keep an eye on them as they approach the 12-minute mark.
You can also experiment by adding a pinch of instant coffee or espresso powder to enhance the chocolate flavor. For an elegant presentation, dust with a bit of powdered erythritol before serving. Enjoy this delightful treat without any guilt!
Raspberry Almond Cheesecake
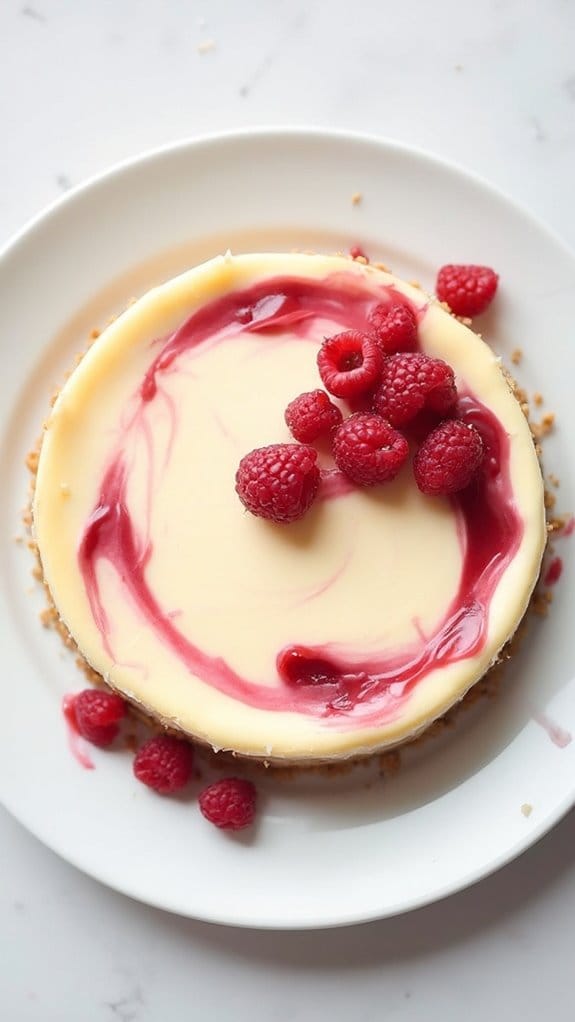
Title: Raspberry Almond Cheesecake
Prep Time: 20 minutes
Cook Time: 60 minutes
Number of Servings: 8
Required Equipment List: Springform pan, mixing bowl, electric mixer, oven
Cuisine Type: Keto-Friendly Dessert
This Raspberry Almond Cheesecake is a delightful keto-friendly dessert that combines the creamy richness of cheesecake with the tartness of fresh raspberries and the nutty flavor of almond. It’s an ideal treat for Valentine’s Day or any special occasion, impressing your loved ones with its beautiful presentation and delicious taste.
The crust is made from almond flour, providing a low-carb alternative to traditional cheesecake crusts, while the addition of fresh raspberries not only adds flavor but also a vibrant color that makes the dessert visually appealing.
The cheesecake itself is incredibly easy to make, requiring just a few simple ingredients and minimal effort. The use of cream cheese and sour cream creates a rich and creamy texture that’s perfectly balanced by the sweetness of erythritol or your preferred keto-friendly sweetener.
This dessert can be made ahead of time and stored in the refrigerator, making it a convenient option for parties or gatherings. Serve each slice garnished with a few fresh raspberries for an elegant touch.
Ingredients:
- 2 cups almond flour
- 1/4 cup erythritol (or preferred keto sweetener)
- 1/2 cup unsalted butter, melted
- 16 ounces cream cheese, softened
- 1 cup sour cream
- 3 large eggs
- 1 teaspoon vanilla extract
- 1/2 cup fresh raspberries (plus extra for garnish)
- 1/4 teaspoon almond extract
- Pinch of salt
Instructions:
- Preheat your oven to 350°F (175°C). Grease a 9-inch springform pan with cooking spray or butter to prevent sticking. This will guarantee that your cheesecake comes out smoothly once it’s baked.
- In a mixing bowl, combine the almond flour, erythritol, and melted butter. Mix until well combined and crumbly. Press this mixture firmly into the bottom of the prepared springform pan to create an even crust layer. Bake in the preheated oven for 10 minutes, then remove and let cool.
- In a separate bowl, beat the softened cream cheese with an electric mixer until smooth and creamy. Gradually add in the sour cream, eggs, vanilla extract, almond extract, and a pinch of salt, mixing until fully combined and fluffy.
- Gently fold in the fresh raspberries, being careful not to break them apart too much. This will create beautiful swirls of raspberry throughout the cheesecake.
- Pour the cheesecake filling over the cooled almond crust in the springform pan. Smooth out the top with a spatula and bake in the oven for 50-60 minutes, or until the edges are set and the center is slightly jiggly.
- Once baked, turn off the oven and let the cheesecake cool inside for about an hour. This will help prevent cracks from forming. After that, remove it from the oven and let it cool completely at room temperature before chilling it in the refrigerator for at least 4 hours or overnight.
Extra Tips: For a smoother texture, make sure all your ingredients, especially the cream cheese, are at room temperature before mixing. If you want to add a little extra flavor, consider swirling a raspberry puree on top before baking.
To serve, run a knife around the edge of the springform pan to loosen the cheesecake and carefully remove the sides. This cheesecake can be kept in the refrigerator for up to a week, making it a great make-ahead dessert option. Enjoy your delicious Raspberry Almond Cheesecake!
Coconut Flour Chocolate Cookies
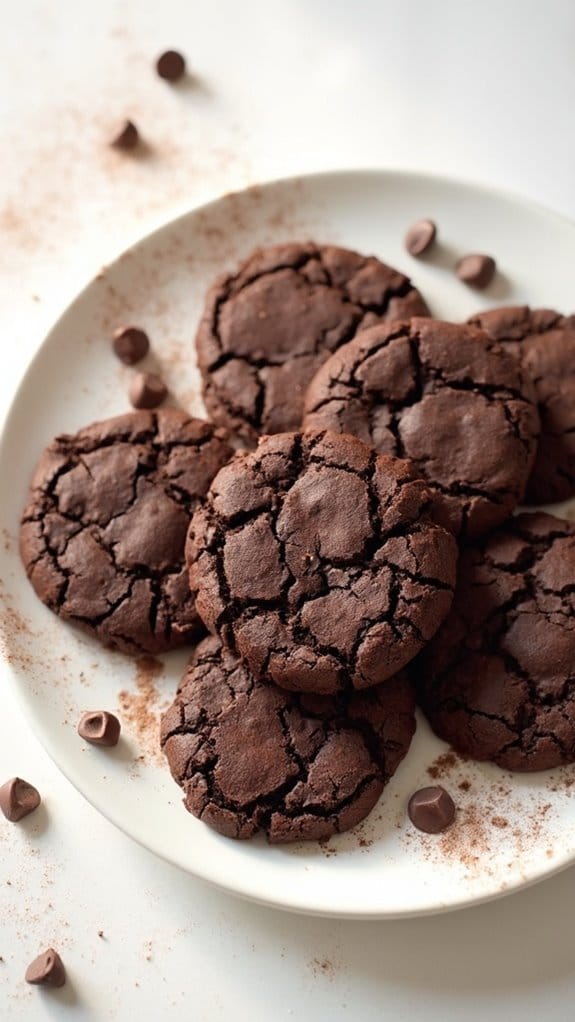
Title: Coconut Flour Chocolate Cookies
Prep Time: 10 minutes
Cook Time: 12 minutes
Number of Servings: 12
Required Equipment List: Mixing bowl, baking sheet, parchment paper, oven, whisk
Cuisine Type: Keto-Friendly
These Coconut Flour Chocolate Cookies are a delightful treat that combines the rich flavor of chocolate with the light, nutty taste of coconut flour. Perfect for those following a ketogenic diet, these cookies are low in carbs yet satisfyingly sweet. They’re great for a Valentine’s Day dessert or any time you crave something indulgent without the guilt.
The use of coconut flour not only makes these cookies gluten-free but also adds a unique texture that will leave you wanting more. The simplicity of this recipe makes it easy for anyone to whip up a batch in no time. With just a few ingredients, you can create a deliciously chewy cookie that pairs perfectly with a cup of coffee or tea.
Whether you’re sharing them with loved ones or keeping them all to yourself, these Coconut Flour Chocolate Cookies are sure to satisfy your sweet tooth while adhering to your dietary preferences.
Ingredients:
- 1/2 cup coconut flour
- 1/2 cup unsweetened cocoa powder
- 1/4 cup granulated erythritol or your preferred sweetener
- 1/4 teaspoon baking soda
- 1/4 teaspoon salt
- 2 large eggs
- 1/4 cup melted coconut oil
- 1 teaspoon vanilla extract
- 1/2 cup sugar-free chocolate chips (optional)
Instructions:
- Preheat your oven to 350°F (175°C). Line a baking sheet with parchment paper to prevent sticking and guarantee easy cleanup while baking the cookies.
- In a mixing bowl, combine the coconut flour, cocoa powder, erythritol, baking soda, and salt. Whisk together until well blended, guaranteeing there are no clumps of dry ingredients.
- In another bowl, whisk together the eggs, melted coconut oil, and vanilla extract until smoothly combined. Pour this wet mixture into the dry ingredients and stir until a thick dough forms.
- If desired, fold in the sugar-free chocolate chips to add extra chocolatey goodness to your cookies.
- Scoop tablespoon-sized amounts of dough onto the prepared baking sheet, spacing them about 2 inches apart as they’ll spread slightly while baking.
- Bake in the preheated oven for 10-12 minutes, or until the edges appear set and the tops look slightly cracked. Remove from the oven and allow the cookies to cool on the baking sheet for a few minutes before transferring them to a wire rack to cool completely.
Extra Tips: To achieve the best texture, make sure to measure your coconut flour accurately, as it can vary in density. If you find the dough too dry, you can add a tablespoon of water or almond milk to help it come together.
For an added twist, consider adding nuts or shredded coconut for extra flavor and crunch. Enjoy your delicious cookies with a glass of almond milk or a cup of herbal tea!
Strawberry Shortcake Cups

Title: Keto Strawberry Shortcake Cups
Prep Time: 15 minutes
Cook Time: 20 minutes
Number of Servings: 4
Required Equipment List: Mixing bowl, muffin tin, electric mixer, measuring cups, measuring spoons
Cuisine Type: American
These Keto Strawberry Shortcake Cups are a delightful, low-carb twist on the classic dessert, perfect for a romantic Valentine’s celebration or any special occasion. The almond flour-based cake is light and fluffy, providing a wonderful base for the luscious whipped cream and fresh strawberries.
This healthier version allows you to indulge without the guilt, making it suitable for anyone following a ketogenic diet. The bright, sweet strawberries paired with the rich, creamy topping create a stunning contrast, both in flavor and presentation.
These individual cups aren’t only easy to make but also a beautiful way to serve dessert to your loved ones. With their charming presentation and delicious taste, Keto Strawberry Shortcake Cups are sure to impress and satisfy everyone at your table.
Ingredients:
- 1 cup almond flour
- 1/4 cup erythritol or other keto-friendly sweetener
- 1 teaspoon baking powder
- 1/4 teaspoon salt
- 3 large eggs
- 1/4 cup unsweetened almond milk
- 1 teaspoon vanilla extract
- 1 cup heavy whipping cream
- 2 tablespoons powdered erythritol (for sweetening the cream)
- 1 cup fresh strawberries, sliced
Instructions:
- Preheat your oven to 350°F (175°C). In a mixing bowl, combine the almond flour, erythritol, baking powder, and salt. Stir until well mixed to create your dry ingredients.
- In a separate bowl, whisk together the eggs, almond milk, and vanilla extract until fully blended. Gradually add the wet mixture to the dry ingredients, stirring until a smooth batter forms.
- Grease a muffin tin or line it with paper liners. Divide the batter evenly among the cups, filling each about two-thirds full. Bake in the preheated oven for 15-20 minutes, or until a toothpick inserted into the center comes out clean.
- While the cakes are baking, prepare the whipped cream. In a mixing bowl, using an electric mixer, beat the heavy whipping cream until soft peaks form. Gradually add the powdered erythritol, continuing to beat until stiff peaks form.
- Once the cakes have cooled completely, remove them from the muffin tin. Carefully slice each cake in half horizontally to create a bottom and top layer. Place the bottom layer on a plate, add a layer of sliced strawberries, and top with a generous dollop of whipped cream.
- Place the top layer on and finish with more whipped cream and a few additional strawberry slices for garnish.
- Serve immediately, or refrigerate for a short time if desired. Enjoy your delicious and guilt-free Keto Strawberry Shortcake Cups!
Extra Tips: To elevate the flavor, consider adding a splash of lemon juice or a teaspoon of lemon zest to the whipped cream for a rejuvenating citrus note.
You can also experiment with other berries like blueberries or raspberries for a mixed berry version. If you want to make the dessert ahead of time, prepare the cakes and whipped cream separately, then assemble just before serving to keep everything fresh and fluffy.
Keto Brownies With Walnuts
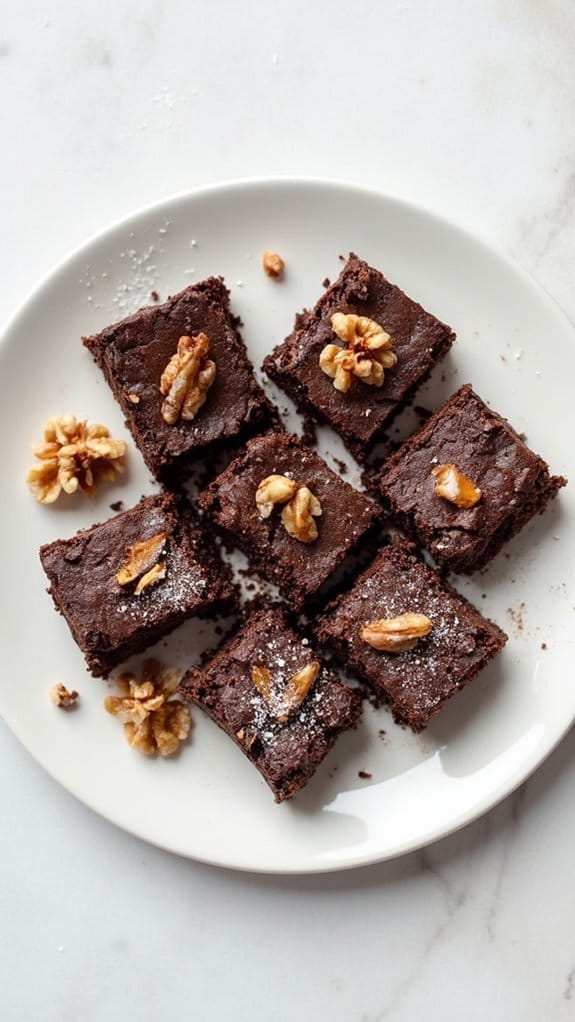
Title: Keto Brownies With Walnuts
Prep Time: 15 minutes
Cook Time: 25 minutes
Number of Servings: 12
Required Equipment List: 8×8 inch baking pan, mixing bowl, whisk, spatula, oven
Cuisine Type: American
Keto Brownies with Walnuts are the perfect low-carb treat that satisfies your chocolate cravings without derailing your diet. Made with almond flour and sweetened with a sugar substitute, these brownies are rich, fudgy, and packed with the goodness of walnuts. They offer a delightful balance of sweetness and nuttiness, making them an ideal dessert for Valentine’s Day or any special occasion.
These brownies aren’t only easy to make but also versatile enough to allow you to customize them to your taste. You can add chocolate chips, swap walnuts for pecans, or even include a hint of espresso powder to amplify the chocolate flavor.
Whether you enjoy them warm with a scoop of keto ice cream or as a snack throughout the week, these brownies will surely become a favorite in your keto dessert repertoire.
Ingredients:
- 1 cup almond flour
- 1/2 cup unsweetened cocoa powder
- 1/2 cup erythritol (or preferred keto sweetener)
- 1/4 cup unsalted butter, melted
- 3 large eggs
- 1 teaspoon vanilla extract
- 1/2 teaspoon baking powder
- 1/4 teaspoon salt
- 1/2 cup walnuts, chopped
Instructions:
- Preheat your oven to 350°F (175°C) and grease an 8×8 inch baking pan or line it with parchment paper for easy removal. This will guarantee that the brownies don’t stick to the pan and make for easier slicing.
- In a mixing bowl, combine the almond flour, unsweetened cocoa powder, erythritol, baking powder, and salt. Whisk these dry ingredients together until they’re well incorporated and free of lumps.
- In a separate bowl, whisk together the melted butter, eggs, and vanilla extract until smooth. Gradually add this wet mixture to the bowl of dry ingredients, stirring until just combined. Be careful not to overmix, as this could result in a denser brownie.
- Fold in the chopped walnuts gently, making sure they’re evenly distributed throughout the batter. This will add a delightful crunch to the fudgy texture of the brownies.
- Pour the batter into the prepared baking pan and spread it evenly with a spatula. Bake in the preheated oven for 20-25 minutes, or until a toothpick inserted into the center comes out mostly clean, with a few moist crumbs.
- Once baked, remove the brownies from the oven and allow them to cool in the pan for at least 10 minutes before transferring them to a wire rack to cool completely. This will help them set and make them easier to cut.
Extra Tips: For an extra layer of flavor, consider adding a pinch of sea salt on top of the brownies right before baking. This enhances the chocolate taste and adds a delightful contrast.
Store any leftover brownies in an airtight container in the refrigerator for up to a week, or freeze them for longer storage. Enjoy these delectable treats guilt-free!
No-Bake Lemon Cheesecake

Title: No-Bake Lemon Cheesecake
Prep Time: 20 minutes
Cook Time: 0 minutes
Number of Servings: 8
Required Equipment List: Mixing bowl, 9-inch springform pan, electric mixer, measuring cups, measuring spoons, spatula
Cuisine Type: American
This No-Bake Lemon Cheesecake is a light and invigorating dessert that brings a zesty twist to your traditional cheesecake. Made with a creamy filling that combines cream cheese, whipped cream, and fresh lemon juice, this cheesecake captures the essence of a sunny day with every bite.
The crust, made from crushed almonds and coconut, offers a delightful crunch that perfectly balances the smooth filling, making it a fantastic treat for any occasion, especially on Valentine’s Day.
Not only is this cheesecake easy to prepare, but it also requires no baking, making it a perfect dessert for those warm days when you want to avoid turning on the oven. Simply mix the ingredients, chill until set, and serve.
With its vibrant lemon flavor and creamy texture, this cheesecake will surely impress your loved ones and is a delightful finish to any meal.
Ingredients:
- 2 cups almond flour
- 1/4 cup unsweetened shredded coconut
- 1/4 cup melted coconut oil
- 1/4 cup sweetener of choice (like erythritol or stevia)
- 16 ounces cream cheese, softened
- 1 cup heavy whipping cream
- 1/2 cup fresh lemon juice
- Zest of 1 lemon
- 1 teaspoon vanilla extract
- 1 tablespoon gelatin (optional, for firmer texture)
Instructions:
- In a mixing bowl, combine the almond flour, shredded coconut, melted coconut oil, and sweetener. Mix until well combined and crumbly. Press this mixture firmly into the bottom of a 9-inch springform pan to create an even crust. Set aside while you prepare the filling.
- In a separate mixing bowl, beat the softened cream cheese with an electric mixer until smooth and creamy. Gradually add in the fresh lemon juice, lemon zest, and vanilla extract, continuing to mix until fully incorporated.
- In another bowl, whip the heavy cream until soft peaks form. Gently fold the whipped cream into the cream cheese mixture using a spatula, being careful not to deflate the whipped cream. This will give your cheesecake a light and airy texture.
- If using gelatin, dissolve it in a small amount of warm water according to package instructions, then fold it into the cheesecake mixture for added stability. Pour the filling over the prepared crust in the springform pan and smooth the top with a spatula.
- Cover the cheesecake with plastic wrap and refrigerate for at least 4-6 hours, or until fully set. Once chilled, carefully remove the sides of the springform pan and slice the cheesecake into wedges for serving.
Extra Tips: For an extra layer of flavor, consider adding a layer of sugar-free lemon curd on top of the cheesecake before serving. You can also garnish with fresh berries or mint leaves for a beautiful presentation.
If you prefer a more intense lemon flavor, adjust the amount of lemon juice and zest to taste. This cheesecake can be made a day ahead of time, allowing the flavors to meld beautifully. Enjoy!
Dark Chocolate Mousse
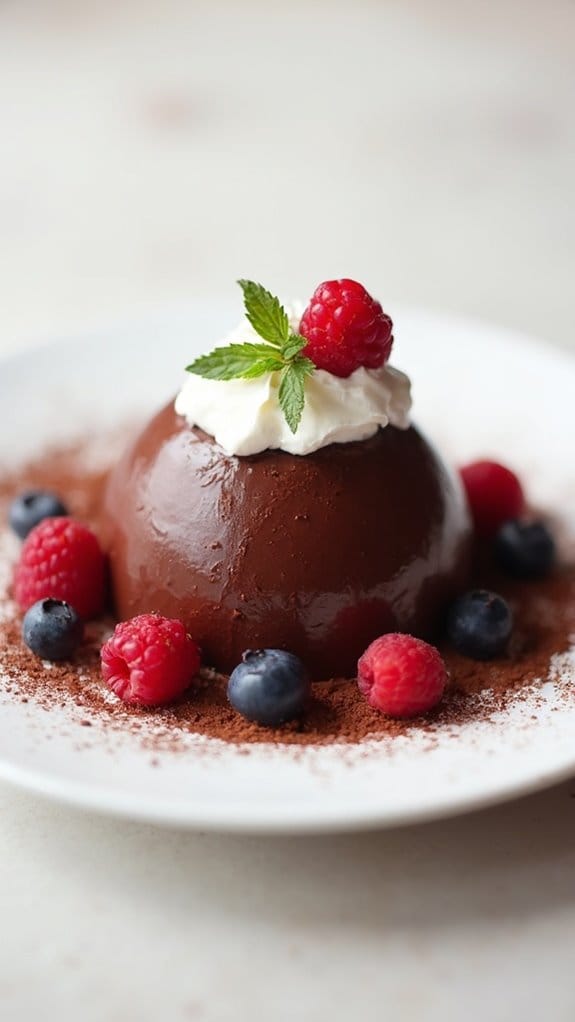
Title: Dark Chocolate Mousse
Prep Time: 15 minutes
Cook Time: 10 minutes
Number of Servings: 4
Required Equipment List: Mixing bowls, electric mixer, rubber spatula, serving dishes
Cuisine Type: French
This Dark Chocolate Mousse is a luxurious dessert that’s both rich and satisfying, making it a perfect treat for Valentine’s Day or any special occasion. The combination of high-quality dark chocolate and whipped cream creates a light yet indulgent texture that melts in your mouth.
With minimal ingredients, this mousse is surprisingly easy to make, allowing you to impress your loved ones without spending hours in the kitchen. In addition to its delectable taste, this mousse can be easily customized to suit your preferences. You can add a splash of vanilla extract for extra flavor or a pinch of sea salt to enhance the chocolate’s richness.
Serve it in elegant glasses topped with fresh berries or a dollop of whipped cream for a stunning presentation that’s sure to delight.
Ingredients:
- 6 ounces high-quality dark chocolate (at least 70% cocoa)
- 3 tablespoons unsalted butter
- 3 large eggs, separated
- 1/4 cup granulated erythritol (or your preferred keto sweetener)
- 1 cup heavy whipping cream
- 1 teaspoon vanilla extract (optional)
- Pinch of sea salt (optional)
Instructions:
- Begin by melting the dark chocolate and butter together. You can do this in a heatproof bowl set over a pot of simmering water (double boiler method) or in the microwave in 30-second intervals, stirring until smooth. Once melted, set aside to cool slightly.
- In a mixing bowl, whisk the egg yolks and erythritol together until the mixture is pale and slightly thickened. Slowly add the melted chocolate mixture to the egg yolks, stirring until well combined. Optionally, add the vanilla extract and a pinch of sea salt for enhanced flavor.
- In a separate bowl, whip the heavy cream until soft peaks form. Gently fold about one-third of the whipped cream into the chocolate mixture to lighten it. Then, carefully fold in the remaining whipped cream until no streaks remain, being cautious not to deflate the mixture.
- In another clean bowl, beat the egg whites until stiff peaks form. Gently fold the egg whites into the chocolate mixture in two additions, ensuring everything is well incorporated without losing the airiness.
- Spoon the mousse into serving dishes and refrigerate for at least 2 hours, or until set. Before serving, you can garnish with additional whipped cream, fresh berries, or a sprinkle of cocoa powder for a beautiful finish.
Extra Tips: For an even richer flavor, consider adding a tablespoon of coffee or espresso powder to the melted chocolate mixture. Make sure to use pasteurized eggs if you’re concerned about safety, or you can use egg substitutes specifically designed for mousse recipes.
This mousse can be made a day in advance, making it a convenient option for hosting or special dinners. Enjoy your decadent creation!
Vanilla Bean Panna Cotta
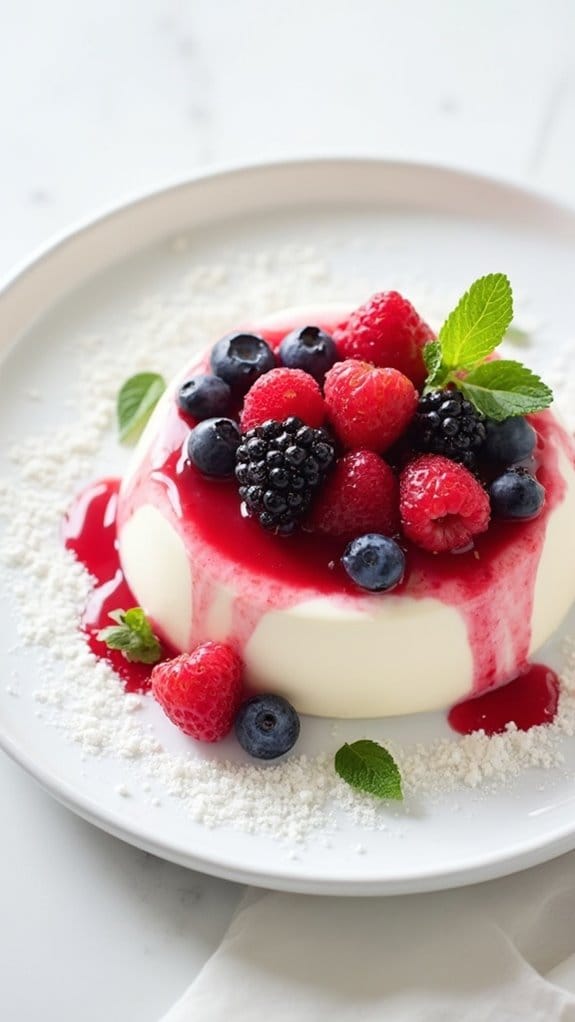
Title: Vanilla Bean Panna Cotta
Prep Time: 15 minutes
Cook Time: 4 hours (chill time)
Number of Servings: 4
Required Equipment List: Medium saucepan, whisk, measuring cups, measuring spoons, ramekins or dessert cups
Cuisine Type: Italian
Vanilla Bean Panna Cotta is a classic Italian dessert that’s elegantly simple, making it perfect for Valentine’s Day or any special occasion. This creamy, custard-like treat is infused with the rich flavors of vanilla bean, resulting in a smooth and silky texture that melts in your mouth.
The panna cotta is usually served chilled, making it a rejuvenating finish to any meal, and can be topped with fresh berries or a berry compote for an extra burst of flavor and color.
The beauty of panna cotta lies in its versatility. While this recipe focuses on the classic vanilla flavor, you can easily customize it by incorporating different extracts or infusions, such as coffee or citrus zest. With only a few ingredients required, this dessert isn’t only delicious but also incredibly easy to make, allowing you to impress your loved ones without spending hours in the kitchen.
Ingredients:
- 1 cup heavy cream
- 1 cup unsweetened almond milk
- 1/4 cup granulated erythritol (or preferred keto sweetener)
- 1 tablespoon gelatin powder
- 1 teaspoon vanilla bean paste (or 1 vanilla bean pod, split)
- Pinch of salt
Instructions:
- In a medium saucepan, combine the heavy cream, almond milk, erythritol, and a pinch of salt. Heat over medium heat, stirring occasionally, until the mixture is warm but not boiling. This guarantees that the sweetener is fully dissolved.
- Once warm, add the gelatin powder to the mixture and whisk continuously for about 2-3 minutes until the gelatin is completely dissolved. If using a vanilla bean pod, scrape the seeds into the mixture and add the pod as well. If using vanilla bean paste, stir it in after the gelatin is dissolved.
- Remove the saucepan from heat and let the mixture cool for about 5 minutes. This helps to guarantee that the panna cotta sets properly without forming bubbles.
- Carefully pour the mixture into ramekins or dessert cups, filling them about three-quarters full. Cover each with plastic wrap and refrigerate for at least 4 hours, or until set. This chilling time allows the panna cotta to firm up and develop its signature texture.
- Once set, carefully remove the panna cotta from the refrigerator. If desired, run a knife around the edges to help release it from the ramekin. Serve chilled and top with fresh berries or a low-carb berry sauce for a delicious finishing touch.
Extra Tips: For a more pronounced vanilla flavor, consider using both vanilla bean paste and a split vanilla bean pod in the recipe. If you’d like to add a fruity topping, a simple berry compote made from simmering mixed berries with a keto sweetener can elevate your panna cotta beautifully.
Remember to allow sufficient chilling time for the best results, and enjoy the delightful contrast of creamy panna cotta with the fresh toppings!
Peanut Butter Fat Bombs
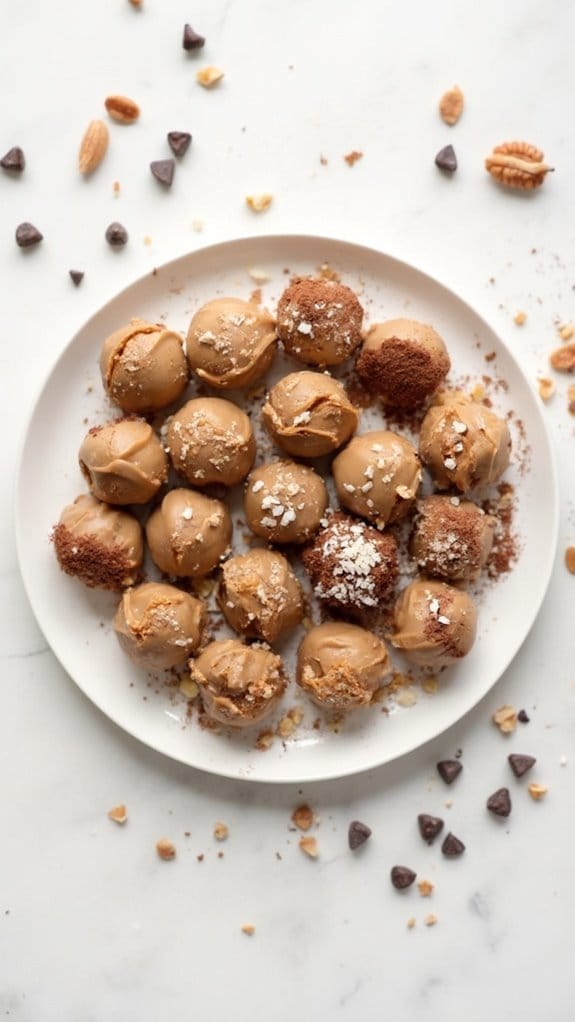
Title: Peanut Butter Fat Bombs
Prep Time: 10 minutes
Cook Time: 0 minutes
Number of Servings: 12
Required Equipment List: Mixing bowl, silicone mold or mini muffin tin, spatula
Cuisine Type: Keto-friendly
Peanut Butter Fat Bombs are a delicious and satisfying treat for anyone following a ketogenic diet. These little bites aren’t only low in carbs but also packed with healthy fats, making them the perfect snack to keep your energy levels up throughout the day.
With the rich, creamy flavor of peanut butter and a hint of sweetness, they’re sure to satisfy your cravings without derailing your dietary goals. Plus, they require no baking, making them incredibly easy to whip up in just a matter of minutes.
These fat bombs are versatile, allowing you to customize them with your favorite additions, such as dark chocolate chips, shredded coconut, or even a sprinkle of sea salt on top. They can be stored in the freezer for a quick snack or dessert whenever you need a little pick-me-up.
Perfect for Valentine’s Day, these treats are a sweet way to show your love while sticking to your keto lifestyle.
Ingredients:
- 1 cup natural peanut butter
- 1/4 cup coconut oil, melted
- 1/4 cup unsweetened cocoa powder (optional for chocolate flavor)
- 1/4 cup sweetener of choice (such as erythritol or stevia)
- 1 teaspoon vanilla extract
- Pinch of salt
Instructions:
- In a mixing bowl, combine the natural peanut butter, melted coconut oil, cocoa powder (if using), sweetener, vanilla extract, and a pinch of salt. Use a spatula to mix everything together until smooth and well combined.
- Once the mixture is fully blended, taste and adjust sweetness if necessary, adding more sweetener if desired. The flavor of the peanut butter should be prominent, but you can tweak it to suit your palate.
- Spoon the mixture into a silicone mold or mini muffin tin, filling each cavity about three-quarters full. Smooth the tops with the spatula if necessary to create a uniform surface.
- Place the filled mold or tin in the freezer and allow the fat bombs to set for at least 30 minutes, or until they’re firm and solid.
- Once set, carefully remove the fat bombs from the mold or tin. Store them in an airtight container in the freezer for up to a month, or in the refrigerator for a week.
Extra Tips: For a fun twist, consider adding chopped nuts, seeds, or even a swirl of sugar-free jam to the mixture before freezing. If you prefer a creamier texture, you can use creamy peanut butter instead of chunky.
Always check the labels of your ingredients to verify they’re keto-friendly, especially the sweeteners and peanut butter. Enjoy these delightful fat bombs as a guilt-free treat any time of the day!
Chocolate-Covered Strawberries

Title: Keto Chocolate-Covered Strawberries
Prep Time: 15 minutes
Cook Time: 10 minutes
Number of Servings: 12
Required Equipment List: Baking sheet, parchment paper, microwave-safe bowl, fork or toothpick
Cuisine Type: Keto-friendly dessert
Keto Chocolate-Covered Strawberries are a delicious and guilt-free treat perfect for celebrating Valentine’s Day or any special occasion. This simple recipe combines fresh, juicy strawberries with rich, sugar-free chocolate, creating a delightful balance of flavors while keeping it low-carb.
The vibrant red strawberries not only add a pop of color but also provide essential nutrients, making them a healthier alternative to traditional sweets. These chocolate-covered strawberries are easy to make and can be customized to your liking. You can dip them in dark chocolate, sprinkle with crushed nuts, or drizzle with white chocolate for an elegant touch.
Whether you enjoy them as a romantic dessert for two or a sweet treat to share with friends, these keto-friendly delights are sure to impress and satisfy your sweet tooth without derailing your diet.
Ingredients:
- 12 large strawberries
- 1 cup sugar-free dark chocolate chips
- 1 tablespoon coconut oil
- Optional toppings: crushed nuts, unsweetened shredded coconut, sea salt
Instructions:
- Begin by rinsing the strawberries under cold water and patting them dry with a paper towel. It’s essential that the strawberries are completely dry, as moisture can prevent the chocolate from adhering properly. Leave the green stems on for easy dipping.
- In a microwave-safe bowl, combine the sugar-free dark chocolate chips and coconut oil. Microwave the mixture in 30-second intervals, stirring after each interval, until the chocolate is fully melted and smooth. Be careful not to overheat, as the chocolate can burn easily.
- Once the chocolate is melted, hold each strawberry by the green stem and dip it into the chocolate, swirling it around to coat evenly. Allow any excess chocolate to drip off before placing the dipped strawberry on a baking sheet lined with parchment paper.
- If desired, sprinkle your choice of toppings on the chocolate-covered strawberries while the chocolate is still wet. This could include crushed nuts, unsweetened shredded coconut, or a sprinkle of sea salt for added flavor.
- Once all strawberries are dipped and decorated, place the baking sheet in the refrigerator for about 10-15 minutes to allow the chocolate to set completely.
Extra Tips: For additional flavor, consider adding a drop of vanilla extract or a pinch of sea salt to the melted chocolate before dipping. If you’re looking for a more artistic presentation, use a piping bag to drizzle melted white chocolate or colored sugar-free chocolate over the dark chocolate for a beautiful finish.
Enjoy your keto chocolate-covered strawberries fresh, as they’re best consumed within a couple of days!
Keto Red Velvet Cupcakes
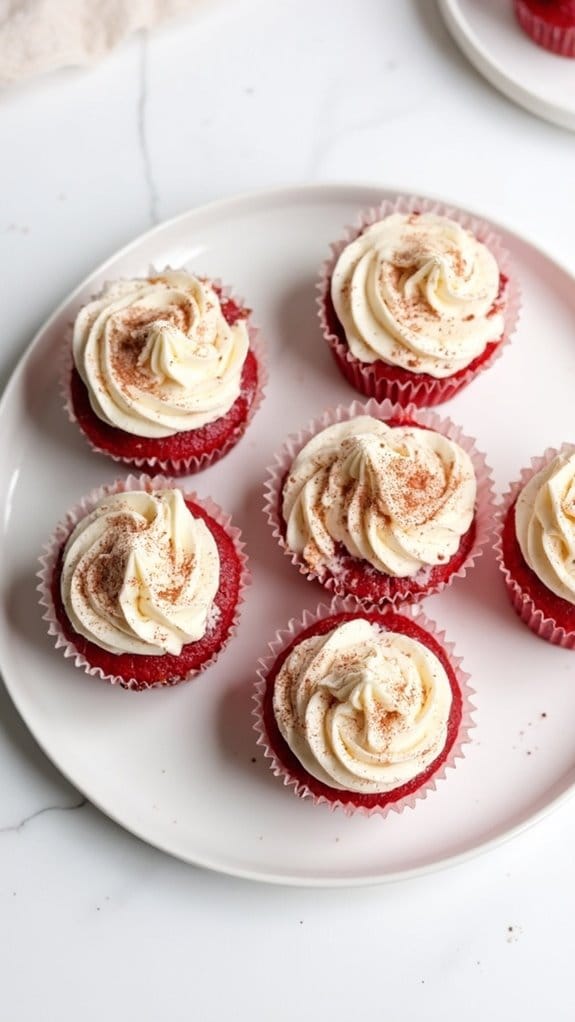
Title: Keto Red Velvet Cupcakes
Prep Time: 15 minutes
Cook Time: 20 minutes
Number of Servings: 12
Required Equipment List: Muffin tin, mixing bowls, whisk, measuring cups, measuring spoons, oven
Cuisine Type: American
Keto Red Velvet Cupcakes are a delicious low-carb alternative to the classic treat, making them perfect for a Valentine’s Day celebration or any special occasion. These cupcakes are rich in flavor and have a beautiful red color that will impress your loved ones.
Using almond flour and erythritol as substitutes for traditional flour and sugar, these cupcakes maintain their moist texture while fitting into a keto lifestyle. Topped with a creamy keto-friendly cream cheese frosting, these red velvet cupcakes are a delightful indulgence without the guilt.
The combination of cocoa powder and vanilla gives them a unique flavor profile that’s sure to satisfy your sweet tooth. Whether you’re a keto enthusiast or just looking to try something new, these cupcakes are an excellent choice for dessert.
Ingredients:
- 1 ½ cups almond flour
- ¼ cup unsweetened cocoa powder
- 1 cup erythritol (or preferred keto sweetener)
- ½ teaspoon baking powder
- ½ teaspoon baking soda
- ½ teaspoon salt
- 2 large eggs
- ½ cup unsweetened almond milk
- 2 tablespoons apple cider vinegar
- 1 teaspoon vanilla extract
- 1 tablespoon red food coloring
Frosting Ingredients:
- 8 ounces cream cheese, softened
- ¼ cup unsalted butter, softened
- ½ cup erythritol (or preferred keto sweetener)
- 1 teaspoon vanilla extract
Instructions:
- Preheat your oven to 350°F (175°C) and line a muffin tin with cupcake liners. This will help prevent the cupcakes from sticking and make for easy cleanup.
- In a mixing bowl, combine the almond flour, cocoa powder, erythritol, baking powder, baking soda, and salt. Whisk the dry ingredients together until well blended to guarantee an even distribution of the leavening agents.
- In a separate bowl, whisk together the eggs, almond milk, apple cider vinegar, vanilla extract, and red food coloring until fully combined. This mixture will provide moisture and the signature red hue to your cupcakes.
- Gradually pour the wet ingredients into the dry ingredients and mix until just combined. Be careful not to over-mix, as this can result in denser cupcakes.
- Evenly distribute the batter into the lined muffin tin, filling each cup about two-thirds full. Bake in the preheated oven for 18-20 minutes, or until a toothpick inserted into the center comes out clean.
- While the cupcakes are baking, prepare the frosting by beating together the softened cream cheese and butter in a mixing bowl until smooth. Gradually add the erythritol and vanilla extract, mixing until well combined and fluffy.
- Once the cupcakes are fully baked, allow them to cool in the tin for 5 minutes before transferring them to a wire rack to cool completely. Once cooled, frost each cupcake generously with the cream cheese frosting.
Extra Tips: For an even richer flavor, consider adding a teaspoon of espresso powder to the dry ingredients, which will enhance the chocolatey notes.
You can also experiment with different food coloring to achieve various shades of red. If you want an extra touch, sprinkle some unsweetened cocoa powder on top of the frosting for a sophisticated finish. Enjoy your delicious keto-friendly treat!
Almond Joy Fat Bombs
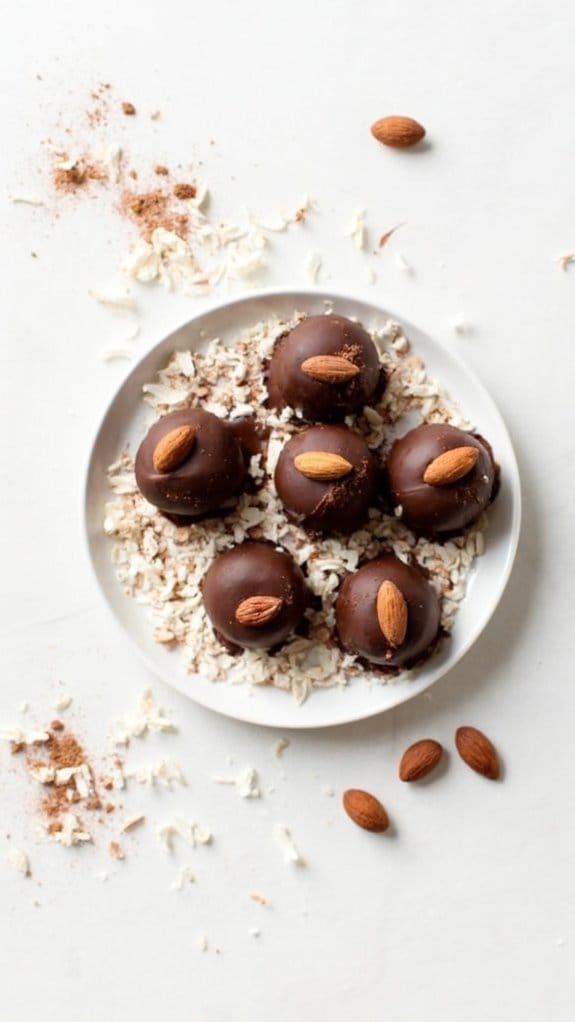
Title: Almond Joy Fat Bombs
Prep Time: 10 minutes
Cook Time: 0 minutes
Number of Servings: 12
Required Equipment List: Mixing bowl, spatula, silicone mold or parchment paper
Cuisine Type: Keto-friendly
Almond Joy Fat Bombs are a deliciously indulgent treat that allows you to enjoy the flavors of your favorite candy bar while staying on track with your keto lifestyle.
These fat bombs combine creamy coconut, rich chocolate, and crunchy almonds, making them a perfect snack to satisfy your sweet tooth without the carbs. With no baking required, they come together quickly and easily, allowing you to whip them up in a matter of minutes.
Not only are these Almond Joy Fat Bombs tasty, but they’re also packed with healthy fats that will keep you feeling full and energized. The combination of coconut oil and almond butter provides a rich source of energy, while the dark chocolate coating adds a decadent touch.
Perfect for satisfying cravings or as a quick pick-me-up, these fat bombs are a must-try for anyone on a ketogenic diet.
Ingredients:
- 1 cup almond butter
- 1/2 cup unsweetened shredded coconut
- 1/4 cup coconut oil, melted
- 1/4 cup powdered erythritol (or sweetener of choice)
- 1 teaspoon vanilla extract
- 1/2 cup dark chocolate chips (sugar-free)
- Whole almonds (for topping)
Instructions:
- In a mixing bowl, combine the almond butter, shredded coconut, melted coconut oil, powdered erythritol, and vanilla extract. Mix well until all ingredients are thoroughly blended, creating a thick and creamy mixture.
- Line a silicone mold or a small baking dish with parchment paper for easy removal. Use a spoon or spatula to scoop the mixture into the mold, filling each cavity to the top. If you’re using a baking dish, spread the mixture evenly and press it down firmly.
- Once filled, place the mold or baking dish in the freezer for about 30 minutes until the fat bombs are firm and set.
- While the fat bombs are setting, melt the dark chocolate chips in a microwave-safe bowl in 30-second intervals, stirring in between until smooth and completely melted.
- After the fat bombs have set, remove them from the mold or cut them into squares if using a baking dish. Dip each bomb into the melted chocolate, coating them thoroughly. Place the coated bombs back onto the parchment paper and top each one with a whole almond.
- Return the chocolate-covered fat bombs to the freezer for another 15-20 minutes to allow the chocolate to harden completely before serving.
Extra Tips: To add some variety, you can experiment with different flavors by incorporating other extracts, such as almond or coconut, into the mixture.
If you prefer a sweeter treat, feel free to adjust the amount of sweetener according to your taste. Store any leftovers in an airtight container in the fridge or freezer for a quick and satisfying snack whenever cravings strike. Enjoy your delicious Almond Joy Fat Bombs!
Berry Coconut Popsicles

Title: Berry Coconut Popsicles
Prep Time: 15 minutes
Cook Time: 4 hours (freezing time)
Number of Servings: 6
Required Equipment List: Blender, popsicle molds, mixing bowl, spoon
Cuisine Type: Keto-friendly dessert
These Berry Coconut Popsicles are a revitalizing and healthy treat that fits perfectly into a keto lifestyle. With a combination of luscious berries and creamy coconut milk, these popsicles deliver a burst of flavor while keeping the net carbs low. Ideal for hot summer days or as a delightful dessert for a special occasion, these popsicles will satisfy your sweet tooth without derailing your diet.
The best part about these popsicles is how easy they’re to make! Simply blend your favorite berries with coconut milk and a touch of sweetener, pour the mixture into molds, and freeze. They make for a fun activity to do with kids or a great way to impress guests at a summer gathering.
Whether you enjoy them by the pool or as a post-dinner dessert, these Berry Coconut Popsicles are sure to be a hit!
Ingredients:
- 1 cup mixed berries (strawberries, blueberries, raspberries)
- 1 cup full-fat coconut milk
- 2 tablespoons erythritol or your preferred keto sweetener
- 1 teaspoon vanilla extract
- Fresh berries for garnish (optional)
Instructions:
- In a blender, combine the mixed berries, coconut milk, erythritol, and vanilla extract. Blend until smooth and the mixture is well combined. You can leave some berry chunks for added texture if desired.
- Taste the mixture and adjust the sweetness if needed by adding more erythritol. Blend again briefly to mix in any additional sweetener.
- Carefully pour the berry coconut mixture into popsicle molds, filling each mold almost to the top but leaving a small space for expansion as they freeze.
- Insert the popsicle sticks into the molds and place them in the freezer. Allow the popsicles to freeze for at least 4 hours or until completely solid.
- To release the popsicles from the molds, run warm water over the outside of the molds for a few seconds. Gently pull on the sticks to remove the popsicles.
- Serve immediately, garnished with fresh berries if desired, and enjoy your revitalizing keto-friendly treat!
Extra Tips: For a twist, you can mix different types of berries or add a layer of pureed berry mix between layers of coconut milk for a marbled effect.
If you prefer a creamier texture, consider adding in a bit of cream cheese or Greek yogurt (if you allow dairy) to the mixture. These popsicles can also be stored in an airtight container in the freezer for up to two weeks, making them a great make-ahead dessert option.
Enjoy your delicious and healthy popsicles!
Chocolate Avocado Pudding

Title: Chocolate Avocado Pudding
Prep Time: 10 minutes
Cook Time: 0 minutes
Number of Servings: 4
Required Equipment List: Food processor or blender, measuring cups, spatula, serving bowls
Cuisine Type: Keto, Dessert
This Chocolate Avocado Pudding is a rich and creamy dessert that captures the essence of indulgence without the guilt. Made from ripe avocados, cocoa powder, and a touch of sweetener, this pudding isn’t only delicious but also packed with healthy fats, making it an ideal treat for those on a keto diet.
The smooth texture and deep chocolate flavor will satisfy any sweet tooth, making it a perfect dessert for Valentine’s Day or any day you want to treat yourself.
What’s great about this recipe is its simplicity and speed. With just a few ingredients and a food processor, you can whip up this delightful pudding in no time. It’s a versatile dessert too; you can customize it by adding flavors like vanilla extract or a pinch of sea salt for an enhanced taste experience.
Whether served on its own or topped with berries or whipped cream, this Chocolate Avocado Pudding is sure to impress.
Ingredients:
- 2 ripe avocados
- 1/2 cup unsweetened cocoa powder
- 1/2 cup unsweetened almond milk (or coconut milk)
- 1/4 cup keto-friendly sweetener (such as erythritol or stevia)
- 1 teaspoon vanilla extract
- A pinch of salt
Instructions:
- Begin by preparing your avocados. Cut them in half, remove the pits, and scoop the flesh into a food processor or blender. This will serve as the creamy base for your pudding.
- Add the unsweetened cocoa powder, almond milk, keto-friendly sweetener, vanilla extract, and a pinch of salt to the food processor. These ingredients will come together to create the rich chocolate flavor.
- Blend the ingredients on high speed until the mixture is completely smooth and creamy. Stop to scrape down the sides of the bowl as needed to guarantee everything is well combined. This should take about 1-2 minutes.
- Once the pudding reaches a velvety texture, taste it and adjust the sweetness if necessary. If you prefer a sweeter pudding, you can add a little more sweetener and blend again.
- Transfer the pudding into serving bowls and chill in the refrigerator for at least 30 minutes before serving. This will allow the flavors to meld and the pudding to firm up slightly.
Extra Tips: To make this dessert even more appealing, consider garnishing it with fresh berries, a dollop of whipped cream, or a sprinkle of chopped nuts for added texture.
If you’re feeling adventurous, try adding a tablespoon of nut butter for a unique flavor twist. This pudding can be stored in an airtight container in the refrigerator for up to three days, making it an excellent make-ahead option for parties or gatherings.
Enjoy your deliciously healthy dessert!
Keto Tiramisu
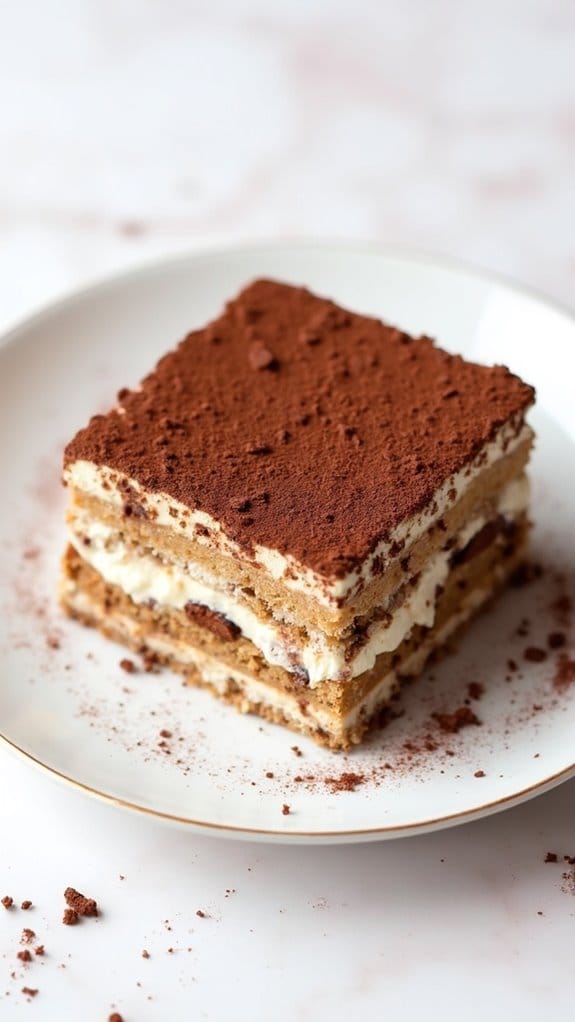
Title: Keto Tiramisu
Prep Time: 30 minutes
Cook Time: 0 minutes
Number of Servings: 8
Required Equipment List: Mixing bowls, electric mixer, 9×9 inch baking dish, spatula, refrigerator
Cuisine Type: Italian
Keto Tiramisu is a low-carb twist on the classic Italian dessert, perfect for those following a ketogenic lifestyle. This indulgent treat features layers of creamy mascarpone cheese and coffee-soaked almond flour sponge cakes, all dusted with cocoa powder for a rich finish. With no added sugars and a delightful balance of flavors, this keto-friendly version allows you to enjoy a taste of Italy while staying true to your dietary goals.
Unlike traditional tiramisu, which often relies on ladyfingers and sugar, this recipe uses a delicious almond flour cake that’s both satisfying and flavorful. It’s an easy make-ahead dessert, as it requires no baking and only needs to chill in the refrigerator for a few hours before serving.
Whether you’re celebrating Valentine’s Day or simply want to impress your loved ones, this Keto Tiramisu is sure to delight with every spoonful.
Ingredients:
- 1 cup almond flour
- 3 large eggs
- 1/4 cup erythritol (or preferred keto sweetener)
- 1 teaspoon vanilla extract
- 1 cup mascarpone cheese
- 1 cup heavy whipping cream
- 1/4 cup strong brewed coffee (cooled)
- 2 tablespoons coffee liqueur (optional)
- Unsweetened cocoa powder (for dusting)
Instructions:
- In a mixing bowl, combine almond flour, eggs, erythritol, and vanilla extract. Use an electric mixer to blend the ingredients until smooth and well combined. The batter should be thick but pourable.
- Pour the batter into a greased 9×9 inch baking dish and spread it evenly. Bake in a preheated oven at 350°F (175°C) for 15-20 minutes or until golden brown. Once baked, allow it to cool completely before slicing into squares.
- In a separate mixing bowl, whip the heavy cream until soft peaks form. Gently fold in the mascarpone cheese until fully incorporated, being careful not to deflate the whipped cream.
- Prepare a shallow dish with the cooled brewed coffee and coffee liqueur (if using). Dip each almond flour square briefly into the coffee mixture, ensuring they absorb some of the liquid but don’t become soggy.
- In a serving dish, create layers by placing a layer of coffee-soaked almond flour squares, followed by a layer of the mascarpone mixture. Repeat the layers until you run out of ingredients, finishing with a layer of mascarpone on top.
- Cover the dish with plastic wrap and refrigerate for at least 4 hours, or overnight for best results. Before serving, dust the top with unsweetened cocoa powder for a classic tiramisu finish.
Extra Tips: To enhance the coffee flavor, consider using espresso instead of regular brewed coffee. Additionally, feel free to add a layer of sugar-free chocolate shavings for an extra touch of decadence.
If you prefer a more pronounced coffee kick, you can increase the amount of coffee liqueur. This dessert is best enjoyed chilled, so be sure to give it enough time in the refrigerator before serving. Enjoy your delightful keto indulgence!
Lemon Blueberry Muffins

Title: Keto Lemon Blueberry Muffins
Prep Time: 10 minutes
Cook Time: 25 minutes
Number of Servings: 12
Required Equipment List: Mixing bowl, muffin tin, oven, measuring cups, measuring spoons
Cuisine Type: Keto, American
These Keto Lemon Blueberry Muffins are a delightful treat that perfectly balances the tartness of lemon with the sweetness of blueberries, making them an ideal option for breakfast or a snack. Made with almond flour and sweetened with a keto-friendly sweetener, these muffins are low in carbs while still being moist and flavorful.
The addition of fresh lemon zest gives them a revitalizing brightness that will leave you wanting more. Not only are these muffins easy to prepare, but they also make for a perfect Valentine’s Day gift or a sweet addition to any brunch table.
The bright colors and vibrant flavors make them a feast for both the eyes and the palate. Plus, they can be enjoyed by those following a keto lifestyle or anyone looking to indulge in a healthier dessert option.
Ingredients:
- 2 cups almond flour
- 1/2 cup erythritol or another keto-friendly sweetener
- 1 teaspoon baking powder
- 1/2 teaspoon baking soda
- 1/4 teaspoon salt
- 3 large eggs
- 1/2 cup unsweetened almond milk
- 1/4 cup melted coconut oil
- Zest of 1 lemon
- 1 cup fresh blueberries
Instructions:
- Preheat your oven to 350°F (175°C) and line a muffin tin with paper liners or grease it with cooking spray to prevent sticking.
- In a mixing bowl, combine the almond flour, erythritol, baking powder, baking soda, and salt. Whisk together until well combined, making sure there are no lumps.
- In a separate bowl, whisk together the eggs, almond milk, melted coconut oil, and lemon zest until smooth. This mixture will provide moisture and flavor to the muffins.
- Pour the wet ingredients into the dry ingredients and stir until just combined. Be careful not to overmix, as this can lead to dense muffins.
- Gently fold in the fresh blueberries, being cautious to avoid crushing them. This will guarantee that the blueberries are evenly distributed throughout the batter.
- Divide the batter evenly among the muffin cups, filling each about 3/4 full. Bake in the preheated oven for 20-25 minutes, or until a toothpick inserted into the center of a muffin comes out clean.
- Allow the muffins to cool in the tin for 5 minutes before transferring them to a wire rack to cool completely. These muffins taste great warm or at room temperature.
Extra Tips: For added flavor, consider mixing in a teaspoon of vanilla extract to the wet ingredients. You can also substitute the blueberries with raspberries or blackberries for a different twist.
If you want to enhance the lemon flavor, drizzle a simple lemon glaze made from powdered erythritol and lemon juice on top once the muffins have cooled. Enjoy your delicious keto-friendly treat!
Chocolate Chip Cookie Dough Bites
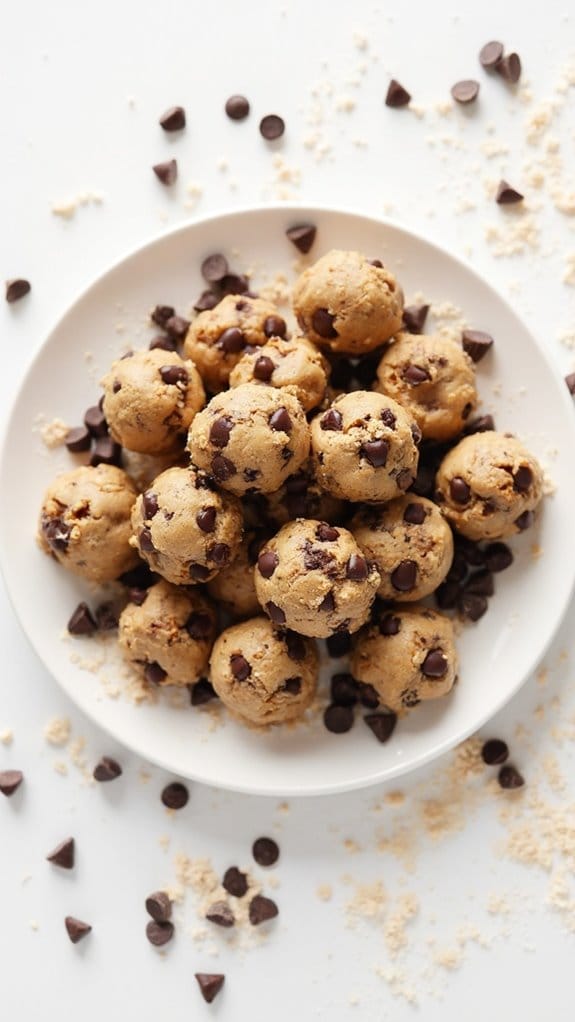
Title: Keto Chocolate Chip Cookie Dough Bites
Prep Time: 10 minutes
Cook Time: 0 minutes
Number of Servings: 12
Required Equipment List: Mixing bowl, spoon, baking sheet, parchment paper, freezer
Cuisine Type: Keto, Dessert
These Keto Chocolate Chip Cookie Dough Bites are a delightful and guilt-free treat perfect for any chocolate lover. Made with wholesome ingredients that adhere to a ketogenic diet, these bites provide all the flavor of traditional cookie dough without the carbs.
With no baking required, you can whip up this easy recipe in just a few minutes and then let your freezer do the work. Each bite is packed with rich chocolate flavor and creamy texture, making them an irresistible indulgence for Valentine’s Day or any special occasion.
The beauty of this recipe lies in its simplicity and adaptability. You can customize the sweetness to your preference by adjusting the keto-friendly sweetener and add-ins like nuts or different types of sugar-free chocolate chips.
Whether you’re enjoying them as a snack or dessert, these cookie dough bites are sure to satisfy any sweet tooth while keeping you on track with your keto lifestyle.
Ingredients:
- 1 cup almond flour
- 1/4 cup keto-friendly sweetener (like erythritol or monk fruit)
- 1/4 cup unsweetened almond butter
- 2 tablespoons coconut oil, melted
- 1 teaspoon vanilla extract
- 1/4 teaspoon salt
- 1/2 cup sugar-free chocolate chips
Instructions:
- In a mixing bowl, combine the almond flour, keto-friendly sweetener, and salt. Mix well to guarantee all dry ingredients are evenly distributed.
- Add the almond butter, melted coconut oil, and vanilla extract to the dry ingredients. Stir until a dough forms, ensuring that all ingredients are well incorporated.
- Fold in the sugar-free chocolate chips, distributing them evenly throughout the cookie dough mixture.
- Using your hands, scoop out small portions of the dough and roll them into bite-sized balls. Place each ball onto a baking sheet lined with parchment paper.
- Once all the dough is rolled into balls, place the baking sheet in the freezer for about 30 minutes to firm up the cookie dough bites.
- After the bites have set, remove them from the freezer and enjoy immediately, or store them in an airtight container in the refrigerator for up to a week.
Extra Tips: For an extra flavor boost, consider adding a pinch of cinnamon or a tablespoon of unsweetened cocoa powder to the dough mixture.
If you prefer a crunchier texture, you can mix in some chopped nuts or seeds. Just remember to keep an eye on portion sizes, as it’s easy to overindulge on these delicious bites! Enjoy your keto-friendly sweet treat!
Peanut Butter Chocolate Bars
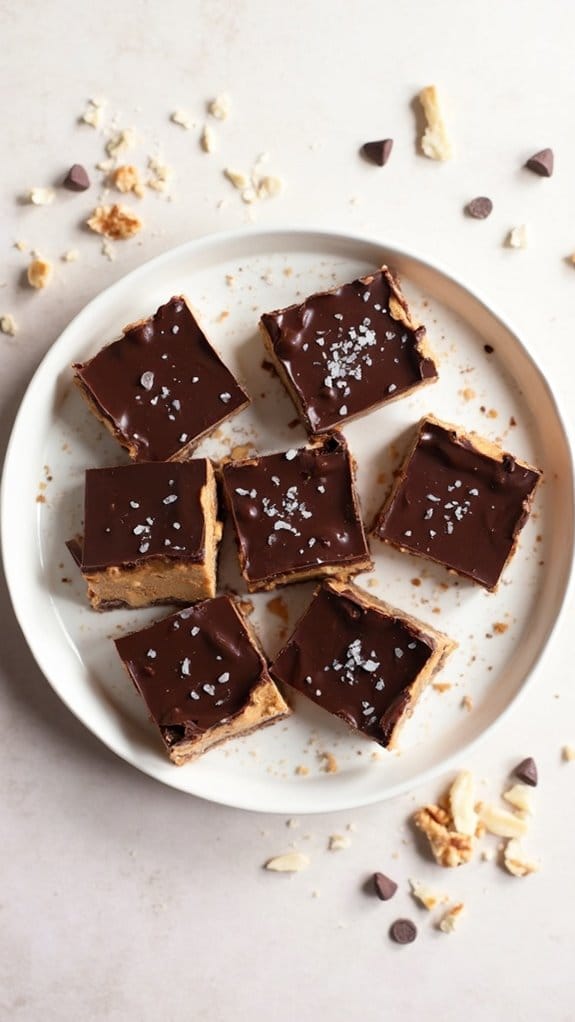
Title: Keto Peanut Butter Chocolate Bars
Prep Time: 10 minutes
Cook Time: 20 minutes
Number of Servings: 12
Required Equipment List: Mixing bowl, 8×8 inch baking dish, parchment paper, spoon, refrigerator
Cuisine Type: Keto Dessert
These Keto Peanut Butter Chocolate Bars are a deliciously decadent treat that satisfies your sweet cravings without the guilt. With a rich combination of creamy peanut butter and dark chocolate, these bars are perfect for those following a ketogenic lifestyle.
They’re low in carbs and sugar, making them a great option for a Valentine’s Day dessert that won’t derail your diet. The recipe is incredibly simple and quick to prepare, requiring no baking, which means you can whip them up in just a few minutes.
Once chilled, the bars become firm and are easy to slice into perfect squares. They’re great for sharing or for indulging in some well-deserved self-care. Plus, the combination of peanut butter and chocolate is a classic pairing that will leave you wanting more.
Ingredients:
- 1 cup natural peanut butter (unsweetened)
- 1/2 cup coconut oil
- 1/4 cup unsweetened cocoa powder
- 1/4 cup erythritol or preferred keto-friendly sweetener
- 1 teaspoon vanilla extract
- Pinch of salt
Instructions:
- Begin by lining an 8×8 inch baking dish with parchment paper, allowing some overhang on the sides for easy removal later. This will prevent the bars from sticking and make cleanup a breeze.
- In a mixing bowl, combine the peanut butter and coconut oil. Microwave for about 30 seconds to 1 minute until melted and easily mixable. Stir until smooth and well combined.
- Add in the unsweetened cocoa powder, erythritol, vanilla extract, and a pinch of salt to the melted peanut butter mixture. Stir until everything is fully incorporated and the mixture is creamy and smooth.
- Pour the mixture into the prepared baking dish, spreading it evenly with a spoon or spatula. Tap the dish gently on the counter to remove any air bubbles and guarantee an even surface.
- Place the baking dish in the refrigerator for about 20-30 minutes, or until the bars are firm and set. Once chilled, use the overhanging parchment paper to lift the bars out of the dish for easy slicing.
- Cut into 12 squares and enjoy! You can store the bars in an airtight container in the refrigerator for up to a week.
Extra Tips: To enhance the flavor, consider adding chopped nuts, sugar-free chocolate chips, or even a sprinkle of sea salt on top of the bars before chilling.
If you prefer a sweeter taste, adjust the amount of erythritol to your liking. These bars also freeze well, so you can make a batch ahead of time and enjoy them whenever a sweet craving strikes!
Mini Keto Fruit Tarts

Title: Mini Keto Fruit Tarts
Prep Time: 20 minutes
Cook Time: 15 minutes
Number of Servings: 12
Required Equipment List: Muffin tin, mixing bowl, whisk, baking paper, rolling pin
Cuisine Type: Keto-friendly dessert
These Mini Keto Fruit Tarts are a delightful and healthy dessert option that will satisfy your sweet tooth without compromising your keto lifestyle. The tart crust is made from almond flour, ensuring a low-carb base that perfectly complements a rich and creamy filling made from cream cheese and vanilla.
Topped with a vibrant assortment of fresh berries, these tarts aren’t only visually appealing but also packed with flavor, making them a perfect treat for Valentine’s Day or any special occasion.
These mini tarts are easy to prepare and can be customized with your favorite low-carb fruits. The combination of the nutty crust, the smooth filling, and the invigorating fruit makes every bite a delicious experience. Whether you serve them at a party or enjoy them as a personal treat, these Mini Keto Fruit Tarts are sure to impress everyone at the table.
Ingredients:
- 1 ½ cups almond flour
- ¼ cup melted coconut oil
- 1 tablespoon erythritol (or sweetener of choice)
- 1 teaspoon vanilla extract
- 1/4 teaspoon salt
- 8 oz cream cheese, softened
- 1/4 cup powdered erythritol
- 1 teaspoon lemon juice
- Assorted fresh berries (strawberries, blueberries, raspberries)
- Mint leaves (for garnish, optional)
Instructions:
- Preheat your oven to 350°F (175°C). In a mixing bowl, combine the almond flour, melted coconut oil, erythritol, vanilla extract, and salt. Stir until the mixture forms a crumbly dough that holds together when pressed.
- Press the dough into the bottom and up the sides of a muffin tin to form mini tart shells. Make sure to create an even layer. Prick the bottom of each tart shell with a fork to prevent bubbling during baking.
- Bake the tart shells in the preheated oven for 12-15 minutes or until they’re golden brown. Once done, remove them from the oven and let them cool completely in the muffin tin.
- While the tart shells are cooling, prepare the filling by mixing the softened cream cheese, powdered erythritol, and lemon juice in a mixing bowl. Use a whisk to blend until the mixture is smooth and creamy.
- Once the tart shells are completely cooled, remove them from the muffin tin and fill each shell with the cream cheese mixture. Spread it evenly and then top with your choice of fresh berries.
- For an elegant presentation, garnish each tart with a mint leaf before serving. Enjoy your delicious Mini Keto Fruit Tarts!
Extra Tips: To make the crust even more flavorful, you can add a teaspoon of cinnamon or a pinch of nutmeg to the dough mixture. If you prefer a sweeter filling, feel free to adjust the amount of erythritol according to your taste.
These tarts can be stored in the refrigerator for a couple of days, making them a great make-ahead dessert option for gatherings.
Cinnamon Roll Mug Cake
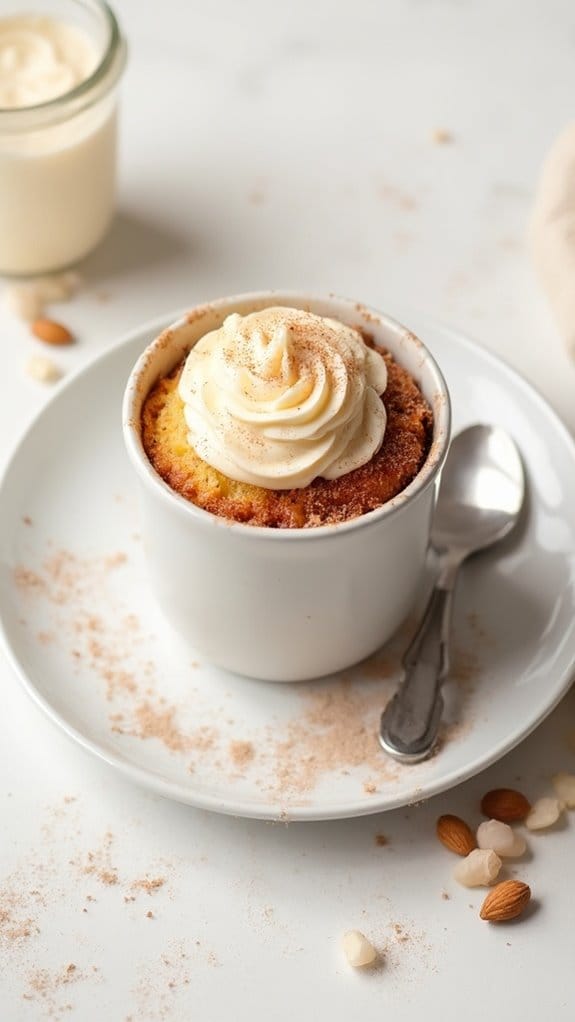
Title: Cinnamon Roll Mug Cake
Prep Time: 5 minutes
Cook Time: 1 minute
Number of Servings: 1
Required Equipment List: Microwave-safe mug, spoon, microwave
Cuisine Type: American
This Cinnamon Roll Mug Cake is the perfect solution for those late-night cravings or when you want a sweet treat without the hassle of baking an entire batch. In just one minute, you can indulge in a warm, gooey cinnamon roll cake that satisfies your sweet tooth while keeping it keto-friendly. Made with almond flour and sweetened with erythritol, this mug cake offers all the flavors of traditional cinnamon rolls without the carbs.
The beauty of this recipe lies in its simplicity and speed, allowing you to enjoy a delicious dessert in no time. Top it off with a quick cream cheese frosting made from just a few ingredients, and you have a delightful treat that feels indulgent yet fits perfectly into your keto lifestyle. Ideal for Valentine’s Day or simply as a cozy dessert, this Cinnamon Roll Mug Cake will surely become a go-to recipe.
Ingredients:
- 3 tablespoons almond flour
- 1 tablespoon erythritol (or preferred sweetener)
- 1/2 teaspoon baking powder
- 1/2 teaspoon cinnamon
- 1/4 teaspoon vanilla extract
- 1 tablespoon unsweetened almond milk
- 1 tablespoon melted butter
- 1 tablespoon cream cheese (for frosting)
- 1 teaspoon powdered erythritol (for frosting)
- 1/2 teaspoon vanilla extract (for frosting)
Instructions:
- In a microwave-safe mug, combine the almond flour, erythritol, baking powder, and cinnamon. Stir the dry ingredients together until well mixed to guarantee an even distribution of flavors.
- Add the vanilla extract, almond milk, and melted butter to the mug. Mix everything together until you have a smooth batter. Make sure there are no lumps, as this will affect the texture of your cake.
- Microwave the mug for about 1 minute. Start checking for doneness at 40 seconds, as microwave power can vary. The cake should rise and appear set, but still slightly moist in the center.
- While the cake is cooling for a minute, prepare the cream cheese frosting. In a small bowl, mix the cream cheese, powdered erythritol, and vanilla extract until smooth and creamy.
- Once the mug cake has cooled slightly, top it with the cream cheese frosting. You can add a sprinkle of cinnamon on top for an extra flavor boost if desired.
Extra Tips: If you prefer a gooey center, microwave the cake for just 40-50 seconds. You can also customize this mug cake by adding chopped nuts or sugar-free chocolate chips into the batter before microwaving. For a richer flavor, consider adding a pinch of nutmeg or a dash of unsweetened cocoa powder to the dry ingredients. Enjoy your warm, keto-friendly treat!
Chocolate Raspberry Truffles
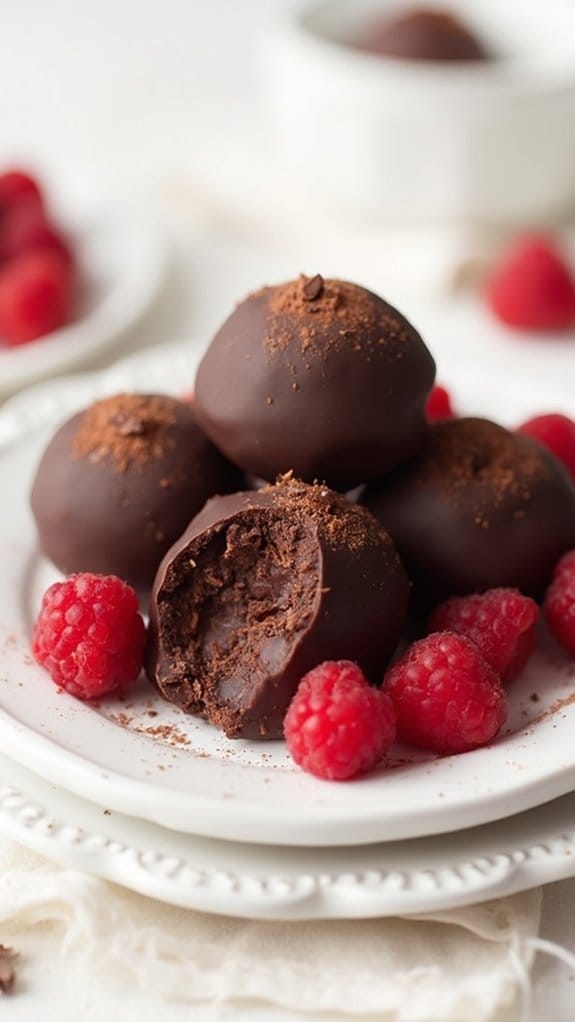
Title: Chocolate Raspberry Truffles
Prep Time: 20 minutes
Cook Time: 10 minutes
Number of Servings: 12
Required Equipment List: Mixing bowl, double boiler or microwave-safe bowl, baking sheet, parchment paper, refrigerator
Cuisine Type: Keto Dessert
These decadent Chocolate Raspberry Truffles are a perfect treat for Valentine’s Day or any special occasion, while still adhering to your keto lifestyle. Made with rich dark chocolate and fresh raspberries, these truffles boast a luscious filling that melts in your mouth. Not only are they low in carbohydrates, but they’re also gluten-free and made with high-quality ingredients, making them a guilt-free indulgence for chocolate lovers.
The process of making these truffles is straightforward and can be a fun activity to do with your partner or family. The combination of sweet and tart from the raspberries pairs beautifully with the rich chocolate, creating a delightful contrast that’s sure to impress.
These truffles can be prepared in advance and stored in the refrigerator, making them a convenient dessert option for any gathering.
Ingredients:
- 1 cup sugar-free dark chocolate chips
- 1/4 cup heavy cream
- 1/2 cup fresh raspberries, mashed
- 1 teaspoon vanilla extract
- 1/4 teaspoon salt
- Unsweetened cocoa powder (for dusting)
Instructions:
- In a double boiler or microwave-safe bowl, combine the sugar-free dark chocolate chips and heavy cream. If using a double boiler, heat over simmering water until melted and smooth. If using a microwave, heat in 30-second intervals, stirring in between, until fully melted.
- Once the chocolate and cream mixture is melted and smooth, remove it from the heat and stir in the mashed raspberries, vanilla extract, and salt. Mix until well combined and the mixture has a uniform consistency.
- Allow the truffle mixture to cool at room temperature for about 10 minutes. Then, cover the bowl with plastic wrap and refrigerate for 1-2 hours, or until the mixture is firm enough to handle.
- Once firm, use a small cookie scoop or your hands to portion out the truffle mixture into bite-sized balls. Roll each ball gently between your palms to create a smooth surface.
- After rolling the truffles, place them onto a baking sheet lined with parchment paper. Once all the truffles are shaped, dust them in unsweetened cocoa powder for a beautiful finish and an extra layer of flavor.
- Return the truffles to the refrigerator to set for at least 30 minutes before serving. Enjoy them chilled or at room temperature for a delightful treat.
Extra Tips: To enhance the flavor of your truffles, consider adding a splash of raspberry extract to the chocolate mixture. You can also experiment with different coatings like crushed nuts or unsweetened shredded coconut for variety.
These truffles make an excellent gift when packaged in a decorative box or bag, perfect for sharing your love with friends and family. Enjoy these delectable treats while staying on track with your keto diet!
Creamy Coconut Macaroons
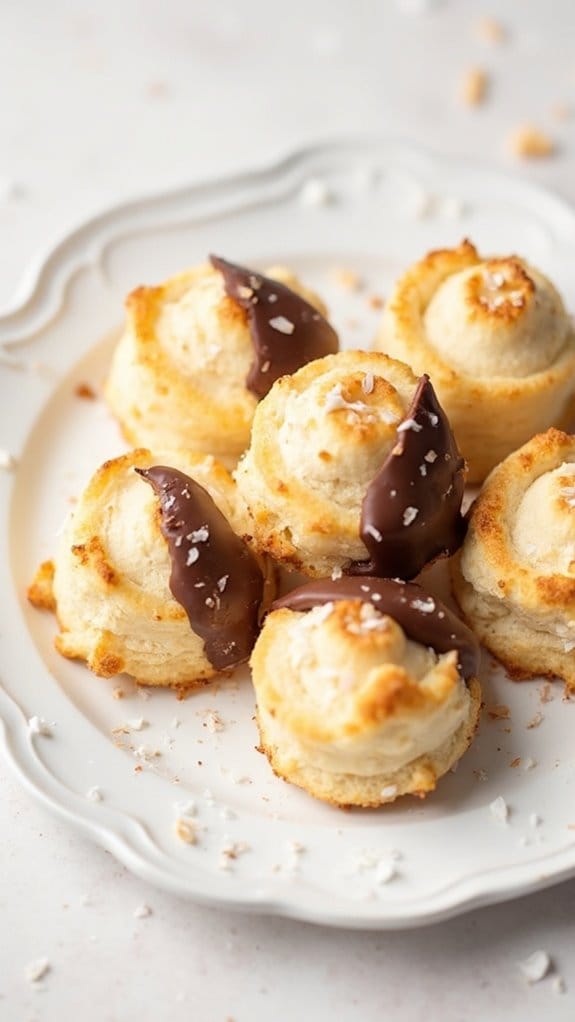
Title: Creamy Coconut Macaroons
Prep Time: 15 minutes
Cook Time: 25 minutes
Number of Servings: 12
Required Equipment List: Mixing bowl, baking sheet, parchment paper, whisk, spatula
Cuisine Type: Keto-Friendly Dessert
These Creamy Coconut Macaroons are a delightful and indulgent treat that fit perfectly into a keto lifestyle. Made with unsweetened shredded coconut and sweetened with a low-carb sweetener, these macaroons are chewy on the inside and slightly crispy on the outside. The addition of coconut cream gives them an extra layer of richness, making them irresistible.
They’re perfect for satisfying your sweet tooth without straying from your dietary goals, making them an excellent choice for a Valentine’s Day dessert. The simplicity of this recipe allows you to whip up a batch in no time, and they can be enjoyed on their own or dipped in sugar-free chocolate for an even more decadent experience.
Whether you’re celebrating with a loved one or just treating yourself, these macaroons are sure to impress while keeping you on track with your keto diet.
Ingredients:
- 3 cups unsweetened shredded coconut
- 1/2 cup coconut cream
- 1/2 cup erythritol (or preferred low-carb sweetener)
- 2 large egg whites
- 1 teaspoon vanilla extract
- 1/4 teaspoon salt
- Sugar-free chocolate (optional, for dipping)
Instructions:
- Preheat your oven to 325°F (160°C). Line a baking sheet with parchment paper to prevent the macaroons from sticking, guaranteeing an easy cleanup after baking.
- In a large mixing bowl, combine the unsweetened shredded coconut, coconut cream, erythritol, vanilla extract, and salt. Mix well until all ingredients are fully incorporated and the coconut is evenly coated.
- In a separate bowl, whisk the egg whites until they form soft peaks. This will help give the macaroons a lighter texture. Gently fold the whipped egg whites into the coconut mixture, being careful not to deflate the egg whites.
- Using a spoon or cookie scoop, portion out the coconut mixture onto the prepared baking sheet, forming small mounds. Ensure they’re spaced apart to allow for even baking.
- Bake in the preheated oven for 20-25 minutes, or until the macaroons are golden brown on the edges. Keep an eye on them towards the end to prevent over-browning.
- Once baked, remove the macaroons from the oven and allow them to cool completely on the baking sheet. If desired, melt sugar-free chocolate and dip the cooled macaroons for an extra indulgent touch before letting them set.
Extra Tips: For a flavor twist, you can add a teaspoon of almond extract to the coconut mixture for a hint of nuttiness. If you prefer, you can also fold in some sugar-free mini chocolate chips for added texture.
Store leftover macaroons in an airtight container at room temperature for up to a week, or in the refrigerator for a longer shelf life. Enjoy these treats as a guilt-free dessert or snack anytime!
Keto Pumpkin Spice Muffins
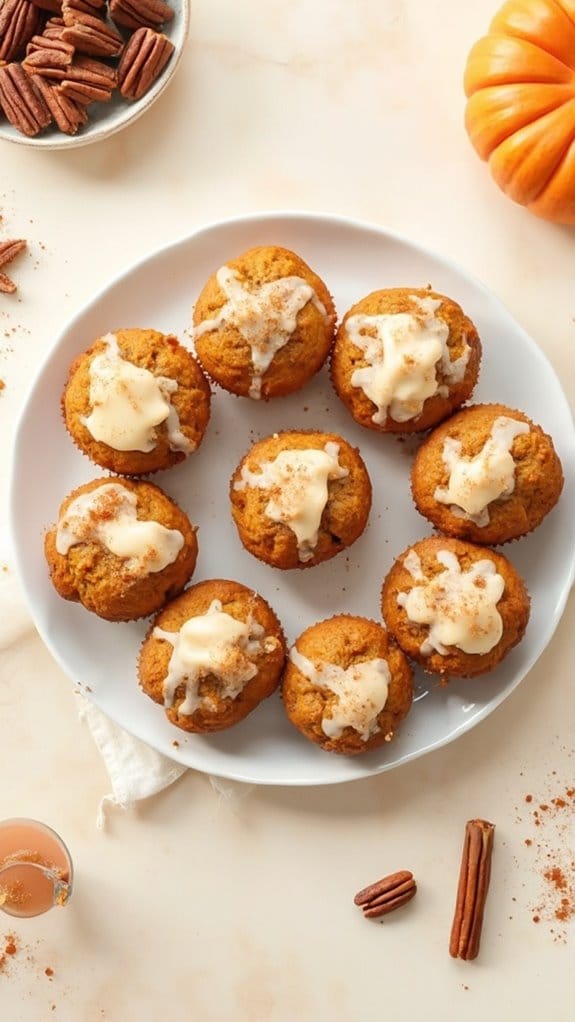
Title: Keto Pumpkin Spice Muffins
Prep Time: 10 minutes
Cook Time: 25 minutes
Number of Servings: 12
Required Equipment List: Muffin tin, mixing bowls, whisk, measuring cups, measuring spoons, oven
Cuisine Type: American
These Keto Pumpkin Spice Muffins are the perfect treat for fall lovers looking to enjoy a deliciously spiced snack without the carbs. Made with almond flour and pumpkin puree, these muffins aren’t only low in carbohydrates but also rich in flavor and moisture. The warm spices of cinnamon, nutmeg, and ginger create a comforting aroma that will fill your kitchen, making these muffins an irresistible addition to your breakfast table or an afternoon snack.
These muffins are incredibly versatile and can be enjoyed as is or with added toppings like nuts or a drizzle of sugar-free frosting. They’re also a great way to satisfy your sweet tooth while sticking to your keto lifestyle. With just a few simple ingredients and minimal prep time, you’ll have a batch of tasty muffins ready to share with family and friends or keep all to yourself!
Ingredients:
- 1 ½ cups almond flour
- ½ cup pumpkin puree
- ½ cup erythritol or other keto-friendly sweetener
- 3 large eggs
- 1 teaspoon baking powder
- 1 teaspoon baking soda
- 1 teaspoon pumpkin pie spice
- ½ teaspoon cinnamon
- ½ teaspoon salt
- 1 teaspoon vanilla extract
- ¼ cup melted coconut oil or butter
Instructions:
- Preheat your oven to 350°F (175°C) and line a muffin tin with paper liners or grease it with cooking spray to prevent sticking. This guarantees easy removal of the muffins once they’re baked.
- In a large mixing bowl, combine the almond flour, erythritol, baking powder, baking soda, pumpkin pie spice, cinnamon, and salt. Whisk the dry ingredients together until they’re well mixed, guaranteeing there are no clumps.
- In a separate bowl, whisk together the pumpkin puree, eggs, melted coconut oil or butter, and vanilla extract until smooth. This mixture will add moisture and flavor to the muffins.
- Gradually add the wet ingredients to the dry ingredients, stirring until just combined. Be careful not to overmix, as this can result in denser muffins. The batter should be thick and well incorporated.
- Divide the batter evenly among the muffin cups, filling each about ¾ full. This allows enough room for the muffins to rise while baking.
- Bake in the preheated oven for 20-25 minutes or until a toothpick inserted into the center comes out clean. Once baked, allow the muffins to cool in the tin for about 5 minutes before transferring them to a wire rack to cool completely.
Extra Tips: For an extra crunch, consider adding chopped nuts such as pecans or walnuts to the batter before baking. If you enjoy a touch of sweetness, you can also fold in some sugar-free chocolate chips.
These muffins can be stored in an airtight container at room temperature for a few days or frozen for longer storage, making them a convenient grab-and-go snack for your keto journey. Enjoy!
Chocolate Hazelnut Spread
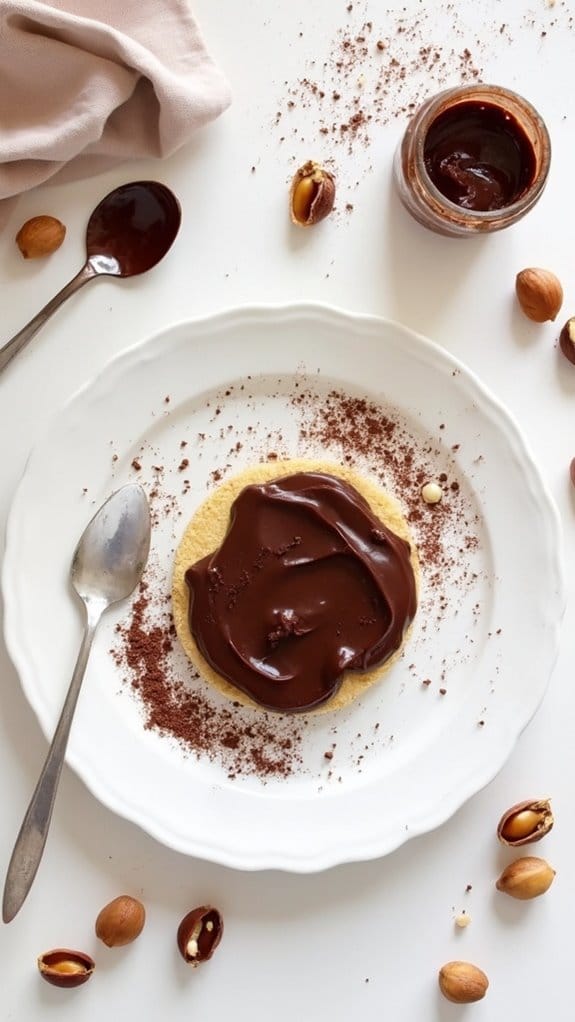
Title: Chocolate Hazelnut Spread
Prep Time: 10 minutes
Cook Time: 10 minutes
Number of Servings: 1 cup
Required Equipment List: Food processor, spatula, measuring cups, measuring spoons
Cuisine Type: Keto, Dessert
This homemade Chocolate Hazelnut Spread is a luscious, creamy treat that aligns perfectly with a keto lifestyle while satisfying your sweet cravings. Made with roasted hazelnuts, cocoa powder, and a hint of sweetener, this spread isn’t only rich in flavor but also packed with healthy fats.
It’s a fantastic addition to keto desserts, breakfast options, or simply enjoyed straight from the jar. Creating your own chocolate hazelnut spread allows you to control the ingredients, guaranteeing it’s free from refined sugars and unhealthy additives found in many store-bought versions.
The combination of crunchy hazelnuts and smooth chocolate creates an irresistible treat that can be used in various ways, from topping pancakes to filling pastries or simply spreading on low-carb bread. It’s quick to make and will elevate any dish or snack.
Ingredients:
- 1 cup roasted hazelnuts
- 2 tablespoons unsweetened cocoa powder
- 2 tablespoons keto-friendly sweetener (like erythritol or monk fruit)
- 1 tablespoon coconut oil
- 1 teaspoon vanilla extract
- Pinch of salt
Instructions:
- Start by placing the roasted hazelnuts in a food processor. Blend them on high speed for about 5-7 minutes until the nuts break down into a smooth hazelnut butter. Scrape down the sides of the bowl as needed to guarantee even blending.
- Once the hazelnuts have reached a creamy consistency, add in the unsweetened cocoa powder, keto-friendly sweetener, coconut oil, vanilla extract, and a pinch of salt. Blend again until all the ingredients are fully incorporated and the mixture is smooth and velvety.
- Taste the mixture and adjust the sweetness if necessary by adding more sweetener. Blend again briefly if you make any adjustments.
- Transfer the chocolate hazelnut spread into a clean jar or airtight container. Allow it to cool slightly before sealing and storing. This spread can be kept in the refrigerator for up to two weeks.
- Serve your chocolate hazelnut spread with your favorite keto-friendly snacks or desserts, or enjoy it straight from the jar as a delicious treat.
Extra Tips: For a more intense flavor, consider toasting the hazelnuts in the oven for about 10 minutes before blending. This will enhance the nuttiness of the spread.
Additionally, if you prefer a smoother texture, you can blend the mixture longer or add a bit more coconut oil to adjust the consistency. Enjoy your homemade treat as a guilt-free indulgence!
Strawberry Cream Cheese Fluff
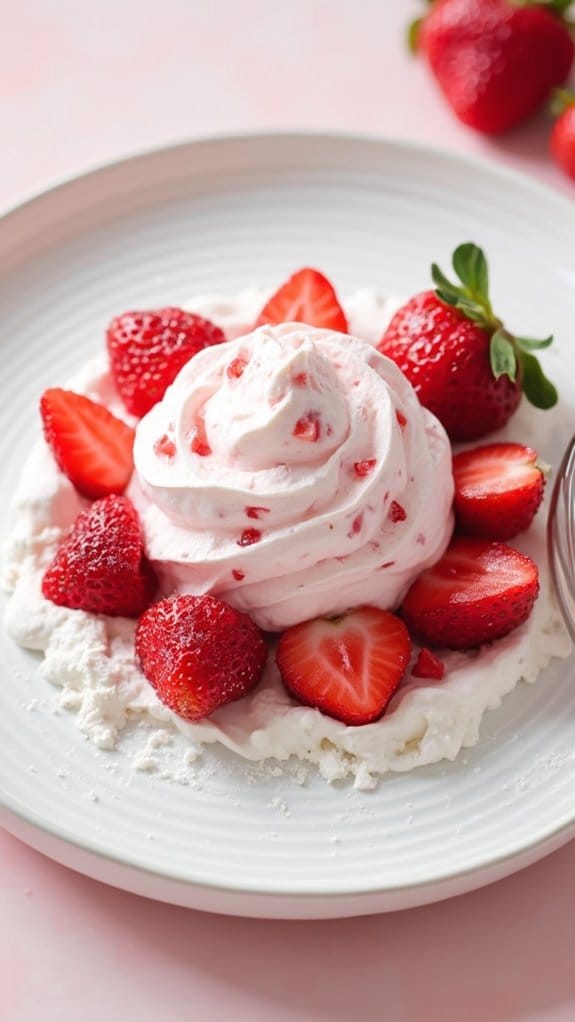
Title: Strawberry Cream Cheese Fluff
Prep Time: 15 minutes
Cook Time: 0 minutes
Number of Servings: 6
Required Equipment List: Mixing bowl, electric mixer, spatula, serving dish
Cuisine Type: Keto Dessert
Strawberry Cream Cheese Fluff is a delightful and indulgent dessert that combines the rich creaminess of cream cheese with the fresh sweetness of strawberries. This keto-friendly treat is perfect for celebrating Valentine’s Day or any special occasion, providing a guilt-free way to satisfy your sweet tooth.
With its light and airy texture, this dessert isn’t only delicious but also easy to prepare, making it a favorite among those following a low-carb lifestyle. The combination of cream cheese, whipped cream, and strawberries creates a luscious dessert that feels decadent without the added sugars.
Serve it in elegant glasses for a beautiful presentation, or simply enjoy it straight from the bowl. This Strawberry Cream Cheese Fluff is a delightful way to incorporate fresh fruit into your dessert while keeping it low in carbs and high in flavor.
Ingredients:
- 8 ounces cream cheese, softened
- 1 cup heavy whipping cream
- 1/2 cup powdered erythritol (or preferred low-carb sweetener)
- 1 teaspoon vanilla extract
- 1 cup fresh strawberries, hulled and chopped
- Additional strawberries for garnish (optional)
Instructions:
- In a mixing bowl, combine the softened cream cheese, powdered erythritol, and vanilla extract. Using an electric mixer, beat the mixture on medium speed until it becomes smooth and creamy, ensuring there are no lumps left.
- In a separate bowl, whip the heavy cream until soft peaks form. This will create a light and fluffy texture that complements the cream cheese mixture beautifully.
- Gently fold the whipped cream into the cream cheese mixture using a spatula. Be careful not to deflate the whipped cream; you want to maintain the airy texture of the fluff.
- Once combined, fold in the chopped strawberries until evenly distributed throughout the mixture. This will add a burst of fruity flavor to each bite.
- Spoon the strawberry cream cheese fluff into serving dishes and refrigerate for at least 30 minutes to allow the flavors to meld and the fluff to set slightly.
- Before serving, garnish with additional fresh strawberries on top for an extra pop of color and a hint of freshness.
Extra Tips: For an added flavor twist, consider adding a splash of almond extract along with the vanilla. If you prefer a thicker consistency, you can chill it longer or add more cream cheese. This dessert can also be customized with different berries, such as blueberries or raspberries, for variation. Enjoy your delicious and keto-friendly Strawberry Cream Cheese Fluff!
Keto Snickerdoodle Cookies
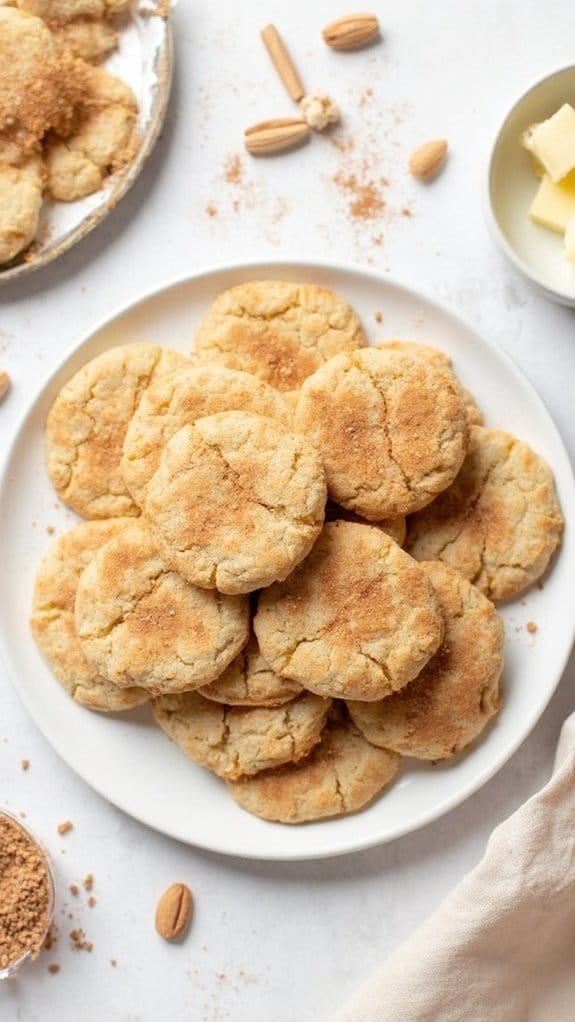
Title: Keto Snickerdoodle Cookies
Prep Time: 10 minutes
Cook Time: 12 minutes
Number of Servings: 12
Required Equipment List: Baking sheet, parchment paper, mixing bowl, whisk, measuring cups, and spoons
Cuisine Type: American
These Keto Snickerdoodle Cookies are a delicious and guilt-free treat that perfectly captures the classic flavors of the beloved cookie without the carbs. Made with almond flour and sweetened with erythritol, these cookies are crispy on the outside and soft on the inside, making them a delightful snack for any occasion.
The combination of cinnamon and sugar (or a keto-friendly substitute) gives them that warm, comforting flavor that everyone loves, while still adhering to your low-carb lifestyle. Not only are these cookies easy to whip up, but they also bake in just 12 minutes, making them a quick option for satisfying your sweet tooth.
Perfect for sharing with friends or enjoying as a special dessert on Valentine’s Day, these Keto Snickerdoodle Cookies will make you forget you’re on a diet. Plus, they’re gluten-free and suitable for those who are watching their sugar intake.
Ingredients:
- 2 cups almond flour
- 1/2 cup erythritol (or your preferred keto sweetener)
- 1/2 teaspoon baking powder
- 1/2 teaspoon salt
- 1 teaspoon ground cinnamon
- 1 large egg
- 1/4 cup unsalted butter, melted
- 1 teaspoon vanilla extract
- 1 tablespoon cinnamon and erythritol mixture (for rolling)
Instructions:
- Preheat your oven to 350°F (175°C) and line a baking sheet with parchment paper. This will prevent the cookies from sticking and guarantee they bake evenly.
- In a mixing bowl, combine the almond flour, erythritol, baking powder, salt, and ground cinnamon. Whisk the dry ingredients together until well blended to guarantee that the leavening agent is evenly distributed throughout the flour.
- In a separate bowl, whisk together the egg, melted butter, and vanilla extract until fully combined. Then, pour the wet ingredients into the bowl with the dry ingredients and mix until a dough forms. The dough should be slightly sticky but manageable.
- Using your hands, scoop out about a tablespoon of dough and roll it into a ball. Then, roll the dough ball in a mixture of cinnamon and erythritol to coat it evenly. Place the coated dough balls on the prepared baking sheet, spacing them about 2 inches apart.
- Gently flatten each cookie ball with the bottom of a glass or your palm to achieve a thicker, chewy cookie. Bake in the preheated oven for 10-12 minutes, or until the edges are lightly golden and the centers are set but still soft.
- Remove the cookies from the oven and let them cool on the baking sheet for a few minutes before transferring them to a wire rack to cool completely. This helps them firm up and makes them easier to handle.
Extra Tips: For an extra touch of flavor, consider adding a pinch of nutmeg or a splash of almond extract to the dough. If you like your cookies a bit chewier, you can slightly underbake them, guaranteeing a soft center that melts in your mouth.
Store any leftover cookies in an airtight container at room temperature for up to a week, or freeze them for longer storage. Enjoy your delicious Keto Snickerdoodle Cookies!
Matcha Green Tea Cheesecake
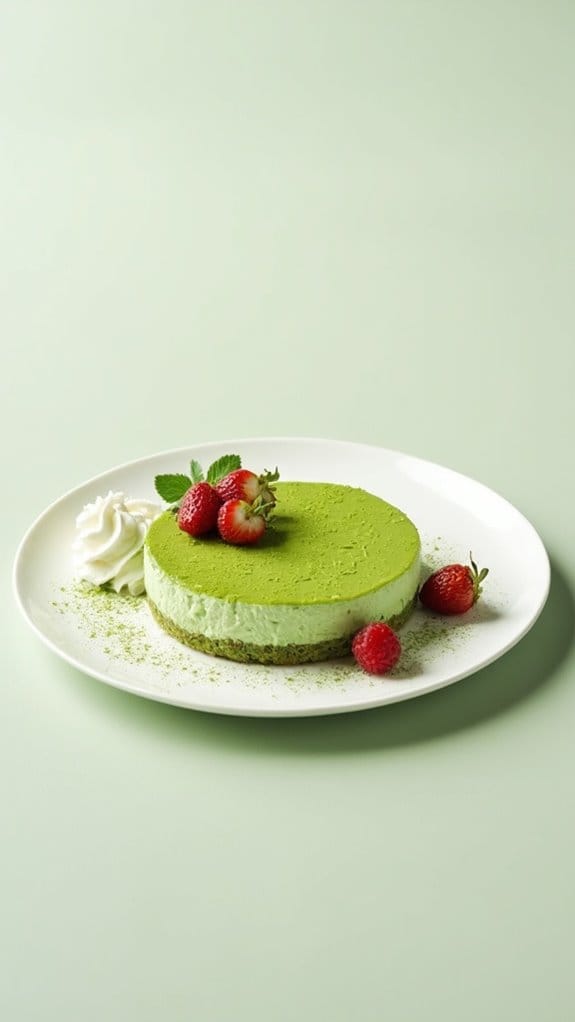
Title: Matcha Green Tea Cheesecake
Prep Time: 20 minutes
Cook Time: 60 minutes
Number of Servings: 8
Required Equipment List: Springform pan, mixing bowls, electric mixer, rubber spatula, oven
Cuisine Type: Japanese-inspired
This Matcha Green Tea Cheesecake is a unique and delicious dessert that combines the rich, creamy texture of traditional cheesecake with the vibrant flavors of matcha green tea. Perfect for a special occasion like Valentine’s Day, this cheesecake isn’t only a feast for the eyes with its stunning green hue but also offers a delightful balance of sweetness and earthiness.
The addition of a buttery almond crust enhances the overall flavor profile, making each bite a heavenly experience. The recipe is surprisingly simple, requiring minimal ingredients while delivering an impressive dessert that’s sure to wow your guests.
Whether you’re a matcha lover or just looking to try something new, this cheesecake is a delightful twist on a classic that’s both indulgent and guilt-free, especially when made keto-friendly. Enjoy this unique dessert chilled, garnished with fresh berries or a dollop of whipped cream for added elegance.
Ingredients:
- 1 ½ cups almond flour
- ¼ cup unsweetened cocoa powder
- ¼ cup butter, melted
- 2 tablespoons erythritol (or sweetener of choice)
- 16 ounces cream cheese, softened
- ¾ cup erythritol (or sweetener of choice)
- 3 large eggs
- 2 tablespoons matcha green tea powder
- 1 teaspoon vanilla extract
- ¼ cup heavy cream
Instructions:
- Preheat your oven to 325°F (160°C). Prepare a springform pan by greasing it lightly with cooking spray or butter. For added protection against leaks, you may also wrap the bottom of the pan with aluminum foil.
- In a mixing bowl, combine almond flour, cocoa powder, melted butter, and 2 tablespoons of erythritol. Mix until the ingredients form a crumbly dough. Press this mixture firmly into the bottom of the prepared springform pan to create an even crust. Bake for 10 minutes, then remove and let cool.
- In another mixing bowl, beat the softened cream cheese with an electric mixer until smooth and creamy. Gradually add ¾ cup erythritol while continuing to mix, making sure that the sweetener is fully incorporated.
- Add the eggs one at a time, mixing well after each addition. Then, add the matcha green tea powder and vanilla extract, mixing until the batter is smooth and uniform. Finally, fold in the heavy cream until well combined.
- Pour the matcha cheesecake filling over the cooled crust in the springform pan. Smooth the top with a rubber spatula for an even finish. Bake in the preheated oven for 45-60 minutes, or until the center is set but still slightly jiggly.
- Once baked, turn off the oven and let the cheesecake cool in the oven with the door slightly ajar for about 1 hour. This helps prevent cracks in the surface. After it has cooled, refrigerate the cheesecake for at least 4 hours or overnight before serving.
Extra Tips: For best results, confirm all your ingredients are at room temperature before starting. This will help the cheesecake mix more smoothly. If you prefer a stronger matcha flavor, feel free to increase the amount of matcha powder, but be cautious as it can also make the cheesecake more bitter.
Garnish with a dusting of matcha powder or some fresh berries for a beautiful presentation when serving. Enjoy your delightful Matcha Green Tea Cheesecake!
Conclusion
So, whether you’re celebrating with a special someone or treating yourself, these keto desserts are like a warm hug on a chilly day. They’ll satisfy your sweet tooth without the guilt, keeping you on track with your health goals. Why not whip up a batch of those gooey chocolate lava cakes or creamy cheesecakes? You’ll be amazed at how delicious healthy can be! Immerse yourself in these recipes, and make your Valentine’s Day truly scrumptious!

