No products in the cart.
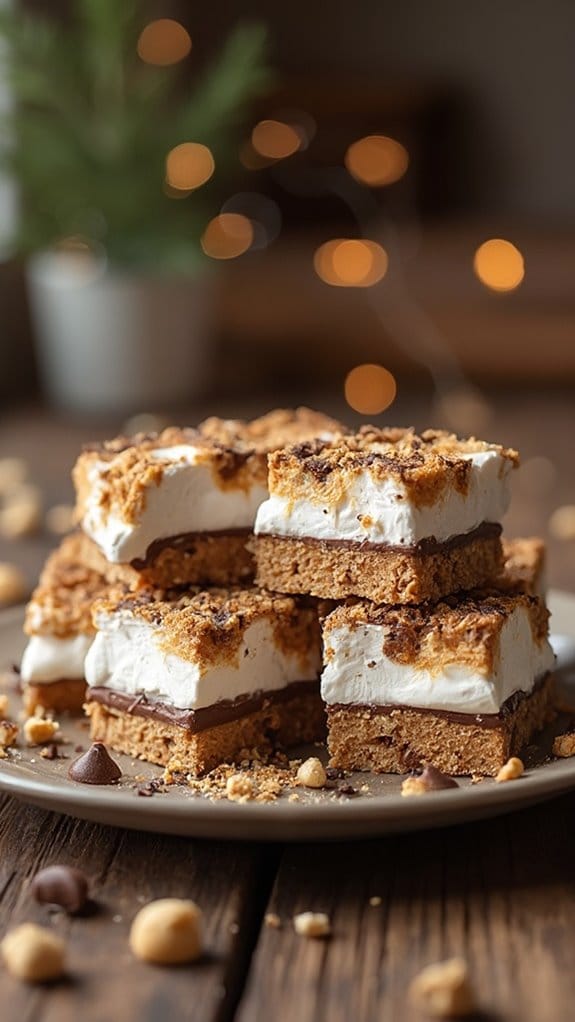
27 Simply Sweet Christmas Candy Recipes
Looking for some sweet ideas to brighten up your holiday season? You’ve got to try these easy 27 simply sweet Christmas candy recipes! From classic chocolate fudge that melts in your mouth to peppermint bark that’s a holiday favorite, there’s something for everyone. How about some Butterscotch Pretzel Treats for a sweet and salty twist? Each recipe is designed to be simple, so you won’t need to be a master candy maker. Think about making holiday gift boxes filled with your homemade goodies. Trust me, your friends and family will love it. Keep going to discover even more tasty treats you can whip up!
Contents
hide
Classic Chocolate Fudge
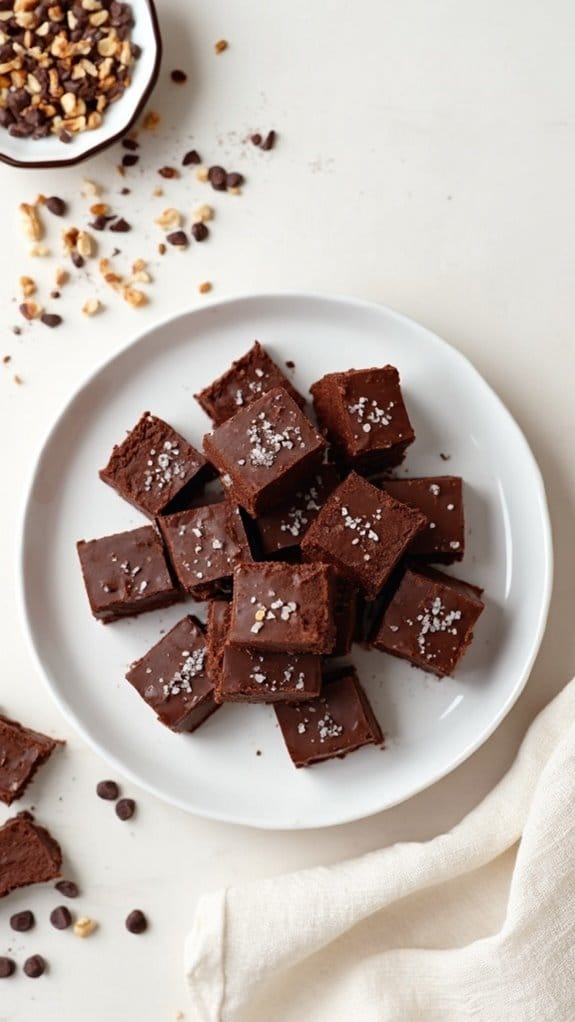
Title: Classic Chocolate Fudge
Prep Time: 15 minutes
Cook Time: 10 minutes
Number of Servings: 36 pieces
Required Equipment List: Medium saucepan, wooden spoon, 8-inch square baking pan, parchment paper, thermometer (optional)
Cuisine Type: American
Classic Chocolate Fudge is a timeless treat that captures the essence of the holiday season. This rich and creamy dessert is made with just a handful of ingredients that come together to create a luscious, melt-in-your-mouth experience. Ideal for gift-giving or holiday gatherings, this fudge is sure to be a crowd-pleaser, offering a delightful sweetness that pairs perfectly with a warm cup of cocoa or coffee.
The beauty of this fudge lies in its simplicity, but it also allows for customization. You can add nuts, dried fruit, or even a sprinkle of sea salt on top for an extra layer of flavor. Whether you’re a seasoned candy maker or trying it for the first time, this classic recipe is straightforward and yields delicious results every time.
Ingredients:
- 2 cups granulated sugar
- 1/2 cup unsalted butter
- 2/3 cup evaporated milk
- 2 cups semi-sweet chocolate chips
- 1 teaspoon vanilla extract
- 1 cup chopped nuts (optional)
Instructions:
- Begin by preparing your baking pan. Line an 8-inch square baking pan with parchment paper, leaving some overhang for easy removal later. This will guarantee that your fudge comes out cleanly once it’s set.
- In a medium saucepan over medium heat, combine the granulated sugar, unsalted butter, and evaporated milk. Stir continuously until the mixture comes to a gentle boil. Allow it to boil for about 5 minutes, stirring constantly to prevent burning.
- After 5 minutes, remove the saucepan from the heat and stir in the semi-sweet chocolate chips and vanilla extract. Mix well until the chocolate is fully melted and the mixture is smooth and glossy. If using, fold in the chopped nuts at this stage.
- Pour the fudge mixture into the prepared baking pan, spreading it evenly with a spatula. Let it cool at room temperature for about 2 hours, or until set. For faster cooling, you can refrigerate it for about 1 hour.
- Once the fudge is set, lift it out of the pan using the parchment overhang. Cut it into small squares or rectangles for serving. Enjoy your homemade classic chocolate fudge!
Extra Tips: To guarantee the fudge has a silky texture, avoid overheating it during the boiling stage. If you want to add a decorative touch, consider drizzling melted white chocolate over the top before it sets.
Store any leftover fudge in an airtight container at room temperature or in the refrigerator to prolong its freshness. This fudge can also be frozen; just make sure to wrap it well to prevent freezer burn. Enjoy sharing this delicious treat with friends and family!
Peppermint Bark Delights
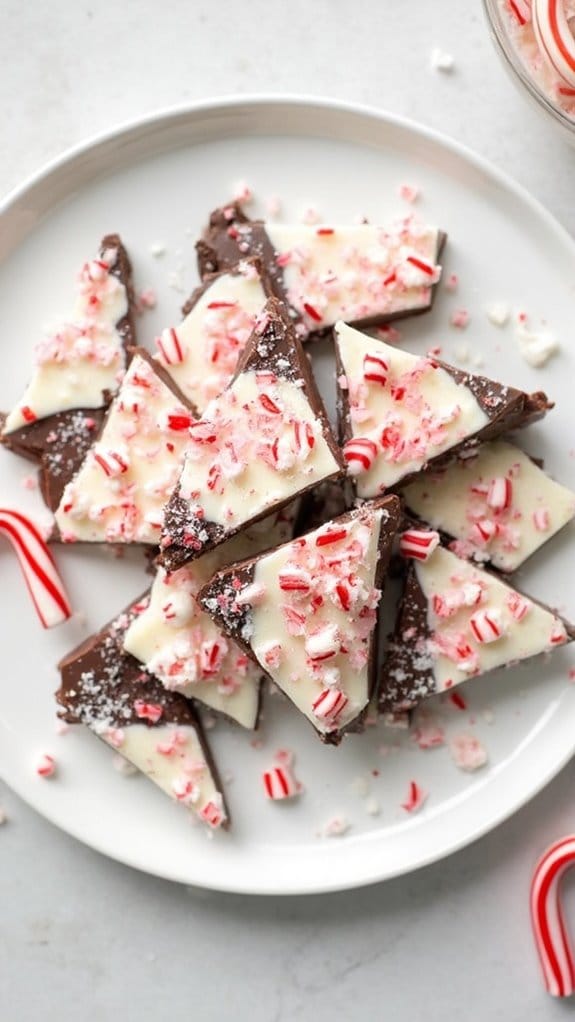
Title: Peppermint Bark Delights
Prep Time: 15 minutes
Cook Time: 10 minutes
Number of Servings: 12
Required Equipment List: Baking sheet, parchment paper, microwave-safe bowl, spatula, refrigerator
Cuisine Type: American
Peppermint Bark Delights are a festive treat that perfectly captures the spirit of the holiday season. This easy-to-make recipe combines rich, creamy white chocolate with crunchy peppermint candy, creating a delightful contrast in texture and flavor. The vibrant colors and festive presentation make this candy a wonderful addition to holiday gift baskets or dessert platters.
Plus, they’re quick to prepare, allowing you to whip up a batch in no time for your holiday gatherings. This peppermint bark isn’t only delicious but also versatile. You can customize the chocolate layers by using dark or milk chocolate beneath the white chocolate, or even add other toppings like nuts or dried fruits for an extra twist.
The invigorating flavor of peppermint is sure to bring a smile to anyone’s face, making these delights a beloved holiday tradition for friends and family alike.
Ingredients:
- 12 ounces white chocolate chips
- 8 ounces semi-sweet chocolate chips
- 1 teaspoon peppermint extract
- 1 cup crushed peppermint candies (or candy canes)
- Optional: additional crushed candies for topping
Instructions:
- Begin by lining a baking sheet with parchment paper, making sure it covers the entire surface. This will prevent the chocolate from sticking and make it easier to remove once set.
- In a microwave-safe bowl, melt the semi-sweet chocolate chips in the microwave in 30-second intervals, stirring between each interval until smooth. Once melted, stir in 1/2 teaspoon of peppermint extract for added flavor.
- Pour the melted semi-sweet chocolate onto the prepared baking sheet and spread it evenly with a spatula to create a thin layer. Place the baking sheet in the refrigerator for about 10 minutes to allow the chocolate to set.
- While the first layer is setting, melt the white chocolate chips in a separate microwave-safe bowl using the same method. Stir in the remaining 1/2 teaspoon of peppermint extract once melted.
- Remove the baking sheet from the refrigerator and pour the melted white chocolate over the set semi-sweet chocolate layer. Use a spatula to spread it evenly, and immediately sprinkle the crushed peppermint candies over the top, pressing them down gently to adhere.
- Return the baking sheet to the refrigerator for an additional 30 minutes to allow the peppermint bark to fully set. Once set, break the bark into pieces and serve or package for gifting.
Extra Tips: For a more colorful presentation, consider adding a few drops of red food coloring to the melted white chocolate before spreading it on top of the semi-sweet layer. You can also experiment with different types of candy toppings, such as crushed nuts or sprinkles, to create your unique version of peppermint bark.
Store the finished pieces in an airtight container at room temperature or in the refrigerator for longer freshness. Enjoy this delightful treat as a holiday favorite!
Butterscotch Pretzel Treats
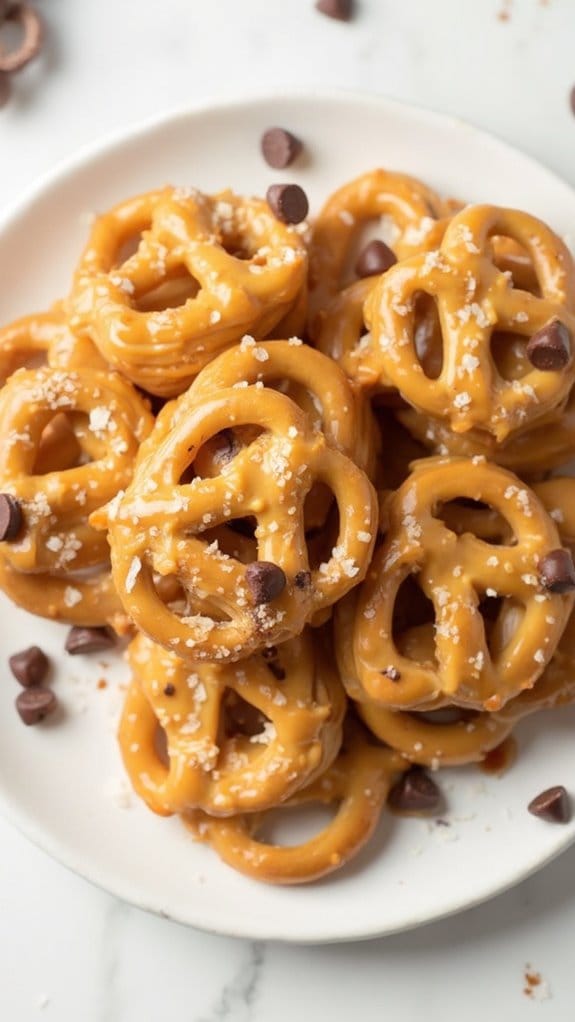
Title: Butterscotch Pretzel Treats
Prep Time: 10 minutes
Cook Time: 15 minutes
Number of Servings: 12
Required Equipment List: Baking sheet, parchment paper, oven, mixing bowl, microwave-safe bowl
Cuisine Type: American
Butterscotch Pretzel Treats are a delightful combination of sweet and salty that will satisfy any snack craving. This easy-to-make treat features crunchy pretzels topped with creamy butterscotch chips and a sprinkle of sea salt, creating the perfect balance of flavors. They aren’t only great for holiday gatherings but also make an excellent after-school snack or party favor.
The beauty of this recipe lies in its simplicity and the delightful contrast of textures. The pretzels provide a satisfying crunch, while the melted butterscotch creates a gooey topping that everyone will love. With only a few ingredients and minimal preparation time, you can whip up a batch of these treats in no time, making them a perfect choice for any occasion.
Ingredients:
- 4 cups pretzel twists
- 1 cup butterscotch chips
- 1/2 cup chocolate chips (optional)
- Sea salt (for sprinkling)
Instructions:
- Preheat your oven to 350°F (175°C). Line a baking sheet with parchment paper to prevent sticking and to make cleanup easier.
- Spread the pretzel twists evenly on the prepared baking sheet, making certain they’re in a single layer. This will allow the butterscotch to melt evenly over the pretzels.
- In a microwave-safe bowl, add the butterscotch chips. Microwave on high for 30-second intervals, stirring in between, until the chips are fully melted and smooth. Be careful not to overheat, as this can cause the chips to seize.
- Once melted, drizzle the butterscotch over the pretzels, using a spoon to make sure of even coverage. If desired, you can also sprinkle chocolate chips over the top for an extra layer of flavor.
- Bake in the preheated oven for 8-10 minutes, or until the butterscotch is bubbly and slightly golden. Remove from the oven and let cool for a few minutes.
- After cooling slightly, sprinkle the treats with a pinch of sea salt to enhance the flavors. Allow them to cool completely before breaking apart and serving.
Extra Tips: For added texture and flavor, consider mixing in some chopped nuts or crushed candy bars before baking. You can also experiment with different types of chocolate chips, such as milk, dark, or even white chocolate, to customize the treats to your liking. Be sure to store any leftovers in an airtight container to keep them fresh and crunchy!
Holiday Peanut Brittle
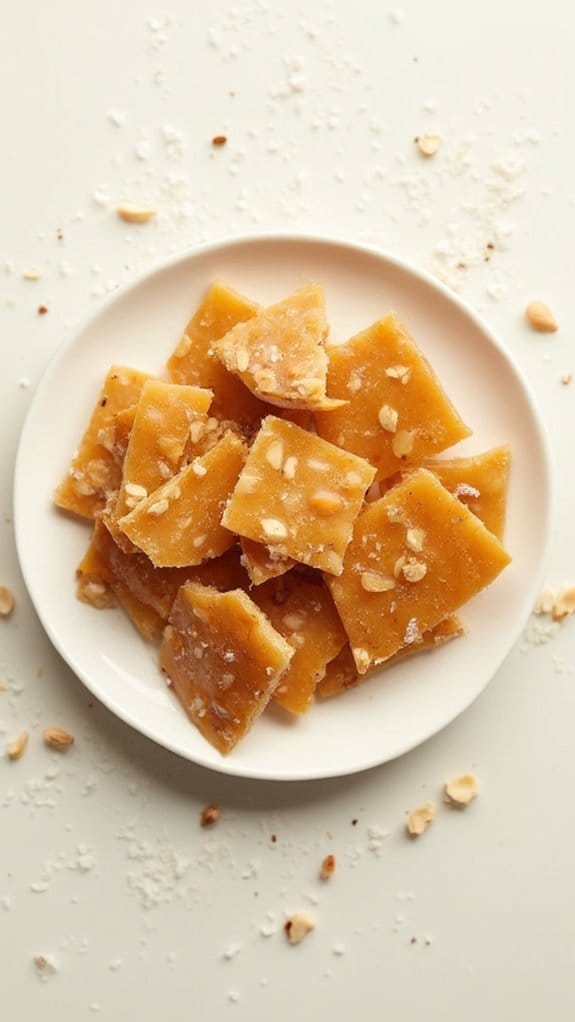
Title: Holiday Peanut Brittle
Prep Time: 15 minutes
Cook Time: 20 minutes
Number of Servings: 12
Required Equipment List: Heavy saucepan, candy thermometer, wooden spoon, baking sheet, parchment paper
Cuisine Type: American
Holiday Peanut Brittle is a classic confection that brings a delightful crunch and sweetness to your holiday festivities. This homemade treat showcases the rich flavor of roasted peanuts combined with a buttery, sugary syrup that creates a perfect balance of textures.
The brittle isn’t only a perfect gift for friends and family but also an excellent addition to any holiday dessert table, offering a nostalgic taste that many cherish during the festive season.
Making peanut brittle at home is surprisingly simple, yet it requires careful attention to achieve that perfect hard-crack stage. With just a few ingredients, you can create a delicious treat that outshines store-bought versions. The process is quick, and the result is a beautifully golden brittle that’s hard to resist.
Once you’ve mastered the basic recipe, you can even experiment by adding ingredients like chocolate or spices for a unique twist.
Ingredients:
- 1 cup granulated sugar
- 1/2 cup light corn syrup
- 1/4 cup water
- 2 cups raw unsalted peanuts
- 2 tablespoons unsalted butter
- 1 teaspoon vanilla extract
- 1/2 teaspoon baking soda
- Pinch of salt
Instructions:
- Prepare a baking sheet by lining it with parchment paper and set it aside. This will be where you pour the hot peanut brittle mixture once it’s ready.
- In a heavy saucepan, combine the sugar, corn syrup, and water over medium heat. Stir the mixture gently until the sugar dissolves. Once dissolved, stop stirring and allow the mixture to boil.
- As the mixture boils, insert a candy thermometer into the pan, making sure it doesn’t touch the bottom. Continue boiling until the thermometer reaches the hard-crack stage, which is about 300°F (150°C). This should take about 10-15 minutes.
- Once the correct temperature is reached, immediately remove the saucepan from the heat and quickly stir in the peanuts, butter, vanilla extract, baking soda, and salt. The mixture will bubble up, so be cautious.
- Pour the hot mixture onto the prepared baking sheet and spread it out evenly with a wooden spoon or spatula. Allow the brittle to cool completely at room temperature, which should take about 30 minutes.
- Once cooled, break the peanut brittle into pieces and enjoy! Store any leftovers in an airtight container to keep them fresh.
Extra Tips: When making peanut brittle, it’s essential to monitor the temperature closely since it can quickly go from perfect to burnt. If you don’t have a candy thermometer, you can test the mixture by dropping a small amount into cold water; it should form hard, brittle threads.
Additionally, feel free to add a sprinkle of sea salt on top before it cools for a sweet and salty flavor profile. Enjoy making this timeless treat!
Chocolate-Covered Cherry Balls

Title: Chocolate-Covered Cherry Balls
Prep Time: 20 minutes
Cook Time: 10 minutes
Number of Servings: 24
Required Equipment List: Mixing bowl, baking sheet, parchment paper, microwave-safe bowl, refrigerator
Cuisine Type: American
Chocolate-Covered Cherry Balls are a delightful holiday treat that combines the sweetness of cherries with a rich chocolate coating. These bite-sized delights are perfect for holiday parties, gifting, or simply enjoying at home. The combination of creamy filling and juicy cherries creates a delicious contrast that’s sure to impress everyone.
Plus, they’re relatively easy to make, making them an excellent choice for both novice and seasoned bakers. These treats feature maraschino cherries coated in a sweet mixture of cream cheese and powdered sugar, then dipped in melted chocolate for a decadent finish. The chocolate coating not only adds a rich flavor but also helps preserve the cherries, allowing you to prepare them ahead of time.
Once chilled and set, these chocolate-covered cherry balls will become a favorite festive delicacy that will have everyone asking for more.
Ingredients:
- 1 jar (10 oz) maraschino cherries, drained and dried
- 8 oz cream cheese, softened
- 2 cups powdered sugar
- 1 teaspoon vanilla extract
- 2 cups semi-sweet chocolate chips
- 1 tablespoon vegetable shortening (optional)
Instructions:
- In a mixing bowl, combine the softened cream cheese, powdered sugar, and vanilla extract. Mix well until the ingredients are fully blended and smooth. This mixture will provide a creamy filling for the cherries.
- Take a maraschino cherry and dip it into the cream cheese mixture, ensuring it’s completely covered. Roll it into a ball shape and place it on a baking sheet lined with parchment paper. Repeat this process for all the cherries, leaving some space between each one on the baking sheet.
- Once all the cherries are coated, place the baking sheet in the refrigerator for about 30 minutes to allow the cream cheese mixture to firm up. This step is essential for easy chocolate dipping later.
- While the cherry balls are chilling, melt the semi-sweet chocolate chips in a microwave-safe bowl. Heat in 30-second intervals, stirring in between, until the chocolate is smooth. If desired, stir in the vegetable shortening to help the chocolate dip more smoothly.
- Remove the cherry balls from the refrigerator. Using a fork, dip each ball into the melted chocolate, ensuring it’s fully coated. Allow any excess chocolate to drip off before placing the chocolate-covered cherry balls back onto the parchment-lined baking sheet.
- Chill the chocolate-covered cherry balls in the refrigerator for an additional 30 minutes to set the chocolate before serving.
Extra Tips: For a fun twist, consider adding a splash of almond extract to the cream cheese mixture for an extra layer of flavor. You can also decorate the chocolate-covered cherry balls with sprinkles or crushed nuts before the chocolate sets for an added festive touch.
Store them in an airtight container in the refrigerator, and they can last for up to a week, making them great for holiday celebrations or as a sweet treat whenever you desire. Enjoy your delicious chocolate-covered cherry balls!
Easy Candy Cane Cookies
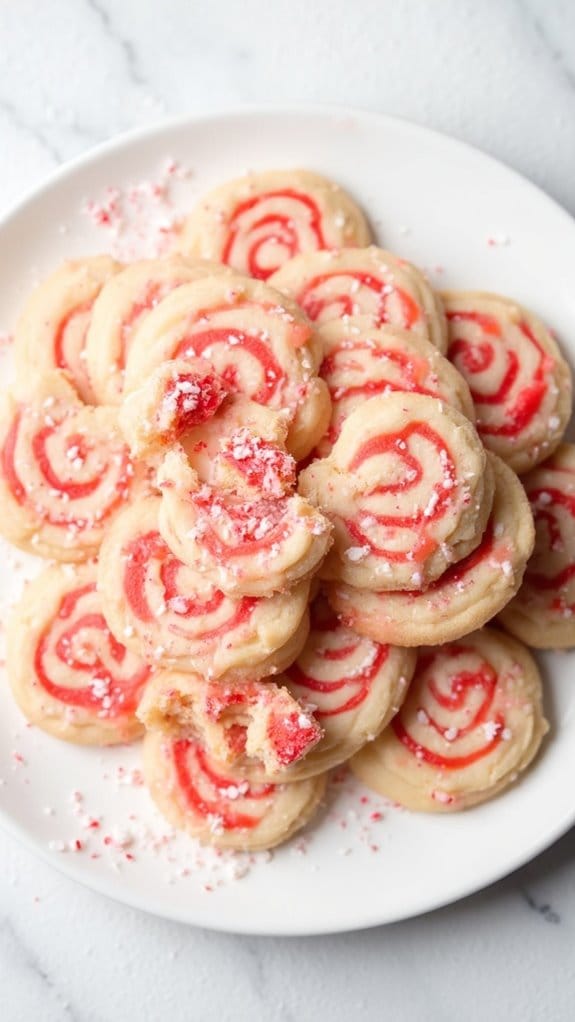
Title: Easy Candy Cane Cookies
Prep Time: 20 minutes
Cook Time: 10 minutes
Number of Servings: 24
Required Equipment List: Mixing bowl, baking sheet, parchment paper, electric mixer, cooling rack
Cuisine Type: American
These Easy Candy Cane Cookies are a festive treat that perfectly captures the spirit of the holiday season. With their delightful peppermint flavor and vibrant red and white swirl design, these cookies aren’t only delicious but also visually appealing. Ideal for holiday gatherings, cookie exchanges, or simply to enjoy at home, they’re sure to bring joy to family and friends alike.
The dough is simple to prepare and can be made ahead of time, making it a great option for busy holiday schedules. Once baked, these cookies can be decorated with crushed candy canes for an added crunch and festive touch.
Whether you’re a seasoned baker or a novice in the kitchen, this recipe will guide you through each step to create these charming cookies that will be a hit at any holiday celebration.
Ingredients:
- 1 cup unsalted butter, softened
- 1 cup granulated sugar
- 1 large egg
- 1 teaspoon vanilla extract
- 1 teaspoon peppermint extract
- 2 ½ cups all-purpose flour
- 1 teaspoon baking powder
- ½ teaspoon salt
- Red food coloring
- Crushed candy canes (for decoration)
Instructions:
- Preheat your oven to 350°F (175°C) and line a baking sheet with parchment paper. This will help prevent the cookies from sticking and make for easier cleanup.
- In a mixing bowl, cream together the softened butter and granulated sugar using an electric mixer until the mixture is light and fluffy. Add in the egg, vanilla extract, and peppermint extract, mixing until well combined.
- In a separate bowl, whisk together the all-purpose flour, baking powder, and salt. Gradually add this dry mixture to the wet ingredients, mixing until a dough forms.
- Divide the dough in half. Leave one half plain, and to the other half, add a few drops of red food coloring. Mix until the color is evenly distributed, creating a red dough.
- Take a small piece of each dough (about 1 tablespoon each) and roll them into logs. Twist the two logs together to create a swirl effect, then shape them into a candy cane form on the prepared baking sheet.
- Bake the cookies in the preheated oven for 8-10 minutes, or until the edges are lightly golden. Allow them to cool on the baking sheet for a few minutes before transferring to a cooling rack.
- Once cooled, sprinkle crushed candy canes over the cookies for a festive touch. You can also drizzle melted chocolate over the top for added flavor and decoration if desired.
Extra Tips: For the best flavor, make sure to use pure peppermint extract instead of imitation to enhance the minty taste. If you want to save time, you can prepare the dough in advance and refrigerate it for up to 3 days before baking.
Additionally, feel free to experiment with different colors or shapes to make your cookies unique and personalized for the holiday season!
Pecan Pie Caramels
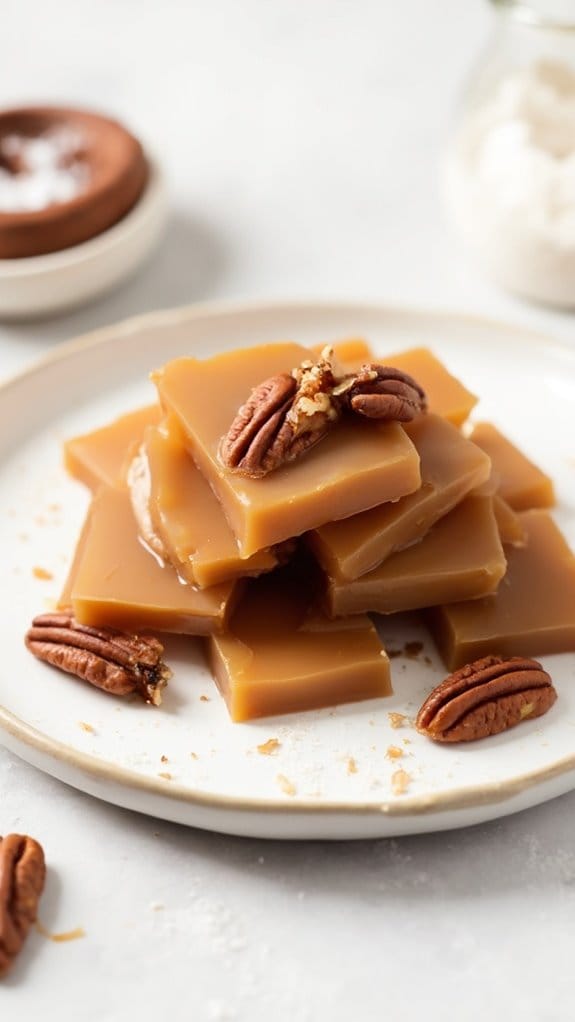
Title: Pecan Pie Caramels
Prep Time: 20 minutes
Cook Time: 30 minutes
Number of Servings: 24 pieces
Required Equipment List: Saucepan, candy thermometer, parchment paper, baking dish, mixing spoon
Cuisine Type: American
Pecan Pie Caramels are a delightful holiday treat that combines the rich flavors of traditional pecan pie with the chewy, buttery goodness of homemade caramels. These bite-sized delights are perfect for gifting or simply enjoying during festive gatherings.
The combination of toasted pecans, brown sugar, and a hint of vanilla creates a mouthwatering caramel that’s both sweet and nutty, reminiscent of the beloved dessert. Making these caramels is surprisingly easy, and once you master the technique, you’ll be able to whip them up for any occasion.
They can be wrapped individually in wax paper for a charming presentation or served in a decorative box. With their irresistible flavor and delightful texture, Pecan Pie Caramels are sure to become a favorite in your holiday repertoire.
Ingredients:
- 1 cup granulated sugar
- 1 cup brown sugar, packed
- 1/2 cup unsalted butter
- 1/2 cup heavy cream
- 1/4 cup light corn syrup
- 1 teaspoon vanilla extract
- 1 cup pecans, toasted and chopped
- 1/4 teaspoon salt
Instructions:
- Begin by preparing a baking dish (approximately 8×8 inches) by lining it with parchment paper, allowing some overhang for easy removal later. This will help prevent the caramels from sticking.
- In a medium saucepan, combine the granulated sugar, brown sugar, butter, heavy cream, corn syrup, and salt. Stir gently over medium heat until the mixture begins to boil, confirming all ingredients are well combined.
- Insert a candy thermometer into the saucepan, and continue to cook the caramel mixture without stirring until it reaches 240°F (115°C), known as the soft ball stage. This process may take about 15-20 minutes, so be patient and keep an eye on the temperature.
- Once the caramel reaches the desired temperature, remove it from the heat and stir in the vanilla extract and toasted pecans. Mixing quickly will guarantee that the pecans are evenly distributed throughout the caramel.
- Pour the caramel mixture into the prepared baking dish, spreading it evenly with a spatula. Allow the caramels to cool at room temperature for about 1-2 hours until they’re firm enough to cut.
- Once cooled, lift the caramels out of the baking dish using the parchment paper overhang. Use a sharp knife to cut the caramels into small squares or rectangles. Wrap each piece in wax paper or store in an airtight container until ready to serve.
Extra Tips: When making caramels, it’s crucial to monitor the heat closely as sugar can quickly go from perfectly cooked to burnt. If you don’t have a candy thermometer, you can test the caramel by dropping a small amount into a glass of cold water; if it forms a soft ball, it’s ready.
Additionally, feel free to experiment with different nuts or spices to customize your caramels to your taste. Enjoy your delicious homemade Pecan Pie Caramels!
Salted Caramel Hot Cocoa Bombs
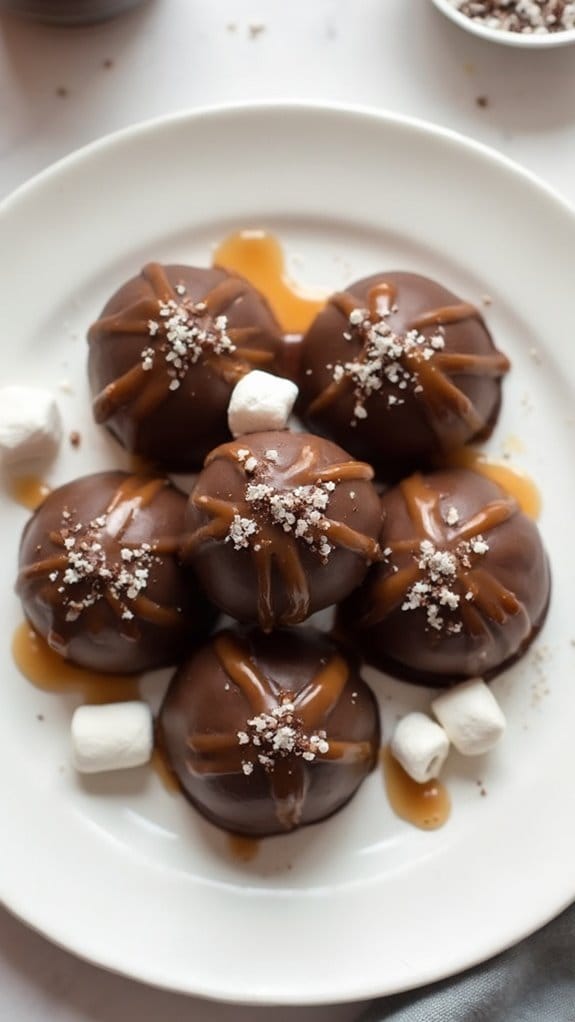
Title: Salted Caramel Hot Cocoa Bombs
Prep Time: 20 minutes
Cook Time: 10 minutes
Number of Servings: 6
Required Equipment List: Silicone mold, mixing bowls, microwave-safe bowl, whisk, spoon
Cuisine Type: American
Salted Caramel Hot Cocoa Bombs are a delightful treat that combines the joy of hot cocoa with the indulgence of rich salted caramel. These chocolate spheres are filled with cocoa mix, mini marshmallows, and a drizzle of gooey caramel, creating a delicious surprise when dropped into a cup of hot milk.
As winter nights draw in, these cocoa bombs make for the perfect cozy beverage, whether enjoyed alone or shared with friends and family during holiday gatherings. Making these hot cocoa bombs isn’t only fun but also allows for creativity in flavor combinations.
The outer chocolate shell can be customized using milk, dark, or white chocolate, while the filling can include various toppings like crushed candies or flavored marshmallows. Once the chocolate spheres are formed, you can package them beautifully as gifts that are sure to impress.
Prepare to indulge your senses with the warm, sweet, and salty flavors that these cocoa bombs bring to your hot chocolate experience.
Ingredients:
- 1 cup chocolate chips (milk, dark, or white)
- 1/2 cup hot cocoa mix
- 1/2 cup mini marshmallows
- 1/4 cup caramel sauce
- Sea salt (for garnish)
- Optional: extra chocolate for drizzling
Instructions:
- Begin by melting the chocolate chips in a microwave-safe bowl. Heat in 30-second intervals, stirring in between, until the chocolate is completely smooth. Be careful not to overheat the chocolate as it can seize up.
- Once melted, use a spoon to coat the inside of each cavity of the silicone mold with a layer of melted chocolate. Ascertain that the chocolate is evenly distributed and thick enough to hold its shape. Place the mold in the refrigerator for about 10 minutes to set.
- After the first layer has hardened, remove the mold from the refrigerator and add a second layer of melted chocolate to reinforce the shells. Return the mold to the refrigerator for another 10 minutes to allow the second layer to fully set.
- Once the chocolate shells are firm, carefully pop them out of the mold. Set half of the shells aside. In the other half, add about 1 tablespoon of hot cocoa mix, a few mini marshmallows, and a drizzle of caramel sauce. You can also add a sprinkle of sea salt for that salted caramel flavor.
- Gently press the empty chocolate shells on top of the filled ones to create a complete sphere. Seal the edges by using a bit of melted chocolate if needed. For an added touch, melt extra chocolate and drizzle it over the top of each bomb before sprinkling a pinch of sea salt.
- Store your salted caramel hot cocoa bombs in an airtight container until you’re ready to use them. To enjoy, simply drop one bomb into a mug of hot milk, stir, and watch as the chocolate shell melts away to reveal the warm cocoa and marshmallows inside.
Extra Tips: Make sure to work in a cool environment to prevent the chocolate from melting too quickly during assembly. If you’re feeling adventurous, try adding different flavored syrups to the filling or use colored chocolate to make fun designs on the bombs.
These hot cocoa bombs also make great gifts; just package them in clear bags tied with a ribbon for a festive touch. Enjoy sipping your delicious creation!
Nutty Fruit and Chocolate Clusters
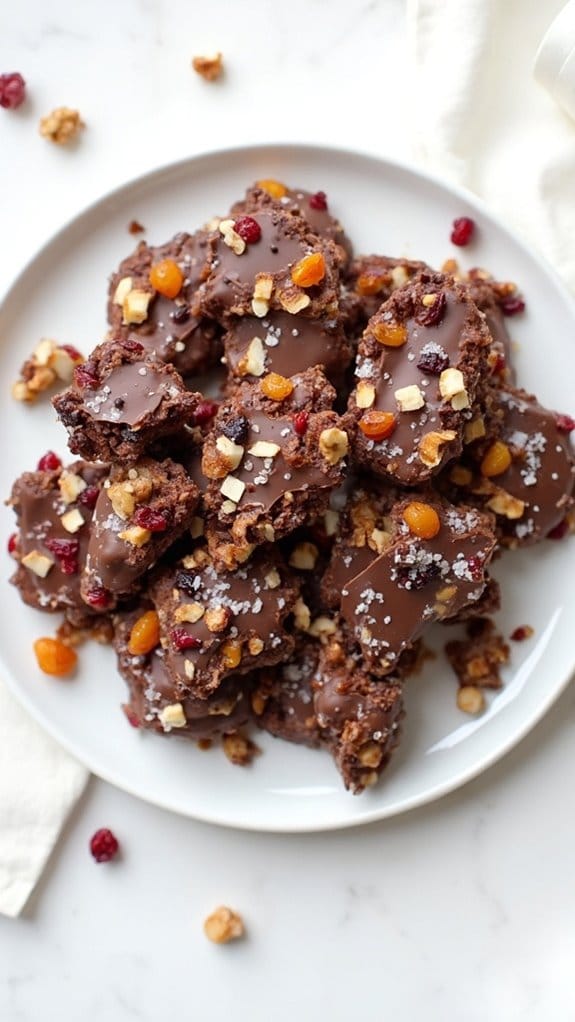
Title: Nutty Fruit and Chocolate Clusters
Prep Time: 15 minutes
Cook Time: 10 minutes
Number of Servings: 12
Required Equipment List: Baking sheet, parchment paper, microwave-safe bowl, spoon
Cuisine Type: American
Nutty Fruit and Chocolate Clusters are a delightful and easy-to-make treat that brings together the best of both worlds: rich chocolate and a variety of crunchy nuts and dried fruits. These clusters are perfect for the holiday season or as a quick snack anytime you need a sweet fix. The combination of semi-sweet chocolate, nuts, and fruits creates a deliciously satisfying bite that’s both indulgent and nutritious.
This recipe is incredibly versatile, allowing you to customize the clusters to your preferences. You can use any combination of nuts such as almonds, walnuts, or pecans, and dried fruits like cranberries, raisins, or apricots. The process is simple and quick, making it an excellent option for last-minute holiday treats or gifts.
Once the clusters are set, they can be stored in an airtight container for several days, guaranteeing you always have a tasty snack on hand.
Ingredients:
- 1 cup semi-sweet chocolate chips
- 1/2 cup almonds, chopped
- 1/2 cup walnuts, chopped
- 1/2 cup dried cranberries
- 1/2 cup dried apricots, chopped
- 1/4 cup unsweetened shredded coconut (optional)
- Sea salt (for sprinkling, optional)
Instructions:
- Begin by preparing your workspace. Line a baking sheet with parchment paper to guarantee the chocolate clusters don’t stick once set. Set this aside while you melt the chocolate.
- In a microwave-safe bowl, add the semi-sweet chocolate chips. Microwave in 30-second intervals, stirring after each interval, until the chocolate is fully melted and smooth. This typically takes about 1 to 2 minutes.
- Once the chocolate is melted, remove it from the microwave and add the chopped almonds, walnuts, dried cranberries, dried apricots, and shredded coconut (if using). Stir until all the ingredients are evenly coated in chocolate.
- Using a spoon, drop tablespoon-sized portions of the chocolate mixture onto the prepared baking sheet, spacing them about an inch apart. You can shape them into clusters as desired.
- If desired, sprinkle a little sea salt on top of each cluster for an extra kick of flavor. Place the baking sheet in the refrigerator for about 10 minutes or until the chocolate has completely set.
- Once set, remove the clusters from the refrigerator and gently peel them off the parchment paper. Store the clusters in an airtight container at room temperature or in the fridge for a firmer texture.
Extra Tips: To make your clusters even more delightful, feel free to add a splash of vanilla extract to the melted chocolate before mixing in the nuts and fruits.
Also, if you want to reduce the sweetness, consider using dark chocolate instead of semi-sweet. For a fun twist, try adding a sprinkle of your favorite spices, like cinnamon or chili powder, to the chocolate mixture for a unique flavor profile. Enjoy these clusters as a sweet treat or a thoughtful homemade gift!
Pumpkin Spice Truffles
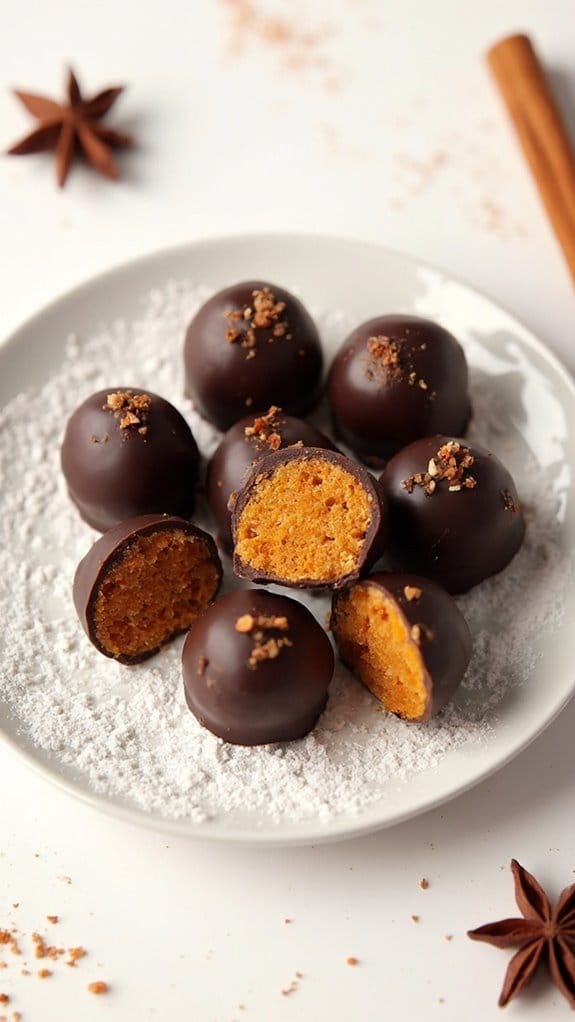
Title: Pumpkin Spice Truffles
Prep Time: 20 minutes
Cook Time: 30 minutes
Number of Servings: 12
Required Equipment List: Mixing bowl, baking sheet, parchment paper, double boiler or microwave, silicone mold or cookie scoop
Cuisine Type: American
Pumpkin Spice Truffles are a delightful treat that captures the essence of fall in every bite. These creamy, rich truffles are infused with the warm spices of pumpkin pie, making them an ideal dessert for holiday gatherings or a cozy night in. Coated in a layer of chocolate, each truffle offers a satisfying crunch before revealing the soft, spiced filling that will transport you to a pumpkin patch on a crisp autumn day.
Making these truffles is a simple process that requires minimal ingredients yet delivers maximum flavor. The combination of pumpkin puree, cream cheese, and pumpkin spice creates a luscious filling, while the outer chocolate shell provides an indulgent finish. Perfect for gifting or entertaining, these truffles are sure to impress family and friends with their delightful flavors and beautiful presentation.
Ingredients:
- 1 cup pumpkin puree
- 4 ounces cream cheese, softened
- 1 teaspoon vanilla extract
- 1 teaspoon pumpkin pie spice
- 2 cups powdered sugar
- 8 ounces semi-sweet chocolate, chopped
- 1 tablespoon coconut oil (optional)
Instructions:
- In a mixing bowl, combine the pumpkin puree, softened cream cheese, vanilla extract, and pumpkin pie spice. Mix until smooth and well combined.
- Gradually add the powdered sugar to the pumpkin mixture, stirring until fully incorporated. The mixture should be thick enough to hold its shape. If it’s too soft, add a bit more powdered sugar.
- Once the mixture is ready, cover the bowl with plastic wrap and refrigerate for about 30 minutes. This will help firm up the mixture, making it easier to shape into truffles.
- After chilling, use a silicone mold or a cookie scoop to portion out the mixture into small balls, about 1 inch in diameter. Place the formed truffles on a baking sheet lined with parchment paper and return them to the refrigerator to chill for another 15 minutes.
- While the truffles are chilling, prepare the chocolate coating. In a double boiler or microwave, melt the chopped chocolate and coconut oil (if using) until smooth. Stir continuously to avoid burning.
- Remove the truffles from the refrigerator, and dip each one into the melted chocolate, ensuring they’re fully coated. Place the coated truffles back on the parchment-lined baking sheet and allow the chocolate to set at room temperature or in the refrigerator.
- Once the chocolate has hardened, your Pumpkin Spice Truffles are ready to enjoy! Serve them chilled or at room temperature.
Extra Tips: To add an extra layer of flavor, consider rolling the finished truffles in crushed graham crackers or chopped nuts before the chocolate coating sets. If you want to make them even more festive, drizzle some melted white chocolate over the top once the dark chocolate has set.
Store the truffles in an airtight container in the refrigerator for up to a week, making them a perfect make-ahead treat for the holidays! Enjoy your delicious pumpkin spice indulgence!
White Chocolate Pretzel Bites

Title: White Chocolate Pretzel Bites
Prep Time: 15 minutes
Cook Time: 10 minutes
Number of Servings: 24 bites
Required Equipment List: Baking sheet, parchment paper, microwave-safe bowl, spoon, cooling rack
Cuisine Type: American
White Chocolate Pretzel Bites are a delightful sweet and salty treat that combines the satisfying crunch of pretzels with the creamy sweetness of white chocolate. These easy-to-make bites are perfect for holiday gatherings, snack platters, or simply satisfying your sweet tooth.
The combination of salty pretzels and rich white chocolate creates a delicious contrast that’s hard to resist. This recipe is incredibly versatile, allowing you to customize your pretzel bites with toppings like crushed nuts, sprinkles, or even a drizzle of dark chocolate for added flair.
Quick to prepare, these treats can be made in just a few minutes and are sure to impress your family and friends. Whether served at a festive gathering or enjoyed as a cozy snack at home, White Chocolate Pretzel Bites are a delightful addition to your holiday treats.
Ingredients:
- 2 cups mini pretzels
- 1 cup white chocolate chips
- 1/4 cup sprinkles (optional)
- 1/4 cup crushed nuts (optional)
Instructions:
- Preheat your oven to 350°F (175°C). Line a baking sheet with parchment paper to prevent the pretzel bites from sticking and for easy cleanup.
- Spread the mini pretzels in a single layer on the prepared baking sheet. Make sure they’re evenly spaced for uniform melting.
- In a microwave-safe bowl, add the white chocolate chips. Microwave in 30-second intervals, stirring in between, until the chocolate is completely melted and smooth.
- Using a spoon, drizzle the melted white chocolate over the pretzels, ensuring each pretzel is well coated. If desired, you can also dip the pretzels directly into the melted chocolate.
- If using, sprinkle crushed nuts or colorful sprinkles over the chocolate-coated pretzels while the chocolate is still warm, allowing the toppings to stick.
- Allow the pretzel bites to cool on the baking sheet for about 10 minutes before transferring them to a cooling rack to set completely.
Extra Tips: For a fun twist, try adding a pinch of sea salt on top of the white chocolate before it sets for a salted caramel flavor. You can also experiment with different types of chocolate, such as milk or dark chocolate, to suit your taste preferences.
Store any leftovers in an airtight container at room temperature for up to a week, though they may not last that long! Enjoy your delicious creations!
Maple Walnut Toffee
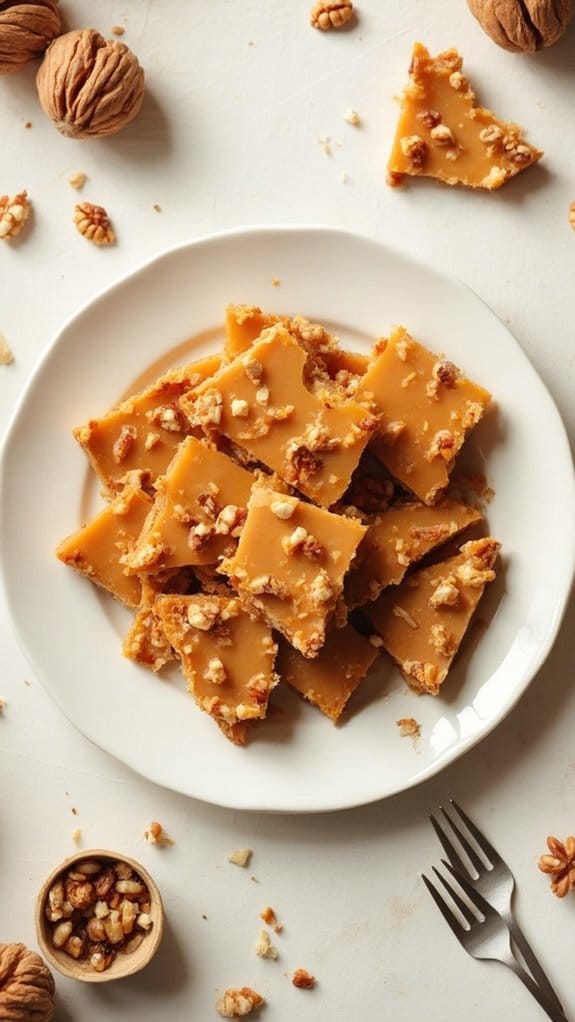
Title: Maple Walnut Toffee
Prep Time: 10 minutes
Cook Time: 25 minutes
Number of Servings: 12
Required Equipment List: Baking sheet, saucepan, candy thermometer, wooden spoon, parchment paper
Cuisine Type: American
Maple Walnut Toffee is a delightful treat that combines the rich flavors of maple syrup and crunchy walnuts, creating a perfect balance of buttery sweetness and nutty goodness. This toffee isn’t only easy to make but also makes for a wonderful homemade gift during the holiday season or a sweet indulgence for yourself.
The fragrant aroma of maple wafting through your kitchen will certainly get everyone excited for this delicious candy. This recipe yields a crispy and delightful toffee that can be enjoyed on its own or chopped into pieces and sprinkled over desserts like ice cream or brownies.
The addition of walnuts adds a lovely texture and flavor, enhancing the overall experience of this festive treat. With just a few simple ingredients and some patience, you can create a batch of Maple Walnut Toffee that will impress friends and family alike.
Ingredients:
- 1 cup unsalted butter
- 1 cup pure maple syrup
- 2 cups granulated sugar
- 1/4 teaspoon salt
- 1 cup walnuts, chopped
- 1 teaspoon vanilla extract
Instructions:
- Begin by preparing your baking sheet. Line a large baking sheet with parchment paper, ensuring it’s smooth and wrinkle-free, as this will be where you pour your toffee mixture once it’s cooked.
- In a medium saucepan, combine the unsalted butter, maple syrup, granulated sugar, and salt. Place the saucepan over medium heat and stir the mixture continuously until the butter has melted and the sugar has dissolved completely.
- Attach a candy thermometer to the side of the saucepan, ensuring the tip doesn’t touch the bottom. Continue cooking the mixture, stirring occasionally, until it reaches a temperature of 300°F (hard crack stage). This usually takes about 15-20 minutes.
- Once the toffee reaches the correct temperature, remove it from the heat and quickly stir in the chopped walnuts and vanilla extract. Be careful, as the mixture will be very hot!
- Immediately pour the toffee mixture onto the prepared baking sheet. Use a spatula to spread it evenly across the sheet, but work quickly as the toffee will start to harden as it cools.
- Allow the toffee to cool completely at room temperature for about an hour. Once it’s set, break it into pieces and store it in an airtight container.
Extra Tips: For a delightful twist, consider adding a sprinkle of sea salt on top of the toffee just before it cools for a sweet-salty combination.
Make sure to keep a close eye on the candy thermometer as the mixture can quickly go from perfect to burnt. If you prefer a different nut, feel free to substitute walnuts with pecans or almonds for a unique flavor. Enjoy your homemade Maple Walnut Toffee!
Chocolate Mint Meringues
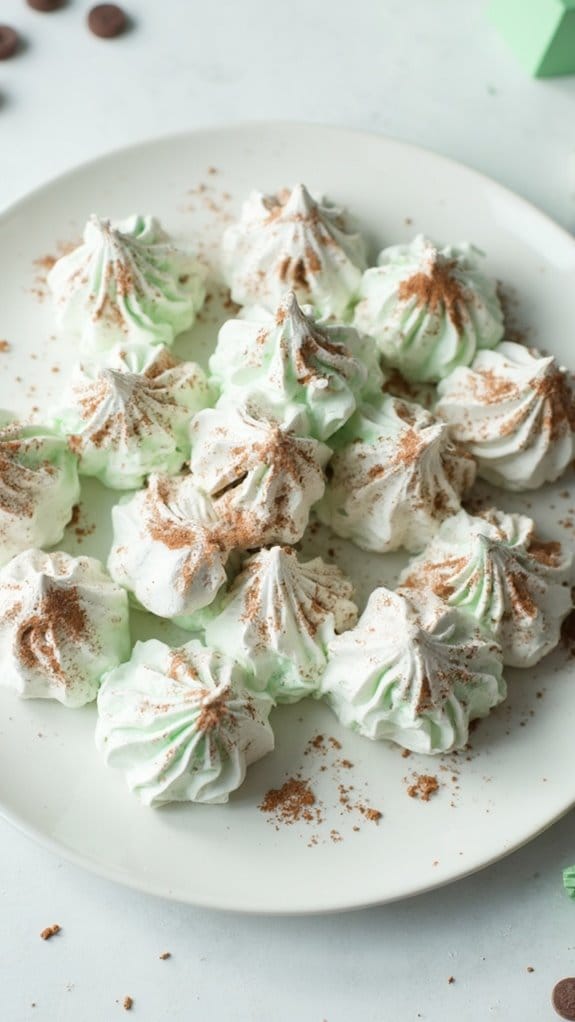
Title: Chocolate Mint Meringues
Prep Time: 15 minutes
Cook Time: 1 hour
Number of Servings: 24
Required Equipment List: Mixing bowl, electric mixer, baking sheet, parchment paper, piping bag (optional)
Cuisine Type: American
Chocolate Mint Meringues are a delightful treat that combine the light, airy texture of meringue with the rich flavors of chocolate and mint. These little confections aren’t only visually appealing with their delicate swirls of chocolate, but they also offer a perfect balance of sweetness and invigorating mint. They make an excellent addition to holiday dessert tables or as a sweet gift during the festive season.
Creating these meringues is a fun and simple process that requires just a few key ingredients. Once baked, they develop a crisp outer shell while remaining soft and chewy on the inside. The hint of mint adds a revitalizing twist, making these meringues a unique alternative to traditional holiday sweets.
Serve them at parties, or enjoy them as a snack with coffee or tea, and watch them disappear quickly!
Ingredients:
- 4 large egg whites
- 1 cup granulated sugar
- 1/4 teaspoon cream of tartar
- 1/2 teaspoon peppermint extract
- 1/4 cup cocoa powder
- 1/3 cup mini chocolate chips (optional)
- Pinch of salt
Instructions:
- Preheat your oven to 200°F (93°C) and line a baking sheet with parchment paper. This low temperature will allow the meringues to dry out slowly, creating the perfect texture.
- In a clean mixing bowl, beat the egg whites using an electric mixer on medium speed until they become frothy. Add the cream of tartar and a pinch of salt, then continue to beat until soft peaks form.
- Gradually add the granulated sugar to the egg whites, one tablespoon at a time, while continuing to beat on high speed. This process helps to dissolve the sugar and create a glossy meringue. Beat until stiff peaks form and the mixture is shiny.
- Gently fold in the peppermint extract and cocoa powder until fully incorporated. If desired, you can also fold in the mini chocolate chips for added texture and flavor.
- Using a piping bag or a spoon, drop or pipe small mounds of meringue onto the prepared baking sheet, leaving some space between each one. You can create swirls or peaks for a decorative touch.
- Bake the meringues in the preheated oven for about 1 hour, or until they’re dry to the touch and can easily be lifted off the parchment paper. Turn off the oven and let the meringues cool completely inside with the door slightly ajar to prevent cracks.
Extra Tips: To guarantee your meringues are successful, make sure your mixing bowl and beaters are completely clean and free of any grease. Even a small amount of fat can prevent the egg whites from whipping properly.
You can also experiment with different flavor extracts, such as vanilla or almond, to customize the meringues to your taste. Store the finished meringues in an airtight container at room temperature to keep them crisp for several days. Enjoy your festive treat!
Coconut Snowballs
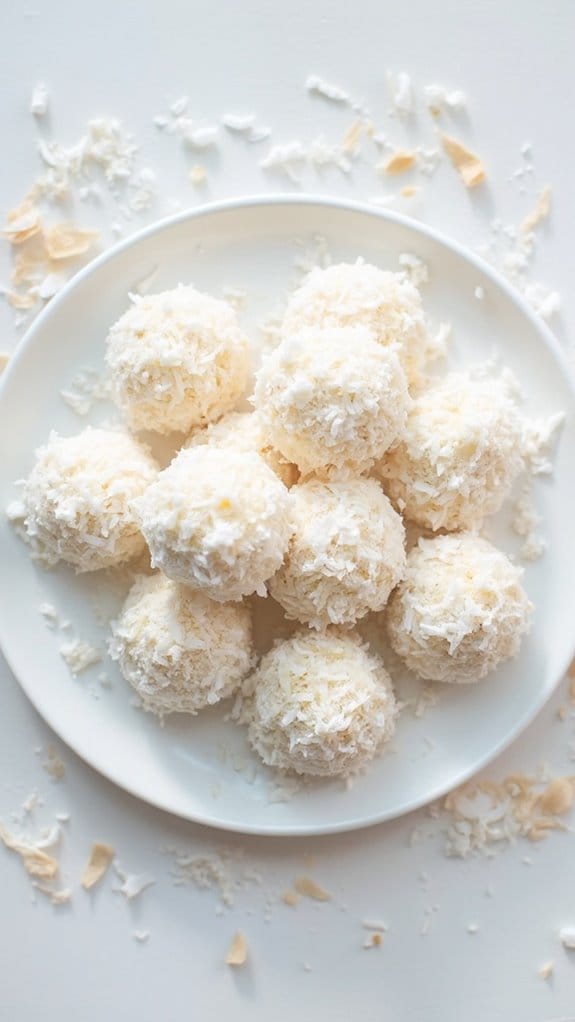
Title: Coconut Snowballs
Prep Time: 20 minutes
Cook Time: 0 minutes
Number of Servings: 24
Required Equipment List: Mixing bowl, baking sheet, parchment paper, refrigerator
Cuisine Type: American
Coconut Snowballs are a delightful no-bake treat that brings the flavors of the tropics to your holiday table. These sweet, chewy confections are made from shredded coconut and sweetened condensed milk, giving them a rich, creamy texture that’s hard to resist.
Rolled in more coconut, these snowballs not only look like little snowy bites but also offer a delightful flavor explosion that will remind you of sunny beach days, making them a perfect addition to your Christmas candy collection.
Easy to prepare and requiring no baking, these Coconut Snowballs are a fun treat to make with kids, as they can help roll the mixture into balls and coat them in coconut. With just a handful of ingredients and a little time in the refrigerator to set, you can create a festive and delicious treat that will impress your family and friends during the holiday season.
Ingredients:
- 3 cups shredded coconut (sweetened)
- 1 can (14 ounces) sweetened condensed milk
- 1 teaspoon vanilla extract
- 1/2 cup powdered sugar
- 1 cup additional shredded coconut (for coating)
Instructions:
- In a mixing bowl, combine the 3 cups of shredded coconut, sweetened condensed milk, vanilla extract, and powdered sugar. Stir until all the ingredients are well mixed and form a sticky dough.
- Using your hands, take small portions of the mixture and roll them into balls, about 1 inch in diameter. Place the rolled balls on a baking sheet lined with parchment paper to prevent sticking.
- Once all the mixture is rolled into balls, pour the additional coconut onto a plate. Roll each coconut ball in the shredded coconut until fully coated, then return them to the baking sheet.
- After all the balls are coated, place the baking sheet in the refrigerator for at least 1 hour to allow the Coconut Snowballs to firm up.
- Once chilled and set, remove the snowballs from the refrigerator and transfer them to a serving platter. They can be stored in an airtight container in the refrigerator for up to a week.
Extra Tips: For an extra festive touch, consider adding a few drops of food coloring to the coconut before rolling it in for a colorful presentation.
You can also experiment with flavors by adding a bit of almond extract or a dash of coconut rum to the mixture for an adult twist. If you want to make them even more decadent, try dipping the snowballs in melted chocolate before coating them in shredded coconut. Enjoy your delicious and festive Coconut Snowballs!
Cherry Almond Bark
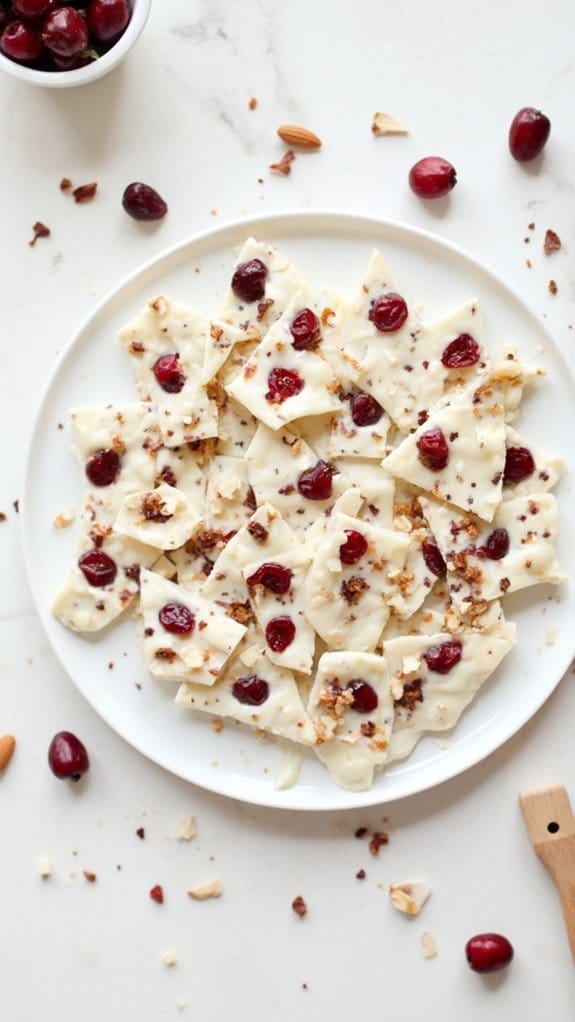
Title: Cherry Almond Bark
Prep Time: 15 minutes
Cook Time: 10 minutes
Number of Servings: 12
Required Equipment List: Baking sheet, parchment paper, microwave-safe bowl, spatula, refrigerator
Cuisine Type: American
Cherry Almond Bark is a delightful holiday treat that combines the sweetness of white chocolate with the tartness of dried cherries and the crunch of almonds. This simple yet elegant candy can be made in just a matter of minutes, making it a perfect addition to your Christmas dessert table or as a thoughtful gift for friends and family.
With its vibrant colors and delicious flavor, Cherry Almond Bark is sure to please anyone with a sweet tooth. The process of making this delicious bark is incredibly straightforward. Melt the white chocolate, mix in the cherries and almonds, and spread the mixture onto a baking sheet to cool.
Once set, simply break it into pieces and enjoy! This versatile treat can also be customized by adding your favorite nuts or dried fruits, making it a truly personal confection.
Ingredients:
- 2 cups white chocolate chips
- 1 cup dried cherries
- 1 cup almonds, chopped
- 1 teaspoon almond extract (optional)
- Sea salt for sprinkling (optional)
Instructions:
- Line a baking sheet with parchment paper to prevent the chocolate from sticking. This will also help with the cleanup process once your bark is ready to be broken into pieces.
- In a microwave-safe bowl, add the white chocolate chips. Heat them in the microwave in 30-second intervals, stirring in between, until they’re completely melted and smooth. Be careful not to overheat the chocolate, as it can burn easily.
- Once melted, stir in the dried cherries and chopped almonds. If you like a stronger almond flavor, add the almond extract at this stage. Mix until everything is well combined and evenly coated in chocolate.
- Pour the mixture onto the prepared baking sheet and spread it evenly with a spatula to your desired thickness. If you’d like, sprinkle a pinch of sea salt on top for a sweet and salty contrast.
- Place the baking sheet in the refrigerator for about 30 minutes or until the chocolate has completely hardened. Once set, remove it from the refrigerator and break it into pieces of your desired size.
- Store the Cherry Almond Bark in an airtight container at room temperature or in the refrigerator for longer shelf life. It can also make a lovely gift when packaged in decorative bags or boxes.
Extra Tips: For a more festive touch, consider drizzling melted dark chocolate over the top of the bark before it sets. You can also experiment with different types of nuts or add in crushed peppermint candies for a holiday twist.
If you find that the chocolate is too thick to spread easily, you can reheat it briefly in the microwave to soften it before pouring it onto the baking sheet. Enjoy your delicious homemade candy!
Festive Rice Krispie Treats
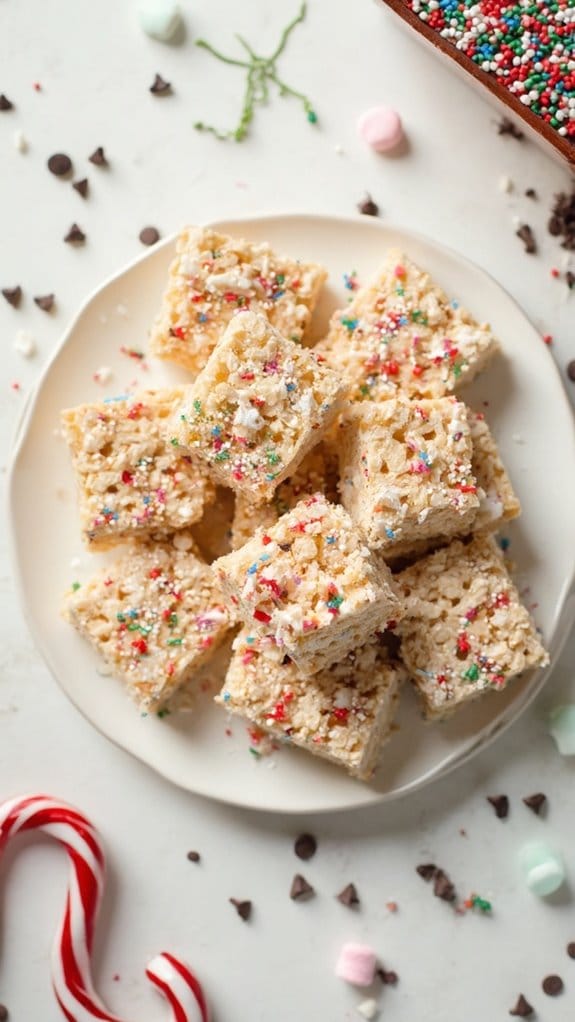
Title: Festive Rice Krispie Treats
Prep Time: 15 minutes
Cook Time: 10 minutes
Number of Servings: 12
Required Equipment List: Large mixing bowl, saucepan, spatula, 9×13 inch baking dish, wax paper
Cuisine Type: American
Festive Rice Krispie Treats are a delightful twist on the classic dessert, perfect for adding a touch of holiday cheer to your celebrations. These treats combine the gooeyness of melted marshmallows with the crunch of Rice Krispies, and they can be easily personalized with festive mix-ins like colorful sprinkles, chocolate chips, or holiday-shaped marshmallows.
These treats aren’t only quick and easy to make but also a fun activity to involve kids in the kitchen during the holiday season. The fun doesn’t stop at just the traditional recipe; you can get creative by using different flavors of marshmallows or adding a splash of peppermint extract for a holiday twist.
These Rice Krispie Treats can be cut into festive shapes using cookie cutters, making them an eye-catching addition to your holiday dessert table. With their sweet, chewy texture and crunchy layers, they’re sure to be a hit with both kids and adults alike.
Ingredients:
- 6 cups Rice Krispies cereal
- 4 cups mini marshmallows
- 3 tablespoons unsalted butter
- 1 teaspoon vanilla extract
- 1/2 cup festive sprinkles (optional)
- 1/2 cup chocolate chips (optional)
Instructions:
- In a large saucepan, melt the unsalted butter over low heat. Once melted, add the mini marshmallows to the saucepan, stirring continuously until they’re completely melted and smooth. This process should take about 5 minutes.
- Once the marshmallows are fully melted, remove the saucepan from heat and stir in the vanilla extract. If you’re using any flavor extracts or other add-ins, now is the time to mix them in for an extra burst of flavor.
- Gradually add the Rice Krispies cereal to the melted marshmallow mixture, folding it in gently using a spatula until the cereal is fully coated. If using chocolate chips or sprinkles, fold them in at this point as well.
- Transfer the Rice Krispie mixture into a greased 9×13 inch baking dish. Use wax paper or the back of a spatula to press the mixture evenly into the pan, making sure it’s tightly packed so that the treats hold their shape when cut.
- Allow the treats to cool at room temperature for about 10 minutes. Once set, use a sharp knife to cut them into squares or festive shapes. For an even more festive look, you can sprinkle additional sprinkles on top before they fully cool.
Extra Tips: To make cutting the treats easier, lightly grease your knife or use a serrated knife for clean slices. If you want to elevate these treats, consider drizzling melted chocolate on top after they’ve cooled for an added layer of flavor and decoration.
Store any leftovers in an airtight container at room temperature to keep them fresh. These treats can also be wrapped in cellophane and tied with a ribbon for a delightful homemade gift!
Spiced Orange Chocolate Truffles

Title: Spiced Orange Chocolate Truffles
Prep Time: 20 minutes
Cook Time: 10 minutes
Number of Servings: 12
Required Equipment List: Mixing bowl, saucepan, baking sheet, parchment paper, refrigerator
Cuisine Type: American
These Spiced Orange Chocolate Truffles are a delightful treat that brings together the rich flavors of chocolate with the invigorating zest of orange and a hint of warm spices. Perfect for holiday gatherings or as a homemade gift, these truffles are surprisingly easy to make and require only a handful of ingredients.
The combination of dark chocolate and citrus creates a luxurious flavor, while the spices like cinnamon and nutmeg add a festive touch that will surely impress. Making these truffles isn’t only a fun kitchen project but also a fantastic way to showcase your creativity.
You can roll them in cocoa powder, chopped nuts, or even shredded coconut for added texture and flavor. Once you’ve mastered the basic recipe, feel free to experiment with different flavorings by incorporating other spices or extracts to make these truffles your own.
Ingredients:
- 8 ounces dark chocolate, chopped
- 1/2 cup heavy cream
- Zest of 1 orange
- 1 teaspoon orange extract
- 1/2 teaspoon ground cinnamon
- 1/4 teaspoon ground nutmeg
- Pinch of salt
- Cocoa powder or chopped nuts (for rolling)
Instructions:
- In a medium saucepan, heat the heavy cream over medium heat until it just begins to simmer. Remove from heat and add the chopped dark chocolate to the saucepan. Let it sit for a minute to allow the chocolate to soften.
- Stir the chocolate and cream mixture until it’s completely smooth and well combined. Add the orange zest, orange extract, ground cinnamon, ground nutmeg, and a pinch of salt. Mix until fully incorporated.
- Pour the chocolate mixture into a mixing bowl and let it cool to room temperature. Once cooled, cover the bowl with plastic wrap and refrigerate for about 1-2 hours, or until the mixture is firm enough to scoop.
- Once the chocolate mixture has set, use a small cookie scoop or your hands to form small balls (about 1 inch in diameter). Roll each ball gently between your palms to create a smooth surface.
- Roll the truffles in cocoa powder or chopped nuts, ensuring they’re evenly coated. Place the finished truffles on a baking sheet lined with parchment paper.
- Refrigerate the truffles for another 30 minutes to firm up before serving. Store any leftovers in an airtight container in the refrigerator for up to a week.
Extra Tips: For an extra burst of flavor, consider adding a splash of Grand Marnier or another orange liqueur to the chocolate mixture. If you prefer a sweeter truffle, you can use milk chocolate instead of dark chocolate.
These truffles can also be decorated with melted chocolate drizzles or edible gold dust for a more festive presentation. Enjoy sharing these delightful treats with friends and family during the holiday season!
Gingerbread Caramel Cups
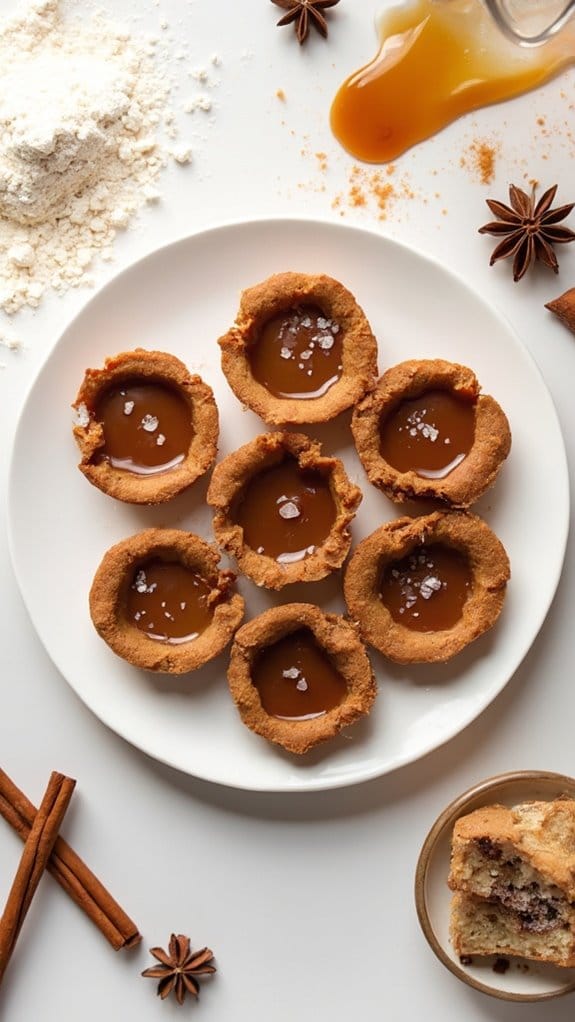
Title: Gingerbread Caramel Cups
Prep Time: 20 minutes
Cook Time: 15 minutes
Number of Servings: 12
Required Equipment List: Muffin tin, mixing bowls, whisk, saucepan, measuring cups, measuring spoons
Cuisine Type: American
These Gingerbread Caramel Cups are a delightful holiday treat that combines the warm, spiced flavors of gingerbread with a rich, gooey caramel center. Perfect for holiday parties or as a sweet gift for friends and family, these bite-sized desserts are sure to bring festive cheer.
The soft gingerbread crust pairs beautifully with the luscious caramel, making each bite a perfect balance of spice and sweetness. Creating these cups is simpler than it looks, and they can be made ahead of time for convenience.
The gingerbread dough is easy to work with, and the caramel can be prepared in advance and stored until you’re ready to fill the cups. Once baked, these treats can be topped with a sprinkle of sea salt or a drizzle of chocolate for an extra touch, making them an impressive addition to any holiday dessert table.
Ingredients:
- 1 ½ cups all-purpose flour
- 1 teaspoon baking soda
- 1 teaspoon ground ginger
- 1 teaspoon ground cinnamon
- ½ teaspoon ground cloves
- ½ teaspoon salt
- ½ cup unsalted butter, softened
- ½ cup brown sugar, packed
- ¼ cup molasses
- 1 egg
- 1 cup caramel sauce (store-bought or homemade)
- Sea salt (for garnish, optional)
Instructions:
- Preheat your oven to 350°F (175°C). Grease a muffin tin or line it with paper liners to prevent sticking. This step is essential to guarantee that the gingerbread cups come out easily after baking.
- In a mixing bowl, whisk together the flour, baking soda, ginger, cinnamon, cloves, and salt. This will guarantee that all the dry ingredients are evenly distributed before adding them to the wet mixture.
- In a separate bowl, cream together the softened butter and brown sugar until light and fluffy. Add the molasses and egg, mixing until well combined. This mixture will create a rich and flavorful base for the gingerbread.
- Gradually add the dry ingredients to the wet mixture, stirring until just combined. Be careful not to overmix, as this can result in dense gingerbread cups.
- Spoon the gingerbread batter into the prepared muffin tin, filling each cup about halfway. Then, add a teaspoon of caramel sauce into the center of each cup, making sure it’s surrounded by the gingerbread batter.
- Bake in the preheated oven for 12-15 minutes or until the tops are set and a toothpick inserted into the gingerbread comes out clean. Allow the cups to cool in the pan for a few minutes before transferring them to a wire rack to cool completely.
- Once cooled, drizzle additional caramel sauce over the tops and sprinkle with sea salt if desired. This step adds a beautiful finish and enhances the flavor profile of the dessert.
Extra Tips: For an extra touch of flavor, consider adding a dash of vanilla extract to the gingerbread batter. If you want to make your own caramel sauce, be sure to keep an eye on it while cooking, as it can go from perfect to burnt quickly.
These cups can also be stored in an airtight container for several days, making them a great make-ahead option for holiday celebrations. Enjoy your festive baking!
Almond Joy Candy Bars
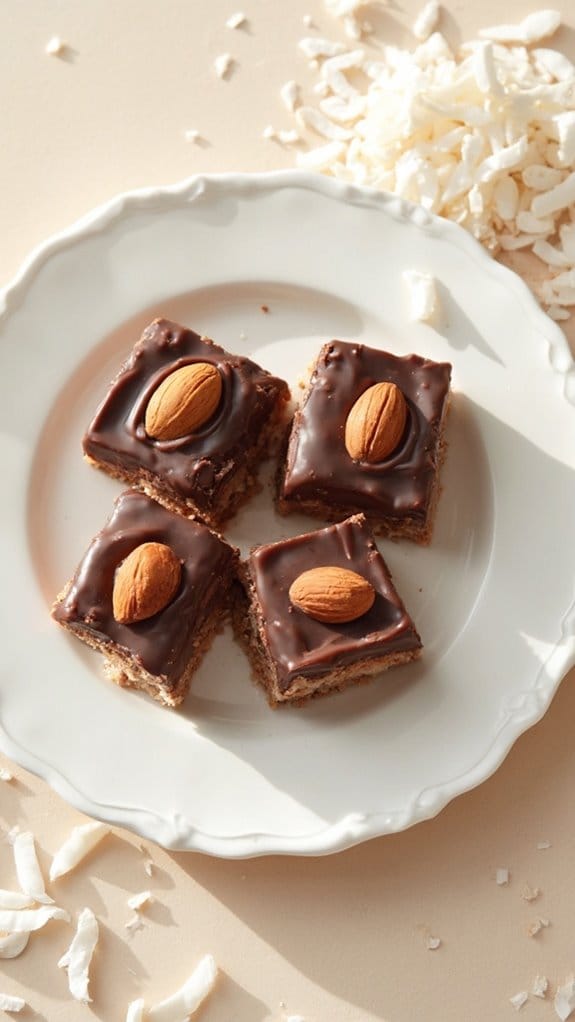
Title: Almond Joy Candy Bars
Prep Time: 20 minutes
Cook Time: 30 minutes
Number of Servings: 12
Required Equipment List: Mixing bowl, baking dish, saucepan, parchment paper, refrigerator
Cuisine Type: American
Almond Joy Candy Bars are a delicious homemade treat that captures the essence of the classic candy bar we all know and love. With a rich coconut filling infused with almond flavor, these bars are coated in smooth chocolate and topped with crunchy almonds, making them a perfect sweet indulgence for the holiday season or any occasion.
This recipe allows you to control the ingredients, ensuring a fresh and tasty result that rivals store-bought versions. Making Almond Joy Candy Bars at home is surprisingly simple and incredibly rewarding. The combination of chewy coconut, sweet chocolate, and crunchy almonds creates a delightful texture that’s satisfying in every bite.
Whether you’re preparing a festive dessert platter, giving them as gifts, or simply indulging yourself, these bars are sure to impress family and friends alike.
Ingredients:
- 2 cups shredded sweetened coconut
- 1/4 cup sweetened condensed milk
- 1 teaspoon almond extract
- 1 cup semi-sweet chocolate chips
- 1 tablespoon coconut oil
- 12 whole almonds
- Parchment paper (for lining the baking dish)
Instructions:
- Begin by lining an 8-inch square baking dish with parchment paper, leaving some overhang for easy removal later. This will make it easier to lift the finished bars out of the dish once they’re set.
- In a mixing bowl, combine the shredded coconut, sweetened condensed milk, and almond extract. Mix well until the coconut is fully coated in the condensed milk. The mixture should be sticky and hold together when pressed.
- Press the coconut mixture evenly into the prepared baking dish, creating a smooth and compact layer. Use the back of a spoon or your hands to pack it down firmly. Place the dish in the refrigerator for about 15 minutes to allow the coconut layer to set.
- While the coconut layer is chilling, melt the chocolate chips and coconut oil together in a saucepan over low heat, stirring constantly until smooth. Be careful not to overheat the chocolate, as it can burn easily.
- Once the coconut layer has set, remove it from the refrigerator and pour the melted chocolate over the top, spreading it evenly with a spatula. Gently place an almond on top of each section of chocolate before placing the dish back in the refrigerator to set for another 15 minutes.
- After the chocolate has hardened, lift the bars out of the baking dish using the parchment overhang. Cut into squares or rectangles, and enjoy your homemade Almond Joy Candy Bars!
Extra Tips: For a more intense chocolate flavor, you can use dark chocolate chips instead of semi-sweet. If you prefer a nuttier taste, consider adding chopped pecans or walnuts to the coconut mixture.
These bars can be stored in an airtight container in the refrigerator for up to a week, making them a perfect treat to prepare in advance for holiday gatherings or whenever you have a sweet craving. Enjoy your delicious homemade candy!
Eggnog Fudge
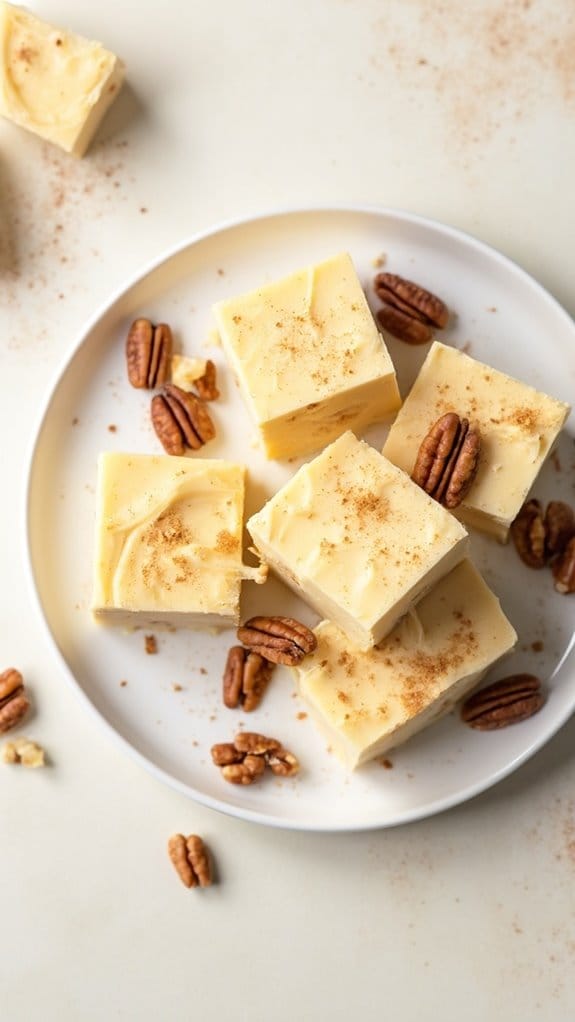
Title: Eggnog Fudge
Prep Time: 15 minutes
Cook Time: 20 minutes
Number of Servings: 16
Required Equipment List: Medium saucepan, mixing spoon, 8×8 inch baking dish, parchment paper, candy thermometer
Cuisine Type: American
Eggnog Fudge is a festive treat that perfectly captures the essence of the holiday season. With its rich, creamy texture and delightful flavors of nutmeg and vanilla, this fudge is a wonderful way to enjoy the classic taste of eggnog in a confectionery form.
Perfect for holiday parties or as a sweet gift for friends and family, this fudge is sure to become a yearly favorite. The process of making Eggnog Fudge is simple and requires only a few ingredients, making it an easy addition to your holiday baking repertoire.
The fudge sets beautifully and can be cut into squares for easy serving. Whether enjoyed on its own or used as a topping for ice cream, this delightful treat brings a taste of Christmas cheer with every bite.
Ingredients:
- 2 cups white chocolate chips
- 1 cup sweetened condensed milk
- 1 teaspoon vanilla extract
- 1/2 teaspoon nutmeg
- 1/4 teaspoon cinnamon
- 1/4 cup eggnog
- 1/2 cup chopped walnuts or pecans (optional)
Instructions:
- Line an 8×8 inch baking dish with parchment paper, allowing some overhang for easy removal later. This will help prevent the fudge from sticking to the pan and make it easier to cut into squares.
- In a medium saucepan over low heat, combine the white chocolate chips and sweetened condensed milk. Stir continuously until the chocolate chips are completely melted and the mixture is smooth and creamy.
- Once the chocolate mixture is smooth, remove it from heat and stir in the vanilla extract, nutmeg, cinnamon, and eggnog. Mix until all the ingredients are well incorporated, creating a rich and fragrant fudge base.
- If desired, fold in the chopped walnuts or pecans into the fudge mixture for added texture and flavor. Pour the fudge into the prepared baking dish and spread it evenly with a spatula.
- Allow the fudge to cool at room temperature for about 2 hours, or until it has fully set. Once set, lift the fudge out of the baking dish using the parchment paper overhang and cut it into squares for serving.
Extra Tips: For a creamier fudge, make sure that the white chocolate is of good quality, as this will greatly impact the texture and taste. You can also experiment with adding a splash of rum extract for an extra festive kick.
Store the fudge in an airtight container at room temperature for up to a week, or refrigerate for longer shelf life. Enjoy this delightful treat during your holiday celebrations!
Chocolate-Covered Marshmallows
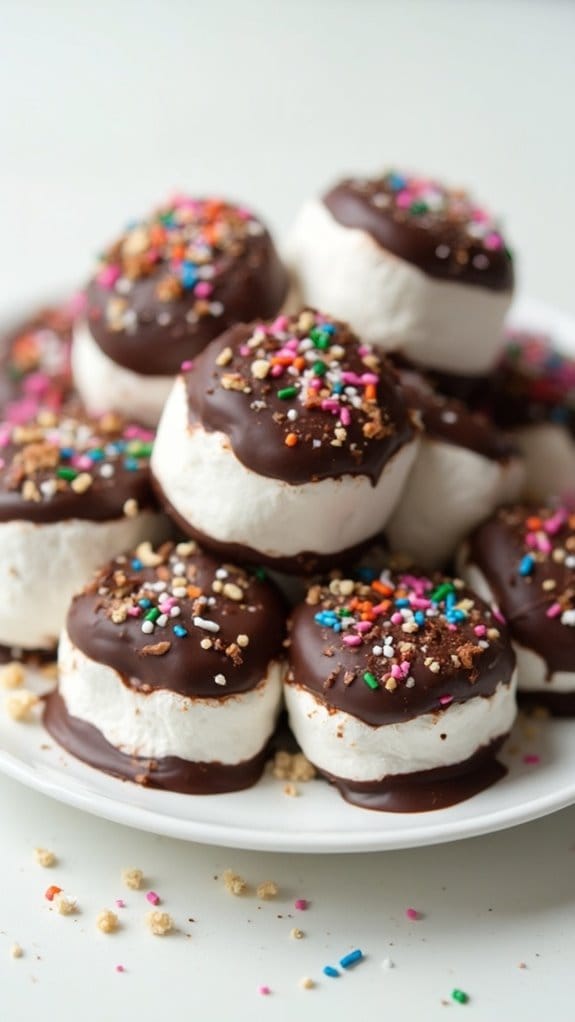
Title: Chocolate-Covered Marshmallows
Prep Time: 20 minutes
Cook Time: 10 minutes
Number of Servings: 12
Required Equipment List: Baking sheet, parchment paper, microwave-safe bowl, fork, refrigerator
Cuisine Type: American
Chocolate-Covered Marshmallows are an indulgent treat that perfectly captures the festive spirit of the holiday season. These sweet morsels consist of fluffy marshmallows coated in rich, melted chocolate, making them a delightful addition to any dessert table or holiday gathering.
With their simple preparation, they can be made in large batches, allowing you to share them with family and friends or enjoy them yourself throughout the season. This recipe isn’t only easy to make but also versatile, as you can customize the chocolate using different varieties, such as dark, milk, or white chocolate.
Sprinkles, crushed nuts, or coconut flakes can be added for an extra touch of flavor and decoration. Whether you package them as gifts or serve them as a fun dessert, these chocolate-covered marshmallows are sure to be a hit.
Ingredients:
- 12 large marshmallows
- 1 cup chocolate chips (dark, milk, or white)
- 1 tablespoon coconut oil (optional, for smoother chocolate)
- Sprinkles or crushed nuts (optional, for decoration)
Instructions:
- Line a baking sheet with parchment paper to prevent the marshmallows from sticking while they cool. Set aside in a safe spot where they won’t be disturbed during the dipping process.
- In a microwave-safe bowl, combine the chocolate chips and coconut oil (if using). Microwave in 30-second intervals, stirring in between, until the chocolate is fully melted and smooth. Be careful not to overheat, as chocolate can burn easily.
- Once melted, take each marshmallow and dip it into the chocolate using a fork, allowing any excess chocolate to drip off. Place the coated marshmallow onto the prepared baking sheet.
- If desired, immediately sprinkle the top of each chocolate-covered marshmallow with sprinkles or crushed nuts before the chocolate hardens. This adds a festive touch and extra flavor.
- After all marshmallows have been coated, place the baking sheet in the refrigerator for about 10-15 minutes, or until the chocolate has set and is firm to the touch.
- Once the chocolate has hardened, remove the marshmallows from the refrigerator. They can be enjoyed immediately or stored in an airtight container at room temperature for several days.
Extra Tips: For a fun twist, consider adding flavor extracts such as peppermint or almond to the melted chocolate for a unique taste.
If you want to make them extra special for gift-giving, package them in decorative bags or boxes tied with ribbon. You can also experiment with different toppings, such as crushed peppermint candies for a holiday flair or sea salt for a gourmet touch. Enjoy your delicious chocolate-covered marshmallows!
Holiday Colorful Candy Corn
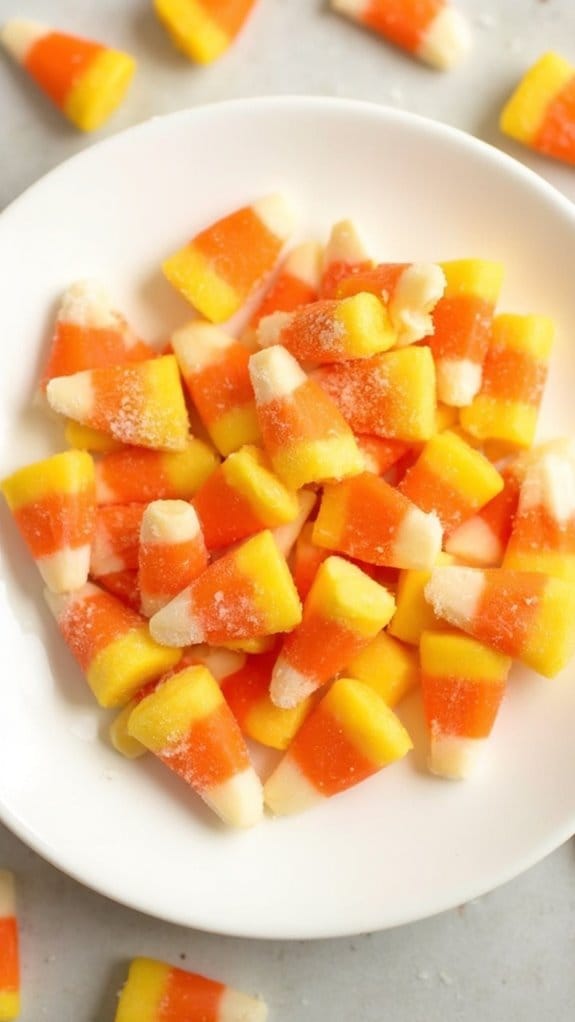
Title: Holiday Colorful Candy Corn
Prep Time: 30 minutes
Cook Time: 10 minutes
Number of Servings: 12
Required Equipment List: Baking sheet, parchment paper, mixing bowls, spatula, candy thermometer
Cuisine Type: American
Holiday Colorful Candy Corn is a festive twist on the classic Halloween treat, perfect for brightening up your holiday gatherings. This delightful recipe incorporates vibrant colors and flavors that capture the essence of the season. Made with a blend of sweetened corn syrup and a touch of vanilla, these homemade candy corns aren’t only a treat for the eyes but also for the palate.
Whether used as a decorative centerpiece or enjoyed as a sweet snack, they’re sure to bring festive cheer to your celebrations. Creating your own candy corn allows for endless customization, whether you want to stick to the traditional tri-color look or experiment with different flavors and shades.
This recipe is simple enough for both beginners and seasoned candy makers, making it a fun activity to do with family or friends. Once prepared, the candy corn can be packaged in cute bags as gifts or served in bowls for everyone to enjoy throughout the holiday season.
Ingredients:
- 2 1/2 cups powdered sugar
- 1 cup light corn syrup
- 1/4 cup unsalted butter
- 1 teaspoon vanilla extract
- 1/2 teaspoon salt
- 1/4 teaspoon baking soda
- Food coloring (yellow, orange, and white)
- 1 cup granulated sugar (for dusting)
Instructions:
- In a large mixing bowl, combine the powdered sugar, salt, and baking soda. Set aside. In a saucepan over medium heat, combine the light corn syrup and unsalted butter. Stir until the butter is melted and the mixture is well combined.
- Once the corn syrup mixture is heated, remove it from the heat and stir in the vanilla extract. Gradually pour the syrup mixture into the bowl with the powdered sugar, mixing with a spatula until a dough forms. Be cautious, as the mixture will be hot.
- Divide the dough into three equal portions. Leave one portion white, and color the second with yellow food coloring and the third with orange food coloring. Knead the food coloring into each portion until the colors are vibrant and evenly distributed.
- On a clean, lightly dusted surface, roll each color into long ropes about 1/4 inch thick. Cut the ropes into small triangles to form candy corn shapes. Alternatively, you can use cookie cutters for more uniform pieces.
- Place the shaped candy corns on a baking sheet lined with parchment paper. Allow them to cool and harden for about 1-2 hours. Once hardened, toss them in granulated sugar to prevent sticking.
Extra Tips: When making candy corn, verify that your workspace is clean and dusted with granulated sugar to avoid sticking. If you want to add a twist to the flavors, consider infusing your syrup with a hint of almond or coconut extract.
For a glossy finish, you can dip the finished candy corns in melted chocolate. Store your candy corn in an airtight container to maintain freshness, and enjoy them throughout the holiday season!
Rum Balls
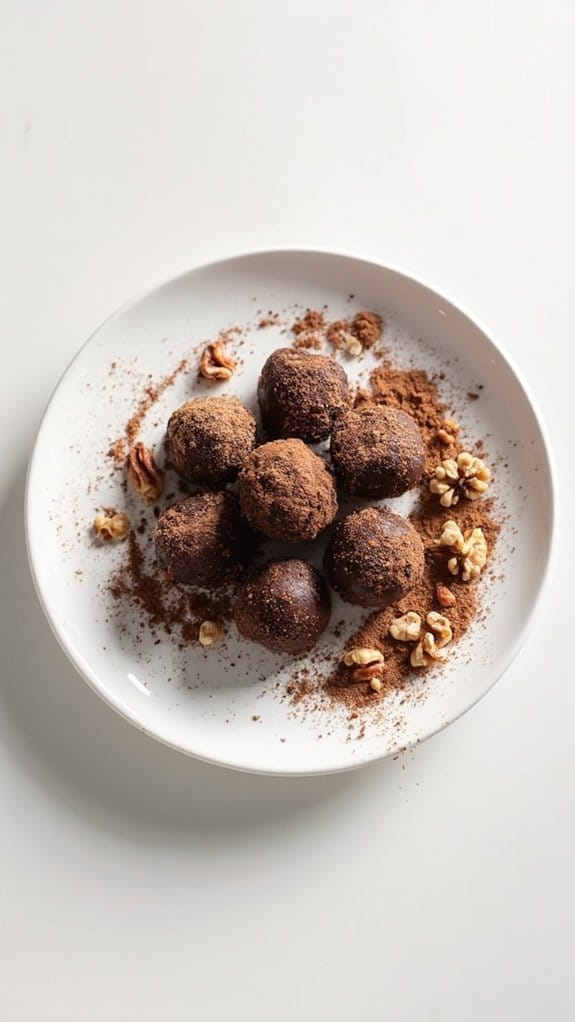
Title: Festive Rum Balls
Prep Time: 20 minutes
Cook Time: 0 minutes
Number of Servings: 24
Required Equipment List: Mixing bowl, baking sheet, parchment paper, airtight container
Cuisine Type: American
Festive Rum Balls are a classic holiday treat that brings together the rich flavors of chocolate, nuts, and a hint of rum, making them a perfect addition to any holiday spread. These no-bake confections are simple to prepare and are guaranteed to impress your family and friends with their indulgent taste.
The combination of crushed cookies and finely chopped nuts provides a delightful texture, while the rum adds a warm, enjoyable kick that’s synonymous with festive celebrations. Not only are these Rum Balls easy to make, but they can also be prepared ahead of time, allowing the flavors to meld together beautifully.
Once rolled in powdered sugar, cocoa powder, or chopped nuts, they become a visually appealing treat that will entice anyone who walks by. Perfect for gift-giving or serving at holiday parties, these delightful little bites are sure to become a cherished tradition in your holiday festivities.
Ingredients:
- 1 cup crushed vanilla wafers
- 1 cup finely chopped nuts (walnuts or pecans)
- 1 cup powdered sugar
- 1/4 cup unsweetened cocoa powder
- 1/2 cup dark rum
- 1 teaspoon vanilla extract
- Additional powdered sugar or cocoa powder for coating
Instructions:
- In a mixing bowl, combine the crushed vanilla wafers, finely chopped nuts, powdered sugar, and cocoa powder. Stir until all dry ingredients are well mixed, ensuring an even distribution of flavors.
- Add the dark rum and vanilla extract to the dry mixture. Using your hands or a spoon, mix thoroughly until the ingredients are combined and form a sticky dough. If the mixture is too dry, add a little more rum, one teaspoon at a time, until it holds together.
- Once the mixture is well combined, cover the bowl with plastic wrap and refrigerate for about 30 minutes. This chilling time will make the dough easier to handle when rolling into balls.
- After chilling, remove the mixture from the refrigerator. Using your hands, scoop about a tablespoon of the mixture and roll it into a ball. Continue this process until all the mixture is formed into balls, placing them on a baking sheet lined with parchment paper.
- To coat the Rum Balls, roll each ball in powdered sugar or cocoa powder until fully covered. This not only adds flavor but also creates a lovely presentation. Once coated, transfer the Rum Balls to an airtight container.
Extra Tips: For an extra touch, consider adding a dash of cinnamon or nutmeg to the mixture for a warm, spicy flavor that complements the rum. You can also experiment with different types of alcohol, such as whiskey or bourbon, for a unique twist on this classic recipe.
These Rum Balls can be stored in the refrigerator for up to two weeks, allowing their flavors to deepen further over time. Enjoy these delightful treats during your holiday celebrations!
Cinnamon Roll Candy
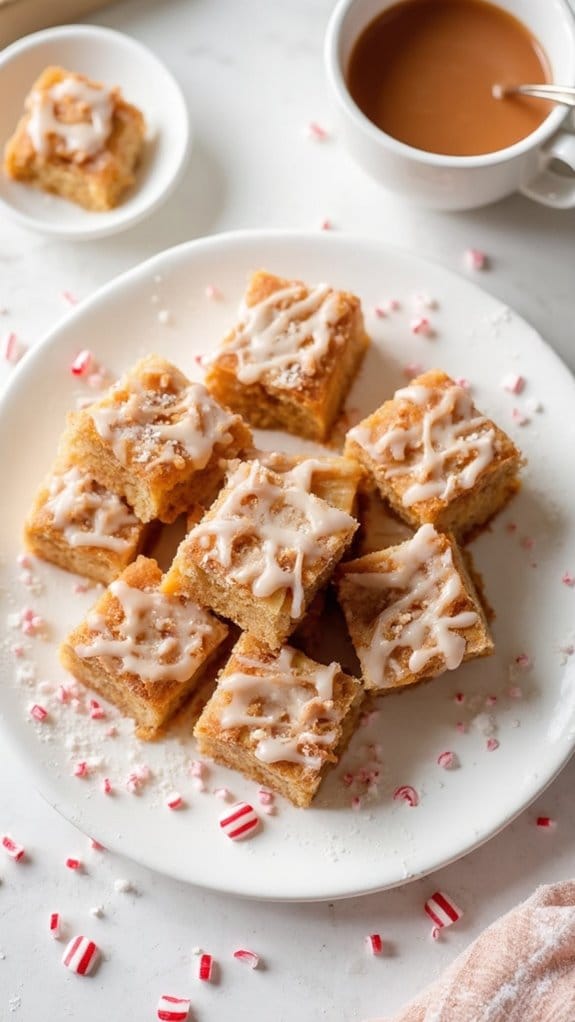
Title: Cinnamon Roll Candy
Prep Time: 20 minutes
Cook Time: 25 minutes
Number of Servings: 24 pieces
Required Equipment List: Baking dish, mixing bowl, spatula, saucepan, parchment paper
Cuisine Type: American
Cinnamon Roll Candy is a delightful treat that combines the warm, comforting flavors of traditional cinnamon rolls with the fun, bite-sized convenience of candy. This recipe features a rich, buttery caramel base infused with cinnamon and topped with a creamy glaze, creating a sweet indulgence that’s perfect for holiday gifting or enjoying at home.
With its irresistible aroma and decadent taste, this candy will quickly become a favorite among friends and family. Making Cinnamon Roll Candy is a fun and straightforward process; it involves melting ingredients to create a luscious caramel, mixing in cinnamon for that signature flavor, and allowing the mixture to set before cutting it into pieces.
The finished product is soft, chewy, and packed with flavor, making it a perfect addition to your holiday dessert table or as a sweet surprise for loved ones. Plus, it’s a great way to enjoy the essence of cinnamon rolls without the fuss of traditional baking.
Ingredients:
- 1 cup unsalted butter
- 2 cups brown sugar
- 1 cup light corn syrup
- 1 teaspoon vanilla extract
- 1 tablespoon ground cinnamon
- 1/2 teaspoon salt
- 2 cups powdered sugar
- 2 tablespoons milk
Instructions:
- In a medium saucepan over medium heat, melt the unsalted butter. Once melted, add the brown sugar and corn syrup, stirring continuously until the mixture comes to a boil. Allow it to boil for 5 minutes, without stirring, to achieve a rich caramel consistency.
- Remove the saucepan from heat and stir in the vanilla extract, ground cinnamon, and salt. Mix well until everything is combined. Be careful as the mixture will be hot!
- Line a baking dish with parchment paper, leaving some overhang for easy removal later. Pour the warm caramel mixture into the prepared dish, spreading it evenly with a spatula.
- Allow the caramel to cool at room temperature for about 15-20 minutes until it begins to set but is still slightly tacky. While it cools, prepare the glaze by whisking together the powdered sugar and milk in a mixing bowl until smooth.
- Once the caramel has cooled, drizzle the glaze over the top, spreading it evenly. Let the entire dish cool completely, which may take an additional 30 minutes. Once set, lift the parchment paper to remove the candy from the dish.
- Cut the candy into small squares or rectangles, and store them in an airtight container. These treats can be enjoyed immediately or kept for later.
Extra Tips: For an extra touch, consider adding chopped nuts or mini chocolate chips to the caramel mixture before it sets for added texture and flavor.
If you want to make the candy more festive, you can sprinkle crushed peppermint on top of the glaze before it sets or use colored sugars for decoration. Store the candy in a cool place to maintain its chewiness, and enjoy sharing this delightful treat with family and friends!
Sugar Cookie Truffles
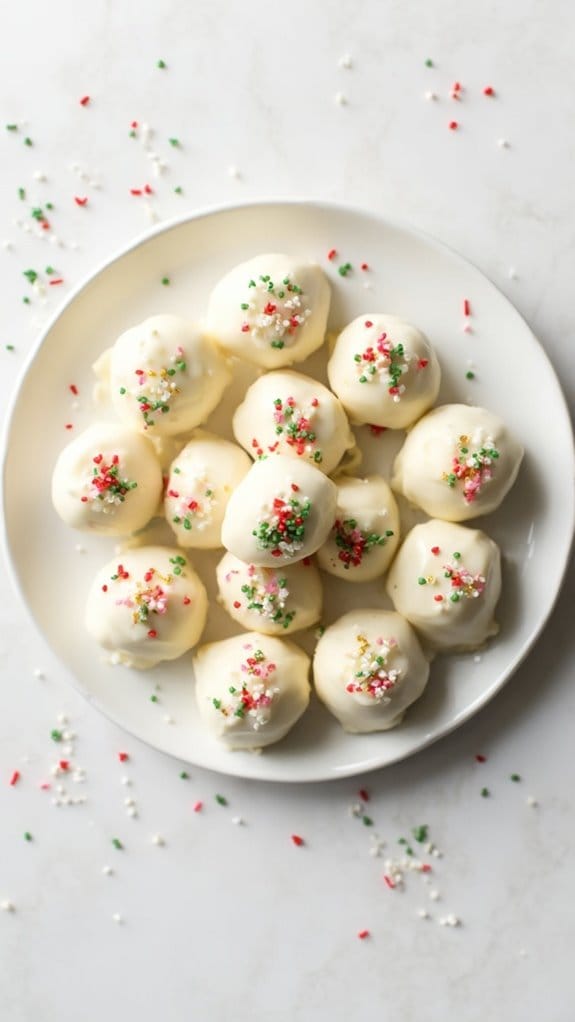
Title: Sugar Cookie Truffles
Prep Time: 20 minutes
Cook Time: 15 minutes
Number of Servings: 12
Required Equipment List: Mixing bowl, baking sheet, parchment paper, food processor, refrigerator
Cuisine Type: American
Sugar Cookie Truffles are a delightful and festive treat that combines the sweetness of sugar cookies with the creamy richness of a truffle. These bite-sized delights are perfect for holiday gatherings, cookie exchanges, or simply as a sweet indulgence during the festive season.
The process of making these truffles is simple, and they can be prepared ahead of time, making them a convenient option for busy holiday schedules. With a luscious coating of white chocolate and a sprinkle of festive sprinkles, these truffles aren’t only delicious but also visually appealing.
The interior is made from crumbled sugar cookies mixed with cream cheese, creating a rich and creamy texture that melts in your mouth. Whether you’re a seasoned baker or a novice in the kitchen, these Sugar Cookie Truffles are sure to become a holiday favorite.
Ingredients:
- 1 cup sugar cookie crumbs (store-bought or homemade)
- 4 ounces cream cheese, softened
- 1 teaspoon vanilla extract
- 8 ounces white chocolate, chopped
- Sprinkles for decoration
- Parchment paper
Instructions:
- In a mixing bowl, combine the sugar cookie crumbs, softened cream cheese, and vanilla extract. Mix thoroughly until the ingredients are well combined and form a dough-like consistency. If the mixture is too crumbly, add a bit more cream cheese until it holds together.
- Once the mixture is well combined, use your hands to roll it into small balls, about 1 inch in diameter. Place the rolled truffles onto a baking sheet lined with parchment paper. Once all truffles are formed, refrigerate for about 15 minutes to firm up.
- While the truffles are chilling, melt the chopped white chocolate in a microwave-safe bowl, heating in 30-second intervals and stirring in between until smooth. Be careful not to overheat, as chocolate can burn easily.
- Remove the chilled truffles from the refrigerator. Using a fork or toothpick, dip each truffle into the melted white chocolate, allowing any excess chocolate to drip off before placing them back onto the parchment-lined baking sheet.
- While the chocolate coating is still wet, sprinkle your choice of festive sprinkles over the truffles. Allow the chocolate to set at room temperature, or place the truffles back in the refrigerator for quicker setting.
- Once the chocolate has set, the Sugar Cookie Truffles are ready to be served. Store any leftovers in an airtight container in the refrigerator for up to a week.
Extra Tips: For added flavor, consider using flavored sugar cookies, like almond or lemon, to give your truffles a unique twist. You can also customize the coating by using colored chocolate melts or even dark chocolate for a different taste.
If you want to get creative, try adding a small amount of crushed peppermint or other festive toppings to the truffles for an extra holiday touch. Enjoy these delightful treats at your next holiday celebration!
Chocolate-Dipped Fruit
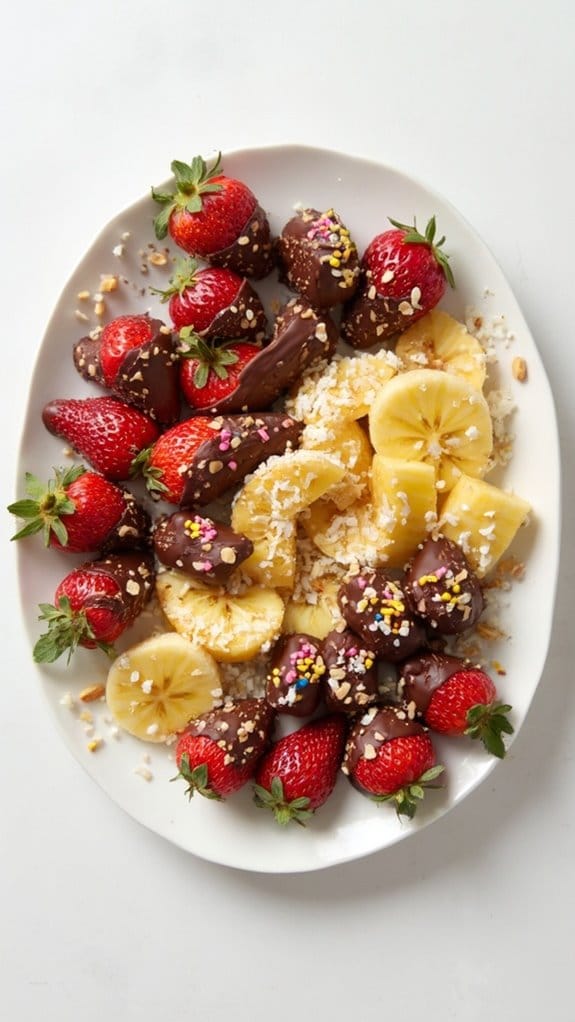
Title: Chocolate-Dipped Fruit
Prep Time: 15 minutes
Cook Time: 10 minutes
Number of Servings: 6
Required Equipment List: Baking sheet, parchment paper, microwave-safe bowl, fork, refrigerator
Cuisine Type: American
Chocolate-Dipped Fruit is a delightful treat that combines the rich decadence of chocolate with the natural sweetness of fresh fruit. This simple yet elegant dessert is perfect for holiday gatherings, parties, or as a sweet surprise for loved ones.
With just a few ingredients, you can create a colorful platter that’s sure to impress guests and satisfy your sweet tooth. The contrast of the warm, melted chocolate and the cool, juicy fruit makes each bite a heavenly experience.
This recipe allows for endless customization, as you can choose from a variety of fruits such as strawberries, bananas, and pineapple, or even try more exotic options like kiwi or mango. The chocolate can be dark, milk, or white, depending on your preference, and you can even add toppings like nuts or sprinkles for an extra crunch.
Chocolate-Dipped Fruit isn’t only a tasty treat but also a great way to incorporate some healthy elements into your holiday indulgences.
Ingredients:
- 1 cup dark chocolate chips (or milk/white chocolate)
- 2 cups fresh strawberries, washed and dried
- 2 bananas, sliced into rounds
- 1 cup pineapple chunks
- Optional toppings: crushed nuts, sprinkles, shredded coconut
Instructions:
- Begin by preparing your workspace. Line a baking sheet with parchment paper to prevent the chocolate-dipped fruit from sticking. Confirm that all your fruit is washed and thoroughly dried, as moisture can cause the chocolate to seize up.
- In a microwave-safe bowl, place the chocolate chips and heat in the microwave in 30-second intervals, stirring after each interval until the chocolate is completely melted and smooth. Be careful not to overheat the chocolate, as this can cause it to burn.
- Once the chocolate is melted, take a piece of fruit and dip it into the chocolate using a fork, making sure it’s completely coated. Allow any excess chocolate to drip off before placing the dipped fruit onto the prepared baking sheet.
- Repeat the dipping process for all pieces of fruit. If using toppings, sprinkle them on the chocolate-dipped fruit before the chocolate sets. This will confirm that the toppings adhere properly.
- Once all the fruit is dipped, place the baking sheet in the refrigerator for about 10-15 minutes to allow the chocolate to harden completely.
- After the chocolate has set, remove the fruit from the refrigerator and arrange it on a serving platter. Serve immediately, or store in an airtight container in the refrigerator until ready to enjoy.
Extra Tips: For added flavor, consider infusing the melted chocolate with a splash of vanilla extract or a pinch of sea salt before dipping the fruit. If you’re using bananas, dip them just before serving to prevent browning.
Experiment with different combinations of fruit and chocolate types to discover your favorite flavor pairings. This treat isn’t only delicious but also visually appealing, making it a perfect addition to any festive table. Enjoy your chocolate-dipped creations!
S’mores Candy Bars
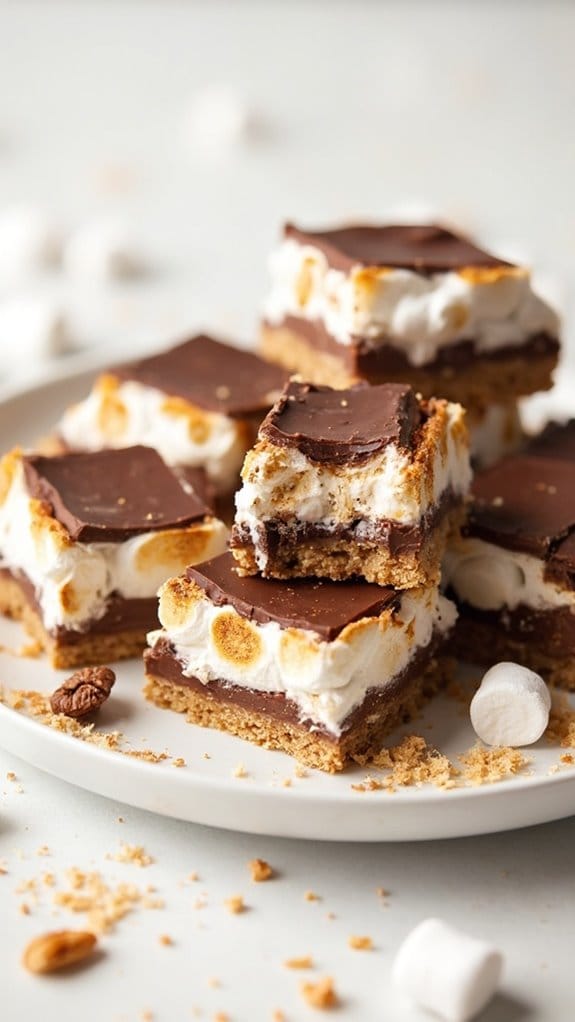
Title: S’mores Candy Bars
Prep Time: 20 minutes
Cook Time: 10 minutes
Number of Servings: 12
Required Equipment List: 9×13 inch baking pan, mixing bowl, saucepan, spatula, parchment paper
Cuisine Type: American
These S’mores Candy Bars are a delicious and convenient twist on the classic campfire treat, perfect for satisfying your sweet tooth any time of year. With layers of graham cracker crumbs, chocolate, and gooey marshmallows, these bars capture all the flavors of s’mores without the need for a fire.
They’re easy to make and are an instant hit at parties, potlucks, and family gatherings, allowing everyone to enjoy this nostalgic treat in a new way. Not only are these bars quick to prepare, but they also offer a delightful texture contrast between the crunchy graham cracker base and the soft, melty chocolate and marshmallow topping.
With just a few simple ingredients, you can whip up a batch of these S’mores Candy Bars that will have friends and family begging for the recipe. They also store well, making them an ideal treat to keep on hand for unexpected guests or late-night cravings.
Ingredients:
- 1 ½ cups graham cracker crumbs
- ½ cup unsalted butter, melted
- 1 cup semi-sweet chocolate chips
- 2 cups mini marshmallows
- ½ cup sweetened shredded coconut (optional)
- ½ cup chopped nuts (optional)
- 1 cup milk chocolate bars, broken into pieces
Instructions:
- Preheat your oven to 350°F (175°C). Line a 9×13 inch baking pan with parchment paper, allowing some overhang on the sides for easy removal later. This will guarantee that your bars come out easily and don’t stick to the pan.
- In a mixing bowl, combine the graham cracker crumbs and melted butter, stirring until the mixture is well combined and resembles wet sand. Press this mixture firmly into the bottom of the prepared baking pan to create an even layer for the base.
- Sprinkle the semi-sweet chocolate chips evenly over the graham cracker crust, followed by the mini marshmallows and optional shredded coconut and nuts if desired. Make sure to distribute the toppings evenly for the best flavor in every bite.
- Bake the bars in the preheated oven for about 10 minutes, or until the marshmallows are puffed and slightly golden. Keep an eye on them to avoid burning, as the marshmallows can brown quickly.
- Once baked, remove the pan from the oven and immediately place the broken milk chocolate bar pieces over the top of the hot marshmallows. Allow them to sit for a few minutes to soften, then use a spatula to spread the melted chocolate evenly over the surface.
- Let the bars cool completely in the pan at room temperature before lifting them out using the parchment overhang. Once cooled, cut into squares and serve.
Extra Tips: To elevate your S’mores Candy Bars, consider adding a layer of caramel sauce before the chocolate layer for a richer flavor. You can also experiment with different types of chocolate, such as dark or white chocolate, to customize the sweetness to your liking.
For a fun twist, try adding crushed pretzels for a salty crunch or drizzling extra melted chocolate on top before serving. Enjoy your delicious creation!
Conclusion
As you immerse yourself in these delightful Christmas candy recipes, think of each sweet treat as a little gift, wrapped in joy and sprinkled with love. Just like ornaments on a tree, each one adds its unique charm to the holiday season. So, why not gather your loved ones, roll up your sleeves, and create some magic together? After all, isn’t the best part of the holidays the sweet moments shared around the table, savoring bites of happiness?

