No products in the cart.
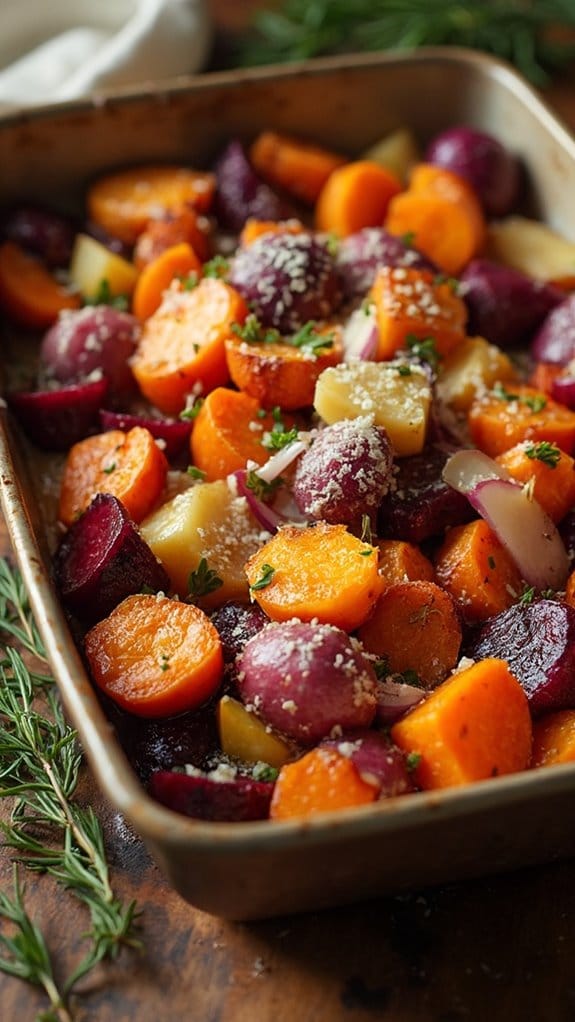
33 Flavor-Packed Winter Dinner One-Pan Wonders
Looking for a winter dinner that’s both easy and full of flavor? You’ll love these 33 one-pan wonders that make meal prep a breeze! Picture dishes like savory One-Pan Chicken and Rice or a hearty Vegetarian Chili Bake, perfect for cozy nights. Each recipe packs a flavor punch and minimizes cleanup, so you can focus on enjoying your meal. Plus, they’re customizable based on what you have on hand! Who wouldn’t want a delicious dinner without the hassle? Stick around, and you’ll discover even more tasty ideas to keep warm this season!
Contents
hide
One-Pan Chicken and Rice
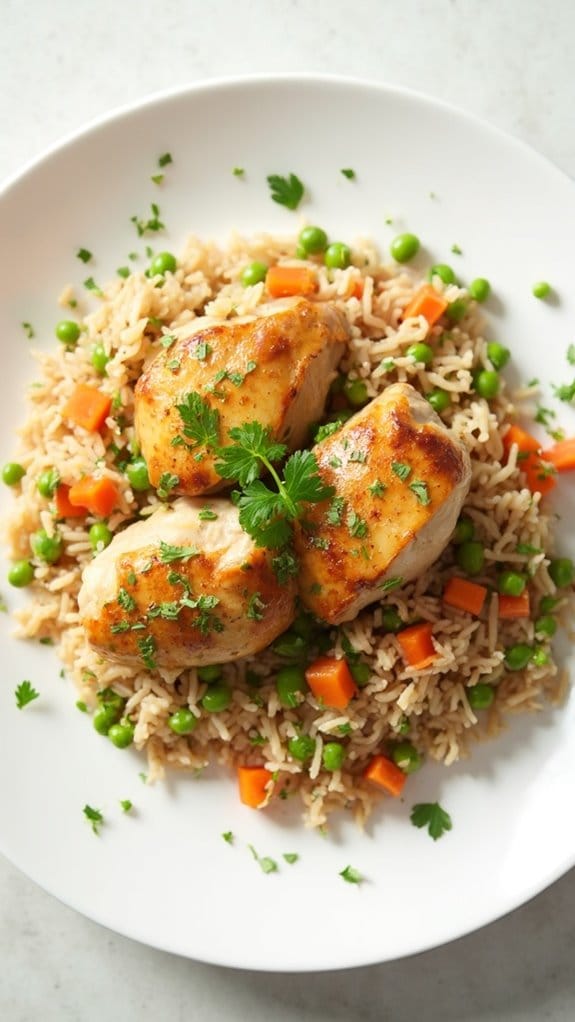
Title: One-Pan Chicken and Rice
Prep Time: 10 minutes
Cook Time: 30 minutes
Number of Servings: 4
Required Equipment List: Large skillet or frying pan, measuring cups, wooden spoon, lid
Cuisine Type: American
This One-Pan Chicken and Rice is a comforting and satisfying dish that brings together tender chicken, flavorful rice, and a mix of vegetables, all cooked in one pan for minimal cleanup.
With a savory broth and aromatic herbs, this recipe is perfect for busy weeknights or cozy family dinners. The chicken remains juicy while the rice absorbs the delicious flavors, creating a harmonious dish that’s both hearty and delicious.
What makes this recipe particularly appealing is its versatility. You can switch up the vegetables based on what you have on hand or your personal preferences, making it a great way to use up leftovers.
Additionally, this one-pan meal can be ready in under an hour, making it a go-to option for those looking for a quick yet nourishing dinner solution.
Ingredients:
- 4 boneless, skinless chicken thighs
- 1 cup long-grain rice
- 2 cups chicken broth
- 1 medium onion, diced
- 1 cup frozen peas and carrots
- 2 cloves garlic, minced
- 1 teaspoon paprika
- 1 teaspoon dried thyme
- Salt and pepper to taste
- 2 tablespoons olive oil
- Fresh parsley, chopped (for garnish)
Instructions:
- In a large skillet, heat the olive oil over medium heat. Season the chicken thighs with salt, pepper, and paprika. Once the oil is hot, add the chicken and sear for about 5 minutes on each side until golden brown. Remove the chicken from the skillet and set aside.
- In the same skillet, add the diced onion and cook for about 3 minutes until softened. Add the minced garlic and cook for an additional minute, stirring frequently to prevent burning.
- Stir in the rice, ensuring it’s well-coated with the oil and onion mixture. Cook for about 2 minutes, allowing the rice to toast slightly.
- Pour in the chicken broth and add the thyme, stirring to combine. Bring the mixture to a boil, then reduce the heat to low. Nestle the seared chicken back into the skillet and cover with a lid.
- Simmer for about 20 minutes, or until the rice is cooked and has absorbed most of the liquid. Add the frozen peas and carrots during the last 5 minutes of cooking, stirring gently to combine.
- Once cooked, remove from heat and let it rest for a few minutes before serving. Garnish with fresh parsley and enjoy your delicious one-pan meal.
Extra Tips: To enhance the flavor even further, consider marinating the chicken thighs in a mixture of lemon juice, olive oil, and herbs for an hour before cooking. This will add a lovely depth of flavor and tenderness to the chicken.
If you prefer, you can also substitute the chicken thighs with breasts or use bone-in chicken for added richness. For a touch of heat, add a pinch of red pepper flakes to the dish.
Beef Stroganoff Skillet
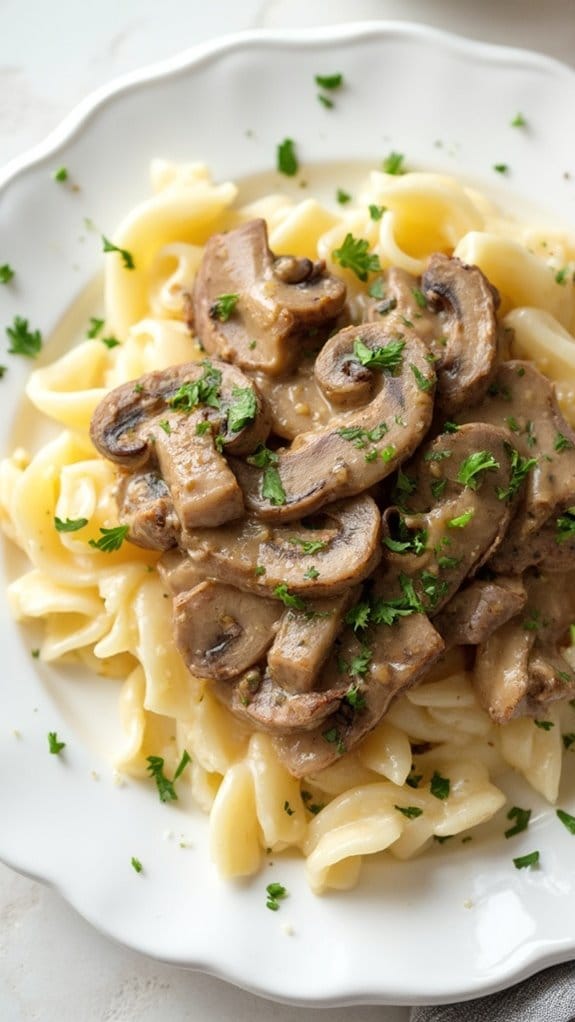
Title: Beef Stroganoff Skillet
Prep Time: 10 minutes
Cook Time: 30 minutes
Number of Servings: 4
Required Equipment List: Large skillet, wooden spoon, measuring cups, measuring spoons
Cuisine Type: Russian-American
Beef Stroganoff Skillet is a comforting and hearty dish, perfect for chilly winter nights. This one-pan meal features tender strips of beef, sautéed mushrooms, and a creamy sauce served over egg noodles or rice. The rich flavors blend beautifully, creating a dish that feels indulgent yet is surprisingly easy to prepare. This recipe will warm your home and satisfy your family, making it a perfect choice for weeknight dinners or gatherings.
This skillet adaptation of the classic beef stroganoff allows you to enjoy all the wonderful flavors without the fuss of multiple pots and pans. With just a handful of ingredients and a quick cooking time, you can have dinner on the table in no time. The creamy sauce made from sour cream and beef broth is the star of the show, adding a luscious touch to the tender beef and mushrooms. Serve it over noodles or rice for a complete and satisfying meal.
Ingredients:
- 1 pound beef sirloin, thinly sliced
- 2 cups mushrooms, sliced
- 1 medium onion, chopped
- 2 cloves garlic, minced
- 1 cup beef broth
- 1 tablespoon Worcestershire sauce
- 1 cup sour cream
- 2 tablespoons olive oil
- 1 teaspoon paprika
- Salt and pepper to taste
- 8 ounces egg noodles or rice (for serving)
Instructions:
- Start by cooking the egg noodles or rice according to package instructions, then set aside. This will guarantee that your starch is ready to soak up the delicious stroganoff sauce.
- In a large skillet, heat the olive oil over medium-high heat. Once hot, add the thinly sliced beef sirloin and season with salt, pepper, and paprika. Sear the beef until browned on all sides, about 3-4 minutes, then remove it from the skillet and set it aside.
- In the same skillet, add the chopped onions and sliced mushrooms. Sauté them for about 5-7 minutes, or until the onions are translucent and the mushrooms have released their moisture and are tender.
- Add the minced garlic and cook for an additional minute. Then, pour in the beef broth and Worcestershire sauce, scraping the bottom of the skillet to deglaze and incorporate any flavorful bits left behind.
- Bring the broth mixture to a simmer, then return the cooked beef to the skillet. Stir in the sour cream until well combined, allowing the sauce to thicken for about 5 minutes. Adjust seasoning with salt and pepper to taste.
- Serve the beef stroganoff over the prepared egg noodles or rice, garnishing with fresh parsley if desired for a pop of color.
Extra Tips: For a richer flavor, consider using a combination of beef broth and red wine in the sauce. If you like a bit of texture, you can add frozen peas or fresh spinach just before serving. This dish is best enjoyed fresh, but leftovers can be stored in an airtight container in the refrigerator for a couple of days. Reheat gently on the stove to maintain the creaminess of the sauce. Enjoy your warming meal!
Vegetarian Chili Bake
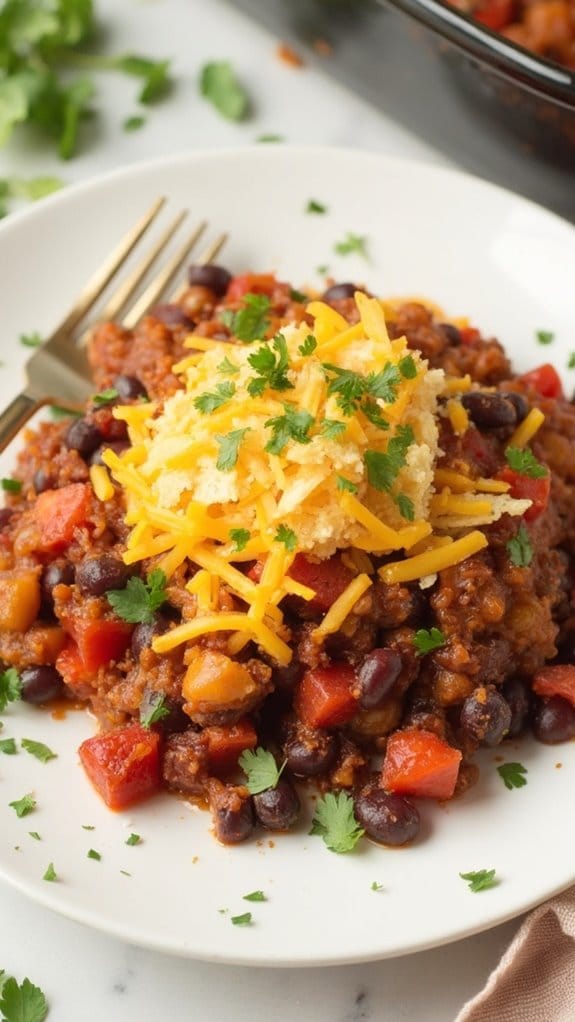
Title: Vegetarian Chili Bake
Prep Time: 20 minutes
Cook Time: 30 minutes
Number of Servings: 6
Required Equipment List: Large mixing bowl, baking dish, oven, spoon, measuring cups, measuring spoons
Cuisine Type: American
This Vegetarian Chili Bake is the perfect comfort food for chilly nights, combining hearty beans, colorful vegetables, and a spicy kick, all baked to perfection. It’s a nutritious and filling dish that can be enjoyed on its own or served with crusty bread or rice.
The blend of spices and the richness of the cheese on top make this dish an absolute crowd-pleaser, suitable for both vegetarians and meat-lovers alike. This recipe isn’t only easy to prepare but also incredibly versatile. You can customize it with your favorite vegetables or beans, making it a great way to use up leftover produce in your fridge.
The baking process melds all the flavors together, creating a warm and satisfying meal that will leave everyone asking for seconds. Plus, it’s an excellent option for meal prep, as it reheats beautifully for lunch or dinner throughout the week.
Ingredients:
- 1 can black beans, drained and rinsed
- 1 can kidney beans, drained and rinsed
- 1 can diced tomatoes (14.5 oz)
- 1 cup corn (frozen or canned)
- 1 bell pepper, diced
- 1 small onion, diced
- 2 cloves garlic, minced
- 2 tablespoons chili powder
- 1 teaspoon cumin
- 1/2 teaspoon paprika
- Salt and pepper to taste
- 1 cup shredded cheese (cheddar or a blend)
- 1 cup tortilla chips, crushed (optional for topping)
- Fresh cilantro for garnish (optional)
Instructions:
- Preheat your oven to 375°F (190°C). This guarantees that your chili bake will cook evenly and develop a beautiful golden top.
- In a large mixing bowl, combine the black beans, kidney beans, diced tomatoes, corn, diced bell pepper, diced onion, minced garlic, chili powder, cumin, paprika, salt, and pepper. Stir well to verify all the ingredients are mixed together and coated in the spices.
- Transfer the mixture into a greased baking dish, spreading it out evenly. If you like a little extra crunch, sprinkle the crushed tortilla chips on top of the bean mixture.
- Cover the dish with aluminum foil and bake in the preheated oven for 20 minutes. This allows the flavors to meld together and the vegetables to soften.
- After 20 minutes, remove the foil and sprinkle the shredded cheese over the top. Return the dish to the oven and bake uncovered for an additional 10 minutes, or until the cheese is melted and bubbly.
- Once baked, remove the chili bake from the oven and let it cool for a few minutes. Garnish with fresh cilantro before serving for a pop of color and flavor.
Extra Tips: For a spicier version, feel free to add diced jalapeños or a pinch of cayenne pepper to the mix. This dish is also a great base for adding other ingredients such as zucchini, mushrooms, or any other favorite veggies you have on hand.
If you’re looking for a little crunch, serve it with additional tortilla chips on the side or a dollop of sour cream for a creamy contrast. Enjoy your warm and hearty vegetarian chili bake!
Lemon Garlic Shrimp
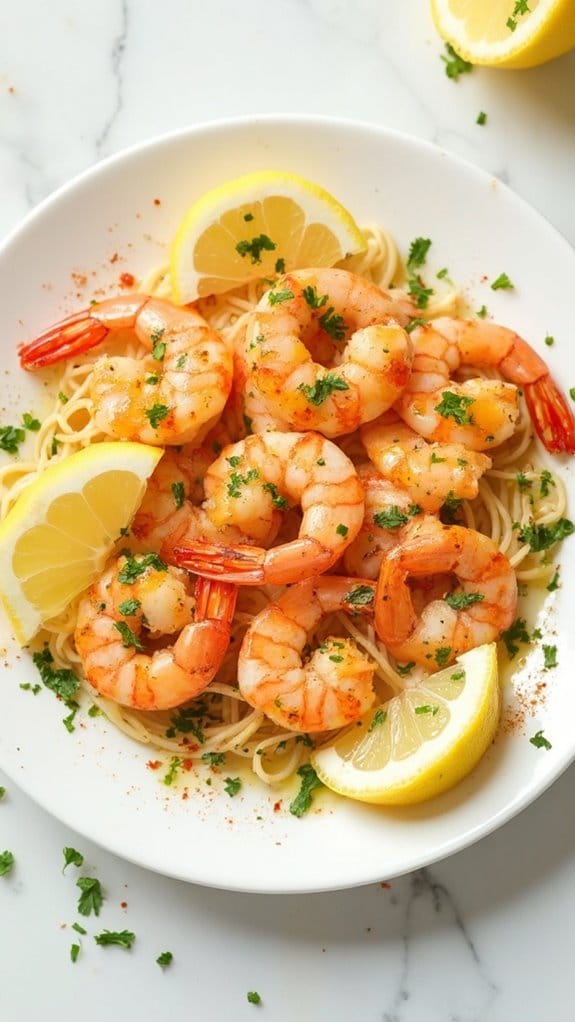
Title: Lemon Garlic Shrimp
Prep Time: 10 minutes
Cook Time: 10 minutes
Number of Servings: 4
Required Equipment List: Large skillet, measuring spoons, spatula, serving plate
Cuisine Type: Mediterranean
Lemon Garlic Shrimp is a quick and flavorful dish that brings the bright, zesty flavors of the Mediterranean to your dinner table. This recipe features succulent shrimp sautéed in a fragrant garlic and lemon sauce, creating a delightful meal that’s both easy to prepare and incredibly satisfying.
Whether served over pasta, rice, or alongside a fresh salad, this dish is perfect for busy weeknights or casual gatherings with friends and family. The combination of garlic and lemon in this recipe not only enhances the natural sweetness of the shrimp but also adds a revitalizing note that complements the dish beautifully.
With just a few simple ingredients and minimal cooking time, you can whip up a restaurant-quality meal in no time. Serve this Lemon Garlic Shrimp as a main dish or as a delightful appetizer, and watch it become a favorite in your household.
Ingredients:
- 1 pound large shrimp, peeled and deveined
- 4 tablespoons olive oil
- 4 cloves garlic, minced
- Zest and juice of 1 lemon
- 1/4 teaspoon red pepper flakes (optional)
- Salt and pepper to taste
- Fresh parsley, chopped (for garnish)
Instructions:
- Heat the olive oil in a large skillet over medium-high heat. Once hot, add the minced garlic and sauté for about 30 seconds until fragrant, being careful not to let it brown.
- Add the shrimp to the skillet in a single layer. Season with salt, pepper, and red pepper flakes if using. Cook for 2-3 minutes on one side until the shrimp turn pink and opaque.
- Flip the shrimp over and add the lemon zest and juice to the skillet. Cook for an additional 2 minutes, stirring gently to ascertain the shrimp are evenly coated in the sauce.
- Once the shrimp are fully cooked and coated in the lemon garlic sauce, remove the skillet from heat. Taste and adjust seasoning if necessary.
- Transfer the shrimp to a serving plate and garnish with freshly chopped parsley. Serve immediately with your choice of side dishes.
Extra Tips: For a richer flavor, consider adding a splash of white wine after sautéing the garlic, allowing it to reduce slightly before adding the shrimp.
You can also customize this dish by including vegetables such as spinach or cherry tomatoes for added color and nutrition. If you have leftovers, they can be stored in an airtight container in the refrigerator for up to two days, making for a delicious lunch option.
Enjoy your zesty and flavorful Lemon Garlic Shrimp!
Stuffed Bell Peppers

Title: Stuffed Bell Peppers
Prep Time: 15 minutes
Cook Time: 30 minutes
Number of Servings: 4
Required Equipment List: Baking dish, mixing bowl, knife, cutting board, oven
Cuisine Type: American
Stuffed Bell Peppers are a colorful and nutritious dish that combines the sweetness of bell peppers with a hearty filling, making them a perfect comfort food for winter evenings. This recipe features a delicious mixture of ground beef, rice, tomatoes, and spices, all baked to perfection inside halved bell peppers. Not only are they visually appealing, but they also pack a punch of flavor, making them a family favorite.
These stuffed peppers are versatile; you can easily customize the filling to suit your preferences or dietary needs. Whether you opt for ground turkey, quinoa, or a vegetarian option using beans and vegetables, the possibilities are endless. Serve them with a side salad or some crusty bread for a complete meal that will warm you up on chilly nights.
Ingredients:
- 4 large bell peppers (any color)
- 1 pound ground beef (or turkey)
- 1 cup cooked rice
- 1 can (14.5 oz) diced tomatoes
- 1 small onion, chopped
- 2 cloves garlic, minced
- 1 teaspoon Italian seasoning
- Salt and pepper to taste
- 1 cup shredded cheese (cheddar or mozzarella)
- Olive oil
Instructions:
- Preheat your oven to 375°F (190°C). Begin by preparing the bell peppers: slice the tops off and remove the seeds and membranes. Lightly brush the outside of the peppers with olive oil and place them upright in a baking dish.
- In a large mixing bowl, combine the ground beef, cooked rice, diced tomatoes (with their juice), chopped onion, minced garlic, Italian seasoning, salt, and pepper. Mix well until all ingredients are thoroughly combined.
- Carefully spoon the meat and rice mixture into each bell pepper, packing it down slightly to guarantee they’re filled to the top. Once all the peppers are filled, sprinkle shredded cheese over the top of each one.
- Pour a small amount of water into the bottom of the baking dish to help create steam during baking. Cover the dish with aluminum foil and bake in the preheated oven for 25 minutes. This will cook the peppers and allow the flavors to meld.
- After 25 minutes, remove the foil and bake for an additional 5-10 minutes, or until the cheese is melted and bubbly and the peppers are tender.
- Once done, take the stuffed peppers out of the oven and let them cool for a few minutes before serving. Garnish with fresh herbs if desired.
Extra Tips: To enhance the flavor of your stuffed peppers, consider adding some chopped fresh herbs like parsley or basil to the filling before baking. You can also spice things up by adding a dash of hot sauce or crushed red pepper flakes to the mixture.
For a vegetarian option, substitute the meat with black beans and corn, along with some diced zucchini or mushrooms for added texture. Enjoy your stuffed bell peppers as a wholesome meal that’s both satisfying and delicious!
Sweet Potato and Black Bean Hash
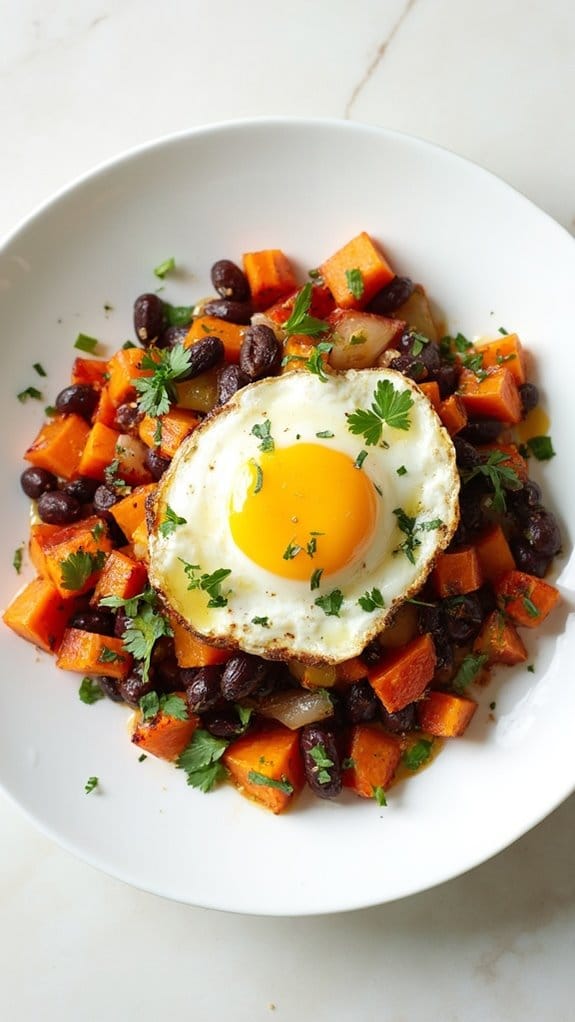
Title: Sweet Potato and Black Bean Hash
Prep Time: 15 minutes
Cook Time: 25 minutes
Number of Servings: 4
Required Equipment List: Large skillet, spatula, knife, cutting board
Cuisine Type: American
Sweet Potato and Black Bean Hash is a hearty and nutritious dish that makes for a perfect winter dinner. This vibrant hash combines tender sweet potatoes with protein-packed black beans, colorful bell peppers, and flavorful spices, creating a satisfying meal that’s both delicious and wholesome.
It’s an ideal dish for breakfast, lunch, or dinner and can be served on its own or topped with a fried egg for extra richness. This recipe isn’t only simple to prepare but also highly customizable. You can add your favorite vegetables or spices to personalize the dish to your taste.
Whether you’re looking for a comforting meal during chilly nights or a healthy option to fuel your day, this Sweet Potato and Black Bean Hash is sure to become a staple in your kitchen.
Ingredients:
- 2 medium sweet potatoes, peeled and diced
- 1 can (15 oz) black beans, drained and rinsed
- 1 red bell pepper, diced
- 1 green bell pepper, diced
- 1 small onion, diced
- 2 cloves garlic, minced
- 1 teaspoon cumin
- 1 teaspoon smoked paprika
- 2 tablespoons olive oil
- Salt and pepper to taste
- Fresh cilantro (for garnish, optional)
Instructions:
- Heat the olive oil in a large skillet over medium heat. Once the oil is hot, add the diced sweet potatoes and season with salt and pepper. Cook for about 10 minutes, stirring occasionally, until the sweet potatoes begin to soften and get slightly caramelized.
- Add the diced onion, bell peppers, and minced garlic to the skillet. Stir well to combine, and continue cooking for another 5-7 minutes, until the vegetables are tender and the onions are translucent.
- Stir in the black beans, cumin, and smoked paprika. Cook for an additional 5 minutes, allowing the beans to heat through and the spices to infuse into the mixture. Taste and adjust the seasoning with more salt and pepper if desired.
- Once everything is well combined and heated through, remove the skillet from heat. If you like, serve the hash topped with a fried or poached egg and garnish with fresh cilantro for added flavor and color.
Extra Tips: For a bit of crunch, consider adding diced avocado or crumbled feta cheese on top before serving. You can also spice things up by adding a dash of hot sauce or some chopped jalapeños to the mix.
This hash is perfect for meal prep; simply store leftovers in an airtight container in the refrigerator for up to 3 days, and reheat for a quick and satisfying meal. Enjoy your tasty and nutritious creation!
Creamy Mushroom Pasta
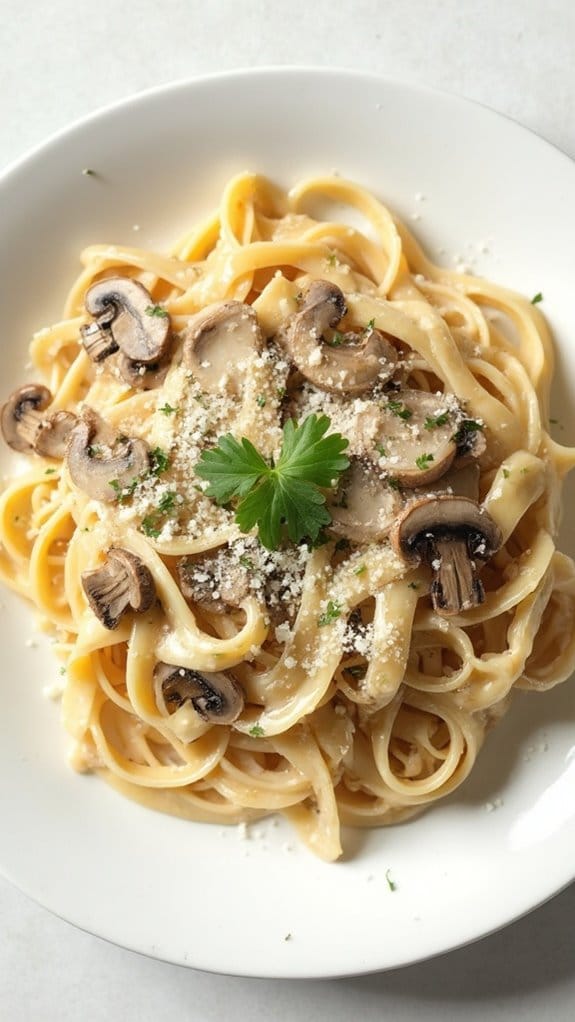
Title: Creamy Mushroom Pasta
Prep Time: 10 minutes
Cook Time: 20 minutes
Number of Servings: 4
Required Equipment List: Large pot, skillet, measuring cups, measuring spoons, colander, wooden spoon
Cuisine Type: Italian
Creamy Mushroom Pasta is a comforting and satisfying dish that’s perfect for chilly winter evenings. This dish features al dente pasta coated in a rich and creamy sauce made from sautéed mushrooms and garlic, finished with a sprinkle of Parmesan cheese for added flavor.
The creamy texture and umami-rich taste of the mushrooms make this pasta a delightful choice that can be enjoyed by all. The beauty of this recipe lies in its simplicity and the ability to customize it with different types of mushrooms or even add in some fresh herbs for an extra layer of flavor.
It’s a one-pot wonder that comes together quickly, making it an ideal meal for busy weeknights or when you want to impress guests without spending hours in the kitchen. Serve it with a side salad and some crusty bread for a complete and satisfying meal.
Ingredients:
- 12 ounces pasta (fettuccine or spaghetti)
- 2 tablespoons olive oil
- 1 medium onion, chopped
- 3 cloves garlic, minced
- 16 ounces mushrooms, sliced (button or cremini)
- 1 cup heavy cream
- 1/2 cup grated Parmesan cheese
- Salt and pepper to taste
- Fresh parsley for garnish (optional)
Instructions:
- Bring a large pot of salted water to a boil. Add the pasta and cook according to package instructions until al dente. Reserve 1 cup of pasta water before draining, then drain the pasta in a colander and set aside.
- In a large skillet, heat the olive oil over medium heat. Add the chopped onion and sauté for about 3-4 minutes until translucent. Then, add the minced garlic and sauté for an additional 1-2 minutes until fragrant.
- Add the sliced mushrooms to the skillet and cook for 5-7 minutes, stirring occasionally, until they’re tender and have released their moisture. Season with salt and pepper to taste.
- Reduce the heat to low and pour in the heavy cream. Stir well to combine, allowing the mixture to simmer for about 3-4 minutes until the sauce thickens slightly. If the sauce is too thick, add some reserved pasta water to reach your desired consistency.
- Add the drained pasta to the skillet, tossing to coat it evenly with the creamy mushroom sauce. Stir in the grated Parmesan cheese until melted and combined. Adjust seasoning with more salt and pepper if needed.
- Serve the creamy mushroom pasta warm, garnished with fresh parsley if desired. Enjoy with a sprinkle of extra Parmesan cheese on top for added richness.
Extra Tips: For added flavor, consider incorporating a splash of white wine into the mushroom mixture after sautéing the onions and garlic. This will enhance the dish with a depth of flavor.
You can also experiment with different types of mushrooms like shiitake or portobello for a more robust taste. If you’re looking for a lighter option, you can substitute the heavy cream with half-and-half or a non-dairy alternative, though the texture may vary slightly.
Teriyaki Chicken and Broccoli
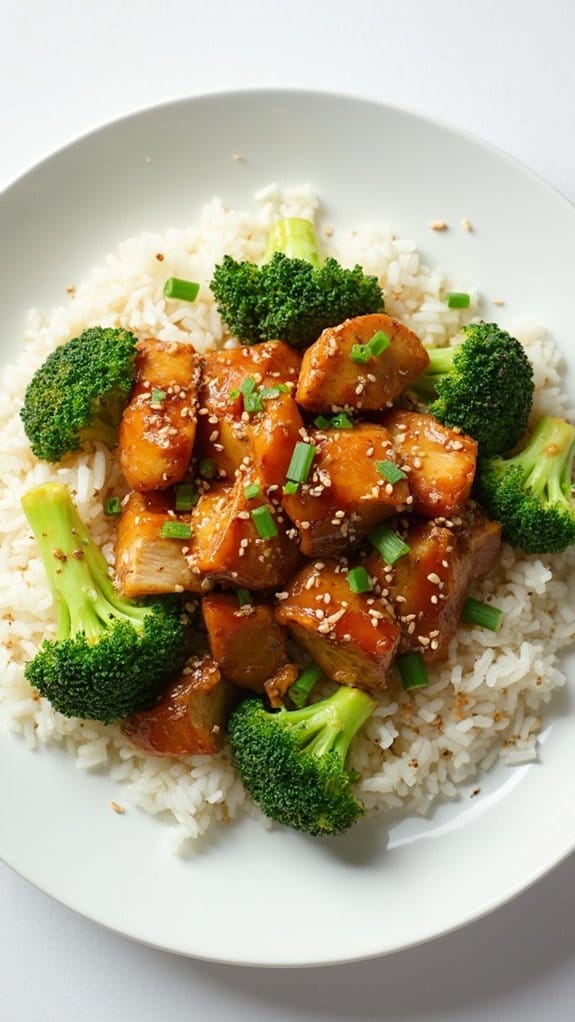
Title: Teriyaki Chicken and Broccoli
Prep Time: 15 minutes
Cook Time: 20 minutes
Number of Servings: 4
Required Equipment List: Large skillet, measuring cups, measuring spoons, spatula, cutting board, knife
Cuisine Type: Asian
Teriyaki Chicken and Broccoli is a classic dish that brings together tender chicken pieces and crisp broccoli florets, all coated in a sweet and savory teriyaki sauce. This dish isn’t only delicious but also quick and easy to prepare, making it perfect for busy weeknights or family gatherings.
The combination of flavors and textures creates a satisfying meal that will please both kids and adults alike. What makes this recipe even more appealing is its versatility; you can easily swap out the broccoli for your favorite vegetables, such as bell peppers or snap peas, and adjust the level of sweetness in the teriyaki sauce to suit your taste.
Served over a bed of fluffy rice or noodles, this dish is a wholesome and flavorful option that can be prepared in under 40 minutes.
Ingredients:
- 1 pound boneless, skinless chicken breasts, cut into bite-sized pieces
- 2 cups broccoli florets
- 1/4 cup teriyaki sauce
- 2 tablespoons soy sauce
- 1 tablespoon vegetable oil
- 2 cloves garlic, minced
- 1 teaspoon ginger, minced
- Cooked rice or noodles (for serving)
- Sesame seeds (for garnish, optional)
Instructions:
- Heat the vegetable oil in a large skillet over medium-high heat. Once the oil is hot, add the minced garlic and ginger, stirring for about 30 seconds until fragrant but not browned.
- Add the chicken pieces to the skillet, spreading them out in a single layer. Cook for about 5-7 minutes, stirring occasionally, until the chicken is browned and cooked through.
- While the chicken is cooking, steam the broccoli florets until tender-crisp, about 3-4 minutes. You can do this in a steamer basket or in the microwave with a bit of water covered in a microwave-safe dish.
- Once the chicken is cooked, add the steamed broccoli to the skillet. Pour in the teriyaki sauce and soy sauce, stirring to combine all ingredients. Cook for an additional 2-3 minutes until everything is heated through and the sauce is slightly thickened.
- Serve the teriyaki chicken and broccoli over a bed of cooked rice or noodles. Garnish with sesame seeds if desired, and enjoy your meal hot.
Extra Tips: For a little extra crunch, consider adding some toasted sesame seeds or chopped green onions on top before serving.
If you prefer a spicier kick, feel free to add a splash of sriracha or red pepper flakes to the sauce. This dish can be made in advance and reheated, making it a great option for meal prep or leftovers!
Sausage and Peppers Tray Bake

Title: Sausage and Peppers Tray Bake
Prep Time: 15 minutes
Cook Time: 30 minutes
Number of Servings: 4
Required Equipment List: Baking sheet, parchment paper, knife, cutting board, mixing bowl
Cuisine Type: Italian-American
This Sausage and Peppers Tray Bake is a hearty and flavorful dish that combines juicy sausages with vibrant bell peppers and onions, all roasted to perfection. The simplicity of this one-pan meal makes it a fantastic option for busy weeknights, as it requires minimal prep and cleanup.
The combination of spices and the natural sweetness of the roasted vegetables creates a comforting and satisfying dinner that the whole family will enjoy. Perfect for serving over rice, pasta, or simply with crusty bread, this dish can easily be customized with your favorite sausage varieties or additional vegetables.
With its bold flavors and vibrant colors, the Sausage and Peppers Tray Bake isn’t only delicious but also a visually appealing centerpiece for your dining table.
Ingredients:
- 1 pound Italian sausage (sweet or spicy)
- 2 bell peppers (any color), sliced
- 1 large onion, sliced
- 4 cloves garlic, minced
- 2 tablespoons olive oil
- 1 teaspoon dried oregano
- 1 teaspoon dried basil
- Salt and pepper to taste
- Fresh parsley (for garnish, optional)
Instructions:
- Preheat your oven to 400°F (200°C). Line a baking sheet with parchment paper to prevent sticking and make cleanup easier. This will also help the vegetables roast evenly and develop a nice caramelization.
- In a mixing bowl, combine the sliced bell peppers, sliced onion, and minced garlic. Drizzle with olive oil, and sprinkle with oregano, basil, salt, and pepper. Toss everything together until the vegetables are well-coated with oil and seasonings.
- Arrange the sausages on the prepared baking sheet, and then spread the seasoned vegetables around them in an even layer. This allows the flavors to meld together as they cook.
- Bake in the preheated oven for about 25-30 minutes, or until the sausages are cooked through and reach an internal temperature of 160°F (70°C). The vegetables should be tender and slightly caramelized. Stir halfway through the cooking time for even roasting.
- Once done, remove the tray bake from the oven and let it cool for a few minutes. Slice the sausages into bite-sized pieces if desired, and garnish with freshly chopped parsley before serving.
Extra Tips: To elevate the flavors even further, consider adding a splash of balsamic vinegar or a sprinkle of red pepper flakes before baking for an extra kick. You can also substitute the sausage for chicken or tofu for a different protein option.
This dish pairs wonderfully with a simple side salad or a warm loaf of bread to soak up the delicious juices. Enjoy your flavorful creation!
Baked Ziti With Spinach
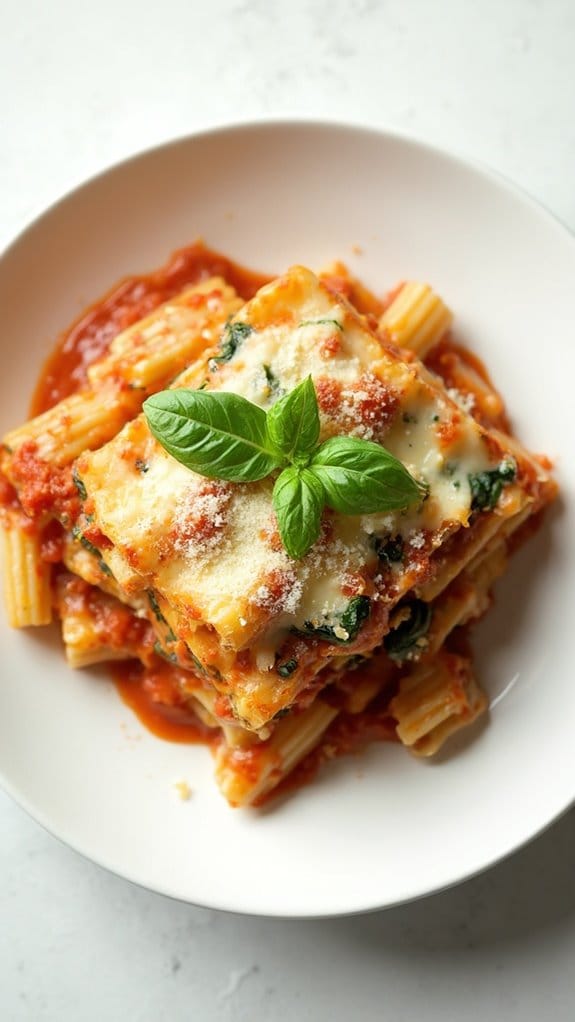
Title: Baked Ziti With Spinach
Prep Time: 15 minutes
Cook Time: 30 minutes
Number of Servings: 6
Required Equipment List: Large pot, 9×13-inch baking dish, mixing bowl, oven, spoon
Cuisine Type: Italian-American
Baked Ziti With Spinach is a comforting and hearty dish that combines tender pasta with a rich tomato sauce, creamy ricotta, and nutritious spinach. This classic Italian-American recipe is perfect for family gatherings or cozy weeknight dinners.
The baked ziti offers a wonderful blend of flavors and textures, making it a satisfying meal that everyone will love. This dish not only satisfies hunger but is also a great way to incorporate veggies into your meal.
The layers of ziti, spinach, and cheese meld together beautifully in the oven, creating a bubbly, cheesy topping that’s hard to resist. Serve it with a side salad and some garlic bread for a complete dinner that will warm you up on a chilly winter night.
Ingredients:
- 12 ounces ziti pasta
- 2 cups marinara sauce
- 1 cup ricotta cheese
- 2 cups shredded mozzarella cheese
- 1 cup grated Parmesan cheese
- 2 cups fresh spinach, chopped
- 1 teaspoon dried oregano
- 1 teaspoon garlic powder
- Salt and pepper to taste
- Fresh basil for garnish (optional)
Instructions:
- Preheat your oven to 375°F (190°C). Bring a large pot of salted water to a boil, then add the ziti pasta. Cook according to the package instructions until al dente, usually about 8-10 minutes. Drain and set aside.
- In a mixing bowl, combine the ricotta cheese, half of the mozzarella cheese, half of the Parmesan cheese, chopped spinach, dried oregano, garlic powder, salt, and pepper. Mix until well combined.
- In a large baking dish, spread a thin layer of marinara sauce on the bottom to prevent sticking. Then, layer half of the cooked ziti over the sauce followed by half of the ricotta mixture, and half of the remaining marinara sauce.
- Repeat the layers with the remaining ziti, ricotta mixture, and marinara sauce. Finally, top with the remaining mozzarella and Parmesan cheese, ensuring an even coverage over the top.
- Cover the baking dish with aluminum foil and bake in the preheated oven for 20 minutes. After 20 minutes, remove the foil and bake for an additional 10 minutes or until the cheese is bubbly and golden brown.
- Once baked, remove from the oven and let it cool for a few minutes before serving. Garnish with fresh basil if desired and enjoy your delicious baked ziti!
Extra Tips: For added flavor, consider sautéing some chopped onions and garlic before mixing them into the ricotta mixture. You can also substitute the spinach with other vegetables like mushrooms or bell peppers, depending on your preference.
This dish can be prepared ahead of time and stored in the refrigerator before baking, making it a great option for meal prep or entertaining guests.
Moroccan Chickpea Stew
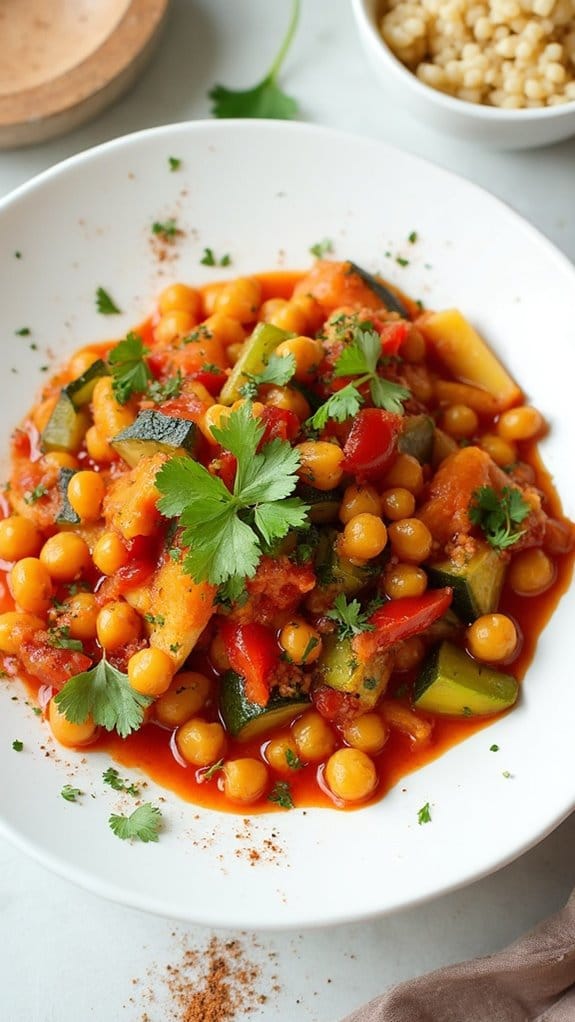
Title: Moroccan Chickpea Stew
Prep Time: 15 minutes
Cook Time: 30 minutes
Number of Servings: 4
Required Equipment List: Large pot, cutting board, knife, measuring cups, measuring spoons, wooden spoon
Cuisine Type: Moroccan
This Moroccan Chickpea Stew is a hearty and flavorful dish that brings the warmth and spices of North Africa right to your dining table. Packed with protein-rich chickpeas, tender vegetables, and aromatic spices, this stew isn’t only nourishing but also bursting with rich flavors.
The combination of cumin, coriander, and cinnamon creates a delightful blend that will transport your taste buds while keeping you cozy during the chilly winter months. Perfect for a weeknight dinner or meal prep, this stew can be made in advance and reheated for a quick meal.
It pairs beautifully with fluffy couscous or warm crusty bread, making it a versatile option for any occasion. Plus, it’s naturally vegan, making it an ideal dish for everyone at the table, regardless of dietary preferences.
Ingredients:
- 1 can (15 oz) chickpeas, drained and rinsed
- 1 tablespoon olive oil
- 1 onion, diced
- 2 garlic cloves, minced
- 1 carrot, diced
- 1 bell pepper, diced
- 1 zucchini, diced
- 1 can (14 oz) diced tomatoes
- 2 cups vegetable broth
- 2 teaspoons ground cumin
- 1 teaspoon ground coriander
- 1/2 teaspoon ground cinnamon
- Salt and pepper to taste
- Fresh cilantro or parsley for garnish (optional)
Instructions:
- In a large pot, heat the olive oil over medium heat. Add the diced onion and sauté until it becomes translucent, about 5 minutes. Stir in the minced garlic and cook for an additional minute until fragrant.
- Add the diced carrot, bell pepper, and zucchini to the pot. Sauté the vegetables for about 5-7 minutes, stirring occasionally, until they start to soften.
- Stir in the chickpeas, diced tomatoes (with their juices), vegetable broth, cumin, coriander, and cinnamon. Season with salt and pepper to taste. Bring the stew to a boil.
- Once boiling, reduce the heat to low, cover the pot, and let it simmer for about 20 minutes. This allows the flavors to meld together and the vegetables to become tender.
- After simmering, taste the stew and adjust the seasoning if necessary. If you prefer a thicker stew, let it simmer uncovered for a few more minutes until it reaches your desired consistency.
- Serve the Moroccan chickpea stew hot, garnished with fresh cilantro or parsley if desired. Enjoy it alongside couscous or crusty bread for a complete meal.
Extra Tips: For added depth of flavor, consider incorporating a pinch of cayenne pepper for heat or a tablespoon of harissa paste for an authentic Moroccan twist.
You can also customize the vegetables based on what you have on hand; sweet potatoes or kale would be excellent additions. This stew also freezes well, making it a perfect make-ahead option for busy weeks. Enjoy your warm, comforting bowl of Moroccan goodness!
Garlic Butter Steak Bites
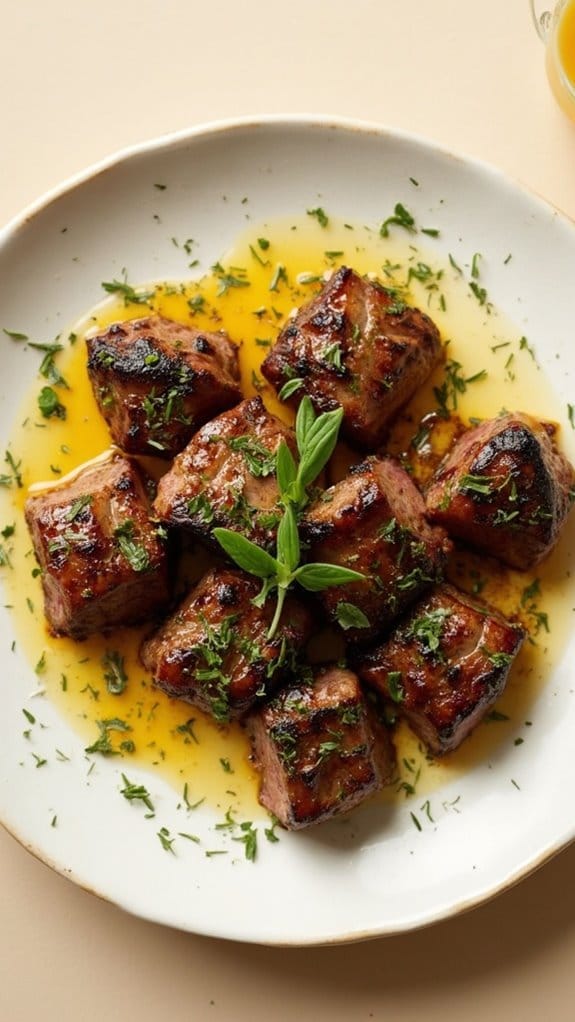
Title: Garlic Butter Steak Bites
Prep Time: 10 minutes
Cook Time: 10 minutes
Number of Servings: 4
Required Equipment List: Large skillet, tongs, cutting board, knife
Cuisine Type: American
Garlic Butter Steak Bites are a quick and flavorful dish that brings the juicy, tender flavors of steak to your dinner table in just minutes. Perfect for a cozy winter meal or as an appetizer for gatherings, these steak bites are seared to perfection in a rich garlic butter sauce, making them irresistible and packed with flavor.
The combination of garlic, butter, and fresh herbs elevates the dish, creating a mouthwatering experience that will leave everyone asking for seconds. This dish is incredibly versatile and can be served on its own, over a bed of rice, or alongside roasted vegetables for a complete meal.
The steak is cooked to your preference, making it a great option for everyone, whether they like it rare, medium, or well-done. Quick to prepare and bursting with flavor, Garlic Butter Steak Bites are sure to become a favorite in your winter dinner rotation.
Ingredients:
- 1 pound sirloin steak, cut into bite-sized pieces
- 4 tablespoons unsalted butter
- 4 cloves garlic, minced
- 1 tablespoon fresh rosemary, chopped
- 1 tablespoon fresh thyme, chopped
- Salt and pepper to taste
- Optional: chopped parsley for garnish
Instructions:
- Start by patting the steak pieces dry with paper towels to remove excess moisture. This will help achieve a nice sear. Season the steak bites generously with salt and pepper on all sides.
- Heat a large skillet over medium-high heat and add 2 tablespoons of butter. Once the butter is melted and bubbling, add the steak bites in a single layer, ensuring they aren’t overcrowded in the pan. Cook for 2-3 minutes without moving them, allowing a nice crust to form.
- Flip the steak bites using tongs, then add the remaining butter, minced garlic, rosemary, and thyme to the skillet. Continue cooking for another 2-3 minutes, occasionally stirring to coat the steak bites in the garlic butter.
- Remove the skillet from heat and let the steak bites rest for a minute. Taste and adjust seasoning with additional salt and pepper if needed. If desired, garnish with chopped parsley for a pop of color before serving.
- Serve the Garlic Butter Steak Bites hot, either on their own or over a bed of your choice, such as rice or mashed potatoes, to soak up the delicious garlic butter sauce.
Extra Tips: For the best flavor, choose a high-quality cut of steak, such as sirloin or ribeye. You can also experiment with different herbs, like oregano or basil, to customize the flavor profile to your liking.
Additionally, if you prefer a kick of heat, consider adding a pinch of red pepper flakes when cooking the garlic. Enjoy your Garlic Butter Steak Bites as a delightful and satisfying meal!
Spinach and Feta Quiche
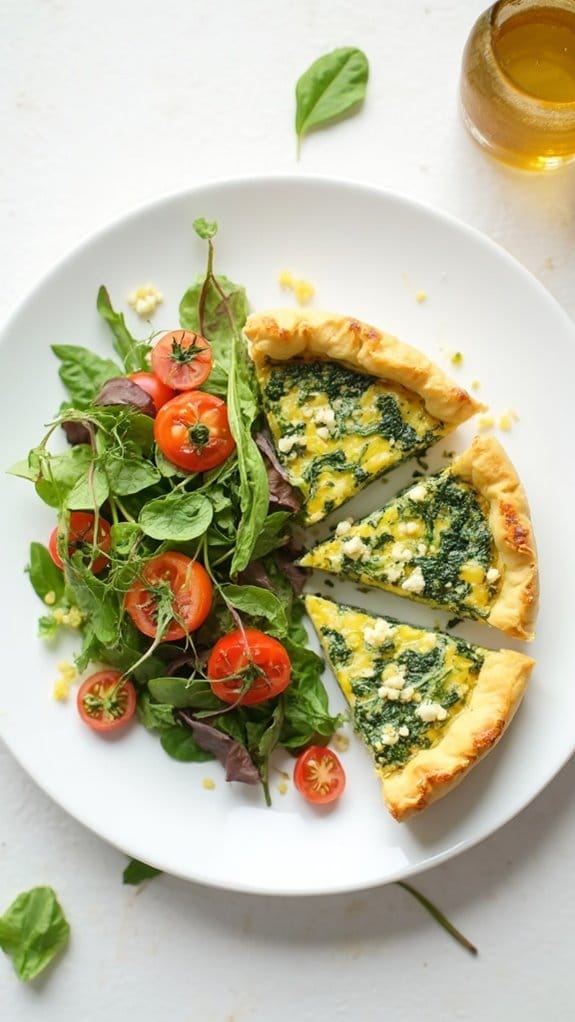
Title: Spinach and Feta Quiche
Prep Time: 15 minutes
Cook Time: 45 minutes
Number of Servings: 6
Required Equipment List: 9-inch pie dish, mixing bowl, whisk, oven, frying pan
Cuisine Type: French
Spinach and Feta Quiche is a classic dish that effortlessly combines nutritious greens with the delightful tang of feta cheese. This quiche is perfect for breakfast, brunch, or even a light dinner, making it a versatile choice for any meal.
The flaky pie crust serves as a delicious base, while the creamy filling creates a satisfying texture that will have everyone coming back for seconds. This recipe isn’t only simple to prepare, but it also allows for customization based on your preferences.
You can easily swap out spinach for other greens like kale or Swiss chard, and experiment with different cheeses like goat cheese or cheddar. Serve this quiche warm or at room temperature, and pair it with a fresh salad for a complete meal that’s both healthy and flavorful.
Ingredients:
- 1 pre-made pie crust
- 2 cups fresh spinach, chopped
- 1 cup feta cheese, crumbled
- 4 large eggs
- 1 cup heavy cream
- 1/2 teaspoon salt
- 1/4 teaspoon black pepper
- 1/4 teaspoon nutmeg
- 1 tablespoon olive oil
- 1 small onion, diced
Instructions:
- Preheat your oven to 375°F (190°C). If your pie crust is frozen, make sure to thaw it according to package instructions. Place the pie crust in a 9-inch pie dish, crimping the edges as desired.
- In a frying pan, heat the olive oil over medium heat. Add the diced onion and sauté until translucent, about 3-4 minutes. Add the chopped spinach to the pan, cooking until wilted, about 2 minutes. Remove from heat and let it cool slightly.
- In a mixing bowl, whisk together the eggs, heavy cream, salt, pepper, and nutmeg until well combined. Stir in the sautéed spinach and onion mixture, followed by the crumbled feta cheese.
- Pour the egg and spinach filling into the prepared pie crust, spreading it evenly. Bake in the preheated oven for 35-40 minutes, or until the quiche is set and lightly golden on top.
- Once baked, remove the quiche from the oven and let it cool for about 10 minutes before slicing. This resting period allows the filling to firm up slightly, making it easier to cut.
Extra Tips: For a crispy crust, consider blind-baking the pie crust for 10 minutes before adding the filling. You can also add other ingredients like sun-dried tomatoes, olives, or herbs for extra flavor.
If you want to make it a bit healthier, substitute half of the heavy cream with milk or a non-dairy alternative. Enjoy your delicious Spinach and Feta Quiche!
One-Pan Ratatouille
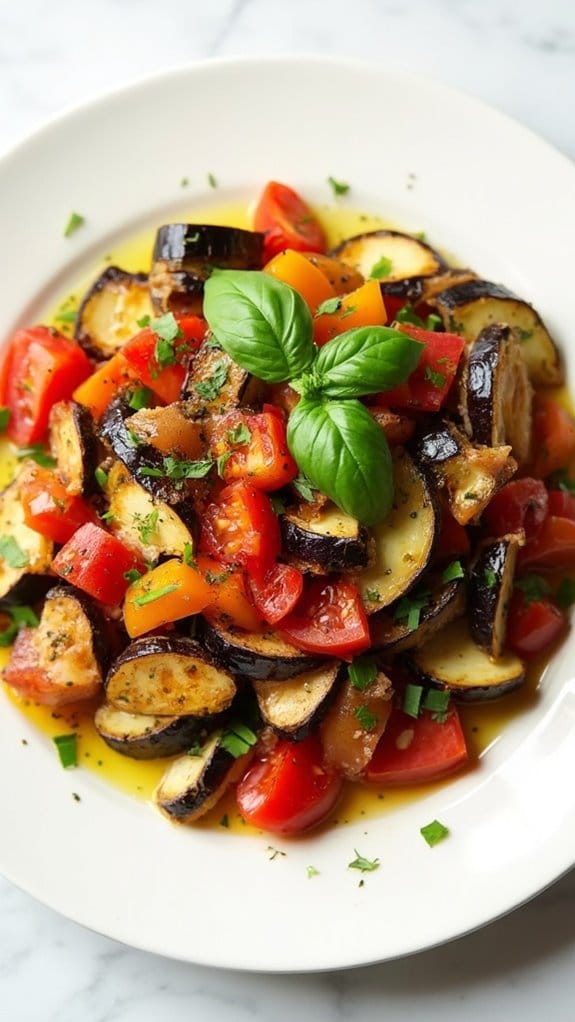
Title: One-Pan Ratatouille
Prep Time: 15 minutes
Cook Time: 45 minutes
Number of Servings: 4
Required Equipment List: Large skillet or sauté pan, cutting board, knife, wooden spoon, measuring cups and spoons
Cuisine Type: French
One-Pan Ratatouille is a colorful and hearty dish that showcases the best of summer vegetables in a simple, yet flavorful way. This classic French recipe brings together eggplant, zucchini, bell peppers, and tomatoes, simmered with aromatic herbs and olive oil, creating a vibrant medley that’s both nutritious and satisfying.
Perfect as a main course or a side dish, this ratatouille is a wonderful way to enjoy the seasonal bounty of vegetables. The beauty of this recipe lies in its simplicity and the fact that it can be made all in one pan, making cleanup a breeze.
The vegetables are sautéed until tender and infused with the essence of garlic and thyme, allowing each bite to burst with flavor. Serve it warm with crusty bread, over rice or pasta, or even alongside grilled meats for a deliciously wholesome meal.
Ingredients:
- 1 medium eggplant, diced
- 2 medium zucchinis, sliced
- 1 bell pepper (any color), diced
- 1 small onion, chopped
- 3 cloves garlic, minced
- 4 medium tomatoes, diced (or 1 can of diced tomatoes)
- 1/4 cup olive oil
- 1 teaspoon dried thyme
- Salt and pepper to taste
- Fresh basil leaves for garnish (optional)
Instructions:
- Heat the olive oil in a large skillet or sauté pan over medium heat. Add the chopped onion and sauté until it becomes translucent, about 3-4 minutes. This will create a flavorful base for your ratatouille.
- Add the minced garlic to the pan and cook for an additional minute until fragrant. Be careful not to burn the garlic, as it can become bitter if overcooked.
- Stir in the diced eggplant and cook for about 5 minutes, allowing it to soften. The eggplant will absorb the olive oil and start to develop a rich flavor.
- Add the zucchini and bell pepper to the pan, stirring well to combine. Cook for another 5-7 minutes, until the vegetables are tender and the colors are vibrant.
- Finally, add the diced tomatoes (with their juices if using canned) along with the dried thyme, salt, and pepper. Stir everything together and let it simmer on low heat for about 20-25 minutes, allowing the flavors to meld together beautifully.
- Once cooked, taste and adjust the seasoning if needed. Serve the ratatouille warm, garnished with fresh basil leaves for a touch of color and flavor.
Extra Tips: To enhance the flavor of your ratatouille, consider adding a splash of balsamic vinegar or a pinch of red pepper flakes for a slight kick. You can also experiment with other vegetables such as mushrooms or carrots, depending on your preference.
This dish stores well in the refrigerator and often tastes even better the next day, making it a great option for meal prep or leftovers. Enjoy your delicious one-pan ratatouille!
Honey Mustard Glazed Salmon
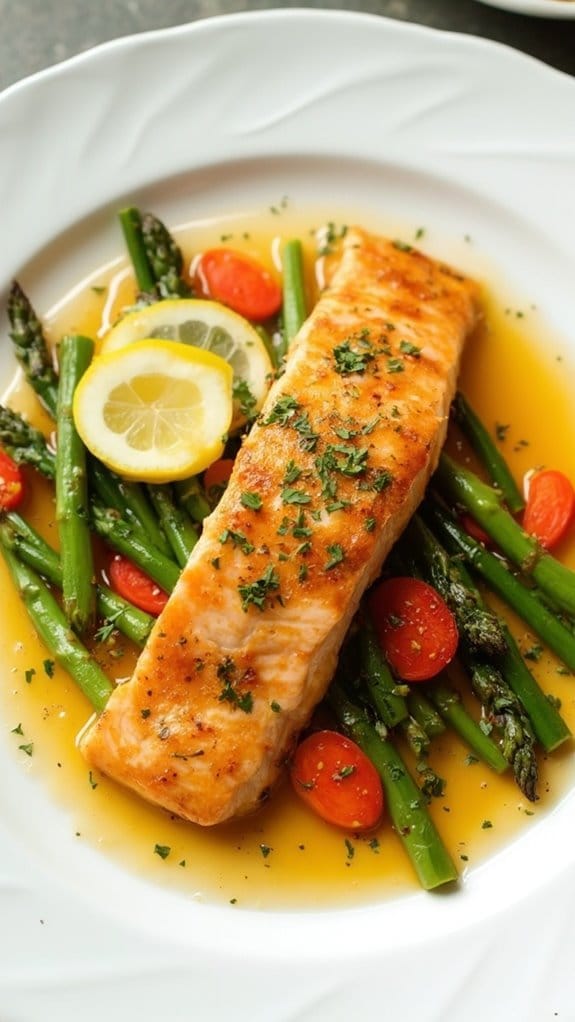
Title: Honey Mustard Glazed Salmon
Prep Time: 10 minutes
Cook Time: 15 minutes
Number of Servings: 4
Required Equipment List: Baking sheet, parchment paper, small bowl, whisk, measuring spoons
Cuisine Type: American
Honey Mustard Glazed Salmon is a simple yet elegant dish that brings together the rich flavors of salmon with a sweet and tangy glaze. The combination of honey and mustard creates a luscious coating that caramelizes beautifully during baking, resulting in a delightful texture and flavor that pairs perfectly with the natural richness of the salmon.
This dish isn’t only quick to prepare but is also a healthy option that can be served for a weeknight dinner or for entertaining guests. The beauty of this recipe lies in its versatility. You can serve the glazed salmon alongside your favorite vegetables or over a bed of rice or quinoa to create a complete meal.
Additionally, the glaze can be adjusted to suit your taste by varying the amount of honey or mustard, making it easy to customize based on your preferences. With its impressive presentation and delicious flavors, this honey mustard glazed salmon is sure to become a family favorite.
Ingredients:
- 4 salmon fillets
- 3 tablespoons honey
- 2 tablespoons Dijon mustard
- 1 tablespoon olive oil
- 1 tablespoon soy sauce
- Salt and pepper to taste
- Lemon wedges (for serving, optional)
- Fresh parsley (for garnish, optional)
Instructions:
- Preheat your oven to 400°F (200°C). Line a baking sheet with parchment paper to make cleanup easier and prevent the salmon from sticking.
- In a small bowl, whisk together the honey, Dijon mustard, olive oil, soy sauce, salt, and pepper until well combined. This mixture will serve as your glaze for the salmon.
- Place the salmon fillets skin-side down on the prepared baking sheet. Brush the glaze generously over each fillet, ensuring they’re well coated. Reserve a little of the glaze for later basting if desired.
- Bake the salmon in the preheated oven for 12-15 minutes, or until the salmon flakes easily with a fork and reaches an internal temperature of 145°F (63°C). Baste with the reserved glaze halfway through cooking for extra flavor.
- Once cooked, remove the salmon from the oven and let it rest for a couple of minutes. Serve with lemon wedges and garnish with fresh parsley, if desired.
Extra Tips: For an added depth of flavor, consider marinating the salmon in the glaze for 30 minutes before baking. This will allow the flavors to penetrate the fish further.
Additionally, if you want a bit of crunch, you can broil the salmon for the last couple of minutes of cooking to give it a caramelized finish. Pair the dish with steamed vegetables or a fresh salad for a complete and satisfying meal. Enjoy your delicious honey mustard glazed salmon!
Curried Lentil Soup
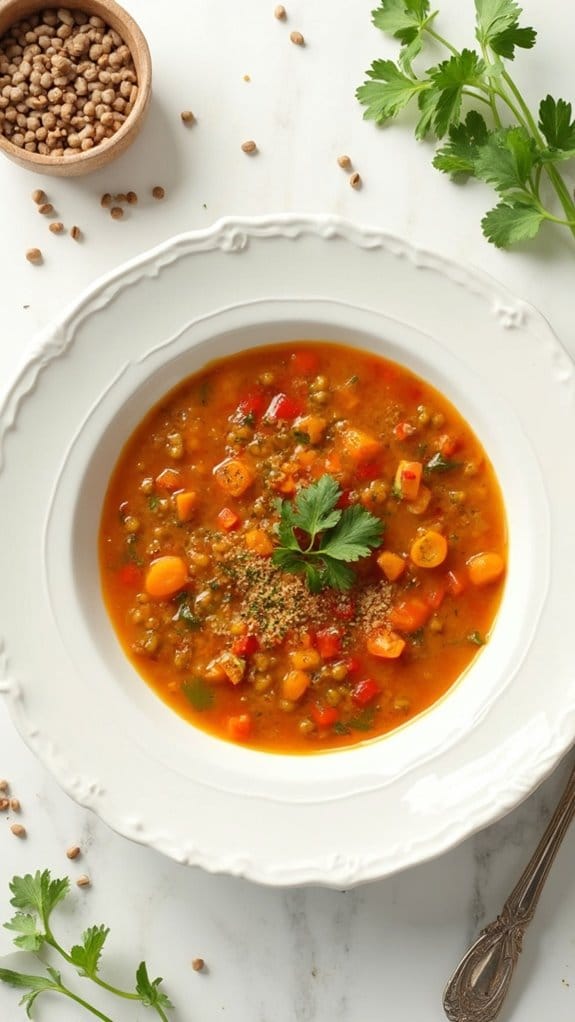
Title: Curried Lentil Soup
Prep Time: 10 minutes
Cook Time: 30 minutes
Number of Servings: 6
Required Equipment List: Large pot, measuring cups, measuring spoons, wooden spoon, blender (optional)
Cuisine Type: Indian-inspired
Curried Lentil Soup is a warm and hearty dish that offers a beautiful balance of spices and wholesome ingredients. This soup isn’t only comforting but also packed with nutrients thanks to the lentils and vegetables. The curry powder infuses the dish with an aromatic flavor, while the coconut milk adds a creamy texture, making it an excellent choice for chilly winter nights.
It’s an ideal meal for those seeking a vegetarian option that’s both satisfying and delicious. This soup is versatile, allowing you to customize the ingredients based on what you have on hand. You can easily add more vegetables, like spinach or carrots, to enhance the nutrition or even adjust the spice level to suit your palate.
Perfect for meal prep, this soup can be made in batches and stored in the fridge or freezer for easy lunches or dinners throughout the week.
Ingredients:
- 1 tablespoon olive oil
- 1 onion, chopped
- 2 garlic cloves, minced
- 1 tablespoon fresh ginger, grated
- 1 tablespoon curry powder
- 1 teaspoon ground cumin
- 1 cup dried lentils (green or brown)
- 4 cups vegetable broth
- 1 can (14 oz) coconut milk
- 2 carrots, diced
- 1 red bell pepper, diced
- Salt and pepper to taste
- Fresh cilantro (for garnish)
Instructions:
- In a large pot, heat the olive oil over medium heat. Add the chopped onion and sauté for about 5 minutes, or until the onion becomes translucent. Stir in the minced garlic and grated ginger, cooking for an additional minute until fragrant.
- Sprinkle in the curry powder and ground cumin, stirring well to coat the onion mixture. Allow the spices to bloom for about 1 minute, which will enhance their flavors.
- Add the dried lentils, vegetable broth, diced carrots, and diced red bell pepper to the pot. Bring the mixture to a boil, then reduce the heat to low, cover, and let it simmer for 20-25 minutes, or until the lentils are tender.
- Once the lentils are cooked, stir in the coconut milk and season the soup with salt and pepper to taste. If you prefer a creamier texture, you can use an immersion blender to puree a portion of the soup or blend it in batches in a traditional blender.
- Serve the soup hot, garnished with fresh cilantro for a burst of color and flavor. Pair it with crusty bread or rice for a complete meal.
Extra Tips: For added depth, consider incorporating other spices such as turmeric or cayenne pepper for heat. You can also experiment with different types of lentils, such as red or yellow, which will cook faster than green or brown.
This soup can be stored in the refrigerator for up to a week or frozen for up to three months, making it a convenient option for meal planning. Enjoy your comforting bowl of curried lentil soup!
Italian Sausage and Cabbage

Title: Italian Sausage and Cabbage
Prep Time: 10 minutes
Cook Time: 30 minutes
Number of Servings: 4
Required Equipment List: Large skillet, wooden spoon, knife, cutting board
Cuisine Type: Italian-American
Italian Sausage and Cabbage is a hearty and flavorful dish that perfectly embodies the comfort of winter meals. The combination of savory Italian sausage and tender cabbage creates a satisfying balance of flavors and textures, making it an ideal choice for a cozy family dinner. This dish isn’t only delicious but also quick to prepare, allowing you to enjoy a warm, home-cooked meal in under an hour.
The beauty of this recipe lies in its simplicity. As the sausage browns in the skillet, it releases its rich flavors, which then meld beautifully with the cabbage and seasonings. This one-pan meal isn’t only easy to clean up but also versatile; you can add other vegetables or spices according to your preference. Serve it with crusty bread to soak up the savory juices, and you’ll have a comforting dinner that warms you from the inside out.
Ingredients:
- 1 pound Italian sausage (sweet or spicy, your choice)
- 1 small head of cabbage, chopped
- 1 medium onion, sliced
- 2 cloves garlic, minced
- 1 teaspoon salt
- 1/2 teaspoon black pepper
- 1 teaspoon dried oregano
- 1 tablespoon olive oil
- 1/4 cup chicken broth or water
Instructions:
- In a large skillet, heat the olive oil over medium heat. Once hot, add the Italian sausage, breaking it apart with a wooden spoon. Cook until browned and cooked through, about 5-7 minutes.
- Once the sausage is cooked, add the sliced onion and minced garlic to the skillet. Sauté for 2-3 minutes until the onion is translucent and fragrant, allowing the flavors to meld together.
- Stir in the chopped cabbage, salt, black pepper, and dried oregano. Mix well to combine all the ingredients, ensuring the cabbage is coated with the sausage mixture.
- Pour in the chicken broth or water, cover the skillet with a lid, and reduce the heat to low. Let it cook for about 15-20 minutes, stirring occasionally, until the cabbage is tender and has reduced in volume.
- Taste and adjust seasoning if necessary. Once the cabbage is tender, remove from heat and let it sit for a few minutes before serving.
Extra Tips: For added flavor, consider using a mix of sweet and spicy sausage. You can also toss in additional vegetables such as bell peppers or carrots for extra nutrition and color. If you prefer a bit of heat, sprinkle some red pepper flakes over the dish before serving. This dish pairs wonderfully with crusty bread or over rice for a more filling meal. Enjoy your comforting Italian Sausage and Cabbage!
Chicken Fajita Skillet
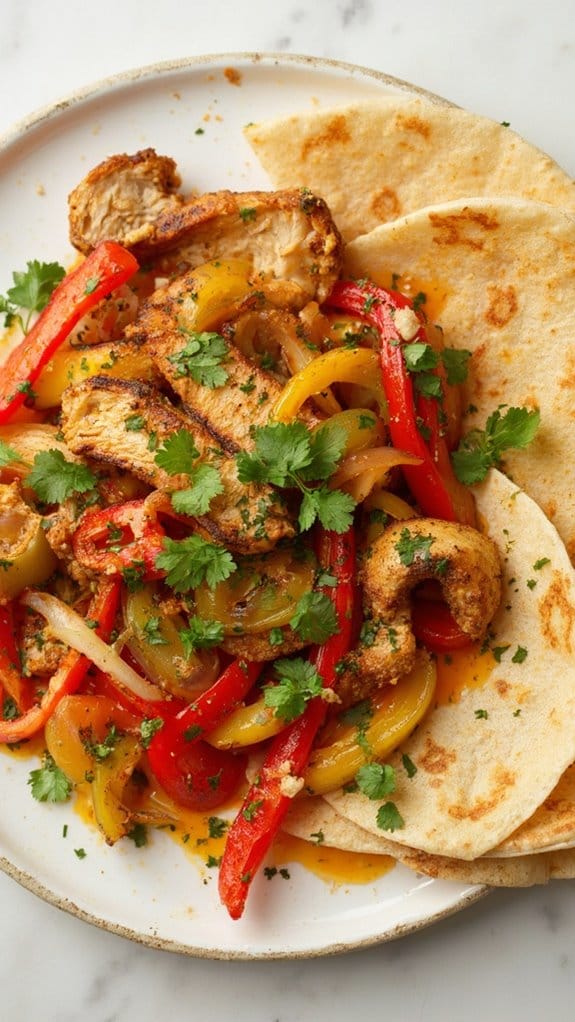
Title: Chicken Fajita Skillet
Prep Time: 10 minutes
Cook Time: 20 minutes
Number of Servings: 4
Required Equipment List: Large skillet, cutting board, knife, spatula, measuring spoons
Cuisine Type: Mexican-American
The Chicken Fajita Skillet is a quick and flavorful one-pan meal that captures the essence of sizzling fajitas right in your kitchen. With tender chicken strips, colorful bell peppers, and sweet onions all cooked together in a zesty seasoning blend, this dish is perfect for busy weeknights or casual gatherings.
The vibrant colors and mouthwatering aromas will have everyone at the table excited to dig in. This recipe not only delivers on flavor but also on convenience, as everything cooks together in one skillet, making cleanup a breeze.
Serve it warm with tortillas, and let everyone customize their fajitas with their favorite toppings, such as guacamole, salsa, or cheese. It’s a fun and interactive meal that brings the family together, making it a staple for any dinner menu.
Ingredients:
- 1 pound boneless, skinless chicken breasts, sliced into strips
- 1 red bell pepper, sliced
- 1 green bell pepper, sliced
- 1 yellow onion, sliced
- 2 tablespoons olive oil
- 1 tablespoon chili powder
- 1 teaspoon cumin
- 1 teaspoon garlic powder
- 1 teaspoon paprika
- Salt and pepper to taste
- Tortillas, for serving
- Optional toppings: sour cream, guacamole, salsa, shredded cheese
Instructions:
- Heat the olive oil in a large skillet over medium-high heat. Once the oil is hot, add the sliced chicken strips to the skillet, seasoning them with salt and pepper. Cook for about 5-7 minutes, stirring occasionally, until the chicken is browned and cooked through.
- While the chicken is cooking, prepare the vegetables. Slice the bell peppers and onion into thin strips. Set them aside until the chicken is fully cooked.
- Once the chicken is cooked, add the sliced bell peppers and onions to the skillet. Sprinkle the chili powder, cumin, garlic powder, and paprika over the mixture. Stir everything together to guarantee the spices coat the chicken and vegetables evenly.
- Continue to cook for another 5-7 minutes, stirring occasionally, until the vegetables are tender and slightly caramelized. Taste and adjust the seasoning if necessary.
- Remove the skillet from heat and let it cool for a minute. Serve the chicken fajita mixture warm with tortillas on the side, allowing everyone to build their own fajitas with their favorite toppings.
Extra Tips: To add an extra layer of flavor, consider marinating the chicken strips in the seasoning mix for 30 minutes before cooking. You can also use a mix of different colored bell peppers for a more vibrant presentation.
If you have leftovers, they make a great filling for burritos or can be enjoyed over rice for another meal. Enjoy your Chicken Fajita Skillet!
One-Pan Paella
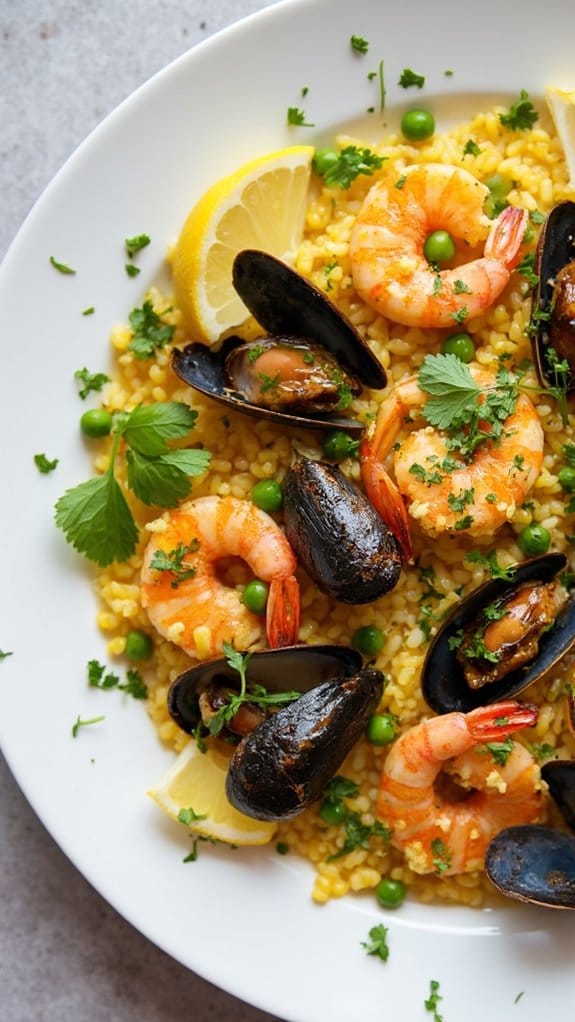
Title: One-Pan Paella
Prep Time: 15 minutes
Cook Time: 30 minutes
Number of Servings: 4
Required Equipment List: Large skillet or paella pan, wooden spoon, measuring cups and spoons
Cuisine Type: Spanish
One-Pan Paella is a vibrant and flavorful dish that captures the essence of Spanish cuisine in a single skillet. This hearty meal is packed with a colorful medley of vegetables, succulent seafood, and aromatic spices, making it a perfect centerpiece for family gatherings or dinner parties.
The use of saffron gives the rice its beautiful golden hue, while the combination of paprika and garlic adds depth and a hint of smokiness to the dish. With minimal cleanup required, this one-pan wonder is as practical as it’s delicious.
This recipe allows for flexibility regarding ingredients, as you can easily swap out the seafood for chicken or chorizo, depending on your preferences. The beauty of paella lies in its adaptability, and it’s an excellent way to showcase seasonal ingredients.
Whether you’re a seasoned chef or a beginner in the kitchen, this One-Pan Paella is sure to impress with its stunning presentation and rich flavors.
Ingredients:
- 2 tablespoons olive oil
- 1 onion, diced
- 2 garlic cloves, minced
- 1 bell pepper, diced
- 1 cup arborio rice
- 1 teaspoon smoked paprika
- 1/4 teaspoon saffron threads
- 3 cups chicken or seafood broth
- 1 cup diced tomatoes (canned or fresh)
- 1 cup frozen peas
- 1/2 pound shrimp, peeled and deveined
- 1/2 pound mussels or clams, cleaned
- Salt and pepper to taste
- Fresh parsley, chopped (for garnish)
- Lemon wedges (for serving)
Instructions:
- In a large skillet or paella pan, heat the olive oil over medium heat. Add the diced onion and cook until translucent, about 5 minutes. Then, add the minced garlic and diced bell pepper, cooking for an additional 2-3 minutes until fragrant.
- Stir in the arborio rice, smoked paprika, and saffron threads, ensuring the rice is well coated with the oil and spices. Toast the rice for about 2 minutes, stirring frequently to prevent sticking.
- Pour in the chicken or seafood broth and diced tomatoes, stirring to combine. Bring the mixture to a gentle boil, then reduce the heat to low, covering the pan with a lid. Allow the rice to simmer for 15 minutes without stirring.
- After 15 minutes, add the frozen peas, shrimp, and mussels or clams on top of the rice. Cover the pan again and cook for an additional 5-7 minutes, or until the seafood is cooked through and the mussels or clams have opened.
- Once cooked, remove the pan from the heat and let it sit for 5 minutes, covered. This resting period allows the flavors to meld together. Garnish with fresh parsley and serve with lemon wedges on the side.
Extra Tips: For an authentic touch, consider using a mix of seafood such as squid or scallops alongside shrimp and mussels. If saffron is unavailable, you can substitute it with a pinch of turmeric for color, though the flavor will differ.
To enhance the socarrat (the crispy bottom layer of rice), you can increase the heat in the last few minutes of cooking. Just be sure to watch it closely to avoid burning. Enjoy your delicious One-Pan Paella!
BBQ Chicken Sweet Potatoes

Title: BBQ Chicken Sweet Potatoes
Prep Time: 15 minutes
Cook Time: 45 minutes
Number of Servings: 4
Required Equipment List: Baking sheet, aluminum foil, mixing bowl, fork, knife
Cuisine Type: American
BBQ Chicken Sweet Potatoes are a satisfying and wholesome meal that combines the smoky flavors of barbecue chicken with the natural sweetness of baked sweet potatoes. This dish isn’t only delicious but also packed with nutrients, making it a great option for a comforting winter dinner.
The tender sweet potatoes serve as a perfect vessel for the shredded BBQ chicken, topped with your choice of garnishes for added flavor and texture. This recipe is incredibly versatile and can be customized to suit your taste. You can use store-bought BBQ sauce for convenience or whip up your own homemade version for a personal touch.
The sweet potatoes can be baked in the oven or microwaved for a quicker preparation. Topped with fresh herbs, cheese, or avocado, these BBQ Chicken Sweet Potatoes will become a favorite for both weeknight dinners and casual gatherings.
Ingredients:
- 4 medium sweet potatoes
- 2 cups cooked shredded chicken
- 1 cup BBQ sauce
- 1/2 cup shredded cheese (cheddar or mozzarella)
- 1/4 cup chopped green onions (for garnish)
- Salt and pepper to taste
- Olive oil (optional)
Instructions:
- Preheat your oven to 400°F (200°C). While the oven is heating, wash the sweet potatoes thoroughly and poke a few holes in each with a fork to allow steam to escape during baking. If desired, lightly coat the sweet potatoes with olive oil and season with salt.
- Wrap each sweet potato in aluminum foil and place them on a baking sheet. Bake in the preheated oven for 40-45 minutes, or until the sweet potatoes are tender when pierced with a fork. Alternatively, you can microwave the sweet potatoes for about 10-12 minutes, turning halfway through.
- While the sweet potatoes are baking, combine the cooked shredded chicken and BBQ sauce in a mixing bowl. Mix well until the chicken is fully coated in the sauce. Set aside to allow the flavors to meld.
- Once the sweet potatoes are done, carefully remove them from the oven and unwrap them from the foil. Cut a slit down the center of each sweet potato to create an opening for the filling.
- Spoon the BBQ chicken mixture generously into each sweet potato, allowing it to overflow slightly for presentation. Top with shredded cheese and return to the oven for an additional 5-7 minutes, or until the cheese is melted and bubbly.
- Remove the sweet potatoes from the oven and garnish with chopped green onions before serving. Enjoy your BBQ Chicken Sweet Potatoes warm for a hearty and flavorful meal.
Extra Tips: For an added crunch and flavor, consider topping your BBQ Chicken Sweet Potatoes with crispy fried onions or chopped jalapeños. You can also experiment with different BBQ sauces to find your favorite flavor profile.
If you have leftover sweet potatoes, they can be stored in the fridge and reheated for an easy lunch or dinner option.
Creamy Tomato Basil Pasta
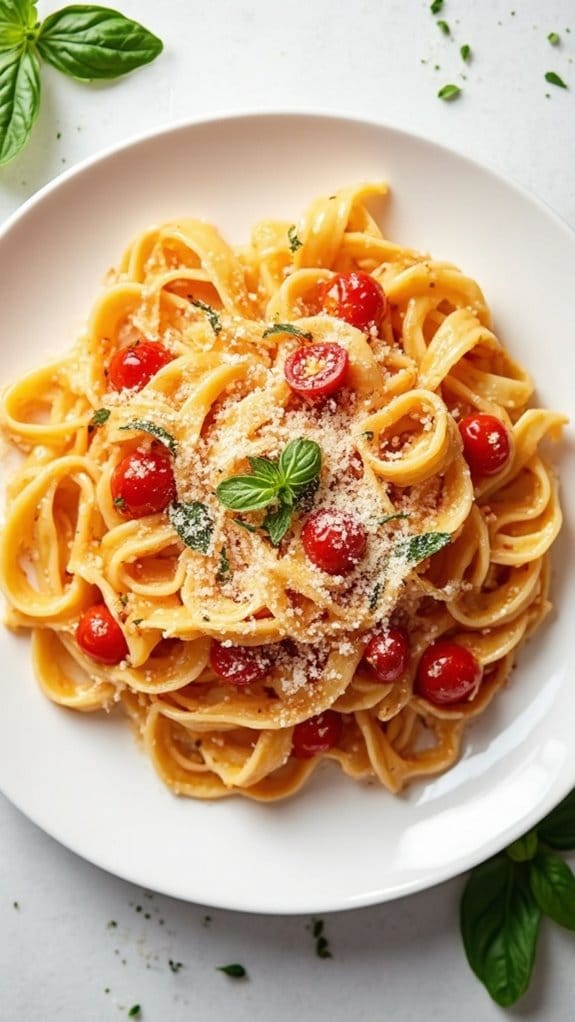
Title: Creamy Tomato Basil Pasta
Prep Time: 10 minutes
Cook Time: 20 minutes
Number of Servings: 4
Required Equipment List: Large pot, colander, large skillet, wooden spoon, measuring cups, and spoons
Cuisine Type: Italian-American
Creamy Tomato Basil Pasta is a comforting and delicious dish that brings together the richness of cream, the acidity of tomatoes, and the freshness of basil. This recipe is perfect for a cozy winter dinner, delivering a hearty meal that can be whipped up in no time.
The combination of flavors creates a luscious sauce that clings beautifully to the pasta, making each bite a delightful experience. With the added bonus of fresh basil, this dish isn’t only flavorful but also aromatic.
It’s versatile enough to pair with your favorite type of pasta, whether you prefer spaghetti, penne, or fettuccine. This creamy pasta is sure to please both adults and kids alike, making it a fantastic option for family dinners or even entertaining guests.
Ingredients:
- 12 ounces pasta of your choice
- 1 tablespoon olive oil
- 3 cloves garlic, minced
- 1 can (14.5 ounces) diced tomatoes
- 1 cup heavy cream
- 1 teaspoon dried oregano
- Salt and pepper to taste
- 1 cup fresh basil leaves, chopped
- Grated Parmesan cheese for serving
Instructions:
- Begin by cooking the pasta according to package instructions in a large pot of salted boiling water. Once al dente, drain the pasta in a colander, reserving about 1 cup of the pasta cooking water for later use.
- In a large skillet, heat the olive oil over medium heat. Add the minced garlic and sauté for about 1 minute until fragrant, being careful not to let it burn.
- Pour in the can of diced tomatoes (with juices) and stir well. Add the dried oregano, salt, and pepper to taste. Let the mixture simmer for about 5 minutes to allow the flavors to meld.
- Reduce the heat to low and pour in the heavy cream, stirring to combine. Allow the sauce to simmer for an additional 5 minutes, stirring occasionally until it thickens slightly.
- Add the cooked pasta to the skillet, tossing to coat the pasta evenly with the creamy tomato sauce. If the sauce is too thick, gradually add some of the reserved pasta water until you reach your desired consistency.
- Finally, stir in the chopped fresh basil and mix well. Serve the creamy tomato basil pasta hot, topped with grated Parmesan cheese.
Extra Tips: For added depth, consider including a pinch of red pepper flakes when you sauté the garlic for a subtle kick.
This dish is also perfect for meal prep; simply store the pasta and sauce separately in the refrigerator and reheat when ready to serve. Feel free to customize the recipe by adding vegetables like spinach or mushrooms, or even proteins like grilled chicken or shrimp for a heartier meal. Enjoy your creamy pasta adventure!
Veggie-Packed Quinoa Bowl
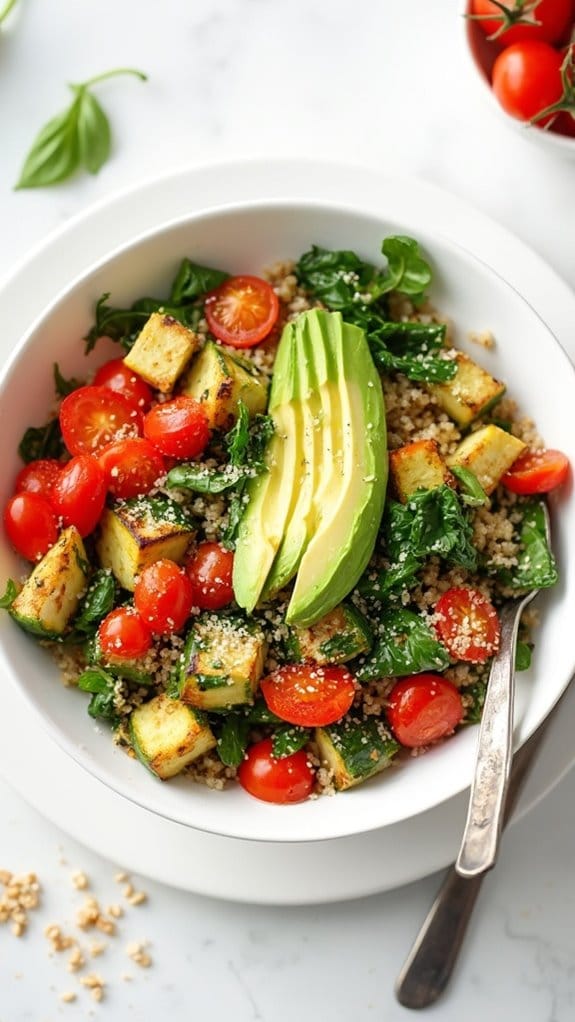
Title: Veggie-Packed Quinoa Bowl
Prep Time: 15 minutes
Cook Time: 20 minutes
Number of Servings: 4
Required Equipment List: Medium saucepan, cutting board, knife, mixing bowl, spoon
Cuisine Type: Healthy/Vegetarian
This Veggie-Packed Quinoa Bowl is a nutritious and colorful dish that brings together a variety of fresh vegetables and protein-rich quinoa. Perfect for a quick weeknight dinner or meal prep for the week, this recipe is as versatile as it’s delicious.
The combination of roasted vegetables, crisp greens, and a zesty dressing creates a satisfying bowl that’s both hearty and invigorating. With the ability to customize the ingredients based on seasonal produce or personal preferences, this quinoa bowl is a fantastic way to incorporate more vegetables into your diet.
Top it off with your choice of dressing or a sprinkle of nuts for added texture, and enjoy a meal that not only nourishes your body but also delights your taste buds.
Ingredients:
- 1 cup quinoa
- 2 cups vegetable broth or water
- 1 red bell pepper, diced
- 1 zucchini, diced
- 1 cup cherry tomatoes, halved
- 1 cup spinach or kale
- 1 avocado, sliced
- 2 tablespoons olive oil
- Salt and pepper to taste
- Juice of 1 lemon
- Optional toppings: nuts, seeds, or feta cheese
Instructions:
- Preheat your oven to 400°F (200°C). Line a baking sheet with parchment paper for easy cleanup. This will be used to roast the vegetables, enhancing their flavors and bringing out their natural sweetness.
- In a medium saucepan, rinse the quinoa under cold water to remove any bitterness. Then, combine the rinsed quinoa and vegetable broth (or water) in the saucepan. Bring to a boil over medium-high heat, then reduce the heat to low, cover, and let it simmer for about 15 minutes or until the quinoa is fluffy and the liquid is absorbed.
- While the quinoa is cooking, prepare the vegetables. In a mixing bowl, toss the diced bell pepper, zucchini, and halved cherry tomatoes with olive oil, salt, and pepper. Spread the vegetables evenly on the prepared baking sheet and roast in the preheated oven for 20 minutes, or until they’re tender and slightly caramelized.
- Once the quinoa is cooked, fluff it with a fork and transfer it to a large mixing bowl. Add the roasted vegetables, fresh spinach or kale, and a squeeze of lemon juice. Mix gently until all the ingredients are well combined.
- To serve, divide the quinoa and vegetable mixture into bowls. Top with sliced avocado and any optional toppings like nuts, seeds, or crumbled feta cheese for added flavor and texture.
Extra Tips: Feel free to customize this bowl by adding your favorite proteins, such as chickpeas, black beans, or grilled chicken, to make it even more filling.
You can also adjust the dressing by adding herbs or spices for a personal touch. Store any leftovers in an airtight container in the refrigerator for up to three days, making it a great option for meal prep. Enjoy your vibrant and healthy quinoa bowl!
Beef and Broccoli Stir-Fry
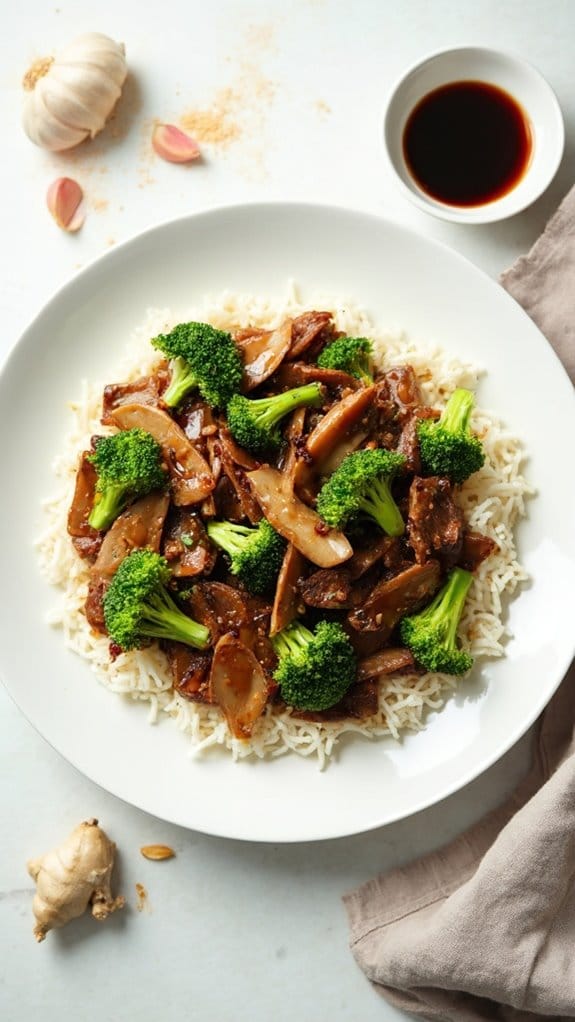
Title: Beef and Broccoli Stir-Fry
Prep Time: 10 minutes
Cook Time: 15 minutes
Number of Servings: 4
Required Equipment List: Wok or large skillet, cutting board, knife, measuring cups, spatula
Cuisine Type: Chinese
Beef and Broccoli Stir-Fry is a classic dish that brings together tender strips of beef and crisp broccoli in a savory sauce, making it a satisfying meal that’s both quick and easy to prepare. The combination of soy sauce, garlic, and ginger creates a flavorful marinade that enhances the natural sweetness of the broccoli, while the beef remains juicy and tender.
Perfect for busy weeknights, this stir-fry can be served over rice or noodles for a complete meal. This dish not only delights the taste buds but also packs a nutritional punch, thanks to the broccoli, which is rich in vitamins and minerals. Cooking everything in a wok allows for quick cooking at high temperatures, sealing in flavors and maintaining the vibrant color and crunch of the vegetables.
With just a few simple ingredients, you can create a delicious and wholesome dinner that the whole family will love.
Ingredients:
- 1 pound beef sirloin, thinly sliced
- 3 cups broccoli florets
- 2 tablespoons soy sauce
- 1 tablespoon oyster sauce
- 1 tablespoon cornstarch
- 2 tablespoons vegetable oil
- 3 cloves garlic, minced
- 1 teaspoon fresh ginger, minced
- Salt and pepper to taste
- Cooked rice or noodles for serving
Instructions:
- In a bowl, marinate the sliced beef with soy sauce, oyster sauce, cornstarch, and a pinch of salt and pepper. Let it sit for about 10 minutes while you prepare the broccoli and other ingredients.
- Heat 1 tablespoon of vegetable oil in a wok or large skillet over medium-high heat. Once hot, add the marinated beef in a single layer, cooking for about 2-3 minutes until browned. Remove the beef from the pan and set aside.
- In the same wok, add the remaining tablespoon of oil. Add the minced garlic and ginger, sautéing for about 30 seconds until fragrant. Then, add the broccoli florets and stir-fry for 3-4 minutes until they turn bright green and are tender-crisp.
- Return the cooked beef to the wok with the broccoli. Stir everything together, ensuring that the beef and broccoli are well combined. Cook for an additional 1-2 minutes, allowing the flavors to meld.
- Taste and adjust seasoning with more salt, pepper, or soy sauce if necessary. Serve the beef and broccoli stir-fry hot over cooked rice or noodles.
Extra Tips: For added flavor, consider adding a splash of sesame oil at the end of cooking. If you like a bit of heat, you can include some red pepper flakes or sliced chili peppers in the stir-fry.
This dish is very versatile; feel free to add other vegetables such as bell peppers, snap peas, or carrots to enhance both the flavor and nutrition. Enjoy your homemade stir-fry!
Baked Risotto With Peas
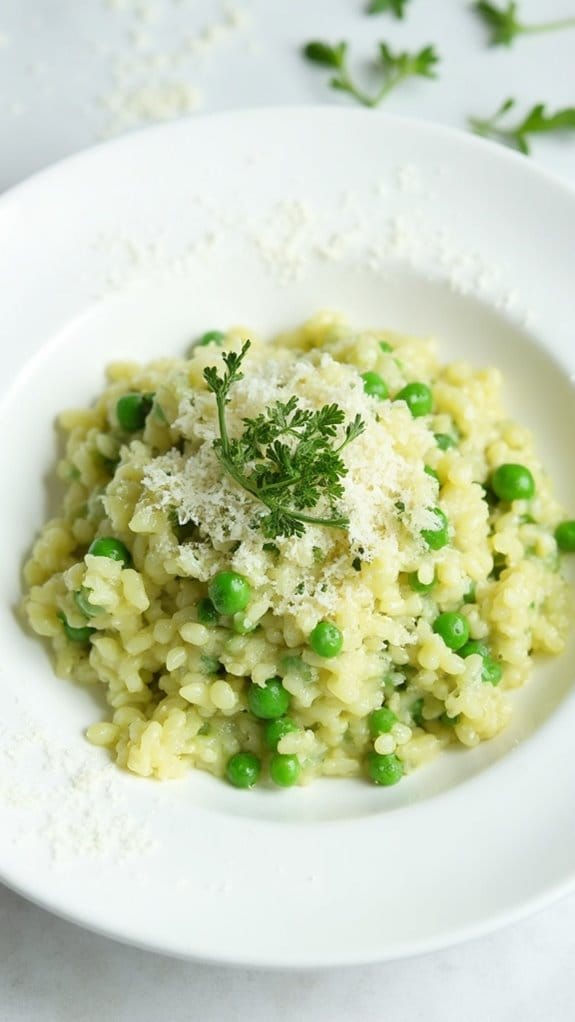
Title: Baked Risotto With Peas
Prep Time: 10 minutes
Cook Time: 30 minutes
Number of Servings: 4
Required Equipment List: Oven-safe skillet or baking dish, measuring cups, stirring spoon, oven
Cuisine Type: Italian
Baked Risotto With Peas is a comforting and creamy dish that brings warmth and flavor to your winter dinners. This method of cooking risotto in the oven simplifies the process, allowing for a hands-off approach while still delivering the rich, creamy texture that risotto is known for.
The addition of sweet peas adds a pop of color and a fresh flavor that beautifully complements the richness of the rice, making it a delightful meal for any occasion. This dish is perfect for busy weeknights or cozy gatherings, as it requires minimal active cooking time.
With just a few simple ingredients and the convenience of baking, you can enjoy a delicious homemade risotto without the constant stirring. Serve it as a main course or as a side dish alongside your favorite protein for a complete and satisfying meal.
Ingredients:
- 1 cup Arborio rice
- 4 cups vegetable broth
- 1 cup frozen peas
- 1 medium onion, finely chopped
- 2 cloves garlic, minced
- 1/2 cup grated Parmesan cheese
- 1 tablespoon olive oil
- Salt and pepper to taste
- Fresh parsley, chopped (for garnish)
Instructions:
- Preheat your oven to 375°F (190°C). In an oven-safe skillet or baking dish, heat the olive oil over medium heat. Add the chopped onion and sauté until it becomes translucent, about 5 minutes.
- Stir in the minced garlic and cook for an additional minute until fragrant.
- Add the Arborio rice to the skillet, stirring to coat the rice with the oil and sauté for 2-3 minutes. This step helps to lightly toast the rice and enhances its flavor. Season with salt and pepper to taste.
- Pour in the vegetable broth and bring the mixture to a gentle boil. Once boiling, cover the skillet or baking dish tightly with aluminum foil to trap the steam, and transfer it to the preheated oven.
- Bake the risotto in the oven for 25 minutes. After 25 minutes, remove the dish from the oven and carefully stir in the frozen peas. Cover again and return to the oven for an additional 5-10 minutes until the rice is tender and the liquid is mostly absorbed.
- Remove the risotto from the oven and stir in the grated Parmesan cheese until melted and creamy. Adjust seasoning with additional salt and pepper if needed. Garnish with freshly chopped parsley before serving.
Extra Tips: To elevate the flavor of your baked risotto, consider adding a splash of white wine to the onion and garlic mixture before adding the rice. You can also incorporate other vegetables, such as asparagus or spinach, for added nutrition and flavor.
Leftover risotto can be refrigerated and reheated, but for best results, add a splash of broth when reheating to maintain its creamy texture. Enjoy this comforting dish on cold winter nights!
One-Pan Mediterranean Chicken
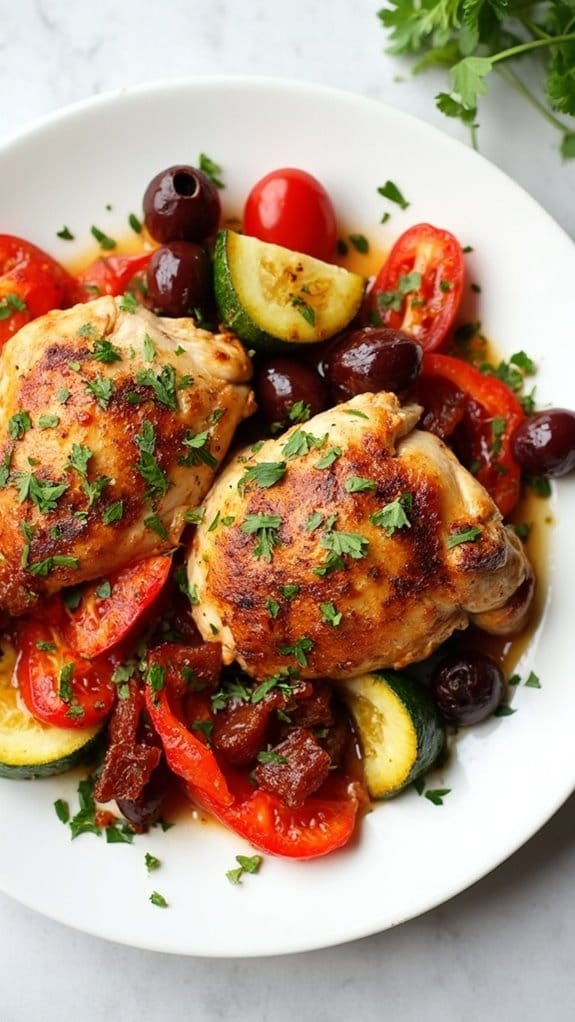
Title: One-Pan Mediterranean Chicken
Prep Time: 15 minutes
Cook Time: 40 minutes
Number of Servings: 4
Required Equipment List: Large skillet or roasting pan, cutting board, knife, measuring cups and spoons
Cuisine Type: Mediterranean
This One-Pan Mediterranean Chicken is a vibrant and flavorful dish that brings together succulent chicken thighs, colorful vegetables, and aromatic herbs in a single skillet. The combination of olives, sun-dried tomatoes, and fresh herbs creates a Mediterranean-inspired feast that isn’t only delicious but also incredibly easy to prepare.
Perfect for busy weeknights, this meal allows you to enjoy a healthy, balanced dinner without the hassle of multiple pots and pans. With minimal cleanup and maximum flavor, this dish is ideal for both family dinners and entertaining guests.
The chicken is seared to golden perfection, locking in its juices, while the vegetables roast alongside, absorbing all the delicious flavors from the herbs and spices. Serve it with a side of crusty bread or over a bed of fluffy couscous for a complete and satisfying meal.
Ingredients:
- 4 bone-in chicken thighs
- 2 tablespoons olive oil
- 1 teaspoon dried oregano
- 1 teaspoon garlic powder
- Salt and pepper to taste
- 1 red bell pepper, sliced
- 1 zucchini, sliced
- 1 cup cherry tomatoes, halved
- 1/2 cup Kalamata olives, pitted
- 1/4 cup sun-dried tomatoes, chopped
- Fresh parsley, chopped (for garnish)
Instructions:
- Preheat your oven to 400°F (200°C). This will guarantee that the chicken cooks evenly and the vegetables roast beautifully.
- In a large skillet or roasting pan, heat the olive oil over medium-high heat. Season the chicken thighs with salt, pepper, oregano, and garlic powder on both sides. Once the oil is hot, add the chicken thighs skin-side down and sear for about 5-7 minutes, or until golden brown.
- Carefully flip the chicken thighs over and add the sliced bell pepper, zucchini, cherry tomatoes, olives, and sun-dried tomatoes around the chicken in the skillet. Toss the vegetables gently to coat them with the oil and seasonings from the pan.
- Transfer the skillet to the preheated oven and roast for 25-30 minutes, or until the chicken is cooked through and reaches an internal temperature of 165°F (75°C). The vegetables should be tender and slightly caramelized.
- Once cooked, remove the skillet from the oven and let it rest for a few minutes. Garnish with freshly chopped parsley before serving to add a pop of color and freshness.
Extra Tips: To elevate the flavors of this dish, consider marinating the chicken thighs in olive oil, lemon juice, and garlic for a few hours before cooking. This will add a zesty kick and enhance the overall taste.
Additionally, feel free to customize the vegetables based on your preference – asparagus, artichokes, or even potatoes would work wonderfully! Remember to keep an eye on the chicken to prevent overcooking, and enjoy this delightful one-pan wonder with your favorite side!
Rustic Vegetable Tart

Title: Rustic Vegetable Tart
Prep Time: 30 minutes
Cook Time: 45 minutes
Number of Servings: 6
Required Equipment List: Tart pan, mixing bowl, rolling pin, baking sheet, oven
Cuisine Type: French-inspired
This Rustic Vegetable Tart is a delightful dish that showcases the vibrant flavors of seasonal vegetables nestled in a buttery, flaky crust. Perfect for a cozy winter dinner, this tart combines a variety of colorful vegetables such as bell peppers, zucchini, and onions, all sautéed to enhance their natural sweetness.
The addition of fresh herbs and a touch of cheese adds depth and richness, making this tart a satisfying centerpiece for any meal. The beauty of this recipe lies in its versatility; you can use whatever vegetables you have on hand or prefer, allowing you to customize it to your taste.
Whether served warm or at room temperature, this Rustic Vegetable Tart is ideal for entertaining guests or enjoying as a comforting family dinner. Pair it with a simple salad and a glass of your favorite wine for a complete and delightful dining experience.
Ingredients:
- 1 pre-made pie crust or puff pastry
- 1 tablespoon olive oil
- 1 small onion, diced
- 1 bell pepper, diced
- 1 medium zucchini, sliced
- 1 cup cherry tomatoes, halved
- 2 cloves garlic, minced
- 1 teaspoon fresh thyme leaves
- 1 teaspoon fresh basil, chopped
- 1/2 cup shredded cheese (e.g., mozzarella or goat cheese)
- Salt and pepper to taste
- 1 egg (for egg wash, optional)
Instructions:
- Preheat your oven to 400°F (200°C). If using a pre-made pie crust, roll it out and fit it into a tart pan, trimming any excess. If using puff pastry, roll it out and place it in the tart pan, pricking the bottom with a fork to prevent bubbling.
- In a large skillet, heat the olive oil over medium heat. Add the diced onion and sauté until translucent, about 3-4 minutes. Then, add the diced bell pepper and sliced zucchini, cooking for another 5-7 minutes until tender.
- Stir in the halved cherry tomatoes and minced garlic, cooking for an additional 2 minutes. Season the mixture with salt, pepper, fresh thyme, and basil, ensuring everything is well combined and the vegetables are coated with the herbs.
- Remove the skillet from heat and let the mixture cool slightly. Once cooled, spoon the vegetable mixture into the prepared tart crust, spreading it evenly. Sprinkle the shredded cheese on top, distributing it uniformly.
- If desired, beat the egg in a small bowl and brush it over the edges of the crust for a golden finish. Place the tart on a baking sheet and bake in the preheated oven for 30-35 minutes or until the crust is golden brown and the cheese is melted and bubbly.
- Once baked, remove the tart from the oven and allow it to cool for a few minutes before slicing. Serve warm or at room temperature, garnished with additional herbs if desired.
Extra Tips: To enhance the flavor of your Rustic Vegetable Tart, consider roasting the vegetables beforehand for a caramelized taste. You can also swap out the vegetables based on seasonal availability, such as using mushrooms, spinach, or asparagus.
For a heartier version, add cooked grains like quinoa or farro to the vegetable mixture before filling the crust. Enjoy your delicious creation!
Spicy Shrimp Tacos
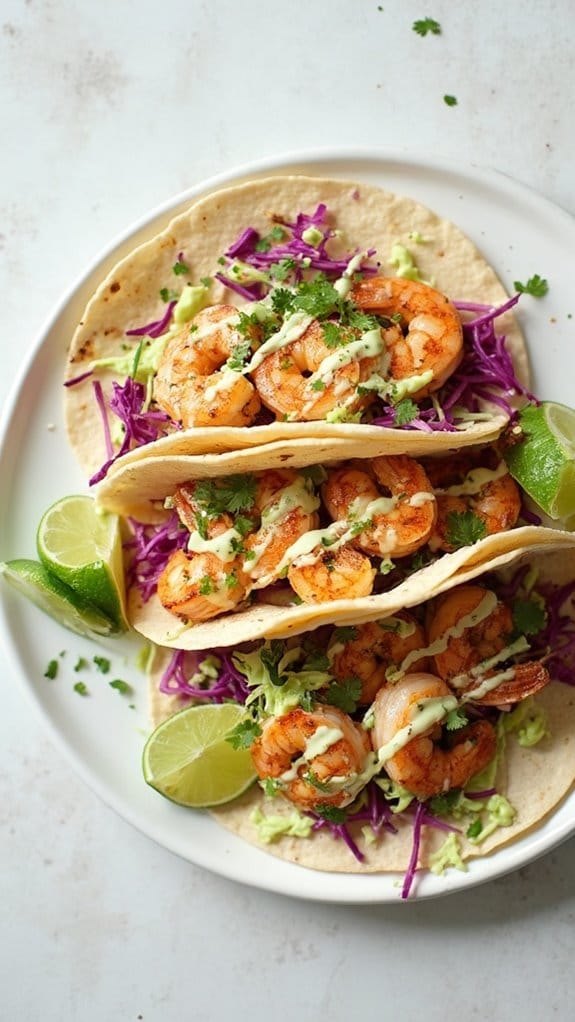
Title: Spicy Shrimp Tacos
Prep Time: 15 minutes
Cook Time: 10 minutes
Number of Servings: 4
Required Equipment List: Skillet, mixing bowl, spatula, serving plates
Cuisine Type: Mexican
These Spicy Shrimp Tacos are a fantastic way to bring bold flavors to your dinner table. With succulent shrimp marinated in a blend of spices and quickly cooked to perfection, these tacos deliver a satisfying crunch with every bite. Topped with a rejuvenating cabbage slaw and a zesty lime crema, they’re perfect for a casual weeknight meal or a lively gathering with friends.
The beauty of this recipe lies in its simplicity; the shrimp cooks in just a few minutes, making it a quick and easy option for busy evenings. Feel free to customize the toppings with your favorite ingredients, such as avocado slices or fresh cilantro, to tailor the tacos to your taste.
Get ready to enjoy a delicious burst of flavor that will transport you to sunny beaches with every bite!
Ingredients:
- 1 pound shrimp, peeled and deveined
- 1 tablespoon olive oil
- 1 teaspoon chili powder
- 1/2 teaspoon cumin
- 1/2 teaspoon paprika
- Salt and pepper to taste
- 8 small corn tortillas
- 2 cups shredded cabbage
- 1 avocado, sliced (optional)
- 1/4 cup sour cream
- Juice of 1 lime
- Fresh cilantro for garnish (optional)
Instructions:
- In a mixing bowl, combine the shrimp, olive oil, chili powder, cumin, paprika, salt, and pepper. Toss until the shrimp are evenly coated with the spice mixture. Let them marinate for about 5-10 minutes while you prepare the other ingredients.
- Heat a skillet over medium-high heat. Once hot, add the marinated shrimp to the skillet and cook for 2-3 minutes on each side, or until the shrimp are pink and opaque. Remove from heat and set aside.
- In a small bowl, mix the sour cream with the lime juice to create a zesty lime crema. Adjust the lime to your taste preference.
- Warm the corn tortillas in a dry skillet for about 30 seconds on each side until pliable. Alternatively, you can microwave them for about 10-15 seconds wrapped in a damp paper towel.
- To assemble the tacos, place a few shrimp on each tortilla, followed by a generous handful of shredded cabbage. Drizzle the lime crema over the top and add avocado slices if desired. Garnish with fresh cilantro for an extra touch.
Extra Tips: For an extra kick, consider adding diced jalapeños to the shrimp marinade or serving pickled jalapeños as a topping.
These tacos pair wonderfully with a side of black beans or a fresh salsa for a complete meal. Don’t hesitate to experiment with different toppings and ingredients based on what you have on hand; the versatility of tacos makes them a fun dish to personalize! Enjoy your spicy shrimp tacos!
Coconut Curry Chicken

Title: Coconut Curry Chicken
Prep Time: 15 minutes
Cook Time: 30 minutes
Number of Servings: 4
Required Equipment List: Large skillet, measuring cups, measuring spoons, wooden spoon, knife, cutting board
Cuisine Type: Indian-inspired
Coconut Curry Chicken is a warm and comforting dish that brings together tender chicken pieces simmered in a rich and creamy coconut curry sauce. This recipe is perfect for winter dinners, as it offers a delightful blend of spices that not only warms you up but also tantalizes your taste buds.
The addition of coconut milk provides a luscious creaminess that balances the heat from the curry powder, making it suitable for all palates. Serve it over fluffy rice or with warm naan bread for a fulfilling meal.
This easy-to-follow recipe highlights the versatility of coconut milk and the aromatic spices commonly found in Indian cuisine. Whether you’re cooking for a family dinner or a cozy night in, the Coconut Curry Chicken is sure to impress and satisfy. With a preparation time of just 15 minutes, you can have a delicious and hearty meal on the table in no time, leaving you more time to enjoy the company of your loved ones.
Ingredients:
- 1 pound boneless, skinless chicken thighs, cut into bite-sized pieces
- 1 tablespoon olive oil
- 1 onion, diced
- 3 cloves garlic, minced
- 1 tablespoon ginger, minced
- 2 tablespoons curry powder
- 1 can (14 oz) coconut milk
- 1 cup chicken broth
- 1 tablespoon soy sauce
- 1 cup bell peppers, sliced (any color)
- Salt and pepper to taste
- Fresh cilantro, for garnish
- Cooked rice or naan, for serving
Instructions:
- Heat olive oil in a large skillet over medium heat. Add diced onion and sauté until translucent, about 5 minutes. This will create a flavorful base for your curry.
- Stir in the minced garlic and ginger, cooking for an additional minute until fragrant. Next, add the curry powder and stir well to coat the onions, allowing the spices to bloom and develop their full flavor.
- Add the chicken pieces to the skillet, seasoning with salt and pepper. Cook for about 5-7 minutes, stirring occasionally, until the chicken is browned on all sides. Confirm the chicken is cooked through.
- Pour in the coconut milk and chicken broth, followed by the soy sauce. Stir to combine, bringing the mixture to a gentle simmer. Allow it to cook for about 15 minutes, letting the flavors meld together and the sauce thicken slightly.
- During the last 5 minutes of cooking, add the sliced bell peppers to the skillet. This will keep them crisp and vibrant, adding both flavor and color to the dish.
- Once everything is cooked, taste and adjust seasoning if necessary. Serve the Coconut Curry Chicken over rice or with naan, garnished with fresh cilantro for a burst of freshness.
Extra Tips: For a deeper flavor, consider marinating the chicken in the curry powder, garlic, and ginger for at least 30 minutes before cooking. If you enjoy a bit of heat, add some red pepper flakes or a chopped chili pepper when sautéing the onion.
This dish is also highly adaptable, so feel free to include your favorite vegetables like spinach or peas for added nutrition. Enjoy your Coconut Curry Chicken with a side of mango chutney for a delightful contrast!
Chicken Alfredo Bake
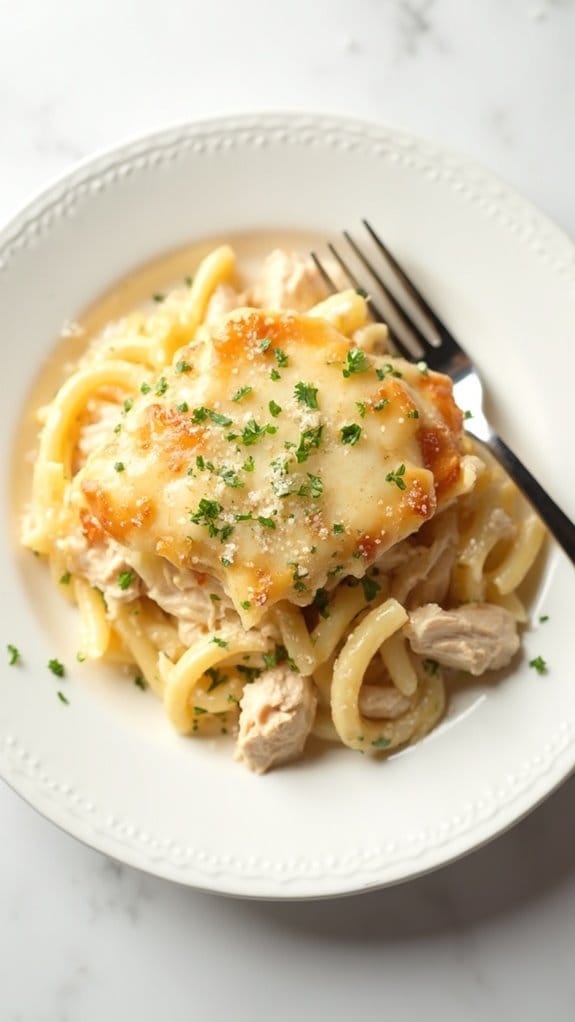
Title: Chicken Alfredo Bake
Prep Time: 15 minutes
Cook Time: 30 minutes
Number of Servings: 6
Required Equipment List: 9×13 inch baking dish, large pot, mixing bowl, spoon, oven
Cuisine Type: Italian-American
This Chicken Alfredo Bake is a comforting and satisfying dish that combines tender pieces of chicken, creamy Alfredo sauce, and pasta all baked to perfection. It’s an ideal meal for busy weeknights or family gatherings, offering a deliciously rich flavor that will please even the pickiest eaters.
The combination of cheese and spices creates a warm, inviting aroma that fills your kitchen, making it a favorite in any home. With its simple preparation and minimal ingredients, this recipe allows you to enjoy a homemade meal without spending hours in the kitchen.
You can easily customize it by adding vegetables like broccoli or spinach for a nutritional boost or substituting the chicken with shrimp or a meat alternative. This Chicken Alfredo Bake isn’t only delightful but also versatile, making it a perfect dish for any occasion.
Ingredients:
- 2 cups cooked rotini pasta
- 2 cups cooked chicken, shredded
- 2 cups Alfredo sauce
- 1 cup shredded mozzarella cheese
- 1/2 cup grated Parmesan cheese
- 1 teaspoon garlic powder
- 1 teaspoon Italian seasoning
- Salt and pepper to taste
- Fresh parsley for garnish (optional)
Instructions:
- Preheat your oven to 350°F (175°C). Grease a 9×13 inch baking dish with cooking spray or butter to prevent sticking.
- In a large pot, combine the cooked rotini pasta, shredded chicken, Alfredo sauce, garlic powder, Italian seasoning, salt, and pepper. Stir until the ingredients are well mixed and evenly coated in the sauce.
- Pour the pasta mixture into the prepared baking dish, spreading it out evenly.
- Sprinkle the shredded mozzarella cheese and grated Parmesan cheese on top of the pasta mixture, covering it generously for a cheesy finish.
- Bake in the preheated oven for 25-30 minutes or until the cheese is melted and bubbly, and the edges are lightly golden.
- Once baked, remove from the oven and let it sit for a few minutes before serving. Garnish with fresh parsley if desired, and enjoy your hearty meal!
Extra Tips: To add a bit of flavor complexity, consider sautéing some garlic and onions in a pan before mixing them into the pasta mixture.
You can also experiment with different types of cheeses, like cheddar or gouda, for a unique twist. If you want to add some vegetables, steamed broccoli or peas can be mixed in with the pasta for a pop of color and nutrition.
This dish keeps well in the fridge, making it great for leftovers or meal prep!
One-Pan Lemon Herb Cod
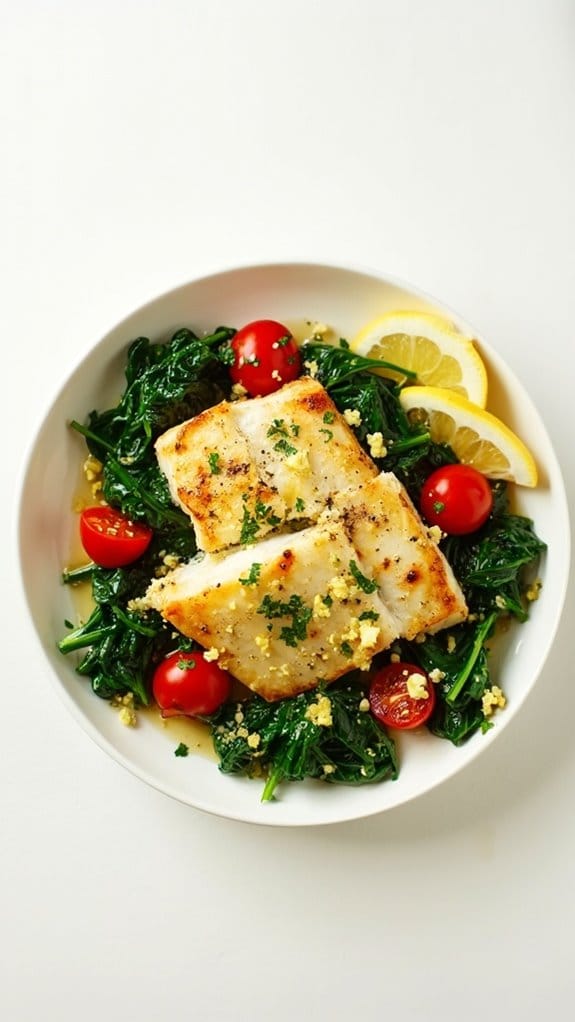
Title: One-Pan Lemon Herb Cod
Prep Time: 10 minutes
Cook Time: 20 minutes
Number of Servings: 4
Required Equipment List: Large skillet, measuring spoons, spatula, serving plates
Cuisine Type: Mediterranean
This One-Pan Lemon Herb Cod recipe is a fresh and flavorful dish that brings the taste of the Mediterranean right to your dinner table. The tender cod fillets are seasoned with a delightful mixture of herbs and zesty lemon, creating a dish that’s both light and satisfying. The best part? Everything is cooked in one pan, which makes for easy cleanup and more time to enjoy your meal.
Perfect for busy weeknights or a special occasion, this recipe will impress anyone who tries it. The combination of garlic, parsley, and lemon not only enhances the flavor of the cod but also infuses the entire dish with a bright and aromatic essence. Served alongside sautéed vegetables, this meal isn’t only nutritious but also visually appealing.
With its simple preparation and delicious results, One-Pan Lemon Herb Cod is bound to become a new favorite in your household.
Ingredients:
- 4 cod fillets
- 2 tablespoons olive oil
- 2 cloves garlic, minced
- 1 teaspoon dried oregano
- 1 teaspoon dried thyme
- Juice and zest of 1 lemon
- Salt and pepper to taste
- 1 cup cherry tomatoes, halved
- 1 cup spinach leaves
- Fresh parsley, chopped (for garnish)
Instructions:
- Heat the olive oil in a large skillet over medium heat. Once hot, add the minced garlic and sauté for about 30 seconds until fragrant, being careful not to burn it.
- Season the cod fillets with salt, pepper, oregano, and thyme. Once the garlic is fragrant, gently place the cod fillets in the skillet and cook for about 4-5 minutes on each side, or until the fish is golden brown and flakes easily with a fork.
- While the cod is cooking, prepare the vegetables. After flipping the cod, add the cherry tomatoes and spinach to the skillet around the fish. Squeeze the juice of half a lemon over the entire dish and sprinkle the lemon zest on top.
- Continue cooking for an additional 5 minutes, allowing the tomatoes to soften and the spinach to wilt. If needed, you can cover the skillet with a lid to help the vegetables cook faster.
- Once everything is cooked through, remove the skillet from heat and garnish with freshly chopped parsley. Serve immediately, drizzling any remaining juices from the pan over the cod and vegetables.
Extra Tips: To guarantee your cod remains moist and tender, avoid overcooking it; it should only take about 10 minutes total to cook through.
Feel free to swap out the vegetables based on what you have on hand; zucchini or bell peppers work well too. For an extra punch of flavor, consider adding a pinch of red pepper flakes for a mild heat or serving with a side of crusty bread to soak up the delicious juices. Enjoy your meal!
Vegetable Fried Rice
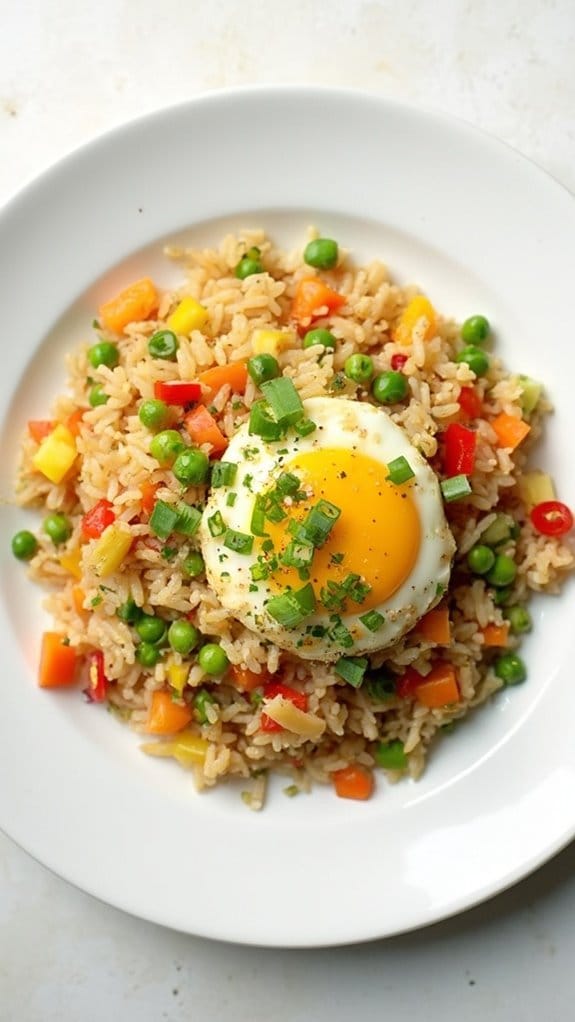
Title: Vegetable Fried Rice
Prep Time: 10 minutes
Cook Time: 15 minutes
Number of Servings: 4
Required Equipment List: Wok or large skillet, spatula, measuring cups, chopping board, knife
Cuisine Type: Asian
Vegetable Fried Rice is a delicious and versatile dish that’s perfect for using up leftover rice and a variety of vegetables. This recipe features colorful vegetables such as bell peppers, peas, and carrots, all stir-fried to perfection in a savory sauce. It’s a quick and easy meal that can be enjoyed on its own or as a side dish to complement your favorite proteins.
The combination of garlic and soy sauce adds depth of flavor, making this fried rice a satisfying option for lunch or dinner. This dish isn’t only great for utilizing leftover rice, but it also offers the flexibility to customize according to your taste preferences. You can add in proteins like tofu, chicken, or shrimp, or swap out the vegetables for whatever you have on hand.
The key to achieving that characteristic fried rice texture is to use cold, day-old rice, which helps prevent the dish from becoming mushy. With just a few simple ingredients and steps, you can whip up a hearty meal that’s both nutritious and delicious.
Ingredients:
- 3 cups cooked rice (preferably day-old)
- 1 tablespoon vegetable oil
- 1 small onion, diced
- 2 cloves garlic, minced
- 1 cup mixed vegetables (carrots, peas, corn)
- 1 bell pepper, diced
- 2 green onions, chopped
- 2 tablespoons soy sauce
- 1 tablespoon oyster sauce (optional)
- Salt and pepper to taste
- 1 egg (optional, for added protein)
Instructions:
- Start by heating the vegetable oil in a wok or large skillet over medium-high heat. Once the oil is hot, add the diced onion and minced garlic, sautéing for 1-2 minutes until fragrant and the onion becomes translucent.
- Add the mixed vegetables and diced bell pepper to the pan. Stir-fry for about 3-4 minutes until the vegetables are tender but still crisp. If you’re using fresh vegetables, adjust the cooking time as needed.
- Push the vegetables to one side of the pan, and if you’re adding an egg, crack it into the empty space. Scramble the egg until fully cooked, then mix it in with the vegetables.
- Add the cooked rice to the pan, breaking up any clumps. Pour the soy sauce and oyster sauce (if using) over the rice. Stir everything together, ensuring that the rice is evenly coated with the sauce and mixed well with the vegetables.
- Continue to stir-fry for an additional 3-4 minutes, allowing the rice to heat through and pick up a bit of crispness. Season with salt and pepper to taste, and toss in the chopped green onions just before serving.
Extra Tips: For the best results, use day-old rice that has been refrigerated, as it helps to keep the grains separate and prevents clumping. You can also experiment with different sauces, such as teriyaki or hoisin, for a unique flavor twist.
To make this dish even healthier, consider adding in some leafy greens like spinach or kale towards the end of cooking. Enjoy your flavorful and colorful Vegetable Fried Rice!
Pesto Chicken and Veggies
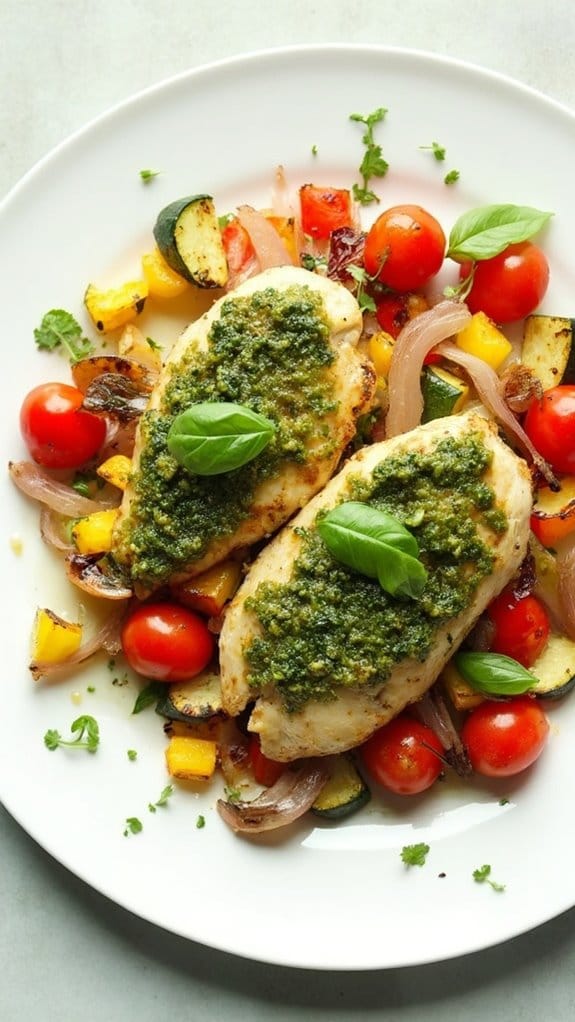
Title: Pesto Chicken and Veggies
Prep Time: 15 minutes
Cook Time: 25 minutes
Number of Servings: 4
Required Equipment List: Baking dish, mixing bowl, oven, knife, cutting board
Cuisine Type: Italian-American
Pesto Chicken and Veggies is a vibrant and flavorful dish that brings together tender chicken breasts and an assortment of colorful vegetables, all coated in a rich basil pesto. This recipe isn’t only delicious but also incredibly easy to prepare, making it a perfect choice for busy weeknights or casual weekend dinners.
The aromatic pesto sauce infuses the chicken and vegetables with a burst of fresh flavors that are sure to please everyone at the table. The beauty of this dish lies in its versatility; you can customize the vegetables based on what you have on hand or what’s in season.
Serve it alongside rice, pasta, or a fresh salad for a complete meal. With just a few simple ingredients, you can create a satisfying dish that feels both comforting and gourmet, perfect for impressing family and friends alike.
Ingredients:
- 4 boneless, skinless chicken breasts
- 1 cup basil pesto
- 2 cups cherry tomatoes, halved
- 1 zucchini, sliced
- 1 bell pepper, chopped
- 1 red onion, sliced
- 2 tablespoons olive oil
- Salt and pepper to taste
- Fresh basil leaves for garnish (optional)
Instructions:
- Preheat your oven to 400°F (200°C). While the oven preheats, prepare your vegetables by washing and cutting them into bite-sized pieces. This will guarantee even cooking and make the dish visually appealing.
- In a mixing bowl, combine the chicken breasts and basil pesto. Toss well to coat the chicken evenly with the pesto. This will infuse the chicken with flavor and keep it moist during cooking.
- In a separate baking dish, arrange the cherry tomatoes, zucchini, bell pepper, and red onion. Drizzle with olive oil and season with salt and pepper. Toss the vegetables to coat them lightly in oil and seasoning.
- Place the pesto-coated chicken breasts on top of the arranged vegetables in the baking dish. This allows the chicken to cook alongside the veggies, allowing their flavors to meld together beautifully.
- Bake in the preheated oven for 25-30 minutes, or until the chicken is cooked through and reaches an internal temperature of 165°F (75°C). The vegetables should be tender and slightly caramelized at the edges.
- Once cooked, remove from the oven and let the dish rest for a few minutes. Garnish with fresh basil leaves before serving to add a touch of color and freshness to the dish.
Extra Tips: To elevate this dish further, consider adding grated Parmesan cheese on top of the chicken and vegetables during the last 5 minutes of baking for a melty, cheesy finish.
You can also experiment with other vegetables such as asparagus or broccoli for added variety. If you have leftover pesto, drizzle it over the dish before serving for an extra burst of flavor. Enjoy your delicious and colorful meal!
Winter Root Vegetable Bake
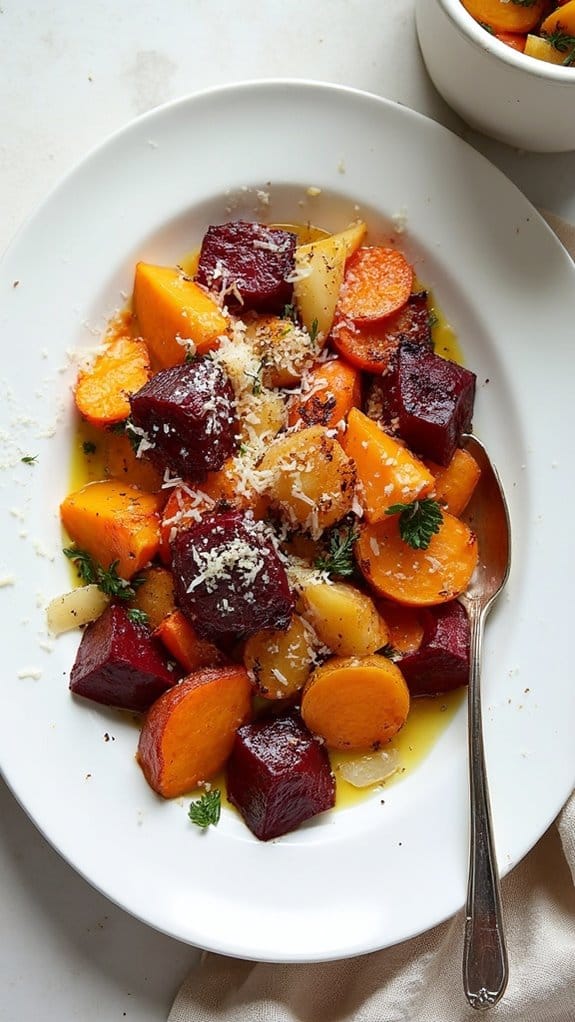
Title: Winter Root Vegetable Bake
Prep Time: 20 minutes
Cook Time: 45 minutes
Number of Servings: 6
Required Equipment List: Baking dish, mixing bowl, oven, knife, cutting board
Cuisine Type: Comfort Food
This Winter Root Vegetable Bake is a hearty and wholesome dish that celebrates the vibrant flavors of seasonal root vegetables, making it an ideal choice for a cozy winter dinner. The combination of sweet potatoes, carrots, parsnips, and beets creates a colorful medley that not only looks beautiful but also packs a nutritional punch.
Roasted to perfection with aromatic herbs and a drizzle of olive oil, this bake is both comforting and satisfying. The recipe is incredibly versatile; you can easily substitute or add your favorite root vegetables based on what you have on hand. Topped with a sprinkle of cheese or a handful of nuts for added texture, this dish can serve as a stunning side or a delicious vegetarian main course.
Perfect for family gatherings or a quiet night in, this Winter Root Vegetable Bake will warm you up from the inside out.
Ingredients:
- 2 sweet potatoes, peeled and cubed
- 3 carrots, peeled and sliced
- 2 parsnips, peeled and sliced
- 2 beets, peeled and cubed
- 1 red onion, chopped
- 4 tablespoons olive oil
- 1 teaspoon dried thyme
- 1 teaspoon dried rosemary
- Salt and pepper to taste
- 1/2 cup grated Parmesan cheese (optional)
Instructions:
- Preheat your oven to 400°F (200°C). This guarantees that the vegetables roast evenly and develop a beautiful caramelization as they cook.
- In a large mixing bowl, combine the cubed sweet potatoes, sliced carrots, sliced parsnips, cubed beets, and chopped red onion. Drizzle the olive oil over the vegetables and sprinkle with thyme, rosemary, salt, and pepper. Toss everything together until the vegetables are evenly coated.
- Transfer the vegetable mixture to a large baking dish, spreading them out in an even layer. If desired, sprinkle the grated Parmesan cheese over the top for an extra layer of flavor.
- Bake in the preheated oven for 35-45 minutes, stirring halfway through to guarantee even roasting. The vegetables should be tender and slightly caramelized around the edges when done.
- Once baked, remove the dish from the oven and let it cool for a few minutes before serving. This allows the flavors to meld together beautifully, making each bite delicious.
Extra Tips: To enhance the flavor even further, try adding a splash of balsamic vinegar or a handful of chopped fresh herbs such as parsley or cilantro right before serving.
You can also experiment with different root vegetables like turnips or rutabagas for added variety. This dish pairs well with roasted meats or can be enjoyed on its own for a filling vegetarian option. Enjoy your winter feast!
Conclusion
As winter wraps its cozy arms around us, it’s the perfect time to embrace these delightful one-pan meals. They’re not just easy to whip up; they’re a celebration of flavor, warmth, and nourishment—without the fuss of endless dishes. So, why not gather your loved ones around the table and enjoy these culinary gems? After all, who wouldn’t want to savor the season with a hearty dish that’s as simple as it is scrumptious? Happy cooking!

