No products in the cart.
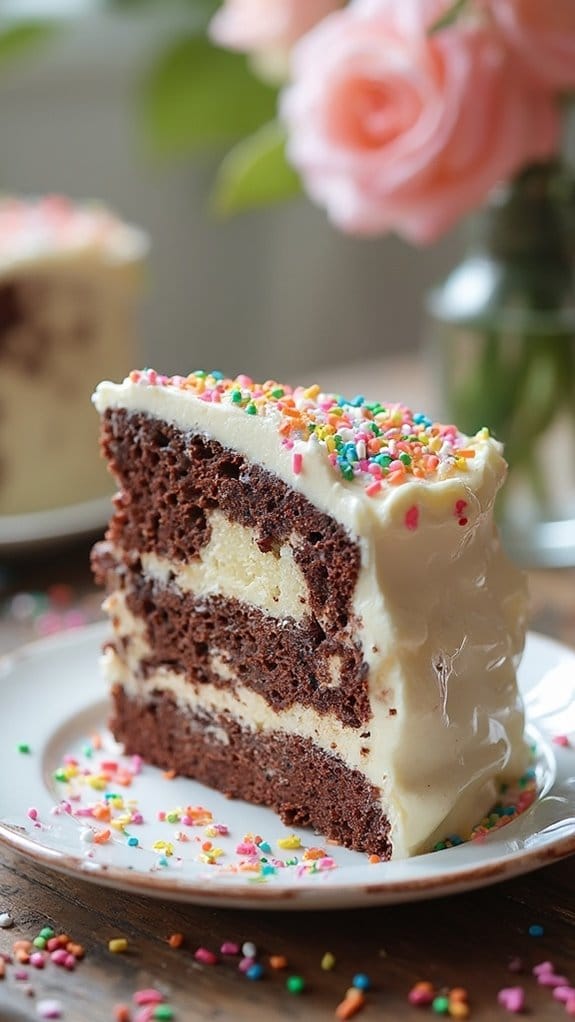
15 Marmorkuchen Recipes – German Marble Cake Delight
Looking for a dessert that’ll wow your guests? You can’t go wrong with Marmorkuchen! This classic German marble cake blends rich chocolate and soft vanilla flavors into a stunning loaf. Whether it’s the timeless classic or fun variations like Lemon Zest or Nutty Almond, you’ll have everyone begging for more. Plus, it’s super easy to whip up, perfect for both novice bakers and seasoned pros. Why not try a Raspberry Swirl or a Peanut Butter twist for extra flair? With these 15 irresistible recipes, you’re just a few steps away from impressing everyone at your next gathering! Curious about more?
Contents
hide
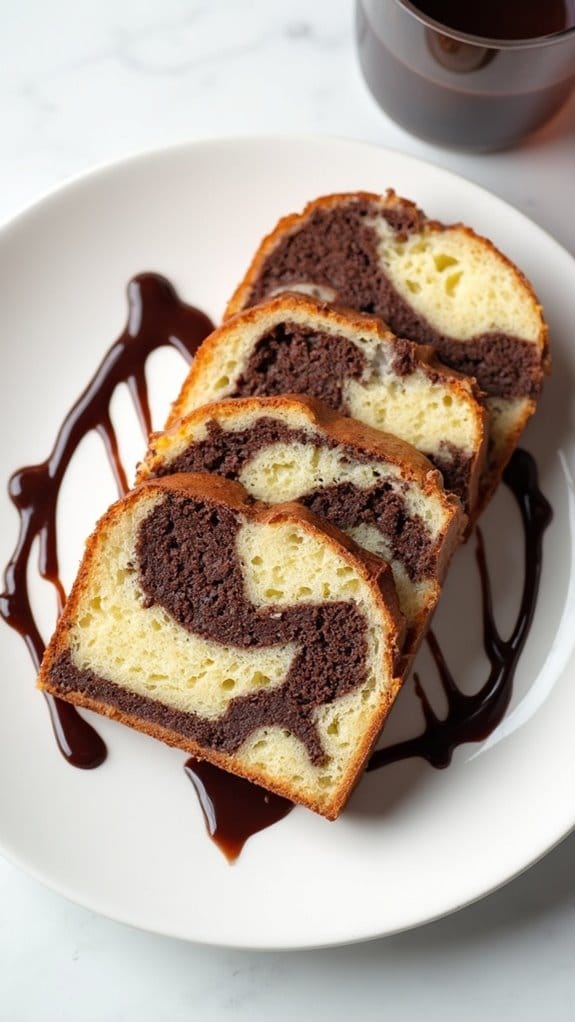
Classic German Marmorkuchen
Title: Classic German Marmorkuchen
Prep Time: 20 minutes
Cook Time: 60 minutes
Number of Servings: 12
Required Equipment List: Loaf pan, mixing bowls, electric mixer, measuring cups and spoons, spatula
Cuisine Type: German
Classic German Marmorkuchen, or marble cake, is a beloved treat that perfectly marries rich chocolate and soft vanilla flavors in a tender, buttery loaf. This cake is traditionally served during coffee time or as a delightful dessert, making it a staple in German households.
The beautiful marbled effect not only pleases the eye but also offers a delicious contrast of flavors in every slice, making it a favorite for both kids and adults alike. The preparation of Marmorkuchen is quite straightforward, allowing even novice bakers to create this delightful dessert with ease.
With simple ingredients and a few easy steps, this cake can be whipped up in no time. Perfect for family gatherings, special occasions, or simply a cozy afternoon treat with a cup of coffee, this classic cake is sure to impress your guests and keep them coming back for more.
Ingredients:
- 250g unsalted butter, softened
- 250g granulated sugar
- 4 large eggs
- 1 teaspoon vanilla extract
- 250g all-purpose flour
- 1 teaspoon baking powder
- 50g cocoa powder
- 100ml milk
- A pinch of salt
Instructions:
- Preheat your oven to 180°C (350°F). Grease and flour a loaf pan to guarantee the cake releases easily after baking. This step is vital for achieving a nice, uniform shape.
- In a large mixing bowl, cream together the softened butter and granulated sugar using an electric mixer until the mixture is light and fluffy. This should take about 5 minutes, and it’s important to incorporate as much air as possible for a light cake.
- Add the eggs, one at a time, mixing well after each addition. Then, stir in the vanilla extract until everything is well combined.
- In a separate bowl, whisk together the flour, baking powder, and salt. Gradually add the dry ingredients to the wet mixture, alternating with the milk. Mix until just combined, being careful not to overmix.
- Divide the batter in half. To one half, fold in the cocoa powder until fully incorporated. Leave the other half plain. This will create the beautiful marbled effect in the cake.
- Spoon the batters into the prepared loaf pan, alternating between the vanilla and chocolate mixtures. Use a knife or a skewer to swirl the two batters together gently, creating a marbled pattern.
- Bake in the preheated oven for 50-60 minutes, or until a toothpick inserted into the center comes out clean. Allow the cake to cool in the pan for about 10 minutes before transferring it to a wire rack to cool completely.
Extra Tips: To enhance the flavor of your Marmorkuchen, consider adding a teaspoon of almond extract along with the vanilla. For an extra touch of decadence, you can drizzle a simple chocolate glaze over the cooled cake.
This cake can be stored in an airtight container for several days, and it also freezes well, making it a perfect make-ahead dessert for future gatherings. Enjoy your baking!
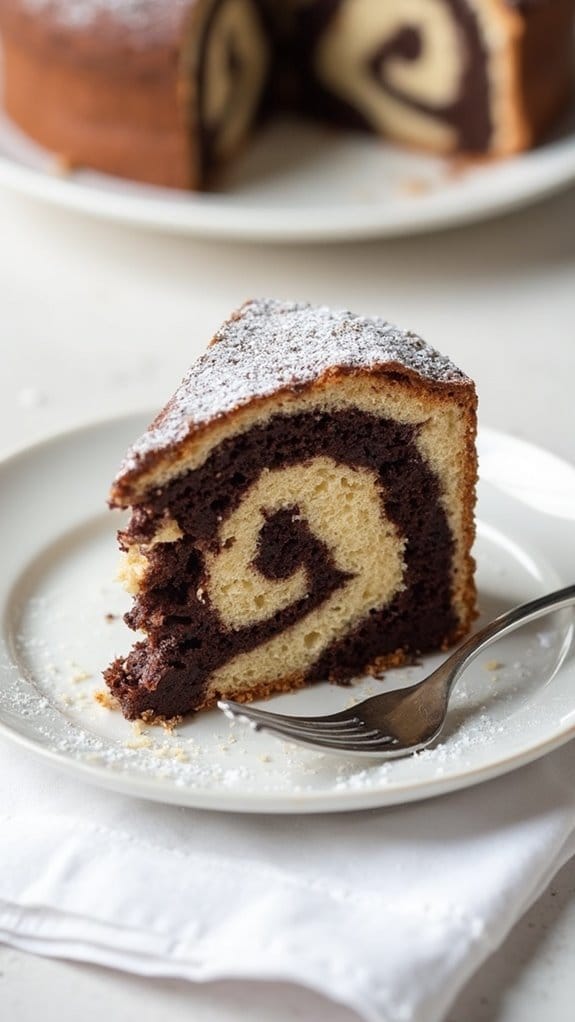
Chocolate Espresso Marmorkuchen
Title: Chocolate Espresso Marmorkuchen
Prep Time: 20 minutes
Cook Time: 50 minutes
Number of Servings: 12
Required Equipment List: Loaf pan, mixing bowls, electric mixer, measuring cups, measuring spoons, whisk
Cuisine Type: German
Chocolate Espresso Marmorkuchen is a decadent twist on the classic marble cake, combining rich chocolate with a bold espresso flavor. This moist and tender cake is perfect for coffee lovers, offering a delightful contrast between the dark chocolate and the aromatic coffee.
The cake’s beautiful marbled appearance makes it not only a treat for the taste buds but also a stunning centerpiece for any gathering. This recipe is straightforward and can be made with ingredients commonly found in your pantry.
Once baked, the cake can be served plain or dusted with powdered sugar for an elegant finish. Perfect for breakfast, a coffee break, or dessert, this Chocolate Espresso Marmorkuchen is sure to become a favorite in your recipe collection.
Ingredients:
- 2 cups all-purpose flour
- 1 cup granulated sugar
- 1/2 cup unsweetened cocoa powder
- 1/2 cup unsalted butter, softened
- 1 cup milk
- 3 large eggs
- 1 tablespoon instant espresso powder
- 2 teaspoons baking powder
- 1/2 teaspoon salt
- 1 teaspoon vanilla extract
Instructions:
- Preheat your oven to 350°F (175°C). Grease a loaf pan with butter and lightly dust it with flour to prevent the cake from sticking. Set aside while you prepare the batter.
- In a mixing bowl, cream together the softened butter and sugar using an electric mixer until the mixture is light and fluffy. This usually takes about 3-4 minutes. Add the eggs one at a time, mixing well after each addition, and then stir in the vanilla extract.
- In another bowl, combine the all-purpose flour, cocoa powder, baking powder, and salt. Gradually add the dry ingredients to the wet mixture, alternating with the milk, and mix until just combined. Be careful not to overmix, as this can make the cake dense.
- Divide the batter into two equal portions. In one portion, dissolve the instant espresso powder in 2 tablespoons of hot water and mix it into the batter. This will create the coffee-flavored layer. Keep the other portion as is for the chocolate layer.
- Spoon the chocolate batter into the prepared loaf pan, followed by dollops of the espresso batter. Use a knife or a skewer to swirl the batters together gently, creating a marbled effect.
- Bake in the preheated oven for 45-50 minutes, or until a toothpick inserted into the center comes out clean. Allow the cake to cool in the pan for about 10 minutes before transferring it to a wire rack to cool completely.
Extra Tips: For an extra kick of flavor, consider adding a teaspoon of coffee liqueur to the batter. If you want to make the cake even more indulgent, you can drizzle a simple chocolate glaze on top once it has cooled.
Store any leftovers in an airtight container at room temperature, and this cake will stay delicious for several days. Enjoy your baking!
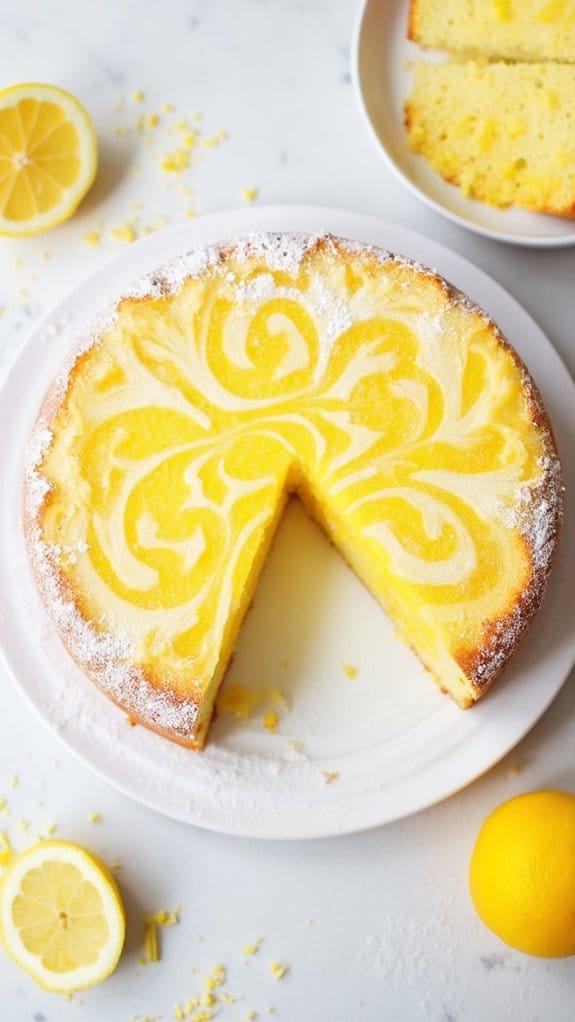
Lemon Zest Marble Cake
Title: Lemon Zest Marble Cake
Prep Time: 20 minutes
Cook Time: 50 minutes
Number of Servings: 10
Required Equipment List: Mixing bowls, electric mixer, loaf pan, whisk, rubber spatula, oven
Cuisine Type: German
The Lemon Zest Marble Cake is a delightful dessert that combines the invigorating zing of lemon with the rich, buttery flavor of vanilla. This cake features a beautiful marbled effect, making it visually stunning as well as delicious. Perfect for afternoon tea or as a light dessert after dinner, this cake is sure to impress your guests with its bright flavor and tender crumb.
The addition of lemon zest not only elevates the taste but also adds a lovely aroma that fills your kitchen while baking. This recipe is easy to follow and creates a perfect balance of flavors. The marble effect is achieved by swirling the lemon batter into the vanilla batter, creating a unique and appealing pattern.
Whether you’re baking for a special occasion or just to enjoy at home, this Lemon Zest Marble Cake is a great way to bring a touch of elegance to your dessert table.
Ingredients:
- 2 cups all-purpose flour
- 1 tablespoon baking powder
- 1/2 teaspoon salt
- 1 cup unsalted butter, softened
- 2 cups granulated sugar
- 4 large eggs
- 1 teaspoon vanilla extract
- 1/2 cup milk
- Zest of 2 lemons
- 1/4 cup fresh lemon juice
Instructions:
- Preheat your oven to 350°F (175°C) and grease a loaf pan with butter or non-stick spray. This will help prevent the cake from sticking and guarantee an easy release once baked.
- In a mixing bowl, whisk together the flour, baking powder, and salt. This dry mixture will create a stable foundation for your cake, ensuring it rises beautifully in the oven.
- In a separate large bowl, use an electric mixer to cream the softened butter and granulated sugar until light and fluffy. This step incorporates air into the batter, leading to a tender cake.
- Add the eggs, one at a time, mixing well after each addition. Then, stir in the vanilla extract, lemon zest, and lemon juice until everything is well combined.
- Gradually add the dry mixture to the wet mixture, alternating with the milk. Start and end with the dry ingredients, mixing just until combined. Be careful not to overmix, as this can lead to a dense cake.
- Divide the batter in half. In one half, fold in the lemon zest and juice mixture, creating a lemon-flavored batter. Leave the other half as plain vanilla.
- Spoon the batters alternately into the prepared loaf pan, then use a knife or a skewer to gently swirl the batters together for a marbled effect.
- Bake in the preheated oven for 45-50 minutes, or until a toothpick inserted into the center comes out clean. Allow the cake to cool in the pan for 10 minutes before transferring it to a wire rack to cool completely.
Extra Tips: For an added burst of flavor, consider drizzling a lemon glaze over the cooled cake made from powdered sugar and lemon juice. You can also experiment by adding poppy seeds to the lemon batter for a delightful texture.
Store any leftovers in an airtight container at room temperature for up to three days, or refrigerate for longer freshness. Enjoy your delicious Lemon Zest Marble Cake!
Nutty Almond Marmorkuchen
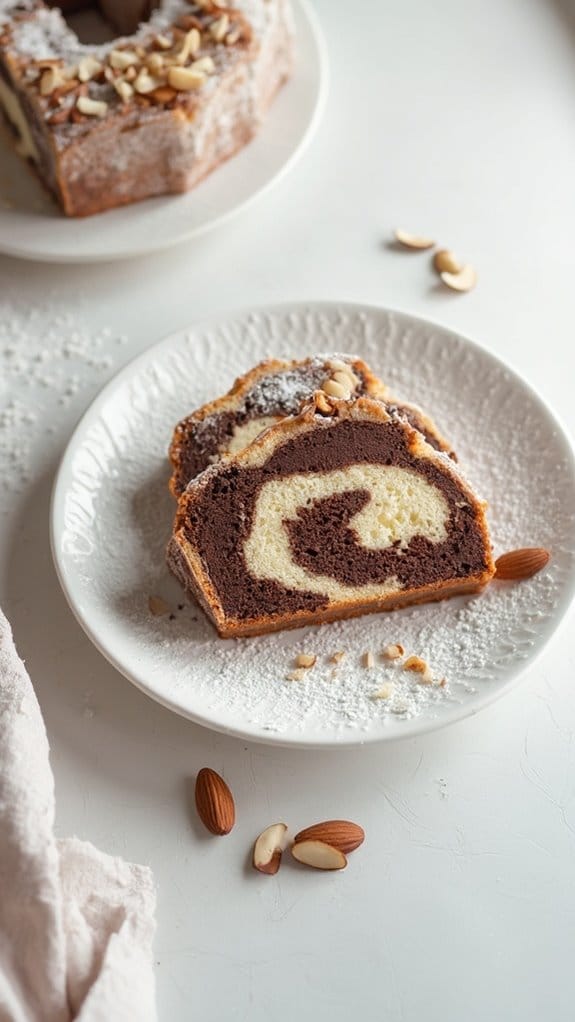
Title: Nutty Almond Marmorkuchen
Prep Time: 20 minutes
Cook Time: 50 minutes
Number of Servings: 10
Required Equipment List: Loaf pan, mixing bowls, electric mixer, measuring cups, measuring spoons
Cuisine Type: German
Nutty Almond Marmorkuchen is a deliciously rich and moist marble cake that combines the flavors of chocolate and almond in a beautiful swirl. This cake is perfect for any occasion, whether it be a cozy family gathering, a festive celebration, or simply a treat with your afternoon tea.
The addition of ground almonds not only enhances the nutty flavor but also gives the cake a delightful texture that’s sure to impress your guests. The beauty of this recipe lies in its simplicity and versatility. You can easily customize the flavors by adding different extracts or using various types of nuts.
The marbling effect achieved by swirling the chocolate and almond batters creates an eye-catching presentation that makes this cake a standout dessert. Serve it plain, dusted with powdered sugar, or with a dollop of whipped cream for an extra special touch.
Ingredients:
- 1 cup unsalted butter, softened
- 1 cup granulated sugar
- 4 large eggs
- 2 cups all-purpose flour
- 1 teaspoon baking powder
- 1/2 teaspoon salt
- 1/2 cup milk
- 1 teaspoon almond extract
- 1/2 cup ground almonds
- 1/2 cup unsweetened cocoa powder
Instructions:
- Preheat your oven to 350°F (175°C). Grease and flour a loaf pan to prevent the cake from sticking. This step is essential for achieving a beautiful, intact slice when serving.
- In a mixing bowl, cream together the softened butter and granulated sugar using an electric mixer until light and fluffy. This process should take about 3-5 minutes and helps to incorporate air into the batter for a lighter cake.
- Add the eggs one at a time, mixing well after each addition. Then, stir in the milk and almond extract until fully combined. This will create a moist and flavorful batter.
- In another bowl, sift together the all-purpose flour, baking powder, salt, and ground almonds. Gradually add this dry mixture to the wet ingredients, mixing until just combined. Be careful not to overmix, as this can result in a denser cake.
- Divide the batter into two equal portions. In one half, fold in the unsweetened cocoa powder until well incorporated. This will create the chocolate portion of the batter.
- Alternate scoops of the almond and chocolate batters into the prepared loaf pan, creating a marbled effect by swirling a knife through the layers. Bake in the preheated oven for 45-50 minutes or until a toothpick inserted into the center comes out clean.
- Once baked, remove the cake from the oven and let it cool in the pan for about 10 minutes. Then, transfer it to a wire rack to cool completely before slicing.
Extra Tips: For an added crunch, consider sprinkling some sliced almonds on top of the batter before baking. This not only enhances the flavor but also adds a lovely presentation.
Be sure to check for doneness a few minutes before the suggested baking time, as oven temperatures can vary. Store any leftover cake in an airtight container at room temperature for up to three days, or freeze for longer storage. Enjoy your Nutty Almond Marmorkuchen!
Raspberry Swirl Marmorkuchen
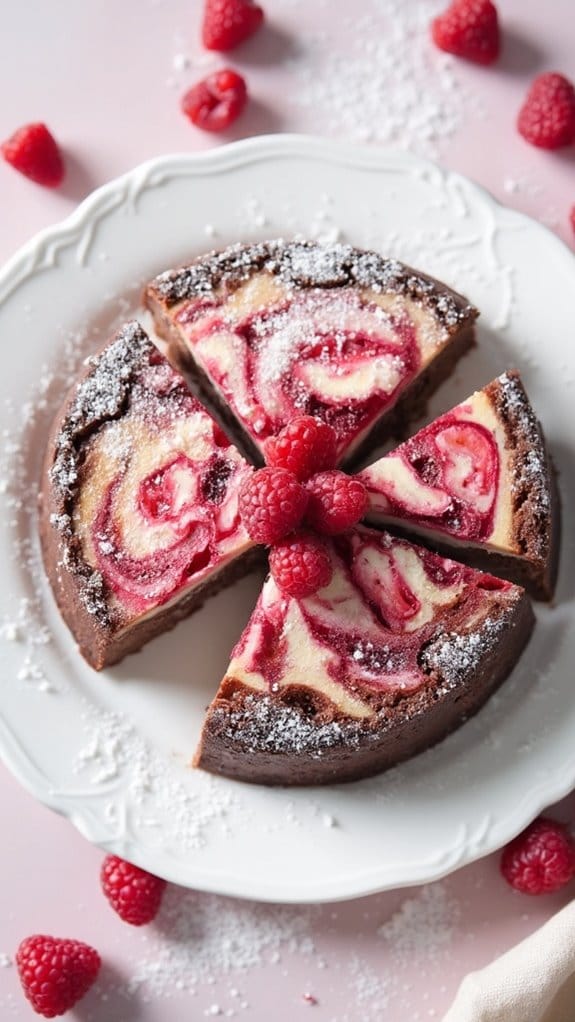
Title: Raspberry Swirl Marmorkuchen
Prep Time: 20 minutes
Cook Time: 50 minutes
Number of Servings: 10
Required Equipment List: Mixing bowls, electric mixer, loaf pan, spatula, parchment paper
Cuisine Type: German
Raspberry Swirl Marmorkuchen is a delightful take on the traditional marble cake, infusing the classic flavors with a tangy raspberry twist. This moist and flavorful cake features a beautiful swirl of raspberry puree that not only adds a pop of color but also a burst of fruity flavor in every bite.
It’s perfect for serving at afternoon tea or as a sweet treat for special occasions, where it’s sure to impress your guests with its visual appeal and delicious taste. The combination of rich vanilla and chocolate batters, accented by the raspberry swirl, creates a harmonious blend that caters to both chocolate lovers and fruit enthusiasts.
This recipe is simple enough for novice bakers yet elegant enough to serve at a celebration, making it a versatile addition to your dessert repertoire. With just a few ingredients, you can create a stunning cake that’s as tasty as it’s beautiful.
Ingredients:
- 2 cups all-purpose flour
- 1 cup unsalted butter, softened
- 1 ½ cups granulated sugar
- 4 large eggs
- 1 teaspoon vanilla extract
- 1 teaspoon baking powder
- ½ teaspoon salt
- ½ cup unsweetened cocoa powder
- 1 cup fresh raspberries
- 2 tablespoons powdered sugar (for raspberry puree)
Instructions:
- Preheat your oven to 350°F (175°C). Prepare a loaf pan by greasing it with butter and lining it with parchment paper for easy removal of the cake later.
- In a mixing bowl, cream together the softened butter and granulated sugar using an electric mixer until the mixture is light and fluffy. This process usually takes about 3-5 minutes.
- Add the eggs one at a time, incorporating each egg fully before adding the next. Stir in the vanilla extract.
- In a separate bowl, sift together the flour, baking powder, cocoa powder, and salt. Gradually add the dry ingredients to the wet mixture, mixing until just combined.
- In a small saucepan, combine the fresh raspberries and powdered sugar over medium heat. Cook for a few minutes until the raspberries break down and form a puree. Remove from heat and let cool slightly.
- Divide the batter in half. Mix the cocoa powder into one half to create the chocolate batter. In the prepared loaf pan, alternate spoonfuls of the vanilla and chocolate batters, and use a knife to gently swirl in the raspberry puree for a marbled effect.
- Bake in the preheated oven for 45-50 minutes, or until a toothpick inserted into the center of the cake comes out clean. Allow the cake to cool in the pan for 10 minutes before transferring it to a wire rack to cool completely.
Extra Tips: To enhance the raspberry flavor, you can add a bit of lemon zest to the raspberry puree. For a more indulgent treat, serve slices of the cake with a dollop of whipped cream or a scoop of vanilla ice cream.
This cake can be stored in an airtight container for up to three days, and it also freezes well, so you can enjoy it later!
Vegan Chocolate Vanilla Marble Cake
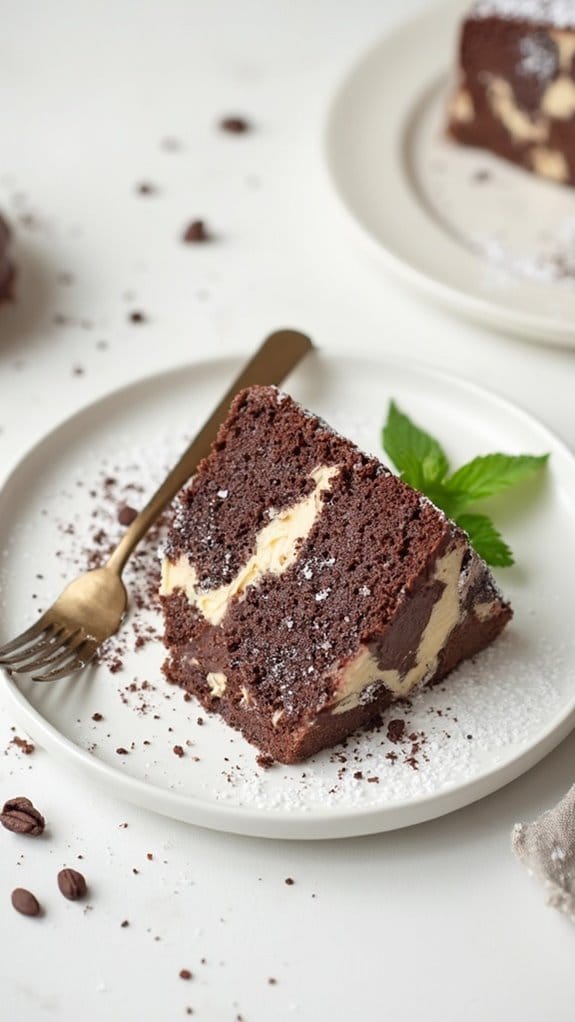
Title: Vegan Chocolate Vanilla Marble Cake
Prep Time: 20 minutes
Cook Time: 40 minutes
Number of Servings: 8
Required Equipment List: Mixing bowls, whisk, loaf pan, measuring cups, measuring spoons, parchment paper, oven
Cuisine Type: Vegan Dessert
This Vegan Chocolate Vanilla Marble Cake is a delightful fusion of rich chocolate and creamy vanilla flavors, creating a visually stunning dessert that’s both delicious and wholesome. Perfect for any occasion, this vegan marble cake is made with simple ingredients that come together quickly, making it an ideal treat for birthdays, celebrations, or just a cozy afternoon tea.
The marbling effect not only adds an artistic touch but also offers a wonderful contrast in flavors that will please any palate. The use of plant-based ingredients guarantees that this cake is entirely dairy-free and egg-free, without compromising on taste or texture.
The moist, tender crumb of the cake is achieved through the combination of almond milk and apple cider vinegar, which mimics the effects of traditional dairy. This recipe isn’t only easy to follow but also allows for variations, such as adding nuts or fruits, making it a versatile addition to your vegan baking repertoire.
Ingredients:
- 1 ½ cups all-purpose flour
- 1 cup granulated sugar
- 1/3 cup unsweetened cocoa powder
- 1 teaspoon baking soda
- 1/2 teaspoon salt
- 1 cup almond milk
- 1/3 cup vegetable oil
- 1 tablespoon apple cider vinegar
- 1 teaspoon vanilla extract
Instructions:
- Preheat your oven to 350°F (175°C) and prepare a loaf pan by lining it with parchment paper. This will help prevent the cake from sticking and make for easy removal after baking.
- In a large mixing bowl, whisk together the flour, sugar, cocoa powder, baking soda, and salt until well combined. This dry mixture will provide the foundation for both the chocolate and vanilla batters.
- In a separate bowl, combine the almond milk, vegetable oil, apple cider vinegar, and vanilla extract. Whisk these wet ingredients together until they’re fully mixed, then pour them into the dry ingredients.
- Stir the batter gently until just combined, being careful not to overmix. Divide the batter evenly into two bowls. In one bowl, leave the batter as is for the vanilla flavor, and in the other bowl, add an additional tablespoon of cocoa powder to enhance the chocolate flavor.
- Using a spoon, alternate scoops of the vanilla and chocolate batters into the center of the prepared loaf pan. Continue layering until all the batter is used, then gently swirl the two batters together with a knife to create a marbled effect.
- Bake in the preheated oven for 35-40 minutes, or until a toothpick inserted into the center comes out clean. Allow the cake to cool in the pan for about 10 minutes before transferring it to a wire rack to cool completely.
Extra Tips: To enhance the flavor, consider adding a splash of espresso or coffee to the chocolate batter for a richer taste. You can also top the cooled cake with a simple vegan frosting or a dusting of powdered sugar for an elegant finish.
Store any leftovers in an airtight container at room temperature for up to three days, or refrigerate for longer freshness. Enjoy your homemade vegan treat!
Marble Bundt Cake Delight
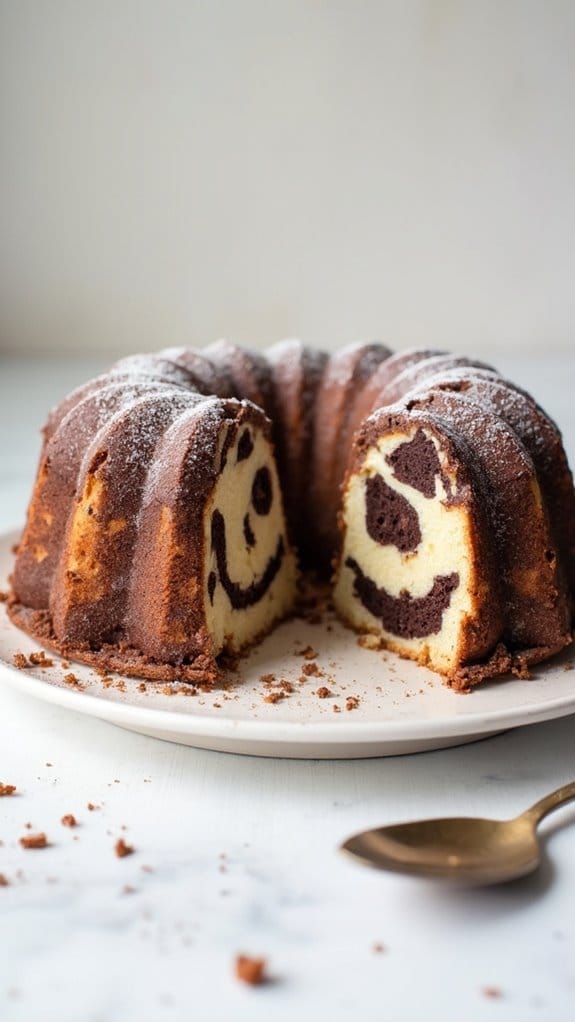
Title: Marble Bundt Cake Delight
Prep Time: 20 minutes
Cook Time: 50 minutes
Number of Servings: 10
Required Equipment List: Bundt pan, mixing bowls, whisk, measuring cups, measuring spoons, cooling rack
Cuisine Type: German
The Marble Bundt Cake Delight is a classic dessert that beautifully combines rich chocolate and vanilla flavors in a stunning marble pattern. This cake is perfect for special occasions or simply as a delightful treat with your afternoon coffee.
The moist and tender crumb, paired with the visual appeal of the marbling, makes this cake a showstopper at any gathering. It’s easy to slice and serve, making it a wonderful choice for entertaining guests.
This recipe is simple yet allows for some creativity in the kitchen. By swirling the chocolate and vanilla batter together, you create a marbled effect that’s both striking and delicious.
The addition of a light dusting of powdered sugar or a chocolate glaze on top adds an elegant finish, guaranteeing your Marble Bundt Cake isn’t only tasty but also visually appealing.
Ingredients:
- 2 cups all-purpose flour
- 1 ½ teaspoons baking powder
- ½ teaspoon salt
- ½ cup unsalted butter, softened
- 1 cup granulated sugar
- 2 large eggs
- 1 teaspoon vanilla extract
- 1 cup milk
- ½ cup unsweetened cocoa powder
- ½ cup powdered sugar (for dusting, optional)
Instructions:
- Preheat your oven to 350°F (175°C). Generously grease and flour a Bundt pan to guarantee the cake releases easily after baking.
- In a mixing bowl, whisk together the flour, baking powder, and salt. Set aside. In another large bowl, cream the softened butter and granulated sugar together until light and fluffy, about 3-4 minutes.
- Add the eggs one at a time to the butter mixture, mixing well after each addition. Stir in the vanilla extract. Gradually add the flour mixture alternately with the milk, starting and ending with the flour. Mix until just combined.
- Divide the batter in half and stir the cocoa powder into one half, mixing until well incorporated. You should now have one vanilla batter and one chocolate batter.
- Spoon alternating dollops of the vanilla and chocolate batters into the prepared Bundt pan, creating a marbled effect. Use a skewer or knife to gently swirl the two batters together for a more pronounced marbling.
- Bake in the preheated oven for 45-50 minutes, or until a toothpick inserted into the center comes out clean. Allow the cake to cool in the pan for about 10 minutes, then carefully invert onto a cooling rack to cool completely.
- Once cooled, you can dust the cake with powdered sugar or drizzle with chocolate glaze if desired before serving.
Extra Tips: For an extra touch of flavor, consider adding a teaspoon of almond extract to the vanilla batter or a pinch of espresso powder to the chocolate batter.
If you want to make the cake even more indulgent, serve it with a scoop of vanilla ice cream or a dollop of whipped cream. Make sure to store any leftovers in an airtight container to keep the cake moist for several days. Enjoy your delicious Marble Bundt Cake Delight!
Spiced Pumpkin Marmorkuchen
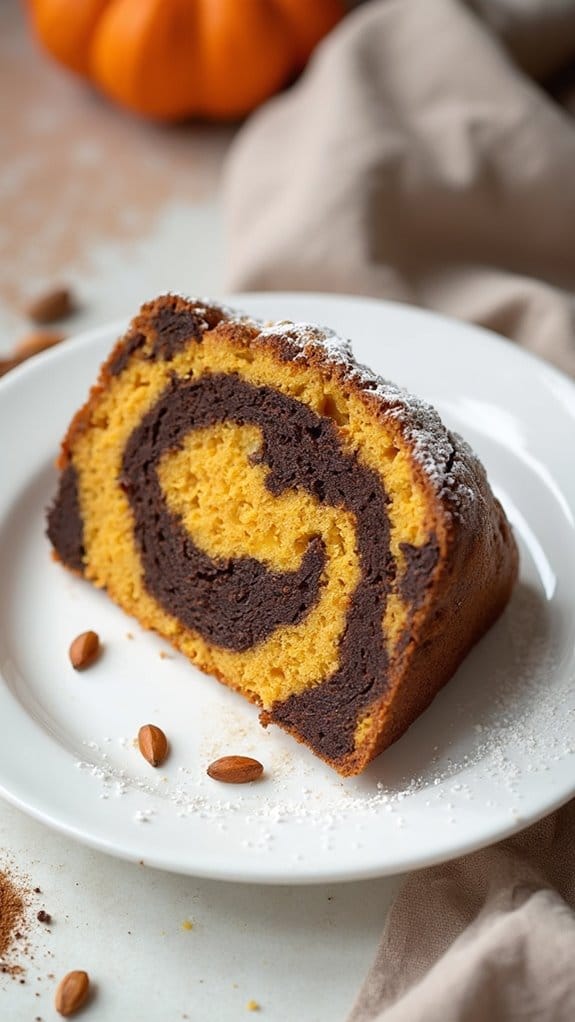
Title: Spiced Pumpkin Marmorkuchen
Prep Time: 20 minutes
Cook Time: 60 minutes
Number of Servings: 12
Required Equipment List: Mixing bowls, whisk, loaf pan, measuring cups, measuring spoons, oven
Cuisine Type: German
Spiced Pumpkin Marmorkuchen is a delightful and seasonal twist on the classic marble cake, combining the cozy flavors of pumpkin and warm spices with the traditional chocolate swirl. This cake is perfect for fall gatherings, coffee breaks, or simply as a treat to enjoy at home.
The moist pumpkin base is complemented by a rich chocolate batter, resulting in a beautiful marbled effect that’s as pleasing to the eye as it’s to the palate. The addition of pumpkin not only enhances the flavor but also adds a wonderful moistness to the cake, while the spices like cinnamon and nutmeg bring warmth and depth.
This cake is incredibly easy to make, and can be served plain or dressed up with a dusting of powdered sugar or a dollop of whipped cream. Whether you’re a pumpkin enthusiast or simply looking for a comforting dessert, this Spiced Pumpkin Marmorkuchen is sure to become a favorite in your recipe collection.
Ingredients:
- 1 cup pumpkin puree
- 1/2 cup vegetable oil
- 1 cup sugar
- 3 large eggs
- 2 cups all-purpose flour
- 1 teaspoon baking powder
- 1/2 teaspoon baking soda
- 1 teaspoon ground cinnamon
- 1/2 teaspoon ground nutmeg
- 1/4 teaspoon ground ginger
- 1/4 teaspoon salt
- 1/2 cup unsweetened cocoa powder
- 1/4 cup milk
Instructions:
- Preheat your oven to 350°F (175°C). Grease a loaf pan with cooking spray or butter and lightly dust it with flour to prevent sticking.
- In a large mixing bowl, combine the pumpkin puree, vegetable oil, and sugar. Whisk in the eggs one at a time, ensuring that each egg is fully incorporated before adding the next.
- In another bowl, whisk together the flour, baking powder, baking soda, cinnamon, nutmeg, ginger, and salt. Gradually add this dry mixture to the pumpkin mixture, stirring until just combined.
- In a separate bowl, mix the cocoa powder with the milk until smooth. Take about half of the pumpkin batter and gently fold in the cocoa mixture to create the chocolate batter.
- Pour half of the pumpkin batter into the prepared loaf pan, followed by the chocolate batter. Then, top with the remaining pumpkin batter. Use a knife or skewer to swirl the batters together gently to create a marbled effect.
- Bake in the preheated oven for 50-60 minutes, or until a toothpick inserted into the center of the cake comes out clean. Allow the cake to cool in the pan for 10 minutes before transferring it to a wire rack to cool completely.
Extra Tips: To enhance the flavors, consider adding chocolate chips to the chocolate batter or chopped nuts to the pumpkin batter. For a festive touch, you can also sprinkle some pumpkin seeds on top before baking.
If you prefer a sweeter cake, feel free to increase the sugar by 1/4 cup. This Spiced Pumpkin Marmorkuchen is best enjoyed the day after it’s baked, as the flavors have time to meld together beautifully.
Coconut Cream Marble Cake
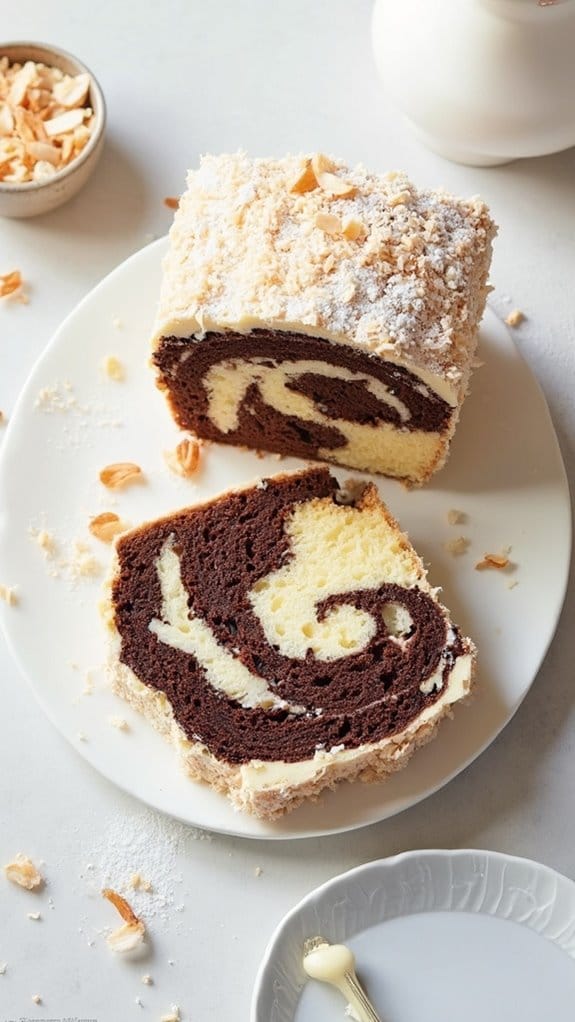
Title: Coconut Cream Marble Cake
Prep Time: 20 minutes
Cook Time: 60 minutes
Number of Servings: 10
Required Equipment List: Mixing bowls, electric mixer, 9×5 inch loaf pan, rubber spatula, oven
Cuisine Type: German
Coconut Cream Marble Cake is a delightful twist on the classic marble cake, combining the rich flavors of coconut and vanilla in a beautifully swirled loaf. The cake’s tender crumb is enhanced by creamy coconut milk and shredded coconut, creating a moist and flavorful dessert that’s perfect for any occasion.
Whether you’re serving it at a birthday party, a family gathering, or enjoying it with a cup of tea, this cake is sure to impress with its delicious taste and appealing appearance. The marbling effect isn’t only visually striking but also allows you to enjoy the distinct flavors of both the coconut and vanilla batters in each slice.
This recipe is straightforward and uses common ingredients, making it accessible for bakers of all skill levels. Once baked, the cake can be dusted with powdered sugar or topped with a simple coconut glaze for an extra touch of sweetness.
Ingredients:
- 1 cup unsalted butter, softened
- 2 cups granulated sugar
- 4 large eggs
- 3 cups all-purpose flour
- 1 tablespoon baking powder
- 1/2 teaspoon salt
- 1 cup coconut milk
- 1 teaspoon vanilla extract
- 1 cup shredded coconut
- 1/4 cup cocoa powder
Instructions:
- Preheat your oven to 350°F (175°C). Grease and flour a 9×5 inch loaf pan to prevent the cake from sticking. This step is essential for achieving a clean release once the cake is baked.
- In a large mixing bowl, cream together the softened butter and granulated sugar using an electric mixer until the mixture is light and fluffy, about 3-4 minutes. This will incorporate air into the batter, giving the cake a lighter texture.
- Add the eggs one at a time, mixing well after each addition. Scrape down the sides of the bowl as needed to confirm all ingredients are well combined. Then, mix in the coconut milk and vanilla extract until smooth.
- In a separate bowl, whisk together the flour, baking powder, and salt. Gradually add the dry ingredients to the wet mixture, mixing until just combined. Be careful not to overmix, as this can lead to a denser cake.
- Divide the batter in half. In one half, fold in the shredded coconut. In the other half, add the cocoa powder and mix until evenly combined. This will create your two distinct batters for marbling.
- Alternately spoon the vanilla coconut batter and the chocolate batter into the prepared loaf pan, starting with the vanilla batter. Use a knife or a skewer to gently swirl the batters together to create a marbled effect.
- Bake in the preheated oven for 55-60 minutes, or until a toothpick inserted into the center comes out clean. If the top is browning too quickly, you can cover it loosely with aluminum foil for the last 15 minutes of baking.
- Once baked, remove the cake from the oven and let it cool in the pan for about 10 minutes before transferring it to a wire rack to cool completely.
Extra Tips: For added coconut flavor, you can toast the shredded coconut before adding it to the batter. This will enhance its natural sweetness and give the cake a richer taste.
If you prefer a more intense chocolate flavor, feel free to increase the amount of cocoa powder to suit your taste. Serve the cake plain, or top it with a light coconut glaze made from powdered sugar, coconut milk, and a splash of vanilla for a delicious finishing touch. Enjoy your Coconut Cream Marble Cake!
Matcha Chocolate Marmorkuchen
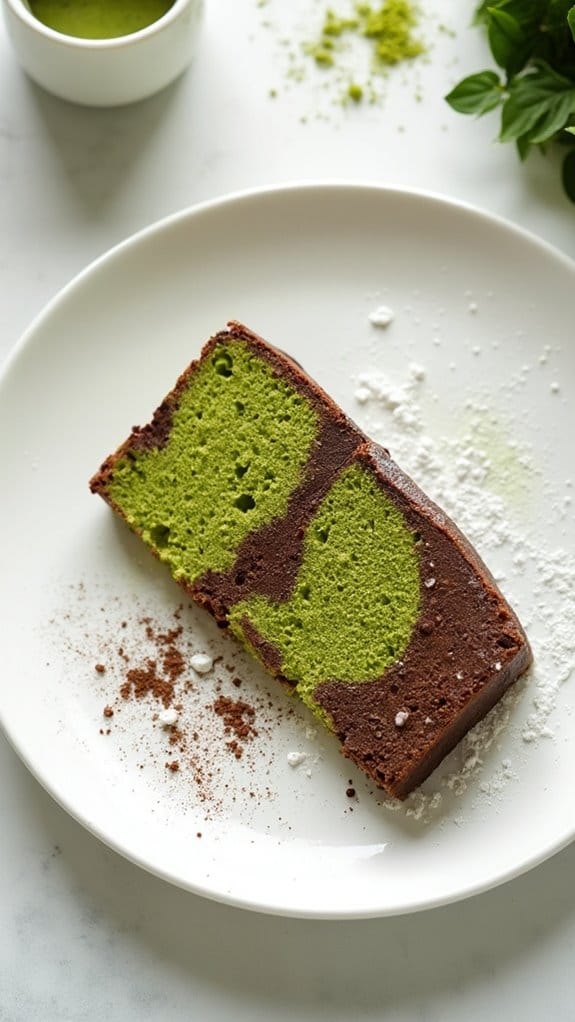
Title: Matcha Chocolate Marmorkuchen
Prep Time: 20 minutes
Cook Time: 50 minutes
Number of Servings: 10
Required Equipment List: Mixing bowls, whisk, loaf pan, measuring cups, measuring spoons, spatula
Cuisine Type: German
Matcha Chocolate Marmorkuchen is a delightful twist on the classic German marble cake, combining the earthy flavors of matcha with rich chocolate. This visually stunning cake not only brings a unique flavor profile but also offers a beautiful contrast of colors.
The combination of soft, fluffy cake and the subtle bitterness of matcha creates a harmonious balance, making it a perfect dessert for any occasion, from afternoon tea to festive gatherings.
The recipe is straightforward, allowing even beginner bakers to create an impressive treat with relative ease. The key to achieving the marble effect lies in the swirling technique, where the matcha and chocolate batters are elegantly combined before baking. Each slice reveals a mesmerizing pattern, making this cake not only a delight to eat but also a feast for the eyes.
Ingredients:
- 1 ¾ cups all-purpose flour
- 1 cup granulated sugar
- ½ cup unsweetened cocoa powder
- 1 tablespoon matcha green tea powder
- 1 teaspoon baking powder
- ½ teaspoon baking soda
- ½ teaspoon salt
- ½ cup unsalted butter, softened
- 3 large eggs
- 1 cup milk
- 1 teaspoon vanilla extract
Instructions:
- Preheat your oven to 350°F (175°C). Grease and flour a loaf pan or line it with parchment paper to facilitate easy removal of the cake after baking.
- In a large mixing bowl, whisk together the flour, baking powder, baking soda, salt, and sugar until well combined. This will be the dry mixture for both the matcha and chocolate batters.
- In a separate bowl, cream the softened butter until light and fluffy. Add the eggs one at a time, mixing well after each addition. Stir in the milk and vanilla extract until fully incorporated.
- Gradually add the wet mixture to the dry ingredients, mixing until just combined. Divide the batter in half into two separate bowls. In one bowl, sift in the cocoa powder and mix well. In the other bowl, add the matcha powder and mix until fully combined.
- Spoon the chocolate batter into the prepared loaf pan, followed by dollops of the matcha batter. Use a knife or skewer to gently swirl the two batters together, creating a marbled effect. Avoid overmixing to maintain the distinct layers.
- Bake in the preheated oven for 45-50 minutes, or until a toothpick inserted into the center comes out clean. Allow the cake to cool in the pan for 10 minutes before transferring it to a wire rack to cool completely.
Extra Tips: For an extra hint of flavor, consider adding a teaspoon of almond extract to the batter. You can also dust the cooled cake with powdered sugar or drizzle a simple icing made from powdered sugar and milk for added sweetness.
Serve slices with a cup of green tea or coffee to enhance the overall experience of this unique dessert. Enjoy your baking adventure!
Red Velvet Marble Cake
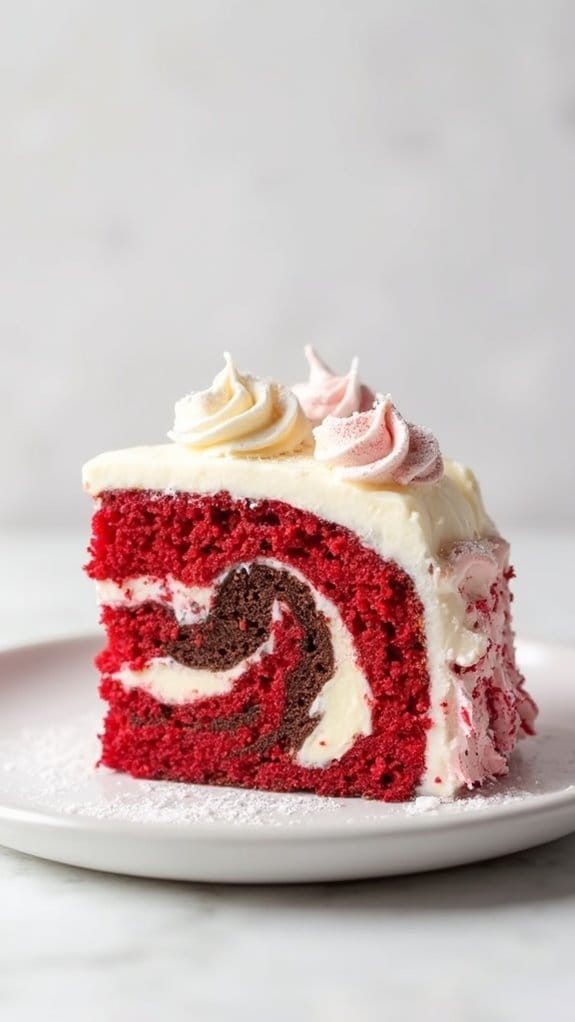
Title: Red Velvet Marble Cake
Prep Time: 20 minutes
Cook Time: 30 minutes
Number of Servings: 12
Required Equipment List: Mixing bowls, electric mixer, measuring cups, measuring spoons, 9×13 inch baking pan, spatula, toothpick
Cuisine Type: Dessert
Red Velvet Marble Cake is an indulgent dessert that combines the classic flavors of red velvet and rich chocolate. This visually stunning cake features swirls of vibrant red and deep chocolate batter, creating a marbled effect that’s both striking and delicious.
Perfect for celebrations or as a sweet treat to share with friends and family, this cake is sure to impress everyone at the table with its unique flavor combination and beautiful presentation. The cake is moist and tender, thanks to the buttermilk and oil in the batter, which also contribute to the cake’s rich, velvety texture.
The cream cheese frosting adds a tangy sweetness that perfectly complements the flavors of the cake. Serve it at birthdays, holidays, or any occasion where you want to add a touch of elegance and decadence to your dessert spread.
Ingredients:
- 2 1/2 cups all-purpose flour
- 1 1/2 cups granulated sugar
- 1 cup vegetable oil
- 1 cup buttermilk, room temperature
- 3 large eggs, room temperature
- 1 tablespoon red food coloring
- 1 teaspoon vanilla extract
- 1 teaspoon baking soda
- 1 teaspoon white vinegar
- 1/2 cup unsweetened cocoa powder
- 1 teaspoon salt
For the Cream Cheese Frosting:
- 8 ounces cream cheese, softened
- 1/2 cup unsalted butter, softened
- 4 cups powdered sugar
- 1 teaspoon vanilla extract
Instructions:
- Preheat your oven to 350°F (175°C) and grease a 9×13 inch baking pan. This guarantees that the cake will come out easily and have a nice shape.
- In a large mixing bowl, combine the flour, sugar, baking soda, and salt. Whisk together until well combined, then set aside.
- In a separate bowl, mix together the oil, buttermilk, eggs, red food coloring, and vanilla extract. Beat with an electric mixer on medium speed until the mixture is smooth and creamy.
- Gradually add the wet ingredients to the dry ingredients, mixing on low speed until just combined. Be careful not to overmix, as this can lead to a denser cake.
- Divide the batter into two bowls. In one bowl, add the cocoa powder and mix until well incorporated, creating the chocolate batter. Leave the other bowl as the red velvet batter.
- Pour alternating spoonfuls of the red velvet and chocolate batter into the prepared baking pan, creating a marbled effect. Use a spatula or knife to gently swirl the two batters together for a beautiful design.
- Bake in the preheated oven for 25-30 minutes, or until a toothpick inserted into the center comes out clean. Allow the cake to cool in the pan for about 10 minutes, then transfer to a wire rack to cool completely.
- While the cake is cooling, prepare the cream cheese frosting by beating the softened cream cheese and butter together in a mixing bowl until smooth. Gradually add the powdered sugar and vanilla extract, mixing until fluffy and creamy.
- Once the cake is completely cool, frost the top with the cream cheese frosting, spreading it evenly. Slice into squares and serve.
Extra Tips: For a deeper red color, you can increase the amount of red food coloring, but be careful not to overpower the other flavors. If you want to make the cake even more festive, consider adding sprinkles or crushed nuts on top of the frosting.
This cake can be stored in the refrigerator for up to a week, and the flavors continue to develop, making it even more delicious over time. Enjoy your delicious Red Velvet Marble Cake!
Strawberry Marble Cheesecake
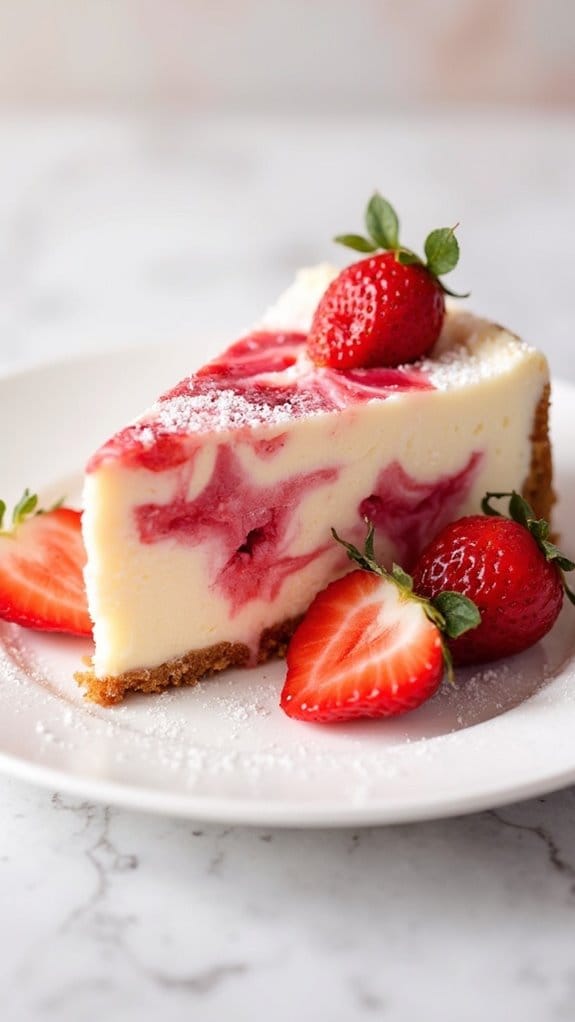
Title: Strawberry Marble Cheesecake
Prep Time: 30 minutes
Cook Time: 60 minutes
Number of Servings: 8
Required Equipment List: Springform pan, mixing bowls, electric mixer, rubber spatula, oven
Cuisine Type: Dessert
This Strawberry Marble Cheesecake is a deliciously decadent dessert that combines the rich creaminess of traditional cheesecake with the fresh, fruity flavor of strawberries. The beautiful marbled effect not only makes it visually appealing but also enhances the flavor, as the sweetness of the strawberries complements the tanginess of the cream cheese.
Perfect for special occasions or just a delightful treat, this cheesecake offers a luxurious experience that’s sure to impress your guests. Making this cheesecake is easier than you might think, as it requires just a few simple ingredients and straightforward steps.
The combination of a buttery graham cracker crust, smooth cream cheese filling, and vibrant strawberry puree creates a harmonious balance that’s both satisfying and invigorating. Serve it chilled, and you’ll have a show-stopping dessert that will have everyone coming back for seconds.
Ingredients:
- 1 ½ cups graham cracker crumbs
- ½ cup unsalted butter, melted
- 2 cups cream cheese, softened
- 1 cup granulated sugar
- 3 large eggs
- 1 teaspoon vanilla extract
- 1 cup fresh strawberries, pureed
- ¼ cup powdered sugar
- 1 tablespoon lemon juice
Instructions:
- Preheat your oven to 325°F (160°C). Prepare a 9-inch springform pan by greasing the sides and bottom with butter or non-stick spray. This will help prevent the cheesecake from sticking.
- In a mixing bowl, combine the graham cracker crumbs and melted butter. Mix until the crumbs are evenly coated. Press the mixture firmly into the bottom of the prepared springform pan to form an even crust. Bake in the preheated oven for about 10 minutes, then remove and let it cool.
- In another large mixing bowl, beat the softened cream cheese with an electric mixer until smooth and creamy. Gradually add the granulated sugar, mixing until well combined. Add the eggs one at a time, mixing on low speed after each addition. Stir in the vanilla extract.
- In a separate bowl, combine the pureed strawberries, powdered sugar, and lemon juice. Mix well to create a smooth strawberry mixture that will be swirled into the cheesecake.
- Pour the cream cheese mixture over the cooled crust in the springform pan. Drop spoonfuls of the strawberry mixture on top of the cheesecake batter, then use a rubber spatula or a knife to gently swirl the two mixtures together for a marbled effect.
- Bake the cheesecake in the oven for 55-60 minutes, or until the center is set but still slightly jiggly. Turn off the oven, crack the oven door, and let the cheesecake cool in the oven for about an hour. This helps prevent cracks from forming.
- After cooling, refrigerate the cheesecake for at least 4 hours or overnight before serving. Carefully remove the sides of the springform pan before slicing and serving.
Extra Tips: To achieve the best flavor, use ripe, fresh strawberries for the puree. If desired, you can also top the cheesecake with additional fresh strawberries or a strawberry sauce for extra presentation.
Make sure to let the cheesecake cool completely before refrigerating, as this will help it set properly. For a twist, consider adding a layer of white chocolate or a hint of almond extract to the cream cheese mixture for added depth. Enjoy your delicious strawberry marble cheesecake!
Peanut Butter Swirl Marmorkuchen
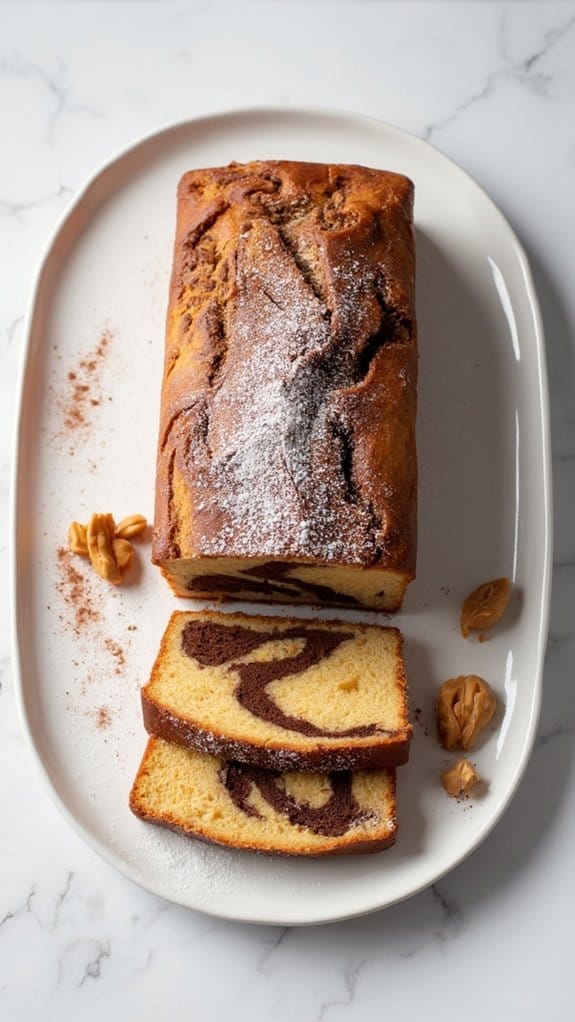
Title: Peanut Butter Swirl Marmorkuchen
Prep Time: 20 minutes
Cook Time: 50 minutes
Number of Servings: 10
Required Equipment List: Mixing bowls, electric mixer, loaf pan, spatula, measuring cups, measuring spoons, oven
Cuisine Type: German
Peanut Butter Swirl Marmorkuchen is a delightful fusion of classic German marble cake and the rich, nutty flavor of peanut butter. This unique twist on a beloved cake is perfect for those who enjoy the combination of chocolate and peanut butter.
The marbled effect not only makes it visually appealing but also allows for a delicious contrast in flavors with every bite. This cake is ideal for afternoon tea, dessert, or simply as a sweet treat to accompany your coffee.
The recipe is surprisingly easy to make, utilizing simple ingredients that most bakers already have on hand. With a moist and tender crumb, the combination of vanilla and cocoa batters creates a beautiful marbled effect when swirled together.
This Peanut Butter Swirl Marmorkuchen is sure to impress your family and friends and become a favorite in your dessert repertoire.
Ingredients:
- 1 3/4 cups all-purpose flour
- 1 cup granulated sugar
- 1/2 cup unsweetened cocoa powder
- 1/2 cup unsalted butter, softened
- 1 cup buttermilk
- 3 large eggs
- 2 teaspoons baking powder
- 1 teaspoon vanilla extract
- 1/2 teaspoon salt
- 1/2 cup creamy peanut butter
Instructions:
- Preheat your oven to 350°F (175°C). Grease and flour a loaf pan to prevent sticking, ensuring an easy release of the cake once baked.
- In a mixing bowl, cream together the softened butter and granulated sugar using an electric mixer until light and fluffy. This should take about 3-5 minutes.
- Add the eggs, one at a time, mixing well after each addition. Then stir in the vanilla extract, ensuring everything is well combined.
- In a separate bowl, whisk together the all-purpose flour, baking powder, cocoa powder, and salt. Gradually add this dry mixture to the wet ingredients, alternating with the buttermilk. Begin and end with the flour mixture, stirring gently until just combined.
- In a small bowl, microwave the peanut butter for about 15-20 seconds until it’s slightly melted and pourable. This will make it easier to swirl into the batter.
- Pour half of the chocolate batter into the prepared loaf pan, followed by dollops of peanut butter. Then pour the remaining chocolate batter on top. Use a knife or spatula to gently swirl the peanut butter into the chocolate batter for a marbled effect.
- Bake the cake in the preheated oven for 45-50 minutes or until a toothpick inserted into the center comes out clean. Allow the cake to cool in the pan for 10 minutes before transferring it to a wire rack to cool completely.
Extra Tips: To enhance the flavor, consider adding a pinch of cinnamon to the batter or topping the finished cake with chocolate ganache or a dusting of powdered sugar.
If you’re a fan of crunchy peanut butter, feel free to substitute it for creamy for added texture. This cake can be stored in an airtight container for several days, making it perfect for meal prep or for enjoying throughout the week.
Marble Cake With Cream Cheese Frosting
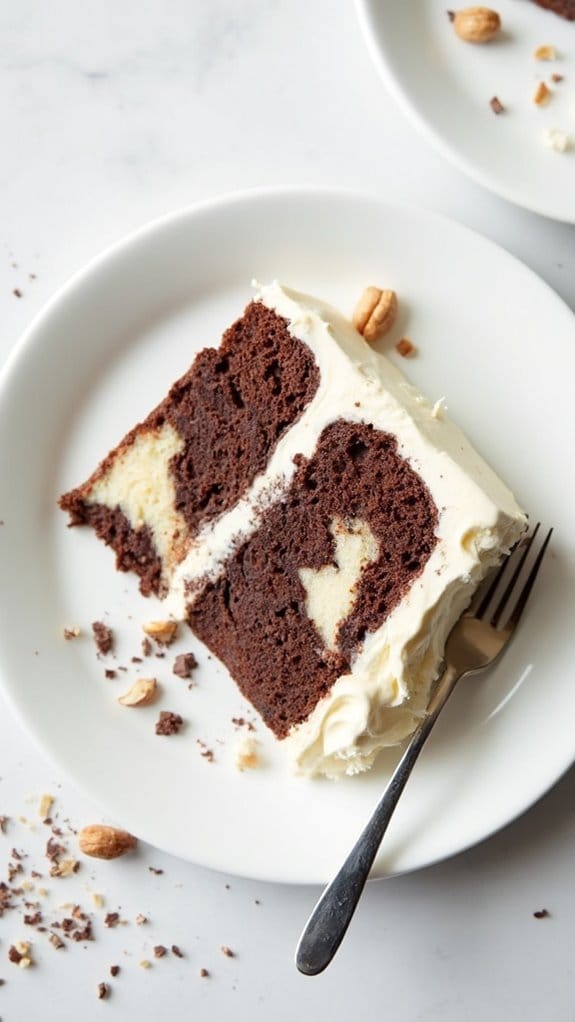
Title: Marble Cake With Cream Cheese Frosting
Prep Time: 20 minutes
Cook Time: 50 minutes
Number of Servings: 12
Required Equipment List: Mixing bowls, electric mixer, loaf pan or bundt pan, spatula, measuring cups and spoons
Cuisine Type: American
Marble Cake with Cream Cheese Frosting is a delightful dessert that combines the rich flavors of chocolate and vanilla in a beautifully swirled cake. This recipe creates a moist and fluffy cake that’s perfect for any occasion, whether it’s a family gathering, a birthday celebration, or simply a treat for yourself.
The cream cheese frosting adds a tangy sweetness that perfectly complements the cake’s rich flavors, making it an irresistible dessert that everyone will love. This cake isn’t only visually appealing with its beautiful marbled pattern but also incredibly simple to make.
By creating a batter that’s divided and flavored with cocoa powder, you can easily create that signature marbled effect. With just a few basic ingredients and some easy mixing techniques, you can whip up this delicious Marble Cake and impress friends and family with your baking skills.
Ingredients:
- 2 cups all-purpose flour
- 1 ½ cups granulated sugar
- ½ cup unsalted butter, softened
- 1 cup milk
- 3 ½ teaspoons baking powder
- 1 teaspoon vanilla extract
- ½ teaspoon salt
- 2 large eggs
- ½ cup unsweetened cocoa powder
- 8 ounces cream cheese, softened
- 4 cups powdered sugar
- 2 tablespoons milk (for frosting)
- 1 teaspoon vanilla extract (for frosting)
Instructions:
- Preheat your oven to 350°F (175°C). Grease and flour a loaf pan or bundt pan to guarantee easy removal of the cake once baked. Set aside.
- In a large mixing bowl, cream together the softened butter and granulated sugar until light and fluffy. Add the eggs one at a time, mixing well after each addition, then stir in the vanilla extract.
- In a separate bowl, whisk together the flour, baking powder, and salt. Gradually add this dry mixture to the creamed mixture, alternating with the milk. Mix until just combined and smooth.
- Divide the batter in half. In one half, stir in the cocoa powder until fully incorporated. You should have one vanilla batter and one chocolate batter.
- Begin layering the batters in the prepared pan by spooning in alternate dollops of vanilla and chocolate batter. Use a knife or a skewer to gently swirl the batters together to create a marbled effect.
- Bake in the preheated oven for 45-50 minutes, or until a toothpick inserted into the center comes out clean. Once baked, remove the cake from the oven and let it cool in the pan for about 10 minutes before transferring it to a wire rack to cool completely.
- While the cake is cooling, prepare the cream cheese frosting. In a mixing bowl, beat the softened cream cheese until smooth. Gradually add in the powdered sugar, milk, and vanilla extract, mixing until the frosting is creamy and spreadable.
- Once the cake has cooled completely, spread the cream cheese frosting generously over the top. Slice and serve your delicious Marble Cake!
Extra Tips: To enhance the flavor of your Marble Cake, consider adding a tablespoon of espresso powder to the chocolate batter for a richer chocolate taste.
Make sure your ingredients are at room temperature before starting, as this helps achieve a smoother batter. For an added touch, sprinkle some chocolate shavings or crushed nuts on top of the frosting for a decorative finish. Enjoy your baking experience!
Funfetti Marble Cake
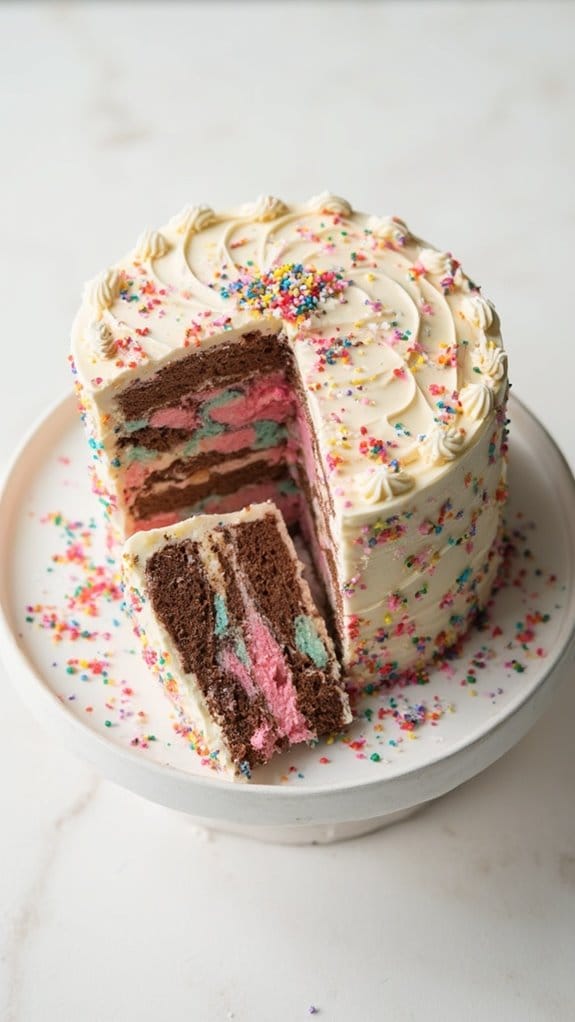
Title: Funfetti Marble Cake
Prep Time: 20 minutes
Cook Time: 50 minutes
Number of Servings: 12
Required Equipment List: Mixing bowls, electric mixer, rubber spatula, 9×13 inch baking pan, oven
Cuisine Type: Dessert
This Funfetti Marble Cake is a delightful twist on the classic marble cake, combining the rich flavors of vanilla and chocolate with colorful sprinkles that bring joy to any occasion. Perfect for birthdays, celebrations, or just a sweet treat, this cake isn’t only visually appealing but also incredibly delicious.
The combination of chocolate and vanilla batters creates a beautiful marbled effect, while the sprinkles add a festive touch that makes each slice a surprise. The beauty of this cake lies in its simplicity. With just a handful of ingredients, it’s easy to whip up and bake without requiring advanced baking skills.
The moist and fluffy texture pairs wonderfully with a simple frosting or can be enjoyed on its own. Whether you’re baking for a party or just to satisfy a sweet tooth, this Funfetti Marble Cake is sure to be a hit with kids and adults alike.
Ingredients:
- 2 cups all-purpose flour
- 1 ½ cups granulated sugar
- ½ cup unsalted butter, softened
- 1 cup whole milk
- 3 large eggs
- 1 tablespoon baking powder
- 1 teaspoon vanilla extract
- ½ cup cocoa powder
- ½ cup rainbow sprinkles
- Pinch of salt
Instructions:
- Preheat your oven to 350°F (175°C). Grease and flour a 9×13 inch baking pan to prevent the cake from sticking once baked.
- In a large mixing bowl, cream together the softened butter and granulated sugar using an electric mixer until the mixture is light and fluffy. This should take about 3-5 minutes.
- Add the eggs to the butter mixture one at a time, mixing well after each addition. Then, add the vanilla extract and continue to mix until fully combined.
- In a separate bowl, whisk together the flour, baking powder, and salt. Gradually add this dry mixture to the wet mixture, alternating with the milk, starting and ending with the flour mixture. Mix until just combined, being careful not to overmix.
- Divide the batter evenly into two bowls. In one bowl, sift in the cocoa powder and gently fold until combined. Leave the other bowl as is. Stir in the rainbow sprinkles into the vanilla batter.
- Using a rubber spatula, alternate spooning the chocolate and vanilla batters into the prepared pan, creating a marbled effect by swirling a knife through the batter gently.
- Bake in the preheated oven for 45-50 minutes or until a toothpick inserted into the center comes out clean. Allow the cake to cool in the pan for about 10 minutes before transferring it to a wire rack to cool completely.
Extra Tips: For an extra flavor boost, consider adding a teaspoon of almond extract to the vanilla batter. You can also top the cooled cake with a simple buttercream frosting or whipped cream, and more sprinkles for a festive look.
If you have leftovers, store the cake in an airtight container at room temperature for up to three days or in the refrigerator for up to a week. Enjoy this delightful treat any time!
Conclusion
So, ready to impress your friends and family with these delicious marmorkuchen recipes? Whether you’re craving classic flavors or adventurous twists, there’s a marble cake here for everyone. You’ll create sweet memories, enjoy delightful bites, and share smiles over each slice. Why not whip one up this weekend? After all, who wouldn’t want a slice of happiness? Immerse yourself in these recipes, spark your creativity, and let your kitchen become a haven for flavor and fun!

