No products in the cart.
15 Fall Potluck Recipes To Please A Crowd
Fall potlucks are all about cozy flavors that bring people together, right? You’ll love dishes like hearty pumpkin chili, savory apple and sausage stuffing, and cheesy broccoli and rice casserole. Don’t forget the creamy spinach and artichoke dip for a crowd-pleasing appetizer! Warm cinnamon roll casserole and pumpkin spice muffins make perfect sweet endings to your meal. With such a delicious array of recipes, everyone will leave happy and full. So, are you ready to impress your friends and family? Keep going to discover all 15 tasty options that will make your potluck unforgettable!
Contents
hide
Hearty Pumpkin Chili
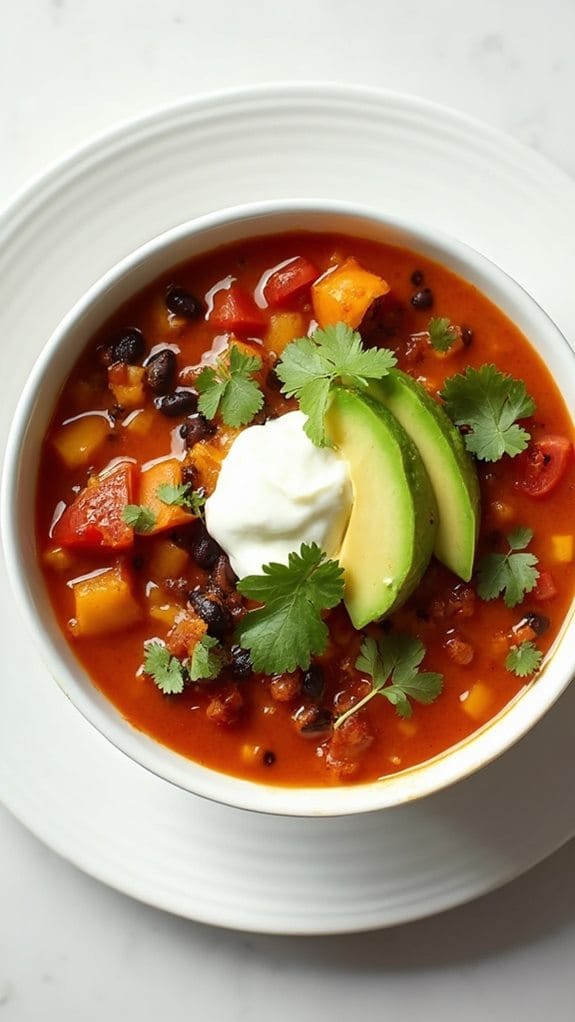
Title: Hearty Pumpkin Chili
Prep Time: 15 minutes
Cook Time: 45 minutes
Number of Servings: 6
Required Equipment List: Large pot, stirring spoon, knife, cutting board, measuring cups, measuring spoons
Cuisine Type: American
This Hearty Pumpkin Chili is a warm and comforting dish that combines the rich flavors of pumpkin with the savory elements of traditional chili. Perfect for chilly fall evenings, this dish is packed with nutritious ingredients including beans, tomatoes, and spices, making it a satisfying option for vegetarians and meat-eaters alike.
The addition of pumpkin not only enhances the flavor profile but also adds a creamy texture that makes this chili uniquely delicious. With its vibrant colors and hearty ingredients, this chili isn’t only a feast for the taste buds but also visually appealing.
It’s an excellent choice for potlucks and gatherings, where it can be served with a variety of toppings such as avocado, cheese, or sour cream. This recipe is easy to customize based on your spice preference, guaranteeing that everyone can enjoy a bowl of this delightful fall dish.
Ingredients:
- 2 tablespoons olive oil
- 1 onion, diced
- 3 cloves garlic, minced
- 1 bell pepper, diced
- 2 cans (15 oz each) black beans, rinsed and drained
- 1 can (15 oz) pumpkin puree
- 1 can (28 oz) diced tomatoes
- 1 cup vegetable broth
- 2 tablespoons chili powder
- 1 teaspoon cumin
- 1 teaspoon smoked paprika
- Salt and pepper to taste
- Optional toppings: avocado, shredded cheese, sour cream, fresh cilantro
Instructions:
- In a large pot, heat the olive oil over medium heat. Add the diced onion and cook until it becomes translucent, about 5 minutes. Stir occasionally to prevent burning.
- Add the minced garlic and diced bell pepper to the pot, cooking for an additional 3-4 minutes until the bell pepper has softened. This will create a flavorful base for your chili.
- Stir in the black beans, pumpkin puree, diced tomatoes (with their juices), and vegetable broth. Mix well to combine all the ingredients thoroughly.
- Add the chili powder, cumin, smoked paprika, and season with salt and pepper to taste. Stir again to confirm the spices are evenly distributed throughout the chili.
- Bring the mixture to a boil, then reduce the heat to low. Cover the pot and let it simmer for about 30 minutes, stirring occasionally, to allow the flavors to meld together.
- After simmering, taste the chili and adjust seasoning as desired. Serve hot with your choice of toppings for added flavor and texture.
Extra Tips: For an extra kick, consider adding a chopped jalapeño or a pinch of cayenne pepper to the chili while it simmers. If you prefer a thicker chili, you can let it simmer uncovered for the last 10-15 minutes.
This chili also stores well, making it perfect for meal prep or leftovers, and it can easily be frozen for future enjoyment. Enjoy your hearty creation!
Savory Apple and Sausage Stuffing
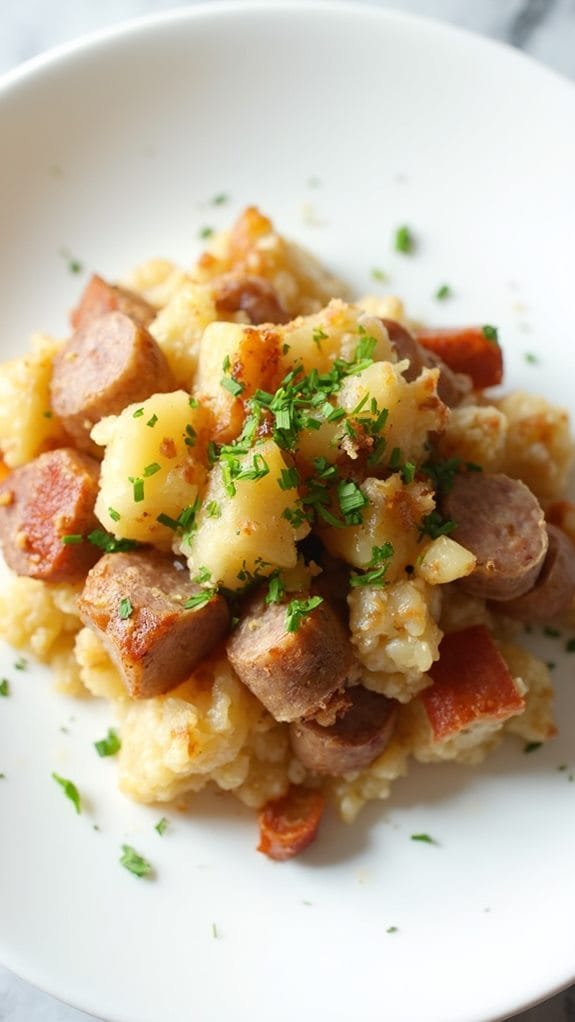
Title: Savory Apple and Sausage Stuffing
Prep Time: 15 minutes
Cook Time: 30 minutes
Number of Servings: 8
Required Equipment List: Large skillet, mixing bowl, baking dish, wooden spoon, oven
Cuisine Type: American
Savory Apple and Sausage Stuffing is a delicious and hearty dish that perfectly captures the essence of fall. The combination of savory sausage, sweet apples, and aromatic herbs creates a flavorful stuffing that’s ideal for Thanksgiving or any festive gathering.
This recipe balances the richness of the sausage with the natural sweetness of the apples, making it a crowd-pleaser that complements turkey, chicken, or can even stand alone as a vegetarian option when made without meat.
This stuffing is incredibly versatile, as you can easily customize it with your favorite bread type, additional vegetables, or different herbs to suit your taste. It comes together quickly and bakes beautifully in the oven, resulting in a golden, crispy topping and a moist, flavorful interior.
Serve it as a side dish during your holiday meals or as a comforting addition to any family dinner.
Ingredients:
- 1 pound Italian sausage, casings removed
- 1 medium onion, chopped
- 2 stalks celery, chopped
- 2 cups apples, peeled and diced
- 1 teaspoon dried sage
- 1 teaspoon dried thyme
- 1 teaspoon salt
- 1/2 teaspoon black pepper
- 8 cups cubed bread (preferably day-old)
- 2 cups chicken broth
- 1/4 cup fresh parsley, chopped
Instructions:
- In a large skillet, cook the Italian sausage over medium heat until browned and cooked through, breaking it apart with a wooden spoon as it cooks. Once browned, remove the sausage from the skillet and set aside, leaving any rendered fat in the pan.
- In the same skillet, add the chopped onion and celery. Sauté for about 5 minutes, until the vegetables are soft and translucent. Then, add the diced apples and cook for an additional 3-4 minutes until the apples begin to soften.
- Stir in the dried sage, thyme, salt, and black pepper, and then return the cooked sausage to the skillet. Mix well to combine all the ingredients, allowing the flavors to meld together for about 2 minutes.
- In a large mixing bowl, combine the cubed bread and the sausage-apple mixture. Slowly pour in the chicken broth, mixing gently until the bread is well-coated and absorbs the liquid. If the mixture seems dry, add a bit more broth.
- Preheat your oven to 350°F (175°C). Transfer the stuffing mixture into a greased baking dish and cover it with aluminum foil. Bake for 25 minutes, then remove the foil and bake for an additional 5-10 minutes until the top is golden brown and crispy.
- Remove the stuffing from the oven and sprinkle with fresh parsley before serving. Allow it to cool for a few minutes before digging in to let the flavors settle.
Extra Tips: For added texture and flavor, consider mixing in some chopped walnuts or pecans into the stuffing before baking. You can also substitute the apples for pears or dried fruits like cranberries for a different twist.
If you prefer a more herbal flavor, fresh herbs can be used instead of dried, but you may need to adjust the quantities as fresh herbs tend to be more potent. Enjoy this delightful stuffing as part of your fall festivities!
Creamy Spinach and Artichoke Dip

Title: Creamy Spinach and Artichoke Dip
Prep Time: 15 minutes
Cook Time: 25 minutes
Number of Servings: 8
Required Equipment List: Mixing bowl, baking dish, oven, spatula
Cuisine Type: American
Creamy Spinach and Artichoke Dip is a classic appetizer that never fails to impress at gatherings and potlucks. This rich and cheesy dip combines tender artichoke hearts with fresh spinach, all enveloped in a luscious cream cheese and sour cream mixture. Baked until bubbly and golden, this dish is perfect for dipping with crispy bread, tortilla chips, or fresh vegetables.
It’s a crowd-pleaser that brings a touch of comfort and indulgence to any occasion. This recipe isn’t only simple to prepare but also incredibly versatile. You can easily adjust the ingredients to suit your preferences, whether by adding more cheese for extra creaminess or incorporating spices for a kick of flavor. Serve it warm straight from the oven, and watch as your guests gather around to enjoy this delicious and comforting dip.
Ingredients:
- 1 cup frozen spinach, thawed and drained
- 1 can (14 ounces) artichoke hearts, drained and chopped
- 1 cup cream cheese, softened
- 1/2 cup sour cream
- 1/2 cup mayonnaise
- 1 cup shredded mozzarella cheese
- 1/2 cup grated Parmesan cheese
- 2 cloves garlic, minced
- Salt and pepper to taste
- Tortilla chips or sliced baguette (for serving)
Instructions:
- Preheat your oven to 350°F (175°C). This temperature allows the dip to bake evenly and become bubbly without burning.
- In a mixing bowl, combine the softened cream cheese, sour cream, and mayonnaise. Use a spatula to blend everything until smooth and creamy, ensuring there are no lumps.
- Stir in the thawed spinach, chopped artichoke hearts, minced garlic, mozzarella cheese, and half of the grated Parmesan cheese. Season with salt and pepper to taste, mixing everything well until fully combined.
- Transfer the mixture to a baking dish and spread it out evenly. Sprinkle the remaining Parmesan cheese on top for a nice golden crust when baked.
- Bake in the preheated oven for 20-25 minutes or until the dip is hot, bubbly, and lightly golden on top. Keep an eye on it to prevent over-browning.
- Remove the dip from the oven and let it cool slightly before serving. Pair it with tortilla chips, sliced baguette, or fresh veggies for dipping.
Extra Tips: To make the dip even creamier, consider adding some shredded cheddar cheese or cream cheese to the mix. For a little extra flavor, you can include a pinch of red pepper flakes or a dash of hot sauce.
If you’re short on time, using canned spinach can be a convenient substitute, just be sure to drain it well. This dip can also be prepared ahead of time and stored in the refrigerator until you’re ready to bake it, making it a great option for busy hosts. Enjoy this delicious dip at your next gathering!
Maple Roasted Brussels Sprouts
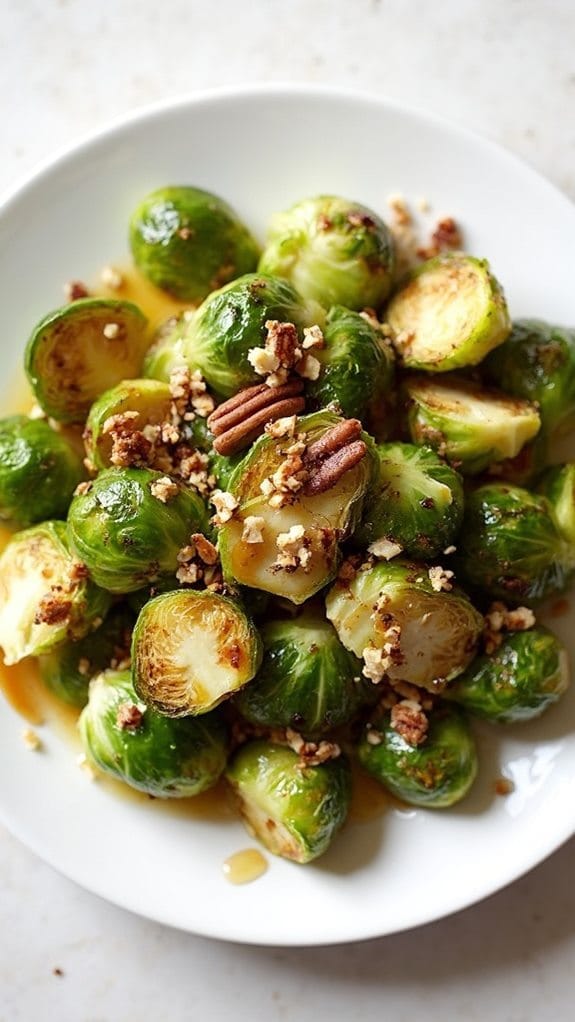
Title: Maple Roasted Brussels Sprouts
Prep Time: 10 minutes
Cook Time: 25 minutes
Number of Servings: 4
Required Equipment List: Baking sheet, parchment paper, mixing bowl, spatula
Cuisine Type: American
Maple Roasted Brussels Sprouts are a delicious side dish that brings together the earthy flavors of Brussels sprouts with the sweetness of maple syrup. This dish is perfect for fall gatherings, holiday dinners, or simply as a tasty addition to your weeknight meals.
The roasting process caramelizes the Brussels sprouts, enhancing their natural flavor while the maple syrup adds a delightful sweetness that balances the slight bitterness of the vegetable.
This recipe isn’t only easy to prepare but also requires minimal ingredients, allowing the Brussels sprouts to shine. Tossed in olive oil, salt, and a generous drizzle of maple syrup, these sprouts are roasted to perfection until they’re crispy on the outside and tender on the inside.
Whether served alongside roasted meats or as part of a vegetarian feast, Maple Roasted Brussels Sprouts are sure to become a favorite dish on your table.
Ingredients:
- 1 pound Brussels sprouts, trimmed and halved
- 2 tablespoons olive oil
- 2 tablespoons pure maple syrup
- Salt and pepper to taste
- 1/4 teaspoon garlic powder (optional)
- 1/4 cup chopped pecans or walnuts (optional)
Instructions:
- Preheat your oven to 400°F (200°C) and line a baking sheet with parchment paper. This will prevent the Brussels sprouts from sticking and make for easy cleanup.
- In a mixing bowl, combine the halved Brussels sprouts with olive oil, maple syrup, salt, pepper, and garlic powder if using. Toss everything together until the sprouts are evenly coated with the mixture.
- Spread the Brussels sprouts in a single layer on the prepared baking sheet, ensuring they aren’t overcrowded. This allows them to roast evenly and develop a nice caramelization.
- Roast in the preheated oven for about 20-25 minutes, stirring once halfway through cooking. The sprouts should be golden brown and crispy on the edges when done.
- If desired, sprinkle the chopped nuts over the Brussels sprouts during the last 5 minutes of roasting to add a delightful crunch.
- Once roasted, remove the baking sheet from the oven and let the Brussels sprouts cool slightly before serving. Drizzle with a little extra maple syrup if desired for added sweetness.
Extra Tips: For an extra layer of flavor, consider adding a splash of balsamic vinegar before roasting or a sprinkle of Parmesan cheese after they come out of the oven.
Feel free to customize this recipe by adding other vegetables, such as carrots or sweet potatoes, for a colorful medley. These roasted Brussels sprouts can also be made ahead of time and reheated in the oven just before serving for a stress-free addition to your meal. Enjoy!
Cheesy Broccoli and Rice Casserole

Title: Cheesy Broccoli and Rice Casserole
Prep Time: 15 minutes
Cook Time: 30 minutes
Number of Servings: 6
Required Equipment List: 9×13 inch baking dish, medium saucepan, mixing bowl, spoon, oven
Cuisine Type: American
Cheesy Broccoli and Rice Casserole is a comforting dish that combines tender broccoli florets with fluffy rice and a rich, creamy cheese sauce. This hearty casserole is perfect for potlucks, family dinners, or as a side dish for any occasion.
The combination of cheese and broccoli not only makes it delicious but also adds a vibrant pop of color to your meal, making it visually appealing as well. This dish is a favorite among both kids and adults alike, guaranteeing that it will be a hit at your next gathering.
What makes this casserole so special is how simple it’s to prepare. With just a few ingredients and minimal prep time, you can have a dish that feels indulgent and satisfying. It can even be made ahead of time and baked just before serving, making it a great option for busy days.
Whether served as a main course or a side, this Cheesy Broccoli and Rice Casserole is sure to please everyone at the table.
Ingredients:
- 2 cups cooked rice
- 2 cups fresh broccoli florets
- 1 can (10.5 ounces) cream of mushroom soup
- 1 cup shredded cheddar cheese
- 1/2 cup milk
- 1/4 teaspoon garlic powder
- Salt and pepper to taste
- 1/2 cup breadcrumbs (optional)
- 2 tablespoons butter (for greasing the dish)
Instructions:
- Preheat your oven to 350°F (175°C). Grease a 9×13 inch baking dish with butter to prevent sticking and facilitate easy serving.
- In a medium saucepan, bring water to a boil and blanch the broccoli florets for about 2 minutes. Drain and set aside to cool slightly. This step helps to maintain the bright green color and crisp-tender texture of the broccoli.
- In a mixing bowl, combine the cooked rice, cream of mushroom soup, milk, garlic powder, salt, and pepper. Stir until well mixed. Add the blanched broccoli and half of the shredded cheddar cheese, mixing until everything is evenly incorporated.
- Pour the rice and broccoli mixture into the prepared baking dish, spreading it evenly. Top with the remaining cheddar cheese and, if desired, sprinkle breadcrumbs on top for added crunch.
- Bake in the preheated oven for 25-30 minutes, or until the cheese is bubbly and golden brown. If you like a crispier top, you can broil it for an additional 2-3 minutes, keeping a close eye to prevent burning.
- Once cooked, remove the casserole from the oven and let it cool for a few minutes before serving. This will allow the flavors to meld together and make it easier to serve.
Extra Tips: For added flavor, consider mixing in some cooked chicken or sausage to make this casserole a more complete meal. You can also substitute the cream of mushroom soup with cream of chicken or a homemade cheese sauce for a different taste.
Feel free to experiment by adding other vegetables such as carrots or bell peppers to increase the nutritional value and flavor variety.
Classic Butternut Squash Soup
Title: Classic Butternut Squash Soup
Prep Time: 15 minutes
Cook Time: 30 minutes
Number of Servings: 6
Required Equipment List: Large pot, blender or immersion blender, cutting board, knife, measuring cups, wooden spoon
Cuisine Type: American
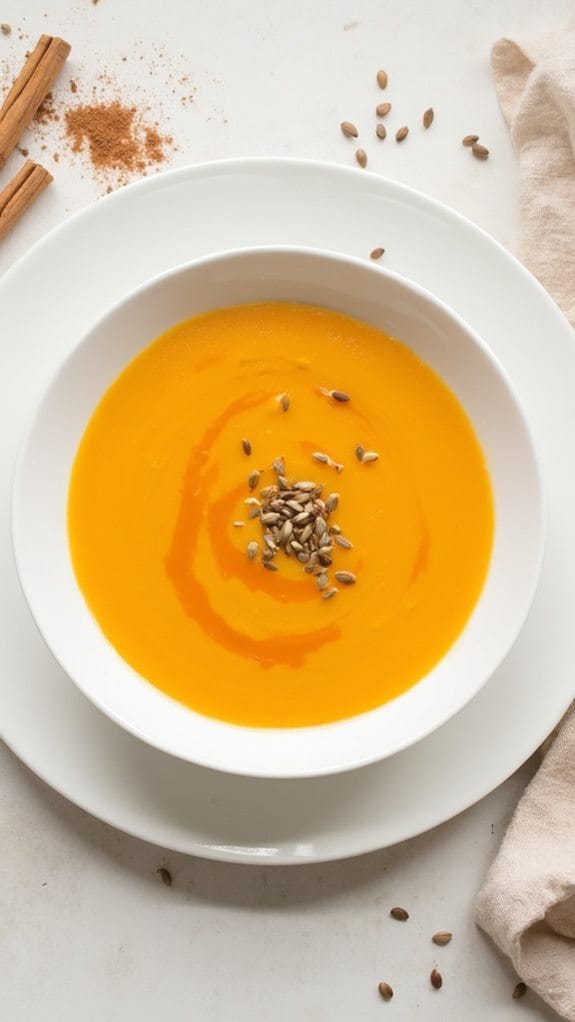
Classic Butternut Squash Soup is a warm, comforting dish that embodies the flavors of fall. This creamy soup is made from roasted butternut squash, which adds natural sweetness and a vibrant orange hue. The addition of onion, garlic, and warm spices such as nutmeg and cinnamon creates a rich depth of flavor that warms the soul.
It’s perfect for cozy dinners and can be served as a starter or a main course, especially when paired with crusty bread. This recipe isn’t only delicious but also simple to prepare. Roasting the squash enhances its sweetness, while blending the ingredients together results in a silky smooth texture.
This soup can easily be made ahead of time and reheated, making it an excellent choice for meal prep. Top with a drizzle of olive oil or a sprinkle of pumpkin seeds for added texture and flavor, and you have a dish that’s sure to impress family and friends.
Ingredients:
- 1 medium butternut squash, peeled and cubed
- 1 onion, chopped
- 2 cloves garlic, minced
- 4 cups vegetable broth
- 1 teaspoon ground nutmeg
- 1 teaspoon ground cinnamon
- Salt and pepper to taste
- 2 tablespoons olive oil
- Optional: pumpkin seeds or cream for garnish
Instructions:
- Preheat your oven to 400°F (200°C). Spread the cubed butternut squash on a baking sheet and drizzle with olive oil. Season with salt and pepper, then toss to coat evenly. Roast in the oven for about 25 minutes, or until the squash is tender and lightly caramelized.
- In a large pot, heat a tablespoon of olive oil over medium heat. Add the chopped onion and sauté until it becomes translucent, about 5 minutes. Add the minced garlic and cook for an additional minute, stirring frequently to prevent burning.
- Once the squash is done roasting, add it to the pot with the sautéed onions and garlic. Pour in the vegetable broth and stir in the ground nutmeg and cinnamon. Bring the mixture to a simmer and cook for about 5-10 minutes to allow the flavors to meld together.
- Using an immersion blender, puree the soup until smooth. If you don’t have an immersion blender, carefully transfer the soup to a blender in batches and blend until creamy. Return the soup to the pot and adjust seasoning with additional salt and pepper if desired.
- Serve the soup warm, garnished with pumpkin seeds or a drizzle of cream for an extra touch. Enjoy with crusty bread or a side salad for a complete meal.
Extra Tips: For added complexity, consider incorporating a splash of apple cider or a hint of ginger to the soup for a different flavor profile. If you prefer a spicier kick, a pinch of cayenne pepper can also be added.
This soup freezes well, so you can make a large batch and store leftovers in individual portions for an easy meal later on.
Sweet Potato Casserole With Marshmallows
Title: Sweet Potato Casserole With Marshmallows
Prep Time: 20 minutes
Cook Time: 30 minutes
Number of Servings: 8
Required Equipment List: 9×13 inch baking dish, mixing bowl, whisk, oven
Cuisine Type: American
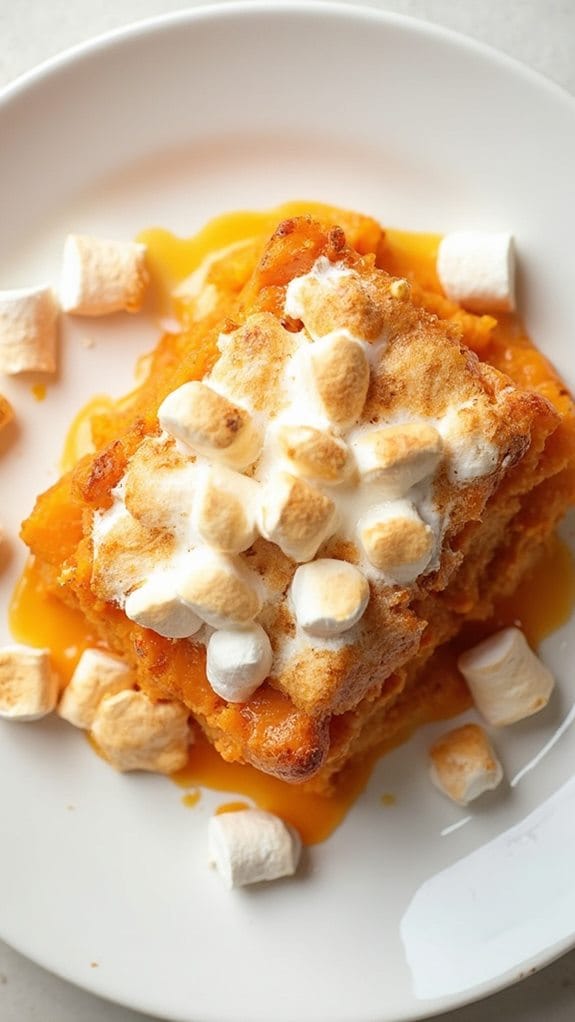
Sweet Potato Casserole with Marshmallows is a classic fall dish that combines the natural sweetness of sweet potatoes with a creamy, buttery topping, making it the perfect side for holiday feasts or potlucks. The dish is typically baked until golden and bubbly, creating a delightful contrast between the smooth, rich sweet potato base and the fluffy, toasted marshmallows that crown the casserole.
This comforting recipe is sure to be a crowd-pleaser, bringing warmth and nostalgia to your dining table. This casserole isn’t only delicious but also easy to prepare, allowing you to spend more time with your loved ones and less time in the kitchen. The harmonious blend of flavors and textures makes it a versatile dish that pairs beautifully with turkey, ham, or any main course.
Whether you’re serving it at Thanksgiving or just on a cozy autumn evening, this Sweet Potato Casserole will surely delight everyone at the table.
Ingredients:
- 4 cups mashed sweet potatoes (about 4 large sweet potatoes)
- 1/2 cup granulated sugar
- 1/2 cup milk
- 1/3 cup unsalted butter, melted
- 2 large eggs
- 1 teaspoon vanilla extract
- 1/2 teaspoon ground cinnamon
- 1/4 teaspoon salt
- 2 cups mini marshmallows
Instructions:
- Preheat your oven to 350°F (175°C). Peel and boil the sweet potatoes in a large pot until tender, about 15-20 minutes. Drain and allow them to cool slightly before mashing until smooth.
- In a mixing bowl, combine the mashed sweet potatoes, granulated sugar, milk, melted butter, eggs, vanilla extract, ground cinnamon, and salt. Whisk the ingredients together until well combined and smooth.
- Pour the sweet potato mixture into a greased 9×13 inch baking dish, spreading it evenly. This will be the base for your casserole.
- Bake the sweet potato mixture in the preheated oven for 25 minutes, allowing it to set and develop flavor.
- After 25 minutes, remove the casserole from the oven and carefully sprinkle the mini marshmallows evenly over the top. Return the casserole to the oven and bake for an additional 5-10 minutes, or until the marshmallows are golden brown and toasted.
- Once baked, remove the casserole from the oven and let it cool slightly before serving. This will allow the flavors to meld and make it easier to scoop out portions.
Extra Tips: To elevate the flavor of your sweet potato casserole, consider adding a pinch of nutmeg or some chopped pecans for a delightful crunch. If you prefer a less sweet dish, you can reduce the amount of sugar or even substitute it with maple syrup for a different flavor profile.
This casserole can be prepared ahead of time and stored in the refrigerator, then simply bake it before serving for a convenient option during busy holiday gatherings. Enjoy your delicious creation!
Fall Harvest Salad
Title: Fall Harvest Salad
Prep Time: 15 minutes
Cook Time: 0 minutes
Number of Servings: 6
Required Equipment List: Large mixing bowl, whisk, cutting board, knife
Cuisine Type: American
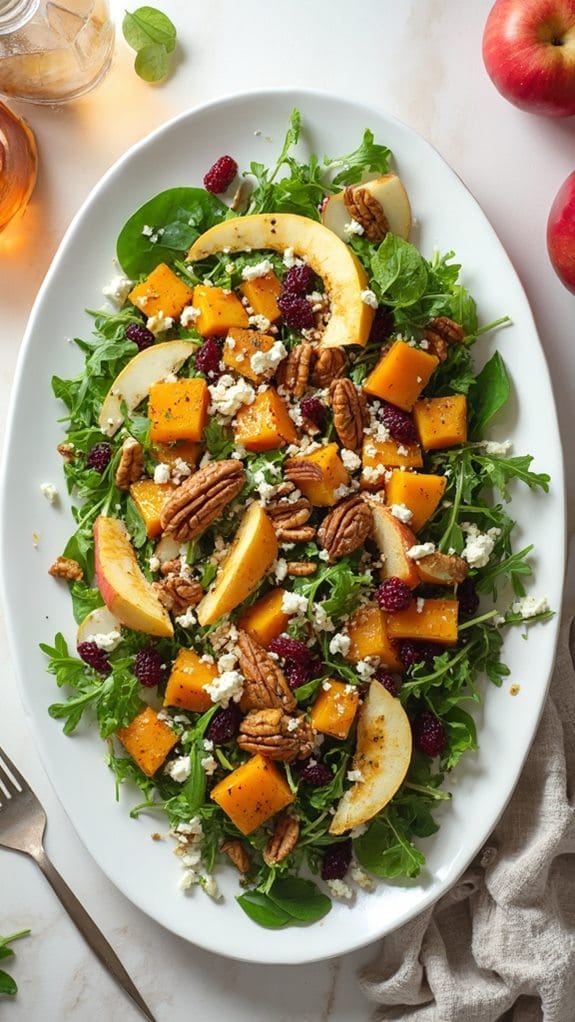
The Fall Harvest Salad is a vibrant and hearty dish that celebrates the flavors of autumn. This salad combines a medley of seasonal ingredients such as crisp apples, sweet pears, and roasted butternut squash, all tossed with peppery arugula and crunchy pecans. Topped with a tangy homemade vinaigrette, this salad is perfect as a side dish for any fall gathering or as a light main course.
Its colorful presentation and diverse textures make it not only delicious but also visually appealing. This recipe is incredibly versatile and allows for substitutions based on personal preferences or seasonal availability. Incorporating ingredients like feta cheese or pomegranate seeds can add an extra layer of flavor and a pop of color.
Whether served at Thanksgiving, a potluck, or a casual dinner, the Fall Harvest Salad is sure to impress your guests with its fresh and wholesome ingredients.
Ingredients:
- 4 cups arugula
- 1 medium butternut squash, peeled and cubed
- 1 apple, thinly sliced
- 1 pear, thinly sliced
- 1/2 cup pecans, toasted
- 1/4 cup dried cranberries
- 1/4 cup feta cheese, crumbled (optional)
- 3 tablespoons olive oil
- 2 tablespoons apple cider vinegar
- 1 teaspoon Dijon mustard
- Salt and pepper to taste
Instructions:
- Preheat your oven to 400°F (200°C). Spread the cubed butternut squash on a baking sheet lined with parchment paper. Drizzle with olive oil and sprinkle with salt and pepper. Roast in the oven for about 20 minutes, or until tender and lightly caramelized. Remove from the oven and let cool slightly.
- While the squash is roasting, prepare the dressing by whisking together olive oil, apple cider vinegar, Dijon mustard, salt, and pepper in a small bowl. Adjust seasoning to taste and set aside.
- In a large mixing bowl, combine the arugula, roasted butternut squash, sliced apple, sliced pear, toasted pecans, dried cranberries, and feta cheese if using. Gently toss to combine all the ingredients.
- Drizzle the prepared dressing over the salad and toss gently to coat all the ingredients evenly. Be careful not to bruise the fruit.
- Serve the salad immediately as a side dish or light main course, garnished with additional pecans or feta if desired.
Extra Tips: For an added crunch, consider roasting the pecans with a sprinkle of cinnamon and sugar for a sweet twist. You can also substitute the arugula with spinach or mixed greens depending on your preference.
If you want to prepare this salad ahead of time, keep the dressing separate until just before serving to maintain the freshness of the greens. This salad pairs wonderfully with grilled chicken or a warm crusty bread for a complete meal. Enjoy your culinary creation!
Cranberry Orange Relish
Title: Cranberry Orange Relish
Prep Time: 15 minutes
Cook Time: 0 minutes
Number of Servings: 8
Required Equipment List: Mixing bowl, spoon, food processor (optional)
Cuisine Type: American
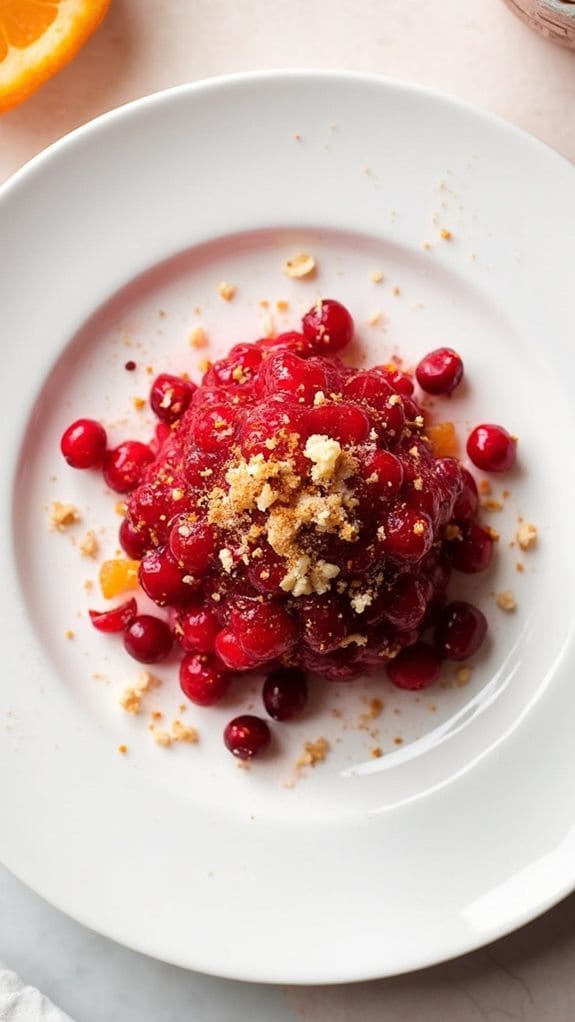
Cranberry Orange Relish is a revitalizing and tangy condiment that brings a burst of flavor to your holiday meals. This simple and quick recipe highlights the natural tartness of fresh cranberries, complemented by the bright citrus notes of orange.
Unlike traditional cooked cranberry sauces, this relish is served raw, preserving the vibrant color and crisp texture of the cranberries, making it a delightful addition to turkey, ham, or even as a topping for desserts.
Perfect for potlucks and festive gatherings, this relish can be made in advance, allowing the flavors to meld beautifully in the refrigerator. The combination of cranberries and orange zest not only provides a beautiful presentation but also offers a healthy alternative to heavier sauces.
It’s an easy way to add a touch of seasonal flavor to your table without spending too much time in the kitchen.
Ingredients:
- 12 ounces fresh cranberries
- 1 medium orange, zested and quartered
- 1/2 cup granulated sugar
- 1/4 cup chopped walnuts (optional)
- 1/4 teaspoon ground cinnamon (optional)
Instructions:
- Start by rinsing the fresh cranberries under cold water to remove any debris. Discard any soft or spoiled berries, as they can negatively affect the flavor and texture of the relish.
- In a mixing bowl, combine the rinsed cranberries, orange quarters (including the zest), and granulated sugar. If you prefer a sweeter relish, feel free to adjust the sugar to taste.
- Using a food processor, pulse the mixture until the cranberries are coarsely chopped but not pureed. If you don’t have a food processor, you can chop the cranberries by hand with a sharp knife for a chunkier texture.
- Stir in the chopped walnuts and ground cinnamon if using. These add depth and crunch to the relish, enhancing its overall flavor profile.
- Transfer the cranberry orange relish to an airtight container and refrigerate for at least an hour before serving. This allows the flavors to meld together beautifully, resulting in a deliciously revitalizing condiment.
Extra Tips: For a unique twist, consider adding other fruits such as diced apples or pears for added sweetness and texture. If you prefer a spicier kick, a pinch of cayenne pepper can be added for a hint of heat.
This relish can be stored in the refrigerator for up to a week, making it a great make-ahead option for your holiday celebrations. Enjoy this vibrant relish as a topping or side dish that will impress your guests!
Spiced Pear and Walnut Tart
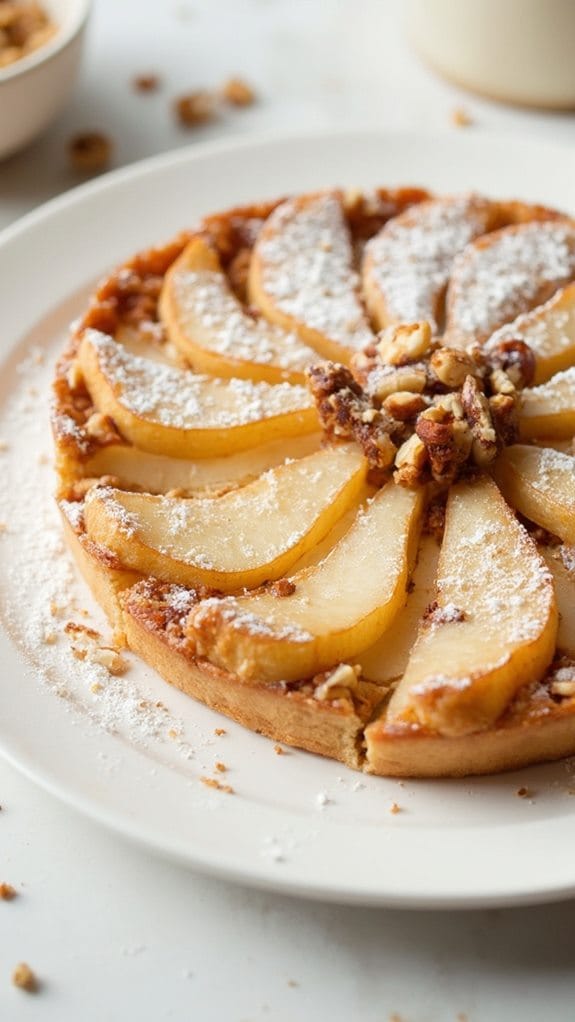
Title: Spiced Pear and Walnut Tart
Prep Time: 20 minutes
Cook Time: 40 minutes
Number of Servings: 8
Required Equipment List: Tart pan, mixing bowl, whisk, rolling pin, oven
Cuisine Type: American
This Spiced Pear and Walnut Tart is a delightful dessert that perfectly captures the essence of fall with its warm spices and fresh pears. The combination of tender, sweet pears and crunchy walnuts creates a delicious contrast in texture, while the aromatic spices of cinnamon and nutmeg bring a cozy warmth to every bite.
This tart not only looks stunning but also fills your kitchen with a delightful aroma as it bakes, making it an excellent choice for holiday gatherings or a comforting treat after dinner. The buttery pastry crust is easy to make and serves as a perfect base for the spiced pear filling.
Topped with a sprinkle of walnuts and a light dusting of powdered sugar, this tart isn’t only delicious but also visually appealing. Whether served warm with a scoop of vanilla ice cream or at room temperature, this dessert is sure to impress your guests and become a fall favorite.
Ingredients:
- 1 ½ cups all-purpose flour
- ½ cup unsalted butter, softened
- ¼ cup powdered sugar
- 1 large egg
- 4 ripe pears, peeled and thinly sliced
- 1 cup walnuts, chopped
- ½ teaspoon ground cinnamon
- ¼ teaspoon ground nutmeg
- 1 tablespoon lemon juice
- 1 tablespoon brown sugar
- Powdered sugar for dusting (optional)
Instructions:
- Preheat your oven to 350°F (175°C). In a mixing bowl, combine the flour and powdered sugar. Add the softened butter and mix until the mixture resembles coarse crumbs. Beat in the egg until the dough forms a ball. Wrap the dough in plastic wrap and refrigerate for about 15 minutes.
- On a lightly floured surface, roll out the chilled dough to fit your tart pan. Carefully place the rolled dough into the pan and press it into the bottom and sides. Trim any excess dough hanging over the edges. Prick the bottom of the crust with a fork to prevent bubbling.
- In a separate bowl, toss the sliced pears with lemon juice, cinnamon, nutmeg, and brown sugar until well coated. Spread the pear mixture evenly over the prepared tart crust. Sprinkle the chopped walnuts evenly on top of the pears.
- Bake the tart in the preheated oven for 30-35 minutes, or until the pears are tender and the crust is lightly golden. Keep an eye on it to verify the crust doesn’t over-bake.
- Once baked, remove the tart from the oven and let it cool for a few minutes before dusting with powdered sugar, if desired. Slice into wedges and serve warm or at room temperature.
Extra Tips: To enhance the flavor of the tart, consider adding a splash of vanilla extract to the pear mixture. If you prefer a little more crunch, you can toast the walnuts lightly before adding them to the tart. This dessert pairs beautifully with a scoop of vanilla ice cream or a dollop of whipped cream for an extra indulgent treat. Enjoy your delicious spiced pear and walnut tart!
Pumpkin Spice Muffins

Title: Pumpkin Spice Muffins
Prep Time: 15 minutes
Cook Time: 20 minutes
Number of Servings: 12
Required Equipment List: Muffin tin, mixing bowls, whisk, measuring cups and spoons, spatula
Cuisine Type: American
These Pumpkin Spice Muffins are the quintessential fall treat, bursting with the flavors of cinnamon, nutmeg, and cloves. With the addition of pumpkin puree, these muffins aren’t only delicious but also moist and tender. They make a perfect companion for your morning coffee or as an afternoon snack, embodying the warmth and comfort of the autumn season.
Baking these muffins is an easy and rewarding experience. The fragrant spices fill your kitchen with the essence of fall, and the simple preparation means you can whip them up in no time. Whether you’re hosting a potluck or simply wanting to share some homemade goodness with friends and family, these muffins are sure to be a hit.
Ingredients:
- 1 ½ cups all-purpose flour
- 1 cup canned pumpkin puree
- ¾ cup granulated sugar
- ½ cup vegetable oil
- 2 large eggs
- 1 teaspoon baking soda
- 1 teaspoon baking powder
- 2 teaspoons pumpkin pie spice
- ½ teaspoon salt
- ½ teaspoon vanilla extract
- Optional: ½ cup chopped walnuts or pecans
Instructions:
- Preheat your oven to 350°F (175°C). Grease a muffin tin or line it with paper liners to prevent the muffins from sticking and to make for easier cleanup.
- In a large mixing bowl, combine the flour, baking soda, baking powder, pumpkin pie spice, and salt. Whisk these dry ingredients together until well blended, ensuring an even distribution of the spices.
- In another bowl, beat together the sugar, vegetable oil, and eggs until the mixture is smooth. Add in the pumpkin puree and vanilla extract, stirring until fully incorporated.
- Gradually add the dry ingredients to the wet ingredients, mixing gently until just combined. Be careful not to overmix, as this can result in dense muffins. If using, fold in the chopped walnuts or pecans at this stage.
- Divide the batter evenly among the muffin cups, filling each about two-thirds full. Bake in the preheated oven for 18-20 minutes or until a toothpick inserted into the center comes out clean.
- Once baked, remove the muffins from the oven and allow them to cool in the pan for about 5 minutes before transferring them to a wire rack to cool completely.
Extra Tips: For an extra touch of flavor, consider adding a sprinkle of cinnamon sugar on top of the muffin batter before baking. This will create a delightful sweet crust.
If you want to make these muffins even more festive, you can add chocolate chips or dried cranberries for a fun twist. Enjoy your delicious pumpkin spice muffins with a warm beverage for a perfect cozy treat!
Baked Macaroni and Cheese

Title: Baked Macaroni and Cheese
Prep Time: 15 minutes
Cook Time: 30 minutes
Number of Servings: 6
Required Equipment List: Large pot, baking dish, mixing bowl, whisk, oven
Cuisine Type: American
Baked Macaroni and Cheese is a classic comfort food that has delighted families for generations. This creamy and cheesy dish features tender pasta enveloped in a rich cheese sauce, topped with a golden breadcrumb crust that adds the perfect crunch. Ideal for potlucks, family gatherings, or a cozy night in, this recipe is sure to satisfy both kids and adults alike.
With its gooey texture and savory flavors, it’s no wonder this dish has secured its place in the hearts of many. This version of baked macaroni and cheese is easy to prepare and can be customized with various cheeses to suit your taste. The combination of sharp cheddar and creamy mozzarella creates a delightful balance of flavors, while the addition of breadcrumbs on top provides a satisfying texture contrast.
Whether you serve it as a side dish or the main attraction, this baked macaroni and cheese will be a hit at any occasion.
Ingredients:
- 8 ounces elbow macaroni
- 2 tablespoons butter
- 2 tablespoons all-purpose flour
- 2 cups milk
- 2 cups shredded sharp cheddar cheese
- 1 cup shredded mozzarella cheese
- 1/2 teaspoon garlic powder
- 1/2 teaspoon onion powder
- Salt and pepper to taste
- 1 cup breadcrumbs
- 2 tablespoons melted butter (for topping)
Instructions:
- Preheat your oven to 350°F (175°C). Begin by bringing a large pot of salted water to a boil. Add the elbow macaroni and cook according to package instructions until al dente. Drain the pasta and set aside.
- In the same pot, melt 2 tablespoons of butter over medium heat. Once melted, whisk in the flour and cook for about 1 minute until bubbly and golden. Gradually pour in the milk, whisking continuously to prevent lumps from forming.
- Continue to cook the milk mixture over medium heat, stirring frequently, until it thickens and begins to simmer. Once thickened, remove the pot from the heat and stir in the shredded cheddar and mozzarella cheeses, garlic powder, onion powder, and season with salt and pepper to taste.
- Combine the cooked macaroni with the cheese sauce, stirring until the pasta is fully coated. Transfer the mixture into a greased baking dish, spreading it evenly.
- In a small bowl, mix the breadcrumbs with 2 tablespoons of melted butter until well combined. Sprinkle the breadcrumb mixture evenly over the top of the macaroni and cheese.
- Bake in the preheated oven for 25-30 minutes or until the top is golden brown and crispy. Remove from the oven and let it cool for a few minutes before serving.
Extra Tips: For an extra layer of flavor, consider adding cooked bacon, sautéed vegetables, or a pinch of cayenne pepper to the cheese sauce. If you prefer a more gourmet touch, experiment with different cheese combinations such as Gruyère or Parmesan.
Make this dish ahead of time and refrigerate it unbaked; simply add a few extra minutes to the cooking time when you’re ready to serve. Enjoy the cheesy goodness!
Roasted Vegetable Platter
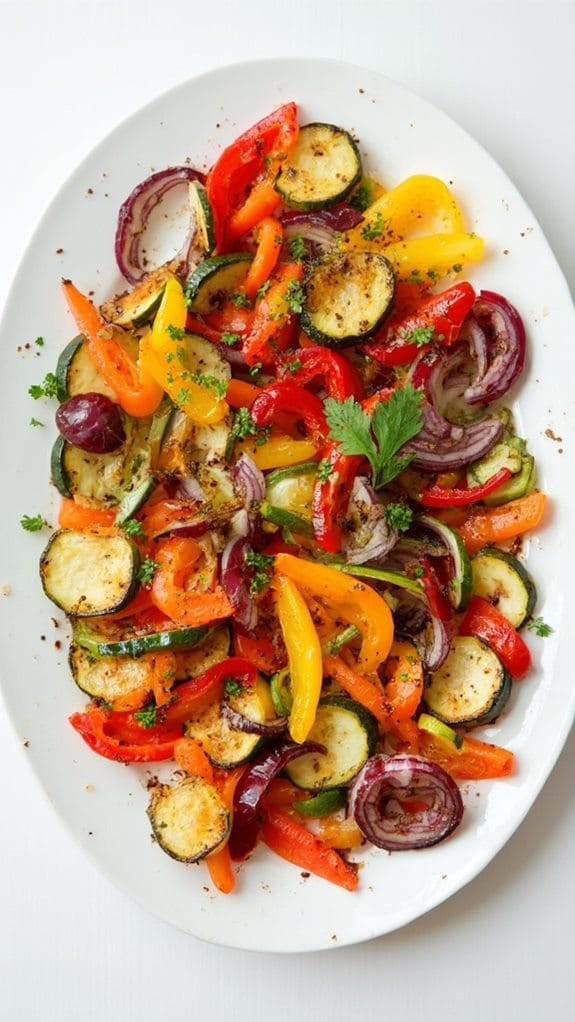
Title: Roasted Vegetable Platter
Prep Time: 15 minutes
Cook Time: 30 minutes
Number of Servings: 6
Required Equipment List: Baking sheet, mixing bowl, oven, spatula
Cuisine Type: American
The Roasted Vegetable Platter is a vibrant and colorful dish that celebrates the rich flavors of seasonal vegetables. This recipe is perfect for potlucks, gatherings, or as a side dish for your family meals. The combination of roasting vegetables at high heat brings out their natural sweetness and enhances their textures, making them irresistibly delicious.
With a medley of vegetables such as bell peppers, zucchini, carrots, and red onions, this platter not only looks appealing but also provides a variety of nutrients. Preparing this roasted vegetable platter is incredibly simple and can be customized based on your preferences or what you have on hand.
Tossing the vegetables in olive oil and seasoning them with herbs creates a delightful flavor that pairs well with any main dish. The vibrant colors and appealing aroma will make this dish a hit at any occasion, leaving your guests asking for seconds.
Ingredients:
- 2 cups bell peppers (mixed colors), sliced
- 2 cups zucchini, sliced
- 2 cups carrots, sliced
- 1 cup red onion, sliced
- 3 tablespoons olive oil
- 1 teaspoon garlic powder
- 1 teaspoon dried thyme
- Salt and pepper to taste
- Fresh parsley (for garnish, optional)
Instructions:
- Preheat your oven to 425°F (220°C). This high temperature is essential for roasting vegetables, as it helps caramelize their natural sugars and develop a rich flavor.
- In a large mixing bowl, combine the sliced bell peppers, zucchini, carrots, and red onion. Drizzle the olive oil over the vegetables and add the garlic powder, dried thyme, salt, and pepper. Toss everything together until the vegetables are evenly coated.
- Spread the seasoned vegetables in a single layer on a baking sheet. Make sure not to overcrowd the pan, as this can lead to steaming rather than roasting. If necessary, use two baking sheets to allow for proper airflow.
- Roast the vegetables in the preheated oven for about 25-30 minutes, stirring halfway through the cooking time. The vegetables should be tender and slightly charred on the edges when they’re done.
- Once roasted, remove the baking sheet from the oven and let the vegetables cool for a few minutes. Transfer them to a serving platter and garnish with fresh parsley if desired before serving.
Extra Tips: For added flavor, consider marinating the vegetables in the olive oil and seasonings for about 30 minutes before roasting. You can also experiment with different vegetables such as asparagus, Brussels sprouts, or even sweet potatoes.
To enhance the dish further, serve it with a drizzle of balsamic glaze or a sprinkle of feta cheese for a delicious twist. Enjoy your roasted vegetable platter as a healthy and satisfying addition to any meal!
Caramel Apple Dip
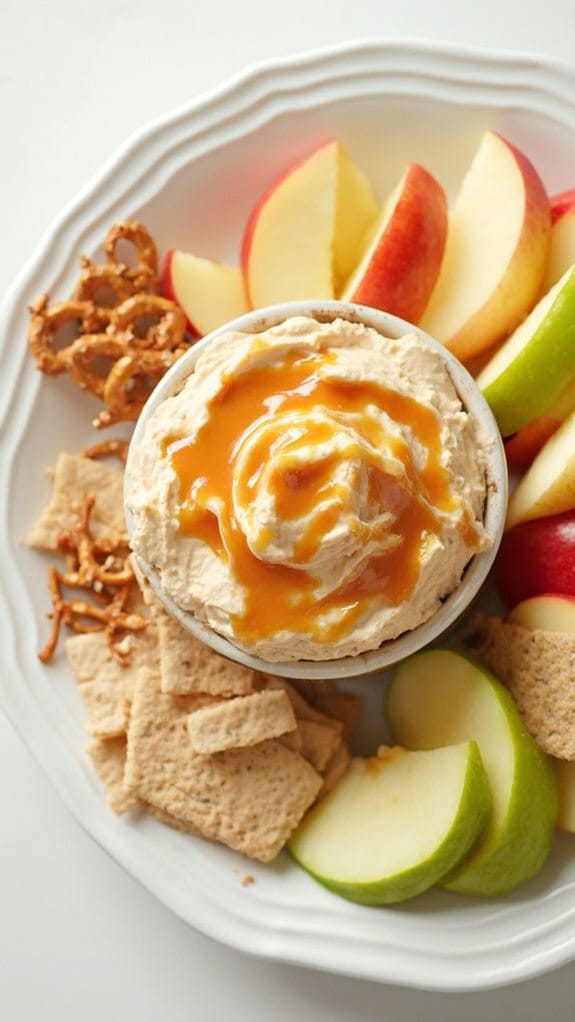
Title: Caramel Apple Dip
Prep Time: 10 minutes
Cook Time: 5 minutes
Number of Servings: 8
Required Equipment List: Small saucepan, mixing bowl, whisk, serving dish
Cuisine Type: American
Caramel Apple Dip is a deliciously sweet treat that brings the flavors of fall right to your table. This simple yet indulgent dip features a smooth and creamy blend of caramel, cream cheese, and brown sugar, making it the perfect accompaniment for crisp apple slices.
It’s an ideal dessert for potlucks, gatherings, or even a cozy night in, and it’s sure to be a hit with both kids and adults alike. The beauty of this recipe lies in its ease of preparation. With just a few ingredients and minimal cook time, you can whip up this delightful dip in no time.
Serve it with a variety of sliced apples for dipping, or even pair it with pretzels or graham crackers for an extra crunchy texture. This Caramel Apple Dip will become a favorite fall snack that you’ll want to make again and again.
Ingredients:
- 1 cup caramel sauce
- 8 ounces cream cheese, softened
- 1/4 cup brown sugar
- 1 teaspoon vanilla extract
- Sliced apples (for serving)
Instructions:
- In a small saucepan over low heat, warm the caramel sauce until it becomes pourable. Stir frequently to prevent burning, about 2-3 minutes. Once warmed, remove from heat and let cool slightly.
- In a mixing bowl, combine the softened cream cheese, brown sugar, and vanilla extract. Using a whisk or an electric mixer, beat the mixture until smooth and creamy, ensuring there are no lumps.
- Gradually pour the warmed caramel sauce into the cream cheese mixture, stirring until fully combined. The dip should have a rich, creamy consistency with a beautiful caramel hue.
- Transfer the caramel apple dip into a serving dish and drizzle any remaining caramel sauce on top for garnish.
- Serve immediately with sliced apples and enjoy the delightful combination of flavors and textures.
Extra Tips: For added flavor, consider mixing in a pinch of cinnamon or nutmeg into the cream cheese mixture. If you want to make the dip even more decadent, you can add crushed toffee bits or chopped nuts on top.
This dip can be made ahead of time and stored in the refrigerator for a few hours; just give it a quick stir before serving. Enjoy your delicious caramel apple dip!
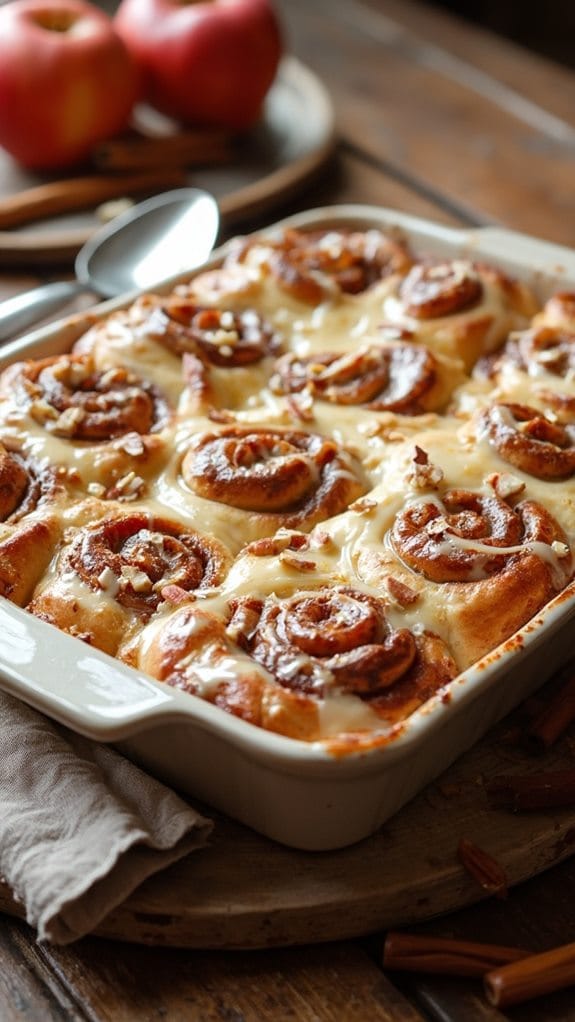
Warm Cinnamon Roll Casserole

Title: Warm Cinnamon Roll Casserole
Prep Time: 15 minutes
Cook Time: 30 minutes
Number of Servings: 8
Required Equipment List: 9×13 inch baking dish, mixing bowl, whisk, oven
Cuisine Type: American
This Warm Cinnamon Roll Casserole is the perfect dish to bring warmth and comfort to any gathering, especially during the fall season. Combining the delicious flavors of cinnamon rolls with the ease of a casserole, this dish isn’t only easy to prepare but also incredibly satisfying.
The gooey cinnamon filling baked into the fluffy rolls creates a delightful texture, while the creamy glaze drizzled on top adds the perfect finishing touch. It’s a crowd-pleaser that can be served for breakfast, brunch, or even dessert.
What makes this casserole so special is its versatility. You can easily customize it by adding your favorite toppings such as nuts, chocolate chips, or even fresh fruit. Plus, it can be made ahead of time and baked just before serving, making it ideal for busy mornings or holiday celebrations.
Once you take it out of the oven, the irresistible aroma will have everyone gathering around to indulge in this sweet treat.
Ingredients:
- 2 cans refrigerated cinnamon rolls (with icing)
- 4 large eggs
- 1 cup milk
- 1 teaspoon vanilla extract
- 1 teaspoon ground cinnamon
- 1/4 teaspoon salt
- 1/2 cup maple syrup (optional)
- 1/2 cup chopped pecans (optional)
Instructions:
- Preheat your oven to 350°F (175°C). Grease a 9×13 inch baking dish with cooking spray or butter to prevent sticking.
- Open the cans of cinnamon rolls and cut each roll into quarters. Place the pieces evenly in the prepared baking dish. If you’re using nuts or any other toppings, sprinkle them over the cinnamon roll pieces.
- In a mixing bowl, whisk together the eggs, milk, vanilla extract, ground cinnamon, and salt until well combined. This mixture will add richness and flavor to the casserole.
- Pour the egg mixture evenly over the cinnamon roll pieces, ensuring they’re all coated. Use a spoon or spatula to gently press down the rolls so they soak up the liquid.
- Drizzle maple syrup over the top if desired, and then bake the casserole in the preheated oven for 25-30 minutes, or until the rolls are golden brown and cooked through. A toothpick inserted in the center should come out clean.
- Once baked, remove the casserole from the oven and let it cool for a few minutes. Drizzle the icing that came with the cinnamon rolls over the top before serving warm.
Extra Tips: For an extra decadent touch, consider adding a cream cheese icing or a simple glaze made from powdered sugar and milk instead of the original icing.
You can also prepare the casserole the night before—just cover it with plastic wrap and refrigerate. In the morning, take it out a bit before baking to bring it to room temperature, then bake as directed.
Enjoy this warm and comforting dish with a side of fresh fruit for a delightful brunch experience!
Conclusion
So, there you have it—15 fall potluck recipes that’ll make you the unofficial culinary hero of the season! Who knew you could impress a crowd with such simple, comforting dishes? Just imagine the looks on their faces when you reveal that warm cinnamon roll casserole. You might just find yourself crowned as the “Potluck King or Queen.” Now, go forth and spread the joy of fall flavors! After all, who doesn’t love a good excuse to eat?

