No products in the cart.

7 Easy Thanksgiving Recipes for Stress-Free Entertaining
Have you ever wondered if it’s truly possible to enjoy Thanksgiving without the usual chaos in the kitchen? This theory might just hold water, especially when you consider simple yet delicious recipes that allow you to spend more time with your guests. Imagine a feast that doesn’t require hours of frantic cooking, but still impresses everyone at the table. To make this a reality, let’s explore seven easy recipes that promise to elevate your holiday gathering while keeping stress at bay.
One-Pan Herb Roasted Turkey
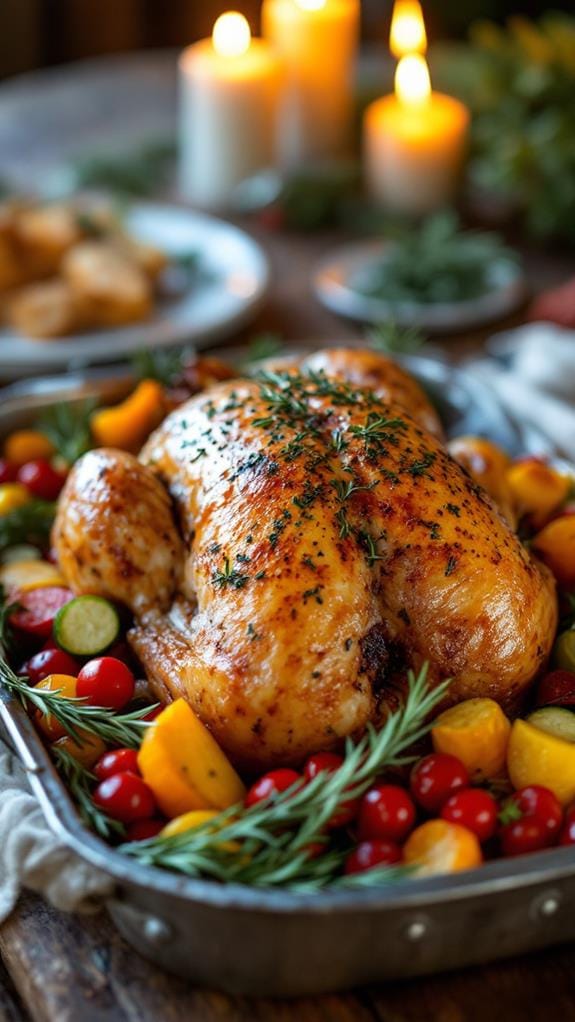
Title: One-Pan Herb Roasted Turkey
Prep Time: 20 minutes
Cook Time: 120 minutes
Number of Servings: 8
Required Equipment List: Roasting pan, meat thermometer, aluminum foil, carving knife
Cuisine Type: American
This One-Pan Herb Roasted Turkey is a classic and flavorful centerpiece for your Thanksgiving table. The turkey is infused with a blend of fresh herbs, garlic, and citrus, resulting in juicy, tender meat with a beautifully crispy skin. By roasting the turkey in a single pan, you can also take advantage of the drippings to create a delicious gravy, making clean-up a breeze and allowing you to focus on the celebration with family and friends.
The herbs used in this recipe, including rosemary, thyme, and sage, enhance the natural flavors of the turkey and create an aromatic dish that fills your kitchen with mouthwatering scents. The addition of lemon and orange not only adds brightness but also keeps the turkey moist throughout the cooking process. This easy yet impressive dish is perfect for those looking to make their Thanksgiving memorable with minimal fuss.
Ingredients:
- 1 whole turkey (12-14 pounds)
- 1/2 cup unsalted butter, softened
- 3 cloves garlic, minced
- 2 tablespoons fresh rosemary, chopped
- 2 tablespoons fresh thyme, chopped
- 2 tablespoons fresh sage, chopped
- Zest of 1 lemon
- Zest of 1 orange
- Salt and pepper to taste
- 1 onion, quartered
- 1 lemon, quartered
- 1 orange, quartered
- 4 cups low-sodium chicken broth
Instructions:
- Preheat your oven to 325°F (163°C). Remove the turkey from the refrigerator and allow it to come to room temperature for about 30 minutes before roasting. This helps guarantee even cooking.
- In a small mixing bowl, combine the softened butter, minced garlic, chopped herbs, lemon zest, orange zest, salt, and pepper. Mix well to create a herb-infused butter that will be used to season the turkey.
- Pat the turkey dry with paper towels, both inside and out. Carefully loosen the skin on the breast and drumsticks using your fingers, being careful not to tear it. Rub the herb butter mixture generously under the skin and all over the turkey, making certain it’s evenly coated.
- Stuff the cavity of the turkey with the quartered onion, lemon, and orange. This will add flavor and moisture during roasting. Tie the legs together with kitchen twine and tuck the wing tips under the body.
- Place the turkey breast-side up in a roasting pan. Pour the chicken broth into the bottom of the pan to keep the turkey moist and create a flavorful base for gravy. Cover the turkey loosely with aluminum foil to prevent over-browning.
- Roast the turkey in the preheated oven for about 2 hours, or until the internal temperature reaches 165°F (74°C) when checked in the thickest part of the thigh. Remove the foil during the last 30 minutes of cooking to allow the skin to crisp up.
- Once cooked, remove the turkey from the oven and let it rest for at least 20-30 minutes before carving. This resting period allows the juices to redistribute, resulting in a more succulent turkey.
Extra Tips: For an extra layer of flavor, consider brining the turkey a day before roasting. You can also add vegetables like carrots and celery to the roasting pan for added flavor and to create a delicious base for gravy. Make sure to use a meat thermometer to guarantee perfect doneness, and don’t forget to save the drippings for a homemade gravy that will elevate your Thanksgiving feast! Enjoy your holiday meal!
Creamy Mashed Potatoes
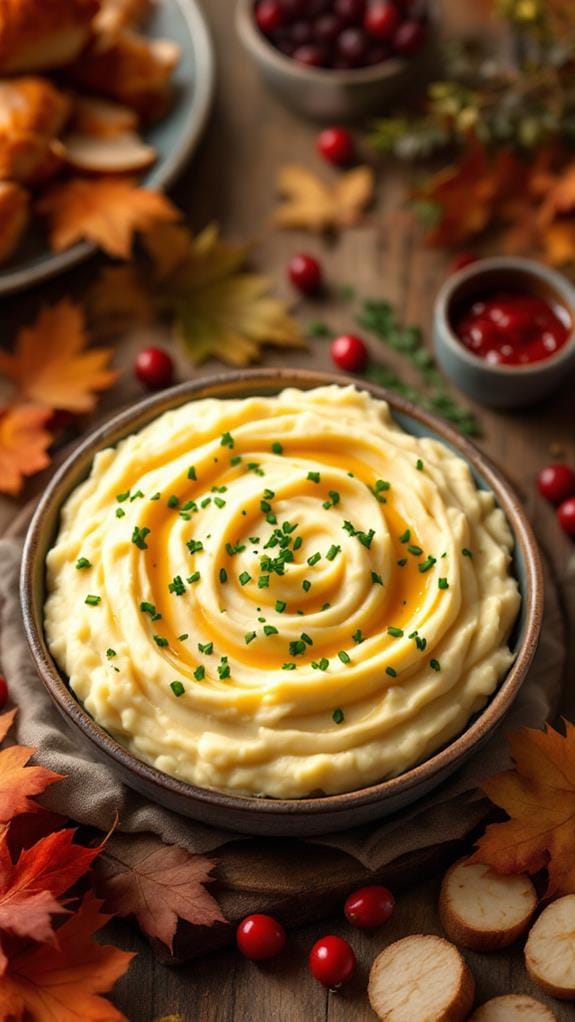
Title: Creamy Mashed Potatoes
Prep Time: 15 minutes
Cook Time: 20 minutes
Number of Servings: 4
Required Equipment List: Large pot, potato masher or electric mixer, colander, measuring cups, measuring spoons
Cuisine Type: American
Creamy Mashed Potatoes are a classic side dish that can elevate any meal, especially during the holiday season. This comforting dish is made by boiling potatoes until tender, then mashing them into a velvety consistency with the addition of rich butter, creamy milk, and a touch of salt. The result is a smooth and buttery side that pairs beautifully with gravies, meats, and vegetables, making it a staple on Thanksgiving tables across the country.
The beauty of this mashed potato recipe lies in its simplicity and versatility. You can easily customize the flavor by adding ingredients like roasted garlic, herbs, or cheese for an extra twist. Whether you prefer them extra creamy or with a bit of texture, these mashed potatoes will certainly please everyone at your table and become a cherished family favorite.
Ingredients:
- 2 pounds russet potatoes
- 1/2 cup unsalted butter, softened
- 1/2 cup whole milk
- Salt to taste
- Pepper to taste
- Optional: garlic powder or fresh herbs for flavor
Instructions:
- Begin by peeling the russet potatoes and cutting them into evenly sized chunks, about 1-2 inches in size. This will guarantee they cook evenly and mash easily.
- Place the cut potatoes into a large pot and cover them with cold water, adding a generous pinch of salt. Bring the pot to a boil over high heat, then reduce to a simmer and cook for about 15-20 minutes, or until the potatoes are fork-tender.
- Once the potatoes are cooked, drain them in a colander and return them to the pot. Allow them to steam for a few minutes to remove excess moisture, which will help achieve creaminess.
- Using a potato masher or an electric mixer, begin mashing the potatoes until they reach your desired consistency. Gradually add the softened butter and milk, mixing until fully incorporated and creamy.
- Season the mashed potatoes with salt and pepper to taste. If desired, add garlic powder or fresh herbs for added flavor, mixing well to combine.
- Serve the creamy mashed potatoes warm, garnished with extra butter or herbs if desired. Enjoy alongside your favorite main dishes for a perfect pairing.
Extra Tips: For an extra creamy texture, consider using a combination of half-and-half or sour cream in place of some of the milk. If you want more flavor, try roasting garlic and mashing it into your potatoes for a savory kick.
Be careful not to over-mix, as this can make the potatoes gummy. Keep your mashed potatoes warm until serving by placing them in a bowl over a pot of simmering water or covering them with a lid.
Easy Green Bean Casserole
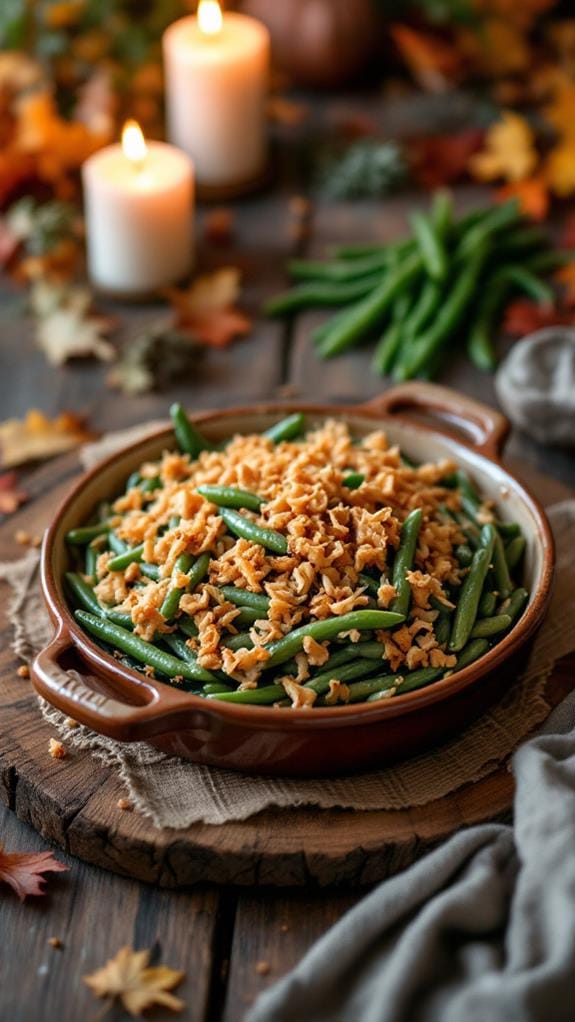
Title: Easy Green Bean Casserole
Prep Time: 15 minutes
Cook Time: 30 minutes
Number of Servings: 6
Required Equipment List: 9×13 inch baking dish, mixing bowl, oven, stirring spoon
Cuisine Type: American
Easy Green Bean Casserole is a classic dish that brings together the vibrant flavor of green beans and the creamy richness of a savory sauce, all topped with crispy fried onions. This comforting casserole is often a highlight at Thanksgiving dinners, but it’s also perfect for family gatherings or potluck events throughout the year.
With its simple ingredients and quick preparation, you’ll find it easy to whip up this delicious dish in no time. This recipe uses tender green beans, a creamy mushroom soup, and a sprinkle of cheese, combined to create a delightful texture and flavor. The crispy fried onions on top not only add crunch but also a savory depth that makes each bite irresistible.
Whether you’re serving it alongside a turkey or as a stand-alone dish, this Easy Green Bean Casserole is sure to please everyone at the table.
Ingredients:
- 1 pound fresh green beans, trimmed
- 1 can (10.5 ounces) cream of mushroom soup
- 1/2 cup milk
- 1 cup shredded cheddar cheese
- 1 cup crispy fried onions
- Salt and pepper to taste
Instructions:
- Preheat your oven to 350°F (175°C) and lightly grease a 9×13 inch baking dish to prevent the casserole from sticking. This step is important to guarantee an easy cleanup after baking.
- In a large mixing bowl, combine the cream of mushroom soup, milk, and half of the shredded cheddar cheese. Stir until the mixture is well combined and smooth. Season with salt and pepper to taste, adjusting to your preference.
- Add the trimmed green beans to the bowl and mix until the beans are evenly coated with the creamy sauce. Transfer this mixture into the prepared baking dish, spreading it out evenly.
- Bake the casserole in the preheated oven for 20 minutes. This allows the flavors to meld together and the green beans to cook slightly before adding the topping.
- After 20 minutes, remove the casserole from the oven and sprinkle the remaining shredded cheddar cheese and half of the crispy fried onions on top. Return it to the oven and bake for an additional 10 minutes, until the cheese is melted and bubbly.
- Finally, take the casserole out of the oven and sprinkle the remaining crispy fried onions over the top. Bake for an additional 5 minutes to achieve a golden, crispy finish before serving.
Extra Tips: For added flavor, consider mixing in some sautéed mushrooms or garlic into the cream mixture before adding the green beans. If you prefer a crunchier topping, let the casserole cool for a few minutes after baking, then broil for a minute or two to achieve your desired crispiness.
This casserole can also be made ahead of time; simply prepare it and refrigerate before baking, adding a few extra minutes to the cooking time if baking straight from the fridge. Enjoy this delightful dish at your next gathering!
Savory Stuffing With Sausage
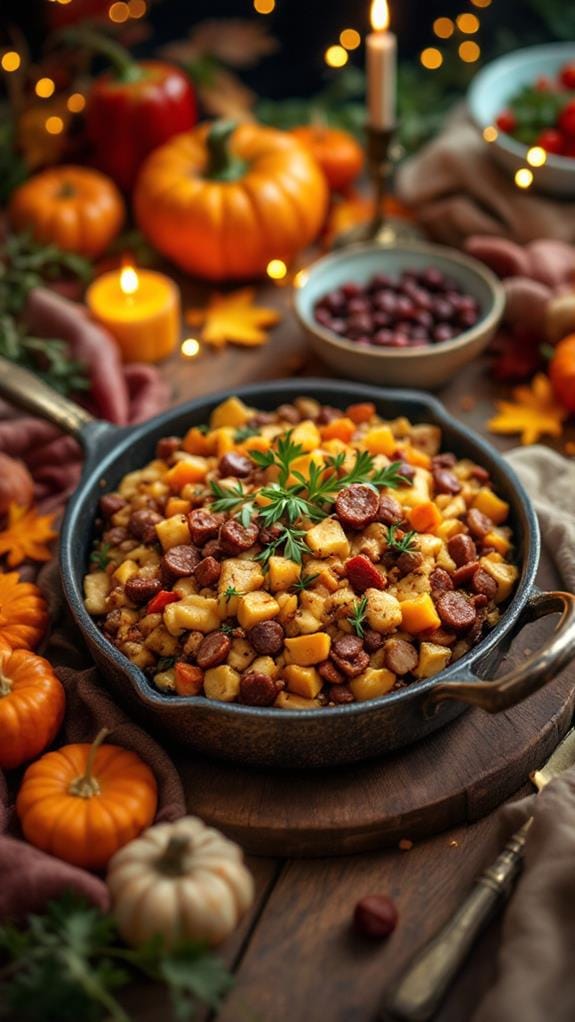
Title: Savory Stuffing With Sausage
Prep Time: 20 minutes
Cook Time: 30 minutes
Number of Servings: 8
Required Equipment List: Large skillet, mixing bowl, baking dish, wooden spoon, measuring cups, measuring spoons
Cuisine Type: American
Savory Stuffing with Sausage is a quintessential dish that brings warmth and heartiness to any Thanksgiving table. This stuffing combines the rich, savory flavors of sausage with a medley of aromatic vegetables and herbs, creating a deliciously moist and flavorful side dish. Baked until golden brown, it offers a delightful contrast in texture, making it a perfect accompaniment to turkey or other holiday mains.
This recipe is versatile enough to be adapted to your taste preferences. You can use different types of sausage, such as spicy Italian or sweet breakfast sausage, and even incorporate various herbs and spices to elevate the flavor profile. Whether you choose to serve it alongside your turkey or enjoy it on its own, this stuffing is sure to be a crowd-pleaser, bringing a comforting and festive feel to any gathering.
Ingredients:
- 1 pound sausage (Italian or breakfast)
- 1 onion, diced
- 2 celery stalks, diced
- 3 cloves garlic, minced
- 8 cups cubed bread (preferably day-old)
- 2 cups chicken broth
- 1 teaspoon dried sage
- 1 teaspoon dried thyme
- 1/2 teaspoon salt
- 1/4 teaspoon black pepper
- 1/4 cup fresh parsley, chopped (optional)
Instructions:
- Preheat your oven to 350°F (175°C). Grease a large baking dish and set aside. This will guarantee that your stuffing bakes evenly and doesn’t stick to the dish.
- In a large skillet over medium heat, cook the sausage until browned and cooked through, breaking it apart with a wooden spoon as it cooks. This will infuse the skillet with rich flavors that will enhance the stuffing.
- Add the diced onion, celery, and minced garlic to the skillet with the cooked sausage. Sauté until the vegetables are soft and translucent, about 5-7 minutes. This step adds depth to the stuffing by softening the vegetables and allowing their flavors to meld.
- In a mixing bowl, combine the cubed bread, cooked sausage and vegetable mixture, chicken broth, sage, thyme, salt, and black pepper. Stir until the bread is evenly moistened and all ingredients are well incorporated. If the mixture seems too dry, add more broth as needed.
- Transfer the stuffing mixture to the prepared baking dish, spreading it out evenly. Cover with aluminum foil and bake in the preheated oven for 25 minutes. This will help the stuffing steam and retain moisture.
- After 25 minutes, remove the foil and bake for an additional 5-10 minutes, or until the top is golden brown and crispy. This final step guarantees a delightful texture contrast between the crispy top layer and the moist stuffing below.
Extra Tips: To add more depth of flavor, consider incorporating additional ingredients such as sautéed mushrooms or chopped apples for a hint of sweetness. If you prefer a slightly drier stuffing, you can reduce the amount of broth used. For a gluten-free version, simply substitute the bread with gluten-free bread or cornbread, and adjust the baking time as necessary. Enjoy your savory stuffing as a comforting side that perfectly complements your holiday feast!
Cranberry Sauce With Orange Zest
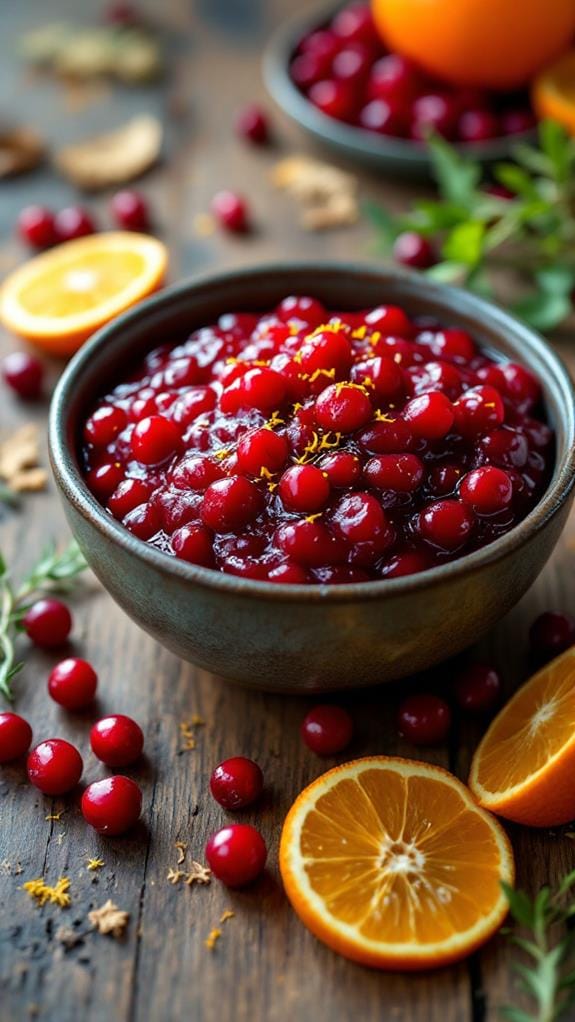
Title: Cranberry Sauce With Orange Zest
Prep Time: 10 minutes
Cook Time: 15 minutes
Number of Servings: 8
Required Equipment List: Medium saucepan, measuring cups, measuring spoons, wooden spoon, zester
Cuisine Type: American
Cranberry Sauce With Orange Zest is a bright and flavorful accompaniment to your Thanksgiving feast. The tartness of fresh cranberries is beautifully balanced by the sweetness of sugar and the revitalizing zing of orange zest. This sauce not only adds a burst of color to your table but also enhances the flavors of turkey, ham, and other holiday dishes.
Making your own cranberry sauce is simple and allows you to customize the sweetness to your preference, guaranteeing a fresh taste that far surpasses store-bought options. This recipe isn’t just about taste; it’s also about the aromatic experience. The scent of simmering cranberries combined with citrus zest fills the kitchen with a warm, inviting aroma that will get everyone in the holiday spirit.
Plus, this sauce can be made ahead of time and stored in the refrigerator, making it a convenient choice for busy holiday preparations. Serve it chilled or at room temperature for a delightful addition to your Thanksgiving spread.
Ingredients:
- 12 ounces fresh cranberries
- 1 cup granulated sugar
- 1 cup water
- Zest of 1 orange
- Juice of 1 orange
- Pinch of salt
Instructions:
- Rinse the fresh cranberries under cold water, discarding any that are soft or blemished. This guarantees that only the best berries make it into your sauce.
- In a medium saucepan, combine the water and sugar over medium heat. Stir until the sugar dissolves completely, creating a simple syrup.
- Add the rinsed cranberries to the saucepan. Bring the mixture to a boil, then reduce the heat to a simmer. Cook for about 10 minutes, stirring occasionally, until the cranberries burst and the sauce thickens.
- Once the cranberries have burst and the sauce has thickened, remove the saucepan from the heat. Stir in the orange zest, orange juice, and a pinch of salt to enhance the flavors.
- Allow the cranberry sauce to cool to room temperature. Once cooled, transfer it to a serving bowl or an airtight container. Refrigerate until ready to serve.
Extra Tips: For added depth of flavor, consider incorporating a cinnamon stick or a splash of vanilla extract while the sauce simmers. If you enjoy a bit of spice, a pinch of ground ginger or nutmeg can also elevate the sauce.
This cranberry sauce can be made up to a week in advance, allowing the flavors to meld beautifully. Enjoy it as a complement to your holiday main dishes, or spread it on sandwiches with leftover turkey for a delicious post-Thanksgiving treat!
Pumpkin Pie With Whipped Cream

Title: Pumpkin Pie With Whipped Cream
Prep Time: 20 minutes
Cook Time: 60 minutes
Number of Servings: 8
Required Equipment List: 9-inch pie dish, mixing bowls, whisk, rolling pin, oven
Cuisine Type: American
Pumpkin Pie with Whipped Cream is a classic dessert that embodies the essence of fall and Thanksgiving celebrations. This rich and velvety pie features a spiced pumpkin filling nestled in a flaky crust, making it the perfect sweet ending to your holiday feast.
The addition of freshly whipped cream not only enhances the pie’s flavor but also adds a delightful creamy texture that complements the warm spices of cinnamon, nutmeg, and ginger. This recipe is straightforward and can be made ahead of time, allowing you to enjoy more time with family and friends during the holidays.
The aroma of baking pumpkin pie wafting through your home is sure to evoke feelings of warmth and nostalgia. Whether served warm or chilled, this pumpkin pie is a comforting treat that will leave your guests asking for seconds.
Ingredients:
- 1 pie crust (store-bought or homemade)
- 1 can (15 oz) pure pumpkin puree
- 3/4 cup granulated sugar
- 1 teaspoon ground cinnamon
- 1/2 teaspoon ground nutmeg
- 1/2 teaspoon ground ginger
- 1/2 teaspoon salt
- 3 large eggs
- 1 can (12 oz) evaporated milk
- 1 teaspoon vanilla extract
- Whipped cream (for serving)
Instructions:
- Preheat your oven to 425°F (220°C). Place your pie crust in a 9-inch pie dish, pressing it firmly against the sides and bottom. Trim any excess dough hanging over the edges and use a fork to poke holes in the bottom to prevent bubbling.
- In a large mixing bowl, combine the pumpkin puree, granulated sugar, cinnamon, nutmeg, ginger, and salt. Whisk until the mixture is smooth and well combined, ensuring that the spices are evenly distributed.
- In a separate bowl, beat the eggs until they’re light and frothy. Gradually add the beaten eggs to the pumpkin mixture, whisking until fully incorporated.
- Slowly pour in the evaporated milk and vanilla extract, continuing to whisk until the filling is creamy and smooth. Make sure there are no lumps in the mixture.
- Pour the pumpkin filling into the prepared pie crust, smoothing the top with a spatula. Bake in the preheated oven for 15 minutes, then reduce the temperature to 350°F (175°C) and continue baking for an additional 45 minutes, or until a knife inserted into the center comes out clean.
- Once baked, remove the pie from the oven and let it cool on a wire rack for at least 2 hours before serving. This allows the filling to set properly. Serve slices with a generous dollop of whipped cream on top.
Extra Tips: To achieve a perfectly flaky crust, make sure your butter is cold when making the dough, and avoid overworking it.
If you want to make your whipped cream extra special, consider adding a tablespoon of powdered sugar and a splash of vanilla extract while whipping. For a twist on the traditional recipe, you can also mix in a couple of tablespoons of maple syrup into the pumpkin filling for a unique flavor profile. Enjoy your delicious pumpkin pie!
No-Bake Cheesecake for Dessert
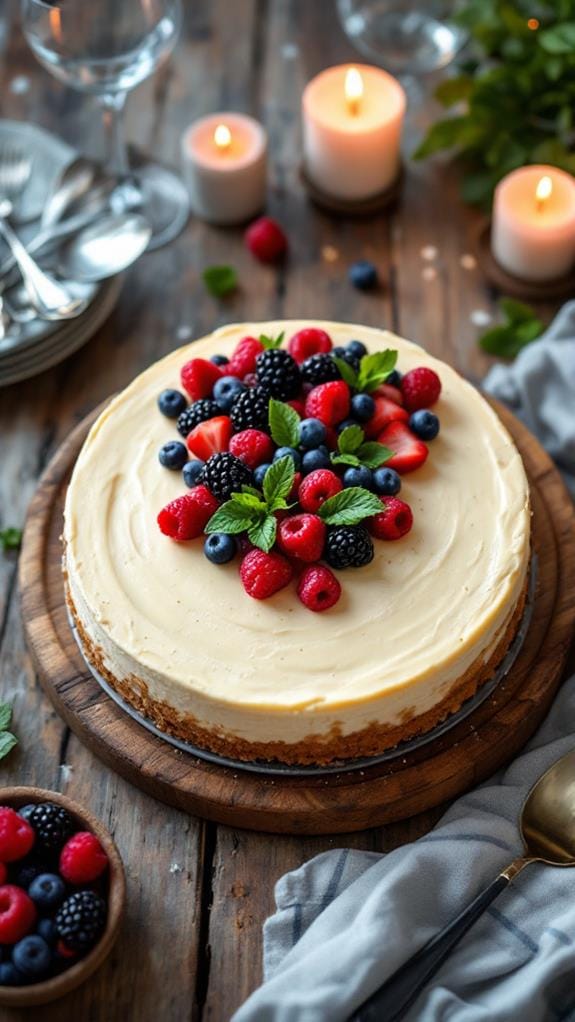
Title: No-Bake Cheesecake for Dessert
Prep Time: 20 minutes
Cook Time: 0 minutes
Number of Servings: 8
Required Equipment List: Mixing bowl, 9-inch springform pan, electric mixer, spatula, refrigerator
Cuisine Type: American
This No-Bake Cheesecake is a creamy and decadent dessert that’s perfect for any occasion, especially during the holiday season. With a buttery graham cracker crust and a rich filling made from cream cheese, sugar, and whipped cream, this cheesecake is both delightful and easy to make.
The best part? It requires no baking, allowing you to prepare this treat in advance and keep it chilled until it’s time to serve. The texture of this cheesecake is smooth and velvety, providing a lovely contrast to the crisp crust.
You can customize it with various toppings such as fresh fruit, chocolate sauce, or caramel, making it adaptable to your taste preferences. This no-bake dessert isn’t only a crowd-pleaser but also a stress-free option for entertaining, leaving you with more time to enjoy the festivities.
Ingredients:
- 1 ½ cups graham cracker crumbs
- ½ cup unsalted butter, melted
- 2 cups cream cheese, softened
- 1 cup powdered sugar
- 1 teaspoon vanilla extract
- 1 cup heavy whipping cream
- Fresh fruit or sauce for topping (optional)
Instructions:
- In a mixing bowl, combine the graham cracker crumbs and melted butter, stirring until the mixture resembles wet sand. Press this mixture firmly into the bottom of a 9-inch springform pan to form the crust. Use the back of a measuring cup or your fingers to guarantee it’s compact and even.
- In another bowl, use an electric mixer to beat the softened cream cheese until smooth. Gradually add the powdered sugar and vanilla extract, mixing until well combined and fluffy.
- In a separate bowl, whip the heavy cream until soft peaks form. Gently fold the whipped cream into the cream cheese mixture using a spatula, being careful not to deflate the whipped cream. This will give the cheesecake its light and airy texture.
- Pour the cheesecake filling over the prepared crust in the springform pan, smoothing the top with a spatula. Cover the pan with plastic wrap and refrigerate for at least 4 hours or overnight to allow the cheesecake to set properly.
- Once set, carefully remove the sides of the springform pan. Serve the cheesecake chilled, topped with fresh fruit or your favorite sauce, if desired.
Extra Tips: To make slicing the cheesecake easier, run a sharp knife under hot water and wipe it dry before cutting each slice. This will help create clean edges.
You can also experiment with different flavors by adding lemon zest for a citrus twist or incorporating melted chocolate into the filling for a chocolate cheesecake variation. Be sure to store any leftovers in the refrigerator, where it will keep well for up to 5 days. Enjoy your delicious no-bake cheesecake!
Conclusion
As you gather around the table, imagine the warm aroma of herb-roasted turkey mingling with the sweet scent of pumpkin pie. With these seven easy recipes, you’re not just serving a meal; you’re creating memories. So, why stress over the little things? Embrace the joy of cooking and the laughter of loved ones. After all, isn’t that what Thanksgiving is all about? Now, roll up your sleeves, and let the festivities begin!

