No products in the cart.
15 Top Christmas Charcuterie Board Ideas
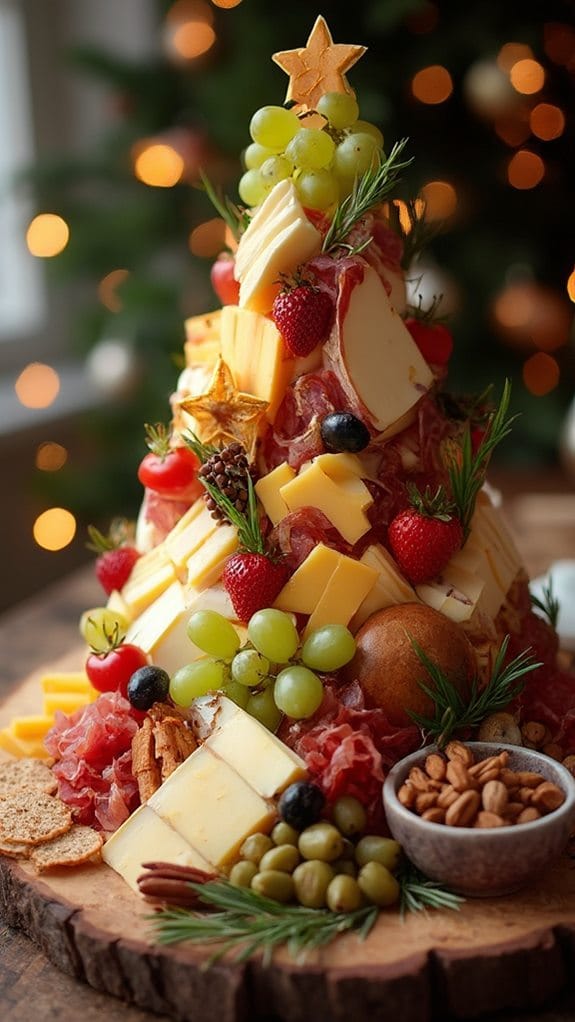
Did you know that 78% of people believe a visually appealing food presentation enhances their dining experience? This holiday season, you can take your gatherings to the next level with Christmas charcuterie boards that not only look festive but also cater to diverse tastes. Imagine an array of cheeses, meats, and seasonal garnishes arranged in a stunning tree shape. Curious about how to create the perfect centerpiece that sparks conversation and indulgence among your guests? Let’s explore some top ideas that blend creativity and flavor seamlessly.
Contents
hide
Classic Cheese and Meat Tree
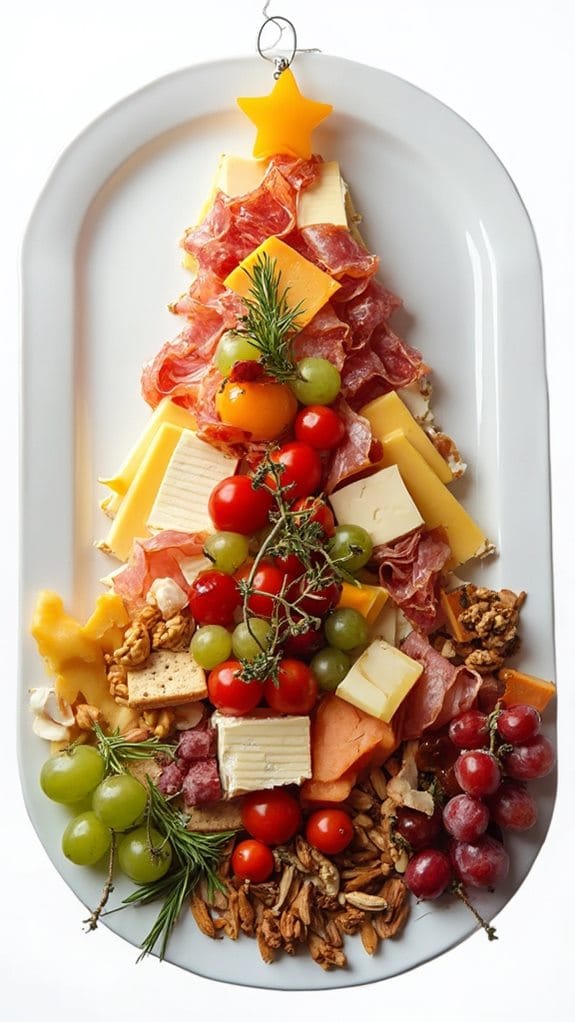
Title: Classic Cheese and Meat Christmas Tree Charcuterie Board
Prep Time: 30 minutes
Cook Time: 0 minutes
Number of Servings: 10
Required Equipment List: Large cutting board or serving platter, small bowls, toothpicks (optional)
Cuisine Type: American
The Classic Cheese and Meat Christmas Tree Charcuterie Board is a festive and visually stunning centerpiece perfect for holiday gatherings. This charcuterie board features a variety of cheeses, cured meats, and colorful accompaniments arranged in the shape of a Christmas tree. Not only does it look gorgeous, but it’s also easy to assemble and allows guests to graze at their leisure, making it an ideal addition to any holiday celebration.
This recipe embraces the spirit of Christmas by using seasonal colors and textures, creating a fun and interactive experience for your guests. The combination of savory meats and rich cheeses, paired with fresh fruits and nuts, guarantees that there’s something for everyone to enjoy. Customize it with your favorite ingredients and let your creativity shine as you build a delicious and festive charcuterie board.
Ingredients:
- 1 pound assorted cheeses (cheddar, brie, gouda)
- 1 pound assorted cured meats (salami, prosciutto, pepperoni)
- 1 cup assorted crackers
- 1 cup cherry tomatoes
- 1 cup grapes (red or green)
- 1/2 cup mixed nuts (almonds, walnuts, cashews)
- Fresh rosemary sprigs (for garnish)
- Small bowls for dips (optional)
- Dips (honey, mustard, or fig jam for serving, optional)
Instructions:
- Start by selecting a large cutting board or serving platter that will serve as the base for your charcuterie board. Arrange the board vertically to resemble a Christmas tree shape.
- Begin layering your ingredients, starting with the cheeses at the base of the tree. Cut the cheeses into various shapes, such as triangles or squares, and place them in a staggered manner to create the tree’s branches.
- Next, add the cured meats in a similar staggered pattern, tucking them between the cheese pieces. You can fold or roll the slices for added visual interest. Make sure to leave some space for the other ingredients.
- Fill in the gaps with the cherry tomatoes and grapes, clustering them together to mimic ornaments on the tree. This will add a pop of color and freshness to your board.
- Scatter the crackers around the board, either at the base or in between the meat and cheese. You can also create small stacks or piles for a more organized look. Add the mixed nuts to any open spaces for additional texture.
- Finally, garnish your charcuterie board with fresh rosemary sprigs, which won’t only enhance the visual appeal but also add a lovely aroma. If desired, place small bowls of dips around the board for guests to enjoy.
Extra Tips: When assembling your charcuterie board, consider using a variety of colors and textures to make it visually appealing. Don’t hesitate to incorporate seasonal elements like pomegranate seeds or cranberries for added color.
Additionally, you can customize your board to fit dietary preferences by including vegetarian options or gluten-free crackers. Remember, there’s no right or wrong way to create a charcuterie board; it’s all about having fun and enjoying the process!
Sweet Treats Wonderland
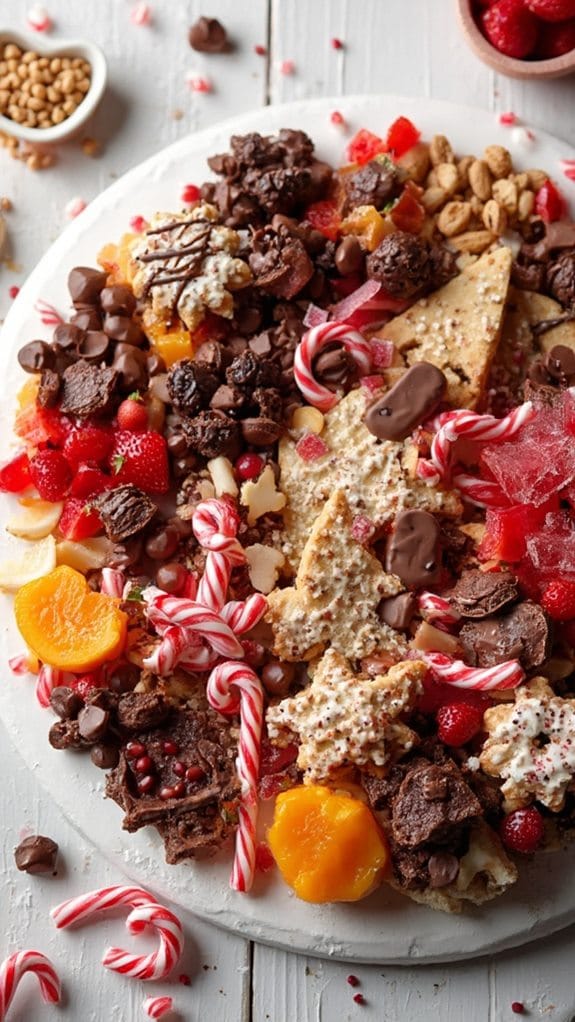
Title: Sweet Treats Wonderland Charcuterie Board
Prep Time: 20 minutes
Cook Time: 0 minutes
Number of Servings: 8
Required Equipment List: Large wooden board or platter, small bowls, knife, and toothpicks
Cuisine Type: American
The Sweet Treats Wonderland Charcuterie Board is a whimsical and delightful way to celebrate the festive season with a variety of colorful and delicious sweets. This board combines an assortment of chocolates, candies, fruits, and baked goods, creating a visual feast that’s perfect for holiday parties or cozy family gatherings.
Each element is chosen to evoke the warmth and joy of the holiday season, making it a centerpiece that everyone will admire and enjoy. Creating this charcuterie board isn’t only simple but also allows for a lot of creativity and personalization. You can mix and match your favorite sweet treats and seasonal items, ensuring that there’s something for everyone.
From rich chocolates to tangy fruits, the Sweet Treats Wonderland is sure to satisfy any sweet tooth and bring smiles to the faces of your guests.
Ingredients:
- 1 cup assorted chocolates (truffles, chocolate-covered pretzels)
- 1 cup candy canes (broken into pieces)
- 1 cup assorted gummies (bears, sour worms)
- 1 cup mixed nuts (sweetened or chocolate-covered)
- 1 cup seasonal fruits (strawberries, mandarin oranges, pomegranate seeds)
- 1 cup mini cookies (gingerbread, sugar cookies)
- 1/2 cup marshmallows (mini or regular)
- 1/4 cup sprinkles (for decoration)
- Fresh mint leaves (for garnish)
Instructions:
- Start by selecting a large wooden board or platter as your base. Make sure it’s clean and dry to create a beautiful presentation for your sweet treats.
- Arrange small bowls on the board to hold individual items, such as chocolates and nuts, ensuring that they’re evenly spaced for visual appeal. This will help create sections on your charcuterie board.
- Begin placing the assorted chocolates around the bowls, filling in gaps with candy canes and gummies. Make sure to distribute the colors and types of treats evenly for a festive look.
- Next, add your seasonal fruits, strategically placing them to add brightness and freshness to the board. You can slice the strawberries and oranges to make them easier to pick up and enjoy.
- Incorporate the mini cookies and marshmallows into the board, tucking them between other treats to create layers and textures. This will add dimension to your charcuterie board.
- Finally, sprinkle the board with colorful sprinkles and garnish with fresh mint leaves to add a touch of holiday cheer. This will make your Sweet Treats Wonderland not only delicious but also visually stunning.
Extra Tips:
Feel free to customize your charcuterie board based on your preferences and what’s available in your area. Consider adding some chocolate fondue for dipping, or include a few savory options like cheese or crackers to balance the sweetness.
Remember to keep the board well-stocked throughout your gathering, and encourage guests to mix and match their favorite treats for a fun and interactive experience!
Mediterranean Delight Board
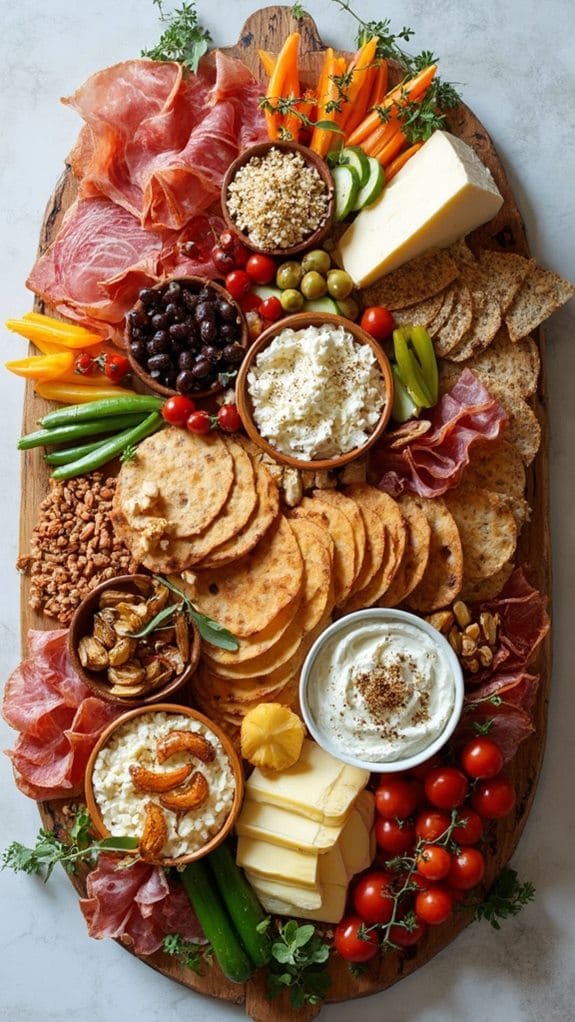
Title: Mediterranean Delight Charcuterie Board
Prep Time: 20 minutes
Cook Time: 0 minutes
Number of Servings: 8
Required Equipment List: Large wooden board or platter, small bowls for dips, knife for cheese, toothpicks or skewers
Cuisine Type: Mediterranean
A Mediterranean Delight Charcuterie Board is a vibrant and visually stunning spread that brings together a variety of flavors and textures, perfect for any gathering. This board showcases the best of Mediterranean cuisine, featuring an array of cheeses, cured meats, fresh vegetables, olives, and dips, all artfully arranged to create an inviting centerpiece.
Ideal for holiday parties or casual get-togethers, this charcuterie board isn’t only a feast for the eyes but also a delightful way to indulge in the diverse flavors of the Mediterranean. Preparing this board is incredibly easy and requires no cooking, making it a stress-free option for entertaining.
Simply select your favorite ingredients and arrange them on a large board or platter. The combination of salty cheeses, savory meats, and fresh produce offers something for everyone, guaranteeing that your guests will leave satisfied. Feel free to customize the board based on your preferences or seasonal ingredients for an even more personalized touch.
Ingredients:
- Assorted cheeses (feta, manchego, and goat cheese)
- Cured meats (prosciutto, salami, and chorizo)
- Fresh vegetables (cherry tomatoes, cucumber slices, and bell pepper strips)
- Assorted olives (kalamata, green, and stuffed)
- Hummus and tzatziki dips
- Pita bread and crackers
- Fresh herbs (basil or parsley for garnish)
- Nuts (almonds or walnuts for crunch)
Instructions:
- Start by selecting a large wooden board or platter as your base for the charcuterie spread. This will serve as the canvas for your Mediterranean Delight Board. Confirm it’s clean and dry for the best presentation.
- Arrange the cheeses in different sections of the board, slicing some into wedges or cubes for easy serving. Place the feta and goat cheese in small bowls to prevent crumbling, while the manchego can be sliced and placed directly on the board.
- Next, add the cured meats, folding or rolling them into elegant shapes and placing them near the cheeses. This not only adds visual interest but also makes it easy for guests to grab and enjoy.
- Fill in the gaps on the board with fresh vegetables, such as cherry tomatoes, cucumber slices, and bell pepper strips. This adds color and freshness, balancing the richness of the cheeses and meats.
- Incorporate small bowls of hummus and tzatziki on the board, confirming that guests have a flavorful dip option. Surround these bowls with pita bread and crackers, allowing for easy access to all the delicious dips.
- Scatter a variety of olives around the board, using a mix of kalamata and green varieties to enhance flavor and presentation. Additionally, sprinkle some nuts for added crunch and texture, filling in any remaining spaces.
- Finally, garnish the board with fresh herbs like basil or parsley for a pop of color and aromatic scent. Make sure to provide toothpicks or skewers for easy serving and enjoyment of the different components.
Extra Tips: When assembling your Mediterranean Delight Charcuterie Board, consider the use of seasonal ingredients to keep it fresh and interesting. You can also add a sweet element, such as honey or dried fruits, to balance the savory flavors.
If you have leftovers, store them in airtight containers to enjoy for days to come. Remember, the key to a successful charcuterie board is variety and presentation, so don’t be afraid to get creative with your arrangements!
Festive Fruit Arrangement
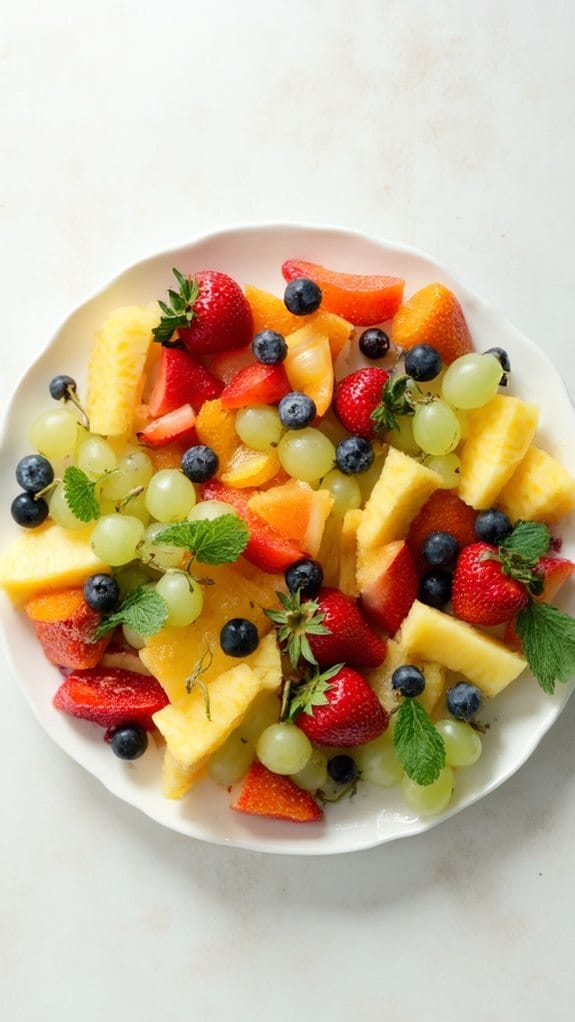
Title: Festive Fruit Arrangement
Prep Time: 15 minutes
Cook Time: 0 minutes
Number of Servings: 8
Required Equipment List: Large cutting board, knife, serving platter
Cuisine Type: American
The Festive Fruit Arrangement is a vibrant and visually stunning centerpiece that brings the joy of the holiday season to your table. Bursting with color and flavor, this fruit board showcases a variety of fresh fruits that not only taste delicious but also provide a healthy option for your holiday gatherings.
The combination of sweet, tart, and juicy fruits creates a revitalizing contrast to heavier holiday dishes, making it a perfect addition to any festive spread. Creating this arrangement is as simple as selecting your favorite seasonal fruits and artfully arranging them on a platter.
This recipe encourages creativity, allowing you to mix and match different fruits based on availability and personal preference. To elevate the presentation, consider adding some greenery such as mint leaves or edible flowers for an extra touch of elegance. This delightful fruit arrangement is sure to impress your guests and leave them feeling rejuvenated and satisfied.
Ingredients:
- 1 pineapple, peeled and cut into chunks
- 2 cups strawberries, hulled and halved
- 2 cups grapes (red and green)
- 2 kiwis, peeled and sliced
- 1 cup blueberries
- 2 cups mandarin oranges (canned or fresh)
- Fresh mint leaves for garnish (optional)
Instructions:
- Begin by preparing your fruits. Peel and cut the pineapple into bite-sized chunks, hull and halve the strawberries, and slice the kiwis. Rinse the grapes and blueberries under cold water to confirm they’re clean and ready to eat.
- Choose a large serving platter or a wooden board as your base for the arrangement. Start by placing the pineapple chunks in one section of the platter, creating a focal point with the vibrant yellow color.
- Next, arrange the halved strawberries around the pineapple, allowing their bright red color to complement the pineapple. Be sure to leave some space between the different fruits to create a visually appealing layout.
- Fill in the remaining spaces with clusters of grapes, both red and green, ensuring a balance of colors throughout the arrangement. Add the blueberries in small clusters to provide pops of blue among the other fruits.
- Finally, add the sliced kiwis and mandarin oranges to the platter, placing them in a way that adds contrast and variety to the overall arrangement. If desired, sprinkle fresh mint leaves around the board for a touch of freshness and color.
Extra Tips: When selecting fruits for your arrangement, aim for a variety of colors and textures to make it visually appealing. You can also consider adding other seasonal fruits like pomegranates or apples depending on your preference.
To keep the fruits fresh, prepare the arrangement close to serving time and cover it with plastic wrap if needed. Enjoy this revitalizing dish as a healthy option at your holiday gatherings!
Gourmet Nut and Dried Fruit
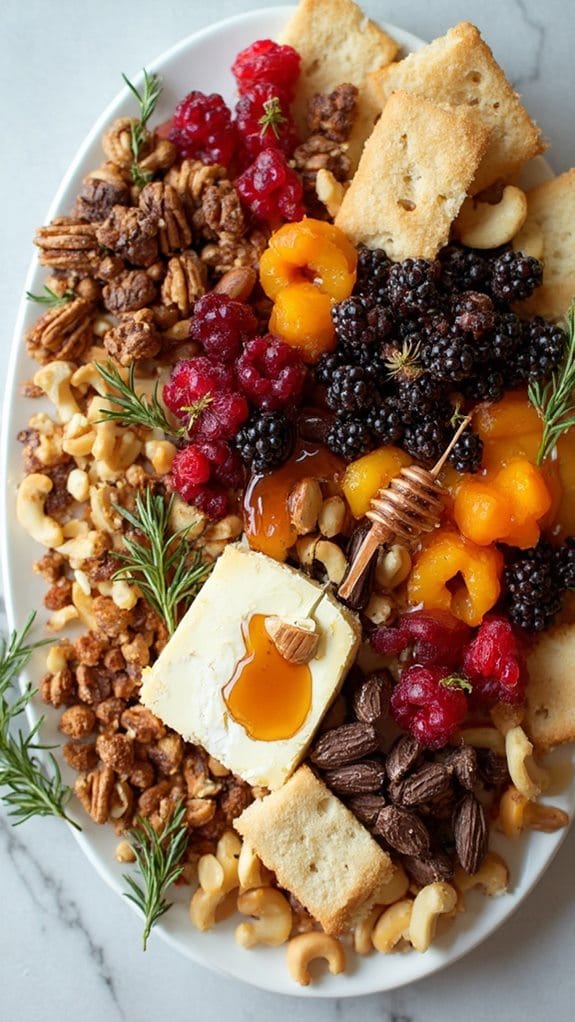
Title: Gourmet Nut and Dried Fruit Charcuterie Board
Prep Time: 20 minutes
Cook Time: 0 minutes
Number of Servings: 8
Required Equipment List: Serving board or platter, small bowls, knife
Cuisine Type: American
Creating a Gourmet Nut and Dried Fruit Charcuterie Board is a fun and visually stunning way to bring a touch of elegance and flavor to your holiday celebrations. This board combines a delightful variety of nuts, dried fruits, and complementary treats that cater to different tastes and preferences. Perfect for gatherings, this no-cook recipe allows you to focus on presentation and flavor, making it a breeze to impress your guests without spending hours in the kitchen.
The beauty of this charcuterie board lies in its versatility. You can customize it with your favorite nuts and dried fruits, as well as add gourmet cheeses or meats if desired. The combination of crunchy nuts, sweet dried fruits, and optional savory elements creates a balanced and satisfying snack that pairs beautifully with a glass of wine.
Arrange the ingredients artistically on a large serving board or platter, and let your creativity shine as you design a festive centerpiece that everyone will enjoy.
Ingredients:
- 1 cup mixed nuts (almonds, walnuts, pecans, cashews)
- 1 cup dried fruits (cranberries, apricots, figs, raisins)
- 1/2 cup dark chocolate covered almonds
- 1/2 cup goat cheese (optional)
- 1/2 cup honey or maple syrup (for drizzling)
- Fresh rosemary sprigs (for garnish)
- Crackers or breadsticks (for serving)
Instructions:
- Begin by selecting a large serving board or platter as your base. Make sure it’s clean and dry to create a beautiful presentation for your charcuterie board.
- Arrange the mixed nuts on one side of the board. You can either leave them in their original packaging for a rustic look or pour them into small bowls to create a more organized appearance.
- Next, add the dried fruits next to the nuts, making sure to distribute the colors and textures evenly across the board. You can slice larger fruits like figs or apricots for easier serving.
- If using, place the goat cheese on the board, either whole or sliced, in a way that complements the arrangement of the nuts and fruits. This adds a creamy element that pairs well with the other flavors.
- For a touch of indulgence, scatter the dark chocolate covered almonds around the board, ensuring they’re easily accessible for guests to grab.
- Drizzle honey or maple syrup over the cheese or leave it in a small bowl for dipping. This adds a sweet element that enhances the overall flavor profile of the board.
- Finally, garnish the board with fresh rosemary sprigs for a pop of color and a hint of fragrance. Serve with an assortment of crackers or breadsticks on the side for added texture.
Extra Tips: Feel free to experiment with different types of nuts and dried fruits based on your preferences or seasonal availability. For a more festive touch, consider adding seasonal fruits like pomegranate seeds or slices of apple.
Remember to use contrasting colors and textures when arranging the board to create an eye-catching display. This charcuterie board can also be made in advance; just cover it with plastic wrap and store it in the fridge until serving time. Enjoy your gourmet creation!
Holiday Veggie Platter
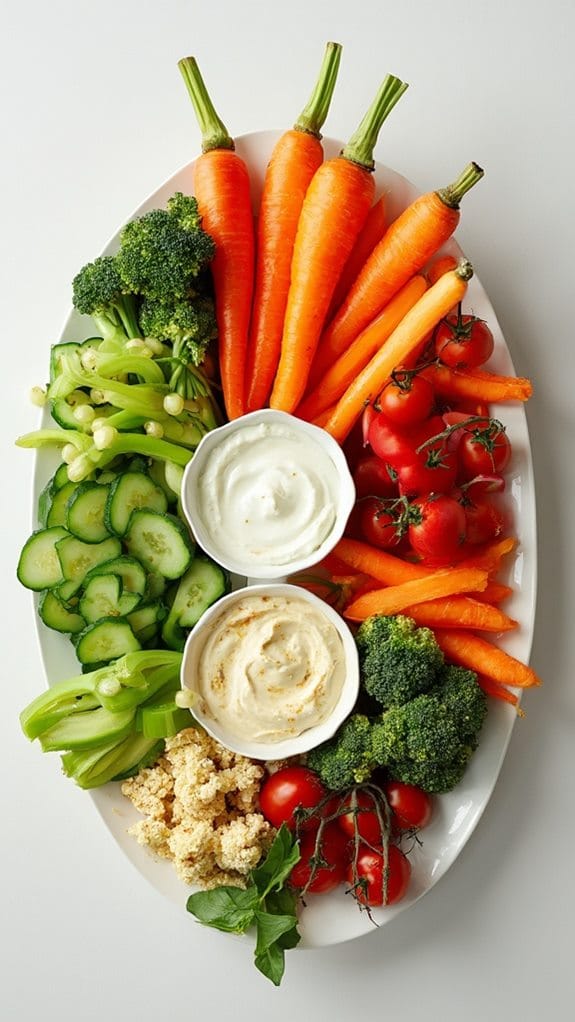
Title: Holiday Veggie Platter
Prep Time: 20 minutes
Cook Time: 0 minutes
Number of Servings: 8
Required Equipment List: Cutting board, knife, serving platter, small bowls
Cuisine Type: American
A Holiday Veggie Platter isn’t only a colorful addition to your festive table but also a healthy option that everyone can enjoy. Featuring a variety of fresh vegetables, this platter can be tailored to your personal preferences, showcasing seasonal produce for a vibrant presentation.
Whether served as an appetizer or as a side dish, this platter is perfect for holiday gatherings, bringing a delightful crunch and freshness to balance out richer holiday fare. The beauty of a veggie platter lies in its versatility. You can mix and match your favorite vegetables, offering a range of flavors and textures.
Pairing the veggies with delicious dips, such as ranch, hummus, or tzatziki, enhances the experience and invites guests to dig in. This simple yet elegant dish is sure to be a hit, guaranteeing that everyone has a chance to indulge in some healthful delights amidst the holiday treats.
Ingredients:
- 1 cup baby carrots
- 1 cup cherry tomatoes
- 1 cucumber, sliced
- 1 bell pepper, sliced
- 1 cup broccoli florets
- 1 cup cauliflower florets
- 1 cup snap peas
- 1 cup radishes, halved
- 1 cup celery sticks
- 1 cup assorted dips (ranch, hummus, tzatziki)
Instructions:
- Start by preparing your vegetables. Rinse all the fresh produce under cold water to remove any dirt or pesticides. Pat them dry with a paper towel to confirm they’re clean and ready to serve.
- Using a cutting board and a sharp knife, slice the cucumber into thick rounds, the bell pepper into strips, and the celery into sticks. Cut the radishes in half for easier dipping and break the broccoli and cauliflower into bite-sized florets.
- Arrange the vegetables on a large serving platter or board. Begin by placing larger items like the cauliflower and broccoli in the center, then fill in the gaps with the sliced cucumber, bell pepper, celery sticks, snap peas, cherry tomatoes, and baby carrots for an attractive presentation.
- For added visual appeal, you can group similar colored vegetables together or create a rainbow effect by arranging them in a circular pattern. This makes the platter not only tasty but also visually stunning.
- Finally, place small bowls of your chosen dips around the platter. These can be positioned at strategic points to allow for easy access, making sure that guests can easily dip their veggies without creating a mess.
Extra Tips: To elevate your holiday veggie platter, consider adding a few garnishes like fresh herbs or edible flowers for an extra touch of elegance.
You can also include a variety of dips to cater to different tastes, such as a spicy salsa or a creamy avocado dip. If you’re looking to add a bit of protein, consider including some cheese cubes or roasted chickpeas as additional options.
Don’t forget to replenish the platter as needed during your gathering to keep it looking fresh and inviting!
Chocolate and Marshmallow Forest

Title: Chocolate and Marshmallow Forest
Prep Time: 20 minutes
Cook Time: 10 minutes
Number of Servings: 8
Required Equipment List: Baking sheet, parchment paper, mixing bowl, spatula, wooden skewers
Cuisine Type: American
The Chocolate and Marshmallow Forest is a whimsical dessert that combines sweet chocolate and fluffy marshmallows into a delightful treat, perfect for holiday gatherings or cozy family nights.
This festive charcuterie board features an array of chocolate-dipped marshmallows arranged like trees, creating a playful forest scene that will captivate both kids and adults alike. Easy to assemble yet impressive in presentation, it’s an ideal way to add a touch of magic to your holiday celebrations.
With just a few simple ingredients, this recipe allows for creativity in your presentation. You can use different types of chocolate for dipping, sprinkle various toppings on the marshmallows, and even incorporate other sweet treats like pretzels or candies to enhance the forest theme.
This fun and interactive dessert encourages sharing and enjoyment, making it a memorable addition to your festive gatherings.
Ingredients:
- 16 large marshmallows
- 1 cup chocolate chips (milk, dark, or white chocolate)
- 1 tablespoon coconut oil (optional, for smooth melting)
- Assorted toppings (e.g., crushed graham crackers, sprinkles, crushed nuts)
- Wooden skewers or lollipop sticks
- Parchment paper (for cooling)
Instructions:
- Begin by preparing your work area. Line a baking sheet with parchment paper to catch any drips from the melted chocolate. This will also provide a non-stick surface for cooling the chocolate-dipped marshmallows.
- In a microwave-safe bowl, combine the chocolate chips and coconut oil (if using). Microwave in 30-second intervals, stirring well after each interval, until the chocolate is fully melted and smooth. Be careful not to overheat the chocolate to avoid burning.
- Once the chocolate is melted, take each marshmallow and dip it into the chocolate, ensuring it’s fully coated. Let any excess chocolate drip off, then sprinkle your choice of toppings onto the chocolate-covered marshmallow while it’s still wet.
- Insert a wooden skewer or lollipop stick into the bottom of each marshmallow, creating a tree-like shape. Arrange the dipped marshmallows on the prepared baking sheet. Repeat this process until all marshmallows are coated and decorated.
- Place the baking sheet in the refrigerator for about 10 minutes, or until the chocolate has fully hardened. Once set, you can arrange the marshmallows on a serving platter to create your edible forest scene.
Extra Tips: Feel free to get creative with your toppings—try crushed peppermint for a festive touch or drizzle additional melted chocolate over the top for added flair.
You can also arrange the finished marshmallows in a cone shape to mimic a Christmas tree, or use them to decorate a larger dessert board. This dessert is best enjoyed fresh, but you can store leftover chocolate-dipped marshmallows in an airtight container for a few days. Enjoy your delightful Chocolate and Marshmallow Forest!
Mini Sandwich Christmas Tree
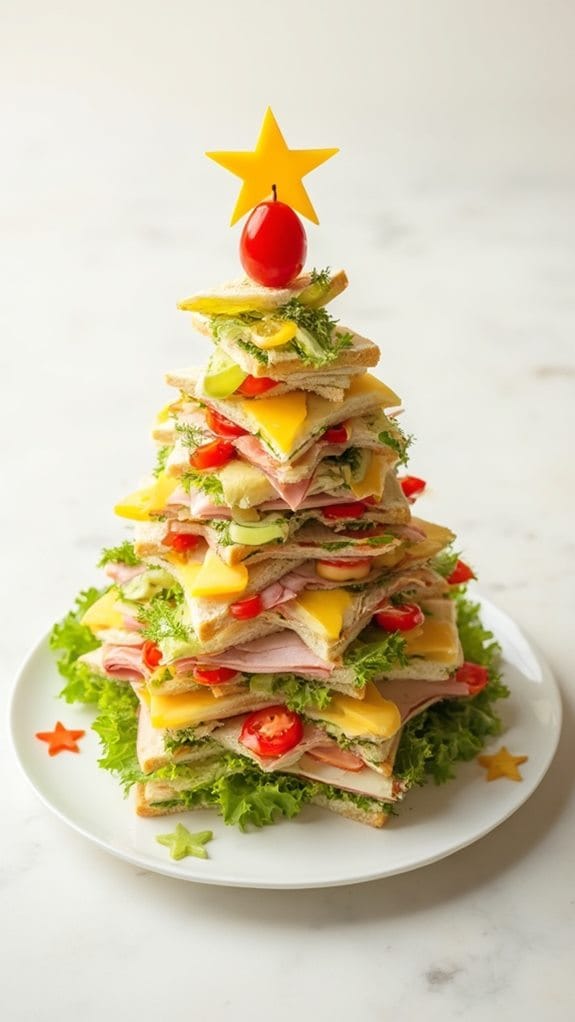
Title: Mini Sandwich Christmas Tree
Prep Time: 20 minutes
Cook Time: 0 minutes
Number of Servings: 8
Required Equipment List: Cutting board, sharp knife, platter or serving board, toothpicks
Cuisine Type: American
The Mini Sandwich Christmas Tree is a festive and creative way to serve bite-sized sandwiches during the holiday season. This delightful presentation not only captures the essence of Christmas but also offers a delicious treat that guests of all ages will enjoy.
Each layer of the sandwich tree can be customized with various fillings, allowing you to cater to different tastes and dietary preferences. This dish is perfect for parties, family gatherings, or as a fun centerpiece for your holiday table.
Creating this sandwich tree is simple and requires no cooking, making it a hassle-free addition to your holiday spread. With a colorful array of ingredients layered together, this dish isn’t only visually appealing but also a delicious way to provide a variety of flavor combinations.
The use of festive decorations like cherry tomatoes or bell pepper stars on top adds that extra holiday cheer, making your sandwich tree the highlight of the party.
Ingredients:
- 12 slices of bread (white, whole grain, or a mix)
- 8 ounces deli meats (ham, turkey, or chicken)
- 8 ounces cheese (cheddar, Swiss, or provolone)
- 1 cup lettuce or spinach
- 1/2 cup mayonnaise or mustard (optional)
- Cherry tomatoes (for decoration)
- Bell pepper (cut into star shapes for decoration)
- Toothpicks
Instructions:
- Begin by cutting the crusts off the bread slices if you desire a cleaner look. Then, use a cookie cutter or a sharp knife to cut the bread into star shapes or triangles for a festive touch. Aim for various sizes to create depth in your sandwich tree design.
- Layer the sandwich fillings by spreading mayonnaise or mustard on one slice of bread, followed by a slice of deli meat and cheese, and then a layer of lettuce. Top it with another slice of bread, and repeat the layering process until you have used all the ingredients.
- Assemble the sandwich tree by starting with the largest pieces at the bottom and stacking smaller pieces on top to create a tree shape. Use toothpicks to hold the layers together securely.
- Once your tree shape is complete, decorate the top of the tree with a cherry tomato as the “star” and use bell pepper cutouts to add additional festive touches around the tree.
- Place the mini sandwich tree on a platter or serving board and serve immediately, or refrigerate until ready to serve. Cut the sandwiches into bite-sized pieces for easy serving.
Extra Tips: To make the mini sandwich tree more festive, consider using a variety of colored bell peppers or adding olives for extra decoration.
You can also personalize each layer with different spreads or additional toppings, such as pickles or cucumbers, to enhance the flavor. If you’re preparing this in advance, keep the sandwiches covered in the fridge to maintain freshness, and assemble the tree just before serving for the best presentation. Enjoy your festive creation!
Savory Puff Pastry Shapes

Title: Savory Puff Pastry Shapes
Prep Time: 20 minutes
Cook Time: 25 minutes
Number of Servings: 12
Required Equipment List: Baking sheet, parchment paper, rolling pin, knife, pastry brush
Cuisine Type: French-inspired
Savory Puff Pastry Shapes are a delightful addition to any charcuterie board, offering a flaky, buttery texture and a savory filling that complements a variety of cheeses and meats. These bite-sized treats are versatile and can be filled with an array of ingredients such as cheese, spinach, or even ham, making them suitable for any occasion.
Their elegant presentation and delicious taste will impress your guests, whether you’re hosting a festive gathering or a cozy get-together with friends. Making these pastry shapes is simpler than you might think, as store-bought puff pastry does most of the work for you.
With a quick roll-out and some creative folding, you can shape them into stars, hearts, or other festive designs. After baking, they become golden and crisp, serving as the perfect vessel for dips or eaten on their own. These savory pastries are sure to be a crowd-pleaser at your next holiday celebration.
Ingredients:
- 1 sheet of puff pastry (thawed)
- 1 cup shredded cheese (cheddar, mozzarella, or your choice)
- 1/2 cup cooked spinach (drained and chopped)
- 1/4 cup diced ham or cooked bacon (optional)
- 1 egg (beaten, for egg wash)
- Salt and pepper to taste
- Fresh herbs (such as thyme or parsley, for garnish)
Instructions:
- Preheat your oven to 400°F (200°C) and line a baking sheet with parchment paper to prevent sticking. This will also help in easy cleanup after baking.
- On a lightly floured surface, roll out the thawed puff pastry to smooth out any creases, aiming for a thickness of about 1/8 inch. Use a knife or pizza cutter to slice the pastry into squares or desired shapes.
- In a mixing bowl, combine the shredded cheese, cooked spinach, diced ham or bacon (if using), and season with salt and pepper to taste. Mix well until all ingredients are evenly incorporated.
- Place a small spoonful of the filling mixture in the center of each pastry square. Be careful not to overfill, as this can cause the pastry to burst while baking.
- Fold the pastry over to create triangles or other shapes, pressing the edges firmly to seal. Use a fork to crimp the edges for a decorative touch and to guarantee they’re tightly sealed.
- Brush the tops of the pastry shapes with the beaten egg to give them a beautiful golden color as they bake. Place them on the prepared baking sheet with enough space between them to allow for puffing.
- Bake in the preheated oven for 20-25 minutes, or until the pastries are puffed and golden brown. Keep an eye on them towards the end of the baking time to prevent over-browning.
Extra Tips: For a fun twist, try adding different spices or cheeses to customize your filling. You can also experiment with additional ingredients like roasted red peppers or artichokes for a unique flavor.
If you prefer a vegetarian option, simply leave out any meat and increase the amount of cheese or vegetables. Serve these pastries warm for the best taste, and consider pairing them with a variety of dips such as marinara or pesto for extra flavor. Enjoy your savory puff pastry shapes!
Breakfast Charcuterie Board
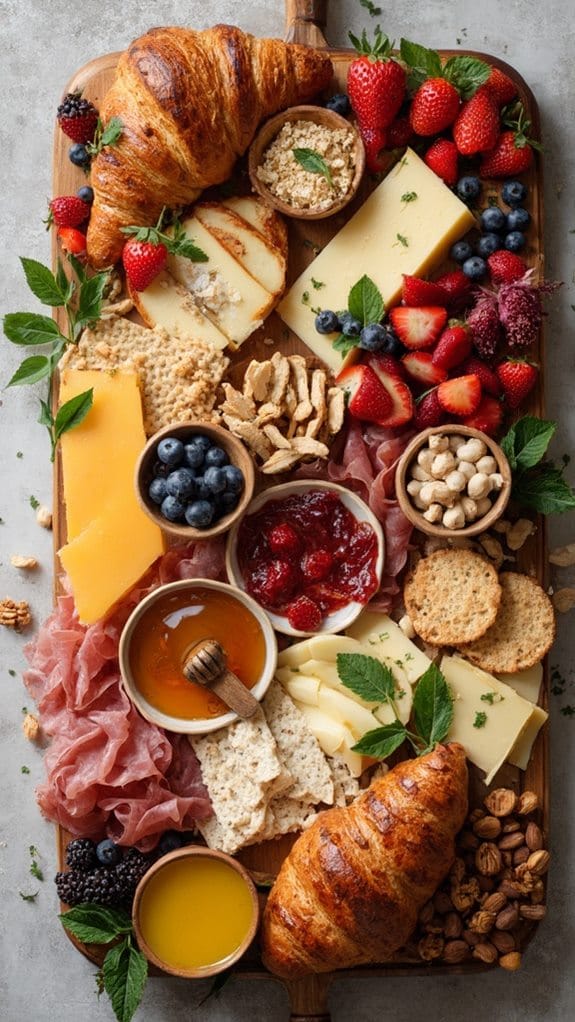
Title: Breakfast Charcuterie Board
Prep Time: 20 minutes
Cook Time: 0 minutes
Number of Servings: 6
Required Equipment List: Wooden board or platter, small bowls, knife, cutting board
Cuisine Type: American
A Breakfast Charcuterie Board is a delightful way to start your day, combining a variety of breakfast favorites into one visually appealing and shareable spread. This board typically includes an assortment of meats, cheeses, fruits, breads, and spreads that cater to different tastes, making it perfect for brunch with friends or a cozy family breakfast.
The beauty of a charcuterie board lies in its versatility; you can customize it with your favorite breakfast items and seasonal ingredients. Creating a Breakfast Charcuterie Board not only allows you to showcase your culinary creativity but also makes for a fun, interactive meal. Guests can mix and match their favorites, making each bite a unique experience.
Whether you prefer sweet or savory, this board is sure to please everyone at the table, and the best part? There’s no cooking involved! Just slice, arrange, and enjoy.
Ingredients:
- Assorted cheeses (cheddar, brie, gouda)
- Assorted cured meats (salami, prosciutto, turkey slices)
- Fresh fruits (berries, sliced apples, grapes)
- Dried fruits (apricots, figs)
- Nuts (almonds, walnuts)
- Croissants or pastries
- Whole grain crackers
- Honey or maple syrup (for drizzling)
- Jams or fruit spreads (strawberry, apricot)
- Fresh herbs (mint, basil) for garnish
Instructions:
- Begin by selecting a large wooden board or platter as the base for your charcuterie spread. Make sure it’s clean and dry to create an inviting presentation.
- Arrange the assorted cheeses on one side of the board, placing them in small wedges or slices. Consider using cheese knives or forks to make it easy for guests to serve themselves.
- Next, add the cured meats in a visually appealing manner. You can fold the slices or roll them up for an attractive display. Make sure to leave some space between the cheeses and meats for other ingredients.
- Fill in the gaps on the board with fresh fruits. Scatter berries, sliced apples, and grapes around the cheeses and meats for a pop of color and natural sweetness.
- Add small bowls for the jams, honey, and nuts. This not only keeps the board organized but also adds an element of interest. If desired, include a few sprigs of fresh herbs for garnish to enhance the board’s aesthetic appeal.
- Finally, complete the board with croissants, pastries, and whole grain crackers, positioning them alongside the other ingredients for easy access.
Extra Tips: When creating your Breakfast Charcuterie Board, feel free to mix and match ingredients based on seasonal availability and personal preferences.
Consider adding a variety of textures—soft cheeses, hard cheeses, and crunchy nuts—to elevate the eating experience. Additionally, use small labels or tags to indicate the types of cheeses and meats for your guests; this will spark conversation and help everyone make informed choices.
Sliced Bread and Spreads
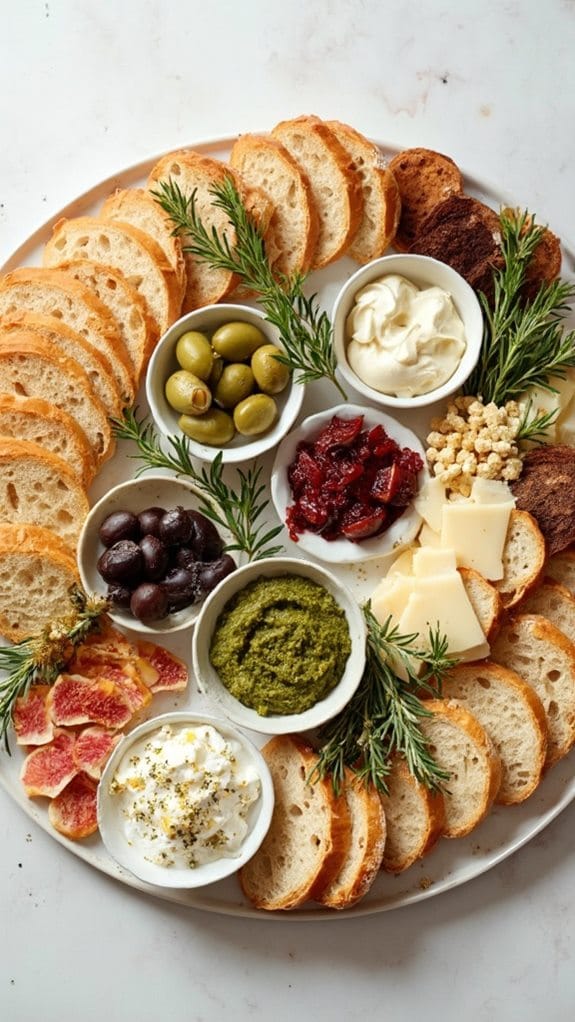
Title: Sliced Bread and Spreads Charcuterie Board
Prep Time: 20 minutes
Cook Time: 0 minutes
Number of Servings: 6-8
Required Equipment List: Cutting board, knife, serving platter or board
Cuisine Type: American
Creating a Sliced Bread and Spreads Charcuterie Board is a delightful way to showcase a variety of flavors and textures, making it perfect for entertaining guests or enjoying a cozy night in. This board features an assortment of artisan breads paired with a selection of delectable spreads, cheeses, and accompaniments. The combination of fresh, crusty bread with creamy, tangy spreads provides a satisfying experience that’s sure to impress.
The beauty of a charcuterie board is its versatility; you can mix and match your favorite ingredients to create a personalized experience. Whether you prefer a mild cream cheese spread or a spicy harissa, this board can cater to different tastes and dietary preferences. It’s an ideal centerpiece for gatherings, allowing guests to help themselves and enjoy the variety of flavors. Plus, with no cooking required, you can spend more time socializing and less time in the kitchen.
Ingredients:
- 1 baguette, sliced
- 1 loaf of sourdough bread, sliced
- 1 cup cream cheese, softened
- 1/2 cup pesto
- 1/2 cup hummus
- 1/2 cup goat cheese, crumbled
- 1/2 cup fig jam
- Fresh herbs (e.g., rosemary, thyme) for garnish
- Mixed olives for garnish
- Assorted crackers (optional)
Instructions:
- Begin by preparing your work surface. Use a cutting board to slice the baguette and sourdough bread into even pieces, aiming for about 1-inch thick slices. Arrange these slices on a large serving platter or board, creating a visually appealing display.
- In small bowls, portion out the spreads: cream cheese, pesto, hummus, and fig jam. If desired, you can mix herbs or spices into the cream cheese for added flavor. Place these bowls strategically around the bread on the board.
- Crumble the goat cheese and sprinkle it over the bread slices or place it in a small bowl for easy serving. This adds a lovely creamy texture that pairs well with the various spreads.
- For an added touch, arrange a small bowl of mixed olives on the board. You can also include some assorted crackers for additional crunch and variety. This will create an enticing selection for guests to choose from.
- Finally, garnish the board with fresh herbs such as rosemary or thyme to add a pop of color and a delightful aroma. Encourage guests to mix and match their favorite combinations of bread and spreads for a personalized tasting experience.
Extra Tips: When assembling your charcuterie board, consider the flavor profiles of your spreads and choose complementary breads. For instance, a robust sourdough pairs nicely with sharper spreads like pesto or fig jam, while a milder cream cheese goes well with the baguette.
Don’t be afraid to add seasonal ingredients like roasted vegetables or fruit slices to enhance the board even further. Enjoy the process of creating this beautiful display and have fun experimenting with different combinations!
Colorful Candy Cane Board
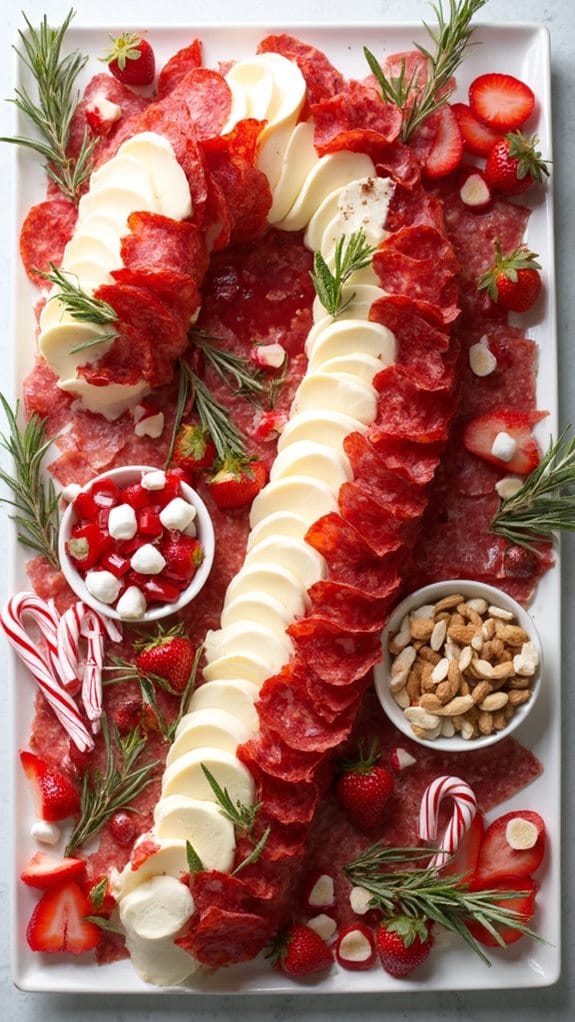
Title: Colorful Candy Cane Charcuterie Board
Prep Time: 20 minutes
Cook Time: 0 minutes
Number of Servings: 8
Required Equipment List: Large board or platter, small bowls, knife, decorative Christmas-themed elements (optional)
Cuisine Type: American
The Colorful Candy Cane Charcuterie Board is a festive and fun way to celebrate the holiday season while indulging in a variety of delicious snacks. This board isn’t only visually appealing with its vibrant red and white color scheme mimicking a candy cane, but it also offers a delightful mix of sweet and savory treats. Perfect for holiday parties, family gatherings, or cozy nights by the fire, this charcuterie board is a festive centerpiece that will surely impress your guests.
Creating this board is incredibly simple, allowing you to customize it based on personal preferences and available ingredients. With a combination of meats, cheeses, fruits, and festive sweets, it’s a versatile dish that can be tailored to suit any palate.
The use of fresh herbs and decorative elements, like small Christmas ornaments or themed napkins, can elevate the presentation, making it not only a treat for the taste buds but also a feast for the eyes.
Ingredients:
- 1 pound sliced salami
- 1 pound sliced pepperoni
- 8 ounces cream cheese, softened
- 8 ounces mozzarella cheese, sliced
- 1 cup fresh strawberries, hulled and halved
- 1 cup red and white gummy candies (like candy canes or marshmallows)
- 1 cup assorted nuts (like almonds or cashews)
- Fresh rosemary sprigs for garnish
Instructions:
- Start by selecting a large board or platter to serve as the base for your charcuterie board. Arrange the board in a way that allows ample space for all ingredients, creating a visually appealing layout.
- Place small bowls on the board to hold the cream cheese and assorted nuts. This will help create sections on the board and make it easier for guests to serve themselves.
- Begin layering the sliced salami and pepperoni by arranging them in a circular pattern to mimic the shape of a candy cane. You can overlap the slices slightly to add dimension and texture to the display.
- Next, slice the mozzarella cheese into rounds and place them next to the meats, creating another section of the board. This will contrast beautifully with the red meats and add a creamy element to the selection.
- Add the fresh strawberries around the board, filling in gaps and adding a pop of color. Their vibrant red will enhance the festive look, while providing an invigorating sweetness that pairs well with the savory options.
- Scatter the red and white gummy candies throughout the board, ensuring they’re visible and easily accessible. This adds a playful touch and reinforces the candy cane theme.
- Finally, garnish the entire board with fresh rosemary sprigs, which won’t only add a fragrant aroma but also enhance the festive presentation. Arrange the nuts in the bowls and serve immediately for your guests to enjoy.
Extra Tips: When assembling your charcuterie board, consider using a variety of textures and flavors to keep things interesting. Feel free to swap out meats or cheeses based on your preferences or dietary restrictions.
You can also include seasonal fruits or other festive candies to further enhance the theme. Remember, the key to a stunning charcuterie board is in the presentation, so take your time arranging everything beautifully!
Rustic Charcuterie With Pickles
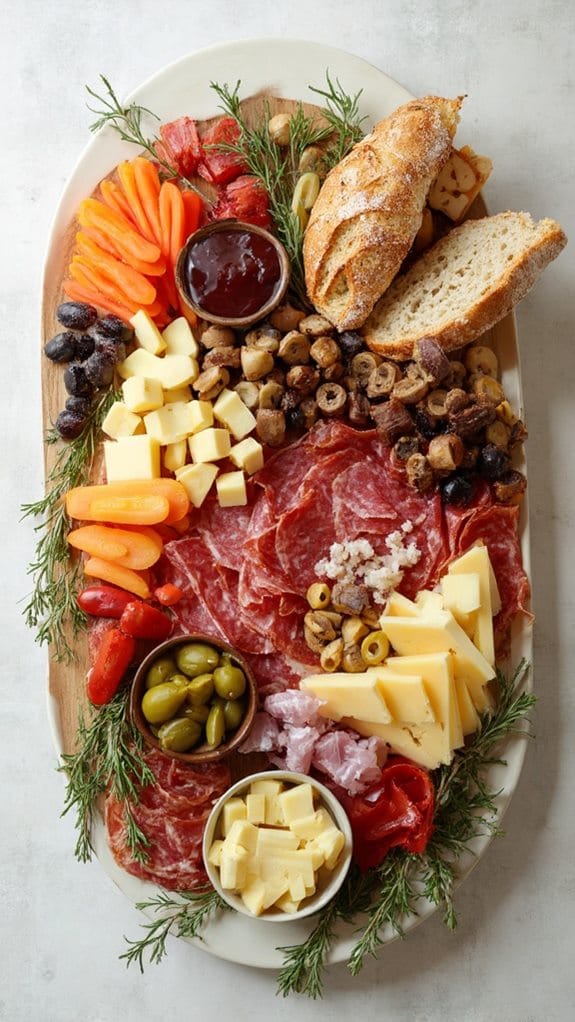
Title: Rustic Charcuterie With Pickles
Prep Time: 20 minutes
Cook Time: 0 minutes
Number of Servings: 8
Required Equipment List: Serving board or platter, small bowls, knife, cutting board
Cuisine Type: Rustic European
This Rustic Charcuterie With Pickles is a charming and visually appealing dish that showcases a delightful assortment of cured meats, cheeses, and tangy pickles. Perfect for holiday gatherings or casual get-togethers, this charcuterie board brings together a variety of flavors and textures that will please any palate.
The combination of savory meats and creamy cheeses is beautifully balanced by the acidity of pickles, making it an ideal appetizer or snack. Creating a rustic charcuterie board isn’t only easy but also allows for creativity and personalization. You can choose your favorite meats and cheeses while incorporating seasonal pickles for an extra zing.
This dish is all about presentation, so feel free to arrange the ingredients artfully on a wooden board or platter, inviting your guests to indulge in a delicious grazing experience.
Ingredients:
- 8 ounces assorted cured meats (such as salami, prosciutto, and chorizo)
- 8 ounces assorted cheeses (such as brie, cheddar, and gouda)
- 1 cup assorted pickles (such as dill pickles, pickled onions, and pickled carrots)
- 1 cup mixed olives (green and black)
- Fresh herbs (such as rosemary or thyme, for garnish)
- Sliced baguette or crackers (for serving)
Instructions:
- Begin by selecting a large serving board or platter that will accommodate all the ingredients. A wooden board adds a rustic charm, while a white platter provides a clean backdrop for the colorful ingredients.
- Arrange the assorted cured meats on one side of the board. You can fold or roll the slices for a visually appealing presentation. Feel free to create small piles or fan them out for variety.
- Next, place the assorted cheeses in different sections of the board. You can cut some into wedges or cubes and leave others whole for a more rustic feel. Consider adding a small cheese knife for easy serving.
- Fill small bowls with the assorted pickles and mixed olives, placing them strategically around the meat and cheese sections. This will create a nice balance on the board and allow guests to easily access the condiments.
- Finally, garnish the board with fresh herbs, scattering them around the different components to add a pop of color and an aromatic touch. Serve the charcuterie board with sliced baguette or a selection of crackers on the side for a complete experience.
Extra Tips: When assembling your rustic charcuterie board, consider incorporating seasonal or local ingredients for a unique twist. Don’t hesitate to experiment with different types of pickles or even add spreads like honey or grainy mustard for added flavor.
The key is to create a board that reflects your personal taste, so have fun mixing and matching ingredients. Enjoy your charcuterie board with a nice glass of wine or craft beer for an elevated experience!
Elegant Antipasto Tree
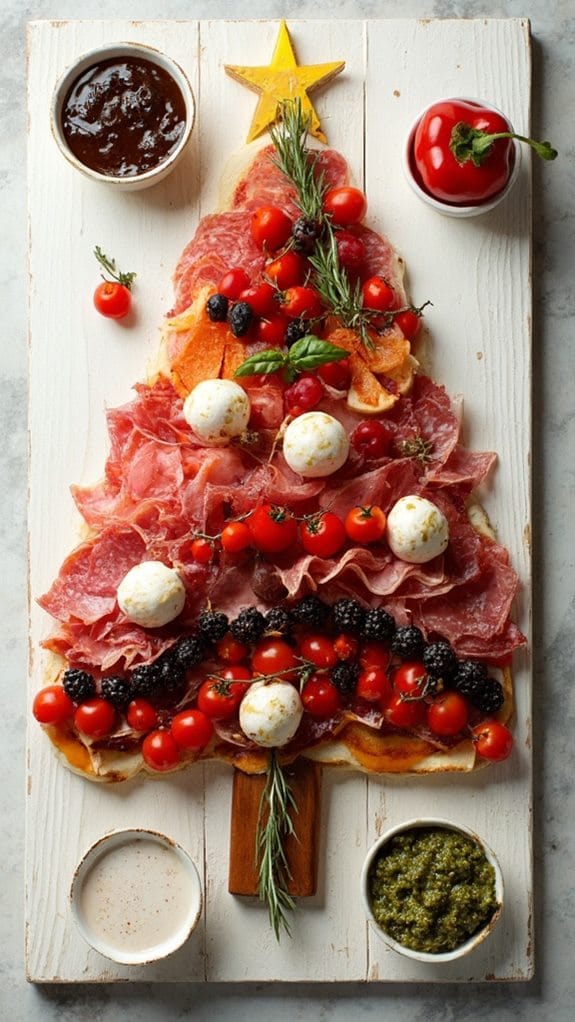
Title: Elegant Antipasto Tree
Prep Time: 20 minutes
Cook Time: 0 minutes
Number of Servings: 8
Required Equipment List: Large wooden board or platter, small bowls (for dips), toothpicks or skewers
Cuisine Type: Italian
The Elegant Antipasto Tree is a stunning and creative way to present a traditional Italian antipasto platter. This visually appealing dish not only serves as an appetizer but also as a centerpiece for your holiday gatherings. Layered in the shape of a Christmas tree, this antipasto board features an assortment of cured meats, cheeses, olives, and vegetables, offering a delightful combination of flavors and textures.
The vibrant colors and varied shapes invite guests to indulge in a festive and flavorful experience. Assembling this antipasto tree is simple and can be tailored to suit your taste preferences and dietary restrictions. You can use a variety of ingredients, including prosciutto, salami, fresh mozzarella, artichokes, and sun-dried tomatoes.
The addition of fresh herbs like rosemary or basil can enhance the visual appeal and provide a touch of freshness. Serve it with a selection of dips like pesto or balsamic glaze for added flavor and a beautiful presentation that will impress your guests.
Ingredients:
- 8 ounces prosciutto, thinly sliced
- 8 ounces salami, thinly sliced
- 8 ounces fresh mozzarella, balls or sliced
- 1 cup cherry tomatoes
- 1 cup kalamata olives
- 1 cup marinated artichoke hearts
- 1 cup roasted red peppers
- Fresh basil or rosemary sprigs (for garnish)
- Small bowls of pesto or balsamic glaze (for dipping)
Instructions:
- Start by selecting a large wooden board or platter as the base for your antipasto tree. You want to guarantee it has enough space to arrange all the ingredients in the shape of a Christmas tree.
- Begin by placing the fresh mozzarella balls or slices at the base of the board to create the tree trunk. Arrange them in a straight line to provide stability for the tree’s structure.
- Next, layer the prosciutto and salami slices in a triangular shape above the mozzarella to form the lower branches of the tree. Alternate the meats for visual interest, overlapping them slightly as you go.
- Continue building the tree by adding cherry tomatoes and olives in the next layer, placing them in a staggered pattern to maintain the triangular shape. These bright colors will add vibrancy to the presentation.
- For the middle layer, arrange the marinated artichoke hearts and roasted red peppers, continuing to follow the tree shape. Be creative and use the varying sizes of the ingredients to give the tree a natural look.
- Finish the tree with a final layer of fresh basil or rosemary sprigs at the top as a decorative star. You can also add a few additional cherry tomatoes or olives to fill in any gaps, assuring a full and festive appearance.
- Serve the antipasto tree with small bowls of pesto or balsamic glaze placed conveniently around the board for dipping. Encourage guests to use toothpicks or skewers to pick their favorite items from the tree.
Extra Tips: To add a personal touch, feel free to customize the ingredients based on your preferences. Consider including marinated mushrooms, pickled vegetables, or even different types of cheese.
If you want to make it more festive, you can use cookie cutters to shape some of the cheese into stars or other holiday motifs. Remember to balance the flavors and textures, and don’t be afraid to get creative with your presentation. Enjoy your elegant antipasto tree!
DIY Personal Charcuterie Trees
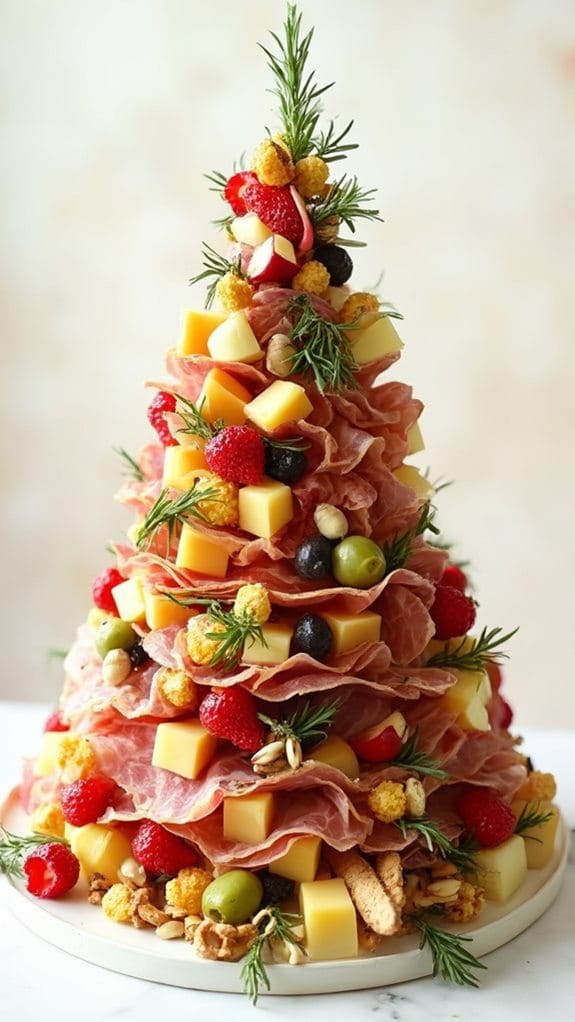
Title: DIY Personal Charcuterie Trees
Prep Time: 20 minutes
Cook Time: 0 minutes
Number of Servings: 4
Required Equipment List: Cutting board, knife, small bowls, platter or wooden board
Cuisine Type: American
Creating your own DIY Personal Charcuterie Trees is a fun and festive way to celebrate the holiday season. These delightful edible trees can be customized with your favorite cheeses, meats, fruits, and nuts, making them perfect for any gathering. Arranging the ingredients in a tree shape not only makes for an eye-catching centerpiece but also adds a playful touch to your charcuterie experience.
Each person can enjoy their own mini tree, allowing for personal preferences and dietary restrictions to be easily accommodated. The beauty of these charcuterie trees is in their versatility. You can choose a variety of ingredients to suit your taste, whether you prefer sharp cheeses, savory cured meats, or sweet fruits.
These trees can be assembled in just a few minutes, making them an excellent option for last-minute holiday parties or cozy family gatherings. Let your creativity shine as you build your very own edible masterpiece!
Ingredients:
- Assorted cheeses (cheddar, brie, gouda, etc.)
- Cured meats (salami, prosciutto, pepperoni, etc.)
- Fresh fruits (grapes, strawberries, apple slices)
- Nuts (almonds, walnuts, pecans)
- Olives (green and black)
- Fresh herbs (rosemary or thyme, for decoration)
- Crackers or breadsticks (optional, for a base)
Instructions:
- Begin by gathering all your ingredients on a clean cutting board or countertop. This will help you visualize how you want to arrange your charcuterie tree and streamline the assembly process.
- Select a base for your charcuterie tree. You can use a large platter or a wooden board. If you opt for a more structured tree, consider using a cone-shaped form (made from cardboard or foam) to help guide your arrangement.
- Start by cutting your cheeses into different shapes and sizes, such as cubes, triangles, or slices. This variety will create visual interest in your tree. Arrange the cheese pieces on the base, forming the outline of a tree.
- Next, add the cured meats. Fold or roll the slices into different shapes and layer them around the cheese. Use larger pieces at the bottom and smaller ones as you move up to give the tree dimension.
- Fill in the gaps with fresh fruits, nuts, and olives, placing them strategically to create a full, festive appearance. Consider using small bowls for olives and nuts to add height and texture to your tree.
- Finally, garnish your charcuterie tree with fresh herbs, like rosemary or thyme, to resemble tree branches. If desired, add crackers or breadsticks at the base for extra crunch and to provide a sturdy foundation.
Extra Tips: When planning your charcuterie tree, consider the color and texture of your ingredients to create an aesthetically pleasing arrangement.
Don’t be afraid to mix and match flavors and textures; experiment with different cheeses and meats to find your perfect combination. Additionally, you can prepare some dipping sauces or spreads, like honey or mustard, to serve alongside your tree for added flavor. Enjoy the process and have fun with it!
Conclusion
Now that you have a treasure trove of Christmas charcuterie board ideas at your fingertips, it’s time to unleash your inner culinary artist and create a spread that will leave your guests raving long after the last bite. Whether you opt for the classic cheese and meat tree or get a little adventurous with the sweet treats wonderland, every option is sure to spark joy and delight. Personally, I can’t resist the savory puff pastry shapes—they’re like little bites of heaven! So roll up your sleeves, gather your favorite ingredients, and craft a festive masterpiece that embodies the spirit of the season. Once you’ve dazzled your friends and family, why not snap a pic of your creation and share it with the world? After all, nothing says holiday cheer quite like a charcuterie board that looks as good as it tastes!

