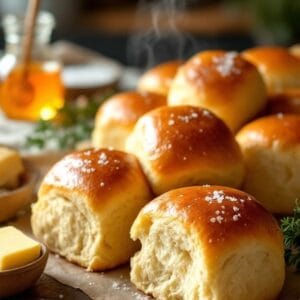
Honey Butter Quick-Cooking Dinner Rolls
Discover how to make Fluffy Honey Butter Quick-Cooking Dinner Rolls in 30 minutes! Perfect for family dinners or holiday gatherings.
Equipment
- Large Mixing Bowl
- Baking sheet
- Parchment paper
- Whisk
- Oven
Ingredients
- 4 cups flour (all-purpose)
- 2 1/4 tsp instant yeast (1 packet)
- 1 tsp salt
- 1 cup milk (warm, 110°F/43°C)
- 1/4 cup butter (unsalted, melted)
- 1 egg (large)
Glaze
- 2 tbsp honey
- 2 tbsp butter (melted)
Instructions
- Mix Warm Milk and YeastTo kick off your Fluffy Honey Butter Dinner Rolls, start by mixing the warm milk and yeast in a large mixing bowl. Confirm your milk temperature is just right—around 110°F (43°C)—to guarantee proper yeast activation. Too hot, and you'll kill the yeast; too cold, and it won't wake up.Pour the warm milk into your bowl, then sprinkle the instant yeast on top. Give it a gentle whisk until the yeast dissolves completely. Now, let this mixture sit for about 5 minutes. This waiting period is essential; you want to see it become frothy, which means your yeast is happily activating and ready to do its job.Just picture that bubbly goodness—it's like a little party in your bowl! Once you see those bubbles, you know you're on the right track. This step is the foundation for those soft, fluffy rolls you're dreaming of.

- Incorporate Egg and SaltAfter your yeast mixture has become frothy, it's time to incorporate the egg and salt. This step not only enhances the flavor but also brings a lovely richness to your rolls. Eggs are like little powerhouses in baking—they add moisture and help create that fluffy texture we all crave. Plus, they're loaded with protein, which can make your rolls even more satisfying!Now, grab that large egg and crack it right into your yeast mixture. You'll want to whisk it in until it's fully blended, creating a beautiful harmony of ingredients.Next, sprinkle in your salt. You can use different salt types, like kosher or sea salt, depending on your preference. Each offers a unique touch, so don't hesitate to choose what speaks to you.Mix in about two cups of flour at this point, stirring until everything combines. The dough should start to come together and pull away from the sides of the bowl.Feel that excitement? You're one step closer to those delicious rolls! Keep your spirits high and enjoy the process; soon, your kitchen will smell divine!

- Knead Dough Until ElasticNow that your dough has come together beautifully, it's time to knead it until it's smooth and elastic. This step is essential for achieving that delightful fluffiness in your rolls. Trust me, you'll want to use some effective kneading techniques here!Start by turning your dough out onto a lightly floured surface. Gently push it away from you with the heels of your hands, then fold it back over itself. Repeat this motion, adding a little flour if it feels sticky. You're looking for that perfect dough elasticity, which means the dough should stretch without tearing. It's almost like giving your dough a little massage—who doesn't love that?Knead for about 5 minutes, and feel free to channel your inner baker! If you find your thoughts wandering, just imagine the delicious rolls that await you. You want the dough to be smooth and springy, ready to rise and become something magical.

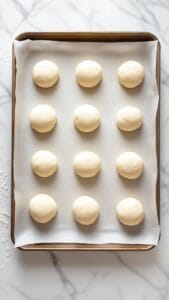
- Form Into Roll ShapesOnce your dough has risen and doubled in size, it's time to shape those fluffy rolls. You'll want to punch down the dough gently, releasing any trapped air, before dividing it into 12 equal pieces.When it comes to roll shaping techniques, think of a little ball of magic in your hands! Take one piece of dough and gently stretch it into a round shape, tucking the edges underneath to create a smooth surface. If your dough feels too sticky, don't hesitate to sprinkle a little flour on your hands. Trust me, it makes a world of difference!As you shape each roll, place them about an inch apart on your lined baking sheet. This spacing is essential; it lets them rise beautifully and gives each roll room to shine.Feeling creative? You can even roll them into different shapes—like knots or crescents—just to mix things up.Just remember, the dough texture should be soft yet elastic, and you'll know you're on the right track! So go ahead, get your hands a little messy, and enjoy the process of creating these delightful rolls. They're going to be so worth it!
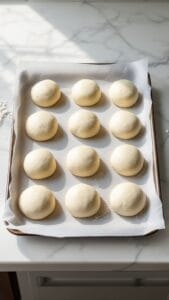
- Let Dough Rise for 30 MinutesLetting the dough rise for 30 minutes is essential for achieving those fluffy, airy dinner rolls you crave. This step allows the yeast to work its magic, creating a light and tender texture. During this time, you'll want to verify the dough temperature is ideal—around 75 to 80°F (24 to 27°C) is perfect for maximum rising.Find a cozy spot in your kitchen, perhaps near a warm oven or on a sunny windowsill, where the dough can enjoy a nice rising environment. Cover it with a clean kitchen towel, which keeps things warm and cozy. You might even catch the delightful aroma of the dough as it puffs up, filling your space with anticipation.Now, resist the urge to peek too often; let it do its thing! After about 30 minutes, you'll notice that the dough has doubled in size. Isn't it amazing how a little patience can lead to such delicious rewards?Once it's risen, you'll be ready to shape those rolls and get them one step closer to your table. Trust me, the wait is worth it for those fluffy bites that'll have everyone coming back for more!
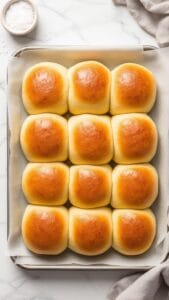
- Bake Until Golden BrownAfter the dough has risen and doubled in size, it's time to shape and bake those delightful rolls.You'll want to preheat your oven to 375°F (190°C), creating a warm environment for your rolls to thrive. Line a baking sheet with parchment paper, making cleanup a breeze.Now, punch down the dough—don't worry, it's just a gentle nudge. Divide it into 12 equal pieces, and roll each piece into a smooth ball. Place them on the baking sheet, giving them a bit of space to expand.Here's where the magic happens: brush your honey and melted butter glaze generously over the tops. This baking technique not only adds flavor but also guarantees that golden-brown finish we all crave.Pop those beauties in the oven for 15-20 minutes. As they bake, your kitchen will fill with an irresistible aroma—can you smell it? Keep an eye on them; you want a lovely golden hue, not overly brown.Serve them warm, and watch everyone reach for seconds. With these roll variations, you'll have everyone asking for your secret! Enjoy every fluffy bite!
Nutrition
Calories: 238kcalCarbohydrates: 37gProtein: 6gFat: 7gSaturated Fat: 4gPolyunsaturated Fat: 0.5gMonounsaturated Fat: 2gTrans Fat: 0.2gCholesterol: 31mgSodium: 254mgPotassium: 105mgFiber: 2gSugar: 4gVitamin A: 229IUVitamin C: 0.02mgCalcium: 36mgIron: 2mg